Connecting Third-Party Channel
Third-party Channel for CINNOX lets you engage and support visitors and customers reaching out to your business from your channel to CINNOX seamlessly and efficiently.
Apart from social media apps (Messenger, WeChat, WhatsApp, and LINE ), you can use the Webhook API to bring your other visitor and customer messaging channels as a third-party channel in CINNOX.
Your visitor and customer enquiries from your channel will route to your CINNOX staff members and create a two-way conversation between them. Your staff will respond using their CINNOX account in the web dashboard or mobile app.
Preconditions
Our Third Party Channel integrates CINNOX and any third-party messaging channel with standard specifications for the connection.
To connect your messaging channel to CINNOX, you will need the following:
You can use a System Integrator (SI) service or your Own In-House Developer to set up the connection and manage the API.
- Generate an Outgoing Webhook URL. This URL will be input in CINNOX when creating the Third Party Channel in the Dashboard. CINNOX will send your app an HTTP POST request with a challenge parameter, and your endpoint must respond with a challenge value to confirm the connection.
- Use of Webhook Message API. This API will allow you to send and receive staff and customer conversations in CINNOX. Please see Message API for reference.
For Developers
- The Omni Message API is available for posting and receiving messages between third-party channels and CINNOX.
| Omni API endpoints | Descriptions |
|---|---|
| Incoming third-party message API | Sending a POST request on this endpoint allows posting the message from a third-party channel to CINNOX. (Message triggered from the third party channel) |
| Outgoing third-party message API | This endpoint shows the contents that will be received from CINNOX when an enquiry comes in. (Message triggered from CINNOX) |
The generated access token can be found in the CINNOX Dashboard. Refer to the below Authentication section to locate and use the access token in the Message API.
For CINNOX administrator
Please follow the setup guide below to connect the third-party channel to your CINNOX Service.
Creating a Third-Party Channel
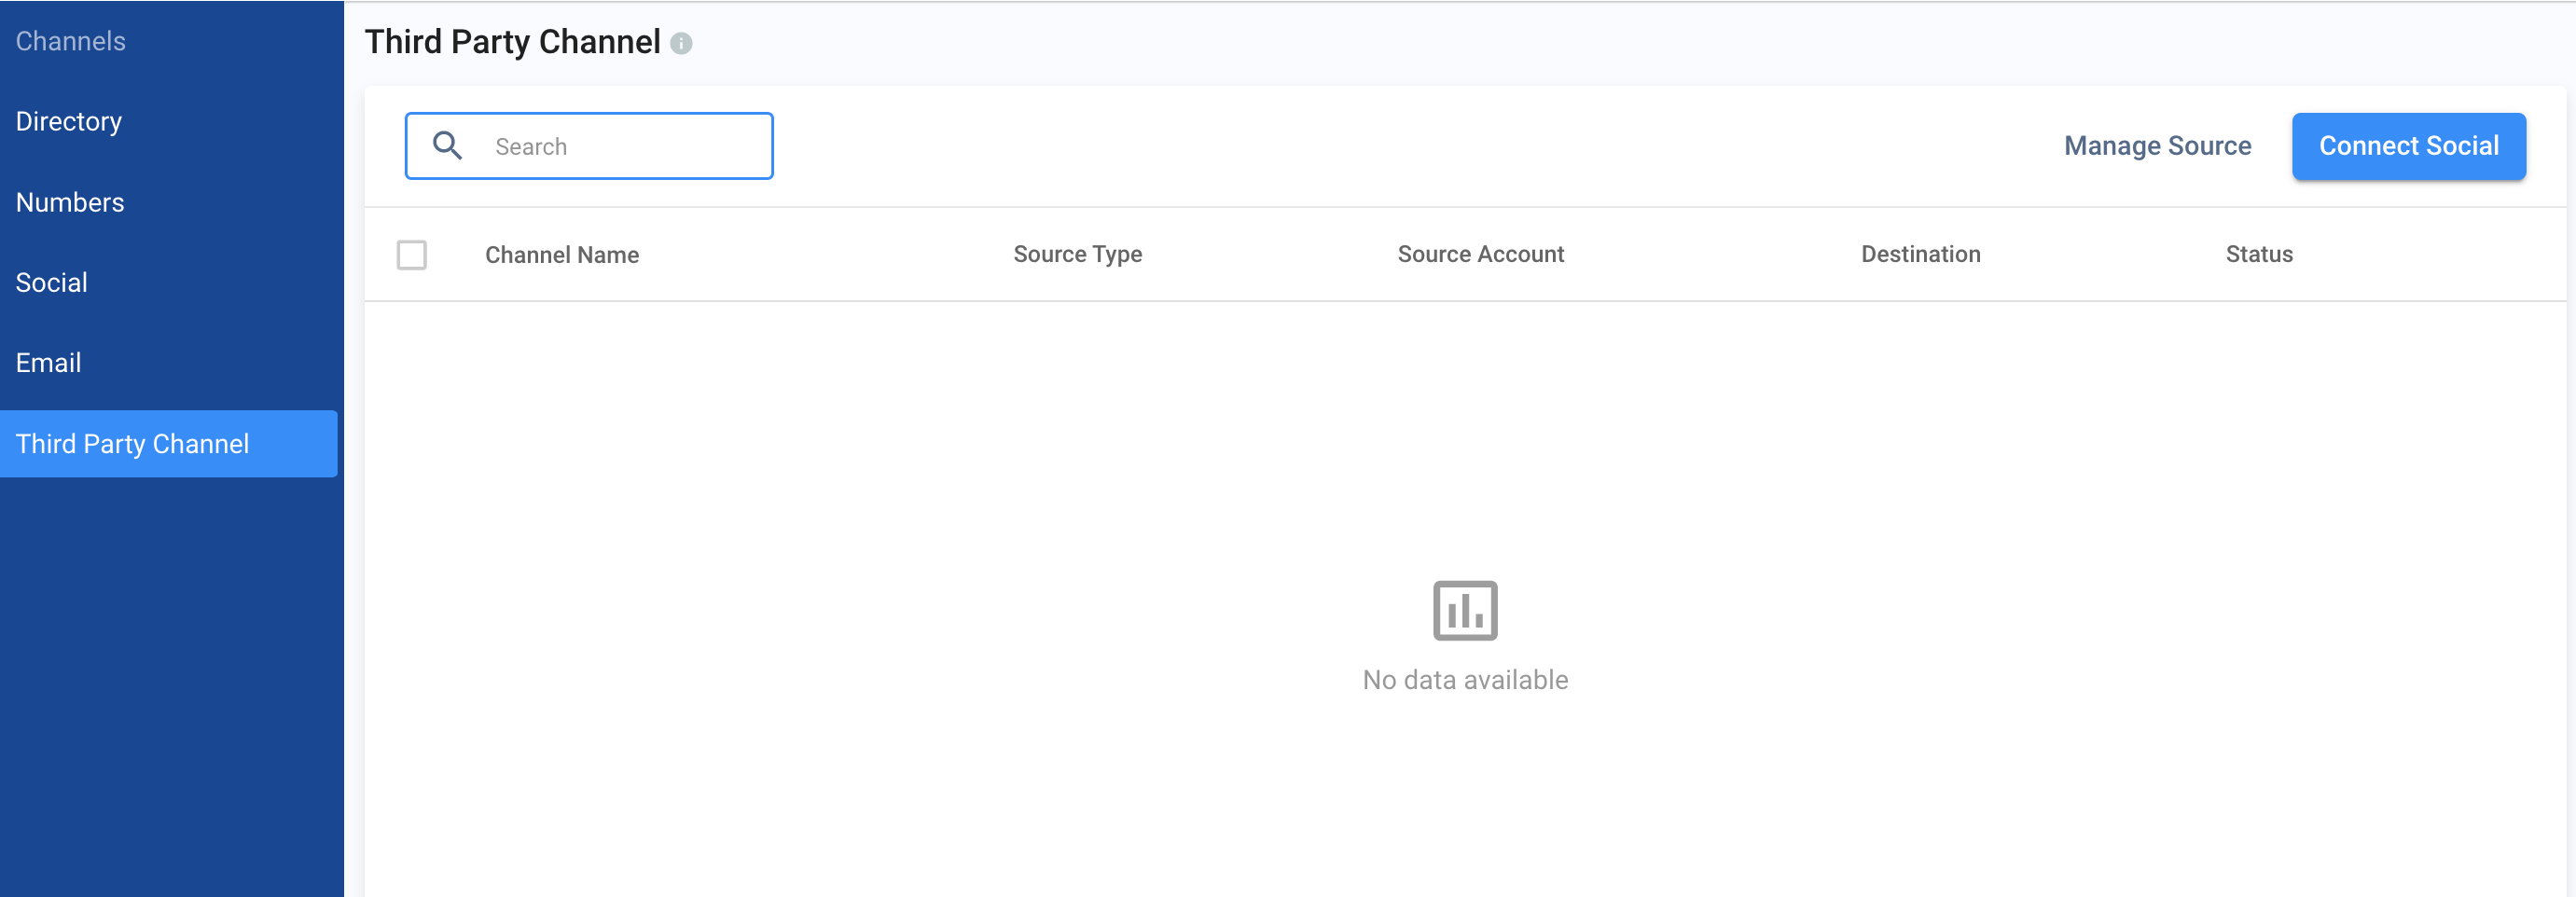
- Go to Administration > Channels > Third Party Channel from the navigation menu.
- On the Third Party channel page, click the Connect Social at the top-right corner.
Selecting Third-Party Channel
Connect your source
- On the Select Third-Party Channel page that will display, click Set up another third-party account.
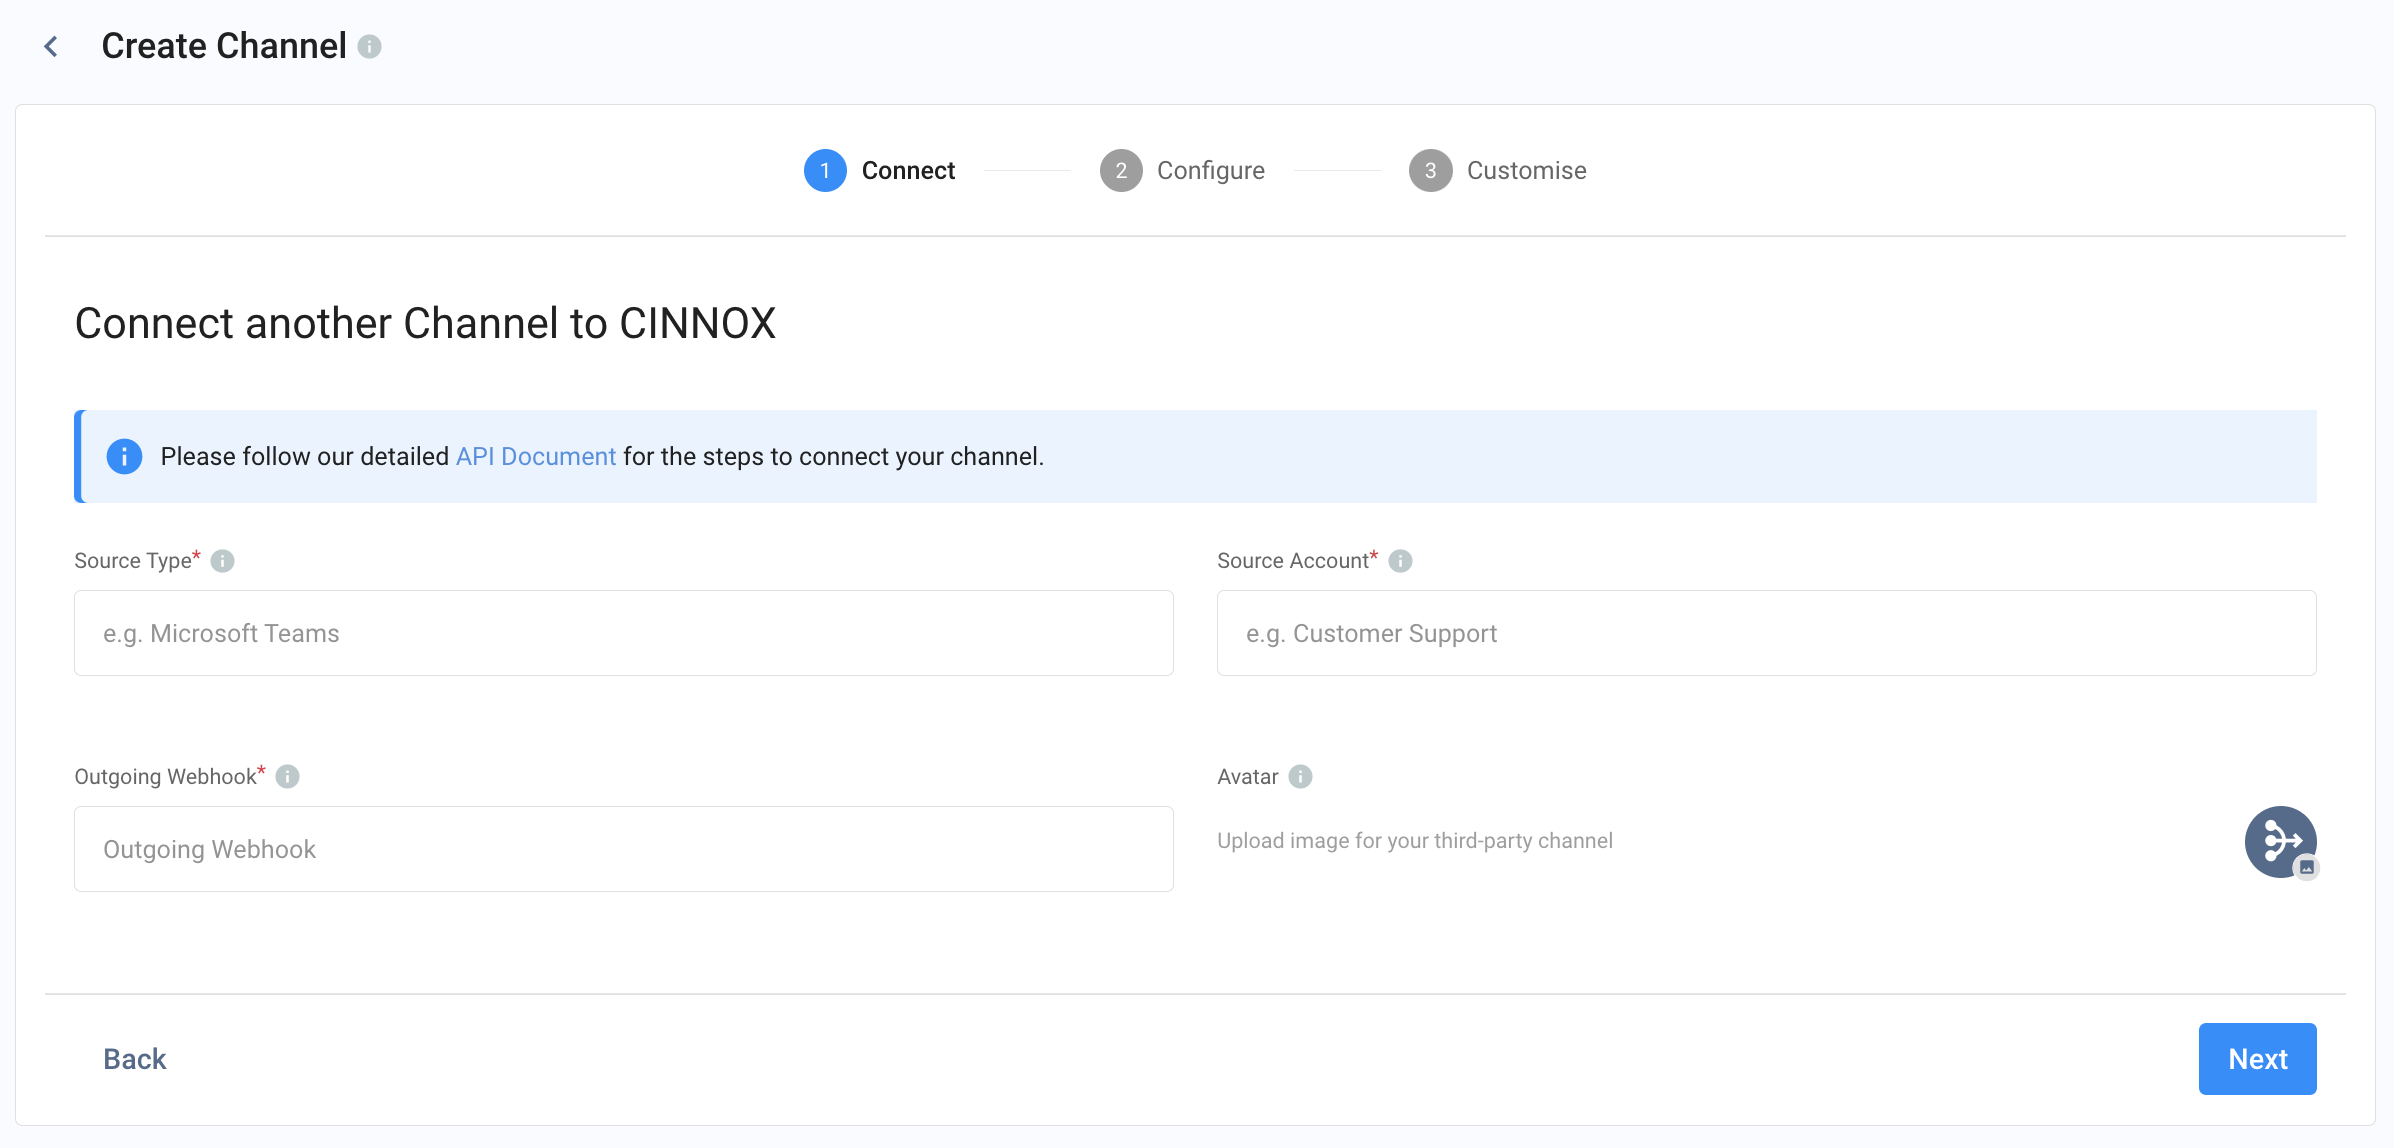
- On the Connect to another Channel to CINNOX that will display, fill in the source name and the Outgoing Webhook fields.
- Source Type: enter the third-party social channel source name you want to connect with CINNOX, e.g., Microsoft Teams. This will also be used for report analytics purposes.
- Source Account : enter the name of the source you will connect as the third-party channel on CINNOX.
- Outgoing Webhook: copy and paste the Outgoing Webhook of your channel. As soon as you enter a URL, we'll send an HTTP POST request with a challenge parameter, and your endpoint must respond with the challenge value.
- Avatar : Upload an image for your third-party channel.
Connecting Source
❗️
Error
When the test connection fails, please ensure the "challenge" value we sent you to the webhook URL has been entered correctly.
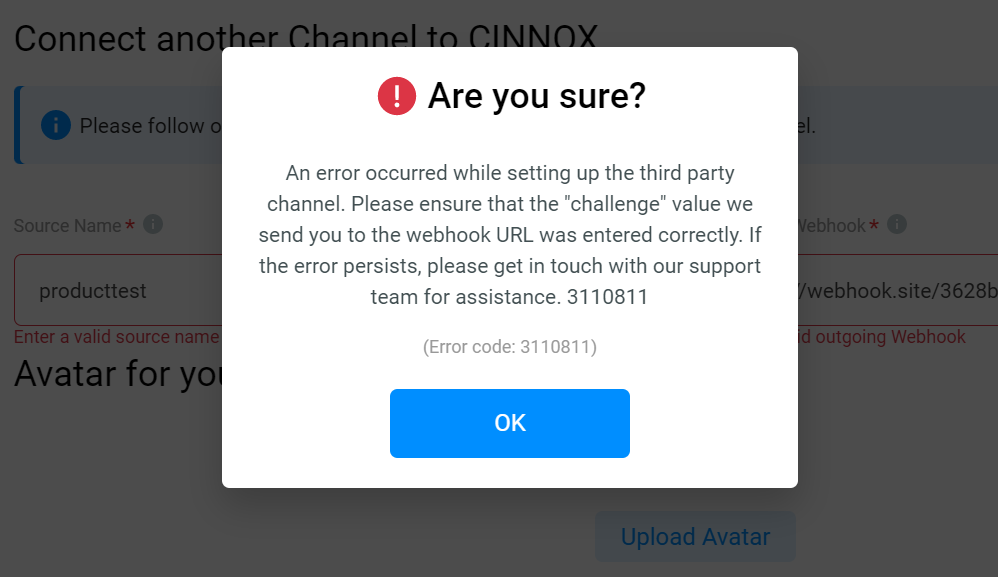
Source Connection Error Message
👍
Success
When the test connection is successful, it will proceed to the configuration page, and the access token will be generated.
Configure your settings
Set how to distribute incoming enquiries from this channel to the target destinations.
- Channel Name: the name of your channel that will be displayed in your chance list.
- Routing Settings: Click Edit, choose the Routing Rules, and add Destinations to your channel based on the operational support.
For more information, please check our detailed guide Alternative, Percentage, Time and Sticky Routing.

Configure the settings
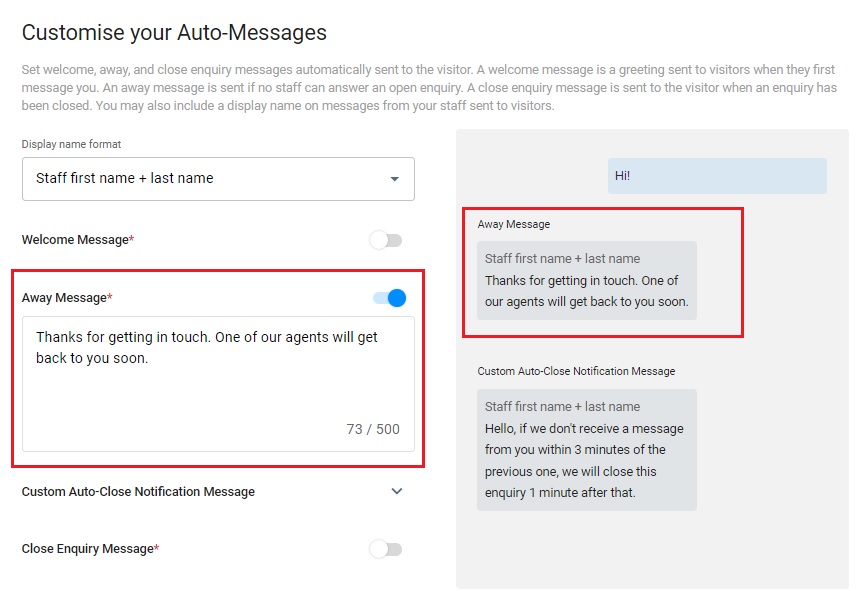
Auto-Message Settings
You can enable and configure the following Auto-Reply Messages:
- Welcome Message: Greetings are sent to customers when they first message you.
- Away Message: It is only sent if no staff can answer an enquiry.
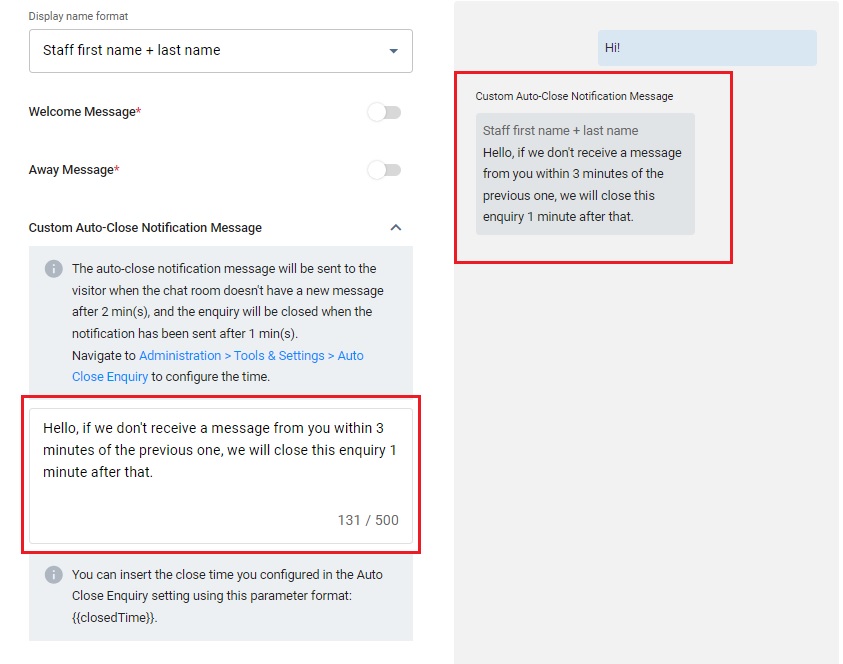
- Custom Auto-Close Notification Message: It is sent when the chat room doesn't have a new message after 2 min(s), and the enquiry will be closed when the notification has been sent after 1 min(s).
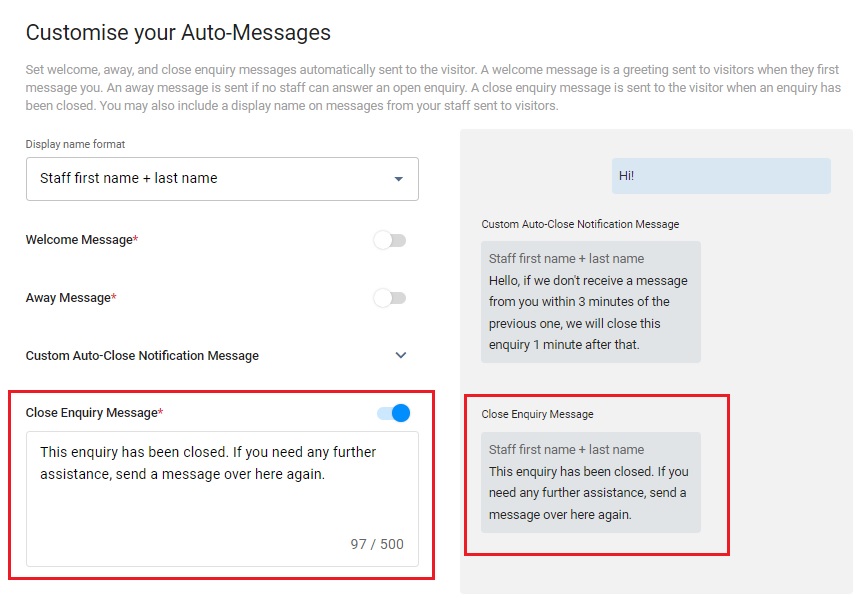
- Close Enquiry Message: This will be sent to the visitors' chatrooms when the staff or the system closes the enquiries.
📘
Reminder
- The limit of Welcome, Away, Custom Auto-Close Notification and Closed Enquiry Messages is 500 characters.
- Before configuring the Custom Auto-Close Notification Message function, you must enable the auto close feature for handled enquiries without new messages. For more information, please refer to the Managing Auto Close Enquiry page.

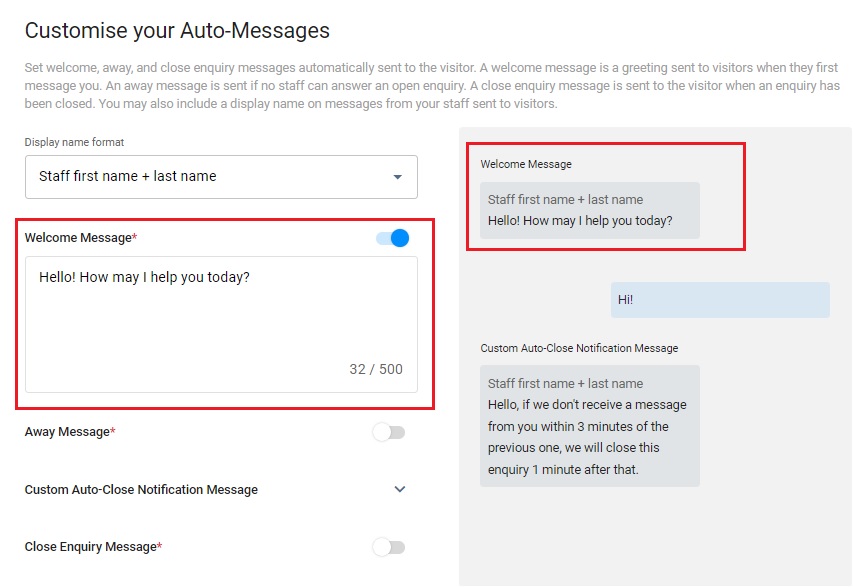
Display Name Format
You may include staff display names in your messages. Choose from the following options:
- No name to display
- Staff first name
- Staff first name + last name
Welcome Message
- CINNOX provides a default welcome message.
- Toggle the switch on to enable it.
- After toggling on it, you can change the default message according to your needs.
Away Message
- CINNOX provides a default away message.
- Toggle the switch on to enable it.
- After toggling on it, you can change the default message according to your needs.
Custom Auto-Close Notification Message
- Click the downward arrow icon.
- Enter your Auto-Close Notification Message in the box.
- You can preview the message in the chat room on the right-hand side of the grey box.
Close Enquiry Message
- CINNOX provides a default close enquiry message.
- Toggle the switch on to enable it.
- After toggling on it, you can change the default message according to your needs.
Channel Custom Info allows you to add your channel details that your staff would see in the call screen and chat room whenever they are serving an enquiry. The custom info can be about the standard procedure or operation details of handling the enquiry.
- Toggle the switch on to enable the Channel Custom Info.
- Adds the required basic information about the channel in the blank space.
- Click the Next button to complete all configurations, and the customised info appears on the Channel Custom Info.
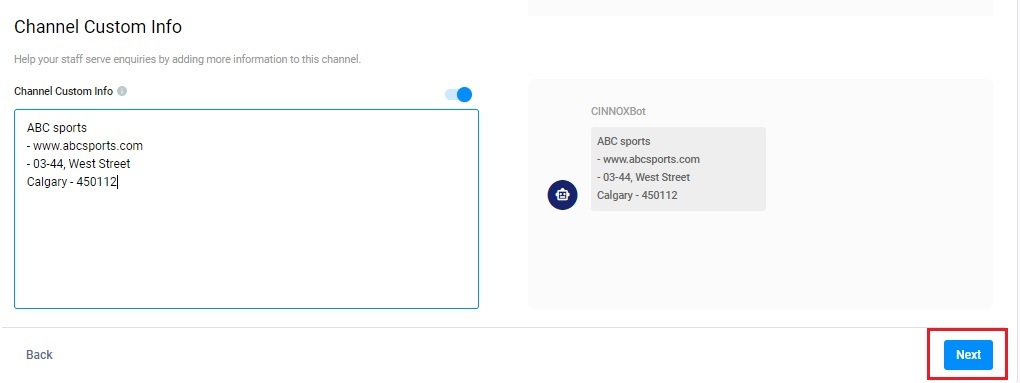
Channel Custom Info
👍
When the integration is successful, the assigned destination to handle your Third-party channel will notify visitor chat enquiries and reply to their messages using their CINNOX staff account.
The details of the third-party channel enquiry are displayed in the Enquiry Overview and Reports.
Authentication
- From the navigation menu, go to Channels > Social.
- On the Social page, click the Manage Source button in the top-right corner. A pop-up window will display a list of sources you have created.
- Click the Third-Party Channel that you created.
- You will find the access token for your Third-Party Channel.
- Please copy the accessToken and use it on the API. Refer to Incoming Third Party Message API for reference.
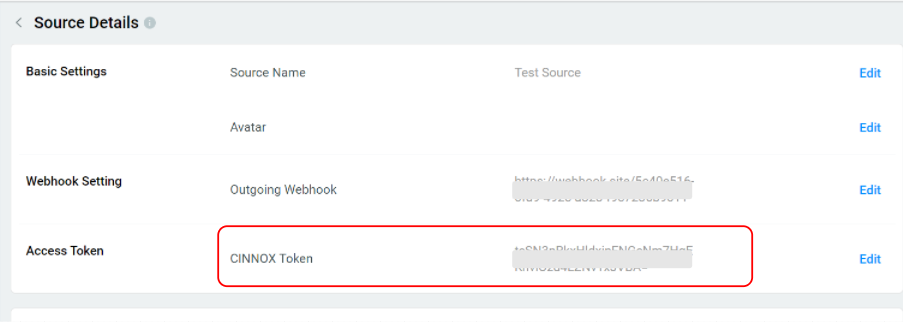
Access Token
Test the Third Party Channel Connection
After connecting and authenticating the Third Party Channel, it is important to test the connection to ensure that the messages are being received in CINNOX and that you can reply to the customer successfully. By sending a test message and verifying the end-to-end process, you can ensure that your channel is fully integrated with CINNOX and ready for use.