Configure CINNOX Web Widget
The following configuration is available for your CINNOX Web Widget in the Web Dashboard.
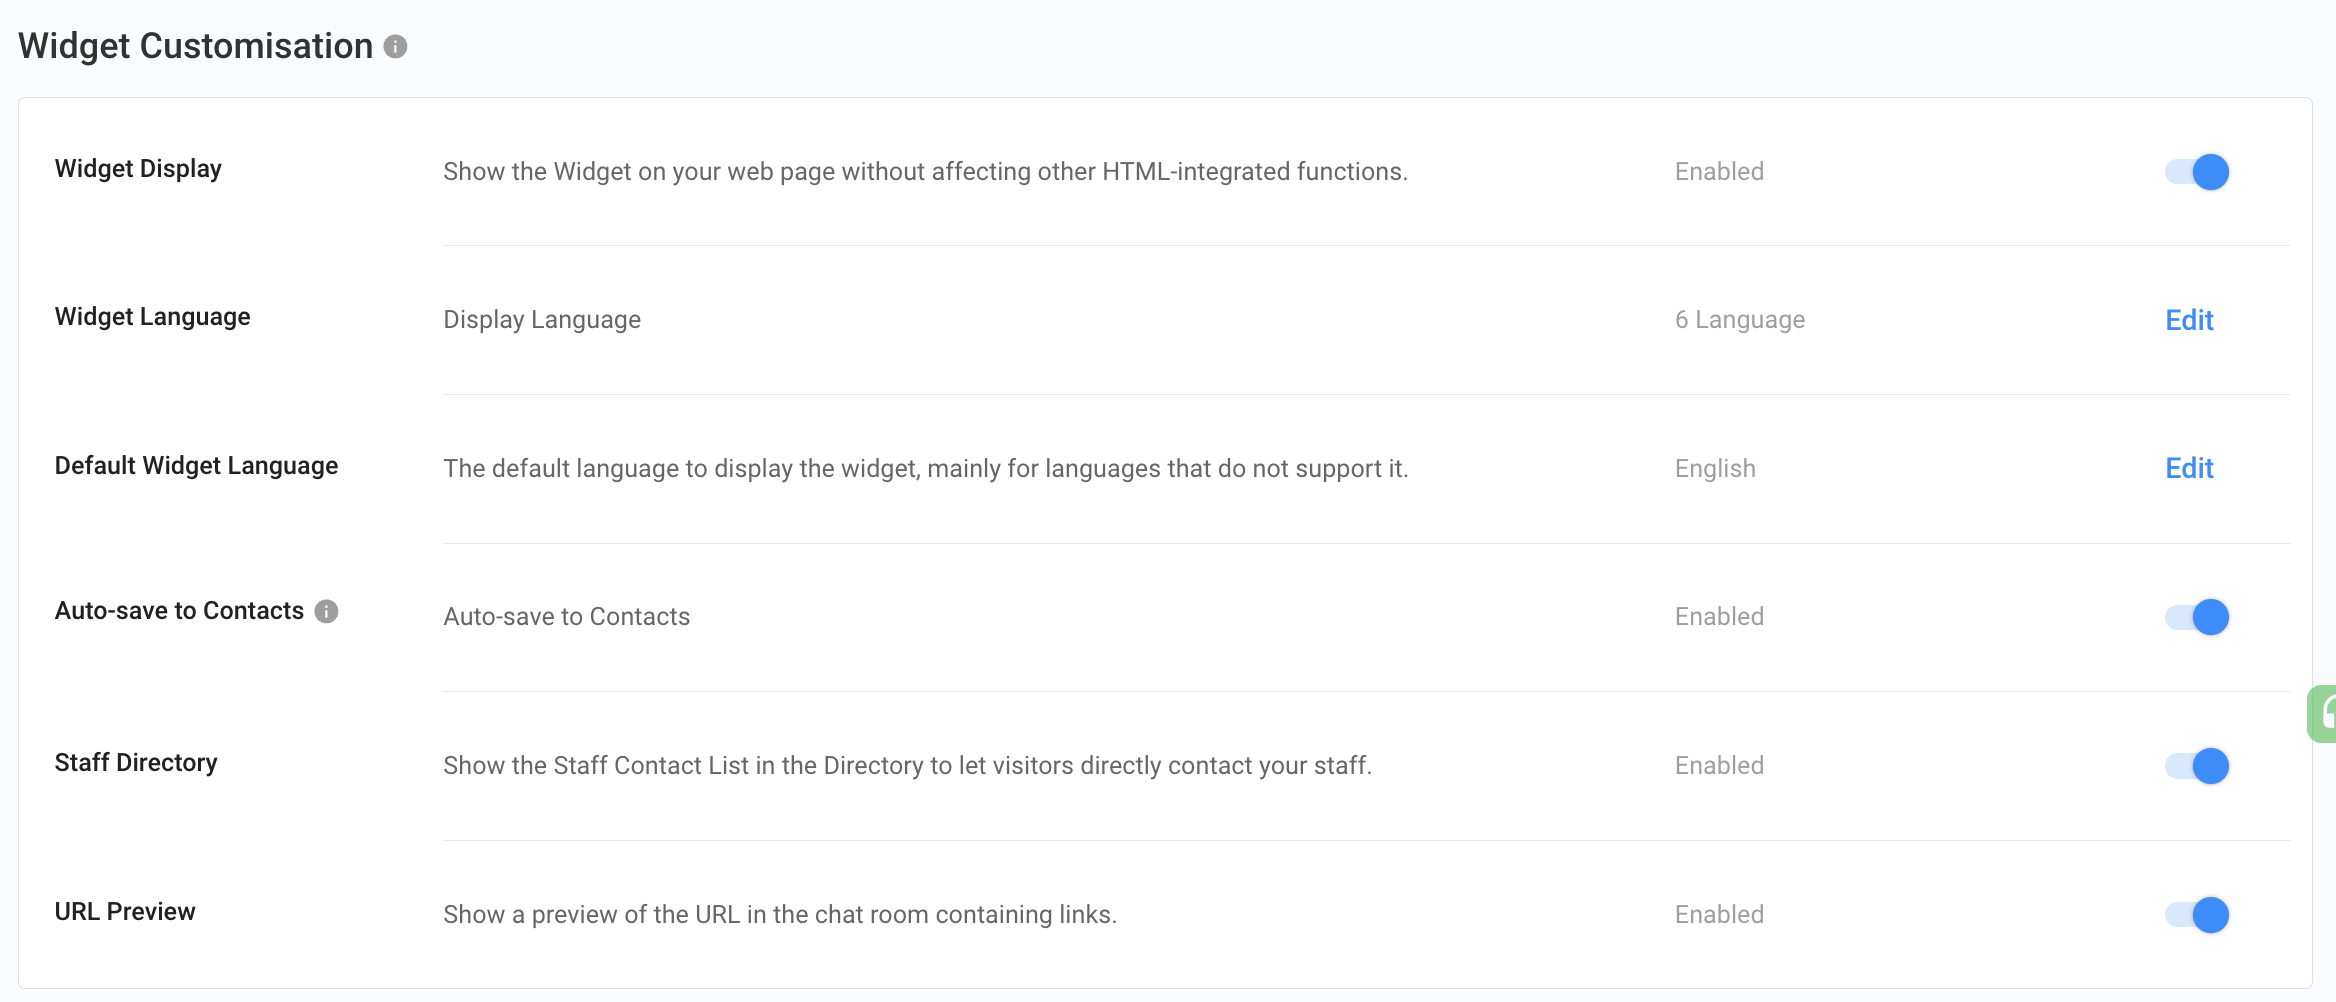
- A toggle button to display or hide the Widget on the web page
- A drop-down menu to select the web widget's display language
- A toggle button to enable or disable the staff directory in the web widget
The Widget Display is enabled by default. Once the CINNOX web widget is installed on your web page, it will automatically be displayed so your website visitors can engage with your staff - customer support- via chat or call conversation.
Assume that you have Installed the CINNOX Web Widget on your Website and would like to use Click-to-Acitons buttons (CTAs) instead of a widget. You can hide the Widget accordingly.
Displaying or Hiding the Widget from the Web Page
To hide the web widget on our Website:
- Go to Administration > Widget > Customisation, then on the Widget Display, toggle the button OFF.
- A pop-up confirmation window will appear to confirm the changes. Click OK.
- A toast message will appear that the Widget Settings have been updated.

To unhide the web widget on our Website:
- Go to Administration > Widget > Customisation, then toggle the button ON on the Widget Display.
- A toast message will appear that the Widget Settings have been updated.
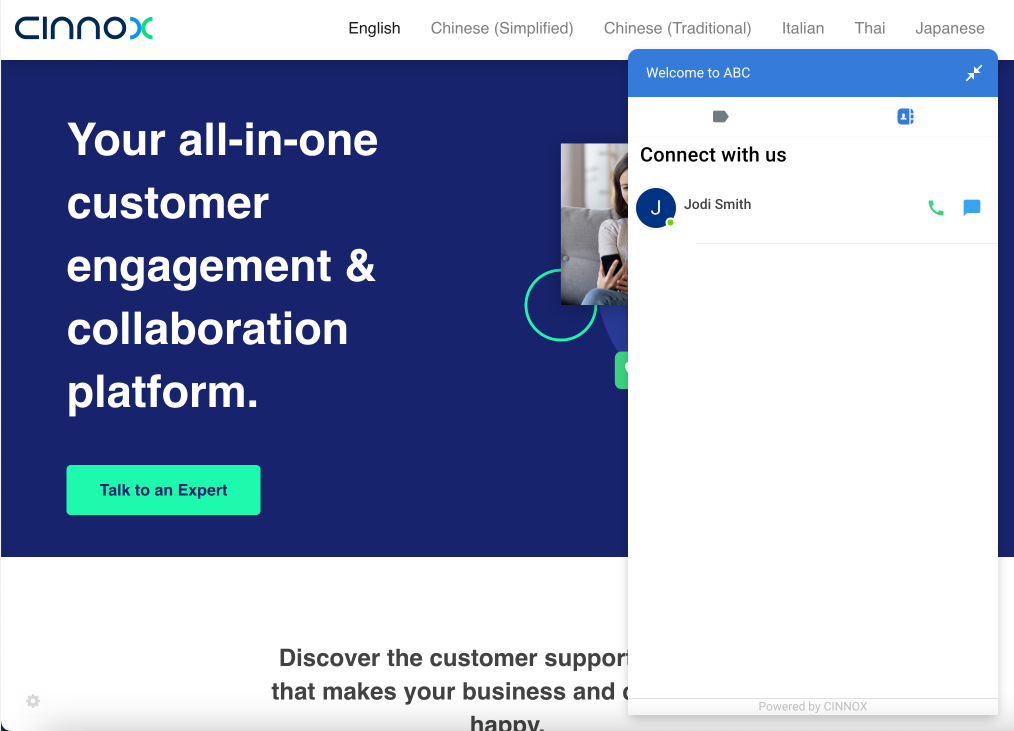
On your website, where the CINNOX widget has been installed, a widget will appear at the bottom area of the page.
Setting Widget Display Language
You can change the Widget's display language to any language in the drop-down menu.
To add a new language:
- Go to Administration > Widget > Customisation, then on the Widget Language, click Edit.
- Select the languages for the Widget Language that will match your Website language.
- Click Save. A toast message will appear that the Widget Settings have been updated.
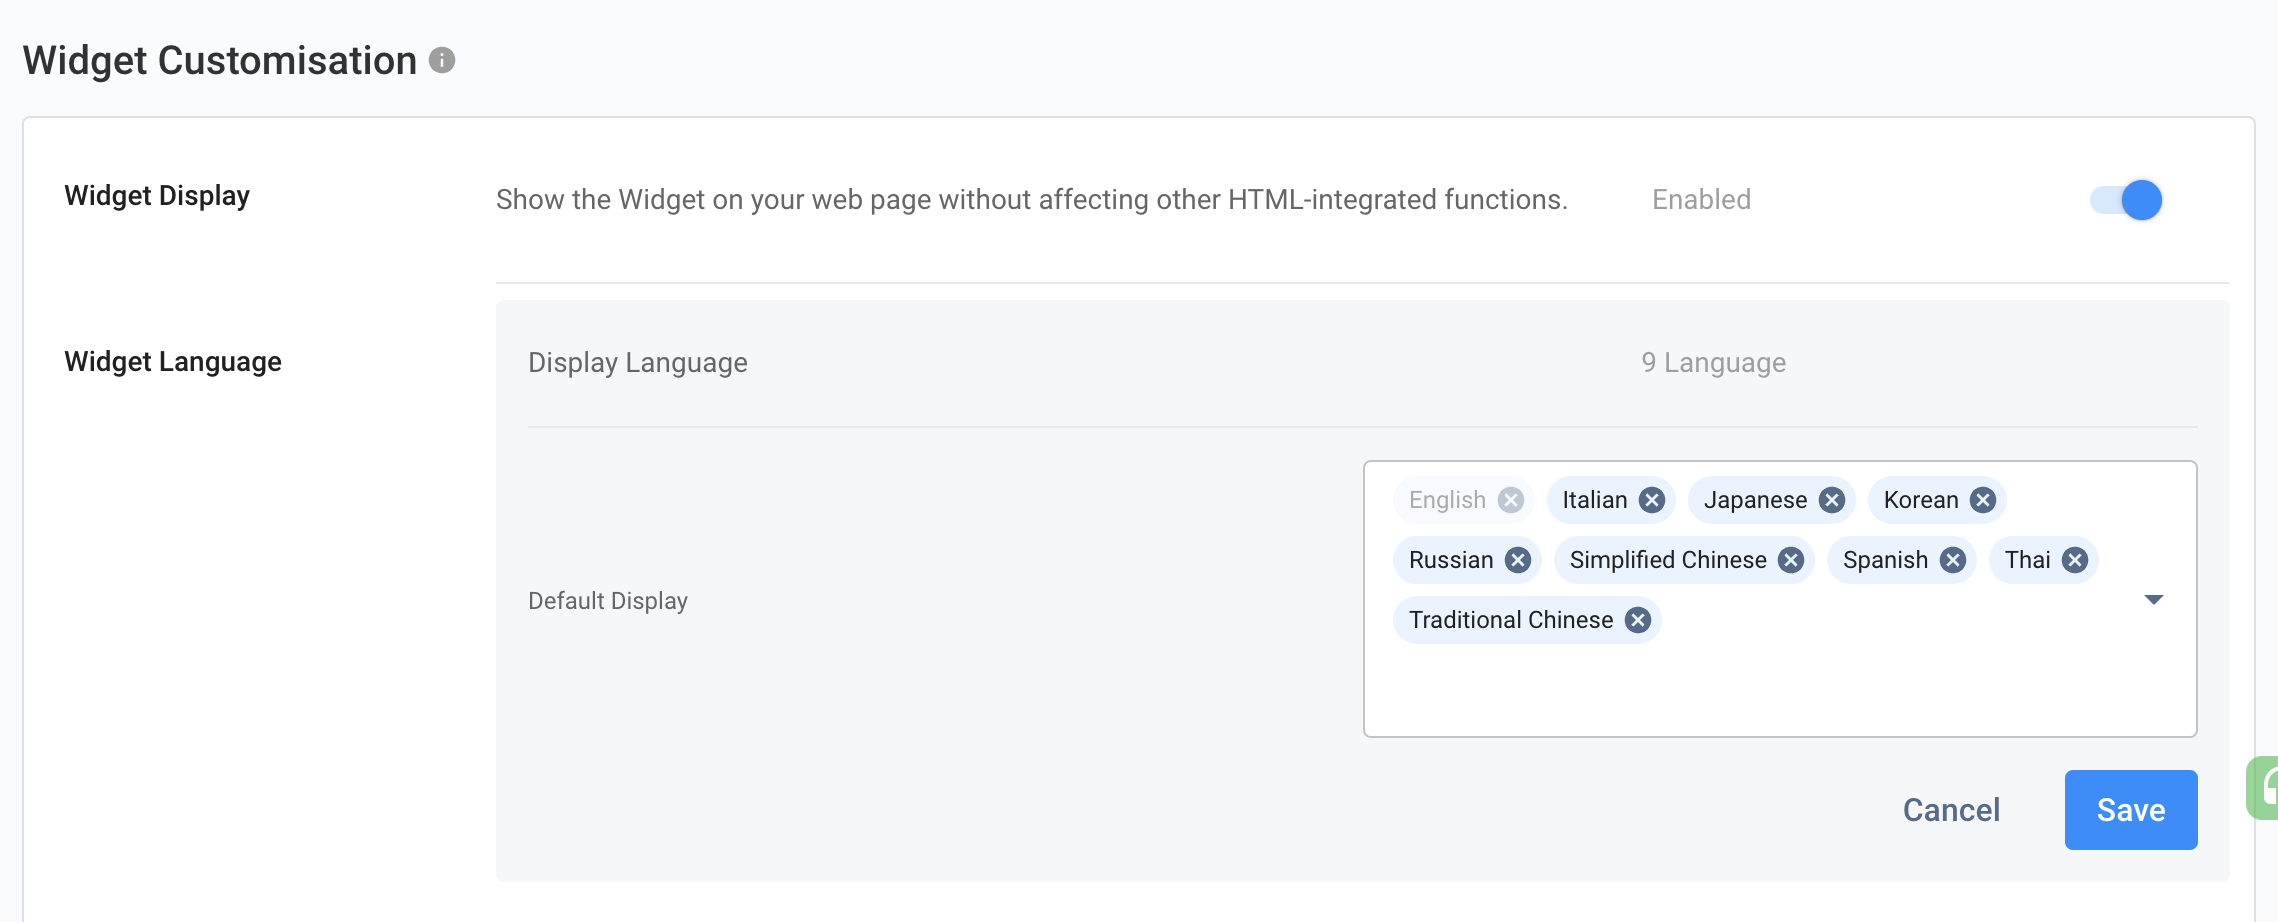
- Select the default language to display the Widget on the Default Widget Language, mainly for languages not supporting your Website's languages.
📘
To configure the Web Widget for each selected language, refer to Customise Your Widget for a detailed Guide.
You can display your support staff contact list on the Widget. This will allow visitors to call or chat directly with a particular staff member.
Enabling or Disabling the Staff Directory in the Web Widget
To disable the Staff Directory in the Web Widget:
- Go to Administration > Widget > Customisation, then toggle the button OFF on the Staff Directory.
- A toast message will appear that the Widget Settings have been updated.

To enable the Staff Directory in the Web Widget:
- Go to Administration > Widget > Customisation, then toggle the button ON on the Staff Directory.
- A toast message will appear that the Widget Settings have been updated.
- Go to Administration > Organisation > Staff, then find the staff you would like to add to the Staff Directory List that your Website visitors can directly contact.
- Open the Staff Account Details of the staff member, then find Handling Destination and Channel > Direct Staff Enquiry and toggle the button ON.
- A toast message will appear stating that the account details have been updated.

When the Staff Directory is enabled, and a staff member is selected, the visitor can directly contact the staff in the Web Widget.
Auto-save to Contacts
- When enabled, it automatically saves your visitors as new contacts when their enquiry has been picked up or followed up.
- Otherwise, you can manually create them as new contacts.
- The toggle setting is shared between the Pre-Chat and Offline Support Forms.
