Customer Public Space (Private Chat)
Looking for a Customer Public Space for Your App?
CINNOX offers seamless integration of Customer Private Chat for Enterprises via our Web SDK, providing a centralized chat room experience. Connect effortlessly with your visitors, customers, and team. Handle customer inquiries, engage, collaborate, share files, and chat—all in one place. Simplify your communication and boost productivity with CINNOX's unified chat room solution.
Introduction
Welcome to the CINNOX Customer Public Space (Private Chat ) User Guide! This community chat platform is designed to facilitate seamless communication between staff members (agents and admins) and customers. Whether your customer service involves broadcasting information, providing assistance, sharing feedback, or engaging in discussions with customers, this guide will help you create, monitor, and moderate your customer public space.
What is Customer Public Space
Customer Public Space, a.k.a Customer Private Chat , is CINNOX's group chat feature designed to facilitate seamless community chat between staff members and customers. It allows for effective collaboration and engagement, ensuring that everyone stays connected and informed.
Communicate with both staff and customers in a single, unified chat space. Each External Space can accommodate up to 500 participants, making it suitable for various group sizes.
Benefits of Customer Public Space (Private Chat)
- Enhanced Communication: Seamlessly connect with both staff and customers in one place, ensuring clear and efficient communication.
- Improved Collaboration: Utilize various tools to work together effectively, fostering a collaborative environment.
- Increased Productivity: Stay organized and informed, ensuring tasks are completed efficiently and on time.
- Customer Engagement: Engage with customers directly, providing them with timely updates and support.
- Flexibility: Adapt to different communication needs, whether for small teams or large groups.
CINNOX Customer Public Space
Creating a New Customer Public Space
To create a Customer Public Space:
- Login to your CINNOX service
- Navigate to your Workspace > Utility panel, click the (+) button, and then select New Customer Public Space.
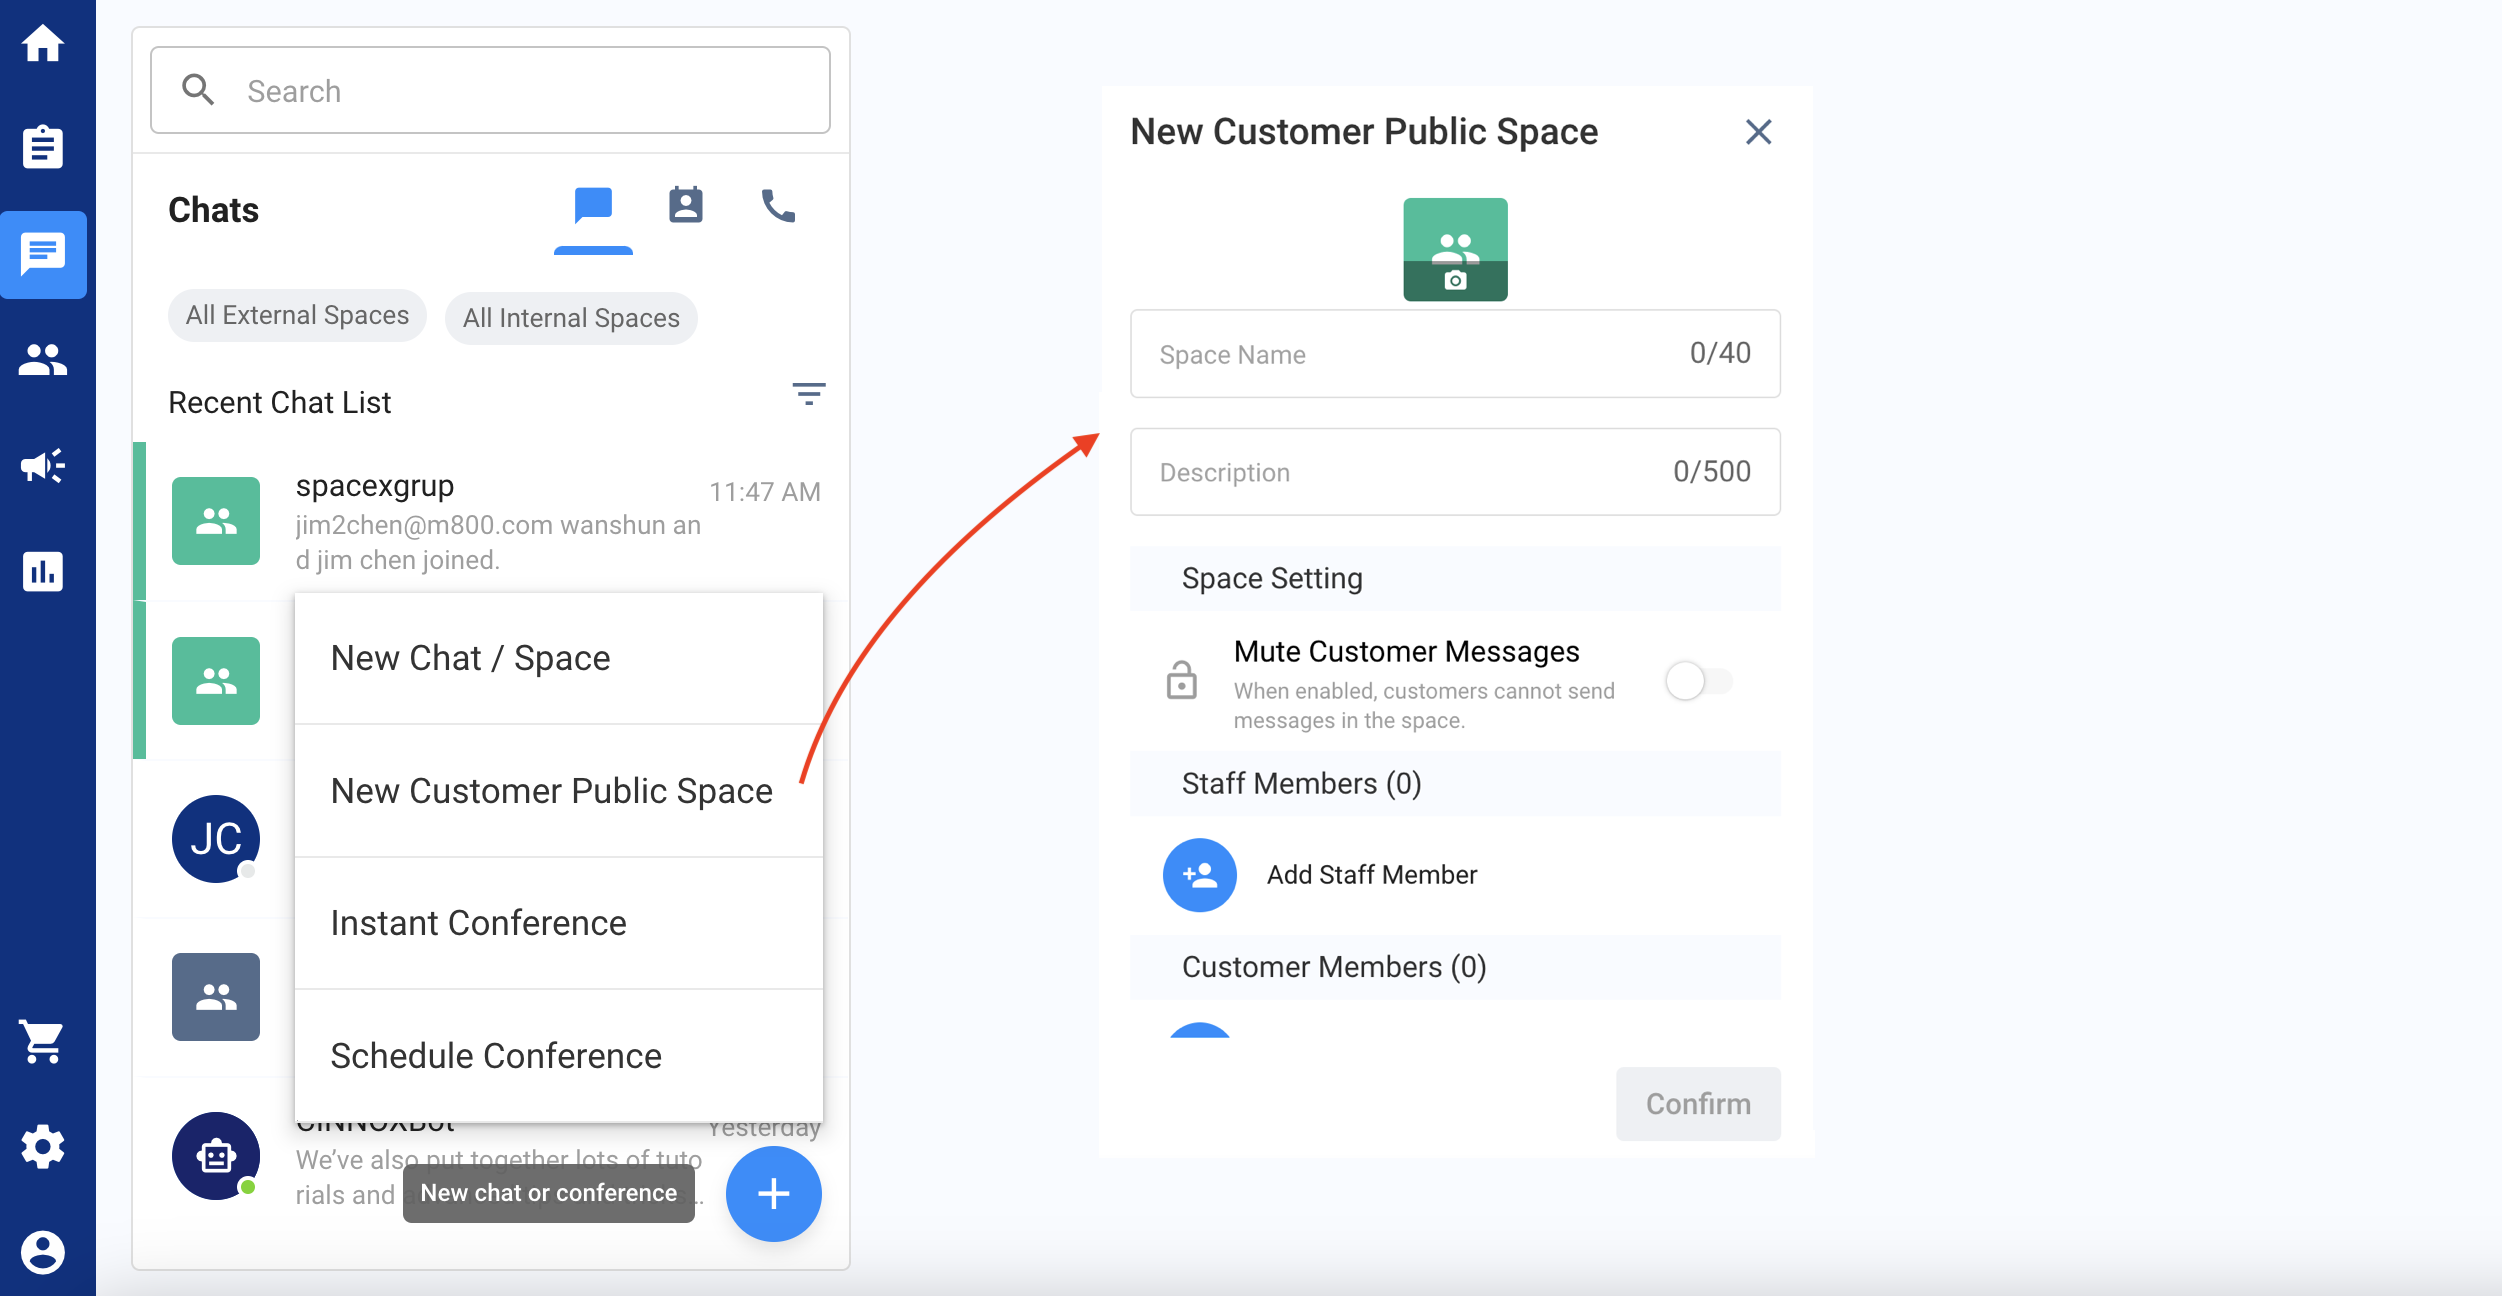
Creating a Customer Public Space
- Name your public space. The Space name must be unique and should be no more than 40 characters; without white spaces and special characters, you can use "_" and "-".
- Add a description to your public Space according to its purpose.
- Mute Customer Messages: a function to disable or enable; when enabled, customers cannot send messages in the Space. This is for Space sending broadcast messages to your customers only.
- Select the staff members you want to add to the Space.
- Select the customer members you wish to add to your Space.
- Click on Confirm to complete the steps.
The newly created Customer Public Space will appear in the Recent Connection area of your Workspace's Utility panel, and the added staff members will be notified.
Public Space Chat Functions
A. As a CINNOX user
Here is the list of functions you can do in your CINNOX space**
- Send messages
- Attach files, preview and download them
- Send Voice Message
- Use Canned Responses
- Insert Emojis
- Insert your Virtual Number or Weblink
- Edit a message you posted within five minutes
- Recall a message or file you posted within five minutes (recalled message would display You recalled this message. in the chat room)
- Reply to a specific message within the Space
- Delete Sent Message can be done by the CINNOX user with an admin role.
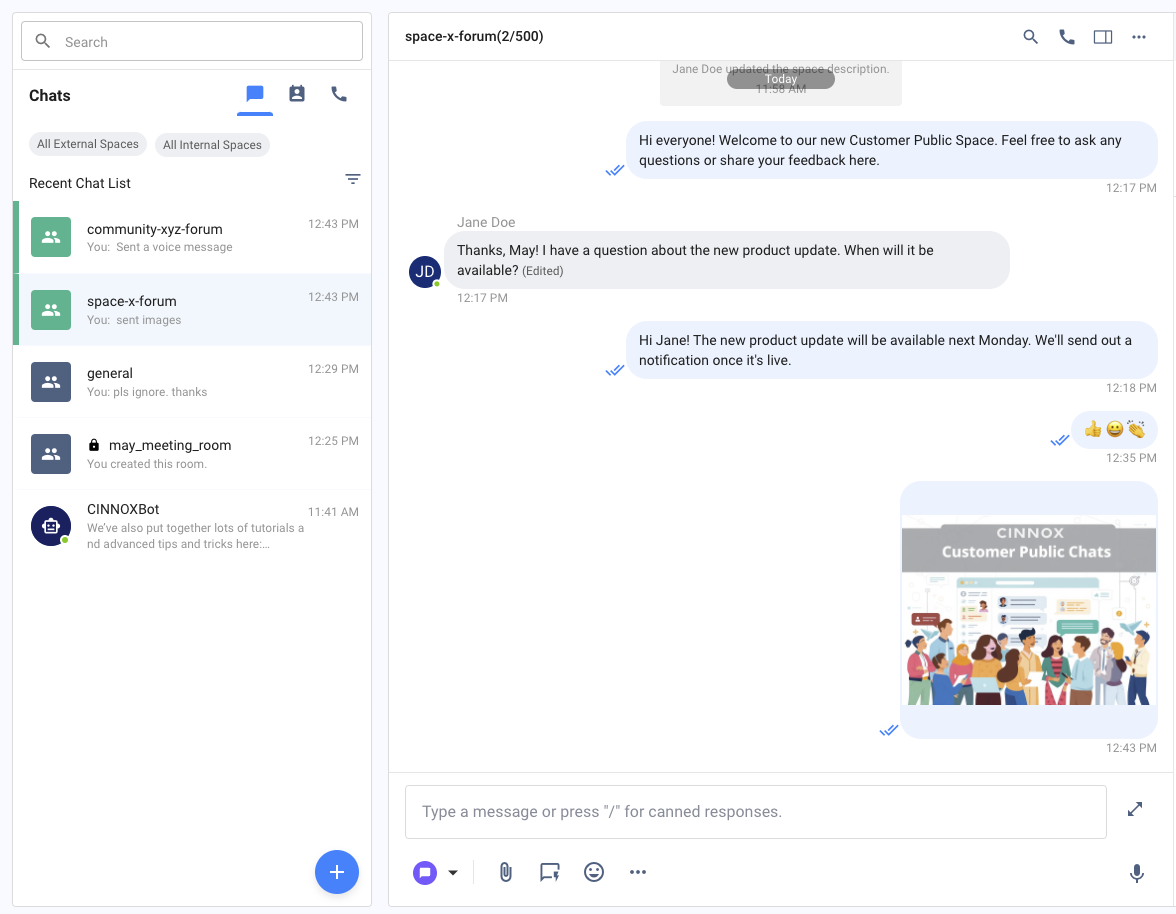
An example of a Customer Public Space for a CINNOX User
Mute Customer Messages
Mute Customer Messages: As an owner of the customer public space, you can mute customers, preventing them from sending messages in the Space. This feature is useful depending on the purpose of the Space, whether it's solely for broadcasting information or customer interaction and chat sharing.
Keyword Masking
- Keyword Masking: allows CINNOX admins to manage and automatically replace specified keywords in chat messages with ****. This helps maintain a clean and professional chat environment by masking sensitive or inappropriate content. For more details, please refer to our Detailed User Guide and contact us
Staff Outbound Enquiry
- Allow Staff to directly engage with the Visitor account, which is created via the Web SDK Customer Public Space
📘
Adding Customers in the Public Space
By integrating our Web SDK into your app, your customers can join the Public Space you have created for them.
B. As a Customer member of a Public Space
- It depends upon the leveraging of the CINNOX Web SDK for the customers to join and use the chat functions.
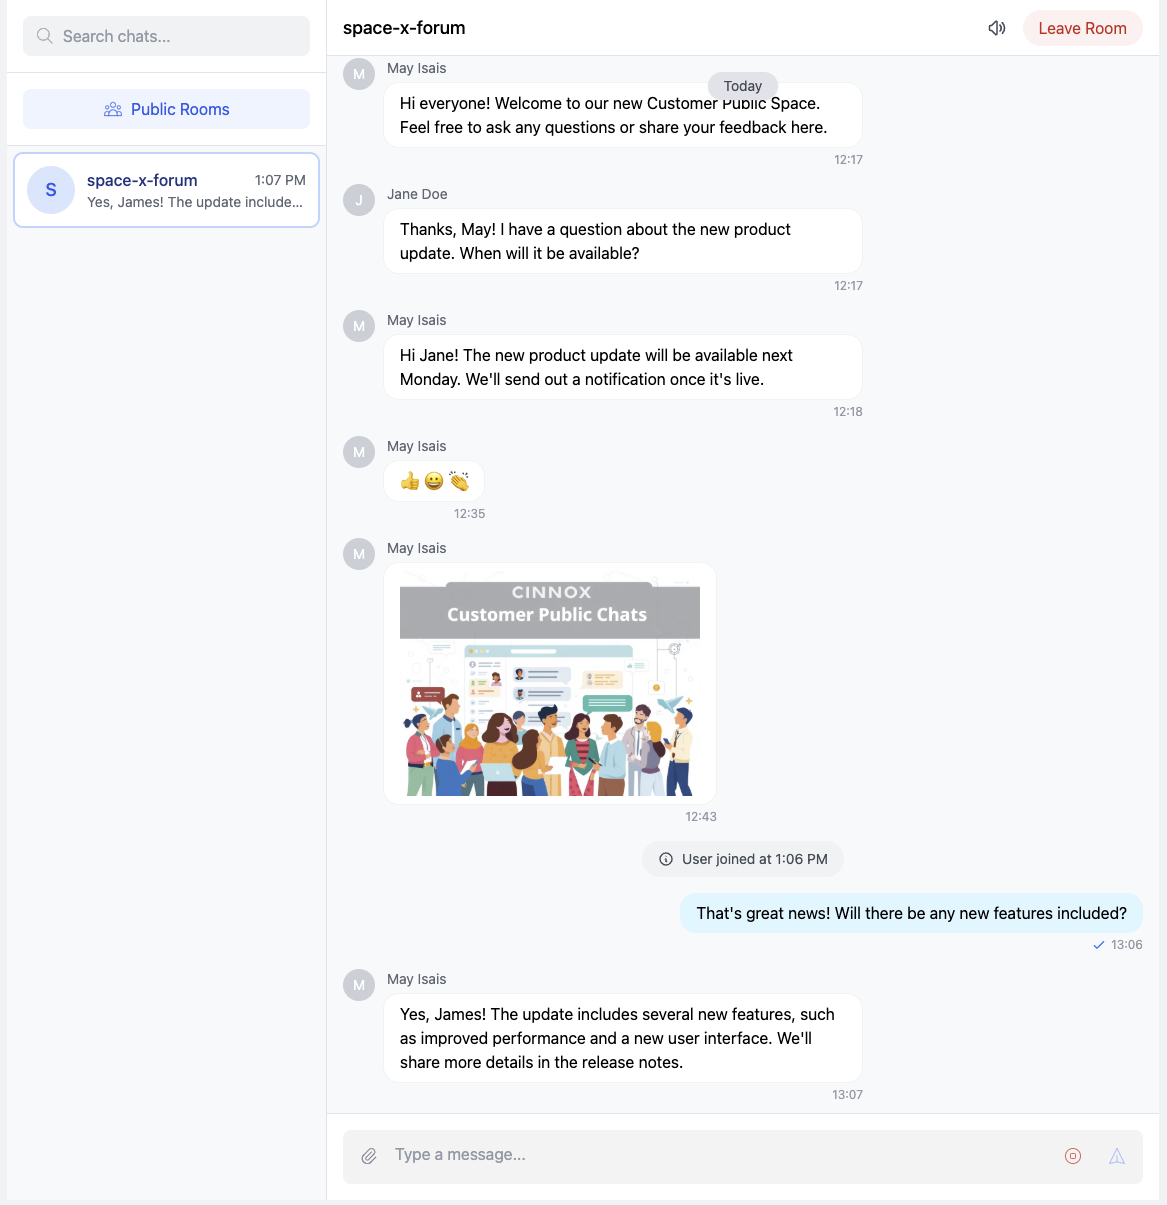
A Demo App as an example of the Customer Public Space use of Web SDK
Managing Customer Public Space
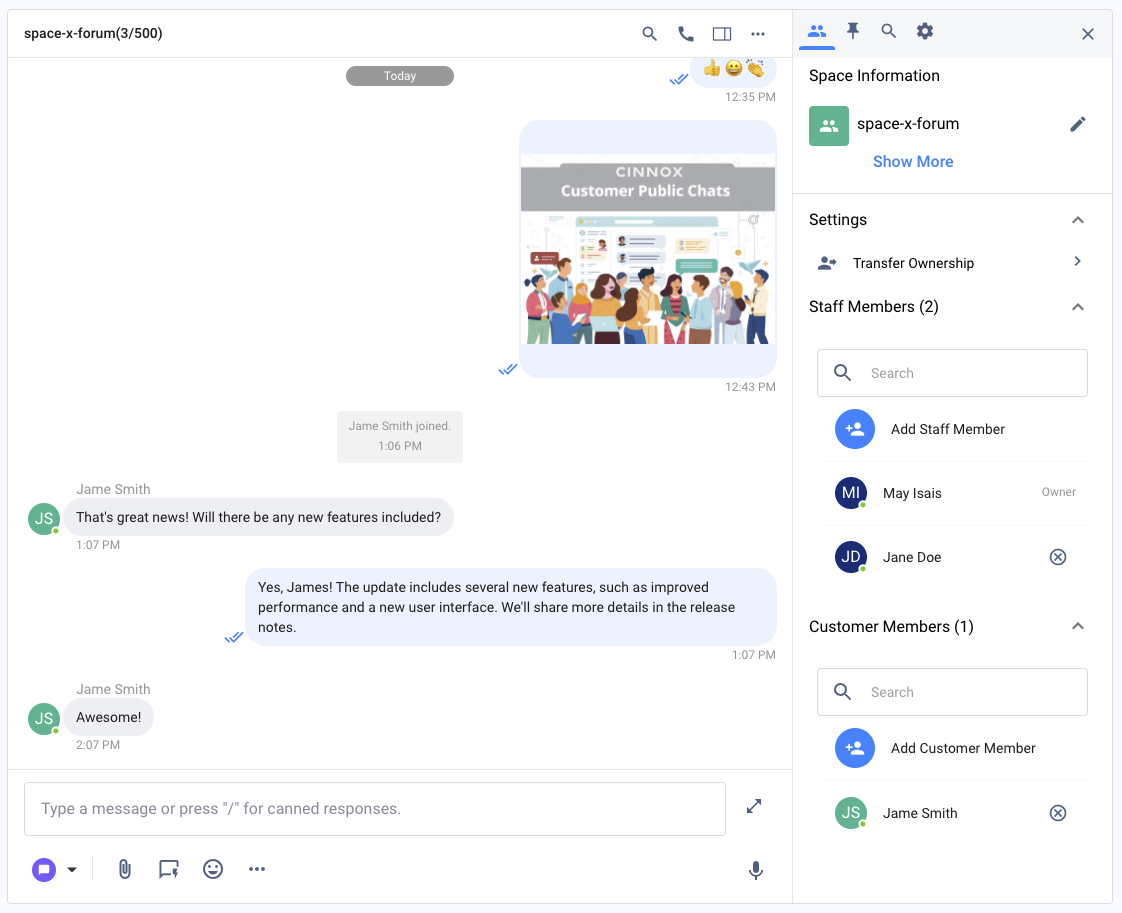
To view the Space information panel:
- Click the Room Profile icon on the Space window's right side.
As a Space owner and staff member, you can:
- View all Space members.
- You can rename the Space, update its description, and upload its profile image.
- To make the changes, click the Edit icon, then click Save.
- Changes in the name, description, and profile image will be reflected in the Space room information.
Transferring Space Ownership
As a Space owner or admin, you can transfer the ownership of your Customer Public Space to your colleague with a CINNOX account.
The Space will then display a system message indicating that the Space ownership has been transferred to another staff member.
Managing Members:
Add a Staff Member or Customer Member
As a Space Owner or admin, you can add members from the Space
- Click Add Staff Member or Customer Member to select among the list to add in the Space.
Removing Members from a Space
As a Space Owner or admin, you can remove members from the Space
- On the right side of the Space window, click the Room Profile icon to view the Space information panel.
- On the Members list, find the staff or customer member you wish to remove, then click the (x) button beside their name. A pop-up message will appear, asking you to confirm the action.
- Click on Remove.
A notification will appear for the successfully removed members, and their names will be removed from the member list. The Space will also display a system message indicating the staff members have left.
Managing Customer Public Space
Muting Customer Messages
As a Space owner or staff member, you mute customer messages, preventing them from sending or replying to any of the broadcasted messages.
Muting a Space
As a Space owner or staff member, you mute the chat room to receive notification of any incoming messages in the Space.
Leaving a Space
As a Space owner or staff member, you can leave and exit from a Space.
- On the right side of the Space window, click the Room Profile icon to view the Space information panel.
- Click on Leave Space. A pop-up message will appear, asking you to confirm the action.
- Click on Leave. A message will then state that you have successfully left the Space. The said Space will also display a system message indicating that you left.
Deleting a Space
As a Customer Public Space Owner or Admin, you can delete a Customer Public Space if necessary.
- On the right side of the Space window, click the Room Profile icon to view the Space information panel.
- Click on Delete Space. A pop-up message will appear, asking you to confirm the action.
- Please check the box beside "I confirm to delete this Space" and then click on "Delete."
A message will then state that Space has been successfully deleted. The said Space will also be deleted and removed from the Recent Connection area of your Utility panel, and other staff and customer members will no longer have access to it.
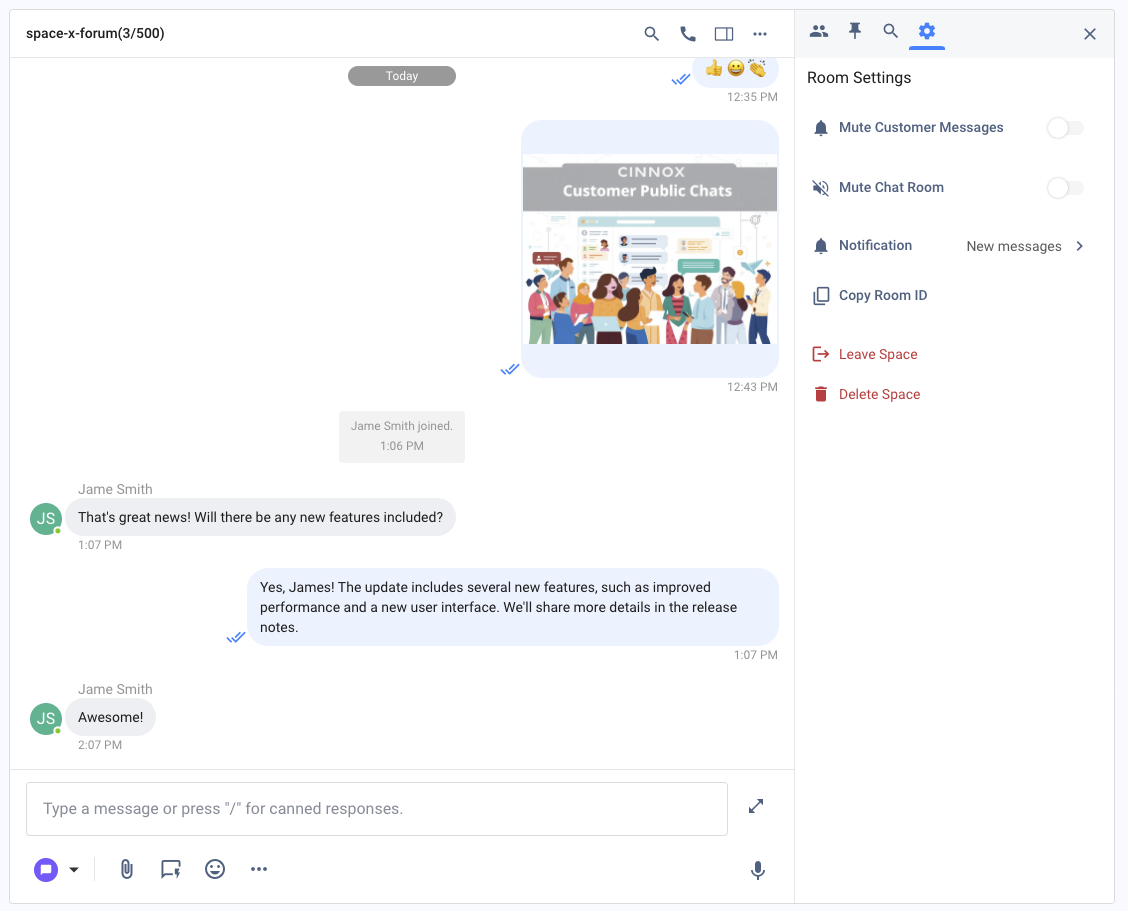
Customer Public Space Settings
📘
Integrate CINNOX Customer Public Space with Your App!
Enhance your application's communication capabilities by integrating the CINNOX Customer Public Space. Our Web SDK makes it easy to add this powerful community chat feature to your platform, enabling seamless interaction between staff and customers.
Interested in integrating CINNOX Customer Public Space? Contact Us today to get started!