Adding Chatbot
As businesses adapt to a digital-first approach, using chatbots has become pivotal in navigating this exciting journey. CINNOX takes chatbot integration to a whole new level, offering more than just a tool - it becomes your ultimate Destination. By deploying an intelligent virtual assistant within the CINNOX ecosystem, you can elevate your customer service and drive impressive sales results: experience unprecedented automation, rapid responses, proactive engagement, and round-the-clock availability.
To add a chatbot to your CINNOX service, you have several options:
-
CINNOX Q&A Bot - If you're new to the chatbot journey or don't have a dedicated chatbot solution, the CINNOX Q&A Bot is here to fill that gap. It ensures you never miss an opportunity to engage effectively with your customers using the Azure OpenAI.
-
Google Dialogflow - Leverage Google Dialogflow's natural language processing capabilities to create intelligent and conversational chatbots within the CINNOX ecosystem.
-
Other - General Chatbots - CINNOX also supports integration with general chatbot solutions, allowing you to bring your preferred chatbot platform into the CINNOX environment.
Connect a Chatbot
To connect a Chatbot:
- Go to Administration > Channels > Destinations from the navigation menu and click the Chatbot tab.
- On the Chatbot interface, click the Add Chatbot button on the page's top-right corner.
Chatbot Source
- Select CINNOX Q&A Bot, Google Dialogflow, or General Chatbot as your chatbot source and fill in the required fields.
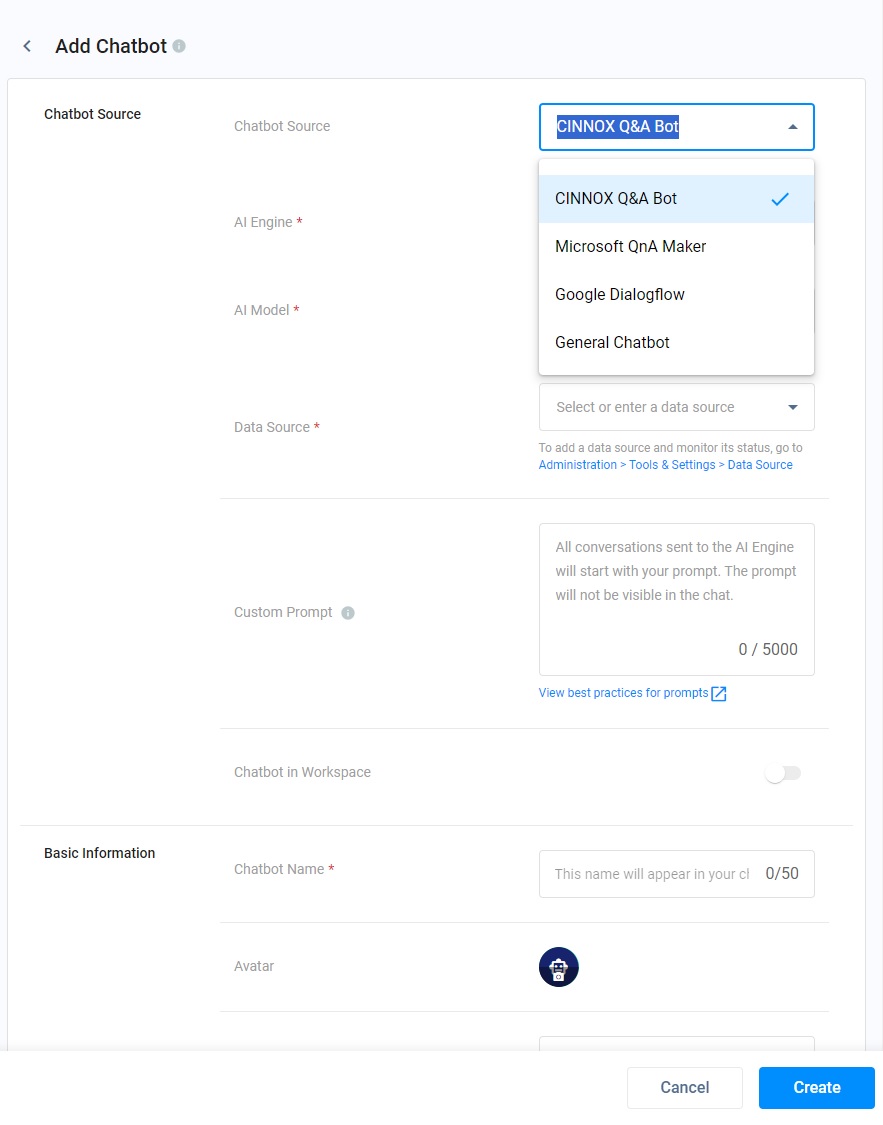
Chatbot Source
CINNOX Q&A Bot
Leverage the power of AI with the CINNOX Q&A bot.
- For details on the CINNOX Q&A bot Configuration, please refer to the CINNOX Q&A Chatbot Configuration section.
Google Dialogflow
- Log in to your Google Dialogflow Console account. Navigate to the Menu and select the IAM & Admin > Service Accounts.
- Click + CREATE SERVICE ACCOUNT, and the Service account details page will appear. Enter the information needed. Click Done
- In the Cloud Console > Service Accounts, click the email address for the newly created service account.
- Click the KEYS tab.
- Click Add KEY, then click Create new key.
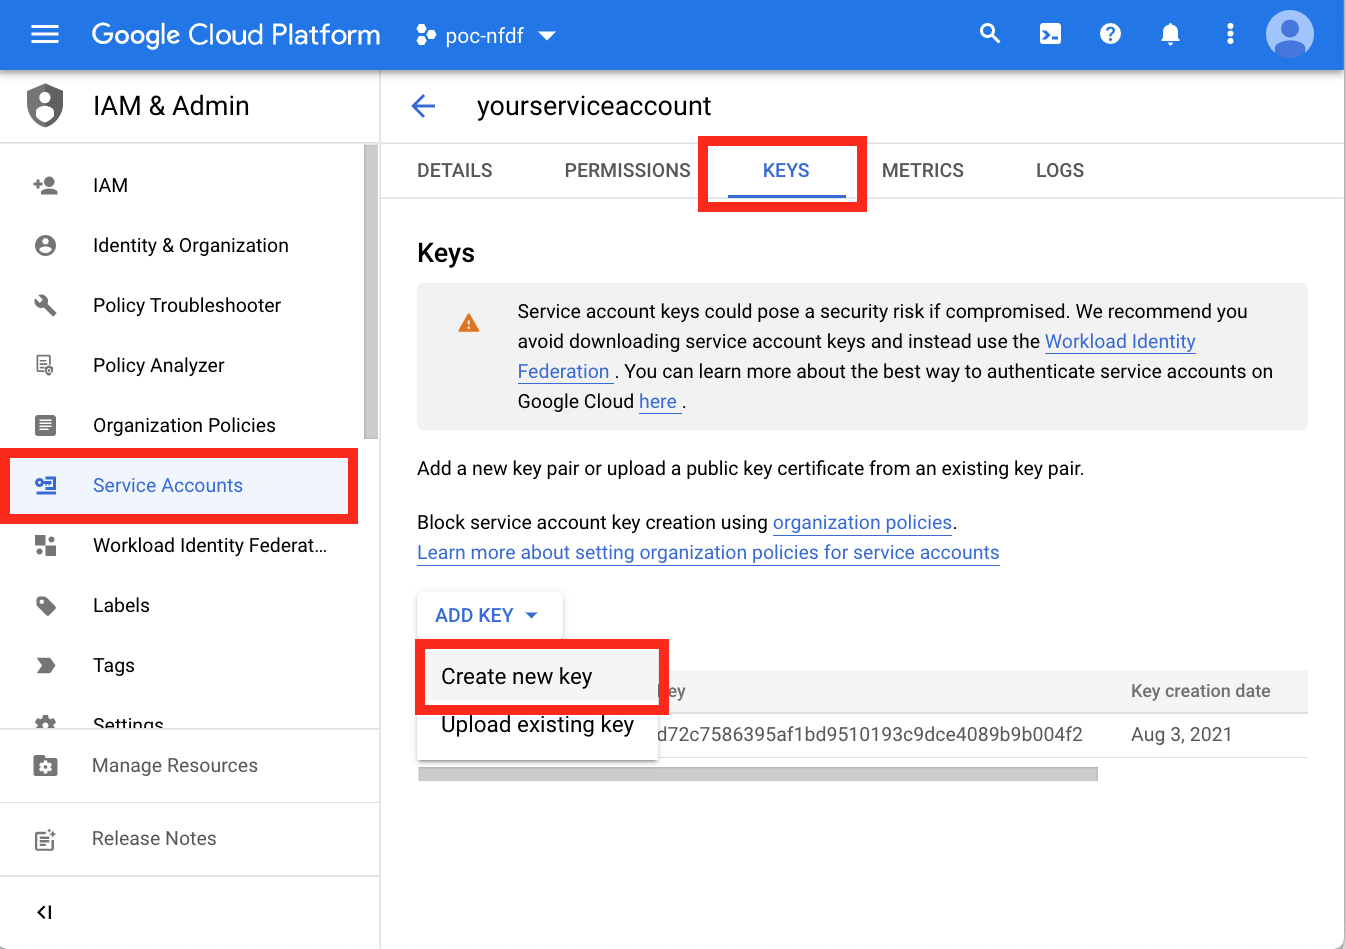
Dialogflow - Create a new key
- Click Create. A JSON key file is downloaded to your computer.
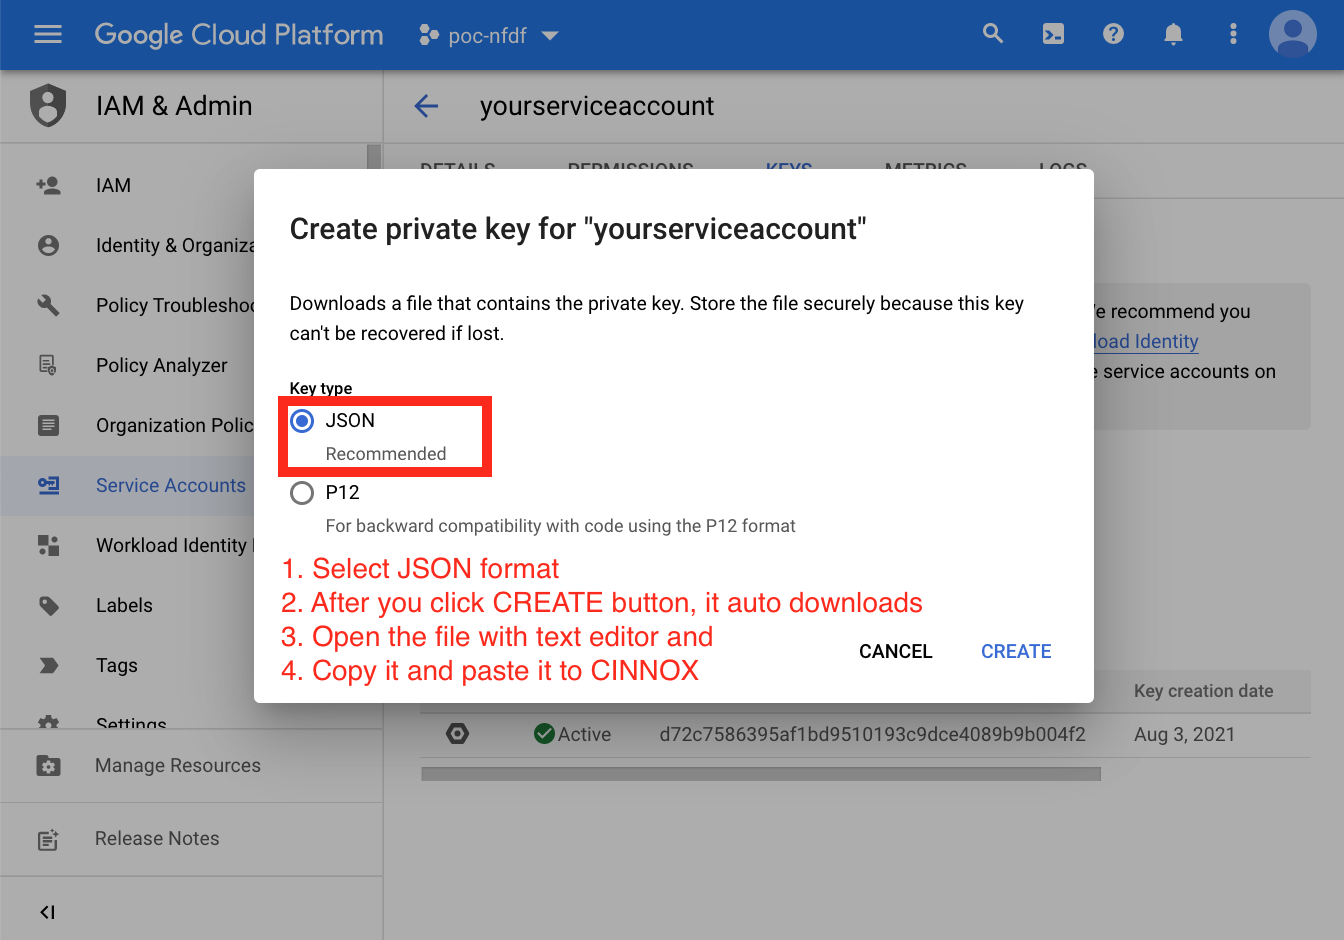
Dialogflow - Service Key Account in JSON format
- A dialogue window will appear with "Private key saved to your computer." Click Close.
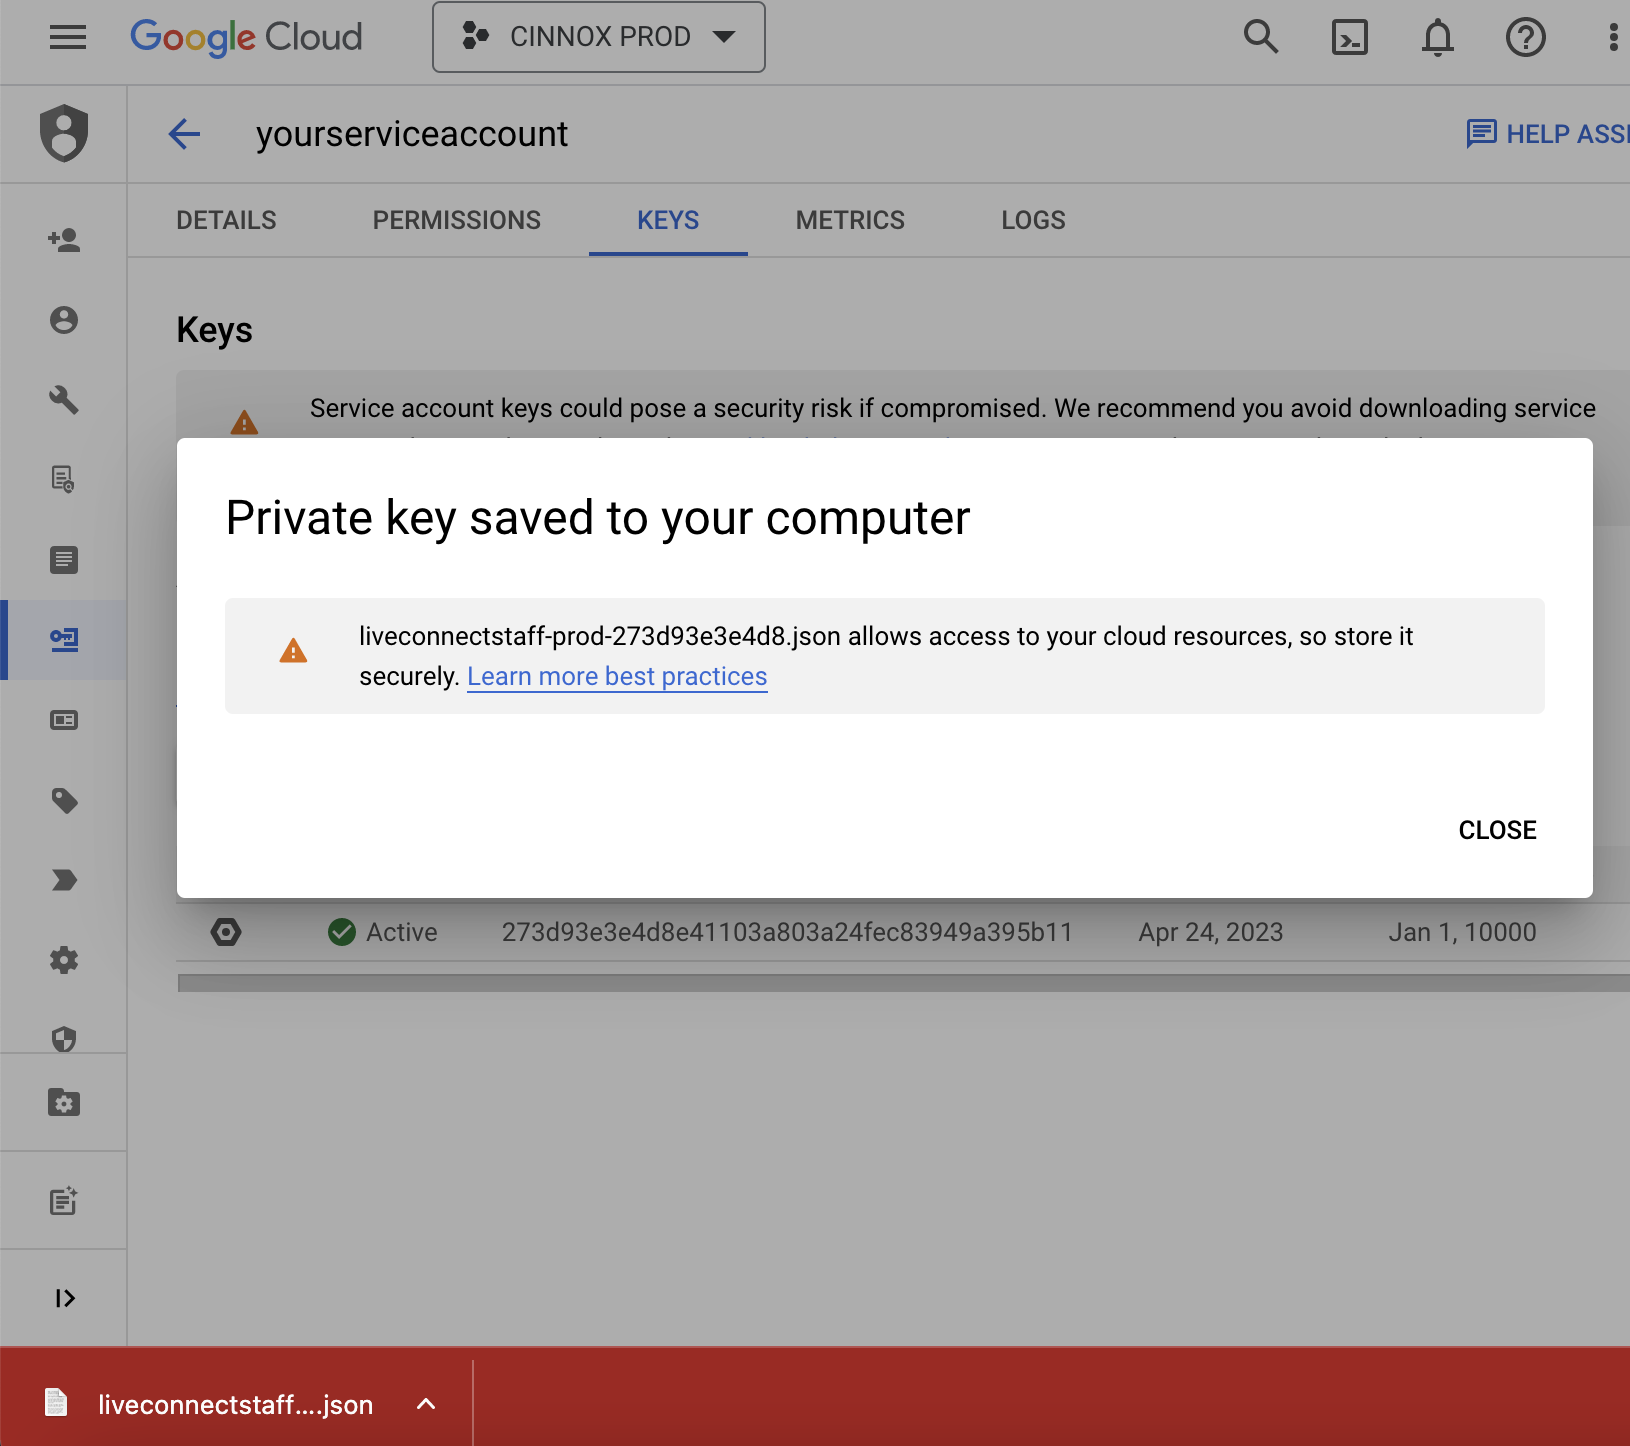
For more details, please check the Dialogflow Documentation.
🚧
Please check the permission of the newly created service account on the IAM setting page and ensure it is granted.
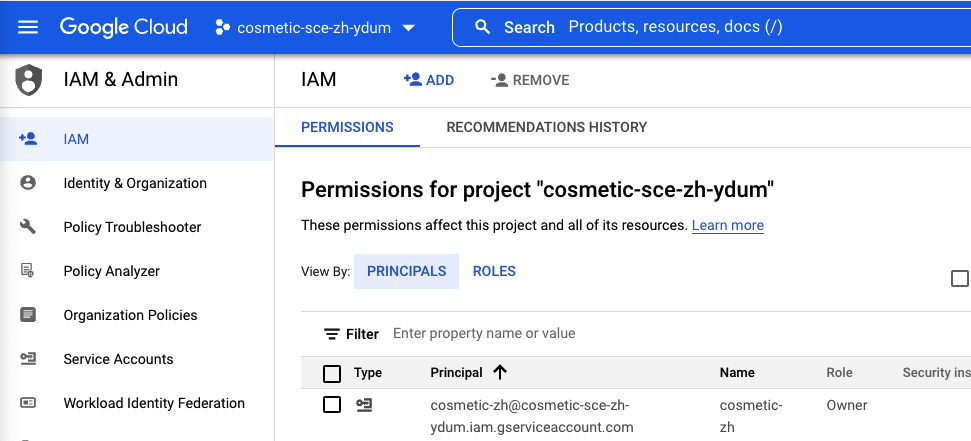
Dialogflow Permission to the service
- Open the JSON file with a text editor.
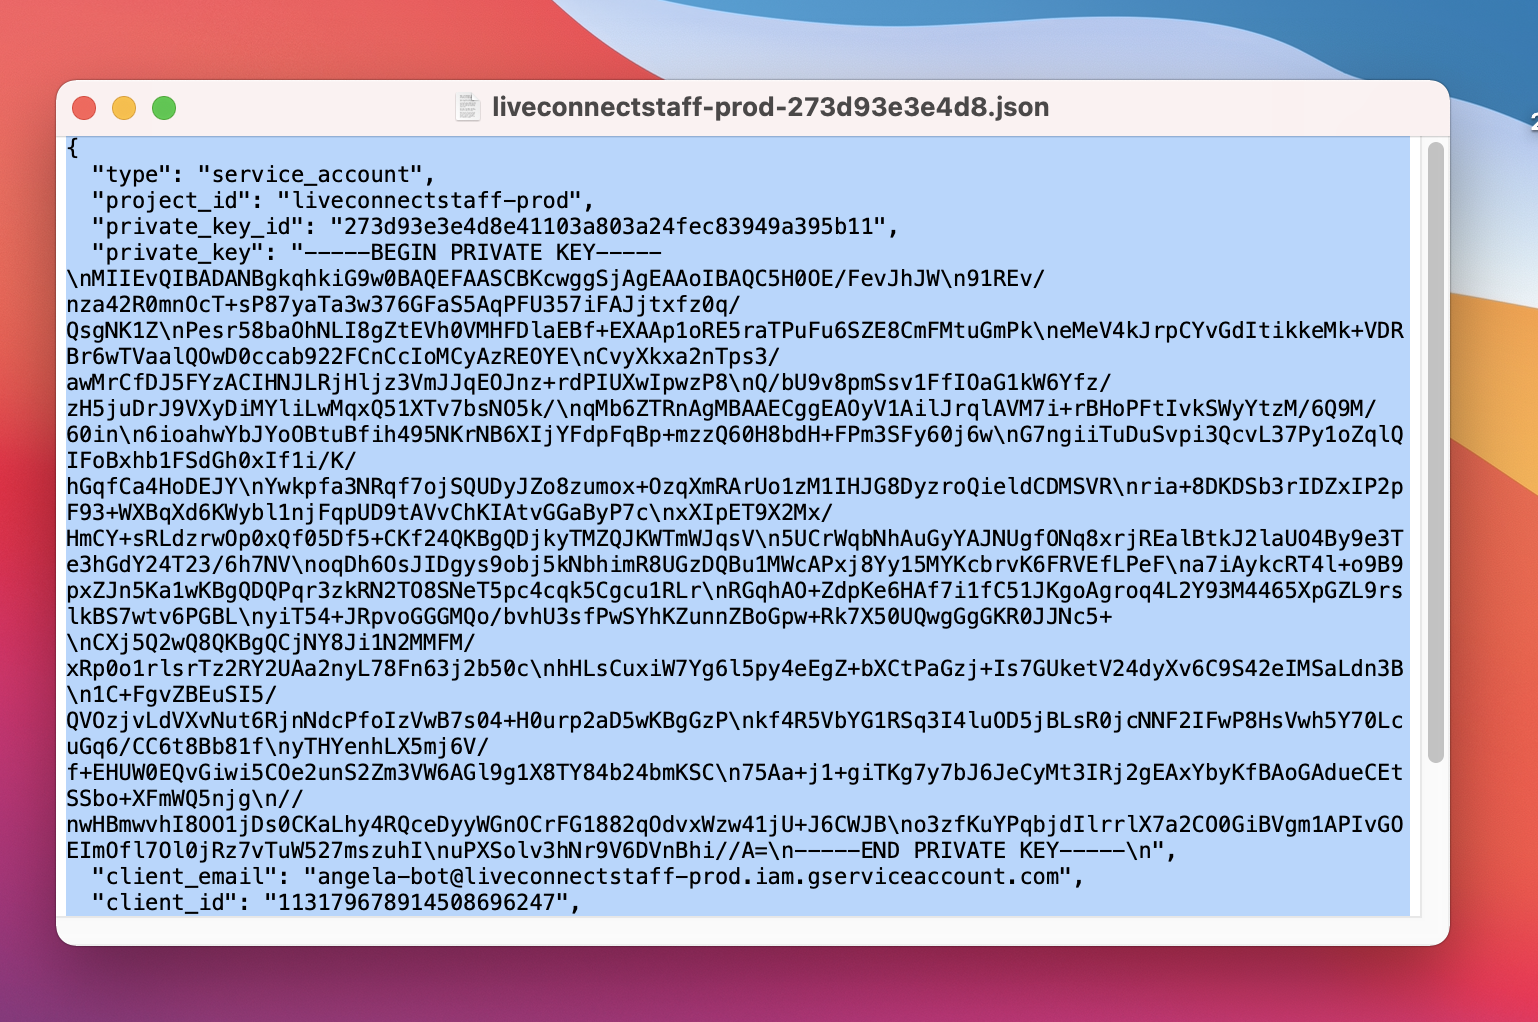
JSON file opened in a text editor
- Copy all and paste them in the Service Account Key field on the CINNOX side.

Dialogflow - Service Account Key
📘
CINNOX supports Intents to respond to customer messages.
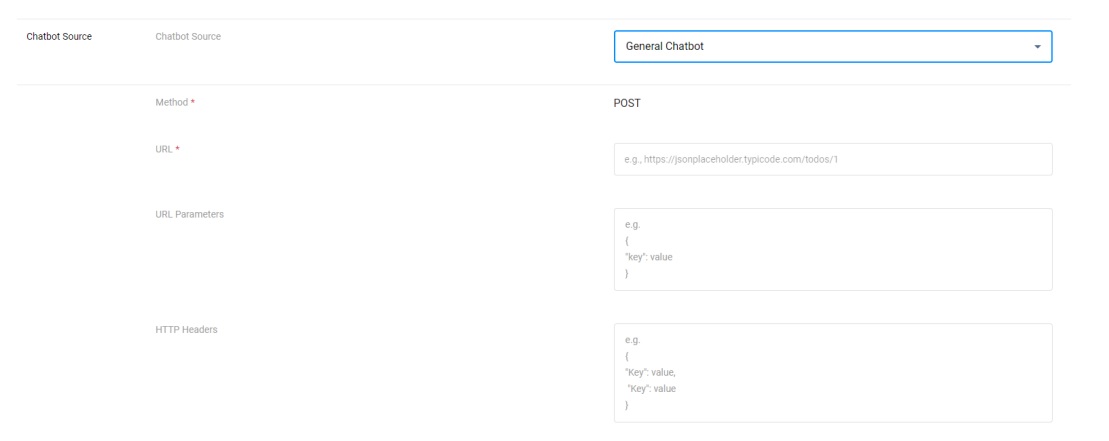
General Chatbot
If your Chatbot source is not CINNOX Q&A Bot - Azure OpenAI or Google Dialogflow, use the General Chat Integration.
- For details on the General Chatbot Configuration, please refer to the section General Chatbot Configuration.
Chatbot Settings
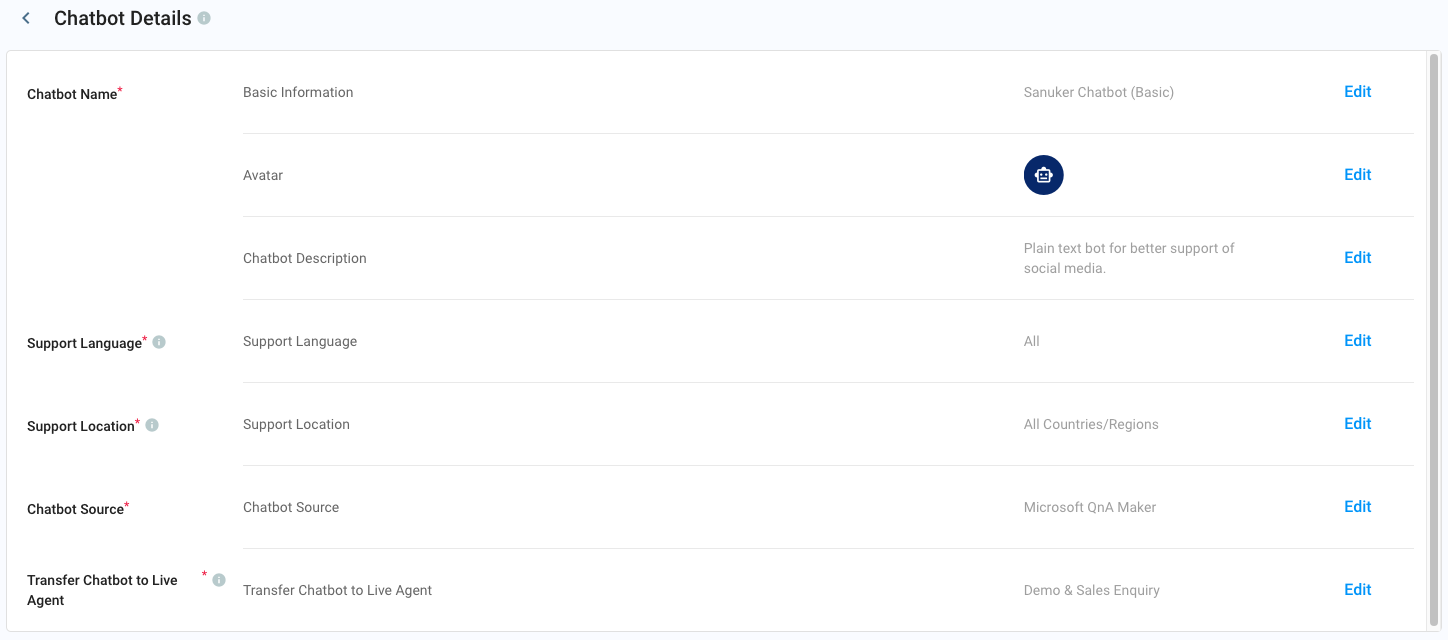
- Basic Information - the name of your Chatbot that will appear in the chatbot list and to your visitor.
- Avatar - Upload the avatar of your chatbot, which will appear to your visitor.
- Chatbot Description - the description of your Chatbot that will appear in your chatbot list.
- Support Language - the language set to handle support by your service team.
- Support Location - the country/region set to handle support by your service team.
Please ensure all information displayed in your chatbot account is correct.
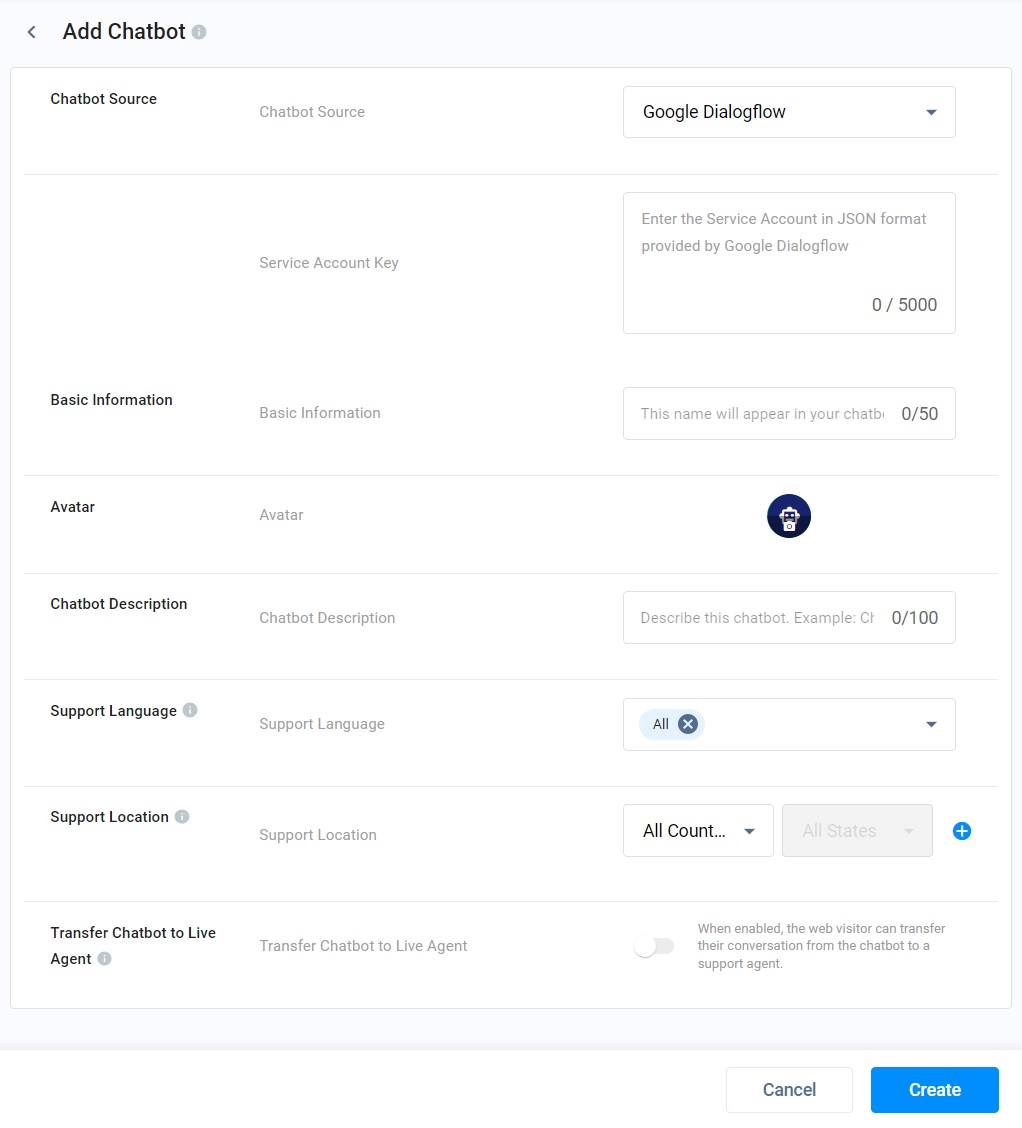
Transfer Enquiry - Chatbot to Live Agent
Allow your staff to jump in and take over the conversation when your visitor finds an agent. You can transfer the ongoing enquiry handled by the Chatbot to a service group associated with a tag or staff member.
- Toggle ON to enable the transfer of chatbot conversation to your staff or tag.
- Click Select Staff or Tag > to select between Tag and Staff in the dropdown list to whom the visitor and chatbot conversation should continue.
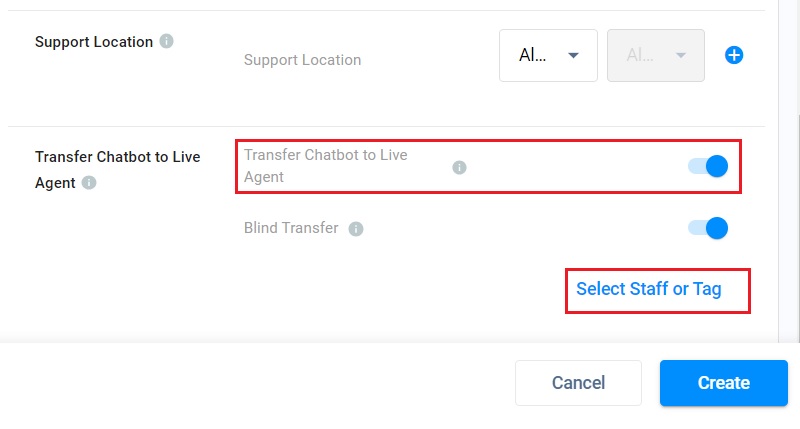
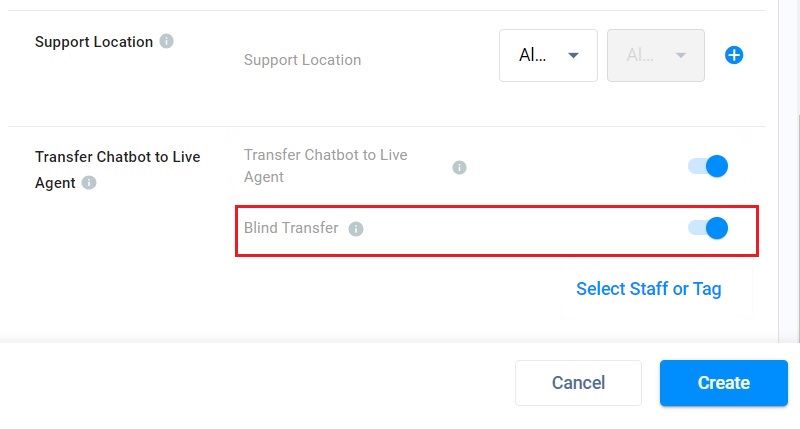
- You can toggle ON or OFF the switch of the Blind Transferto determine how the transferred enquiry will be handled if no staff or tag picks up the transferred enquiry.
- Toggle ON for an unattended transferred enquiry to become a Missed Enquiry.
- Or, toggle OFF for an unattended transferred enquiry to loop back to the Chatbot.
- Click Create when done with setting up your Chatbot.
📘
Transfer Chatbot to Live Agent
- The visitor will initiate the transfer of enquiry from the chatbot to the live agent.
- Select a tag to transfer an enquiry that does not consist of a chatbot destination to avoid the loop of enquiry transfer from a chatbot to a chatbot.
📘
Transfer CINNOX Q&A Chatbot to Live Agent
Keywords to transfer to the Live Agent:
- live agent, 線上客服, 线上客服,
- contact agent, 聯絡客服, 联络客服,
- transfer to agent, 轉移到線上客服 or 转移到线上客服
Set Up a Chat Transfer Trigger in your Chatbot Portal
After enabling the Transfer Chatbot to Live Agent in your CINNOX Dashboard, you must set the chat transfer to your agent trigger in your chatbot portal.
Google Dialogflow
Create a Text Response and add the keyword DIRECT_TRANSFER as the response to trigger the Chatbot Live Agent transfer flow.
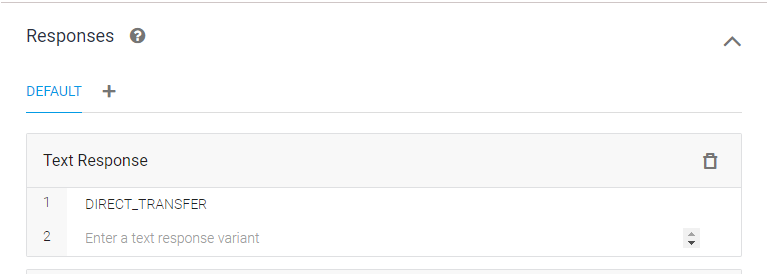
Transfer to Live Agent on Dialogflow
Close an Enquiry from the Chatbot Side
You can create a close enquiry mechanism between your visitor and the Chatbot and set it up in your chatbot portal.
Google Dialogflow
- Create a Text Response and add the keyword CLOSE_ENQUIRY as the response to trigger the close enquiry flow.
- Enable the Set this intent as the end of conversation.
- Enable the webhook call for this intent.
- Click Save
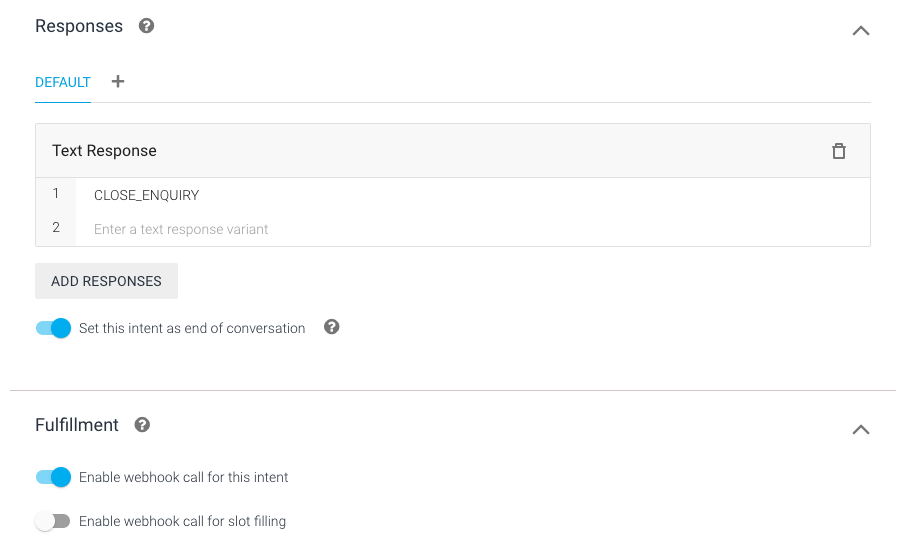
Close an enquiry on Dialogflow
Using Chatbot to Channel
To use your Chatbot to serve chat enquiries in your channel:
- Go to Administration > Channels > Tag Directory or any Social Channels, create a new channel, edit an existing channel, and go to Routing Settings.
- Under Routing Rules (you may have selected Alternative, Time or Percentage Routing), click + Add Destination, and a pop-up window will show to choose a destination.
- Go to the Chatbot tab and select the Chatbot you added.
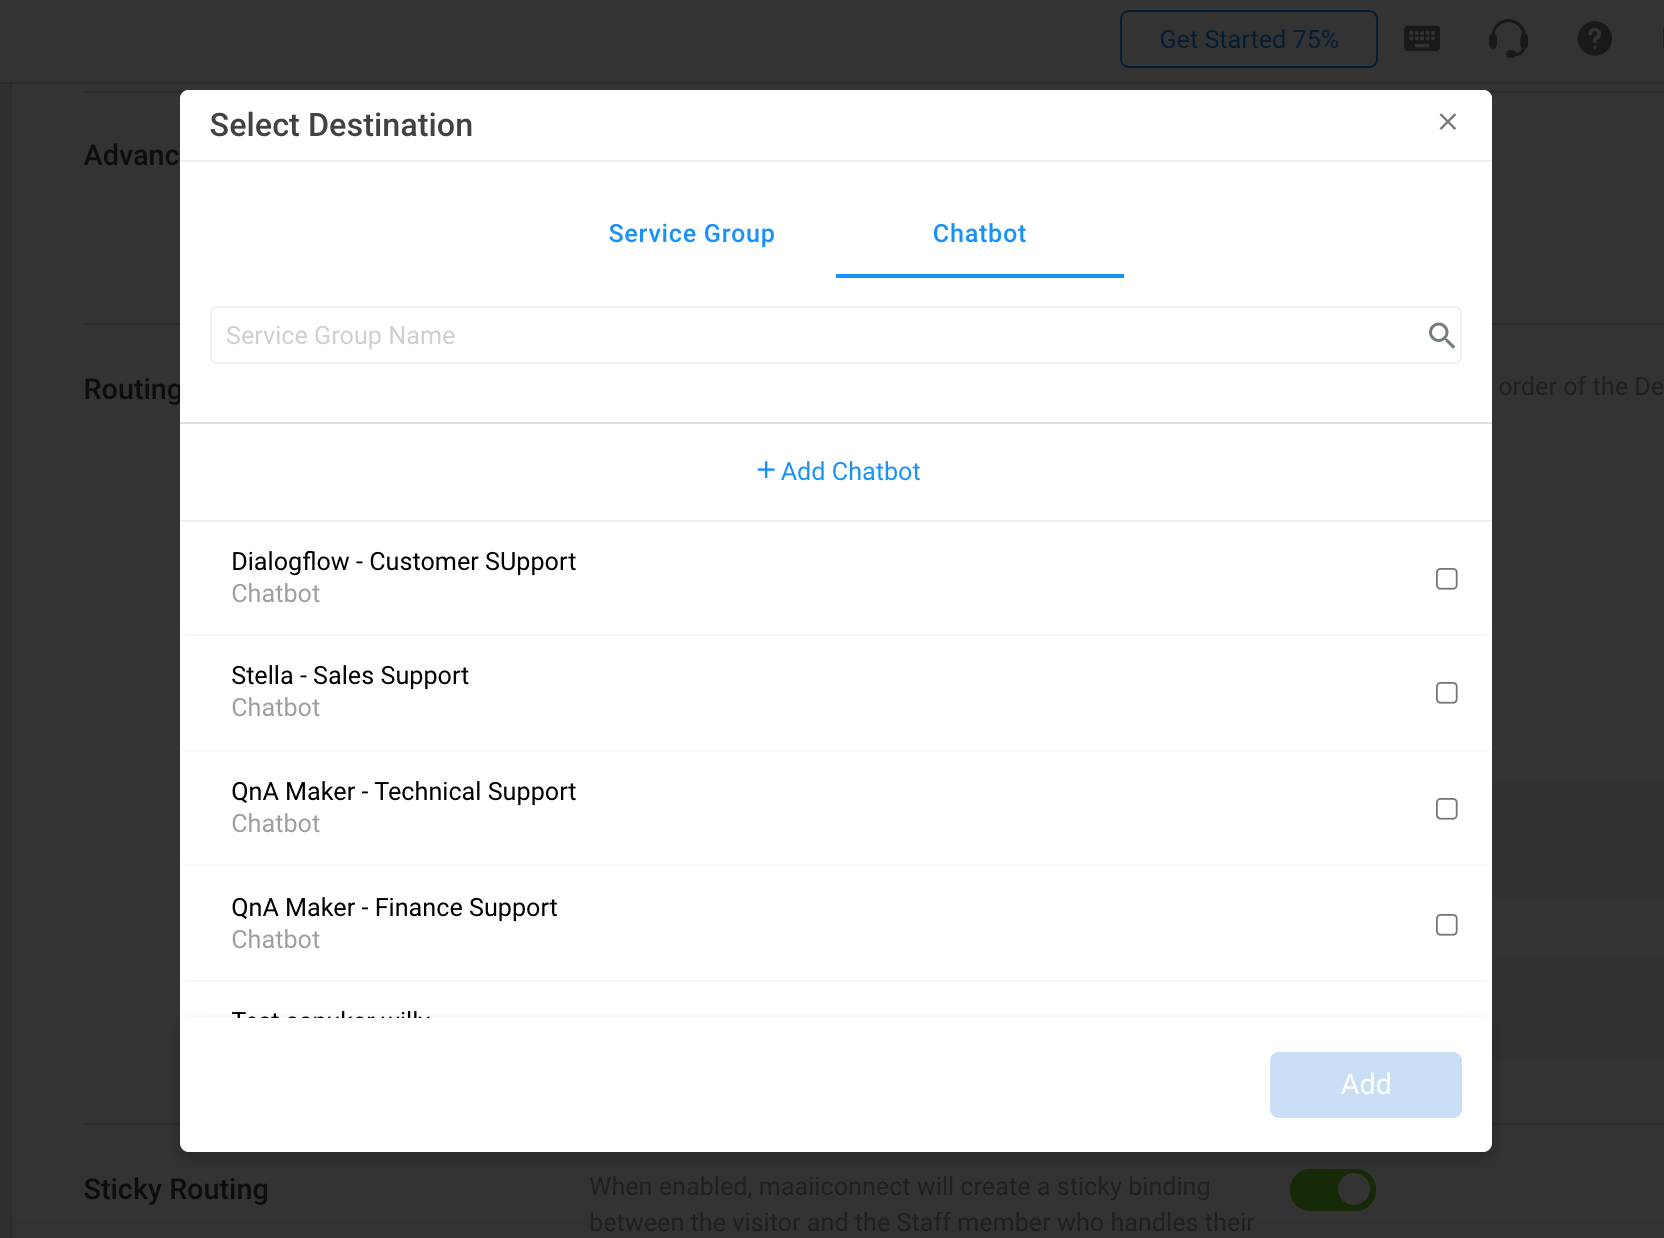
Selecting Chatbot as Destination
📘
The routing rule should work the same with or without a chatbot in the destination. The chatbot can only serve a chat enquiry.
Channel Info on Dialogflow
When the Chatbot Dialogflow has attended an enquiry, the following channel information will be passed by CINNOX to Dialogflow in JSON format.
Directory, Staff, Web Link and Campaign Channels
Directory, Staff, Weblink and Campaign channel information are available using the corresponding Dialogflow context key.
- Channel Type
- Channel ID
- Channel Name
| Dialogflow Context Key | Example Value |
|---|---|
| tagType | DIRECTSTAFF ONECLICKCALL SMARTROUTING |
| tagId | 277d7dec-4aad-4fc2-829b-f25dc4556f99 |
| tagName | Hotel Reservation |
Social & Other Channels
The following social and other channel information is available using the corresponding Dialogflow context key.
- Channel Type
- Channel ID
- Channel Name
- Channel Source
- Channel Source Name
- Channel Phone Number
- Visitor Name
- Visitor Phone
| Dialogflow Context Key | Example Value |
|---|---|
| omniType | CINNOX WhatsApp WeChat LINE WOZTELL Facebook Messenger Third Party Channel Email |
| channelType | CINNOX EMAIL FACEBOOK LINE THIRDPARTY WECHAT WHATSAPP WOZTELL |
| channelId | 02b76025-dc95-4741-97ab-6ae045d156c1 |
| channelName | Hey Resort |
| channelSourceName | Angela Resort Group |
| channelPhoneNumber (for WhatsApp channel) | +85212345678 |
| visitorName (if available) | May Isais |
| visitorPhone (if available & for WhatsApp channel only) | +85260578655 |
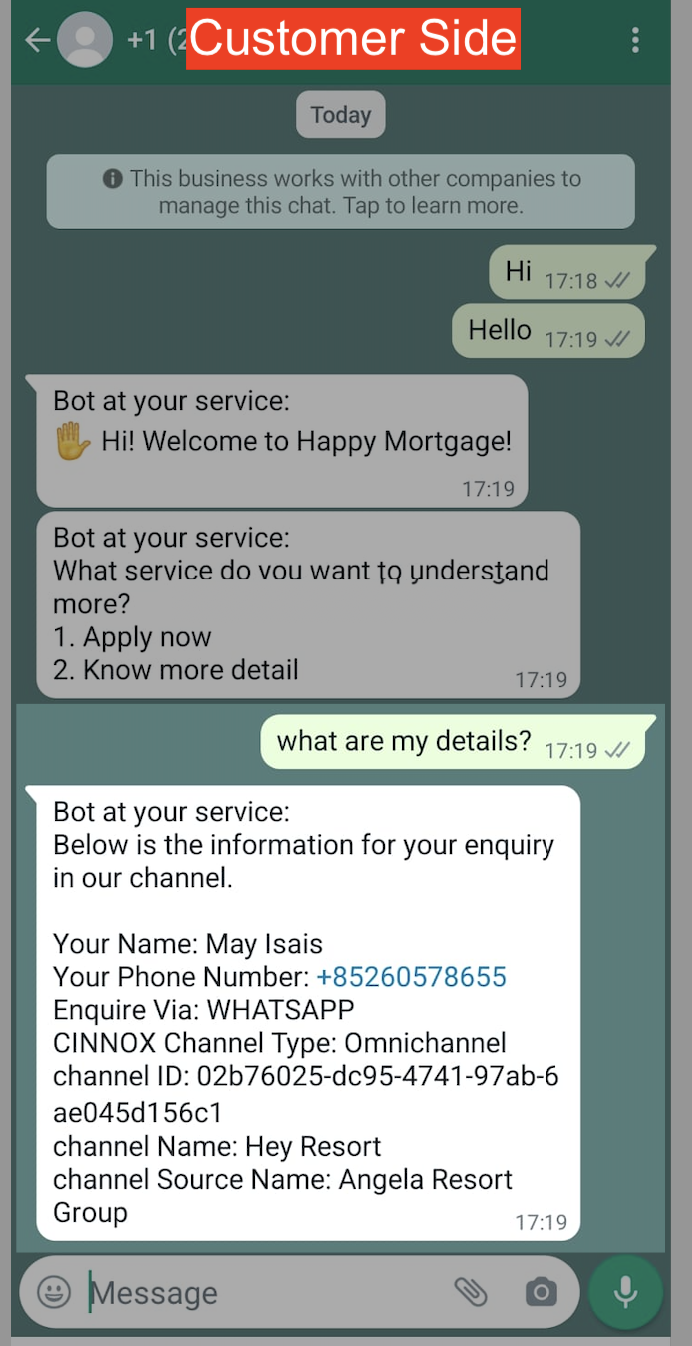
Example Case (Replying Visitor with Channel Info) to test it out
Below is an example case and steps when you want to reply to your visitors and customers with channel information via the Chatbot Dialogflow.
- On your Dialogflow - Agent, create a new Intent.
- On the Contexts, enter cinnox on the Add output context.

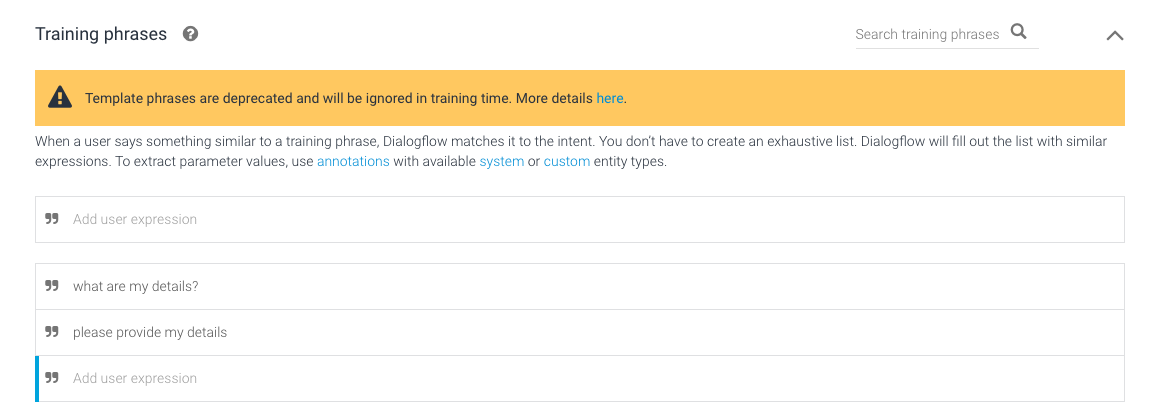
- On the Training phrases, enter the user expression expected for your customers to reply in the conversation.
-
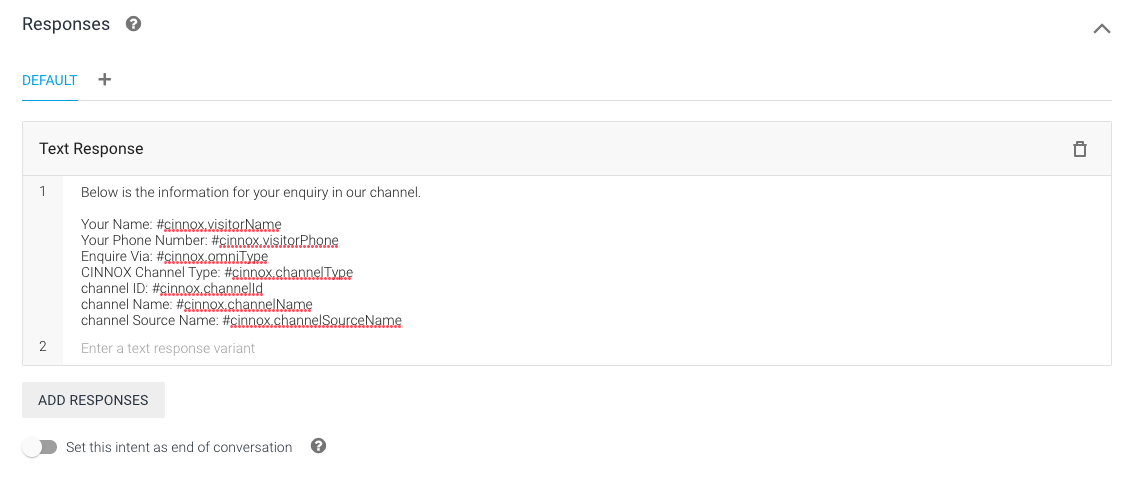
On the Responses, enter the text response variant to reply to your customers that comes with the following format:
- "#cinnox.{parameter}"
The {parameter} corresponds to the Dialogflow Context Key in the above table.
- "#cinnox.{parameter}"
-
Then click on Save.
| Text Response Example |
|---|
| Below is the information for your enquiry in our channel. Your name: #cinnox.visitorName Your Phone Number: #cinnox.visitorPhone Enquire Via: #cinnox.omniType CINNOX Channel Type: #cinnox.channelType channel ID: #cinnox.channelId channel Name: #cinnox.channelName channel Source Name: #cinnox.channelSourceName |
📘
The same goes for the channel with tag details. Create a new intent and use the following Text Response.
- Tag Type: #cinnox.tagType
- Tag ID : #cinnox.tagId
- Tag Name: #cinnox.tagName
Edit Chatbot Details
To view and edit an added Chatbot:
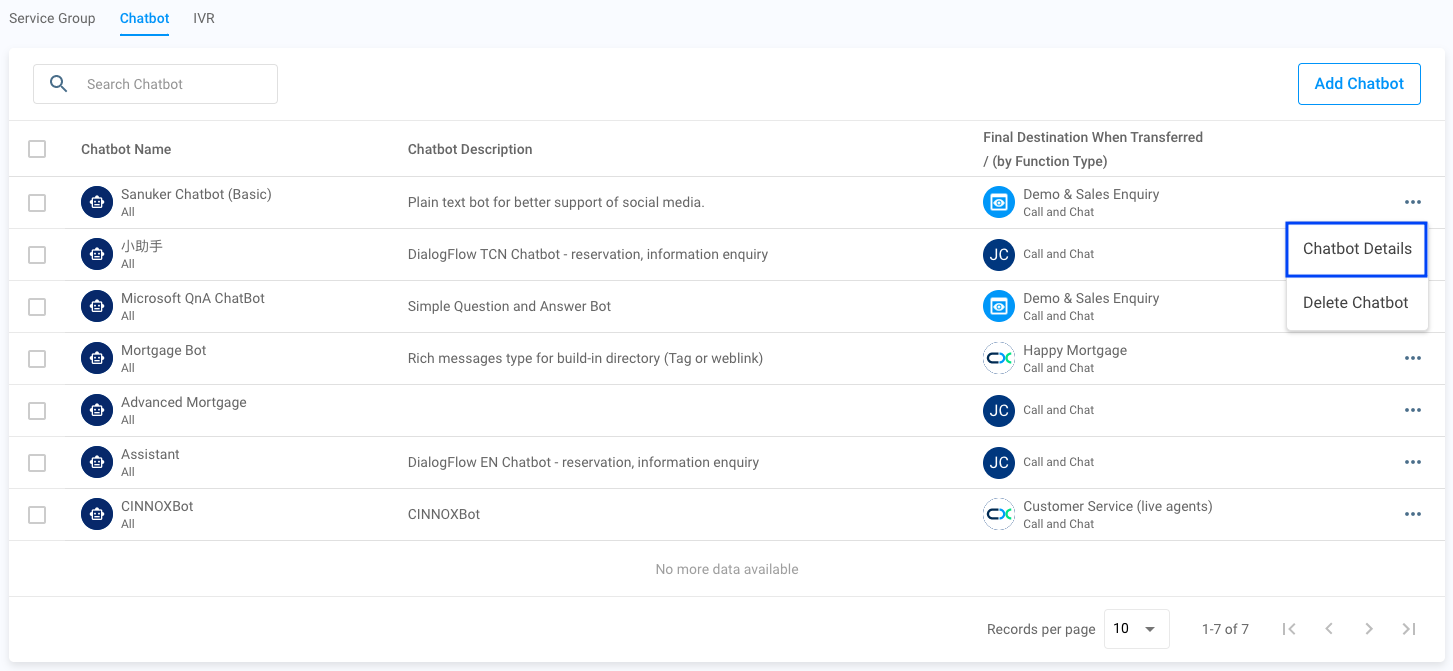
- Go to Administration > Channels > Destinations from the navigation menu.
- Click the "..." on the right side of an added chatbot.
- Select Chatbot Details. The Chatbot Details page will display.
- Click Edit for the respective area to edit the details.
- Click Save.
Remove Chatbot
To remove an added chatbot:
- Go to Administration > Channels > Destinations from the navigation menu
- Click the "..." on the right side of an added chatbot.

- Select Delete Chatbot. A pop-up confirmation page will appear to remove the Chatbot.
- Click OK.

🚧
You cannot delete the chatbot if it is assigned to a destination for a tag. Please adjust the tag settings before attempting to remove the chatbot.