Zapier
Overview
Zapier is a tool that helps automate repetitive tasks between two or more apps with zero free code. Zapier can tell another app to perform (or do) a particular action when an event happens in one app.
What can be automated with Zapier?
Zapier links app A with app B.
You use app A for project management and app B for the calendar to manage your project schedule. When app A creates a new task through Zapier, the time-related events for this new task will automatically be created for app B as your reminder.
Some Use Cases Between Zapier and CINNOX
- Create a new item for the follow-up actions to another app for the missed enquiry with the enquiry ID from CINNOX.
- Create a new contact in another app when the external contact is created on CINNOX.
- Update the corresponding status to another app when the new external contact is created in CINNOX.
- Send an IM to CINNOX - Staff or the Space (group chat) when a status has been updated to another app.
- Send an SMS via CINNOX to the customer when their request has been approved to another app.
Please refer to Zapier Online Documentation.
📘
Zapier integration is available in the Omnichannel Contact Centre plan and up. For more details, refer to our CINNOX Pricing page.
Integrating Zapier and CINNOX
Create your Zapier Account and integrate it into the CINNOX service using the CINNOX-generated App ID and App Token and Base URL in your Zapier Account to complete the integration and authentication.
Generate CINNOX Credentials for Zapier Authentication
You must create a Zapier Account on CINNOX Dashboard to generate the credentials.
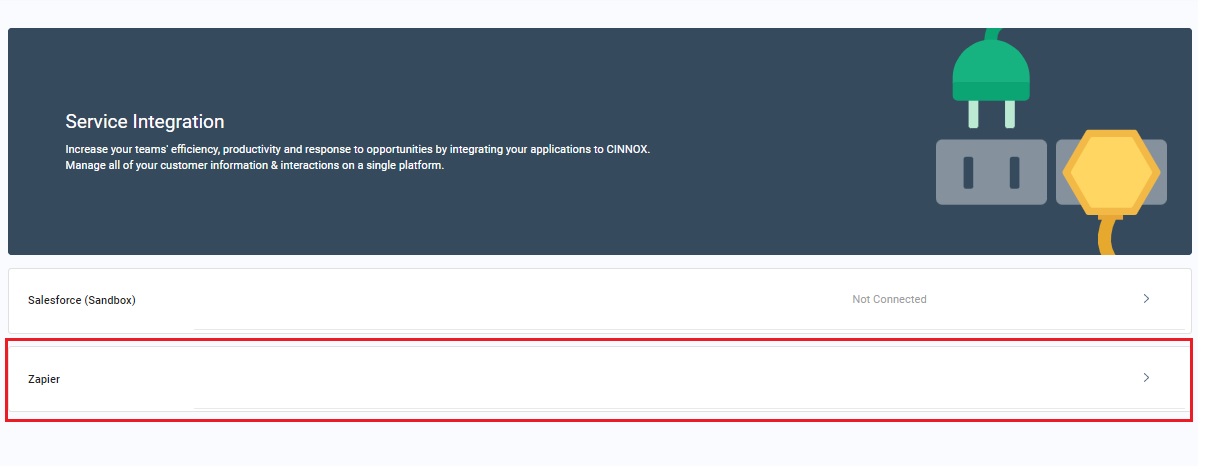
- Navigate to Administration>Service Integration.
- Click on Zapier under the Third Party Integration.
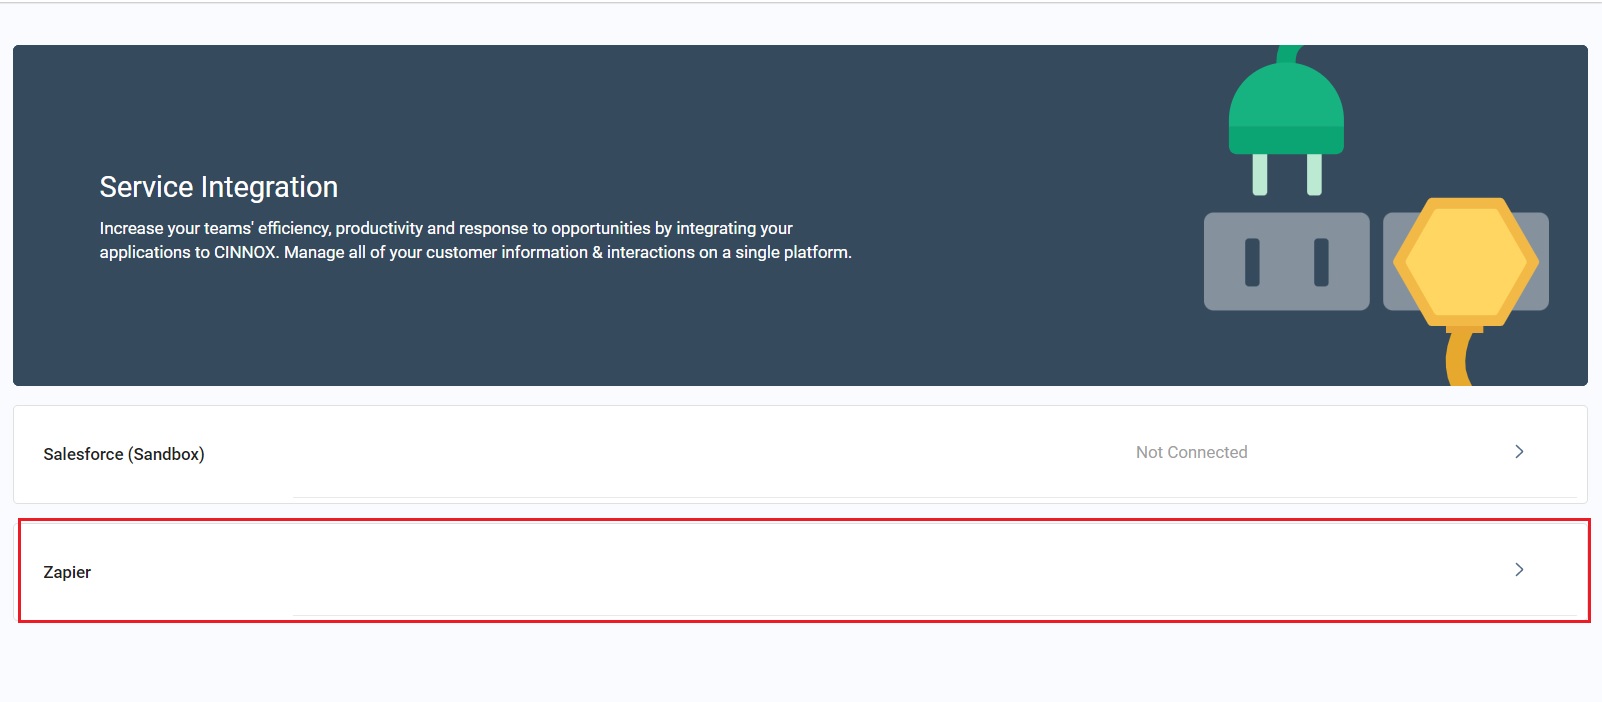
Select Zapier
- Click on Add Zapier Account and enter your Zapier Account Name (it can be any name) to generate an APP ID and App Token to connect with and authenticate your Zapier Account.
- Click on Confirm
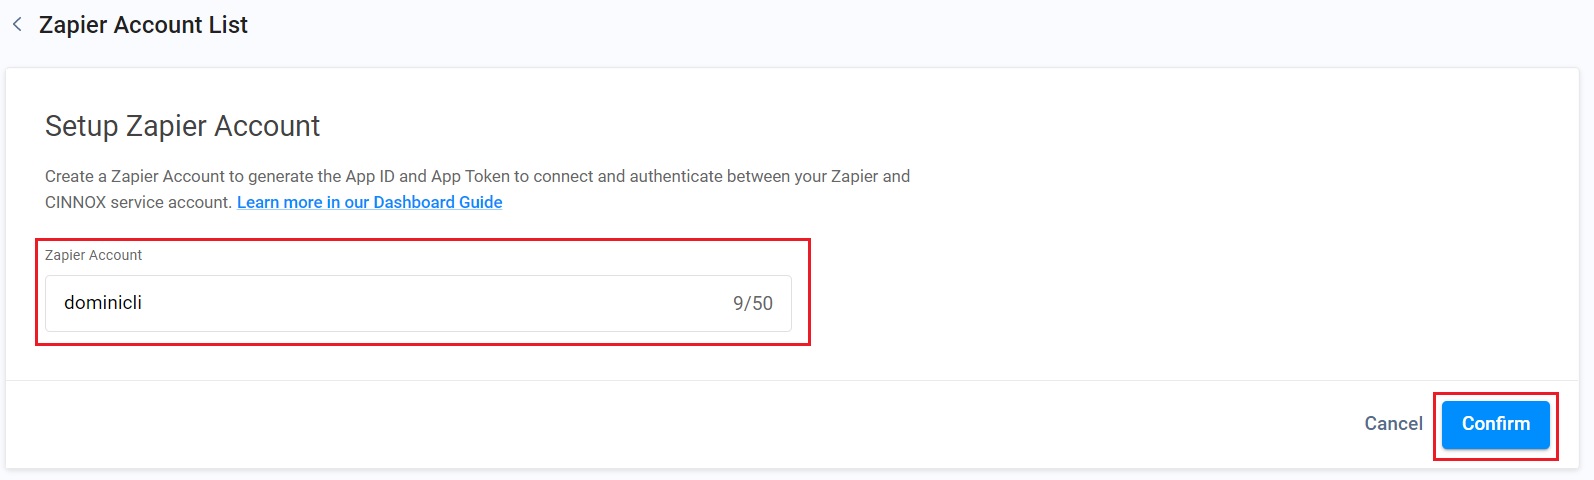
Enter your Zapier Account Name
📘
The Zapier Account Name in both CINNOX and Zapier should be the same for the administrator to easily trace the Zapier Accounts connected to the CINNOX service.
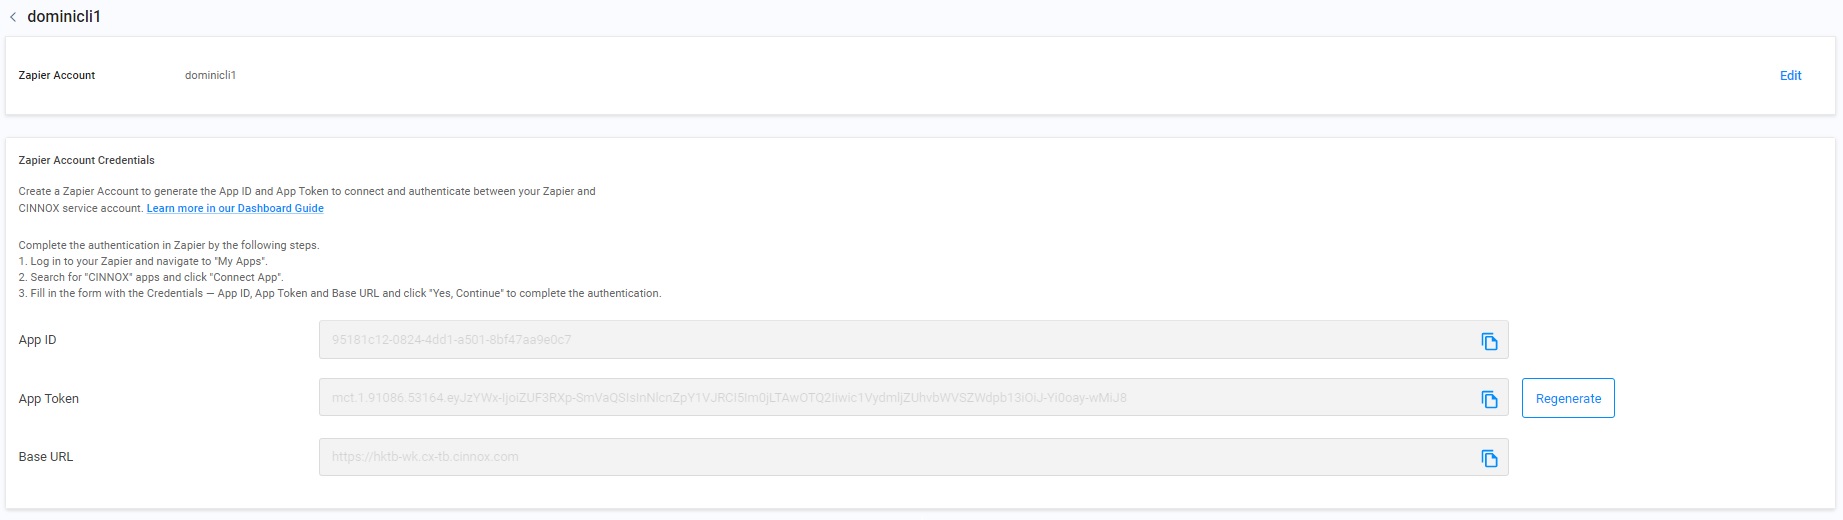
After confirming your Zapier Account name, Dashboard will display your Zapier Account Credentials consisting of App ID, App Token, and Base URL, which you must copy and paste to your Zapier Account afterwards for Zapier Account Authentication.
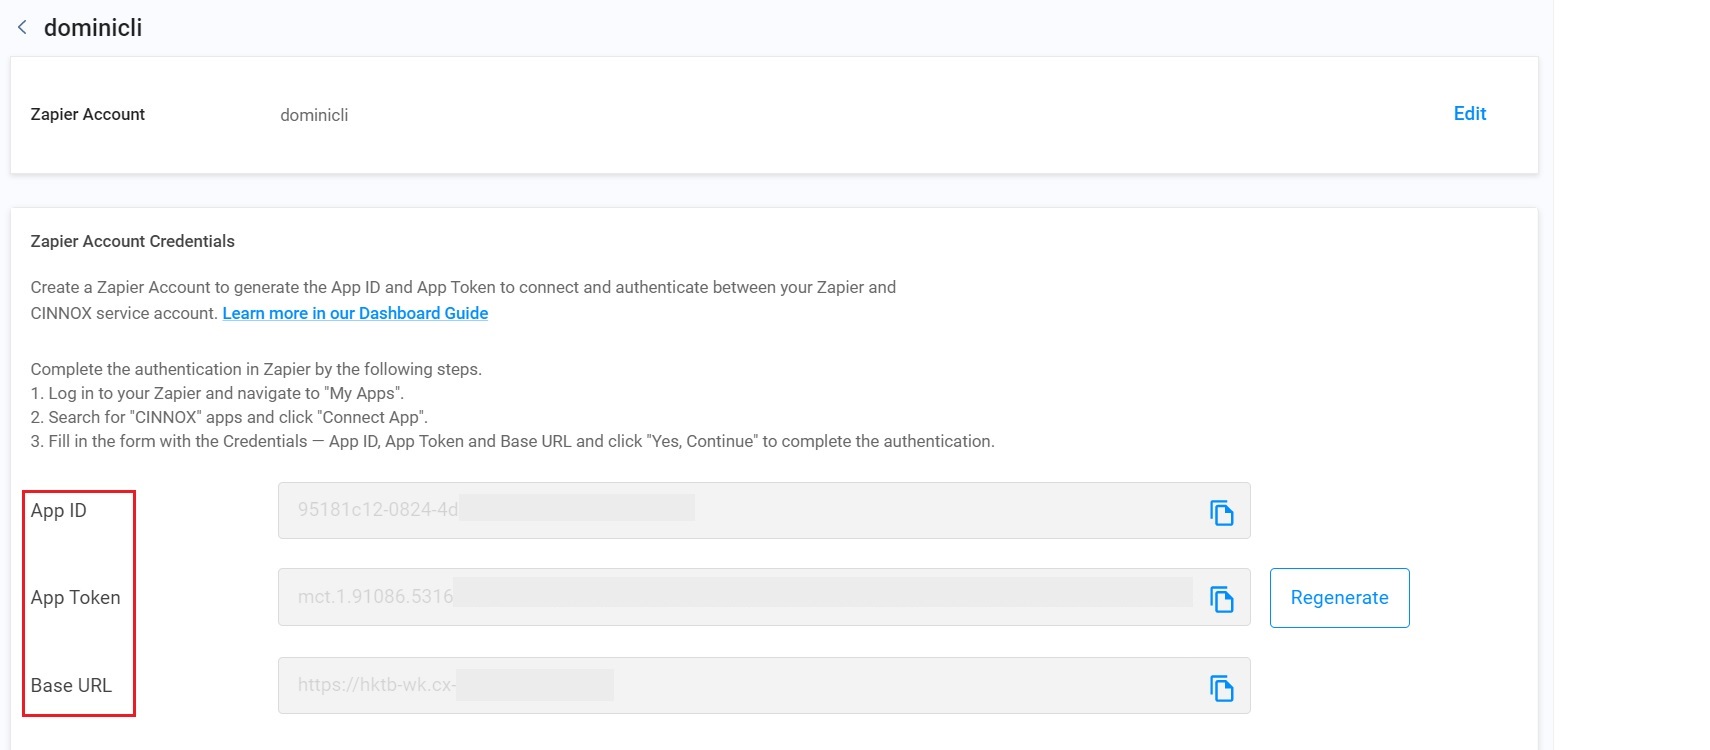
Zapier Account Credentials
📘
The limit of the Zapier Account created in CINNOX is 10. You have to delete the existing account before adding a new one when the number of the Zapier Account reaches the limit.
❗️
The Regenerate button is configurated to update the App Token for security purposes regularly. However, regenerating a new App Token after Zapier account connection to CINNOX will terminate the existing account connection. Please think about it carefully before regenerating a new App Token.
Connecting your CINNOX service to your Zapier Account
Complete the connection and authentication by the following steps.
- Log in to your Zapier Account and Click on My Apps on the left-hand side of the navigation menu.
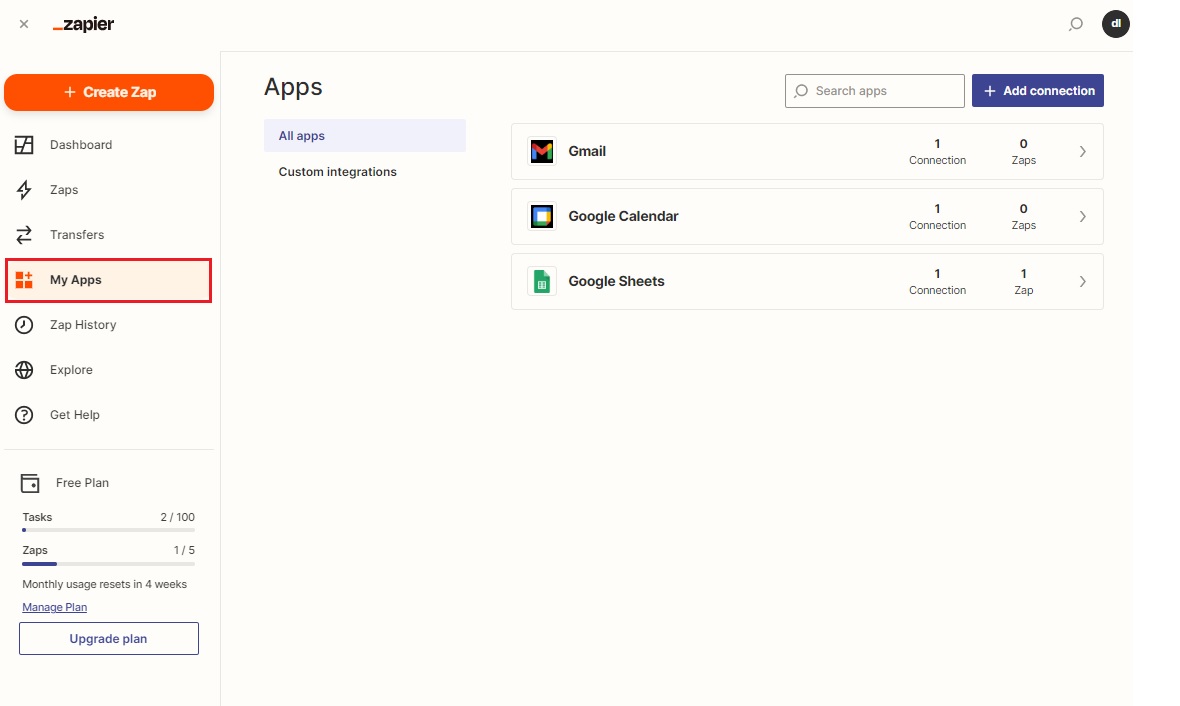
Click on Create Zap
- Click on +Add connection at the top right-hand corner.
- Enter CINNOX in the search box.
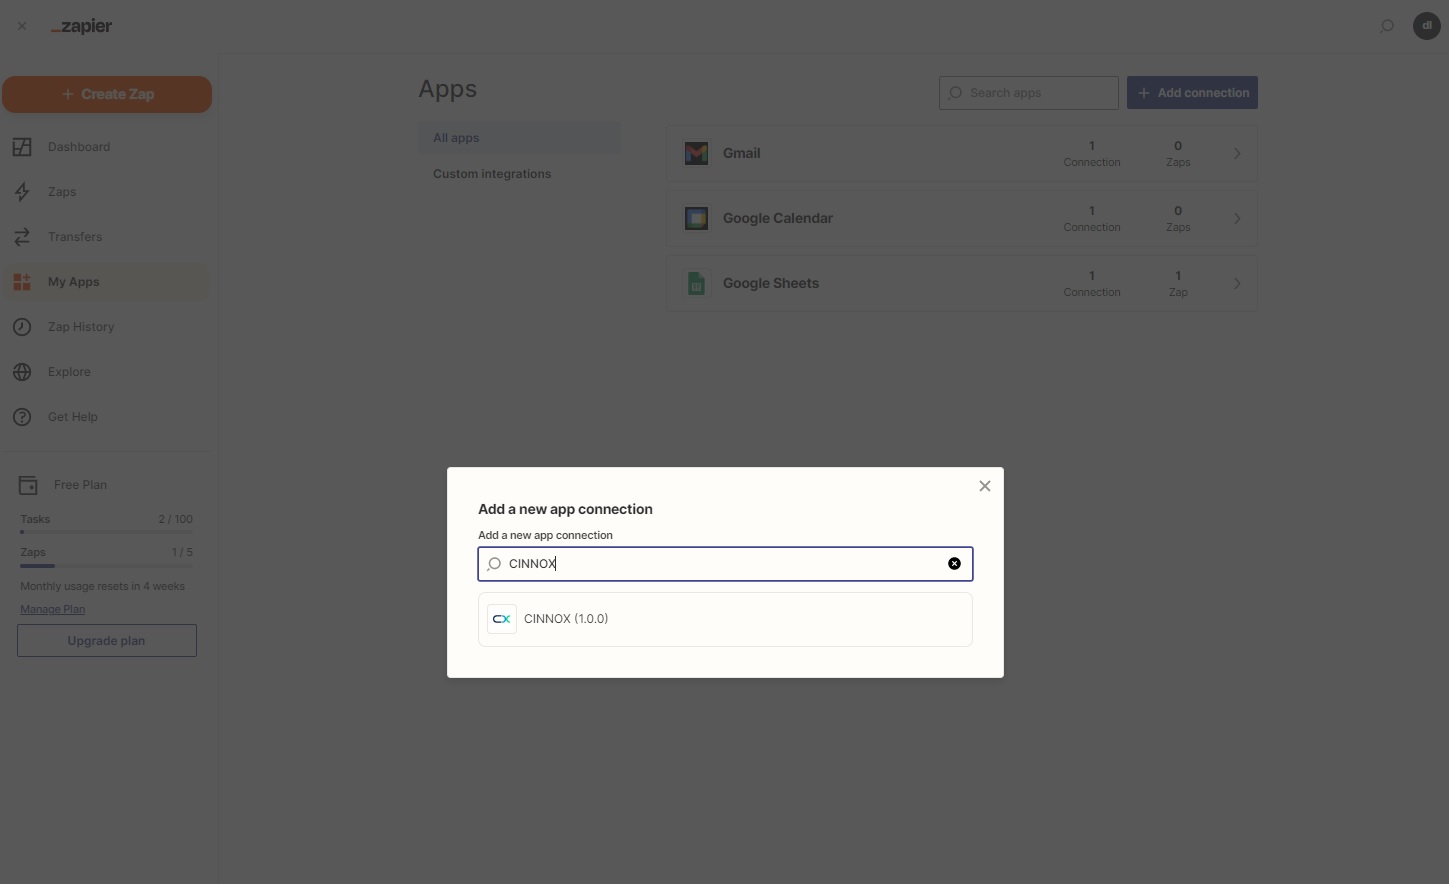
Enter CINNOX into the search box
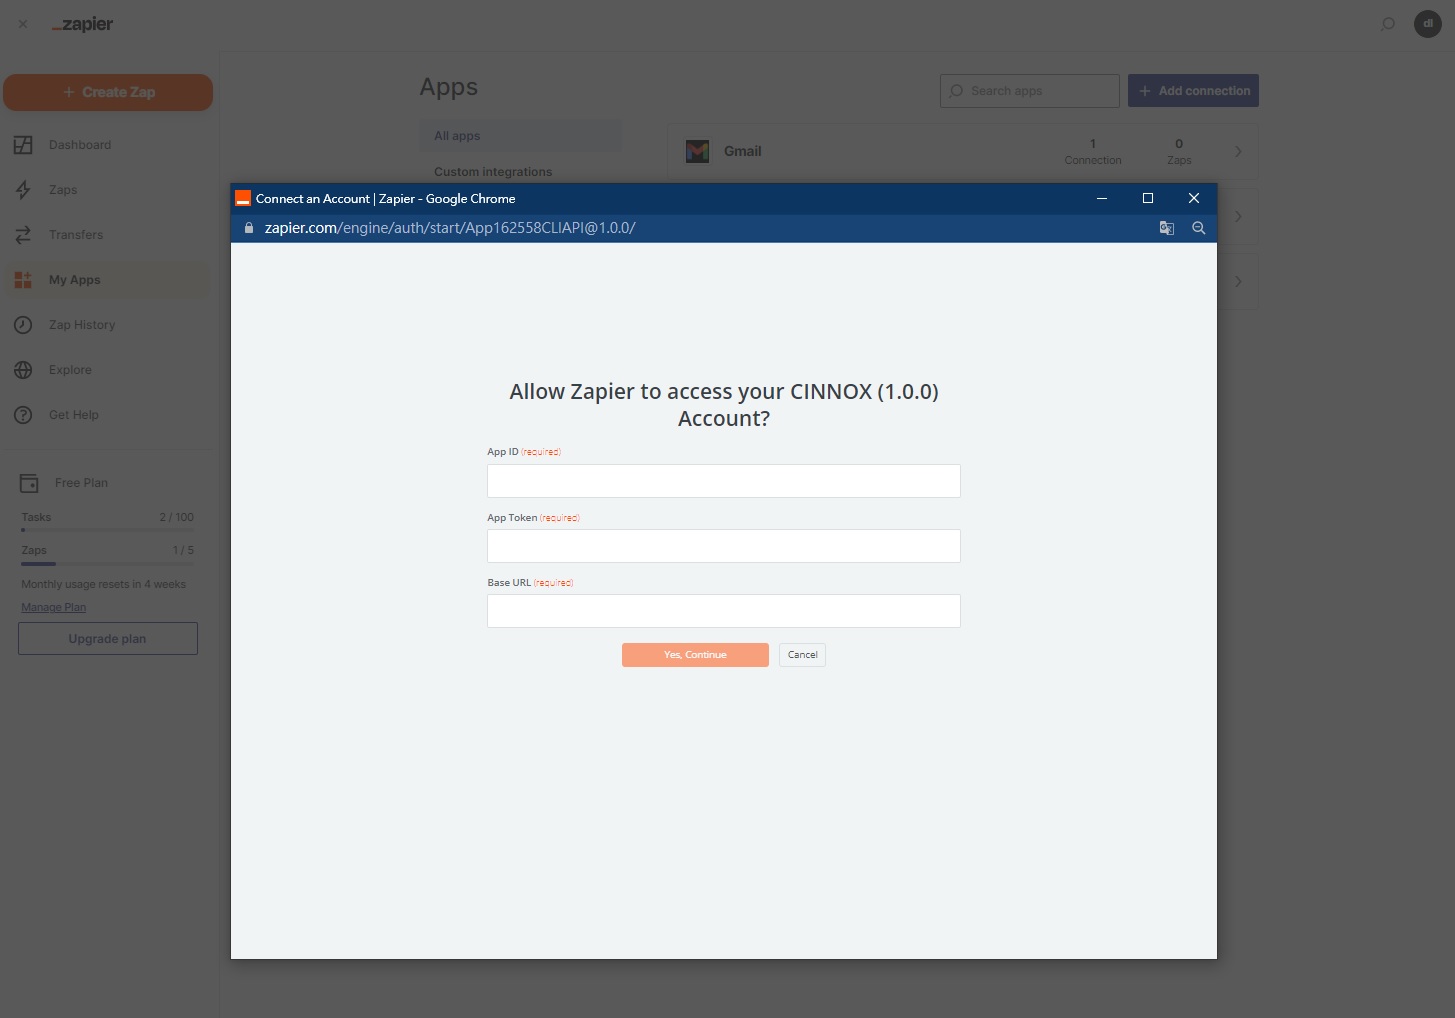
- Fill in the form with the credentials to the pop-up window, which are App ID, App Token, and Base URL, generated from your CINNOX Zapier Account mentioned in the previous part.
- Click on Yes, Continue. to complete the connection and authentication.
CINNOX as an App event
The CINNOX app is added connection shown on the screen.
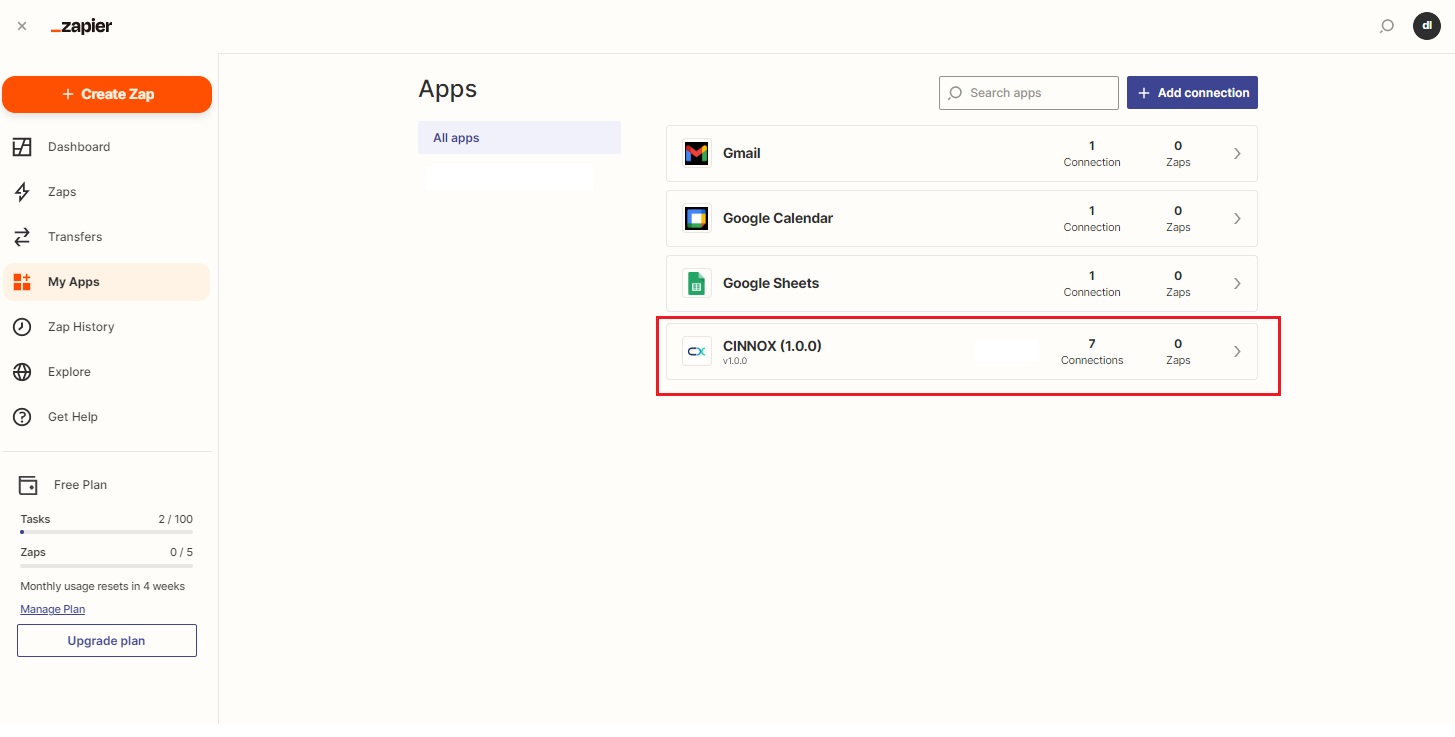
CINNOX is added
Trigger and Action on Zapier
What is a Trigger?
A Trigger is an event that starts a Zap on Zapier. Once you create a Zap and turn it on, Zapier will monitor for that trigger event.
Example: You want to set up a Zap to send a direct message in CINNOX to yourself whenever you receive a new update on monday.com. In this Zap - In this Zap - The trigger is the new update on monday.com.
The following table shows the CINNOX- supported Triggers available in Zapier.
| TriggerNew external contact created | Key = status Value = create Key = name Value = (The full name of the external contact profile created.) | Trigger the Action when CINNOX has received a new incoming enquiry. |
|---|---|---|
| External contact edited | Key = status Value = edit Key = name Value = (The full name of the contact profile that has been edited successfully) | Trigger the Action when an external contact has been edited in CINNOX. |
| External contact merged | Key = status Value = merge Key = name Value = (The full name of the external contact merged with the other contact.) | Trigger the Action when the external contact has been merged in CINNOX. |
| Transferred external contact ownership | Key = status Value = transfer Key = name Value = (The full name of the external contact whose ownership has been transferred) Key = fromOwnerID Value = (The previous owner id) Key = toOwnerID Value = (The updated owner id) | Trigger the Action when the external contact owner has been transferred to another in CINNOX. |
| External contact deleted | Key = status Value = delete Key = name Value = (The full name of the contact that has been deleted successfully.) | Trigger the Action when an external contact has been deleted in CINNOX. |
| New incoming enquiry | Key = status Value = Opened Key = enquiryID Value = (Enquiry ID) Key = displayCaseNumber Value = (Enquiry display number) Key = type Value = (Enquiry typeAction, e.g. Broadcast Chat, Broadcast Call, Direct Chat and Direct Call) Key = channel Value = (ChannelAction, e.g. CINNOX, Virtual Number, Email, Third Party Channel, Messenger, WhatsApp, WeChat, LINE or WOZTELL) Key = date Value = (Date & Time) Key = destination Value = (destination id) Key = destination Types Value = (Destination Type, e.g. STAFF, PSTN or TRUNK) | Trigger the action when CINNOX has received a new incoming enquiry to CINNOX. |
| Enquiry being handled by Staff (agent) | Key = status Value = Handling Key = enquiryID Value = (Enquiry id) Key = displayCaseNumber Value = (Enquiry display number) Key = type Value = (Enquiry type, e.g. Broadcast Chat, Broadcast Call, Direct Chat and Direct Call) Key = channel Value = (Channel, e.g. Directory - Web Link, Campaign, Virtual Number, Messenger, WhatsApp, WeChat, LINE, WOZTELL, Email or Third Party Channel) Key = date Value = (Date & Time) Key = destination Value = (destination ID) Key = destination Types Value = (Destination Type, e.g. STAFF, PSTN or SIP Trunk String) | TriggAction action when the enquiry has been handled in CINNOX. |
| Enquiry closed | Key = status Value = Closed Key = enquiryID Value = (Enquiry id) Key = displayCaseNumber Value = (Enquiry display number) Key = type Value = (Enquiry type, e.g. Broadcast Chat, Broadcast Call, Direct Chat and Direct Call) Key = channel Value = (Channel, e.g. Directory - Web Link, Campaign, Virtual Number, Messenger, WhatsApp, WeChat, LINE, WOZTELL, Email or Third Party Channel) Key = date Value = (Date & Time) Key = destination Value = (destination id) Key = destination Types Value = (Destination Type, e.g. STAFF, PSTN or SIP Trunk String) | TriggAction action when the enquiry has been closed in CINNOX. |
| Missed enquiry | Key = status Value = Missed Key = enquiryID Value = (Enquiry id) Key = displayCaseNumber Value = (Enquiry display number) Key = type Value = (Enquiry type, e.g. Broadcast Chat, Broadcast Call, Direct Chat or Direct Call) Key = channel Value = (Channel, e.g. Directory - Web Link, Campaign, Virtual Number, Messenger, WhatsApp, WeChat, LINE, WOZTELL, Email or Third Party Channel) Key = date Value = (Date & Time) Key = destination Value = (destination id) Key = destination Types Value = (Destination Type, e.g. STAFF, PSTN or TRUNK) | TriggAction action when the enquiry has been missed in CINNOX. |
| Receive SMS delivery receipts status | Key = transactionId Value = (The unique transaction id for each SMS) Key = recipientNumber Value = (recipient phone number) Key = recipientCountry Value = (recipient country) Key = responseCode Value = (response code) Key = status Value = (receipt status) Key = exception Value = (error message - for error response only) | TriggAction action when CINNOX has received the status of the SMS delivery receipt. |
| New Label created | Key = status Value = create Key = id Value = (The id of the created label) Key = name Value = (The name of the created label) Key = colorCode Value = (The colour code of the created label based on the Hex colour code) | TriggeActionaction when a new label is created in CINNOX |
| Label edited | Key = status Value = update Key = id Value = (The id of the edited label) Key = name Value = (The name of the edited label) Key = colorCode Value = (The colour whose code of the edited label is based on the Hex colour code) | Trigger the action when a label is edited in CINNOX |
| Label deleted | Key = status Value = deleted Key = id Value = (The id of the deleted label) Key = name Value = (The name of the deleted label) | Trigger the Action when a label is deleted in CINNOX |
Configuring Triggers in your Zapier Account
To configure Trigger (termed Event in Zapier):
- Navigate to Zaps and click on +Create Zap.
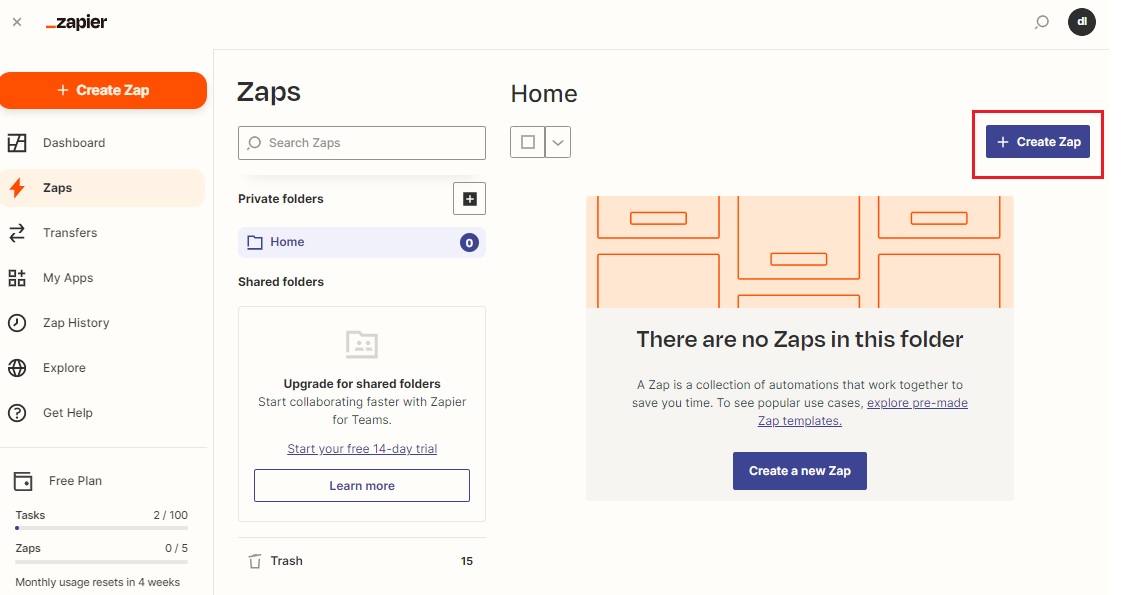
Click on Create Zap
- Name the Zap you create and enter CINNOX to the search box.
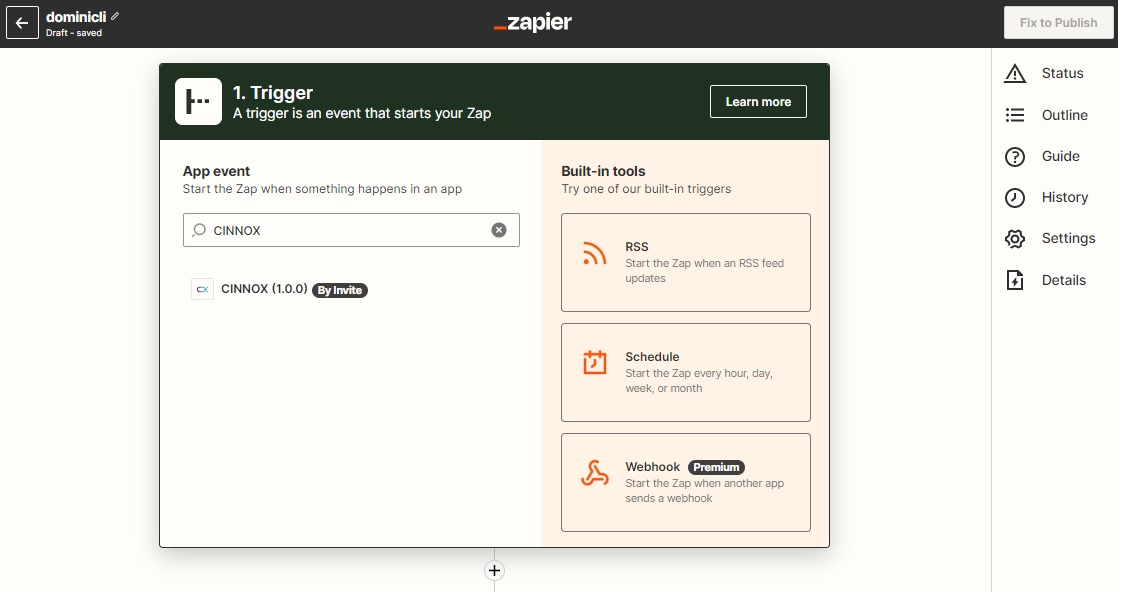
Enter CINNOX to the search box
- Click on the drop-down list of Event.
- Select the required Event.
- Click on Continue after the Event selection.

- Click on the drop-down list to select the connected app account for the trigger configuration.
- Click on +Connect a new account to connect a new account, if needed.
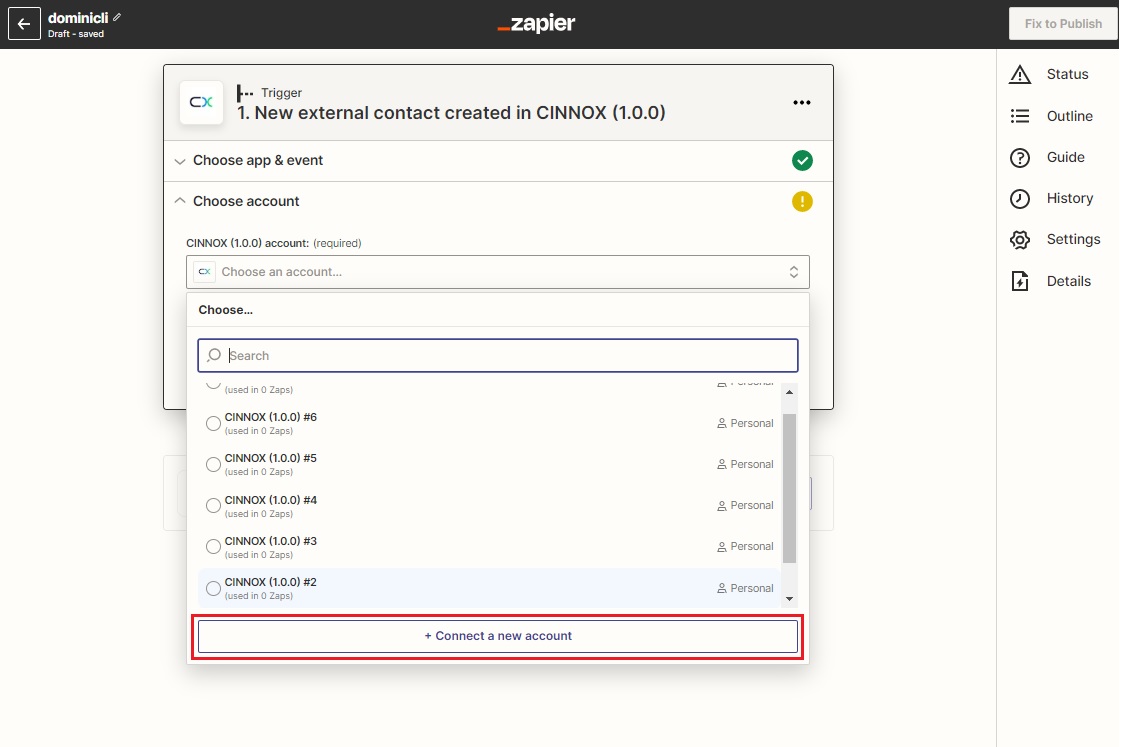
Click on Connect a new account
- Click on Continue.
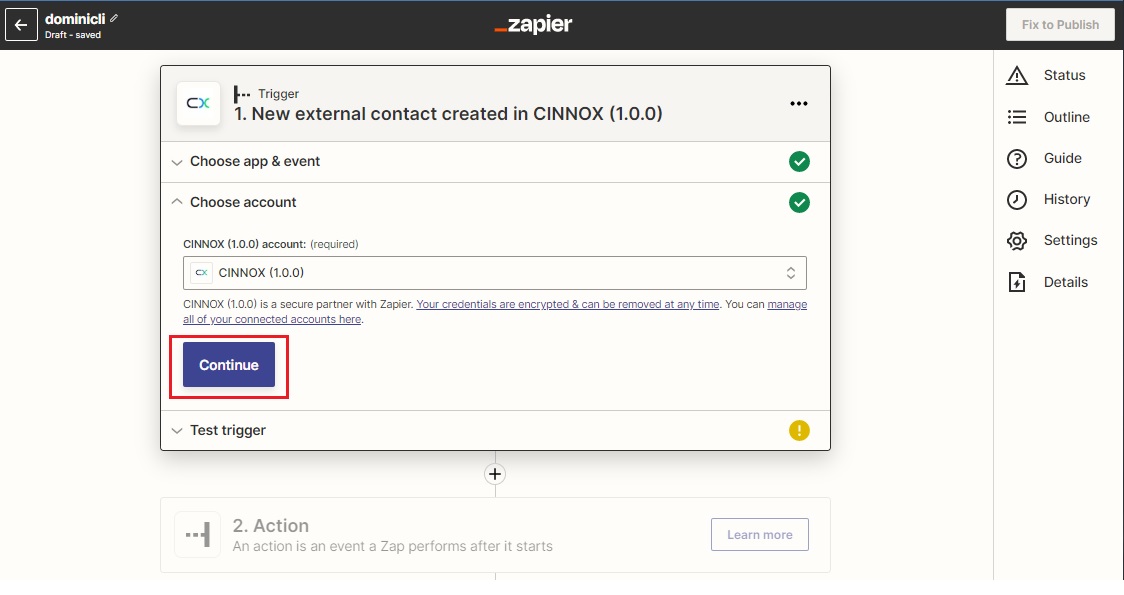
Click on Continue
- Click on Test trigger.
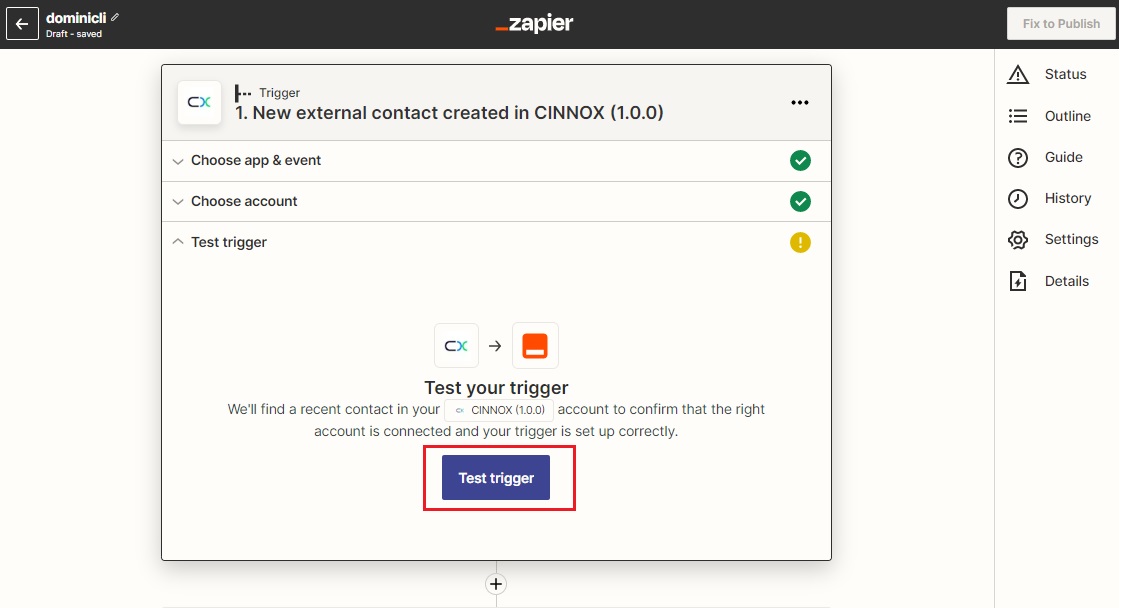
Click on Test Trigger
- If your Triggers are correctly configured, the Green Tick is displayed after you click on Test Trigger.
- Click on the drop-down list to select the location and the data for Zapier to test your trigger.
- Click on Continue
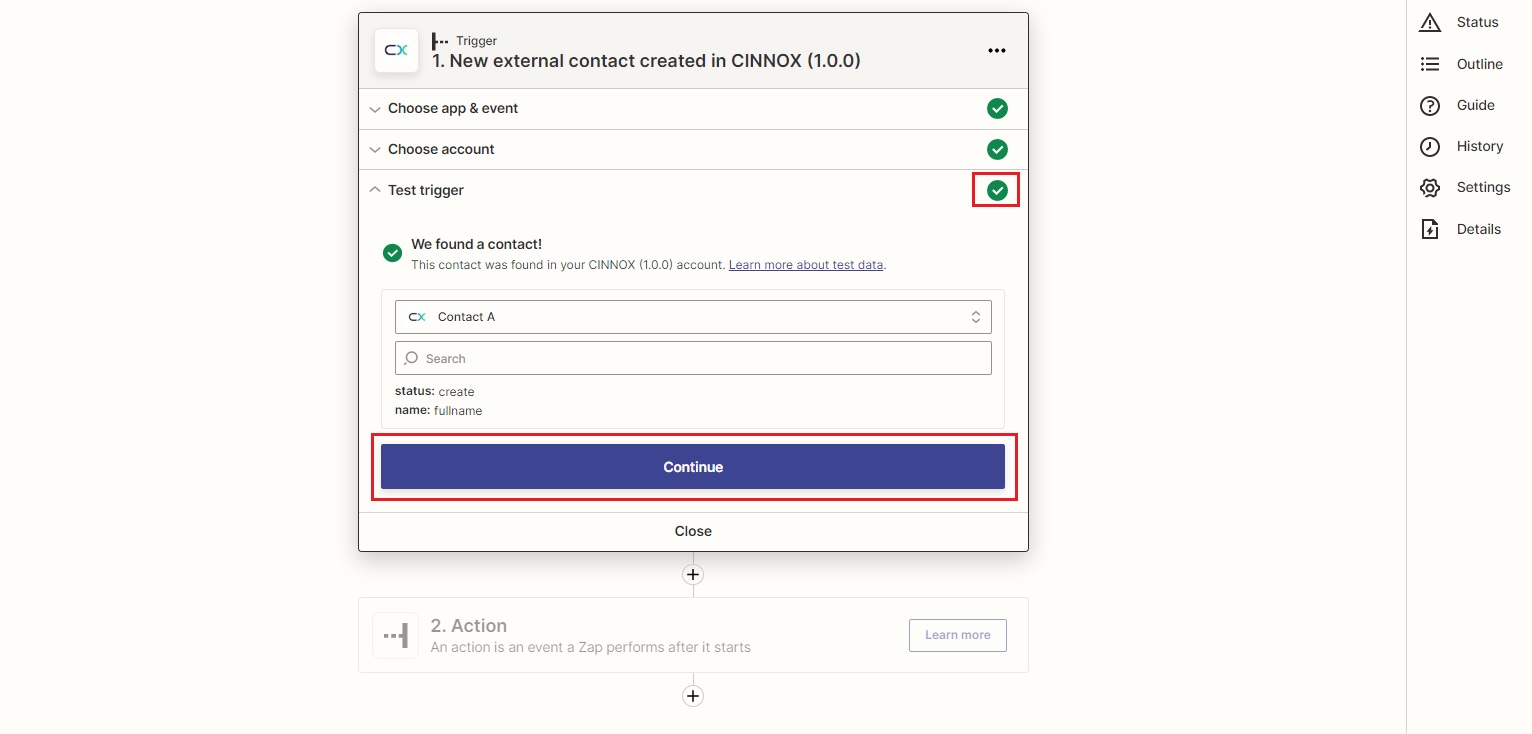
Click on Continue
- After clicking on Continue, your trigger configuration is completed. Next, you will need to configure the Action.
Configure the Action
What is an Action?
The Action was the fulfilment of a Zap when a trigger/event happened.
Example: You want to set up a Zap to send a direct message in CINNOX to yourself whenever you receive a new update on monday.com. In this Zap - The Trigger is the new update on monday.com. The Action is receiving a direct message in CINNOX.
The following table shows the CINNOX-supported Action available for Zapier Integration.
| CINNOX-supported Action | Request Objects | Response Objects | Description |
|---|---|---|---|
| Get Enquiry detail | Key = Display Case Number (The required field) Value = (displayCaseNumber) | Key = _id Value = (DB record ID in CINNOX) Key = uniqueKey Value = (Internal Use) Key = createdAT Value = (Enquiry creation time) Key = svcID Value = (Service account ID) Key = inquiry Value = (Enquiry ID) Key = tag Value = (Tag ID) Key = visitor Value = (Visitor ID) Key = roomID Value = (Enquiry room ID) Key = initChannel Value = (Channel Type adopted by the enquiry) - CALL - IM (Instant message) Key = omniType Value = (Omni-channel type adopted by the enquiry) - CINNOX (Including Virtual Number, Weblink, directory staff, etc.) - FACEBOOK (Facebook) - LINE (LINE) - WECHAT (WeChat) - WHATSAPP (Whatsapp) - THIRDPARTY (Third party channel) - CHATBOT (Chatbot) - EMAIL (Email) Key = ip Value = (Visitor's IP address) Key = language Value = (language supported by the Staff) - en (English) - it (Italian) - ja (Japanese) - th (Thai) - zh-hans (Simplified Chinese) - zh-hant (Traditional Chinese) Key = location Value = (Visitor's location) Key = locationDetail Value = * regionCode (Country code based on ISO 3166-1 alpha-2) * subdivision (Country subdivision code based on ISO 3166-1 alpha-2) * city (City where the visitor enquired) * province (Province where the visitor enquired) Key = platform Value = (Platform where visitor uses for enquiry. e.g. ios) Key = status Value = (Enquiry status) Key = closedByType Value = (by whom/which the enquiry is closed) - Staff - visitor - system Key = displayCaseNumber: Value = (Displayed enquiry ID in CINNOX Dashboard) Key = channel Value = (channel type adopted by the enquiry) - Directory - Web Link - Campaign - Virtual Number - Email - Messenger - WhatsApp - WeChat - LINE - Third-Party Channel - WOZTELL Key = destinationID Value = (Destination ID) Key = destinationName Value = (Destination name) Key = destinationType Value = (Destination type) - PHONE (PSTN Phone) - STAFF (Staff List) - TRUNK (SIP Trunk) Key = destinationEndPoint Value = (Destination Endpoint) Key = handledType Value = (The method used to handle the enquiry) - STAFF (Staff List) - Phone (PSTN Phone) - TRUNK (SIP Trunk) Key = handledTarget Value = (Staff's EID or phone number of enquiry handler) Key = handledPartyName Value = (Staff who handled the enquiry) Key = huntedStaffTargetHistory Value = (List of Staff who picked up this enquiry) Key = channelDetail Value = (Details of the sub-channel) - type (Channel sub-type, e.g. Tag or Staff in Directory) - id: (Channel ID) - maaiiDisplayName (Channel's displayed name) Key = inquiryType Value = (Enquiry type) - Broadcast (Alerts all staff members, and one of them picked up the enquiry) - Direct (Directs to a specific staff) Key = updatedAt Value = (Time for an update on the enquiry) Key = closedAt Value = (Closing time for the enquiry) Key = inquiryGroup Value = (Enquiry group details) Key = transferredParty Value = (Info of the destination where the enquiry was transferred) Key = pickedUpAt Value = (Time for the enquiry to be picked up) Key = missedAt Value = (Time for the enquiry to be missed) Key = reopenedAt Value = (Time for the enquiry to be re-opened) Key = handledPartyDepartment Value = (Department ID of the Staff) Key = visitorName Value = (Visitor's full name) Key = closeDuration Value = (Enquiry duration, in milliseconds) Key = historyJoined Value = (ID of the Staff who joined the enquiry) Key = attachment Value = True (With attachment)/ False (With no attachment) Key = staffFirstName Value = (Staff's first name) Key = staffLastName Value = (Staff's last name) Key = visitorFirstName Value = (Visitor's first name) Key = visitorLastName Value = (Visitor's last name) Key = inquiryDeepLink Value = (The link by default redirects the Staff to the corresponding enquiry chat room on the Handling Enquiry Details page, Missed Enquiry Details page or Closed Enquiry Detailspage. (Please log in to the CINNOX Dashboard before clicking on the deep link) Key = cid Value = (Internal use) | Allows you to query the enquiry details |
| Create External Contact (Not support Custom Fields) | Key = First Name Value = (First Name of the external contact) (The limit is 50 characters) Key = Last Name Value = (Last Name of the external contact) (The limit is 50 characters) Key = Level Value = (Level of the external contact. Drop down list - Primary/ Secondary/ Tertiary) Key = Type Value = (Type of the external contact) (Drop-down list - Lead/ Prospect/ Customer/ Others) Key = Phone Type Value = (Drop down list -Mobile/ Work/ Home/ Other) Key = Phone Number Value = (Phone Numer of the external contact. Format: +county code + number)(Note that "+" should be added in front of the country code) Key = Email Type Value = (Drop down list -Work/ Personal/ Other) Key = Email Address Value = (Email address of the external contact) Key = Company Value = (Company Name of the external contact) (The limit is 100 characters) Key = Job Title Value = (Job Tite of the external contact) (The limit is 100 characters) Key = Team Value = (Team Name of the external contact) (The limit is 100 characters) Key = Group Value = (Group Name of the external contact) (The limit is 100 characters) Key = Language Value = (The language code based on ISO 639-1. Drop down list - English (en)/ Italian (it)/ Thai (th)/ Japan (ja)/ Traditional Chinese (zh-ant)/ Simplified Chinese (zh-hans)) Key = Birth Date Value = (Date of birth of the external contact. Format: dd/mm/yyyy) Key = Zip Code Value = (Zip Code of the external contact)(The limit is 10 characters) Key = Street Value = (Street)(The limit is 50 characters) Key = City Value = (City)(The limit is 50 characters) Key = State Value = (State)(The limit is 50 characters) Key = Country Value = (Country)(The limit is 50 characters) Key = Social Message Type Value = (The social media the external contact uses. Drop down list - Messenger/ WhatsApp/ WeChat/ LINE/ Twitter/ LinkedIn/ WOZTELL (WhatsApp Cloud)/ WOZTELL (Facebook)/ WOZTELL (Instagram)) Key = Social Messaging Name Id Value = (The social media ID or the account name of the external contact. Format: type + id/name) (The limit of ID/Name is 100 characters) | Key = birth_date Value = (Date of birth of the external contact) Key = city Value = (City) Key = company Value = (Company Name of the external contact) Key = country Value = (Country) Key = email_address Value = (Email address of the external contact) Key = email_type Value = (Email type of the external contact) Key = first_name Value = (First Name of the external contact) Key = group Value = (Group Name in the company) Key = job_title Value = (Job Title of the external contact) Key = language Value = (Language code based on ISO 639-1. e.g., en, ja, zh-hans) Key = last_name Value = (Last Name of the external contact) Key = level Value = (Level of the External Contact) Key = phone_number Value = (Phone Number of the external contact) Key = phone_type Value = (Phone type of the external contact) Key = social_messaging_name_id Value = (The social media id or the account name of the external contact) Key = social_messaging_type Value = (The social media the external contact uses) Key = state Value = (State) Key = street Value = (Street) Key = team Value = (Team name of the external contact) Key = type Value = (Type of the external contact) Key = zip_code Value = (Zip Code) | Allows you to create an external contact |
| Get External Contact Detail | Key = Full Name (The required field) Value = (Full name - The format should be First name{SPACE}Last name, support exact search only) | Key = id Value = (External contact id) Key = firstName Value = (External contact first name) Key = lastName Value = (External contact last name) Key = mobilePhone Value = (Mobile contact number) Key = workPhone Value = (Work contact number) Key = homePhone Value = (Home contact number) Key = otherPhone Value = (Other contact number) Key = email Value = (Email address) Key = personalEmail Value = (Personal email address) Key = otherEmail Value = (Other email address) Key = facebook Value = (Facebook id) Key = whatsApp Value = (WhatsApp number) Key = weChat Value = (Wechat id) Key = line Value = (LINE id) Key = twitter Value = (Twitter id) Key = linkedin Value = (Linkedin account) Key = companyName Value = (Company name) Key = department Value = (Department team) Key = jobTitle Value = (Job Title) Key = birthday Value = (Birth date) Key = language Value = (Preferred language) Key = addresses.street Value = (Mailing address) Key = addresses.city Value = (Mailing city) Key = addresses.state Value = (Mailing state) Key = addresses.zipcode Value = (Mailing zipcode) Key = addresses.country Value = (Mailing country) Key = customerType Value = (Customer type) Key = group Value = (Contact group) Key = level Value = (Contact level) Key = ownerID Value = (Contact owner id) Key = ownerName Value = (Contact owner name) Key = ownerDepartment Value = (Contact - owner department) Key = sharedWith Value = (Staff member (staff id) shared with the contact) Key = slavecontacts Value = (Merged contacts (contact id)) | Allows you to query the external contact details |
| Get Number list | Key = Number Type Value = (Drop down list - access-numbers (Virtual Number); cli (Service Number); sms-numbers (Alphanumeric)) | Key = ServiceID Value = (The service account ID) Key = Number Value = (The number) Key = type Value = (Type of the number) - CUSTOM (Service number). - ALPHANUMERIC. - TF (Toll-free number). - DID (Local number) Key = country Value = (The country where the phone number was registered) Key = expireDate Value = (Number expiry date) | Allows you to query the available number list |
| Update External Contact | Key = External Contact ID Value = (The unique Id of the external contact to be updated) Key = First Name Value = (The updated First Name of the external contact) (The limit is 50 characters) Key = Last Name Value = (The updated Last Name of the external contact) (The limit is 50 characters) Key = Level Value = (The updated Level of the external contact. Drop down list - Primary/ Secondary/ Tertiary) Key = Type Value = (The updated Type of the external contact. Drop down list - Lead/ Prospect/ Customer/ Others) Key = Phone Type Value = (The updated Phone Type of the external contact. Drop down list - Work/Personal/Other) Key = Phone Number Value = (The updated Phone Number of the external contact. Format: +country code + number)(Only supports a single phone number)(Note that "+" should be added in front of the country code) Key = Email Type Value = (The updated Email Type of the external contact. Drop down list - Mobile, Work, Home and Other) Key = Email Address Value = (The updated Email Address of the external contact)(Only support a single email address) Key = Company Value = (The updated Company Name of the external contact) (The limit is 100 characters) Key = Job Title Value = (The updated Job Title of the external contact) (The limit is 100 characters) Key = Team Value = (The updated Team Name of the external contact) (The limit is 100 characters) Key = Group Value = (The updated Group Name of the external contact) (The limit is 100 characters) Key = Language Value = (The updated language code based on ISO 639-1. Drop down list - English (en)/ Italian (it)/ Thai (th)/ Japan (ja)/ Traditional Chinese (zh-ant)/ Simplified Chinese (zh-hans)) Key = Birth Date Value = (The updated date of birth. Format: dd/mm/yyyy) Key = Zip Code Value = (The updated Zip Code of the external contact)(The limit is 10 characters) Key = Street Value = (The updated street)(The limit is 50 characters) Key = City Value = (The updated city)(The limit is 50 characters) Key = State Value = (The updated state)(The limit is 50 characters) Key = Country Value = (The updated country)(The limit is 50 characters) Key = Social Messaging Type Value = (The updated social media the external contact uses. Drop down list - Messenger/ WhatsApp/ WeChat/ LINE/ Twitter/ LinkedIn/ WOZTELL (WhatsApp Cloud)/ WOZTELL (Facebook)/ WOZTELL (Instagram)) Key = Social Messaging Name Id Value =(The updated social media ID or the account name of the external contact. Format: type + id/name) (The limit of Id/Name is 100 characters) | Key = birth_date Value = (The updated date of birth) Key = city Value = (The updated city) Key = company Value = (The updated Company Name) Key = contact_id Value = (id of the updated external contact) Key = country Value = (The updated country) Key = email_address Value = (The updated email address) Key = email_type Value = (The updated email type) Key = first_name Value = (The updated First Name) Key = group Value = (The updated group Name in the company) Key = job_title Value = (The updated job Title in the company) Key = language Value = (The updated language code based on ISO 639-1. e.g., en, ja, zh-hans) Key = last_name Value = (The updated last Name) Key = level Value = (The updated level of the External Contact) Key = phone_number Value = (The updated phone Number) Key = phone_type Value = (The updated phone type) Key = social_messaging_name_id Value = (The updated social media id the external contact uses) Key = social_mesasging_type Value = (The updated type of social media) Key = state Value = (The updated state) Key = street Value = (The updated street) Key = team Value = (The updated team the external contact person belongs to in the company) Key = type Value = (The update type of the External Contact) Key = zip_code Value = (The updated zip code) | Allows you to update the external contact details. Note that External Contact Custom Fields are not yet supported. |
| Send SMS | Key = Number Type Value = (Drop down list - Virtual Number / Service Number) Key = Sender Number Value = (select from the drop-down list) Key = Recipient Number Value = (Recipient Number, Format: Country code+Service Number) Key = Text Value = (SMS Content: The text of SMS message) * Note: The limit of characters in an SMS message: English: 160 characters; Chinese: 70 characters. CINNOX will charge for each SMS sent. | Key = Response Code Value = (response code) Key = Exception Value = (Error message) | Allows you to send the SMS |
| Send Instant Message (IM) to Staff | Key = Staff Id Value = (The Id of the Staff you are required to send an instant message to) Key = Text Value = (The text message you are required to send to the Staff) | Key = staff_id Value = (The Id of the Staff you are required to send an instant message to) Key = text Value = (The text message you are required to send to the Staff) | Allows you to send an instant message to a staff |
| Send IM to Room (Group Chat) | Key = Room Id Value = (The Id of the chat room of the Space you are required to send an instant message to) Key = Text Value = (The text message you are required to send to the Space) | Key = room_id Value = (Chat Room Id in CINNOX) Key = text Value = (The text message you are required to send to the Space) | Allows you to send an instant message (IM) to a Space (group chat). |
📘
Send IM to Room
You will need to copy and paste the Room ID of the Space (group chat) for the room id value.
Please check our Space Detailed Guide for more details on finding the Space Room ID.
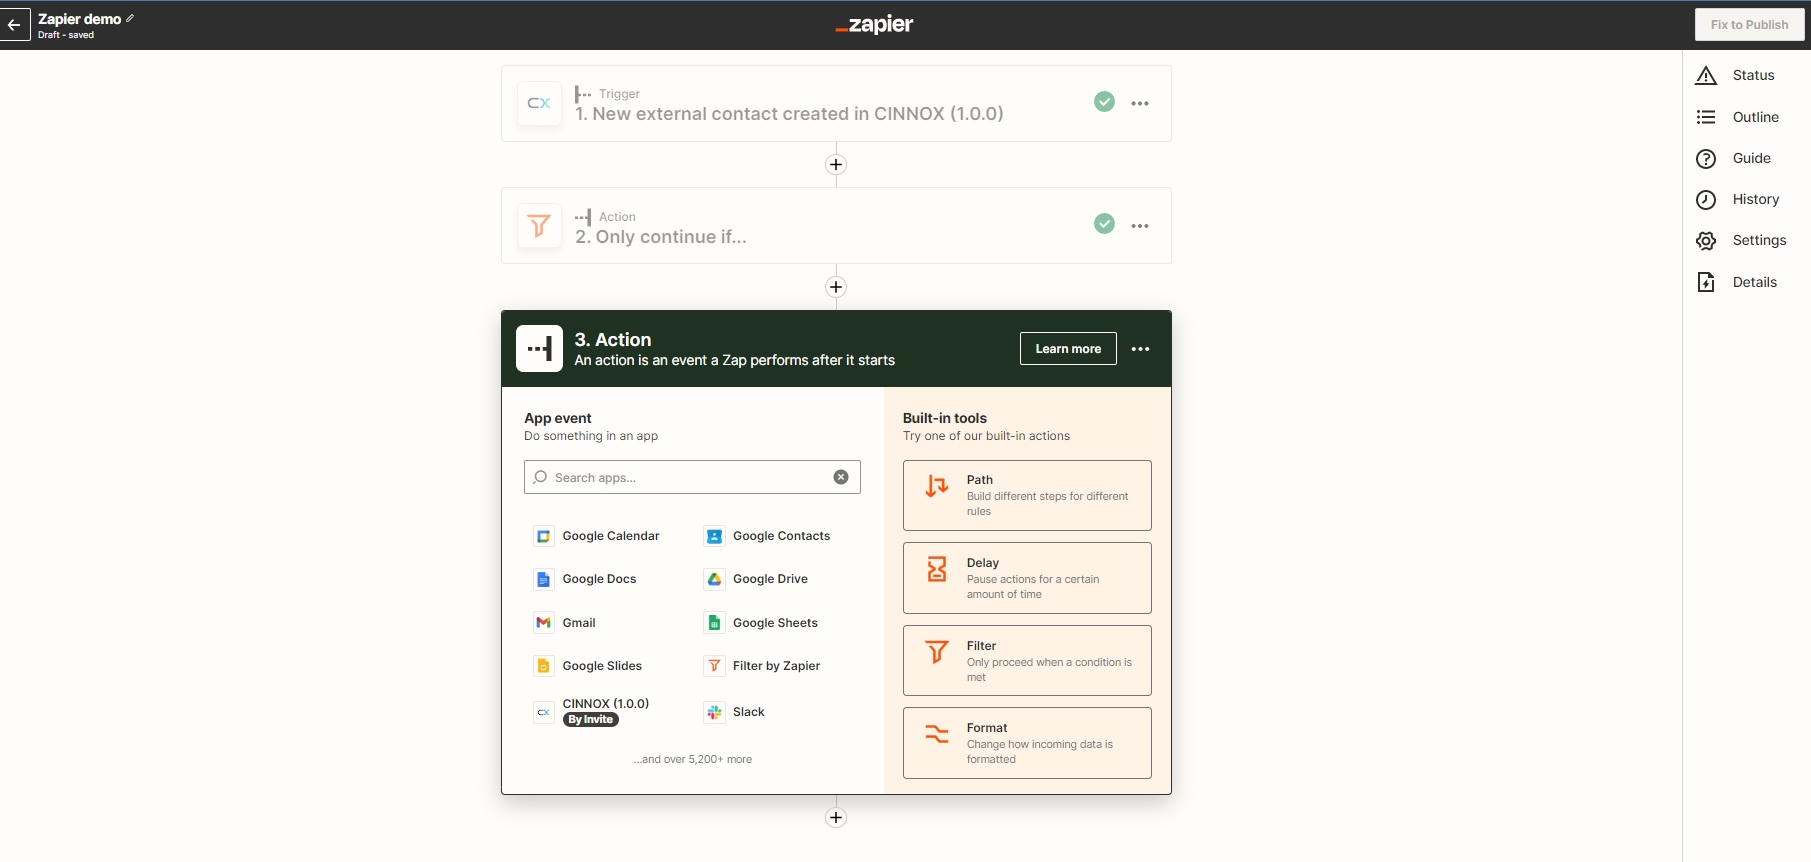
Configuring Action in your Zapier Account
To configure Action:
- Enter the app's name in the search box to find the app you require to configure the Action.
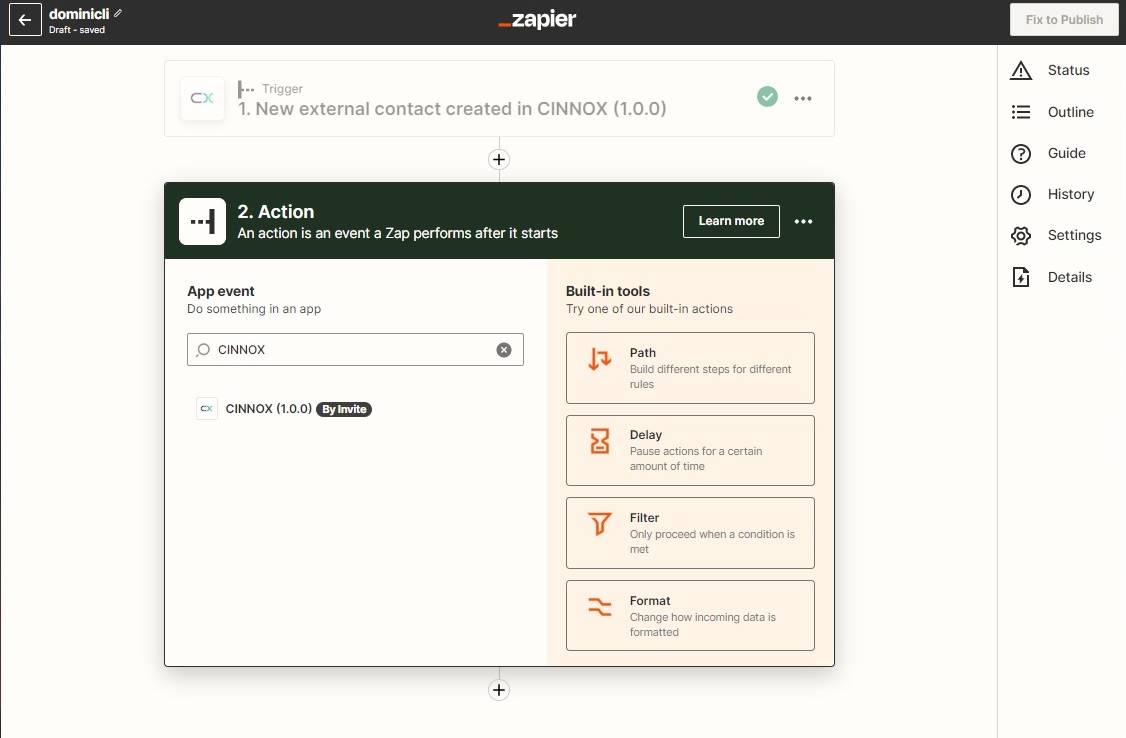
App for Action
- Click on the drop-down list to select the required event (the Action to be taken in the app).
- Click on Continue.
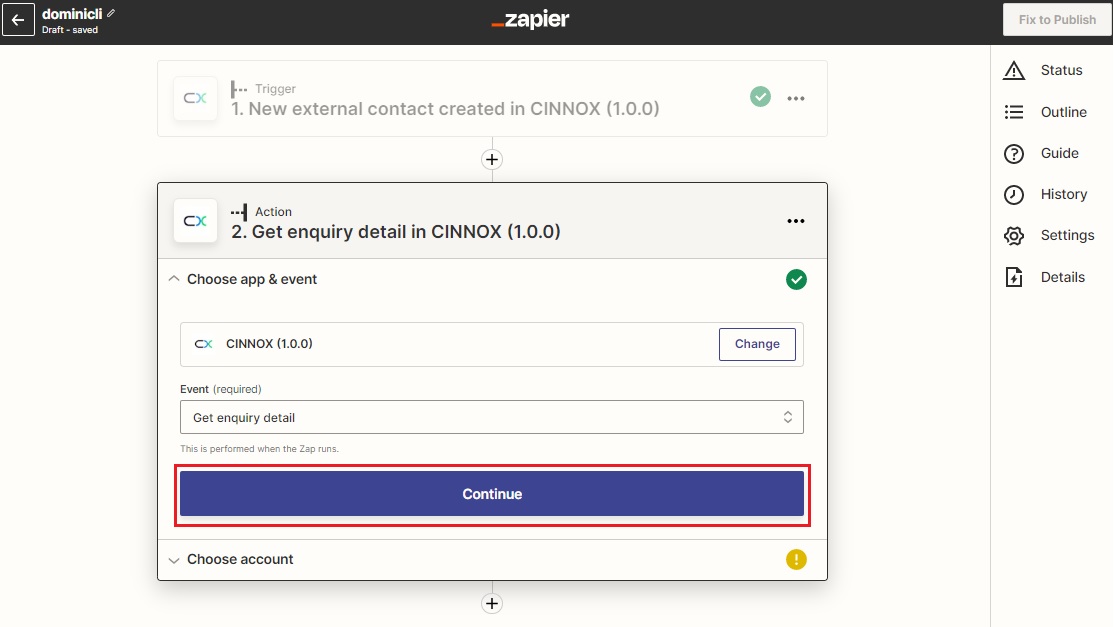
Click on Continue
- Click on the drop-down list to select your required account for the action configuration.
- You can click on +Connect a new account to connect a new account
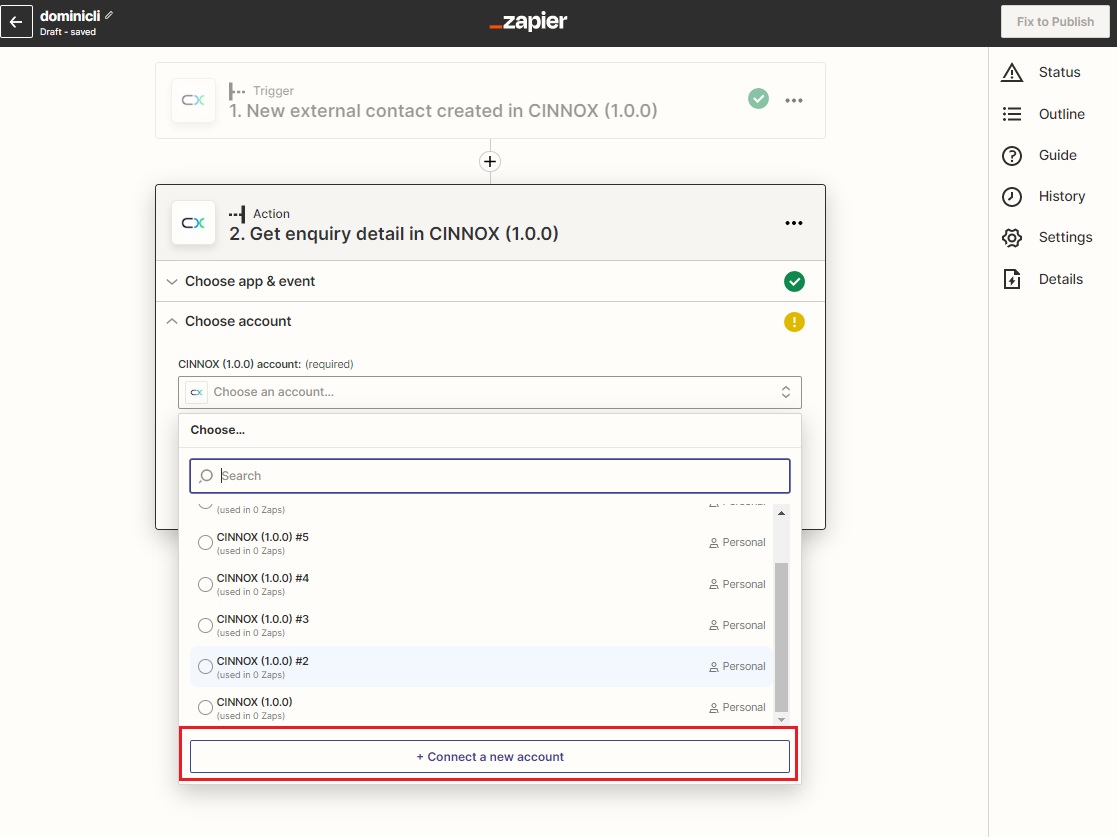
Click on Connect a new account
- Click on Continue.
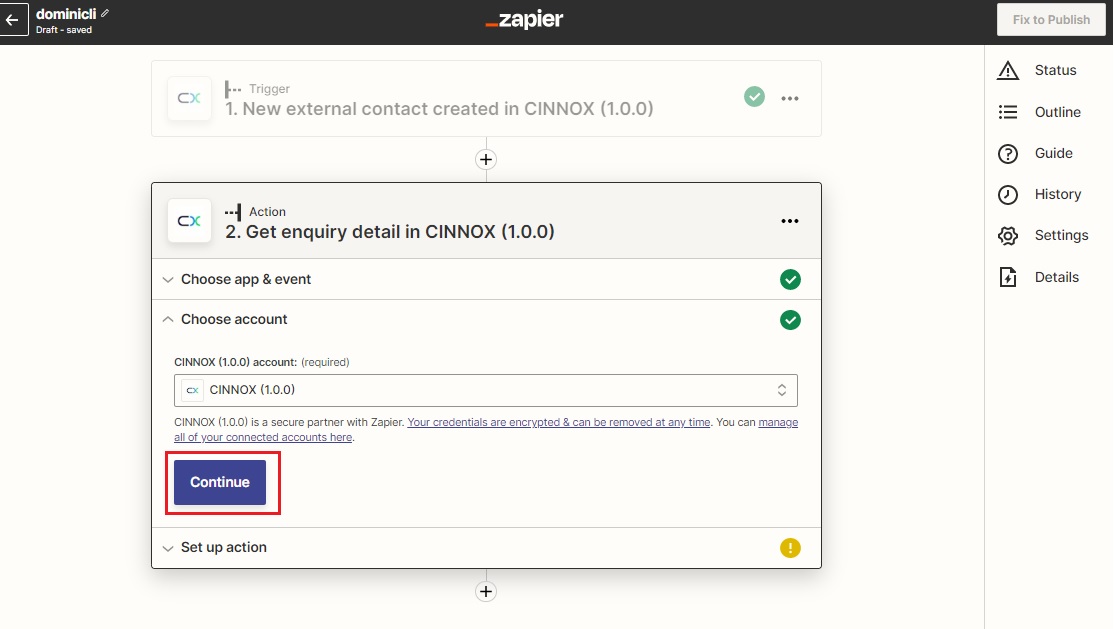
Click on Continue
- Click on the drop-down list to select the data for setting up the Action.
- Click on Continue after you finish your action setup.
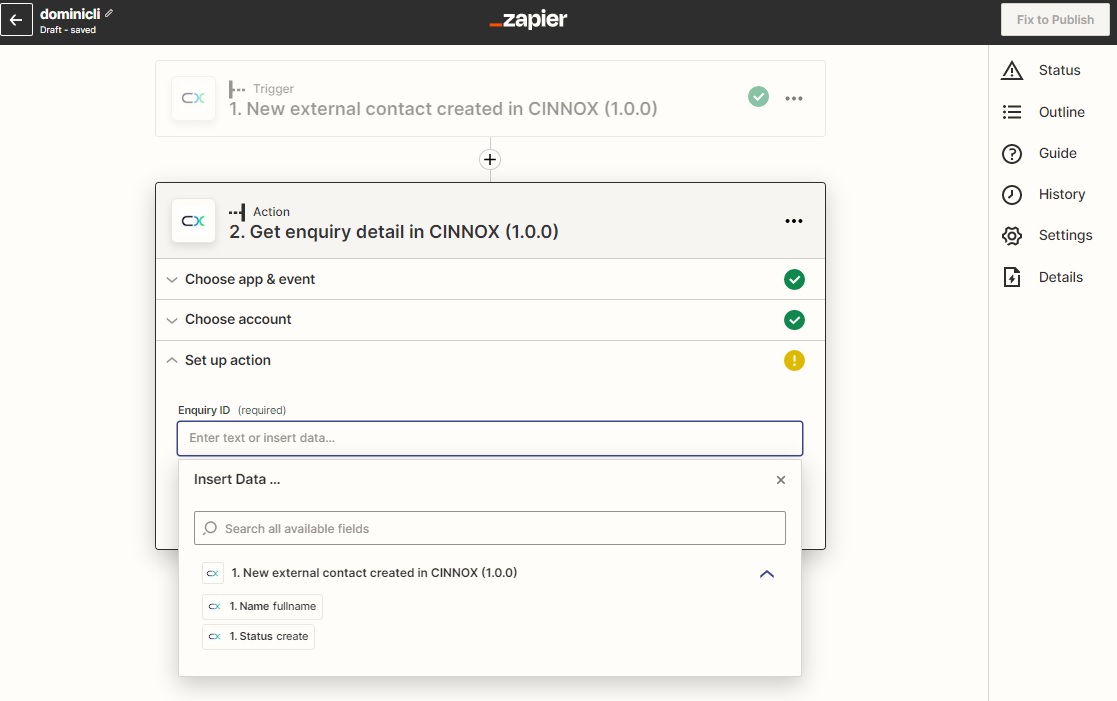
Select data for action setup
- Click on Continue.
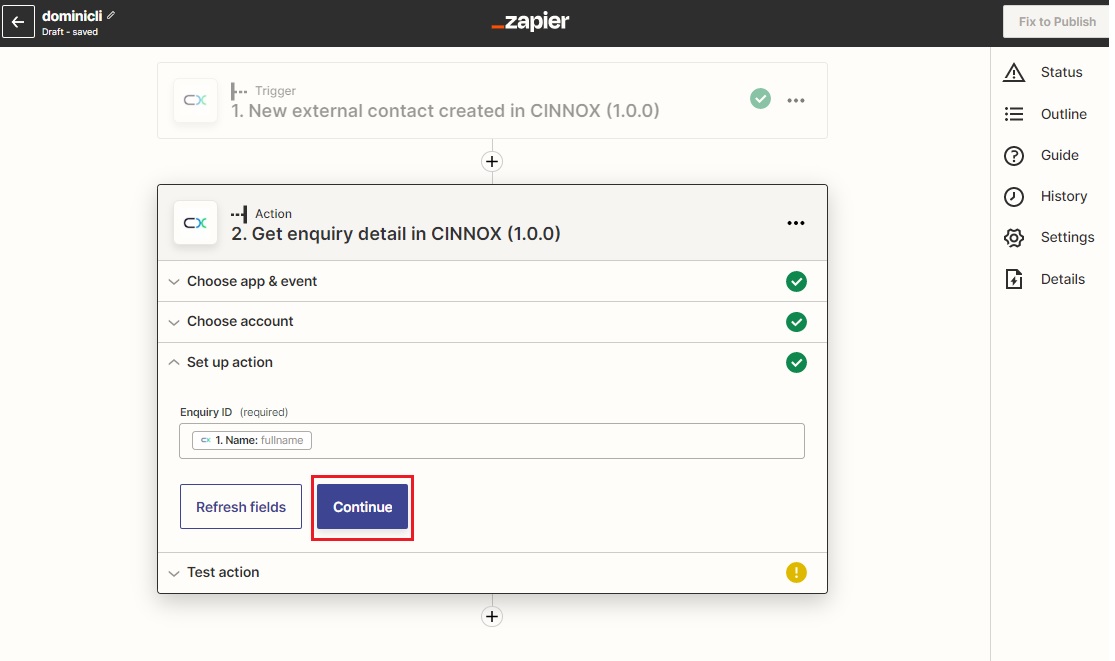
Click on Continue
- If your action setup is correct, the Test action taken by Zapier is successful, and the Green Tick is displayed.
- Click on Publish Zap or Retest & Review, if needed.
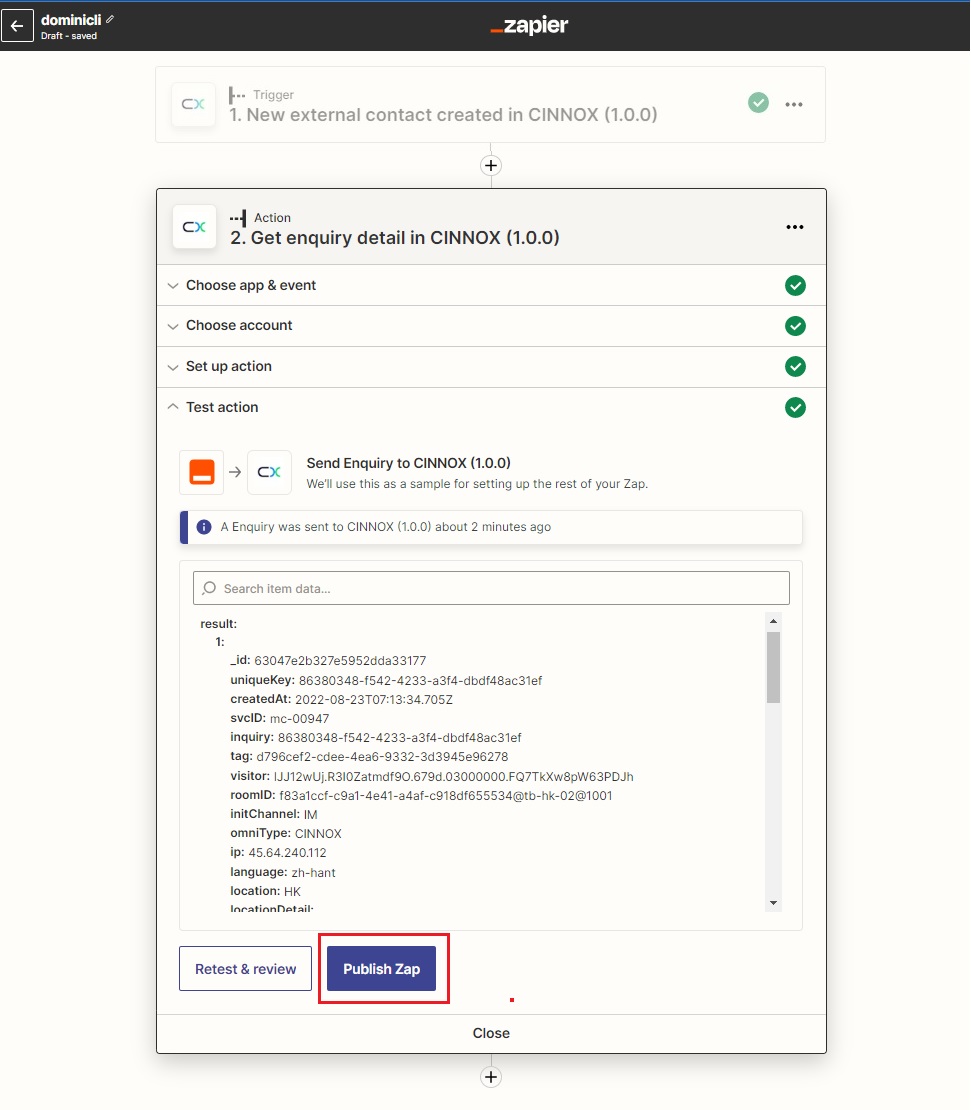
Click on Publish Zap
- Click on Publish & Turn On to publish your Zap.
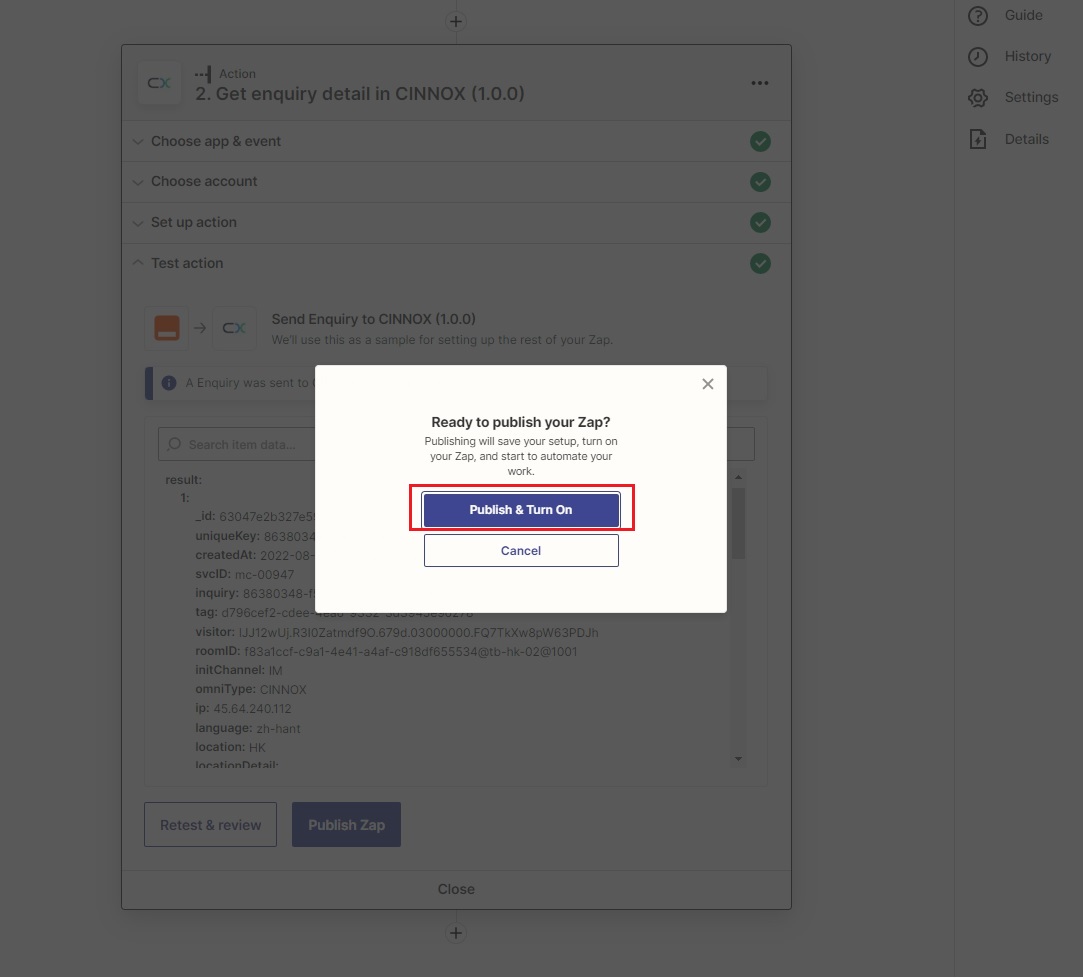
Click on Publish & Turn On
- The action profile is created after you finish the action setup.

The action profile is created
🚧
Notices
- The conditions for the setup processes of actions depend on your required app and trigger.
- You can click on Refresh fields in the pop-up window when you are required to update the conditions for the action setup.
📘
You should select a suitable app where the action can take place for easy management after the workflow automation. For example, if the new external contact created will trigger the action, perhaps the spreadsheet specialising in data collection should be one of the options as the app where the action will take place.
Managing Zapier Account in CINNOX
View Zapier Account Details
Staff with administrator roles can view the details of the existing Zapier Account in CINNOX.
- Navigate to Administration>Service Integration>Third Party Integration
- Click on Zapier.
Click on Zapier
- Click More (...) for the Zapier Account, of which you are required to view the details.

Click on View
The CINNOX Dashboard displays the details of the Zapier Account - Zapier Account name and the credentials.
Zaiper Account Name and its credentials
Update Zapier Account Details
To Update the details of the existing Zapier Account in CINNOX.
- Follow the procedure above to view the account details
- Click on Edit of the Zapier Account name.
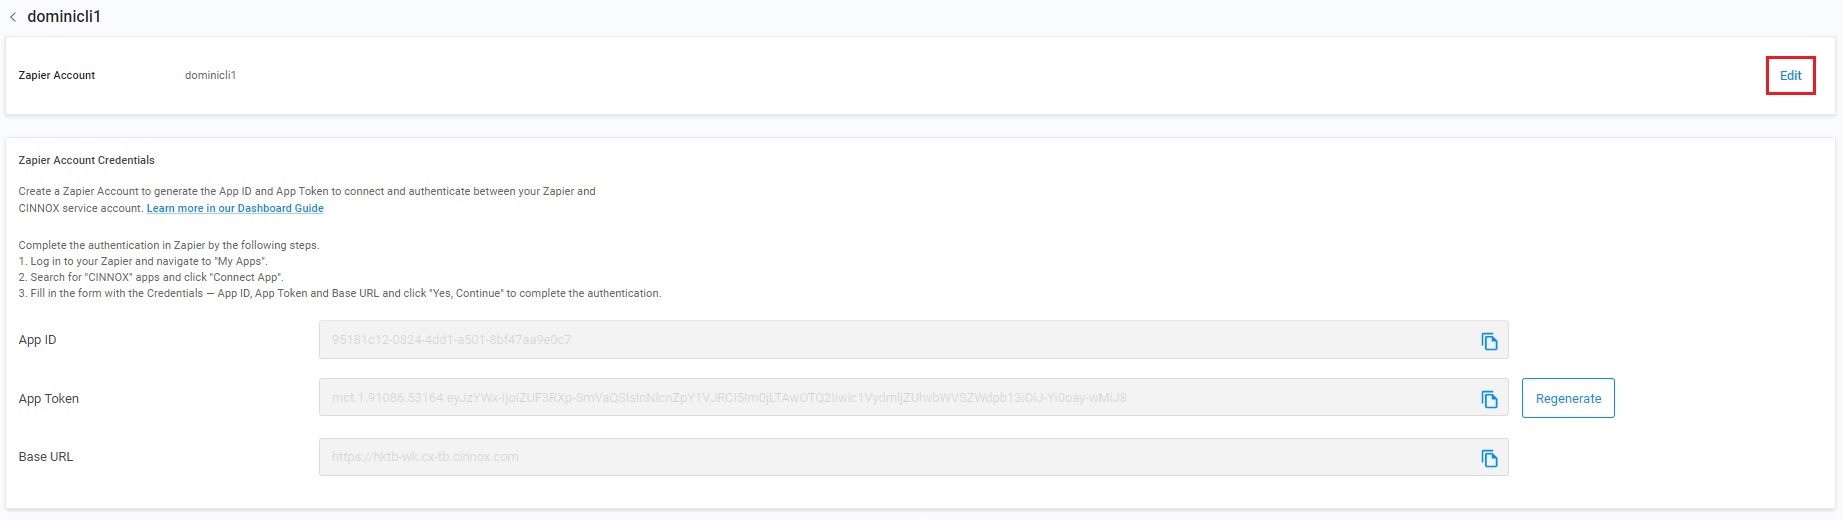
Click on Edit
- You are only allowed to edit the Zapier Account name.
- After editing the name, click on Save.
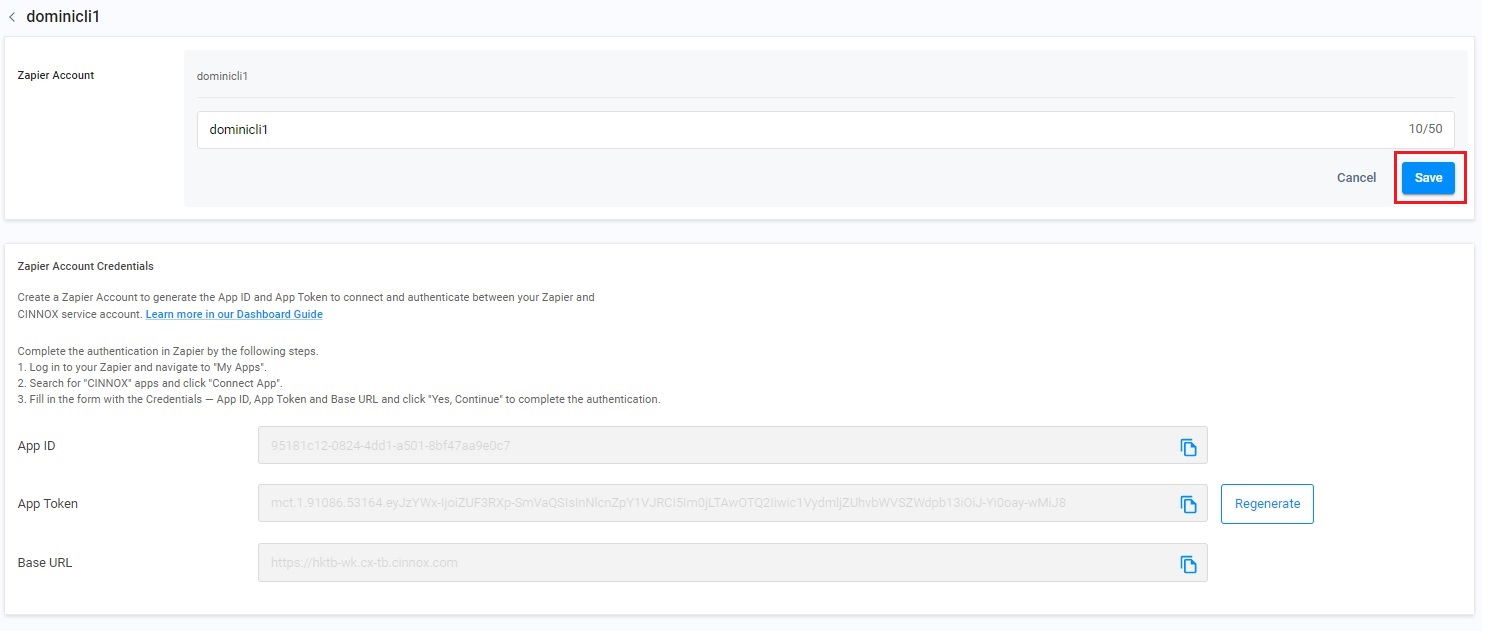
Click on Save
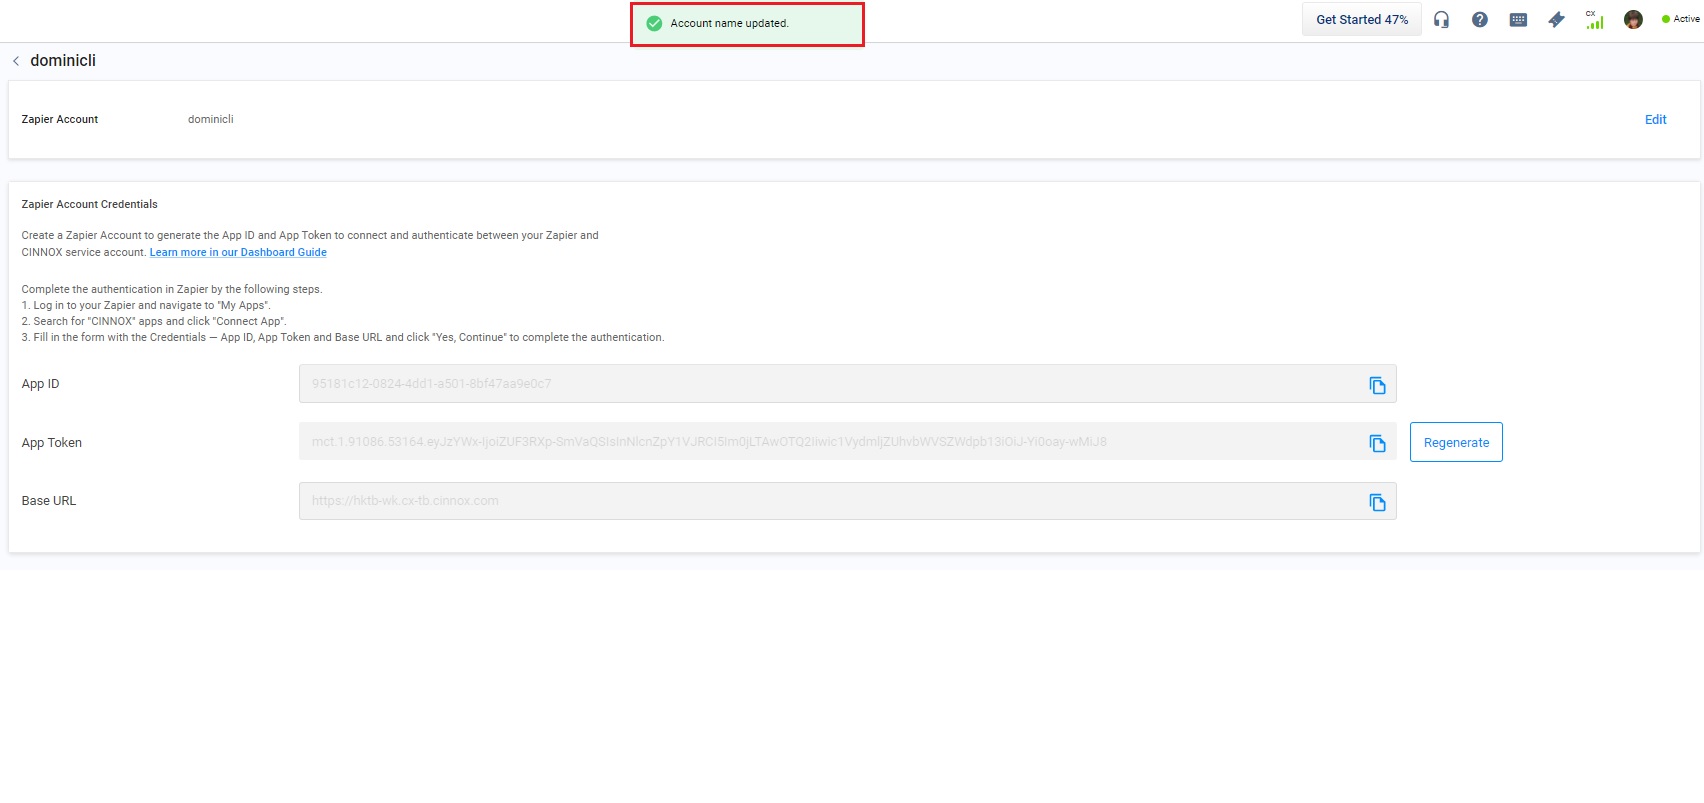
- The toast message shows the account name has been updated.
Delete Zapier Account Details
To delete the existing Zapier Account in CINNOX.
- Navigate to Administration>Service Integration>Third Party Integration>Zapier.
- Click on More (...) for the Zapier Account, which you must delete.
- Click on Delete.
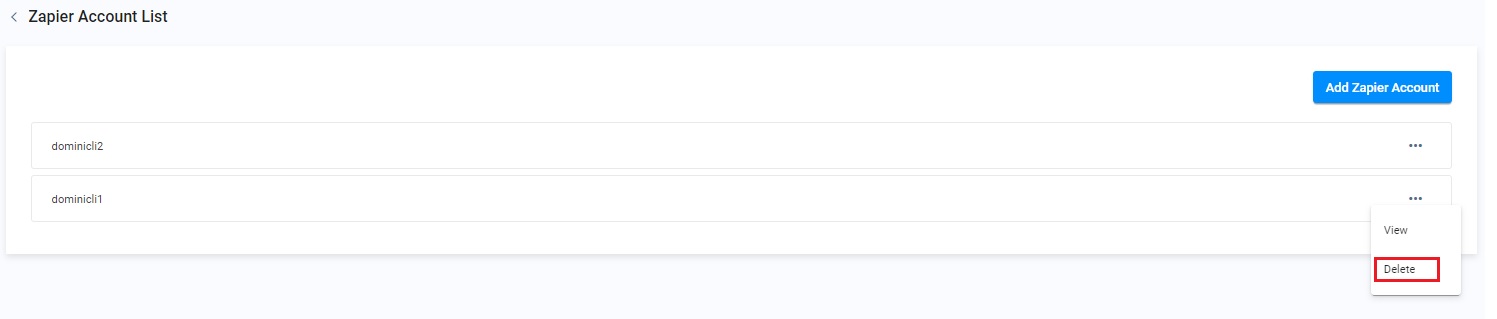
Click on Delete to confirm the deletion of the selected Zapier Account.
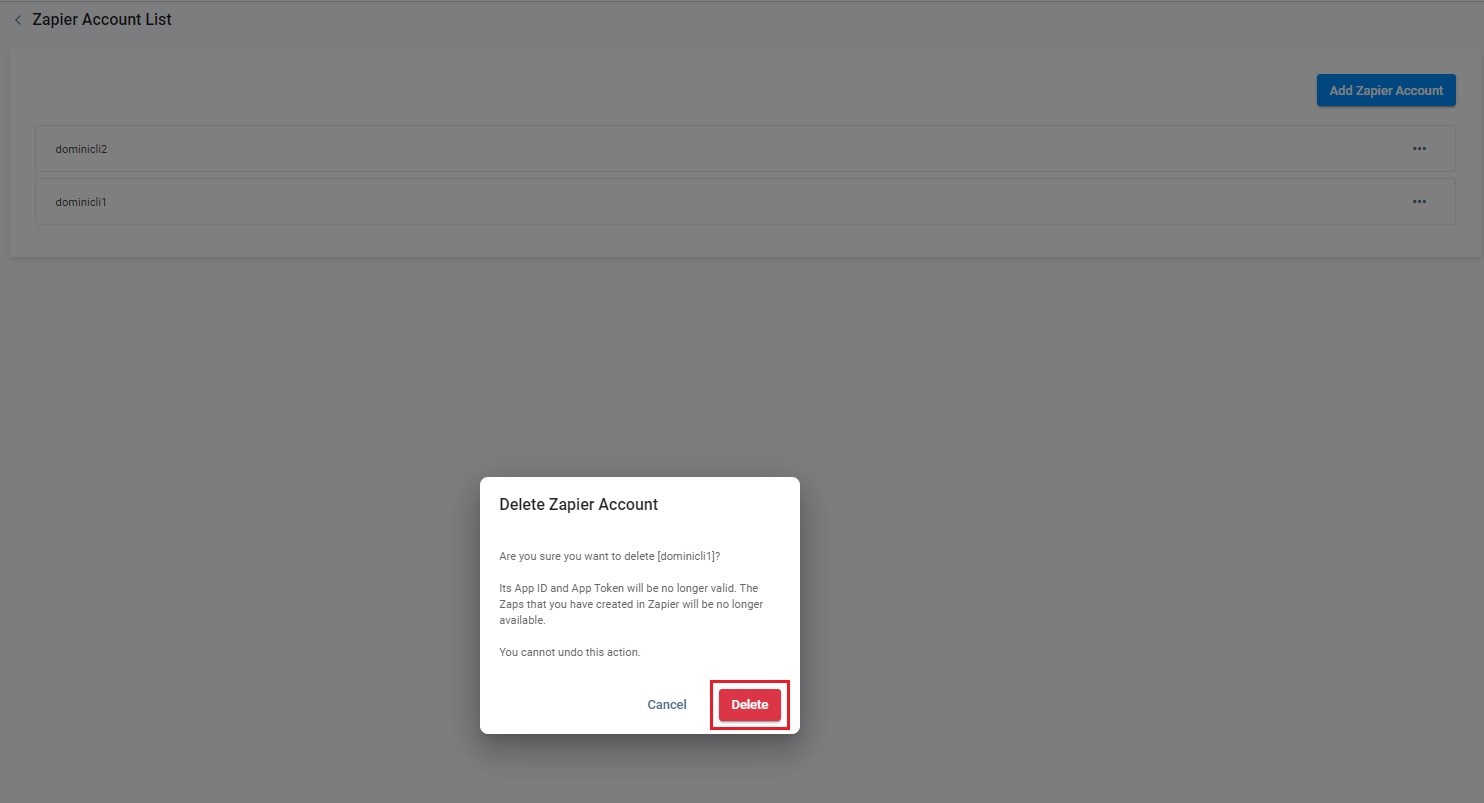
Click on Delete
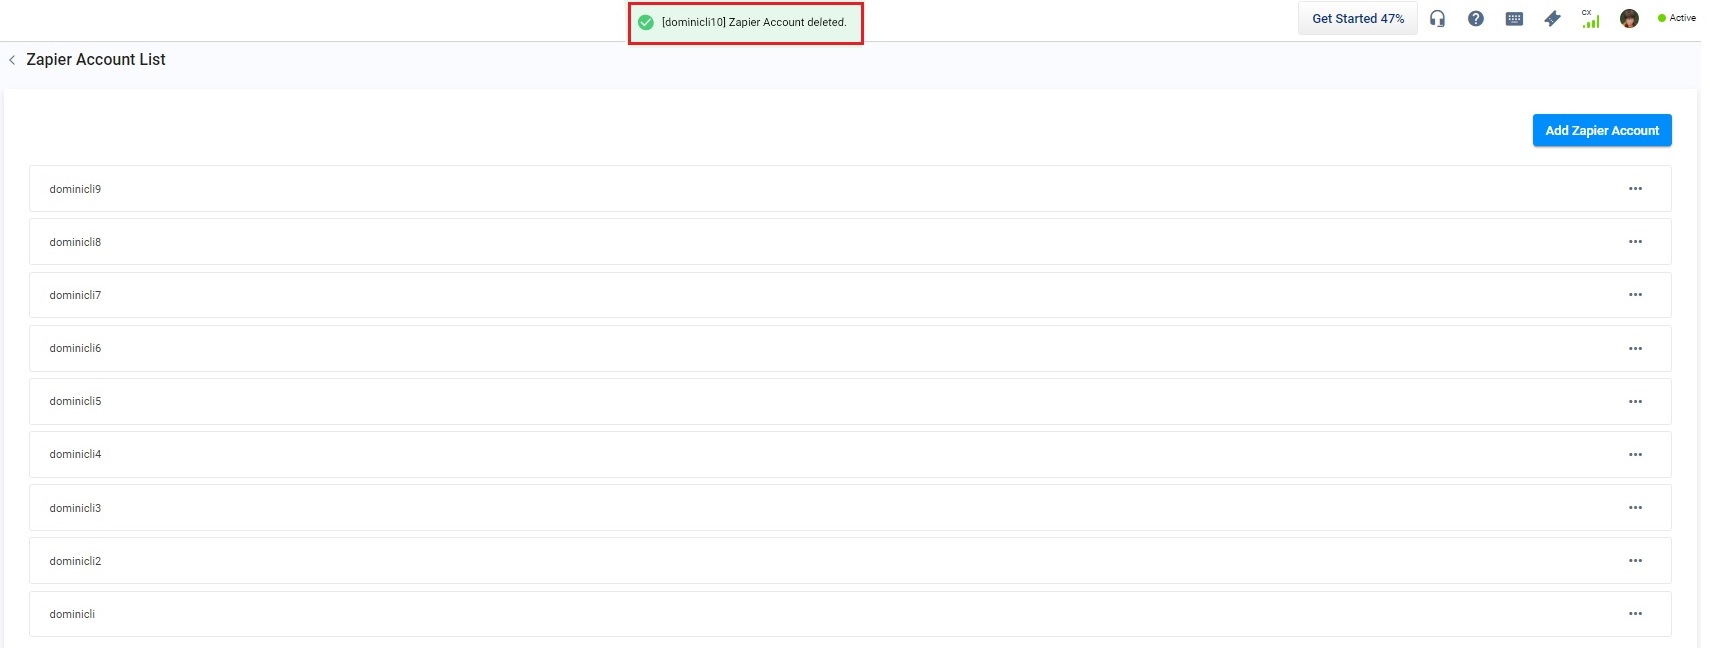
- The toast message shows the Zapier Account has been deleted.
❗️
Deleting the Zapier Accounts already connected to CINNOX will terminate the connection between your Zapier Account and the CINNOX service. You cannot undo any deleted Zapier Accounts.