Create SMS Dynamic Campaign
This section will guide you in creating SMS Dynamic Campaigns.
- Click Campaigns from the Dashboard navigation menu, and navigate to Submitted Campaign, Draft Campaign, or Sent Campaign.
- Click on Create Campaign at the page's top right corner.
Creating an SMS Dynamic Campaign
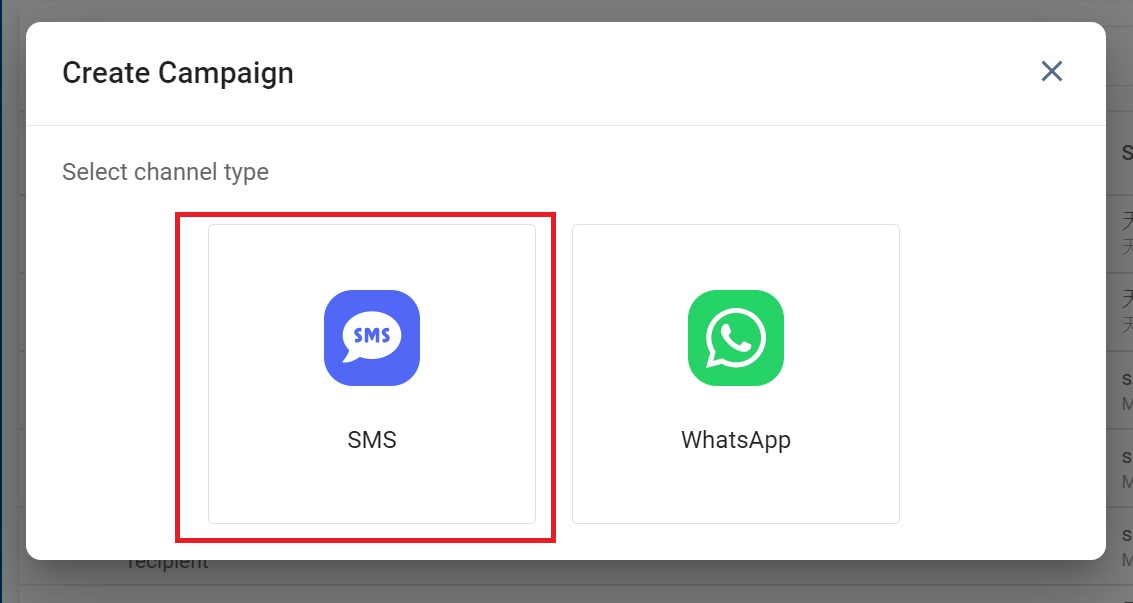
- Select SMS as the channel type.
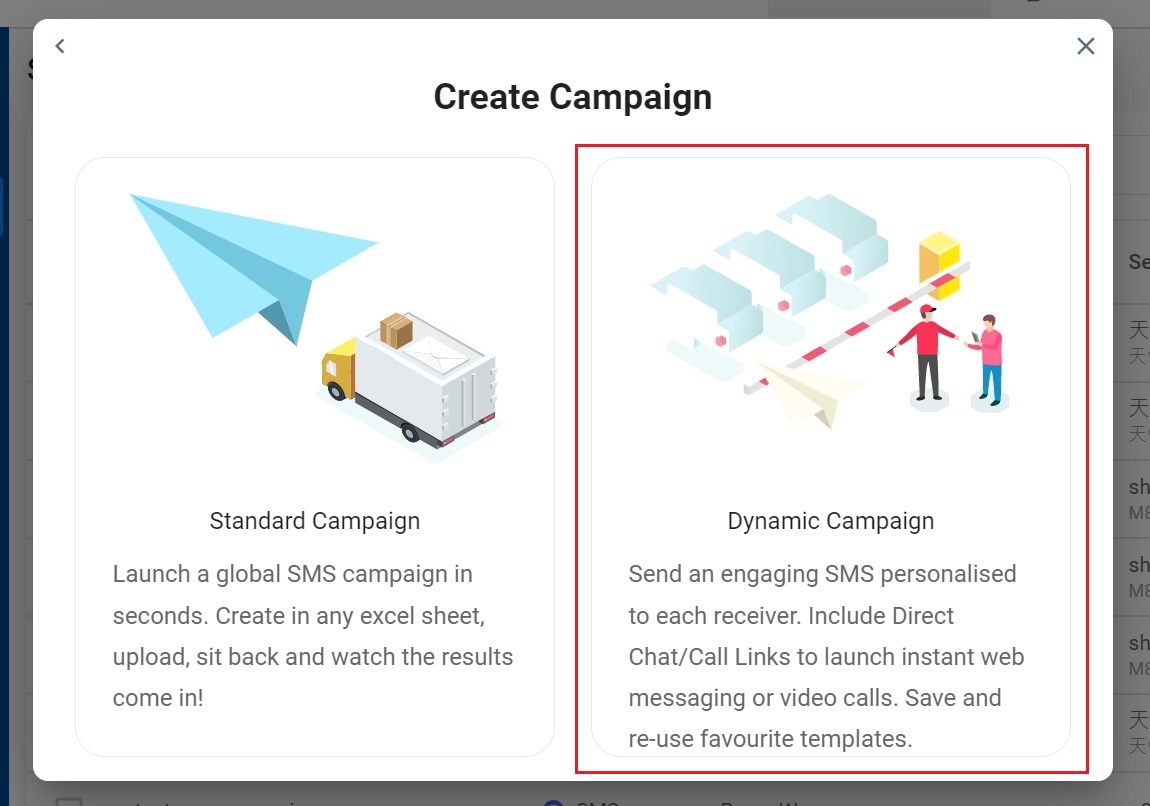
- On the pop-up window that will appear, click Dynamic Campaign.
📘
10,000 phone numbers are the maximum number of recipients to send per campaign.
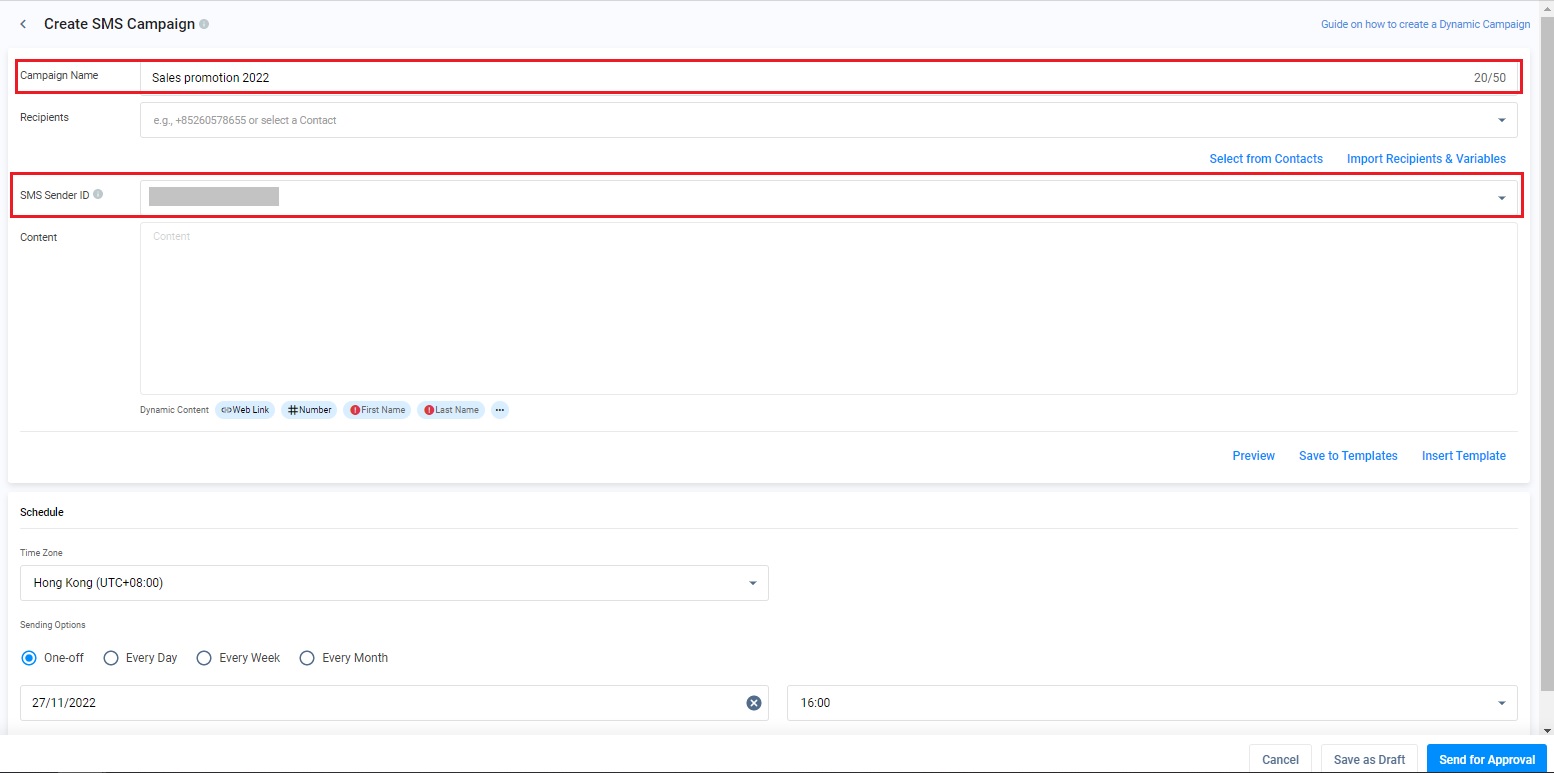
- Type in the required Campaign Name in the provided text field. The limit of the campaign name is 50 characters.
- Select the SMS Sender ID from the drop-down menu. Note that the Sender ID is not guaranteed to be displayed to your message recipients.
- Please check our Service Numbers guide for more details about SMS Sender ID.
There are two ways to create a Dynamic Campaign Message:
- Option A: Create the same message to multiple target recipients
- Option B: Create a personalised message to multiple target recipients
Option A: Creating the Same Message to Multiple Target Recipients
To send the same message to multiple target recipients:
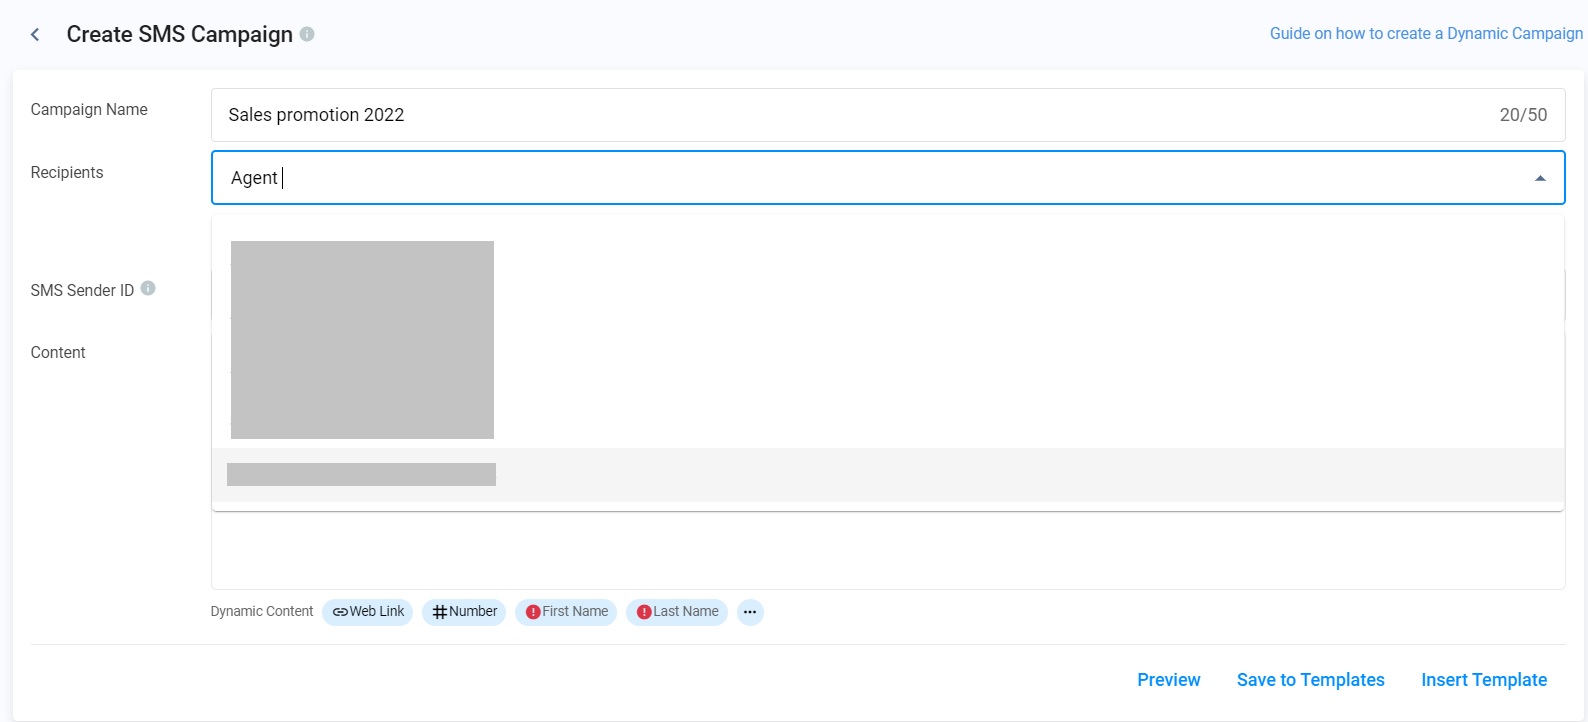
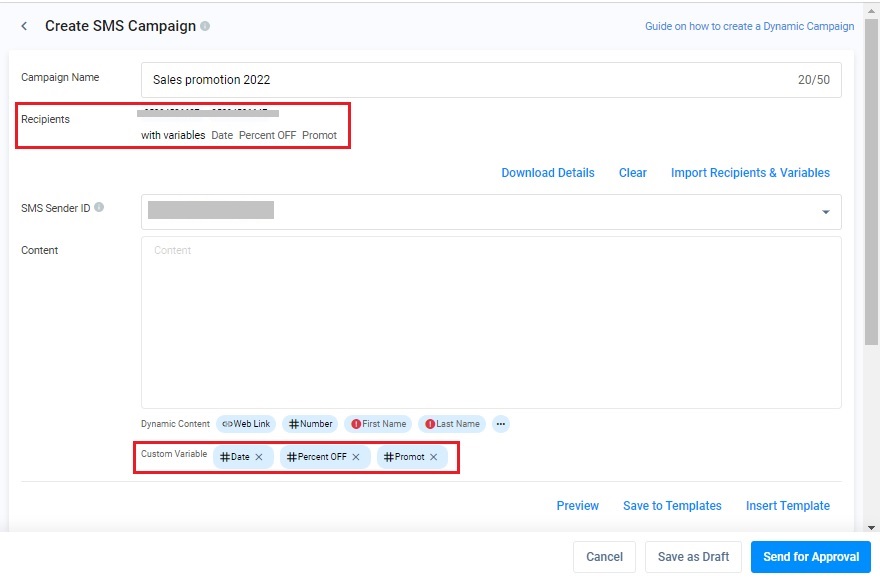
- In the Recipients text field, type in and select your target recipients' phone numbers.
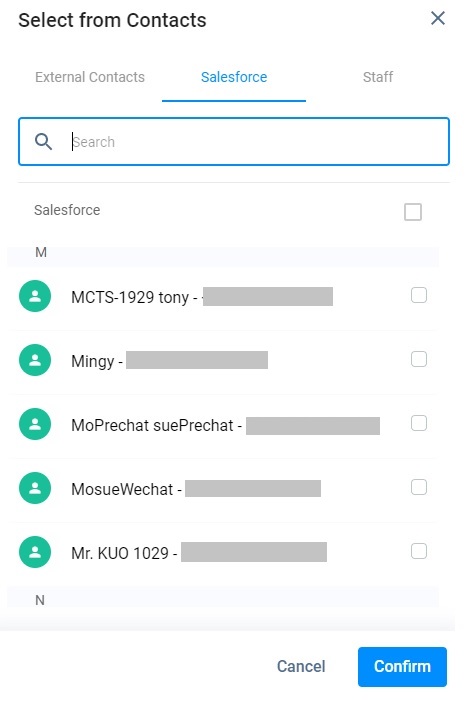
- You may also click Select from Contacts on the top right corner of the page to select a contact with a phone number from your Contact List that will pop up.
- After selecting your contacts, click Confirm.

👍
If your Salesforce Contacts are synced in your CINNOX Service, you can select from your Salesforce Contacts to send the SMS Campaign.
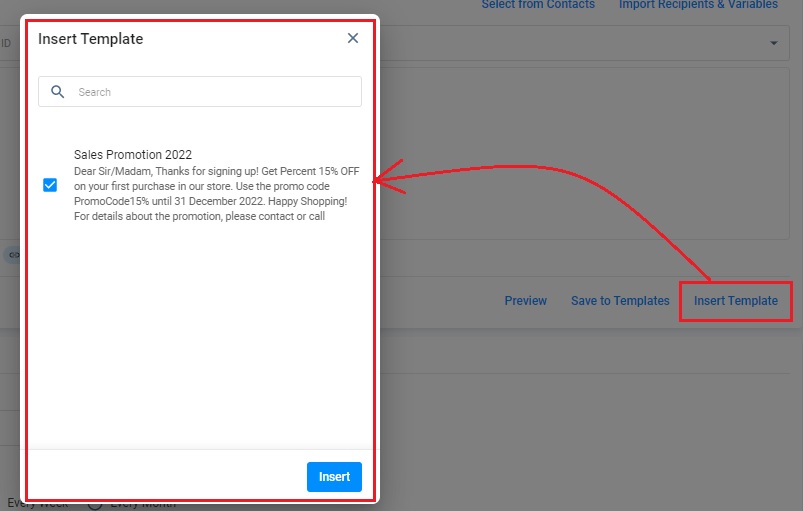
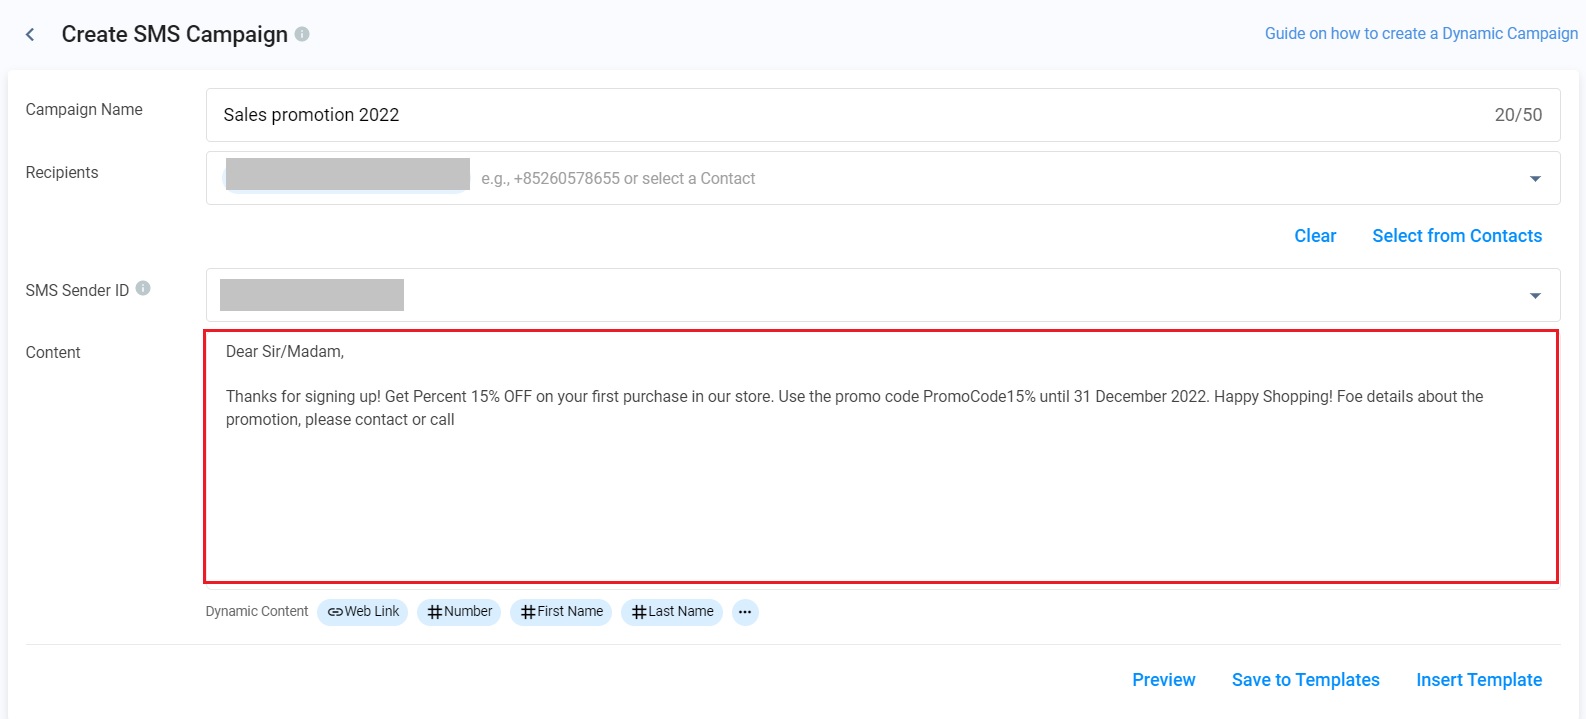
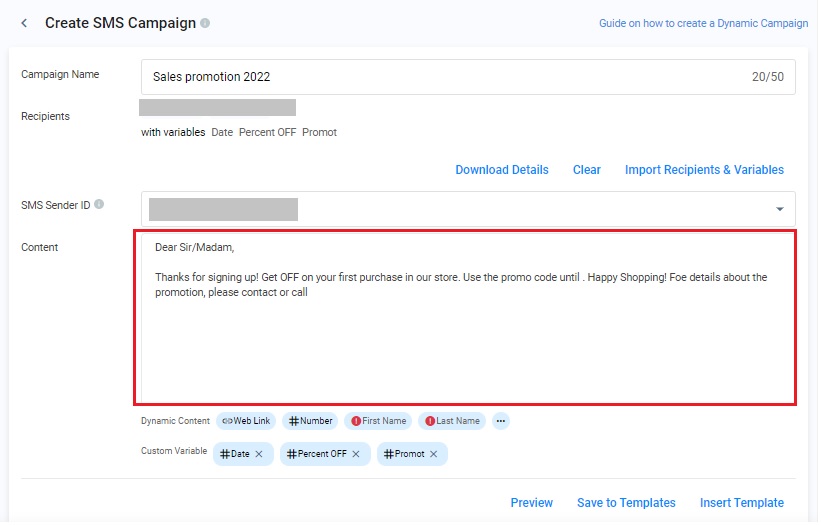
- On the Content text box, type in your message. You can type up to 1000 characters for the message content. You can click Save to Templates to save the Content as a template.
- Or you can click Insert Template, type the keywords and select a template as your Content. Please refer to the SMS Templates section for details about the template.
- Click Insert.
- You can insert Dynamic Content like Weblinks, Numbers, etc., into the message content. Please refer to the section Insert Dynamic Content and Custom Variable into the Campaign for details.
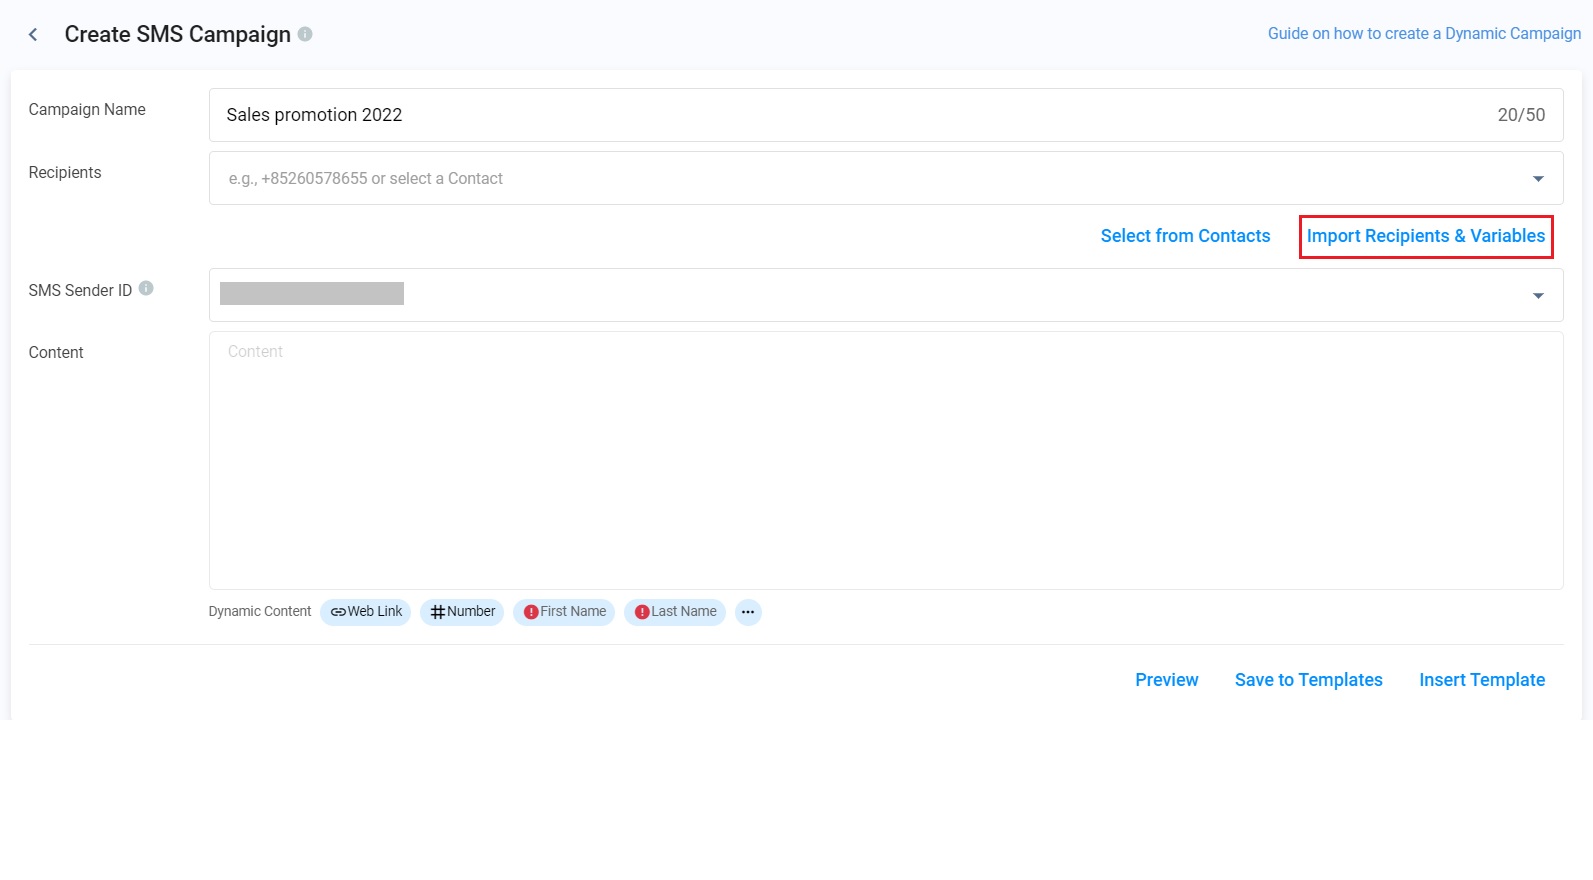
Option B: Creating Personalised Messages to Multiple Target Recipients
To send personalised messages to multiple target recipients:
- Click Import Recipients & Variables on the Create Campaign page in the top right corner.
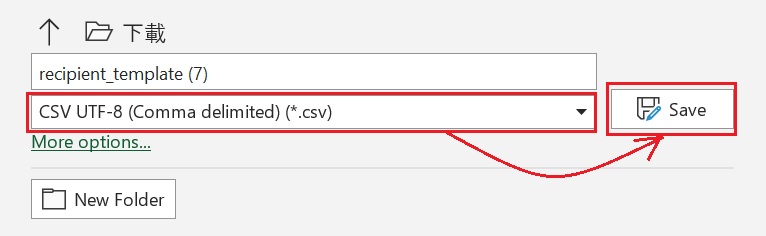
- On the Import Recipients & Variables pop-up window that will appear, click the CSV or XLSX sample file to download a spreadsheet template.
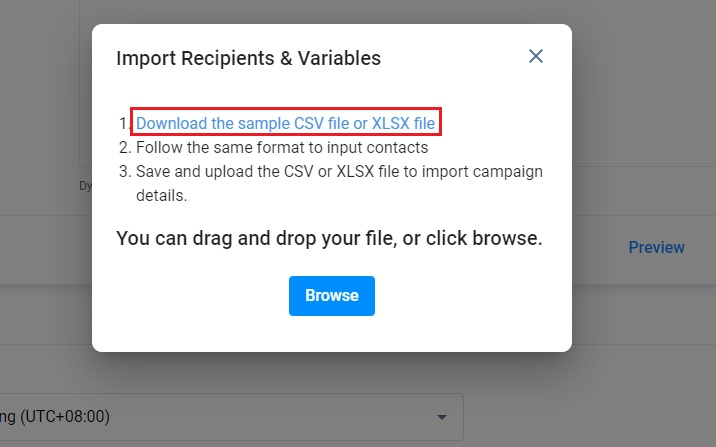
- Open the spreadsheet template, which should contain four columns, and remove the sample first record.
- In the Recipients Number column, add the phone numbers of your target recipients. Make sure the entered phone numbers include the country codes before the numbers.
| Recipient | Var 1 | Var 2 | Var 3 |
|---|---|---|---|
| +85294526637 | A1 | A2 | A3 |
| +85294536647 | A2 | B2 | C2 |
- In the following columns, rename the variable header names to match your message content, then add their corresponding values for each row. You may add as many columns as you want.
- Add as many records in the spreadsheet as long as the file size does not exceed 5MB.

📘
- CINNOX only accepts text format cells.
- Please add "+" in front of the recipient phone numbers when you add them to the Excel file.
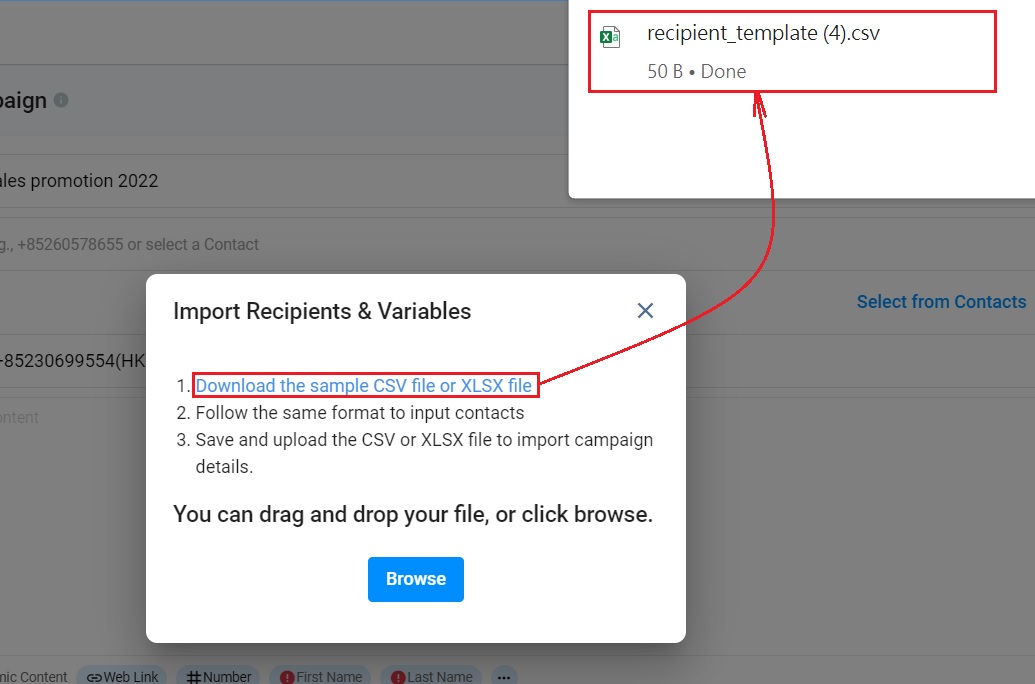
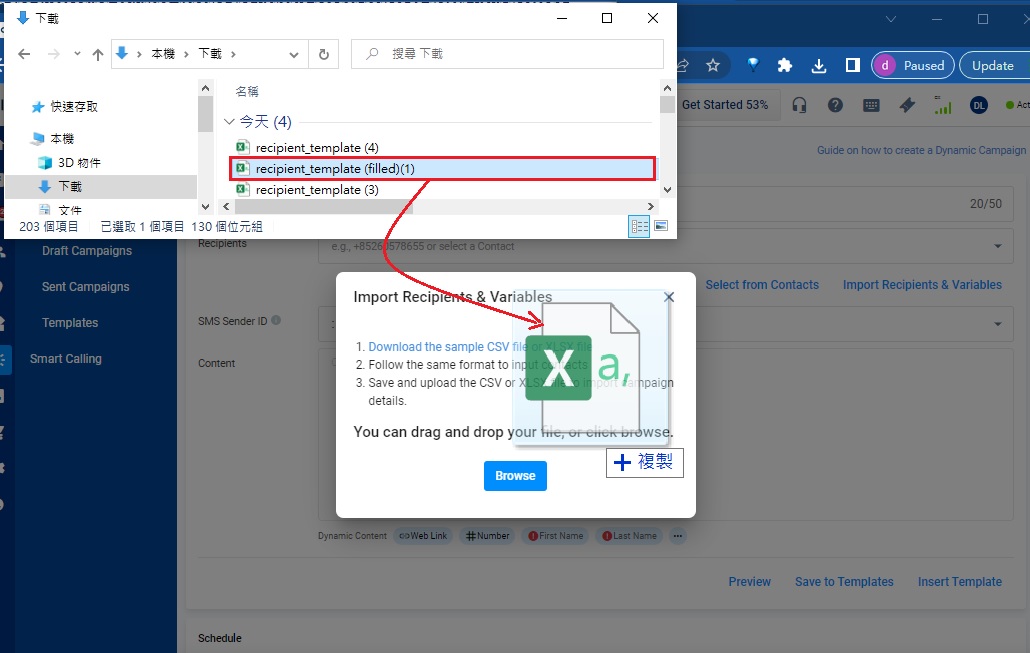
- Once all columns are ready, please save the file and upload it to CINNOX by dragging and dropping it on the designated box in the pop-up window. CINNOX will then validate the uploaded file and create an error log if there are invalid records.
- You may also upload the file by clicking Browse and selecting it from its location.
- When some records fail to import, please refer to the section Handling Invalid Records in the Creating SMS Standard Campaign.
- When the input text is split, please refer to the subsection How to handle the case of the splitting text in the CSV file in the section.
.
- When the recipients and variables are successfully imported, the recipients and variables are displayed on the Create SMS Campaign page.
- On the Content text box, type in your message. You can type up to 1000 characters for the message content. You can click Save to Templates to save the Content as a template.
- Or you can click Insert Template, type the keywords and select a template as your Content. Please refer to the section SMS Templates for details about the template.
- Click Insert.

- You can insert Dynamic Content like Weblinks, Numbers, etc., into the message content. For more details, please refer to the section Insert Dynamic Content and Custom Variable into the Campaign.
How to handle the case of the splitting text in the CSV file
Using a comma (,) to split the text is the function of the CSV file. When importing the CSV file with the comma between texts, the text will be split into the next column in the file after the file upload.
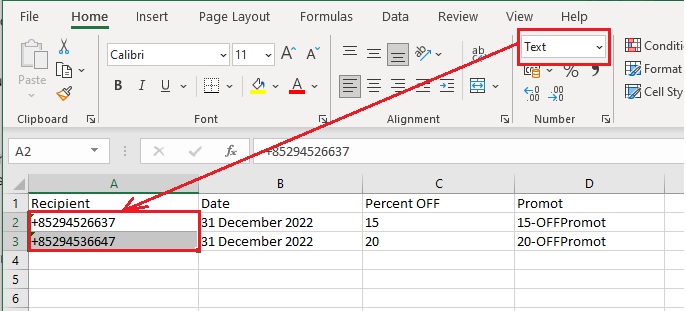
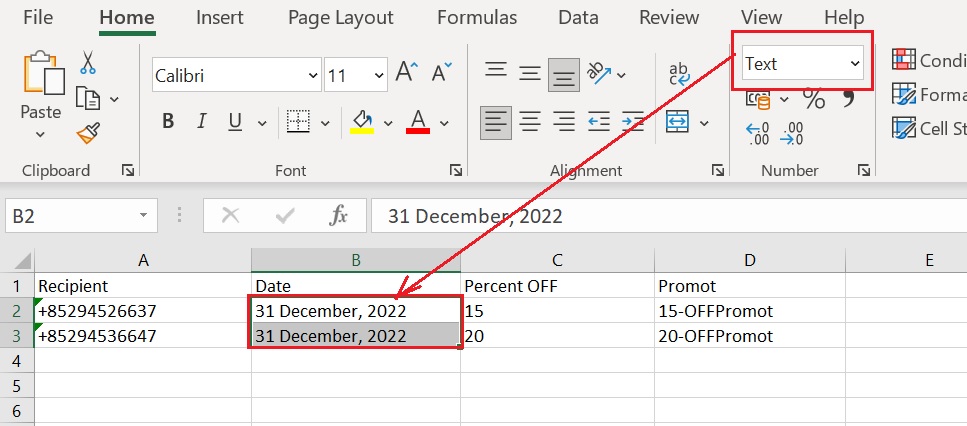
Splitting text in the CSV file
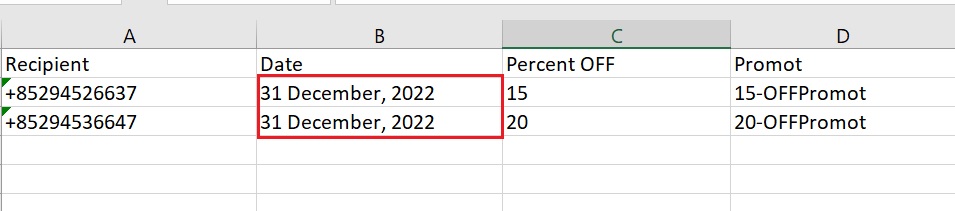
For example, when you enter 31 December, 2022 into the column Date, the file is shown below:
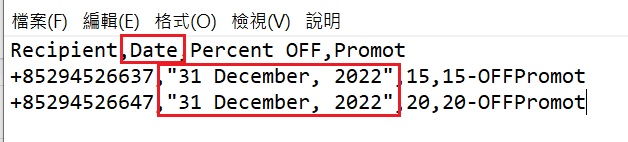
After the file upload, the text is shown below:
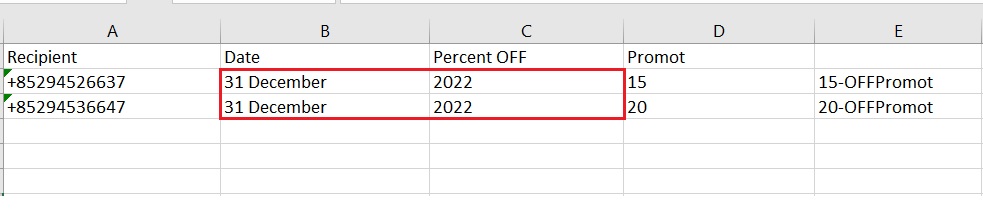
As the text 31 December 2022 contains a comma in the Content after the filled CSV file is uploaded, the text is split into two columns, 31 December in the column Date and 2022 in the column Percent OFF.
How to avoid splitting text
Using a text editor
- Put the text with a comma in the double quote (""), like "31 December, 2022" and save it as a CSV file when you upload the file.
Using Excel or style sheet editors
- Fill in the text in the text format.
- Save the sheet as a CSV file and upload it to the CINNOX.
- The double quote should be added automatically to the file.
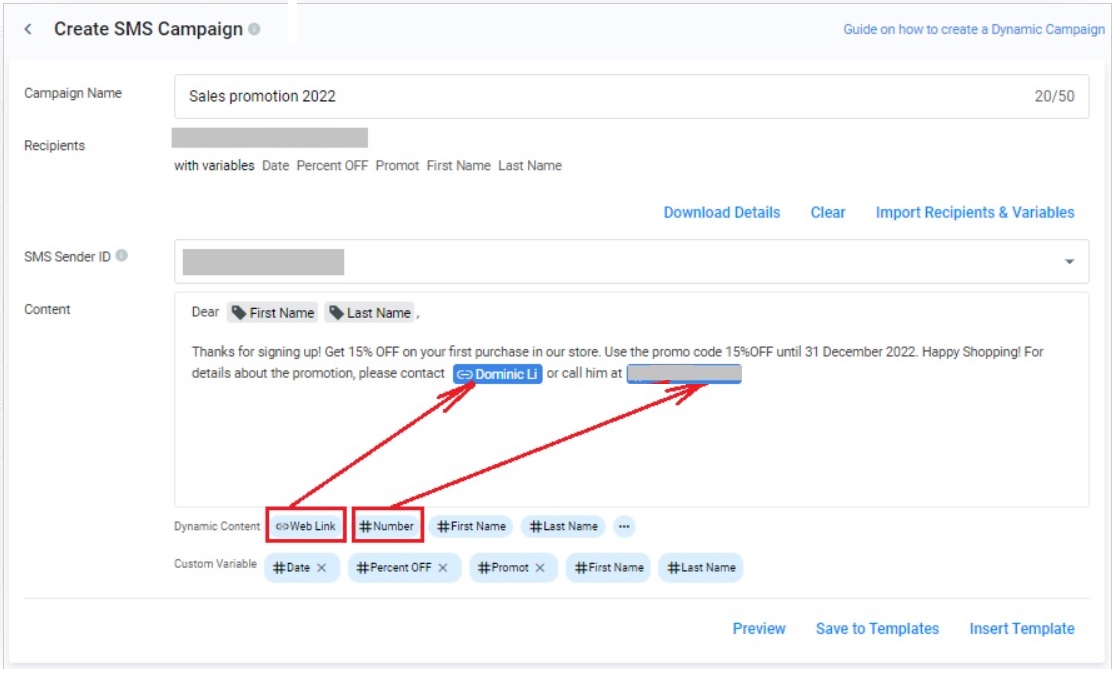
Insert Dynamic Content and Custom Variables into the Campaign
- On the Create SMS Campaign page, if your target recipients have name details (i.e., first and last names) on your Contact List, they will also appear as Dynamic Content at the bottom of the Content text box.
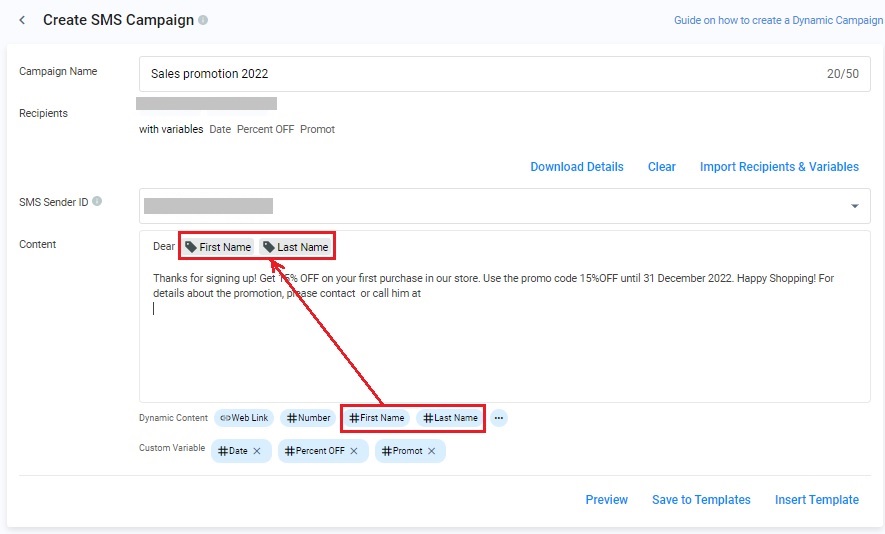
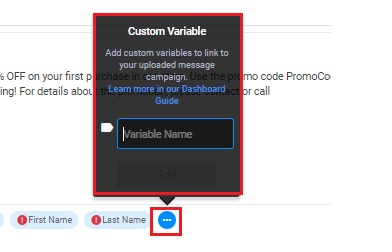
- Click More(...) to add custom variables.
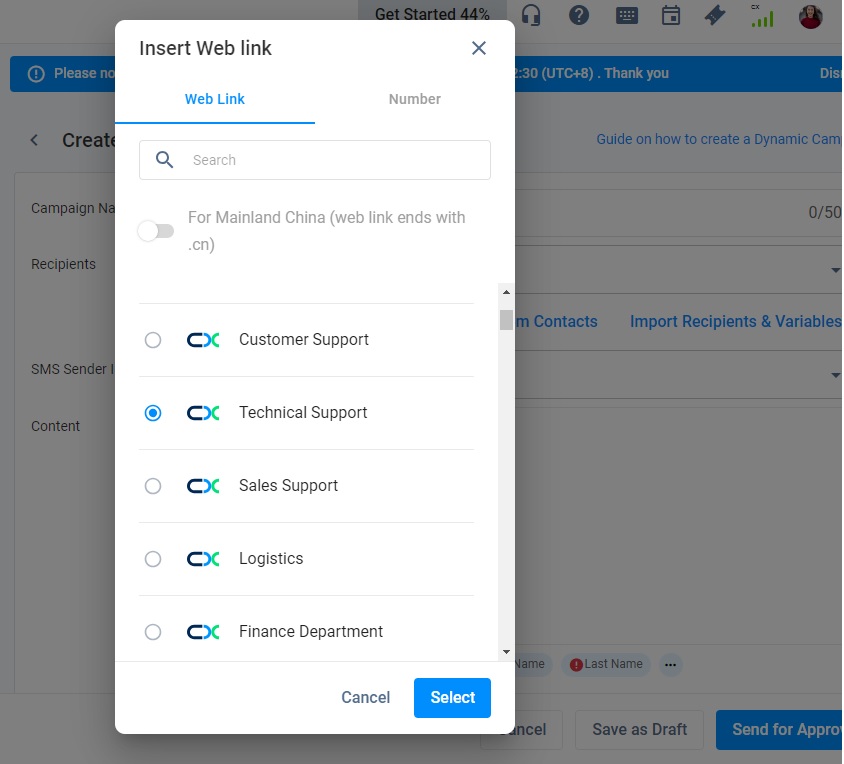
- If you want your target recipients to get back to you via a web link or phone number, click Dynamic Content Weblink or Number at the bottom of the Content text box to add the respective variables to the Content.
- Select the Weblink or Number you wish to add to your message content on the pop-up window.
- You may switch between weblinks or numbers by clicking their respective tabs on the top of the pop-up window. After clicking this link, visitors can engage in a Chat or Call conversation with the party associated with the web link.
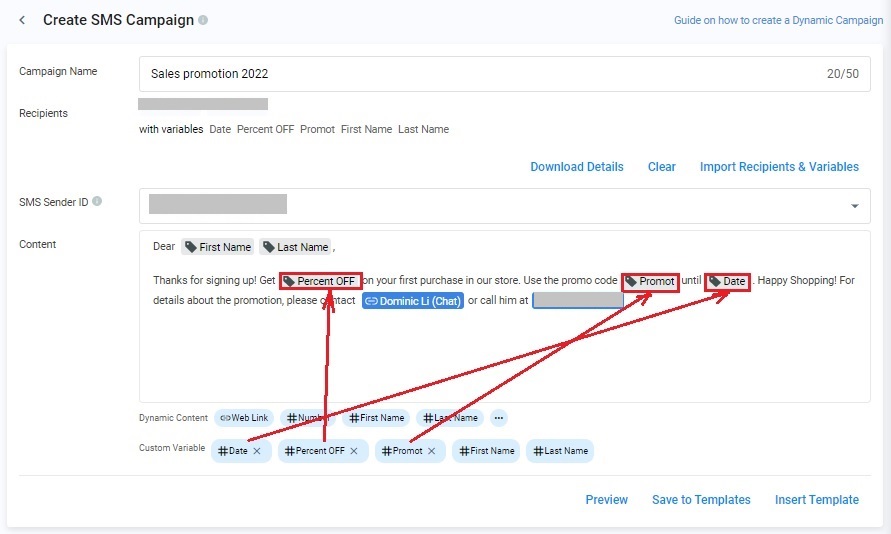
- In your message content, insert your uploaded variables, which should appear as suggested variables at the bottom of the Content text box under Custom Variable.
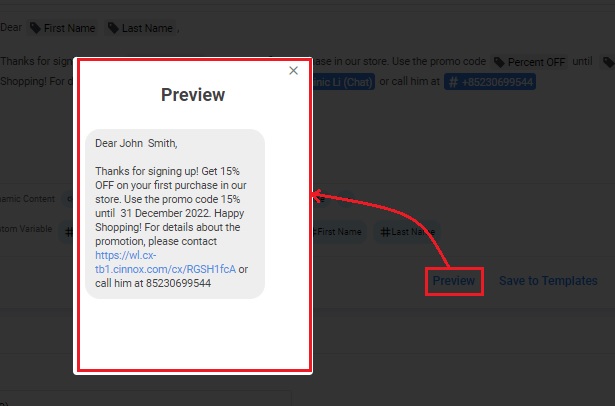
- Click Preview to view the final message sent to your target recipients.
- The next step you must do is schedule a campaign.
📘Learn more about how to Increase Marketing Engagement Rates with CINNOX Web links.
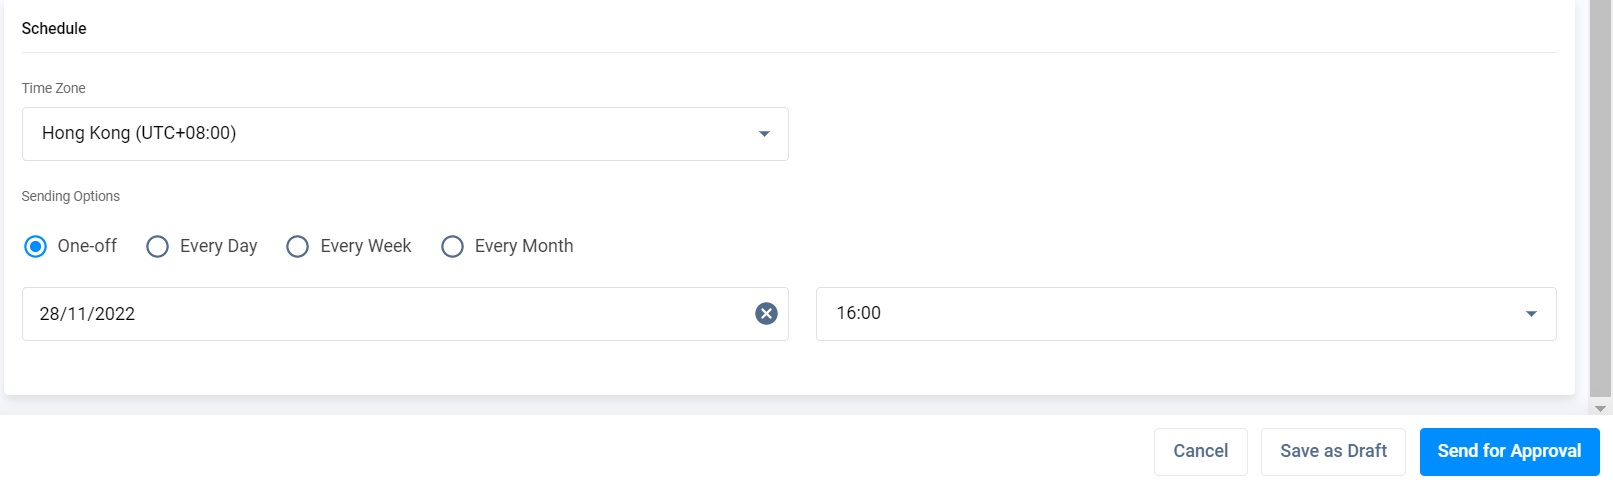
Scheduling a Campaign
- Click the drop-down menu and select the Timezone, which is preset to UTC+08:00.
- Select the Sending Options:
- One-off
- Every Day
- Every Week
- Every Month
- Set the date the Campaign will be sent, which is preset to the current date.
- Set the time the Campaign will be sent, which is preset to the nearest 30 minutes of the current time.
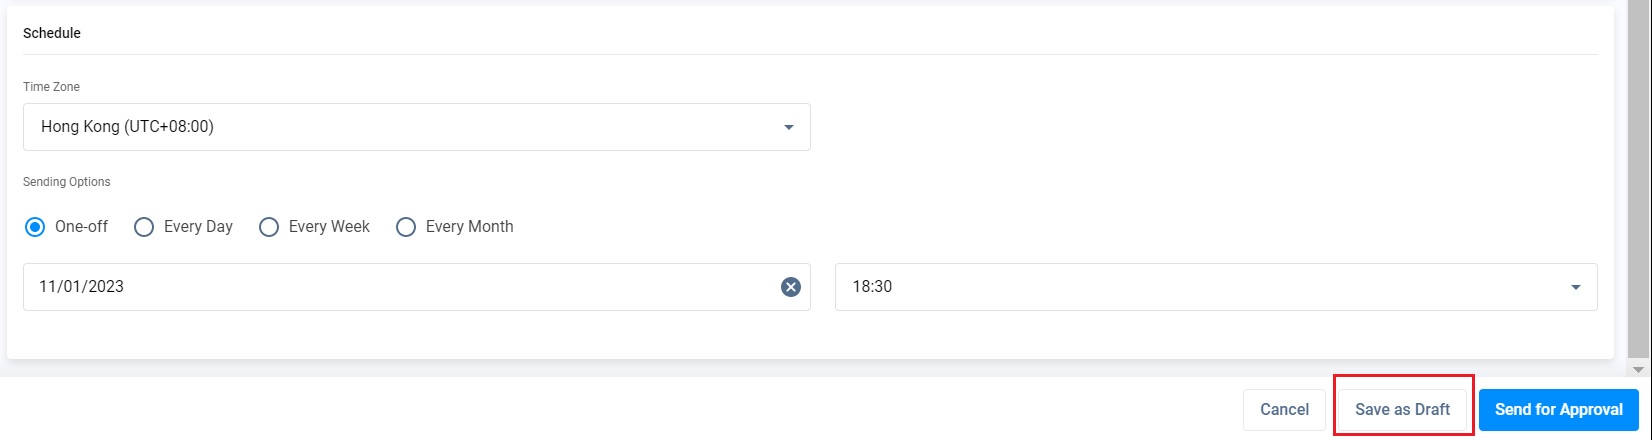
- Click Send for Approval for the approver to approve your created Campaign.
- You can also click Save as Draft to save the Campaign you are creating as a draft campaign. Thus, this Campaign will be moved to the Draft Campaign list.
Sending a Campaign for Approval
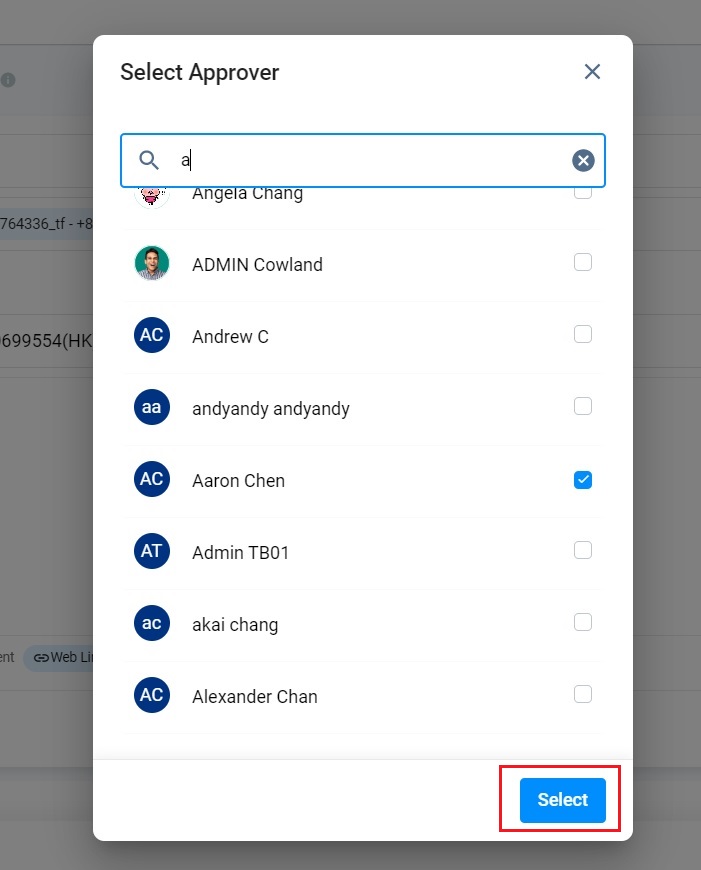
- After your schedule setting and clicking Send for Approval, select the staff member required to approve your Campaign on the Select Approver pop-up window that will appear.
- Click Select. A CINNOXBot message and an email will be sent to the selected approver, alerting them about the Campaign pending approval.
👍
- If the campaign creator is also the assigned approver, CINNOX will automatically approve the campaigns they create.
- The Administrator, Supervisor or any custom role with the approval permission is assigned to approve the campaigns to be sent out.
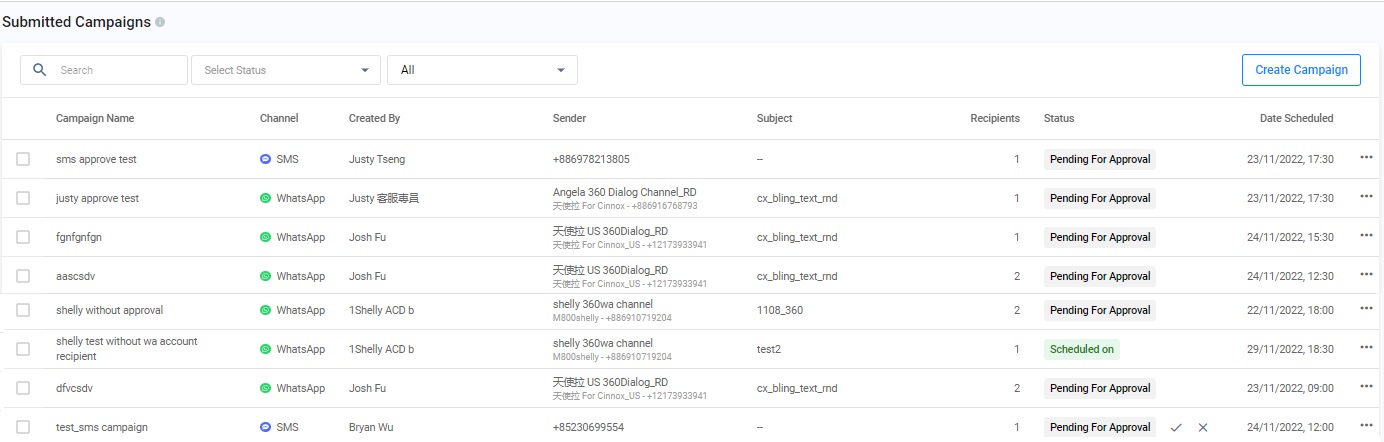
After finishing all the steps for creating an SMS Dynamic Campaign, the Campaign is successfully submitted and displayed on the Submitted Campaign page.
Sending SMS to mainland China number (+86)
According to the regulations and requirements of the China carrier, you will need to register a template to the carrier to send an SMS to a mainland China number (+86). And only the SMS content matched precisely with the registered template will be delivered.
Suppose you still send SMS with the Content without a registered template or the actual Content is not 100% matched with the registered template (e.g., a variable field containing an index filled with a string). In that case, it will still be sent out but void and incur a cost.
Please get in touch with your account manager to learn more about the procedure and requirements for registering a carrier template.