Custom Field for External Contacts
Collecting the contact information matters most to your business and service. In CINNOX, Contact consists of standard contact details - full name, phone number, email address, company information and mailing address. With customer business growing and knowledge increasing, you may need to collect more than the standard contact details.
With Custom Fields, you can create any fields, collect information from your visitors, leads, prospects, customers and other contacts, save them in their contact profiles and use them in your business operation and engagement.
👍
Advantages of using Custom Fields
- You can add custom fields to the contact profiles and map them onto the different areas of visitor input (e.g. chat window/visitor form/platform account integration) so that the enquiry is handled fast and efficiently with the provided context to each enquiry provided.
- Custom fields can also be used for automation triggers, where automation can happen when a custom field's value is changed.
- This contact information can also be collected by the ChatBot and stored in the custom fields, thus being passed to an agent to facilitate the enquiry handling process.
Managing Custom Field
Create Custom Fields
Create custom fields on the Contact Field Management page with two entry points:
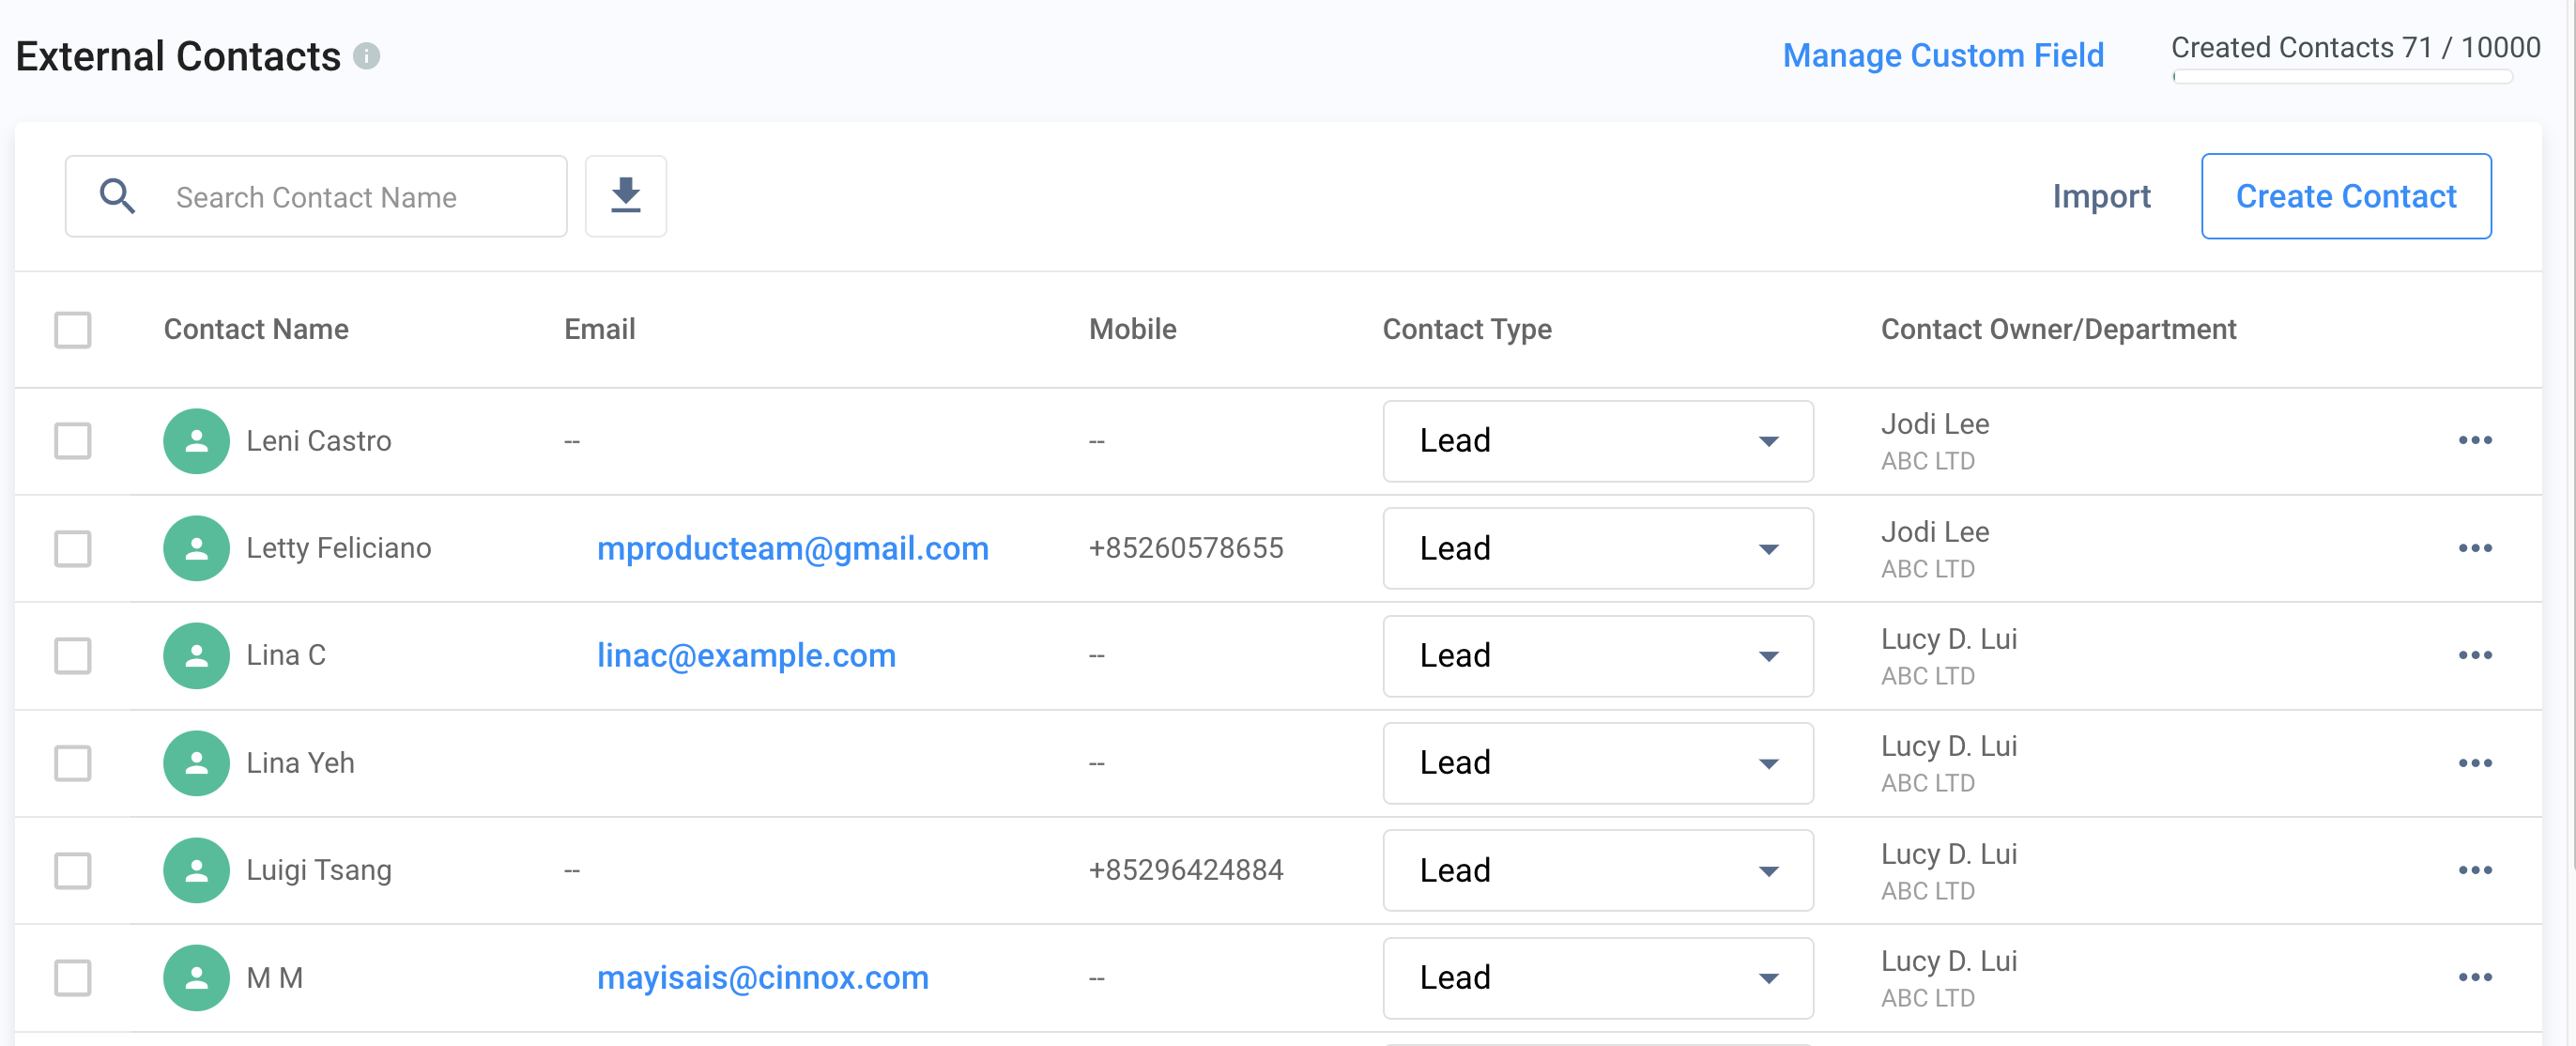
1. Via the External Contact Page
- Navigate to Contact Management>External Contacts
- Click on Manage Custom Field.
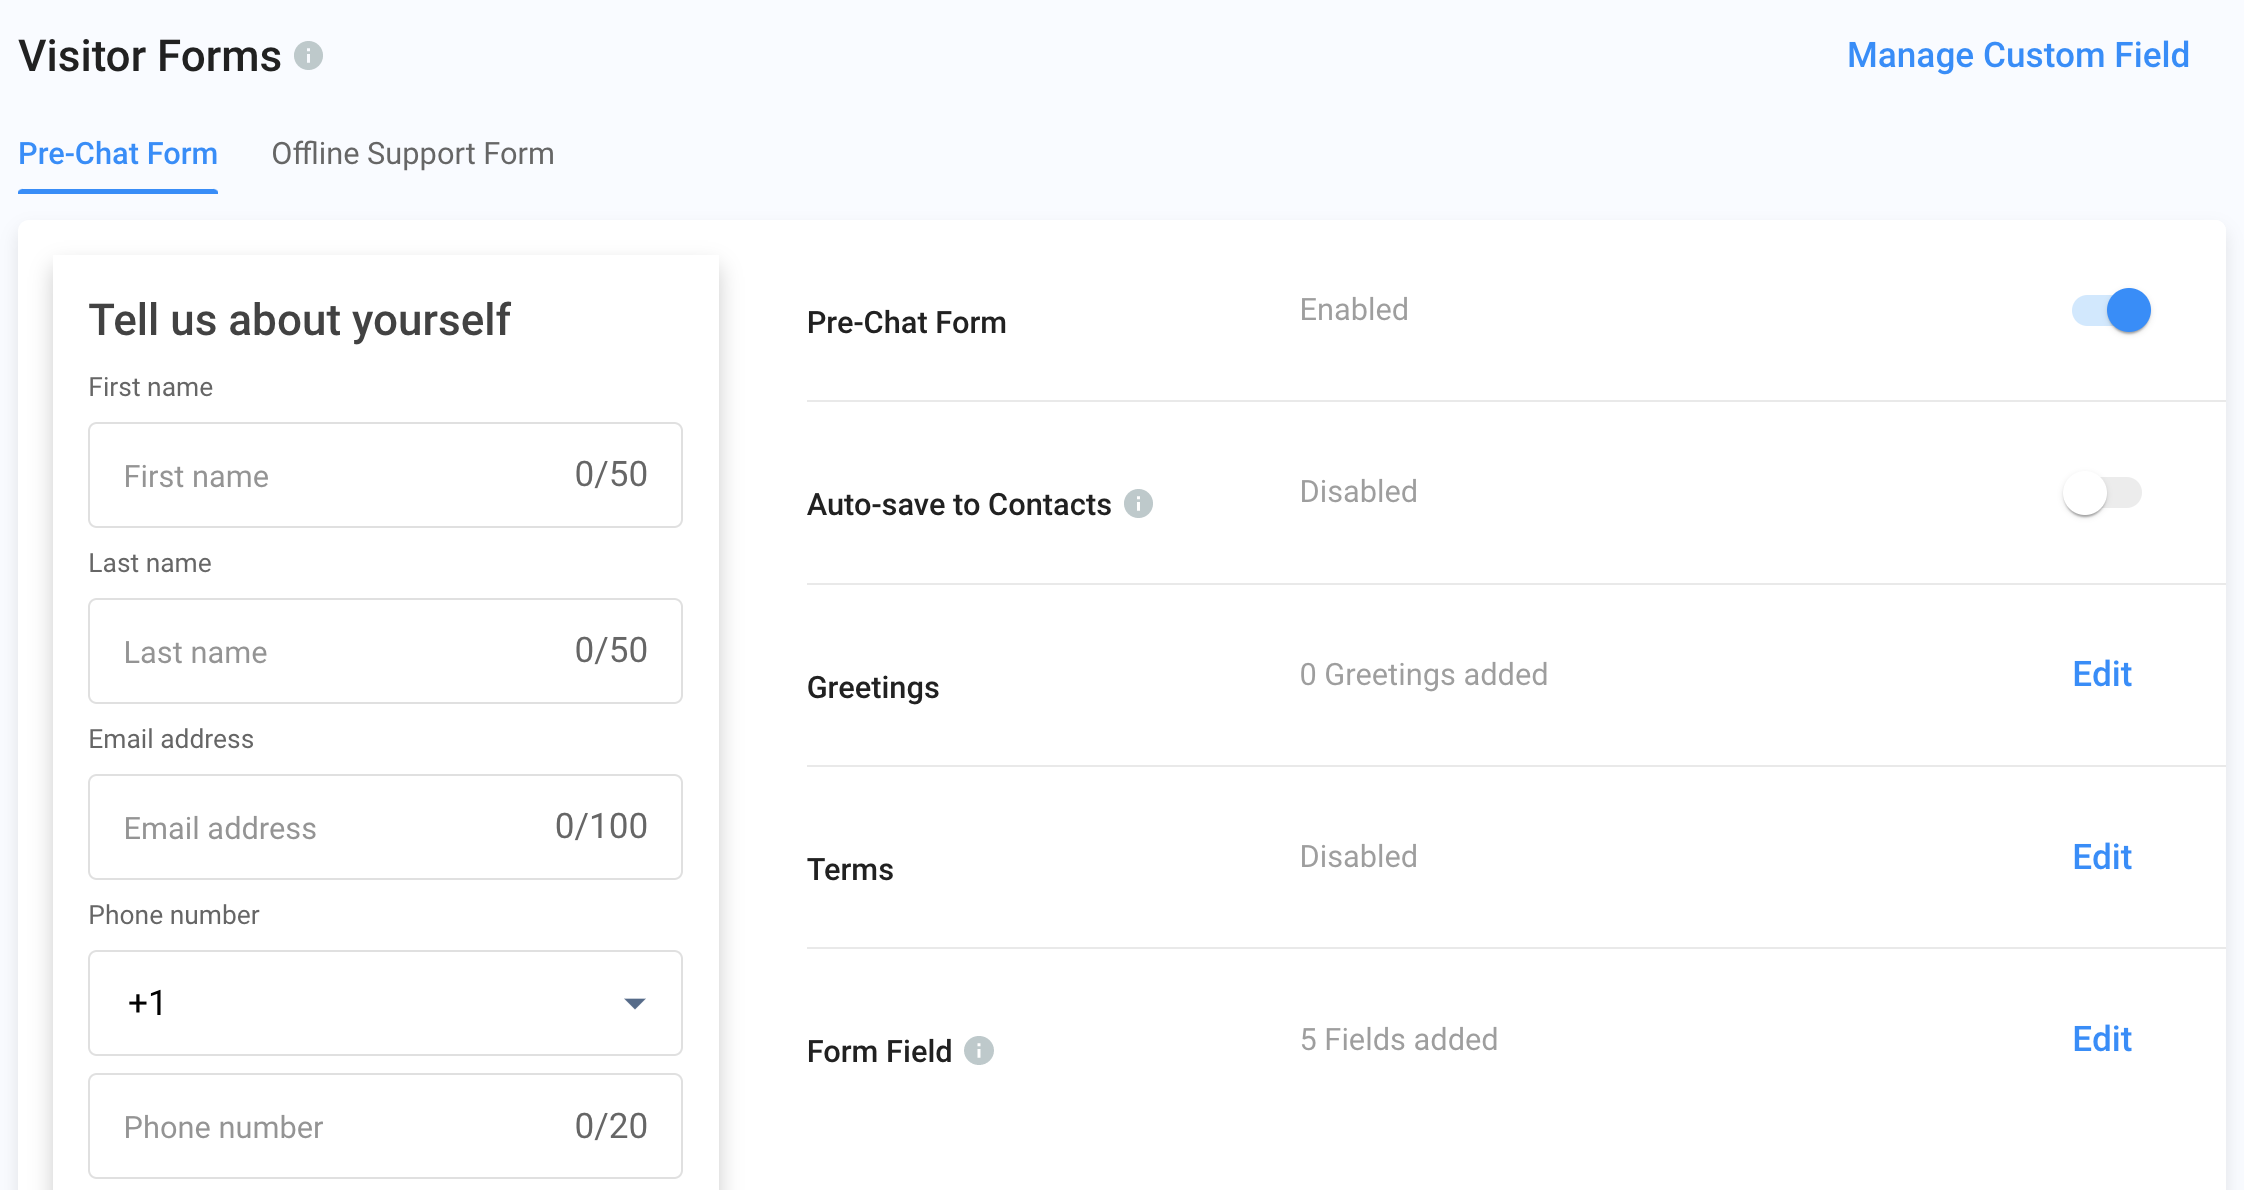
2. Via the Visitor Forms
- Navigate to Administration>Widget>Visitor Forms.
- Click on the Pre-Chat Form tab or Offline Support Form tab and click on Manage Custom Field on the top right-hand corner of the page.
Click on Manage Custom Field
- Either choosing External Contacts or Visitor Forms as an entry point can access the Contact Field Management page.
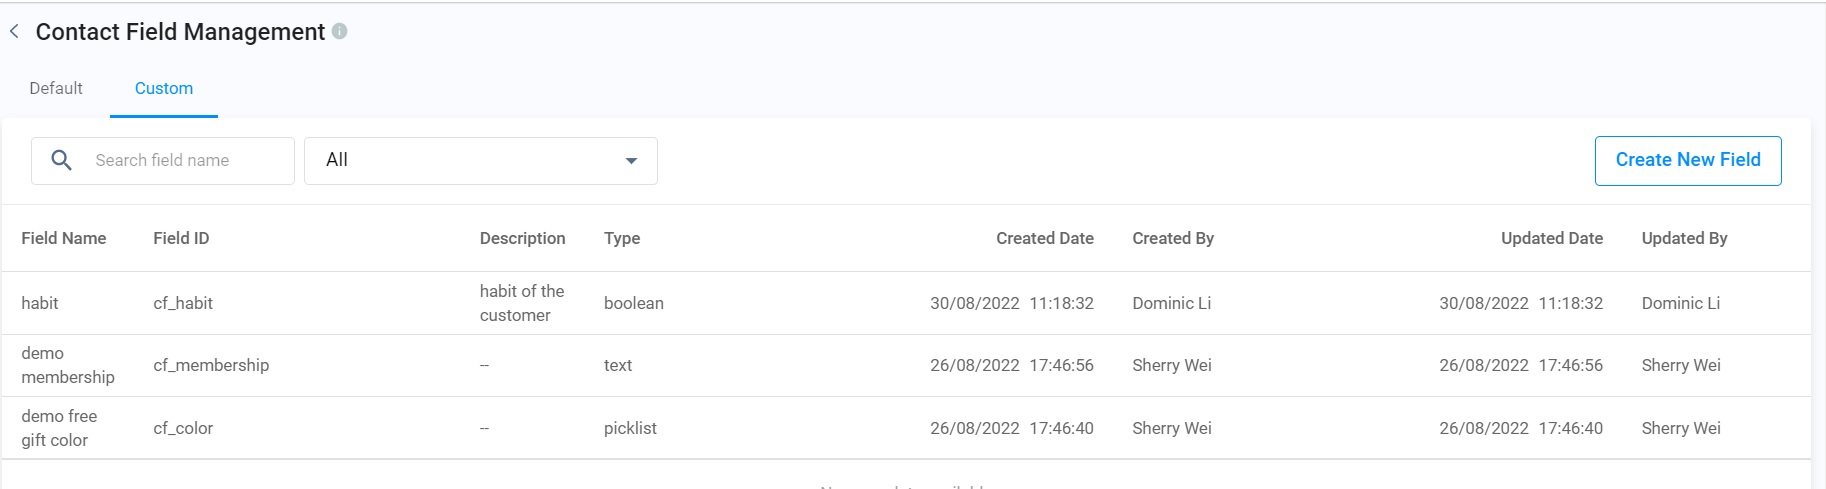
Contact Field Management
- Select the Custom tab.
- Click on Create New Field on the top right-hand corner of the page.

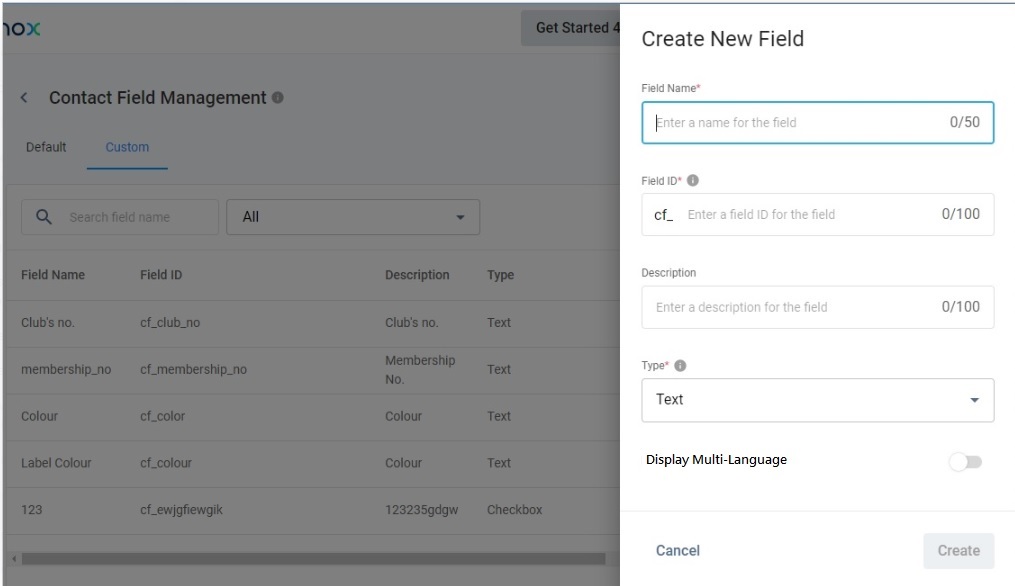
Click on Create New Field
- Fill in the Field Name (Required), Field ID (Required) and Description.
Fill in the Form
- You must select one as the type of the custom field you create. The selectable types are
- Text
- Dropdown List (Single Selection)
- Dropdown List (Multiple Selection)
- URL
- Date
- Time
- Checkbox
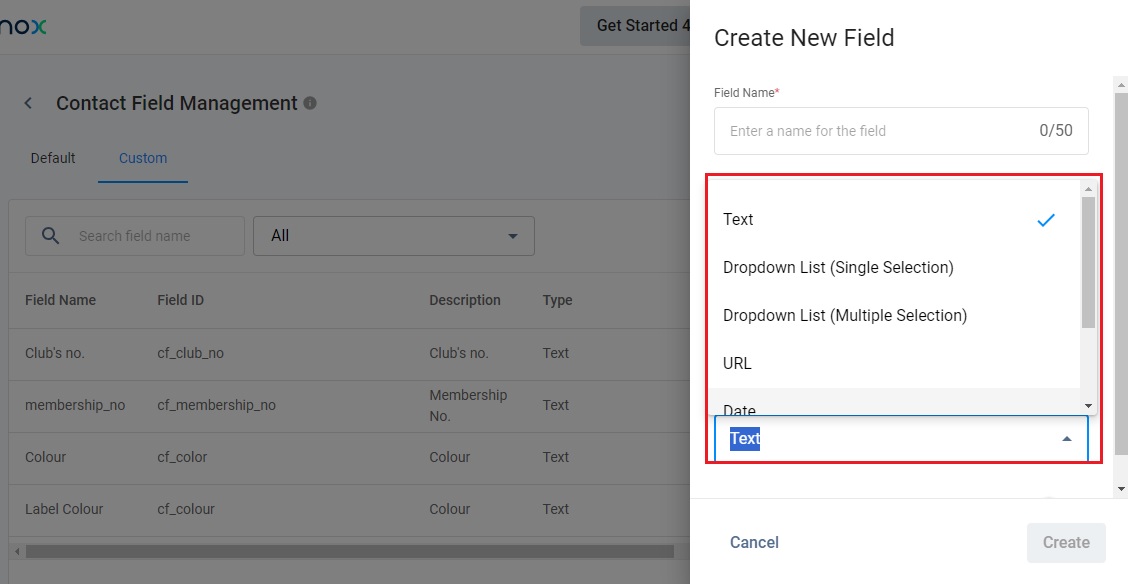
Select one field type
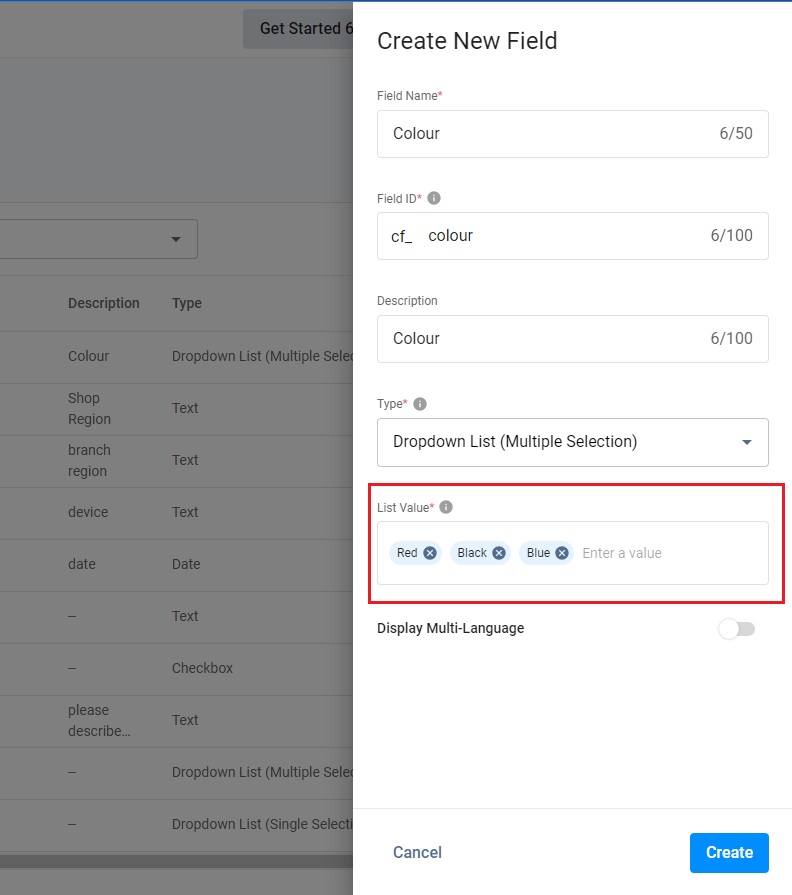
- When selecting Dropdown List (Single Selection) and Dropdown List (Multiple Selection), you must enter the List Value for the dropdown list.
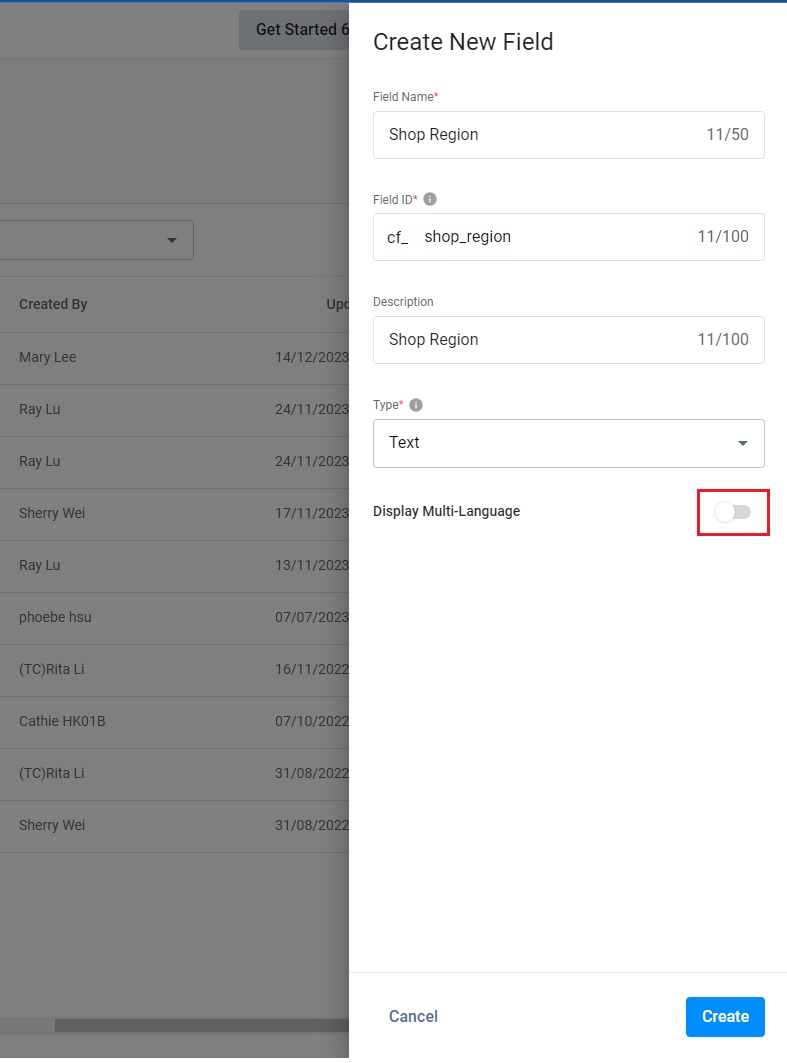
- If the custom fields have to support multiple languages, you must toggle ON the Display Multi-Language switch.
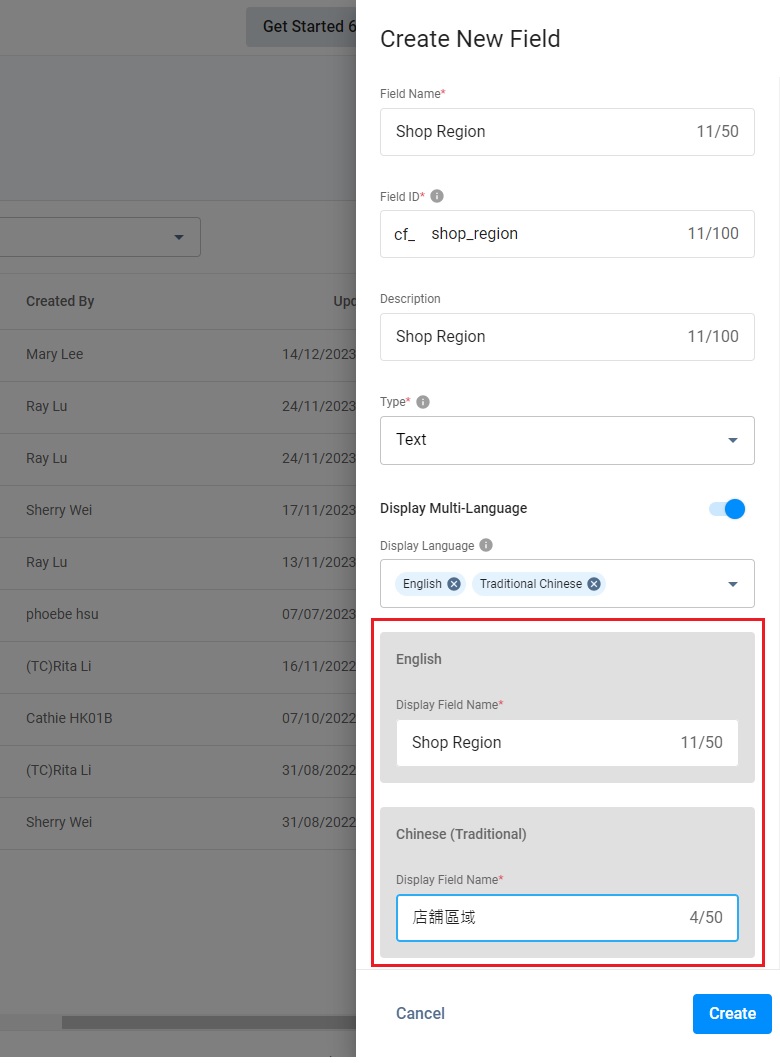
- You can select multiple languages, such as Chinese (Simplified), Chinese (Traditional), Japanese, Thai and Italian.
- Enter the Field Name in the selected multiple languages.
- Click Create.
Reminder
- Values of the dropdown list do not support the Display Multi-Language function.
- The table below shows displayed languages after you toggle on the Display Multi-Language and select languages for fields in different views:
| View | Browser language | CINNOX display language |
|---|---|---|
| Custom fields viewed by visitors | * Display the custom field in the browser languages when the selected languages for custom fields match the browser languages * Directly display the entered field names when the browser languages are undetected. | N/A |
| Custom fields viewed by agents | N/A | * Display the custom field in CINNOX display languages when the selected languages for custom fields match with CINNOX display languages * Directly display the entered field names when the CINNOX display languages are undetected. |
📘
Notices
- For Dropdown List (Single Selection) and Dropdown List (Multiple Selection):
- The limit of values to be entered is 50.
- The limit of characters of each value is 25.
- Visitors can select only one value from the Dropdown List (Single Selection) while selecting multiple values from the list from the Dropdown List (Multiple Selection).
- The limit of custom fields to be created is 20.
- The limit of the text type of custom fields is 500 characters.
- Custom field name supports all languages with a limit of 50 characters.
- Custom field description supports all languages with a limit of 100 characters.
- Custom field ID starting with "cf_"supports small case a-z and underscore"_".
- Each Custom field ID, with a limit of 100 characters, is not editable and is used for ONE FIELD ONLY.
Edit Custom Fields
- Select the Custom tab.
- Click on More (...) of the custom field you will edit at the right on the Contact Field Management page.
- Click on Edit.

Click on Edit
- If required, edit the Field Name, Description and List Value. If needed, edit the Display Multi-Language and the corresponding Display Field Name.
- Click on Save.
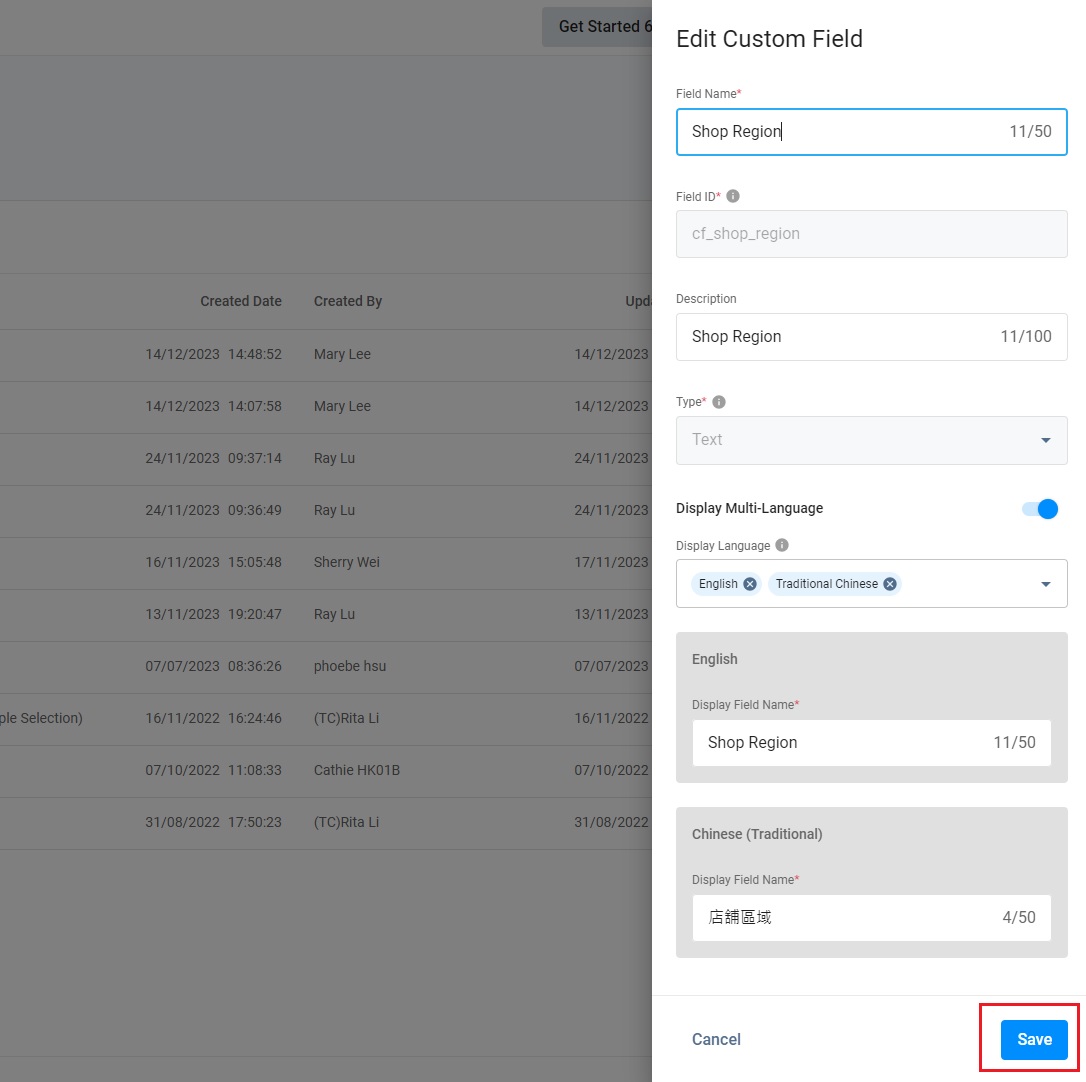
Click on Save
📘
Reminder
- The Field Type and Field ID are not editable.
Delete Custom Fields
- Select the Custom tab.
- Click on More (...) of the custom field you will delete at the right on the Contact Field Management page.
- Click on Delete.
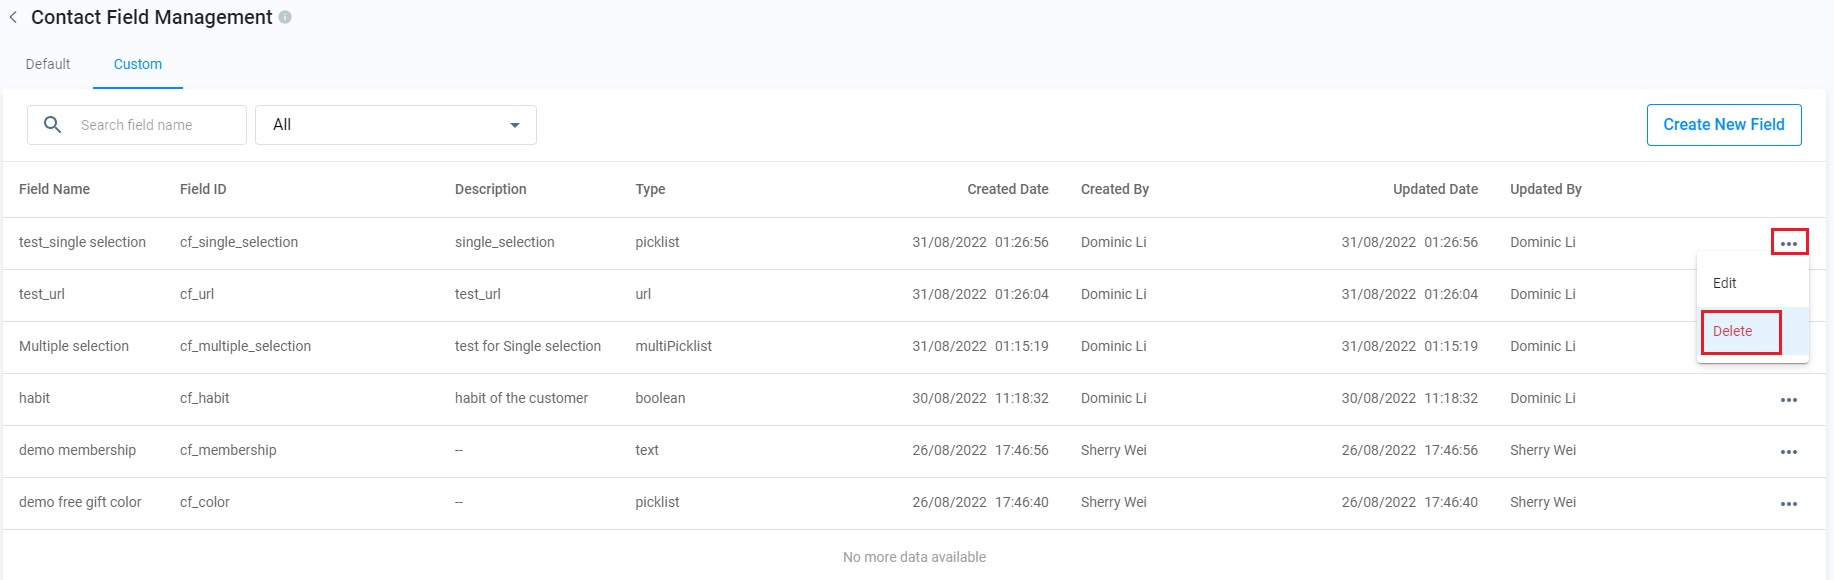
Click on delete
- You cannot delete the custom field in the Visitor Forms. When you delete this custom field, the message indicates you must click on Go to Visitor Forms to cancel using this field.
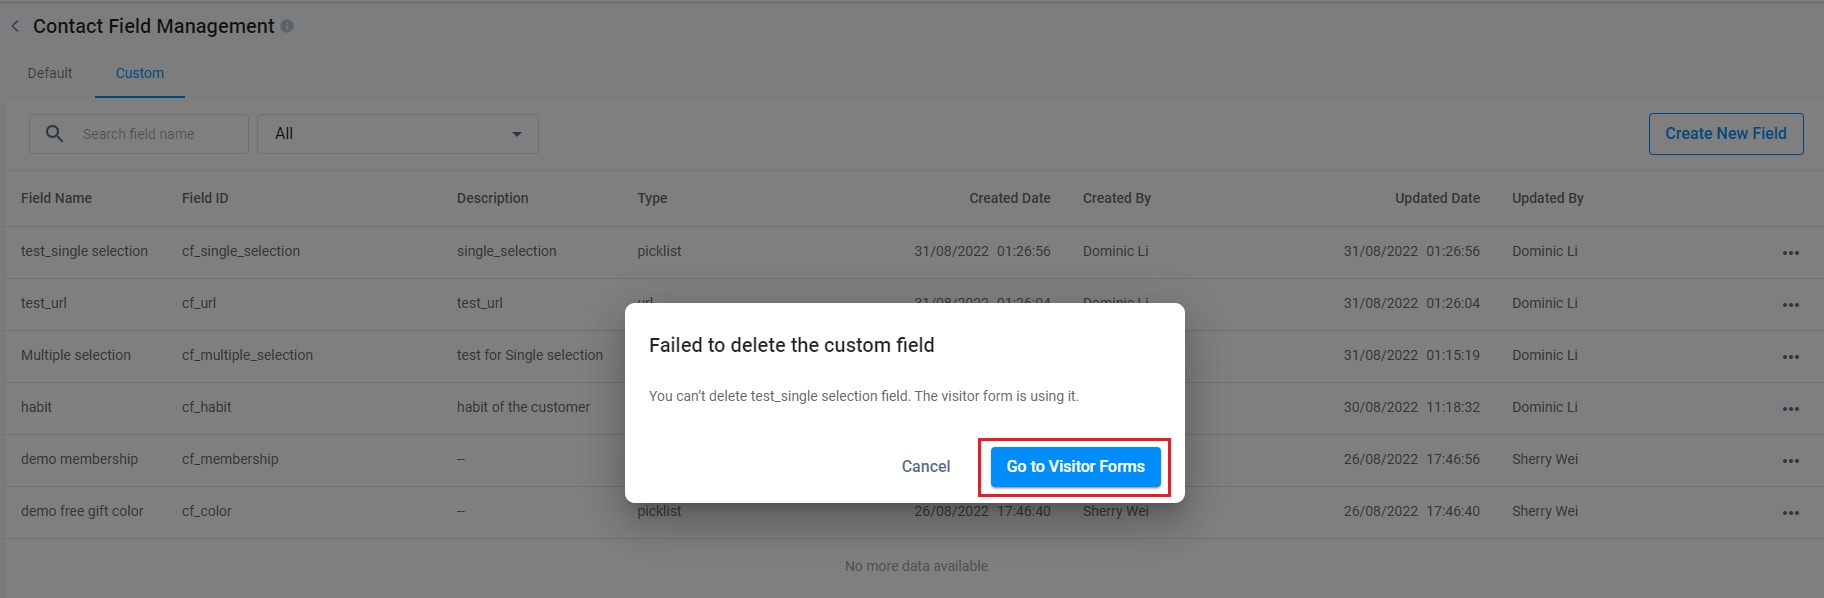
Click on Go to Visitor Forms
- If a created custom field is not being used, you can delete it.
- Click on Delete.

- When the custom field is successfully deleted, the system will display a toast message to indicate the custom field is deleted.
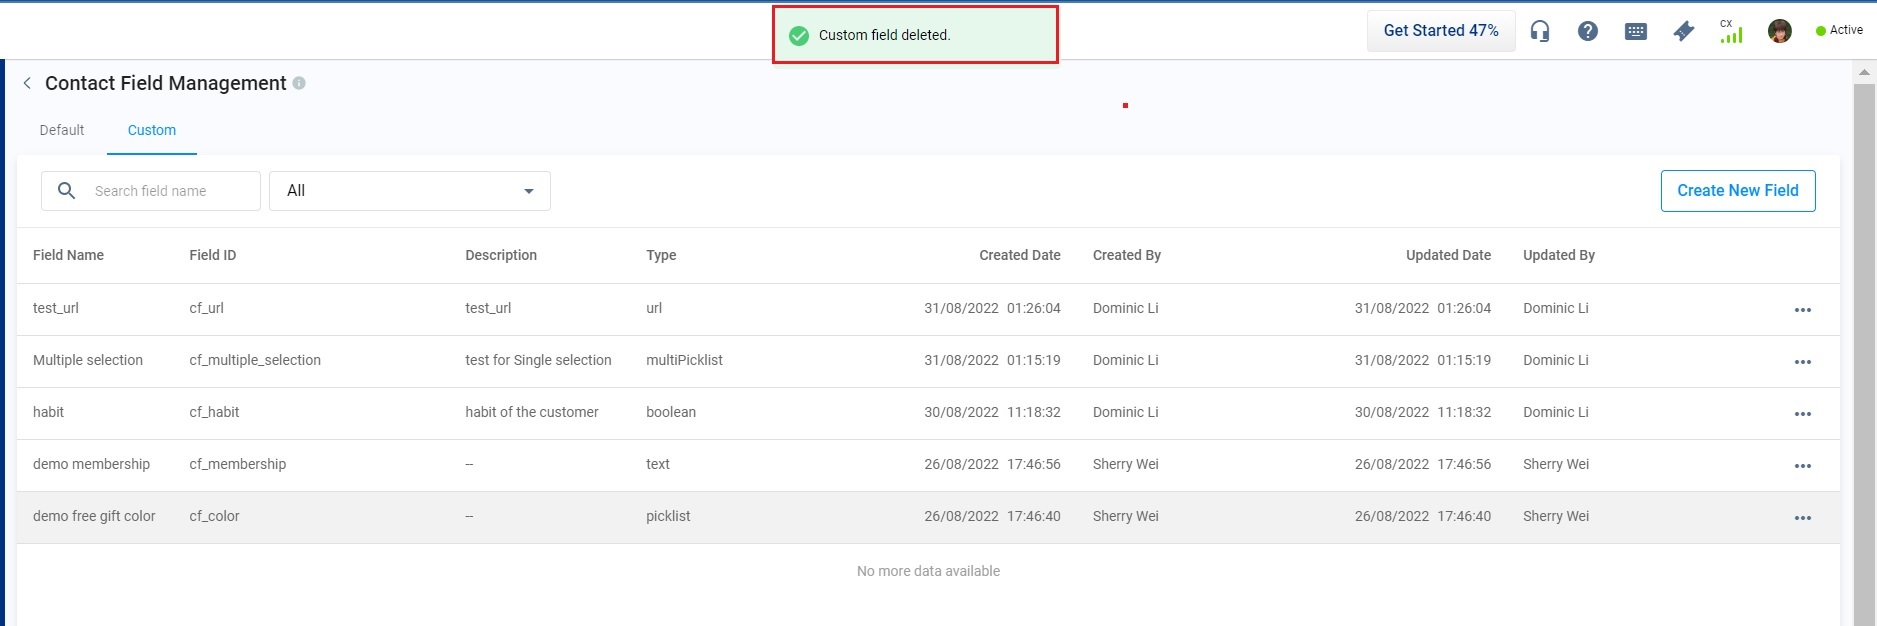
The custom field is deleted
Managing Custom Fields in different functionalities
You are enabled to manage the custom fields, which can be added, edited and deleted to boost the effectiveness of collecting information in the Visitor Forms.
Custom Fields in Visitor Forms
Add the created custom fields
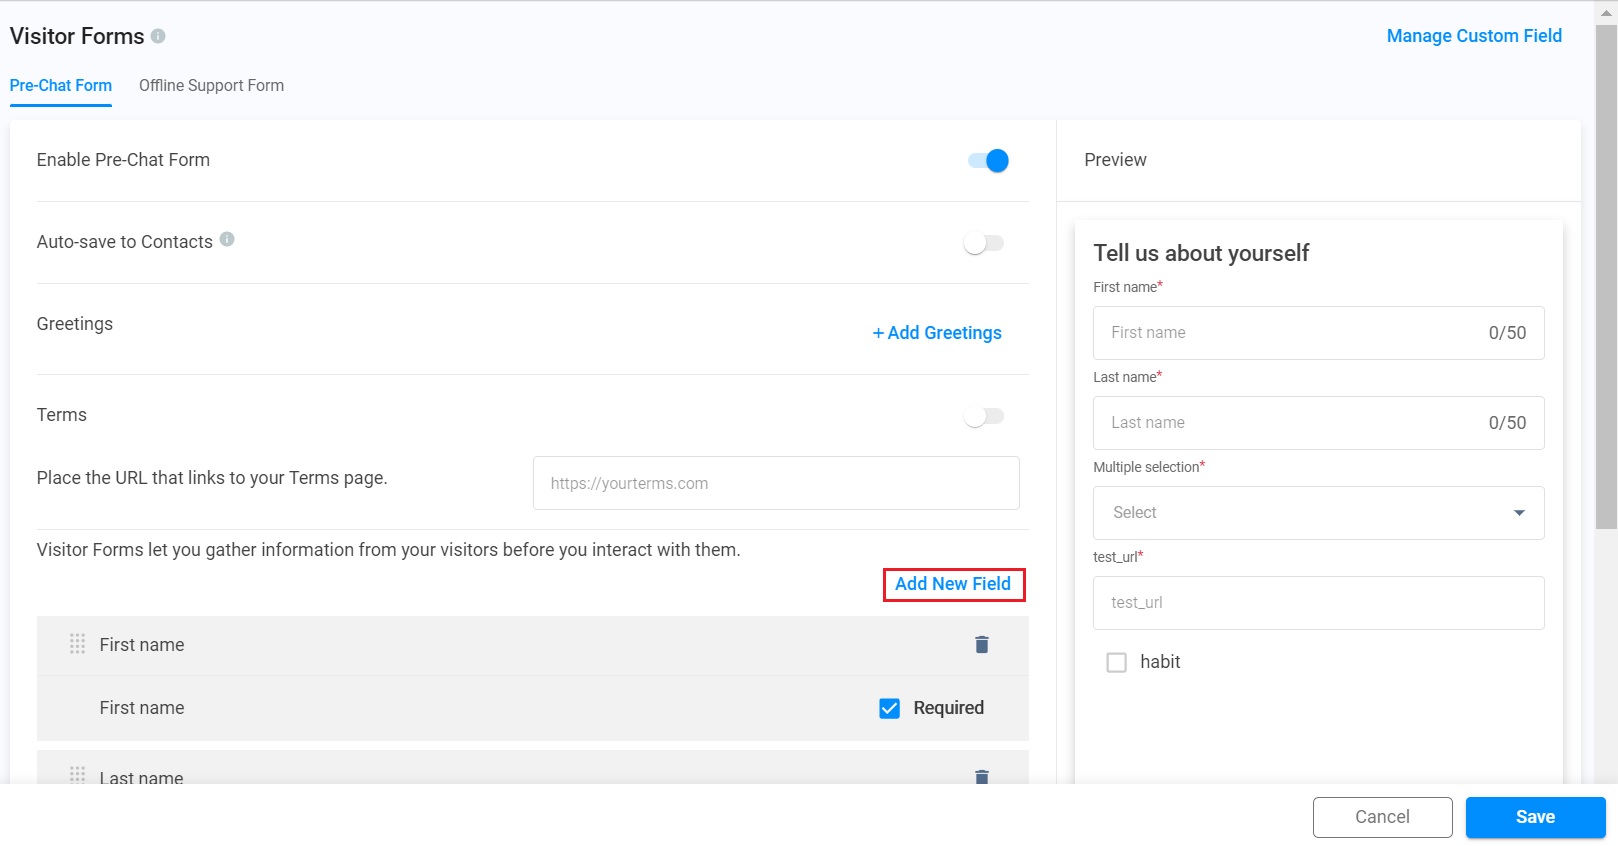
- Navigate to Administration>Visitor Forms.
- Select the Pre-Chat Form tab or Offline Support Form tab to add custom fields.
- Click on Add New Field.
Click on Add New Field
- Enter the keyword of the custom field you are required to add to the Form.
- Click on Add.
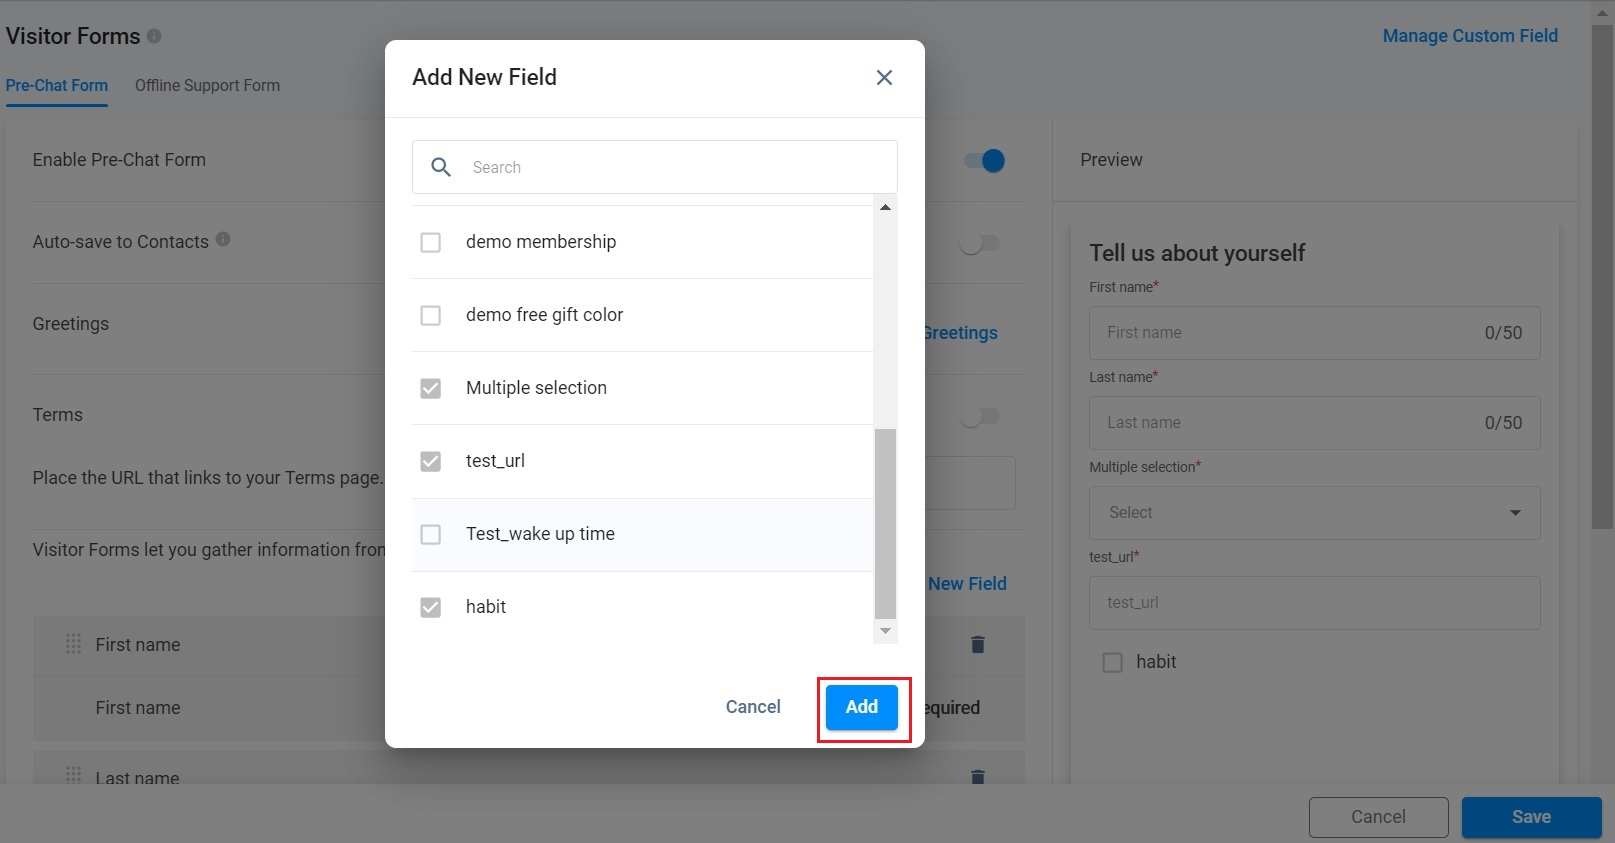
Enter the keyword into the search box
- After adding the required custom field to the Form, you can tick the checkbox Required on the right of each field if visitors must provide the information for the custom fields.
- Click on Save.
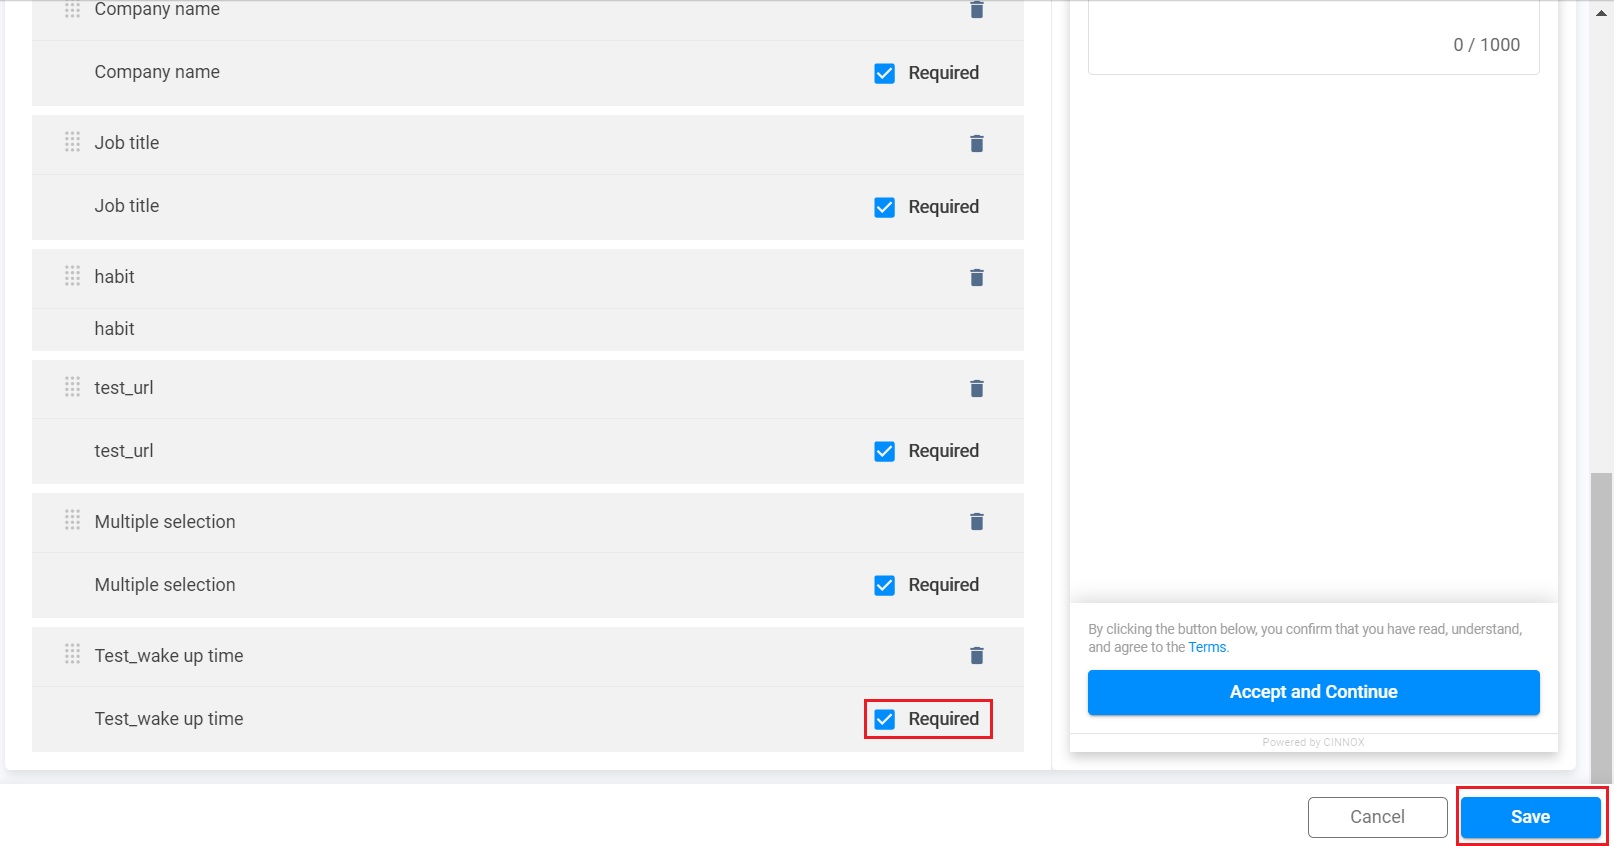
Click on Save
Edit the created custom fields
- You can tick or untick the checkbox Required.
- If you must change the sequence of the fields, hold and drag the field to do it.
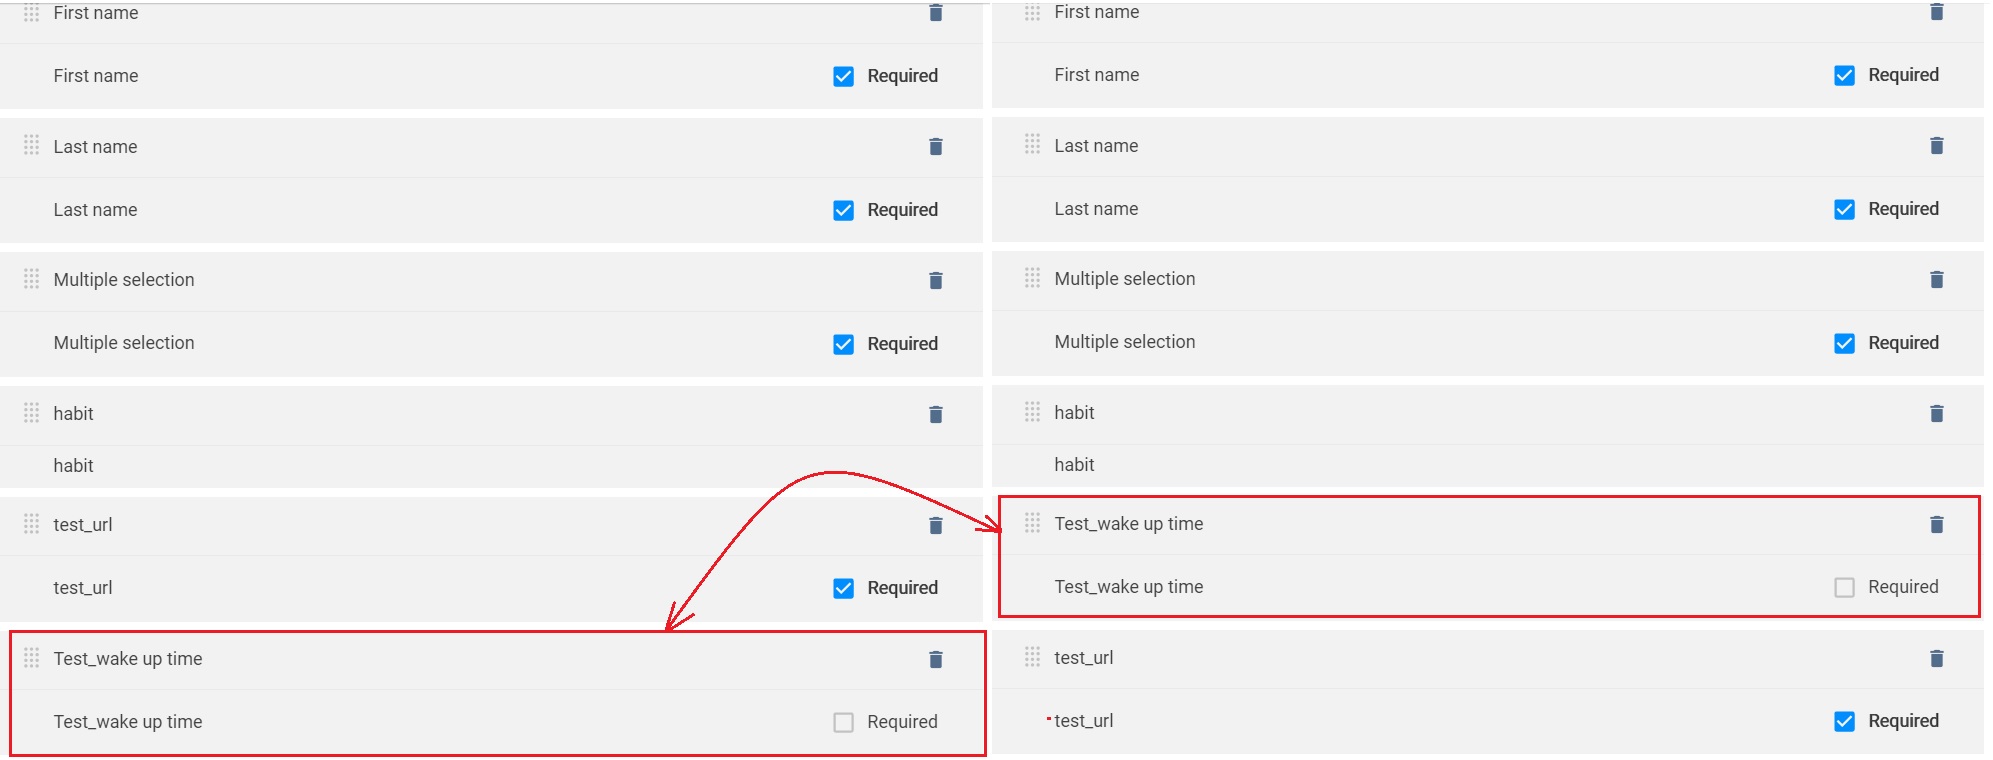
Resequence the custom field
Delete the created custom fields
- Click on the trash bin icon on the right of the field. The field is removed immediately from the visitor form.
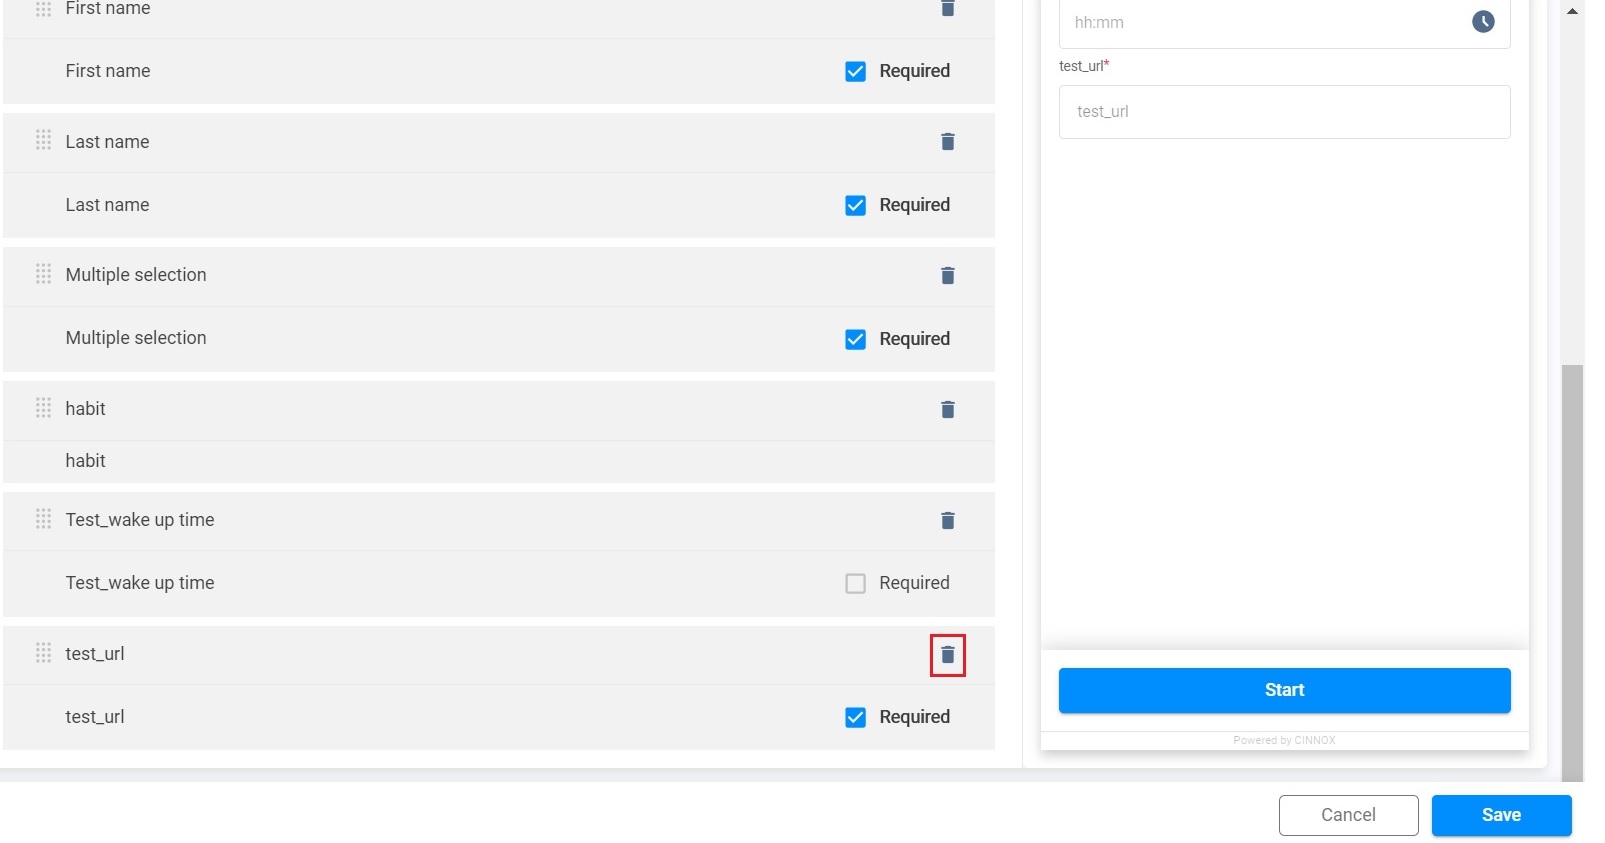
Click on the trash bin icon
Custom Fields in External Contact
Add the created custom fields
The custom fields in the external contact come from the added custom fields on the Contact Field Management page. You must create the custom field on the Contact Field Management page if adding the custom fields to the external contact.
Refer to Create Custom Fields for more details on creating the custom fields.
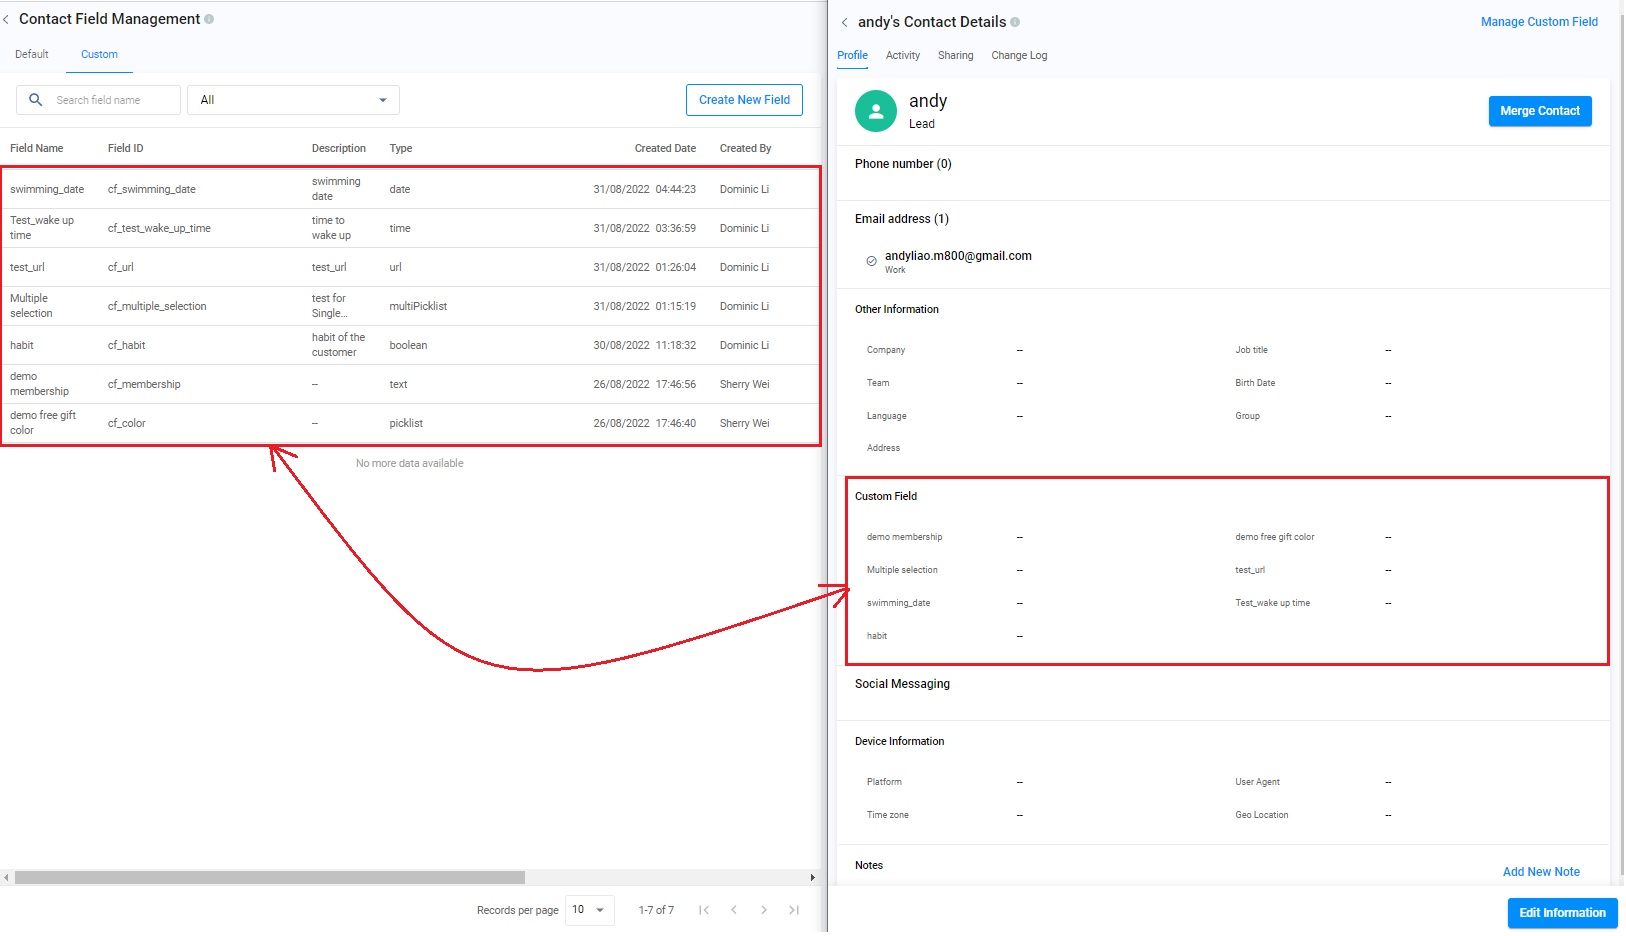
Custom fields in the External Contact
Edit the information in the created custom fields.
- Navigate to Contact Management>External Contacts.
- Click on Edit Information.
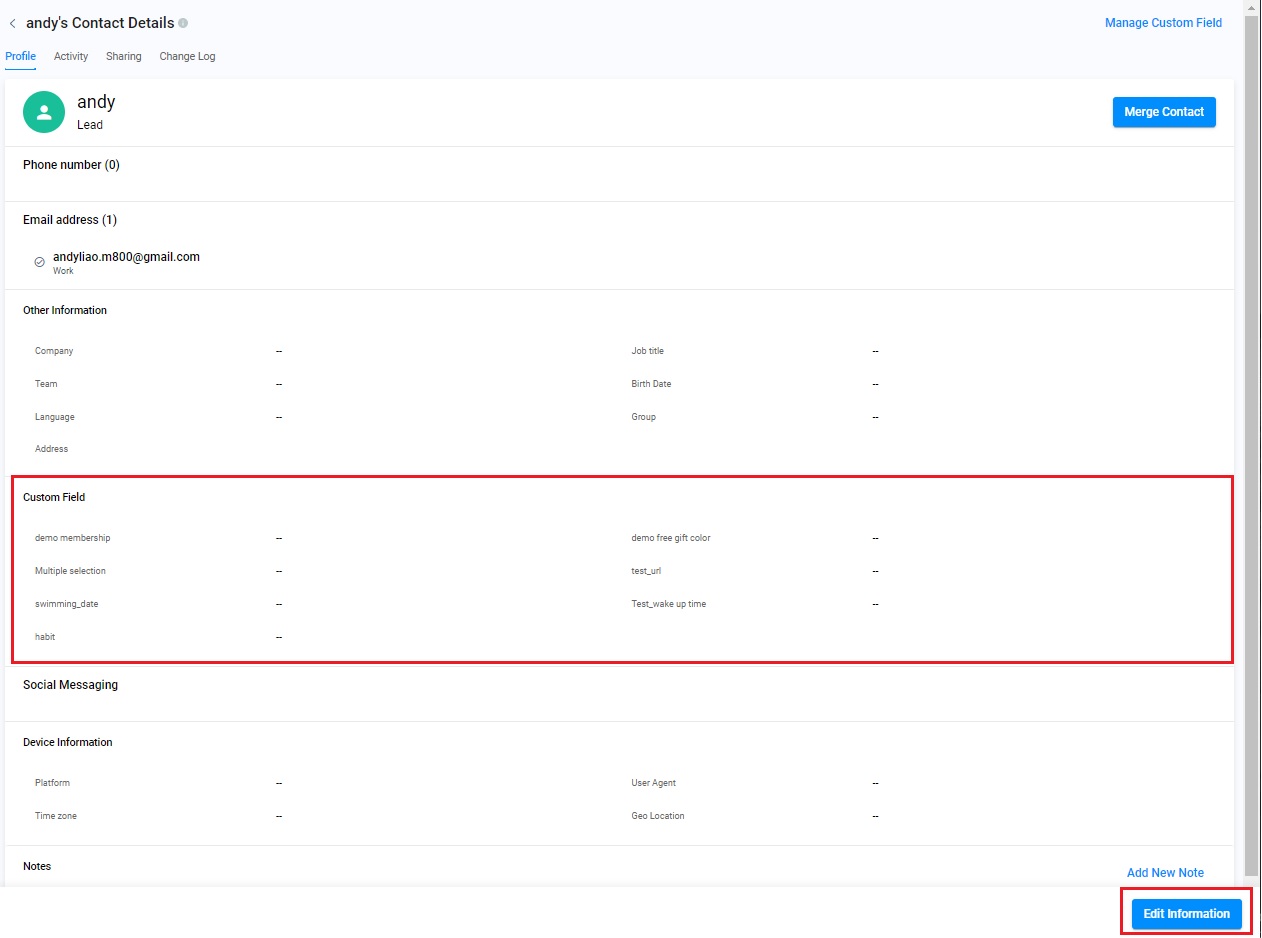
Click on Edit Information
- After editing the information in the custom fields, click on Save.
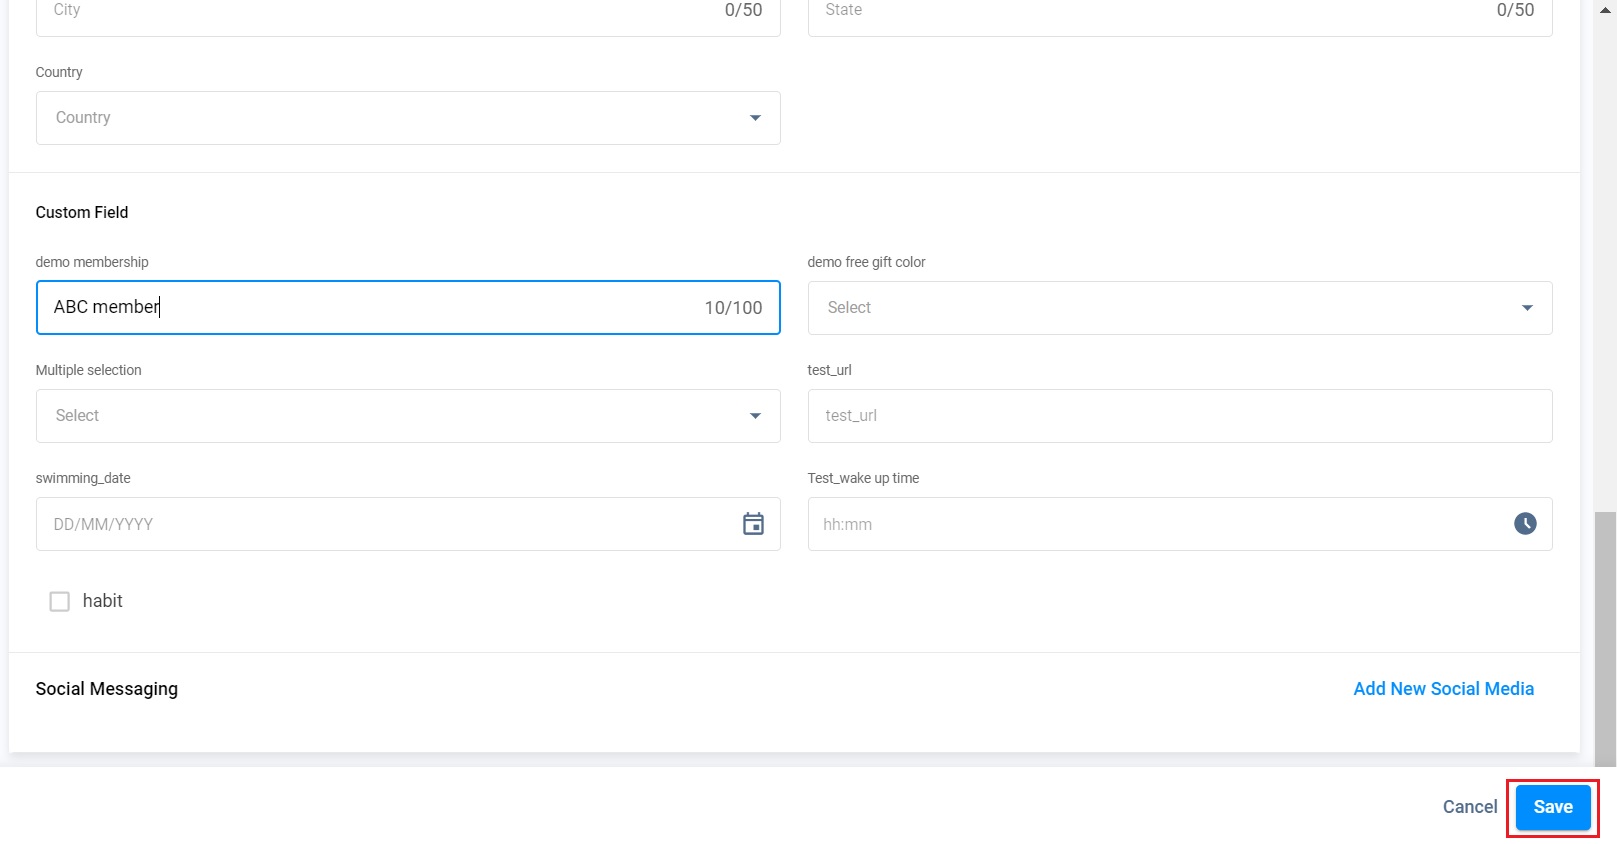
Click on Save
Custom Fields in the enquiry chatroom
Add the created custom fields
The custom fields in Chatroom come from the added custom fields on the Contact Field Management page. If adding the custom fields to the Chatroom, you must create the custom field on the Contact Field Management page.
Refer to Create Custom Fields for more details on creating the custom fields.
Edit the information in the created custom fields
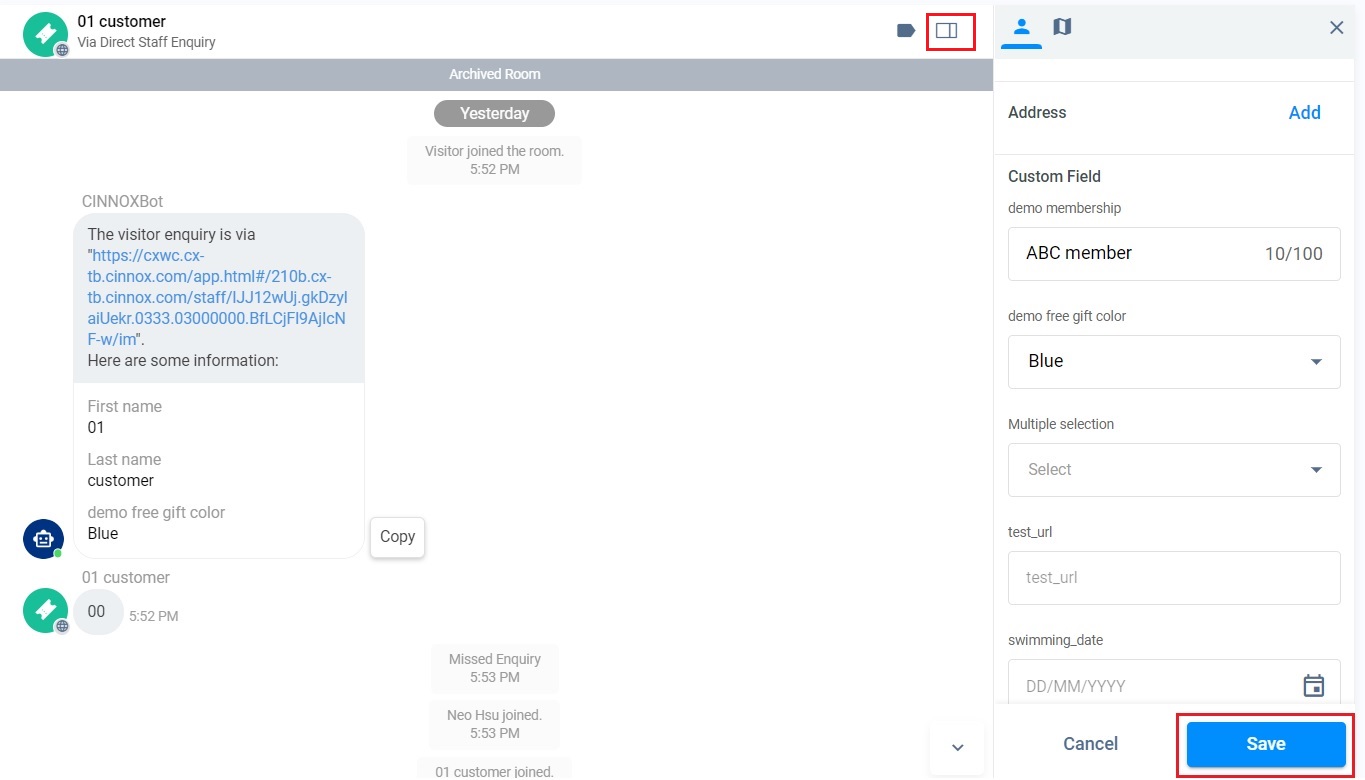
- Navigate to Overview or Workspace to select the enquiry where you are required to edit the information in the custom fields.
- Click on Detail Information at the top right corner of the Chatroom>Show more information.
- After editing the required information, click on Save.
Use of Contact Custom Fields API for Developers
This feature is used via the CINNOX Widget that sends visitor information from the website to CINNOX without asking for visitor information that has been provided.
Use API to pass the contact information to CINNOX using Javascript
After installing the Web Widget and completing the Widget initialisation, you can call window.onCinnoxReady function to pass the required contact information via the Widget.
JavaScript
//After the Widget installation code

window.onCinnoxReady = (cinnox) => {
    // Add the CINNOX Javascript Function here
}
CINNOX Javascript Function for passing the contact information to CINNOX
| Function | Type | Description |
|---|---|---|
| cinnox.contact.setCollectedForm(formData) | Array | * Format of formData: Field ID:Value\ * Example: cf_colur:'Black'\ * Field ID: cf_color Value: Black |
- The example below shows how to pass the contact information to CINNOX via the Widget.
JavaScript
<script type="text/javascript">
window.wcSettings = {
  serviceName: 'hk01b.cx-tb1.cinnox.com',
  ctaTags:{    // Editable
    'ritatest': { tagId: '*', contactMethod: 'CALL' }
  }
};
!function(e,t,c){var n,s=e.getElementsByTagName(t)[0];e.getElementById(c)||(n=e.createElement(t),n.id=c,n.defer=!0,n.src="https://cxwc.cx-tb1.cinnox.com/cxwc/cxwc.js",n.charset="UTF-8",s.parentNode.insertBefore(n,s))}(document,"script", "wc-dom-id");

//
 window.onCinnoxReady = (cinnox) => {

    //
    cinnox.contact.setCollectedForm({cf_color:'Black'})};


</script>- For example, after entering the code of the function cinnox.contact.setCollectedForm(cf_color:'Black'), when a visitor initiates an enquiry, this function is called, and the contact information is automatically passed to CINNOX.
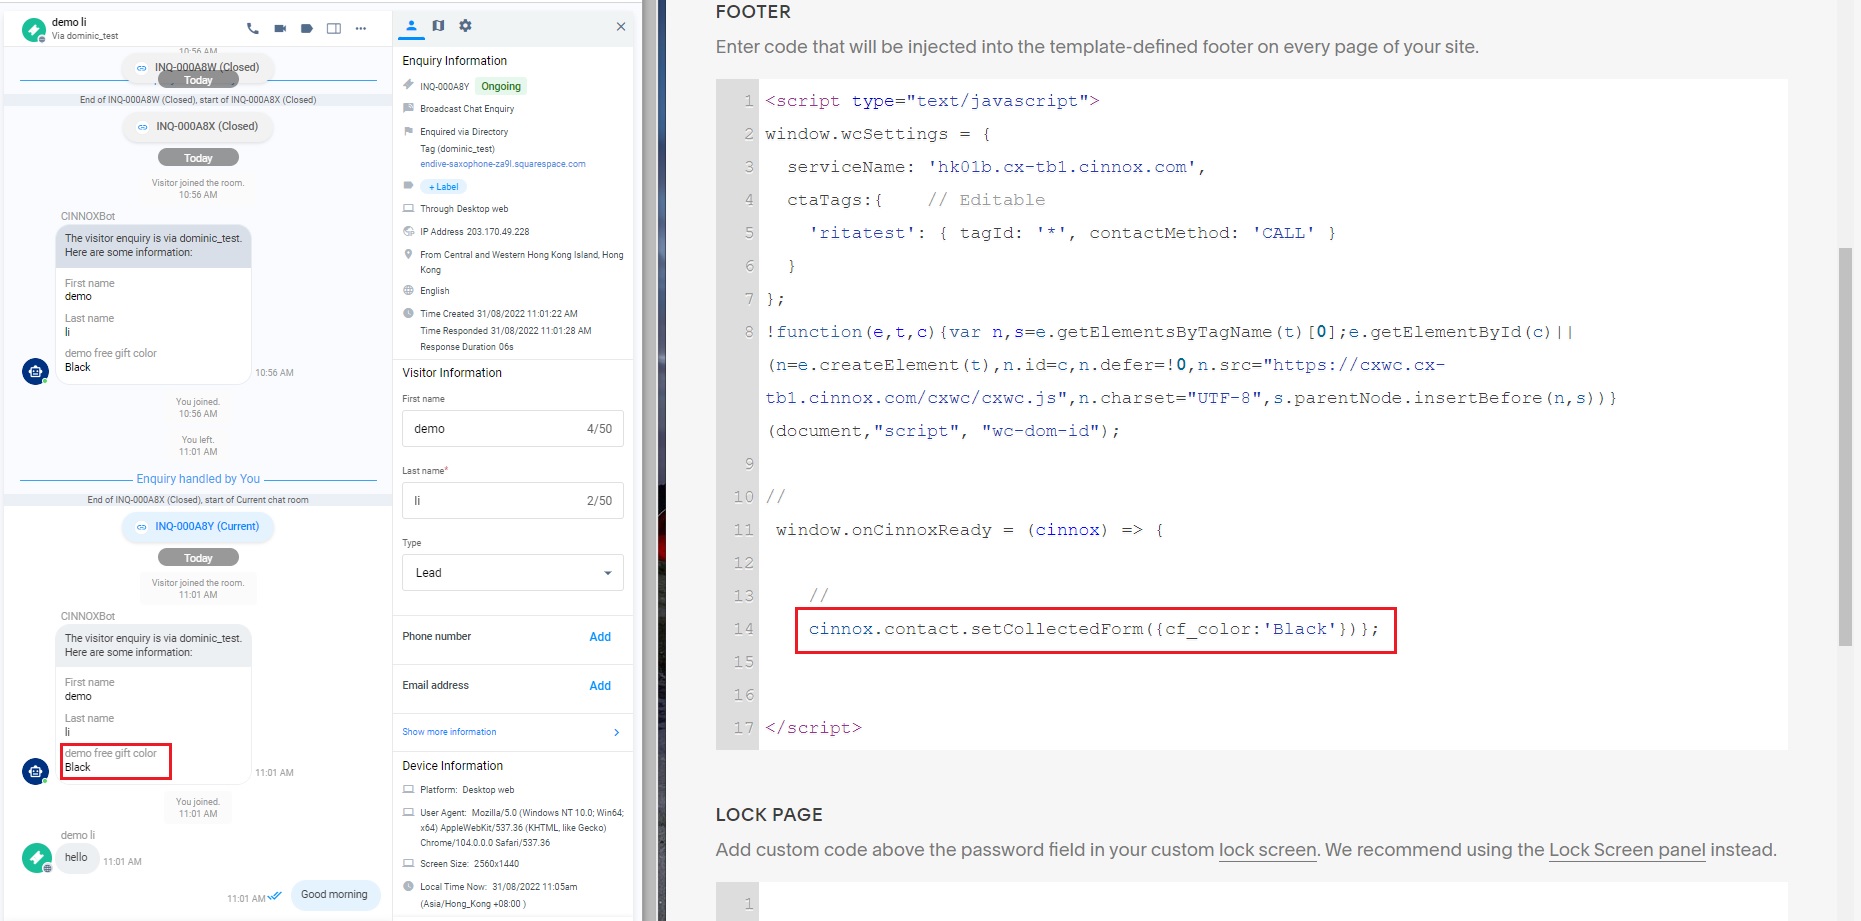
Call the function
📘
Notices
- You should have permission to access the contact custom field to get and send data by installing the widget.
- The data overlap should be avoided since the javascript form data will override the visitor form data if the two data sets overlap.
- In case of any data/information leakage, we suggest the general data be passed via Javascript.