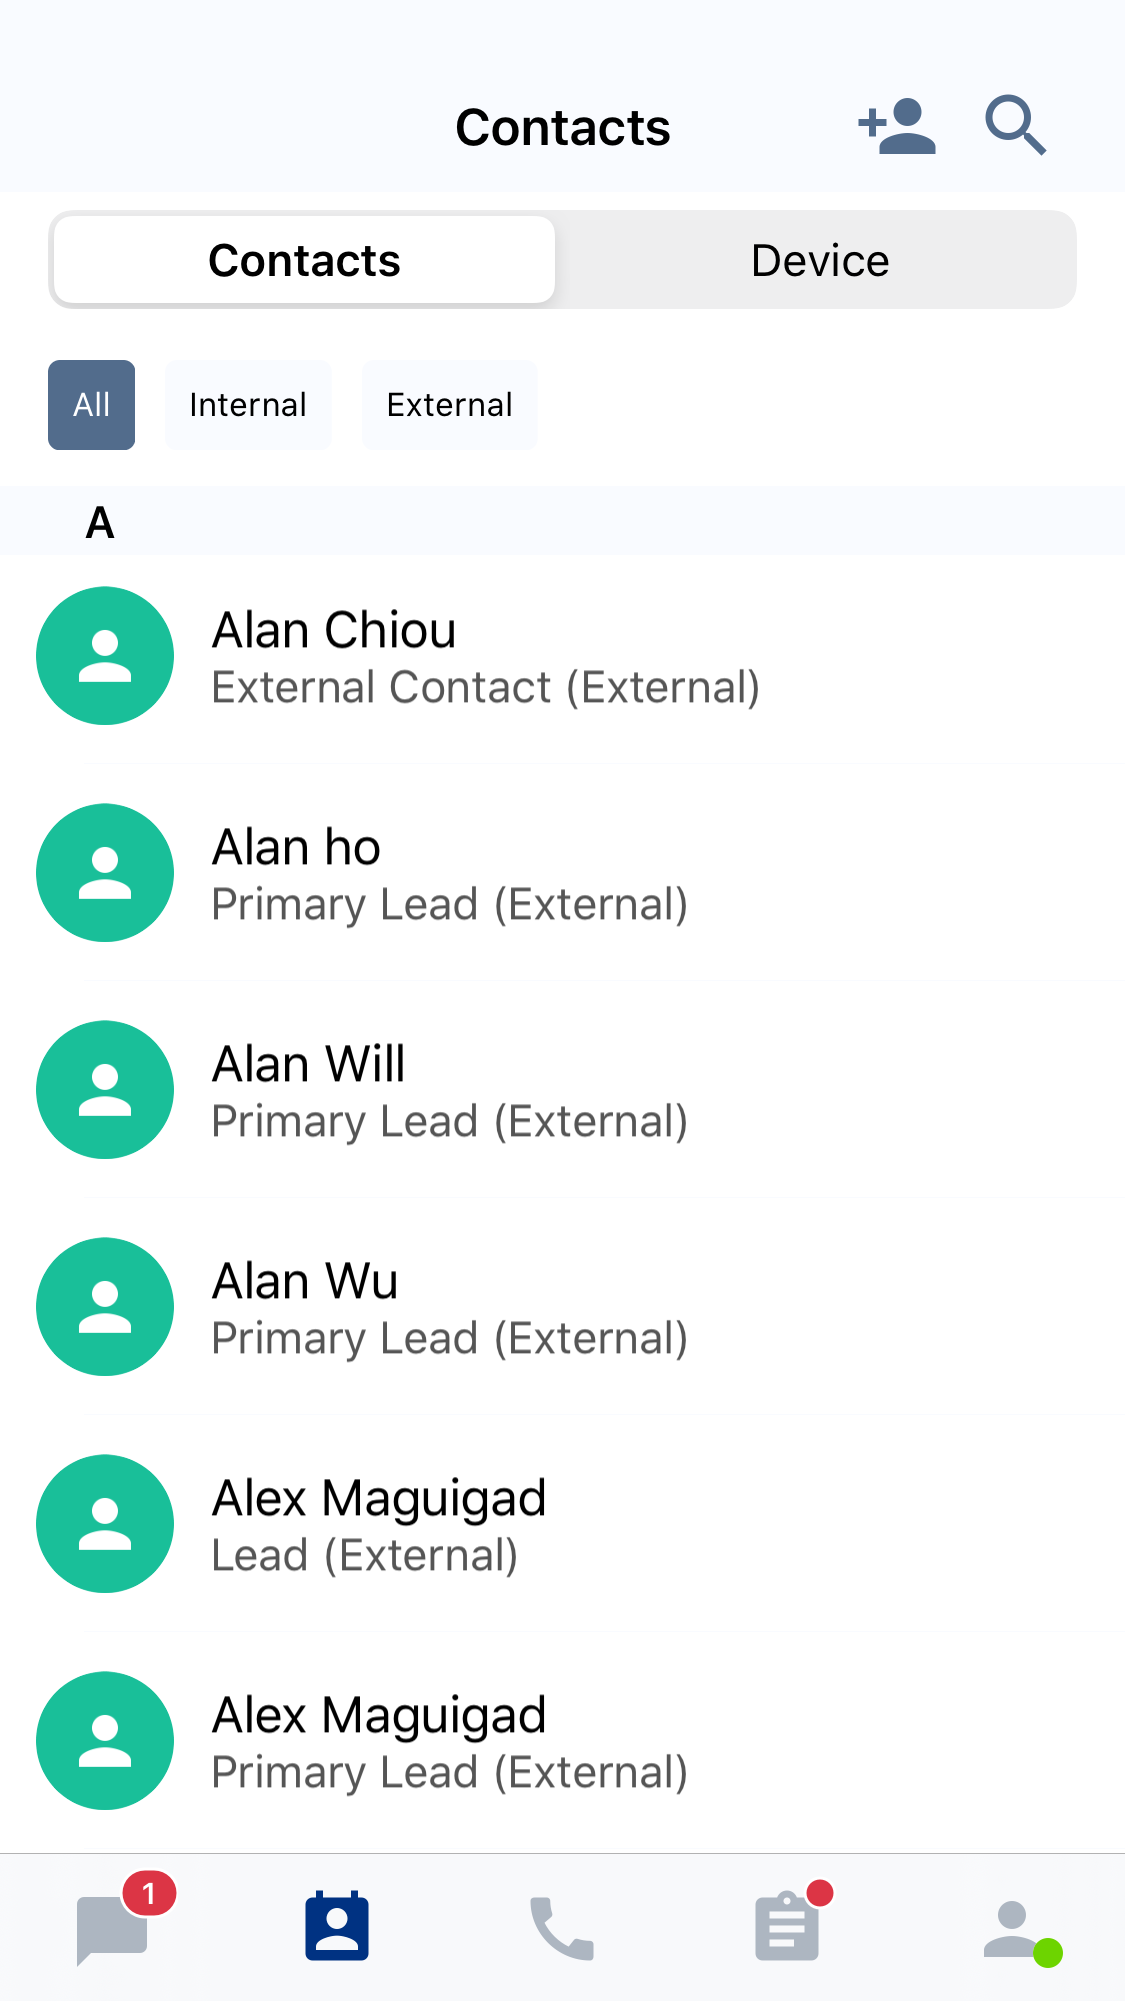
Contacts
CINNOX lets you store and find information about people inside and outside your organisation, including names, email addresses, and phone numbers.
You can view your contacts by category (e.g., External Contacts, Staff Contacts, and Salesforce Contacts) and keep their information up-to-date.
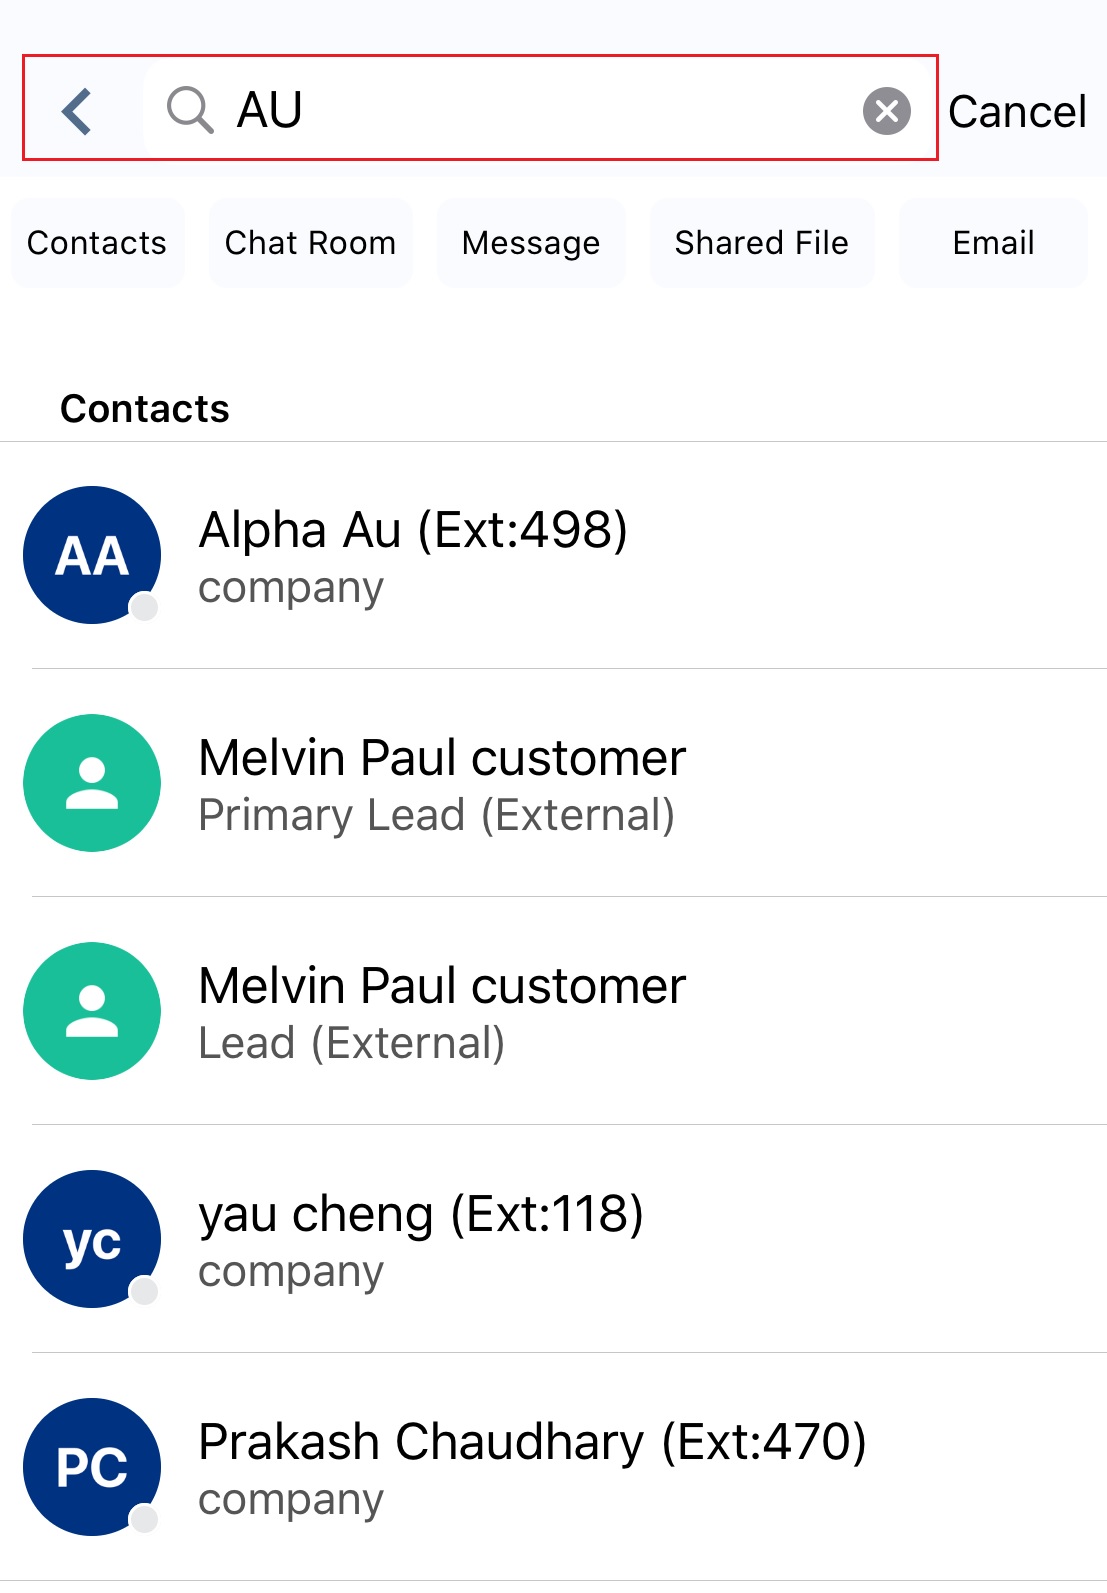
Searching for Contacts
- You can search for individual contacts by typing their name in the search bar on your Contacts screen.
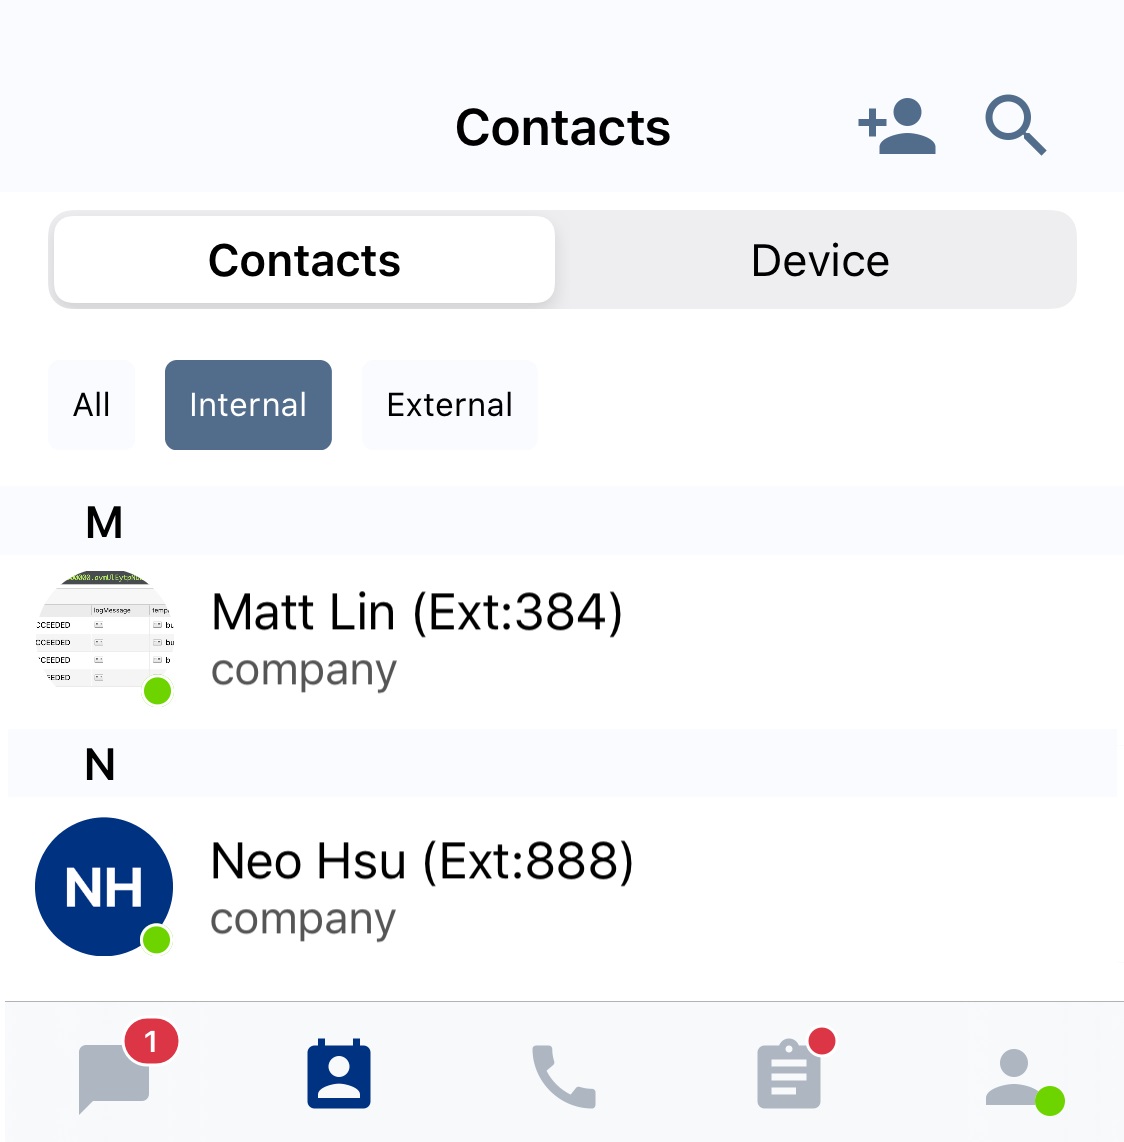
Staff Contacts List
The Staff Contacts List (internal) displays the following details of your fellow Staff members or colleagues:
- Profile image/avatar
- Staff name
- Extension number
- Availability Status
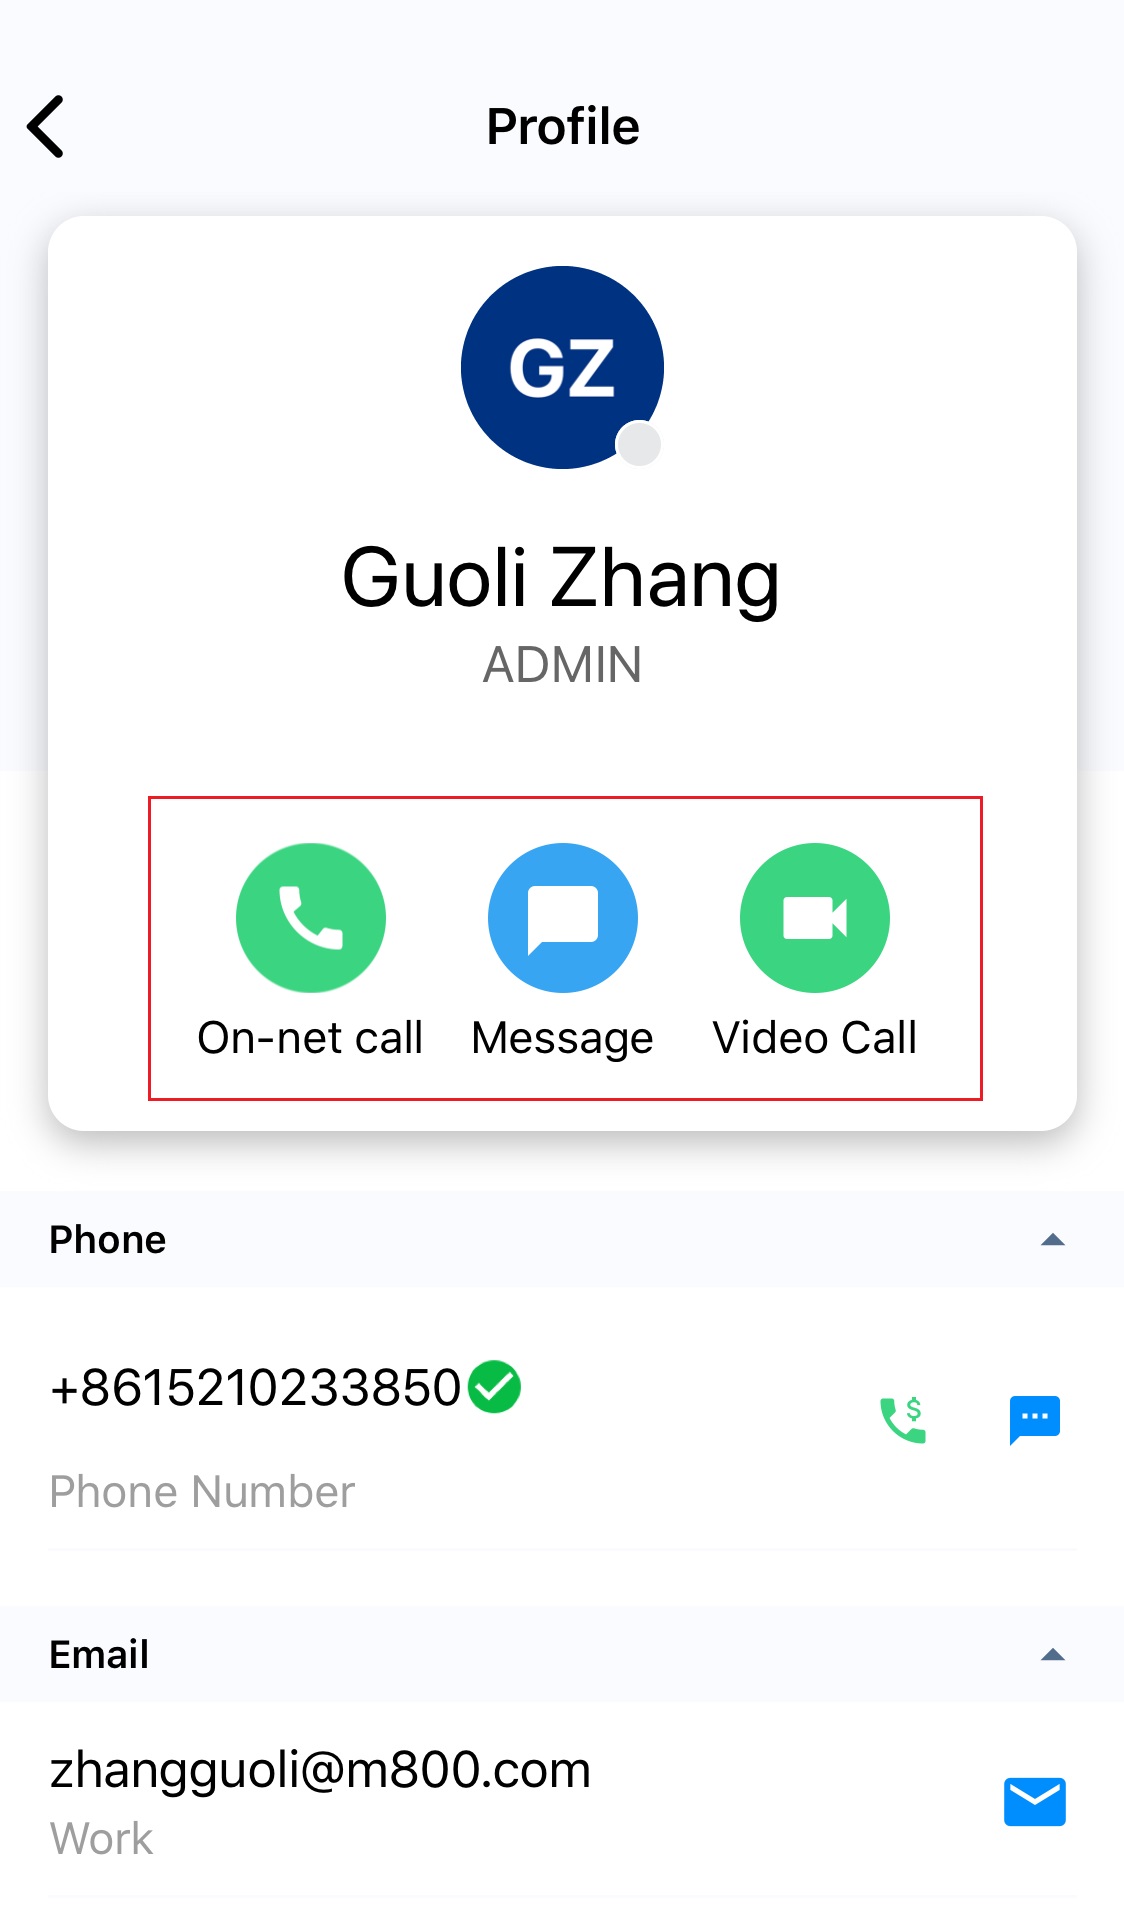
Tapping on a Staff member's name or avatar will display the following detailed information:
- Profile image/avatar
- Availability Status
- Staff name
- Role
- Phone number
- Email address
- Other Information
- Team
- Extension number
- Timezone

Tap the On-net Call, Message, or Video Call buttons to start a conversation with a staff member.
The internal Staff Contacts List also shows the CINNOX Q&A Bot when the corresponding Chatbot in Workspace toggle is turned on in the CINNOX Dashboard. Please refer to the CINNOX Q&A Bot Configuration page for details on configuring and enabling the CINNOX Q&A Bot.
- Tap the Message icon.

- You can send a message to the CINNOX Q&A Bot in the workspace contact list of the staff. The CINNOX Q&A Bot will reply to your messages based on the selected data source.
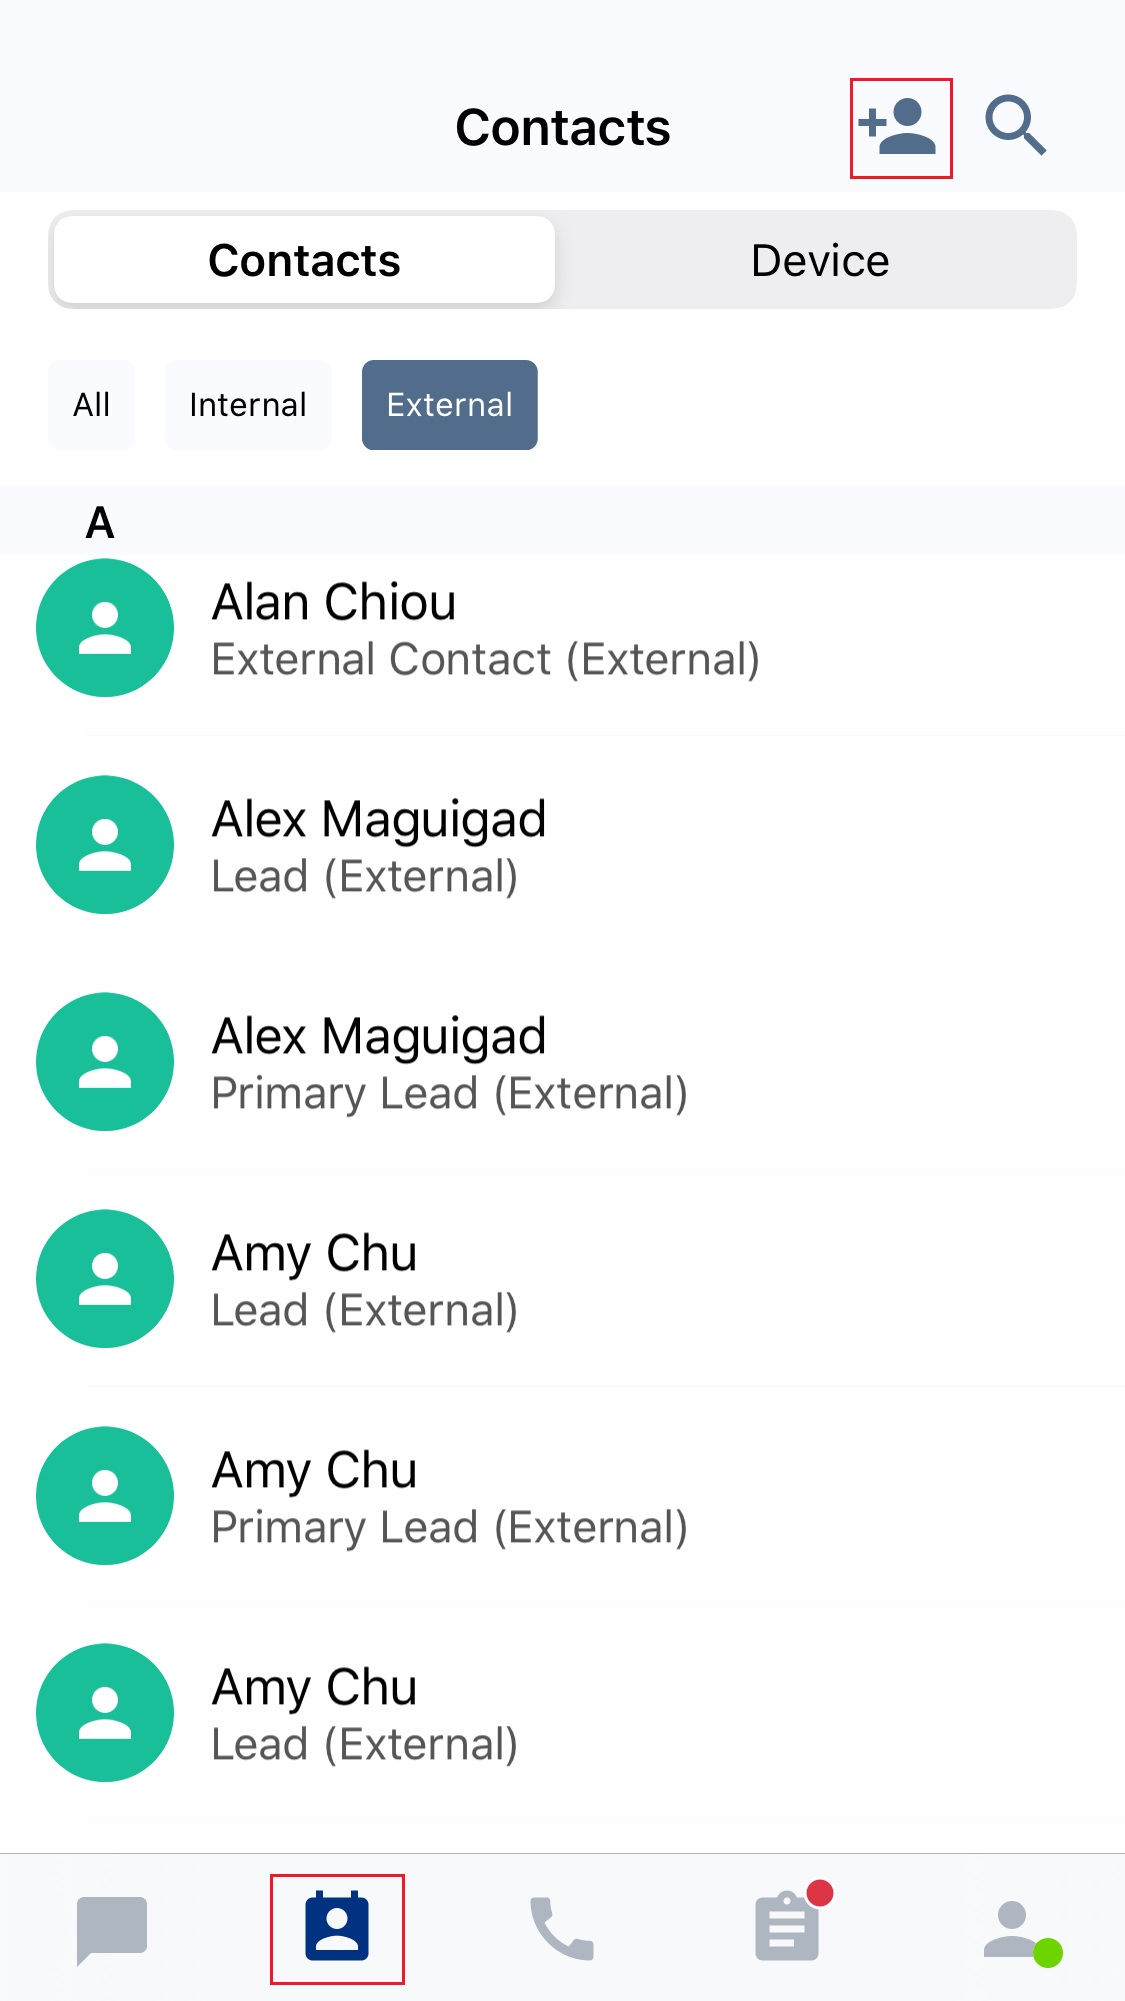
External Contacts List
The External Contact List lets you store, manage, and share information about people outside your organisation, such as leads, prospects, and customers.
You can add, search, edit, and remove details from your external contacts, such as first name, last name, phone number, and email address.

📘
CINNOX Contact Management does not automatically detect and alert your duplicate entries for your contacts. You can merge your contacts manually or based on the suggestions when handling an enquiry by their phone number or email address.
See more details in our Merging Contact section of this Guide.
Creating External Contacts
To create an external contact:
- Go to Contacts from the menu tab and tap the Create New Contact icon on the top-right corner of your screen.
- On the New Contact screen that will appear, fill out the following details:
- Personal Information
- First Name
- Last Name (Required)
- Tap > and select any of the next:
- Lead - default selection
- Prospect
- Customer
- Other
- Level - tap > and select any of the next:
- Primary
- Secondary
- Tertiary
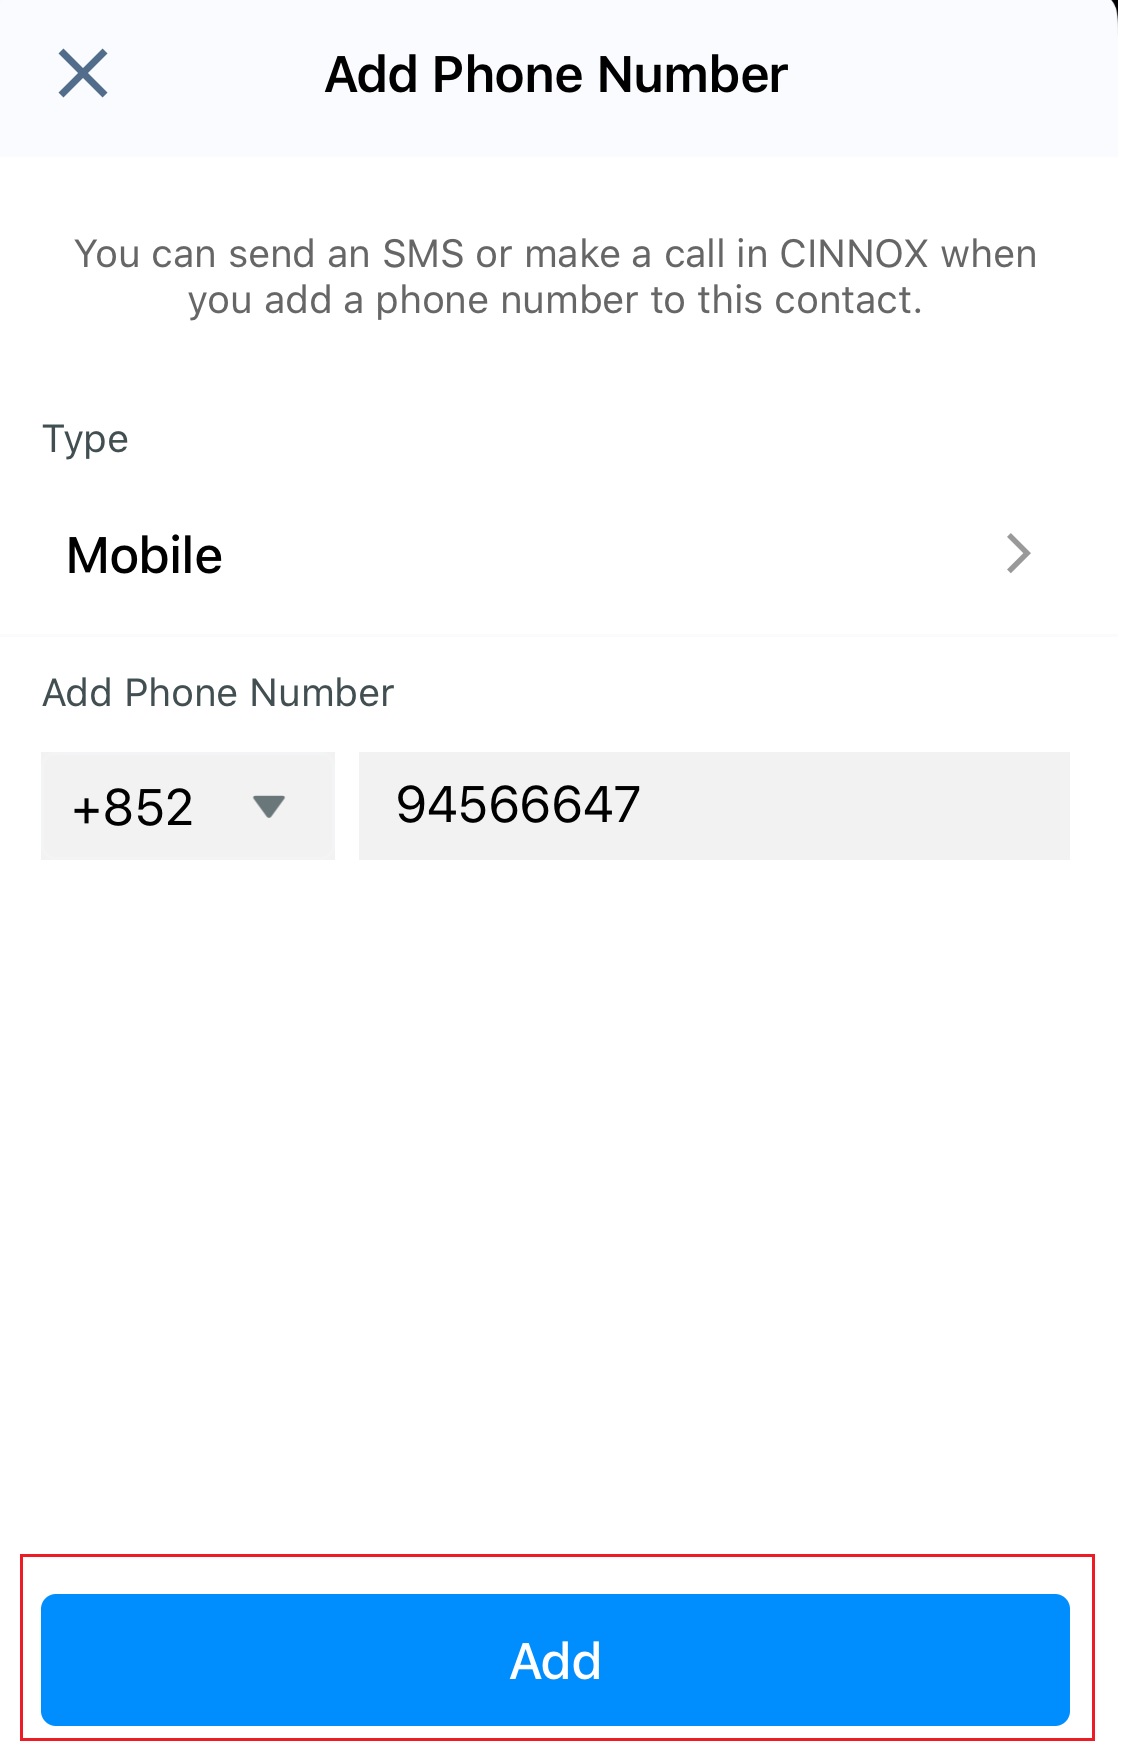
- Tap +Add Phone Number to add the Phone Number
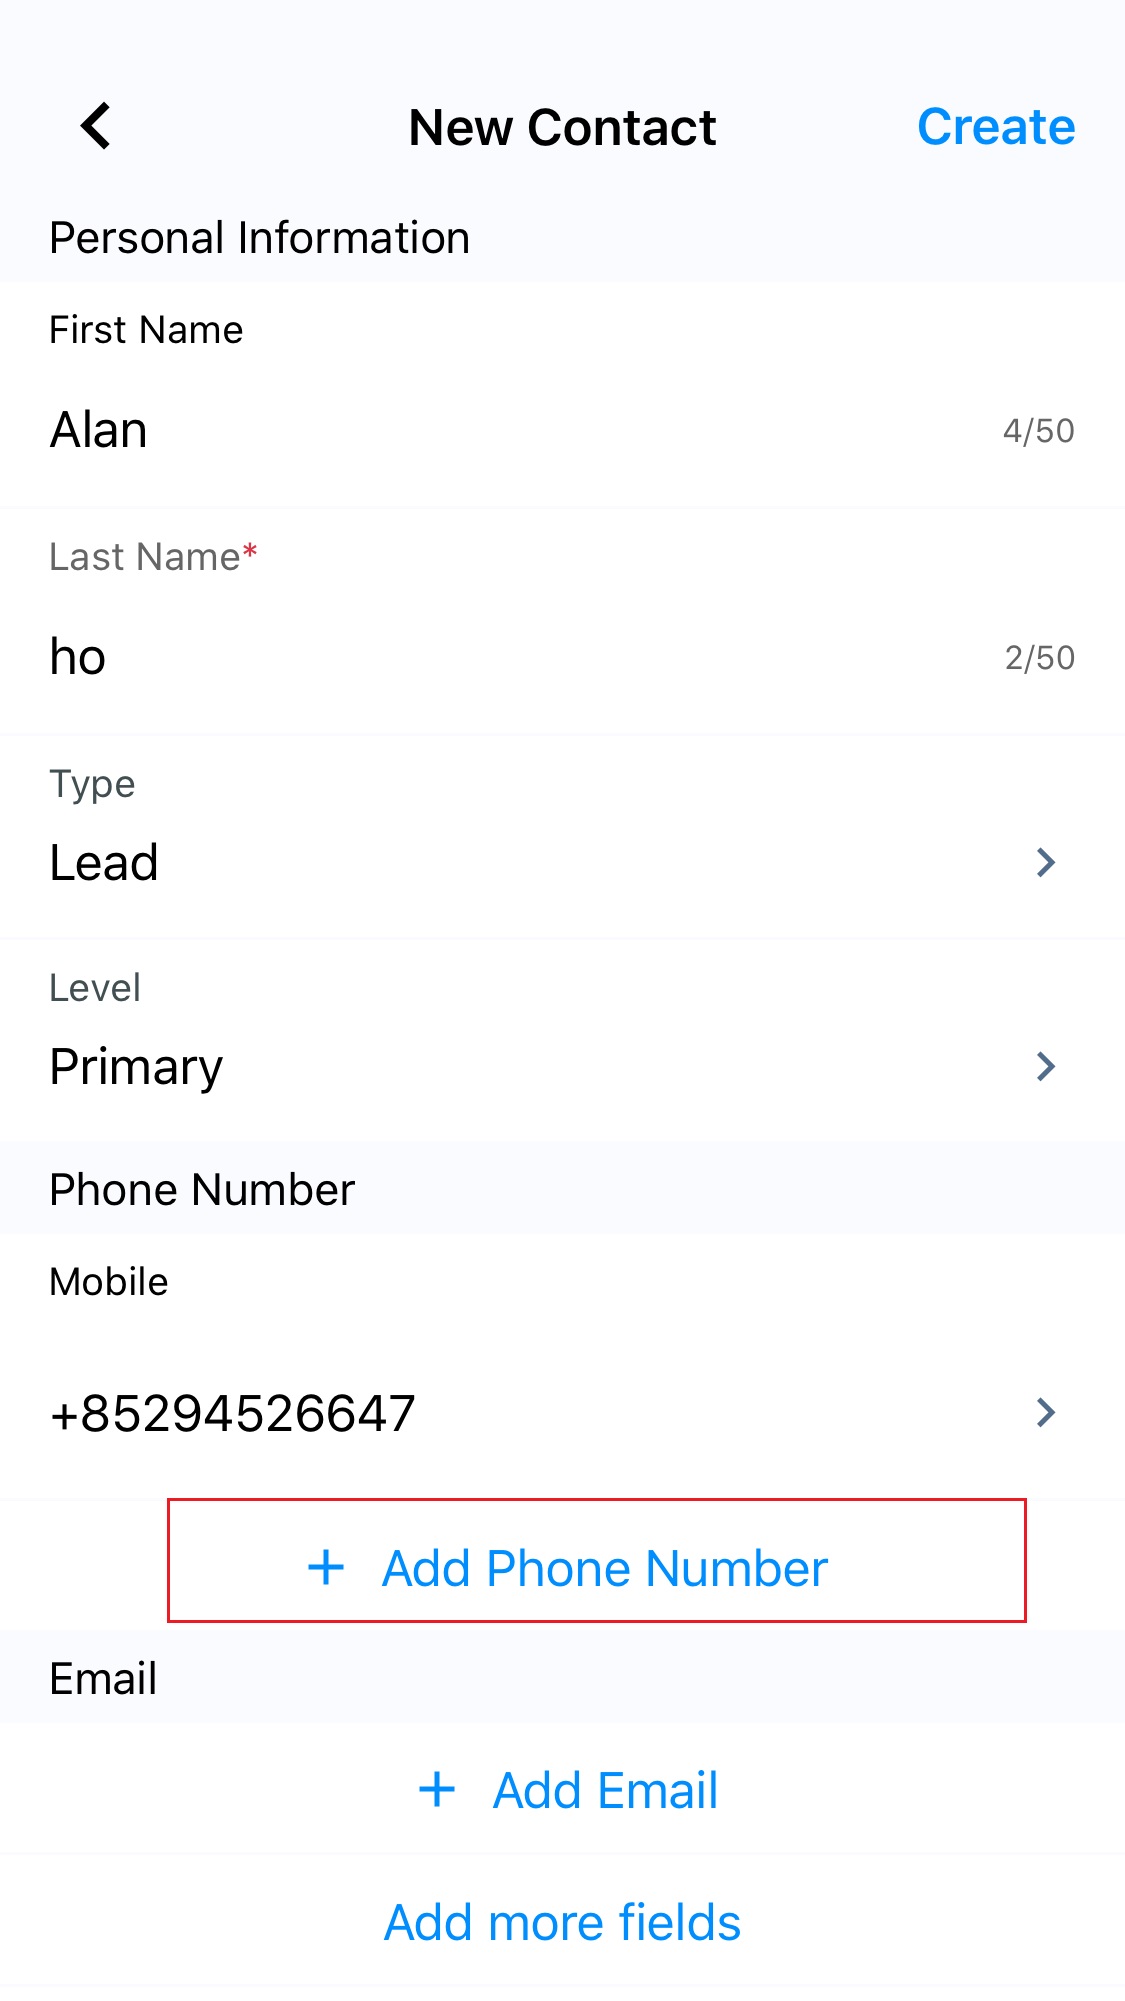
- After tapping +Add Phone Number, add the phone number and select one of the phone number types by tapping > including Mobile (Default Selection), Work, Home and Other.
- Tap Add.
-
Tap +Add Email and tap > to select one of the following email types: Work, Personal or Other. Tap Add.
-
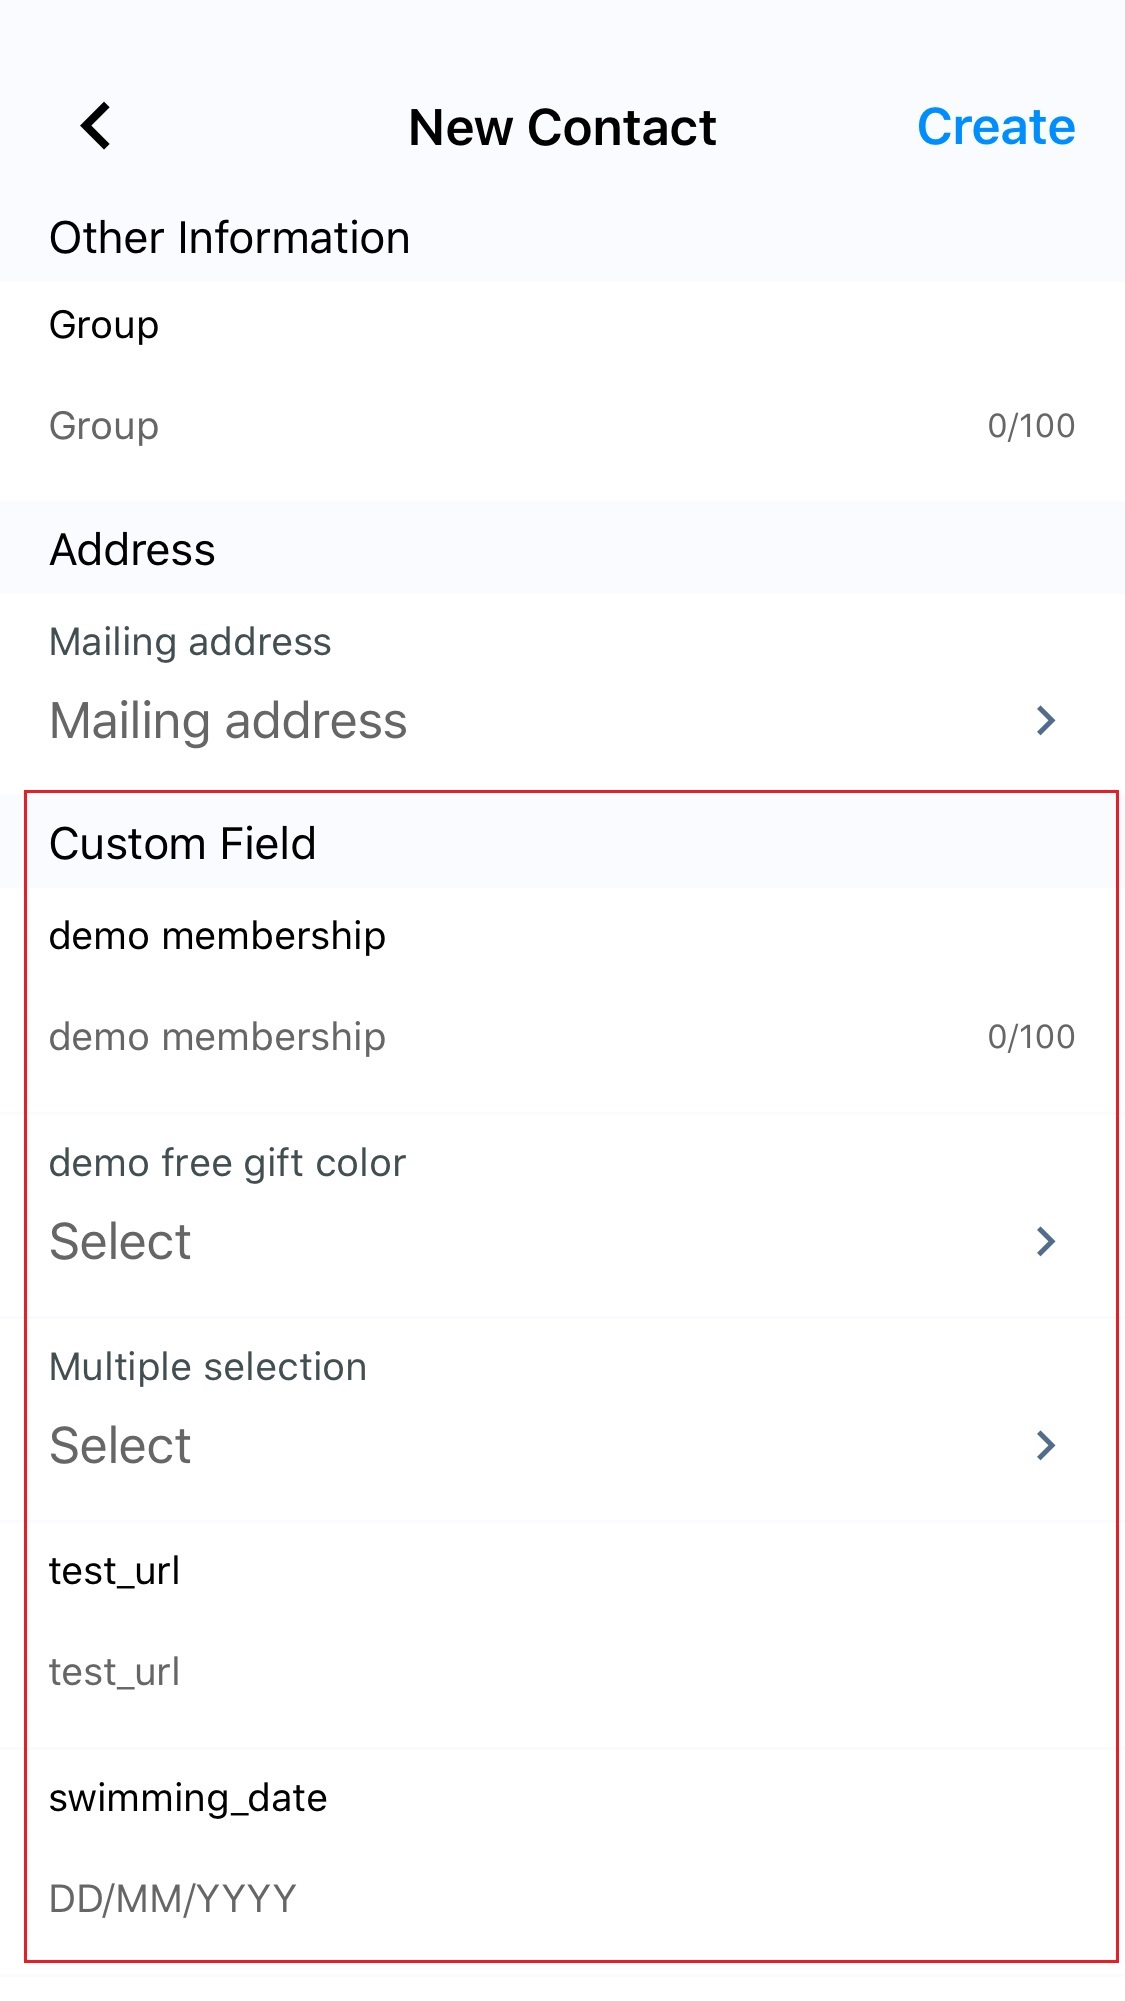
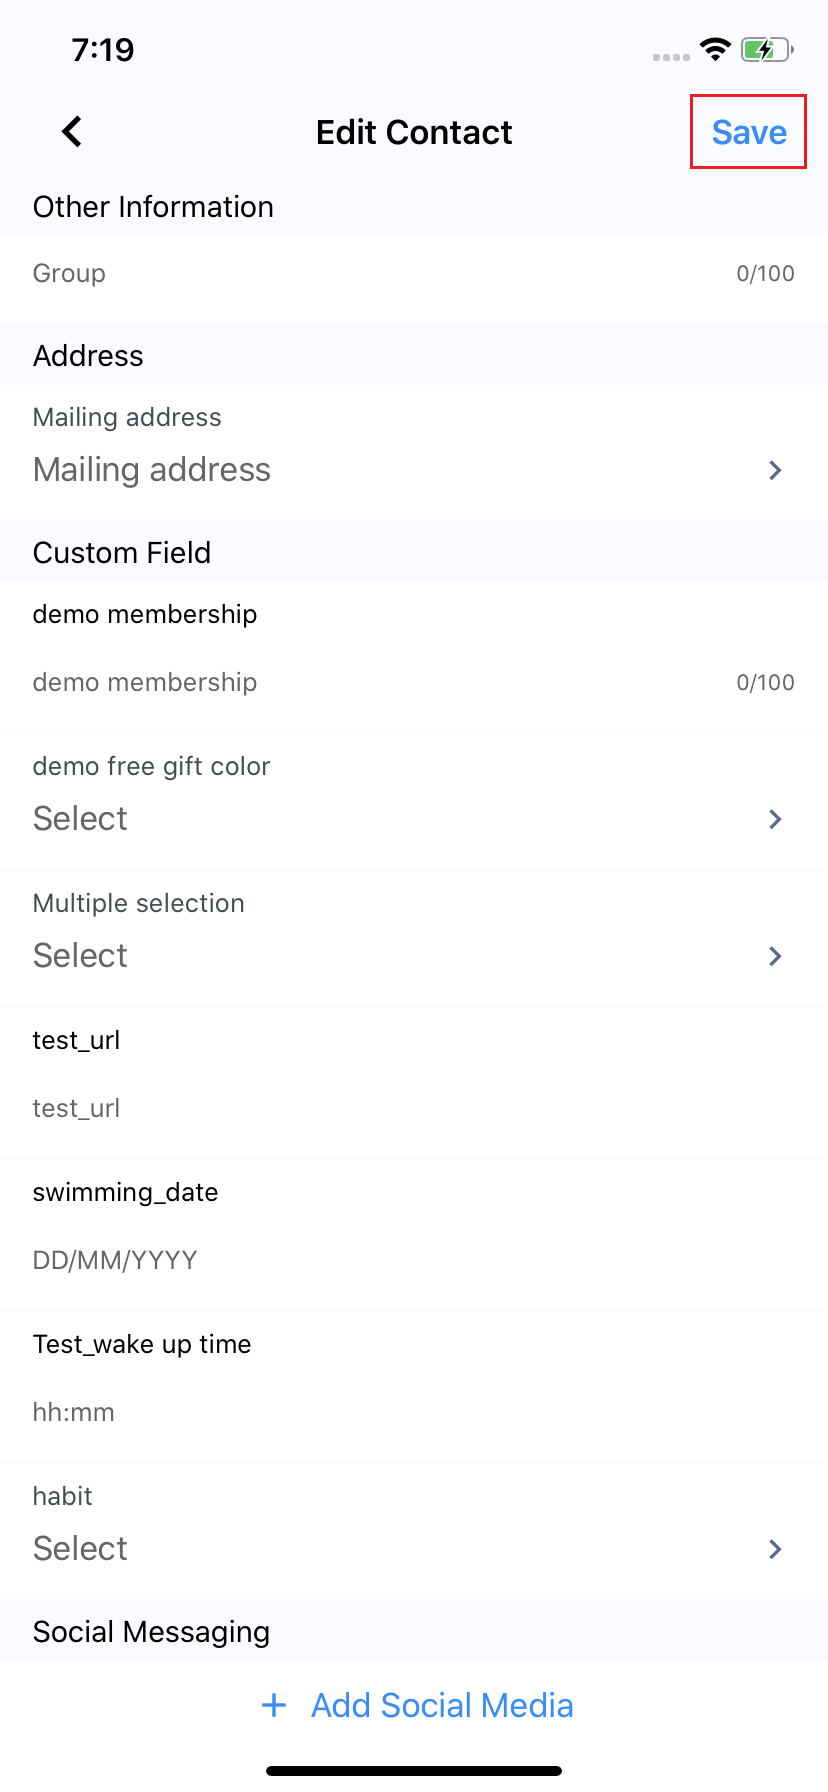
Tap Add more fields to fill out other information such as:
- Company
- Job Title
- Team
- Birth Date (DD/MM/YYYY)
- Language (Tap > to select one of the languages: English, Simplified Chinese, Traditional Chinese and Japanese.)
- Group
- Mailing address (Tap > to fill in Address, City, State, Zip code and select one of the Country/Region by tapping > to select.)
-
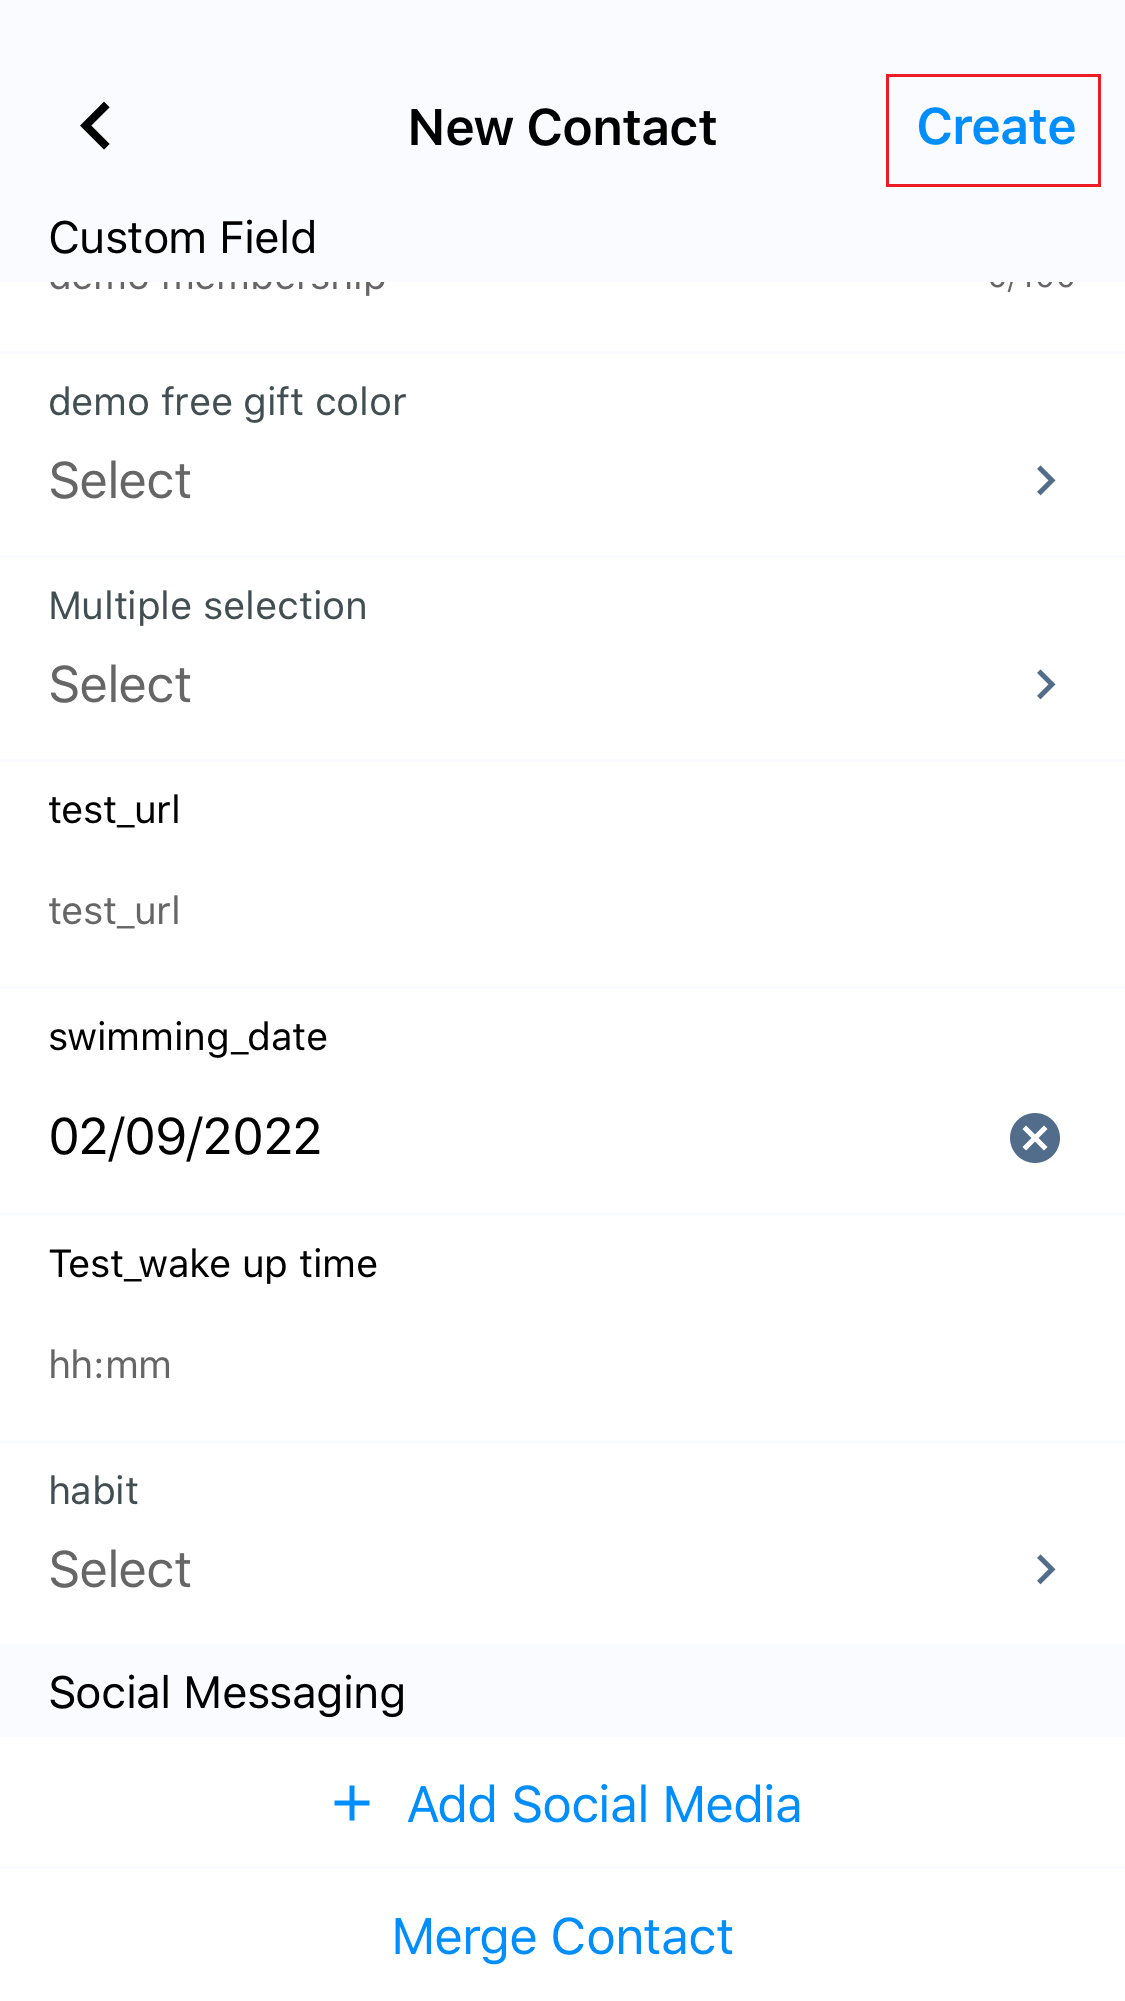
Also, fill in the fields in the Custom Fields section.
-
Tap +Add Social Media to select one of the social media the visitor is using, such as Messenger, WeChat, WhatsApp, LINE, Twitter, LinkedIn, WOZTELL (WhatsApp Cloud, Facebook or Instagram) and provide the User Name/ID for the corresponding the social media account. Tap Add.
- Tap Create when you finish saving the information.
- The required external Contact is created successfully. The newly created external Contact will be added to your External Contacts List.
Since using JavaScript to pass the visitor information via the Web Widget to CINNOX is introduced, the mobile device can display the same information passed to CINNOX.

Adding Notes to Contact
Adding notes to contact is a simple way to inform your group about something important.
You can add, view or edit notes to your contacts anytime.
To add a note to contact:
- Find the name of a contact and open its Profile.
- Tap the ➕ icon near the Contact Name to open the Add a note pop-up screen.
- Add your note.
- Tap Add to save the note.
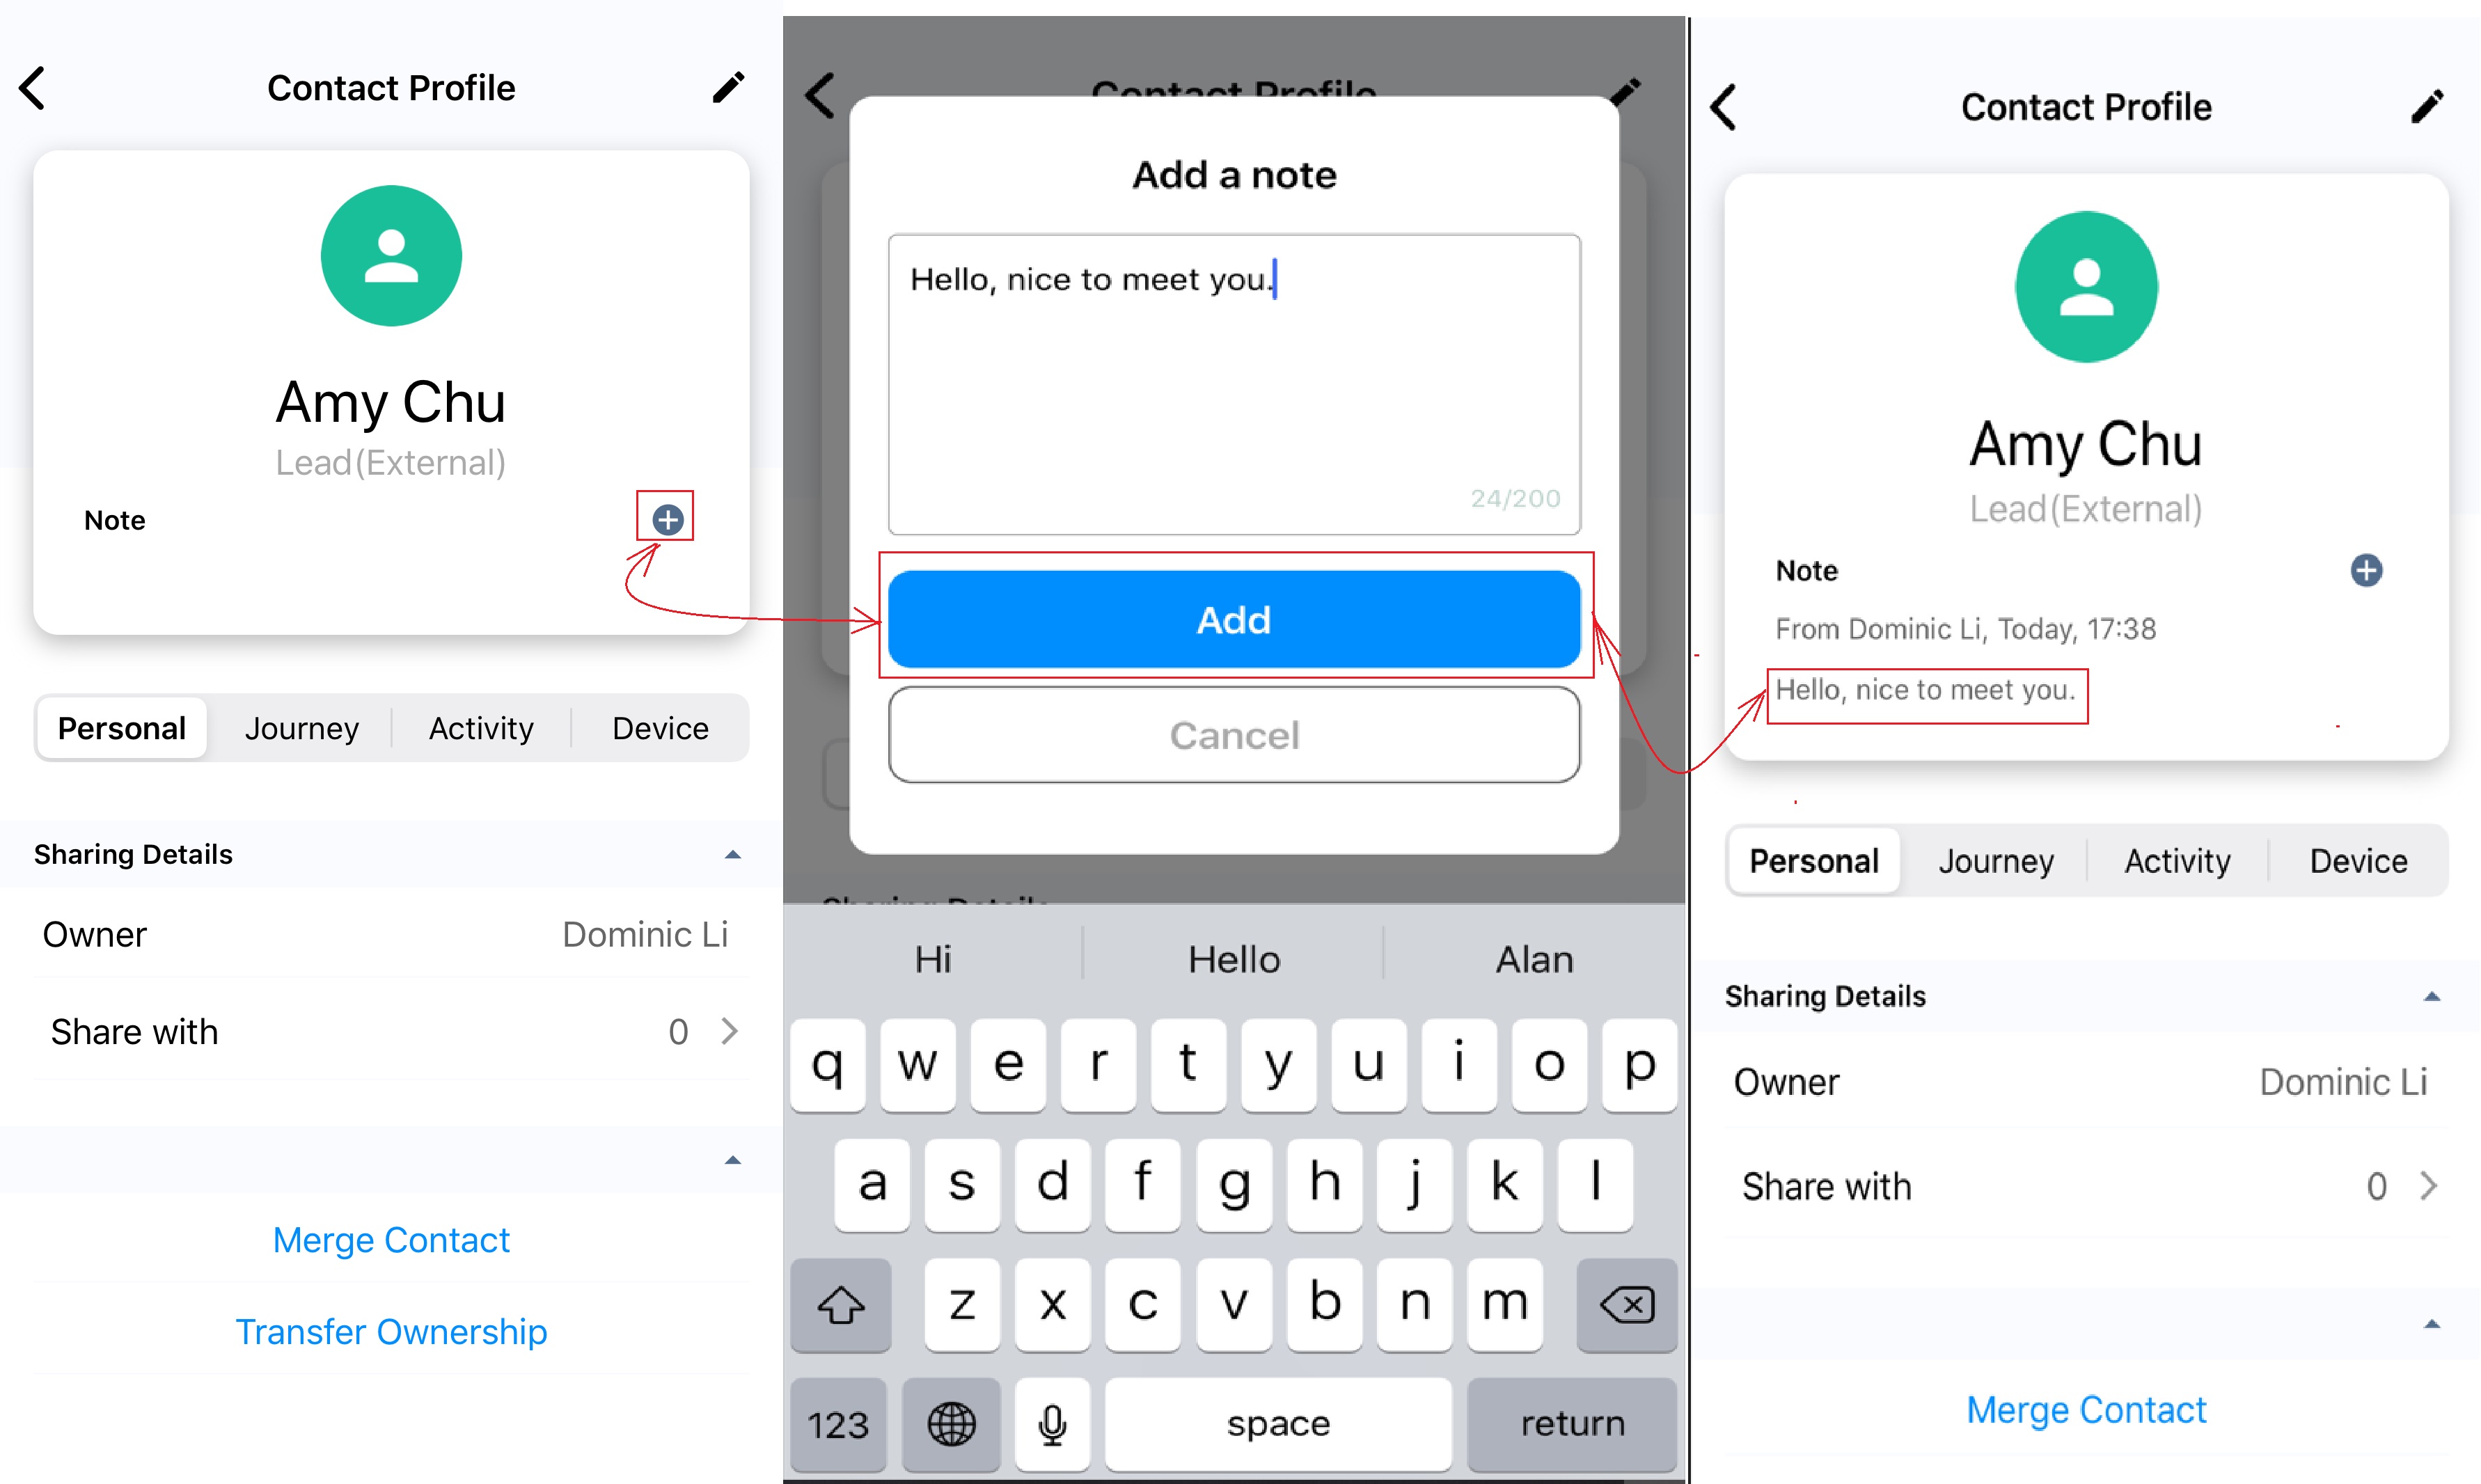
Adding a note to a contact
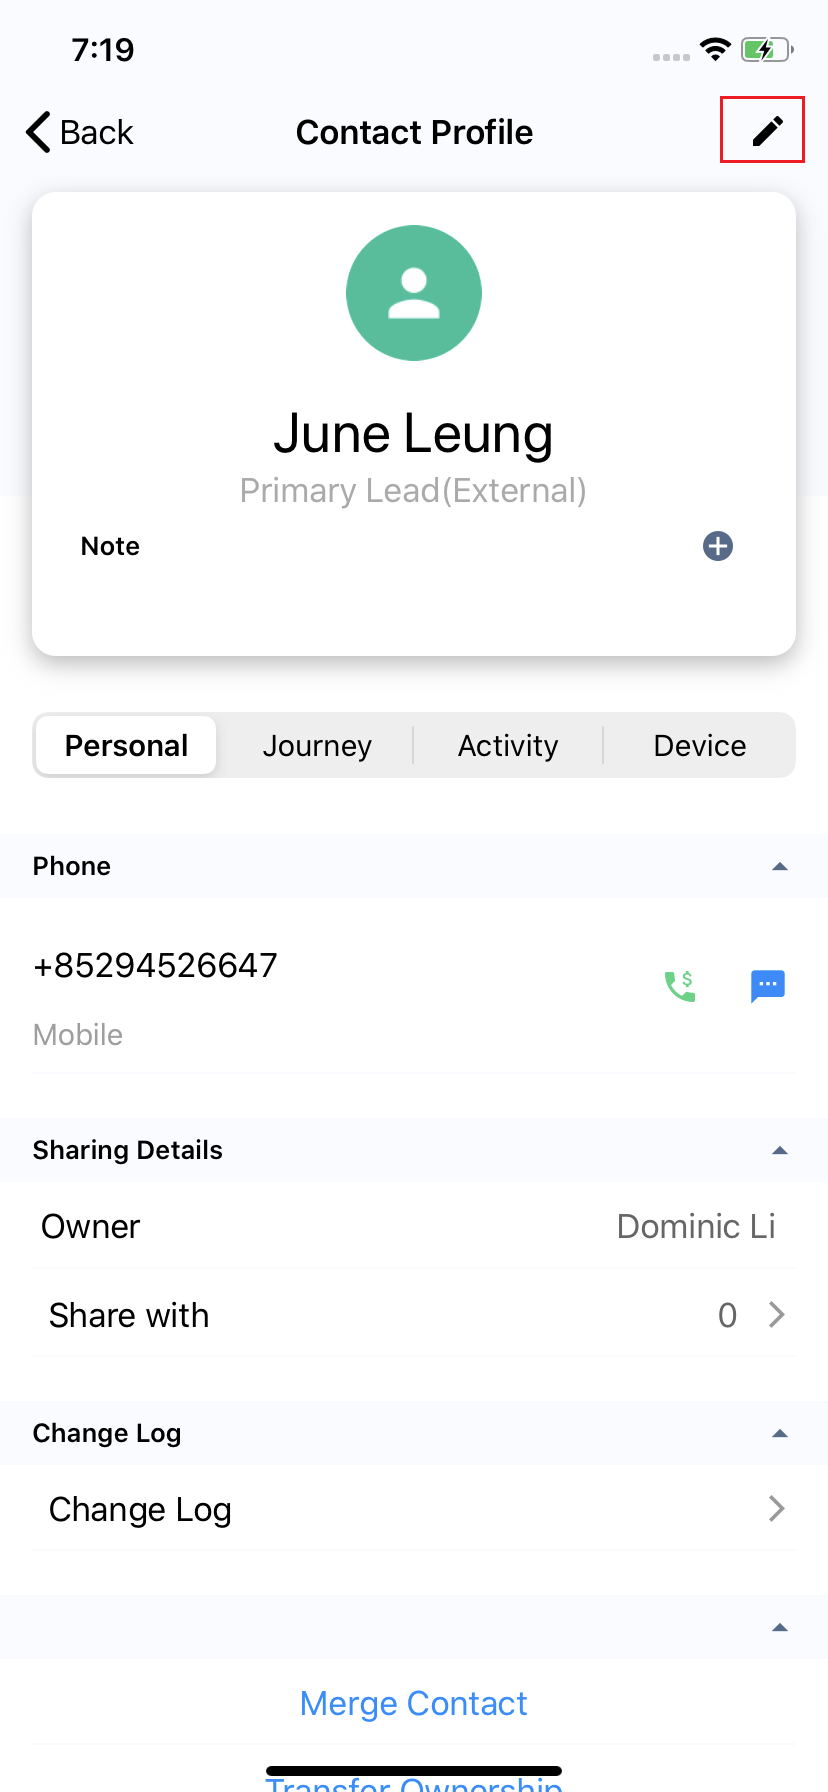
Viewing External Contact Details
To view external contact details:
- To view their details, tap an external contact's name on your Contacts screen.
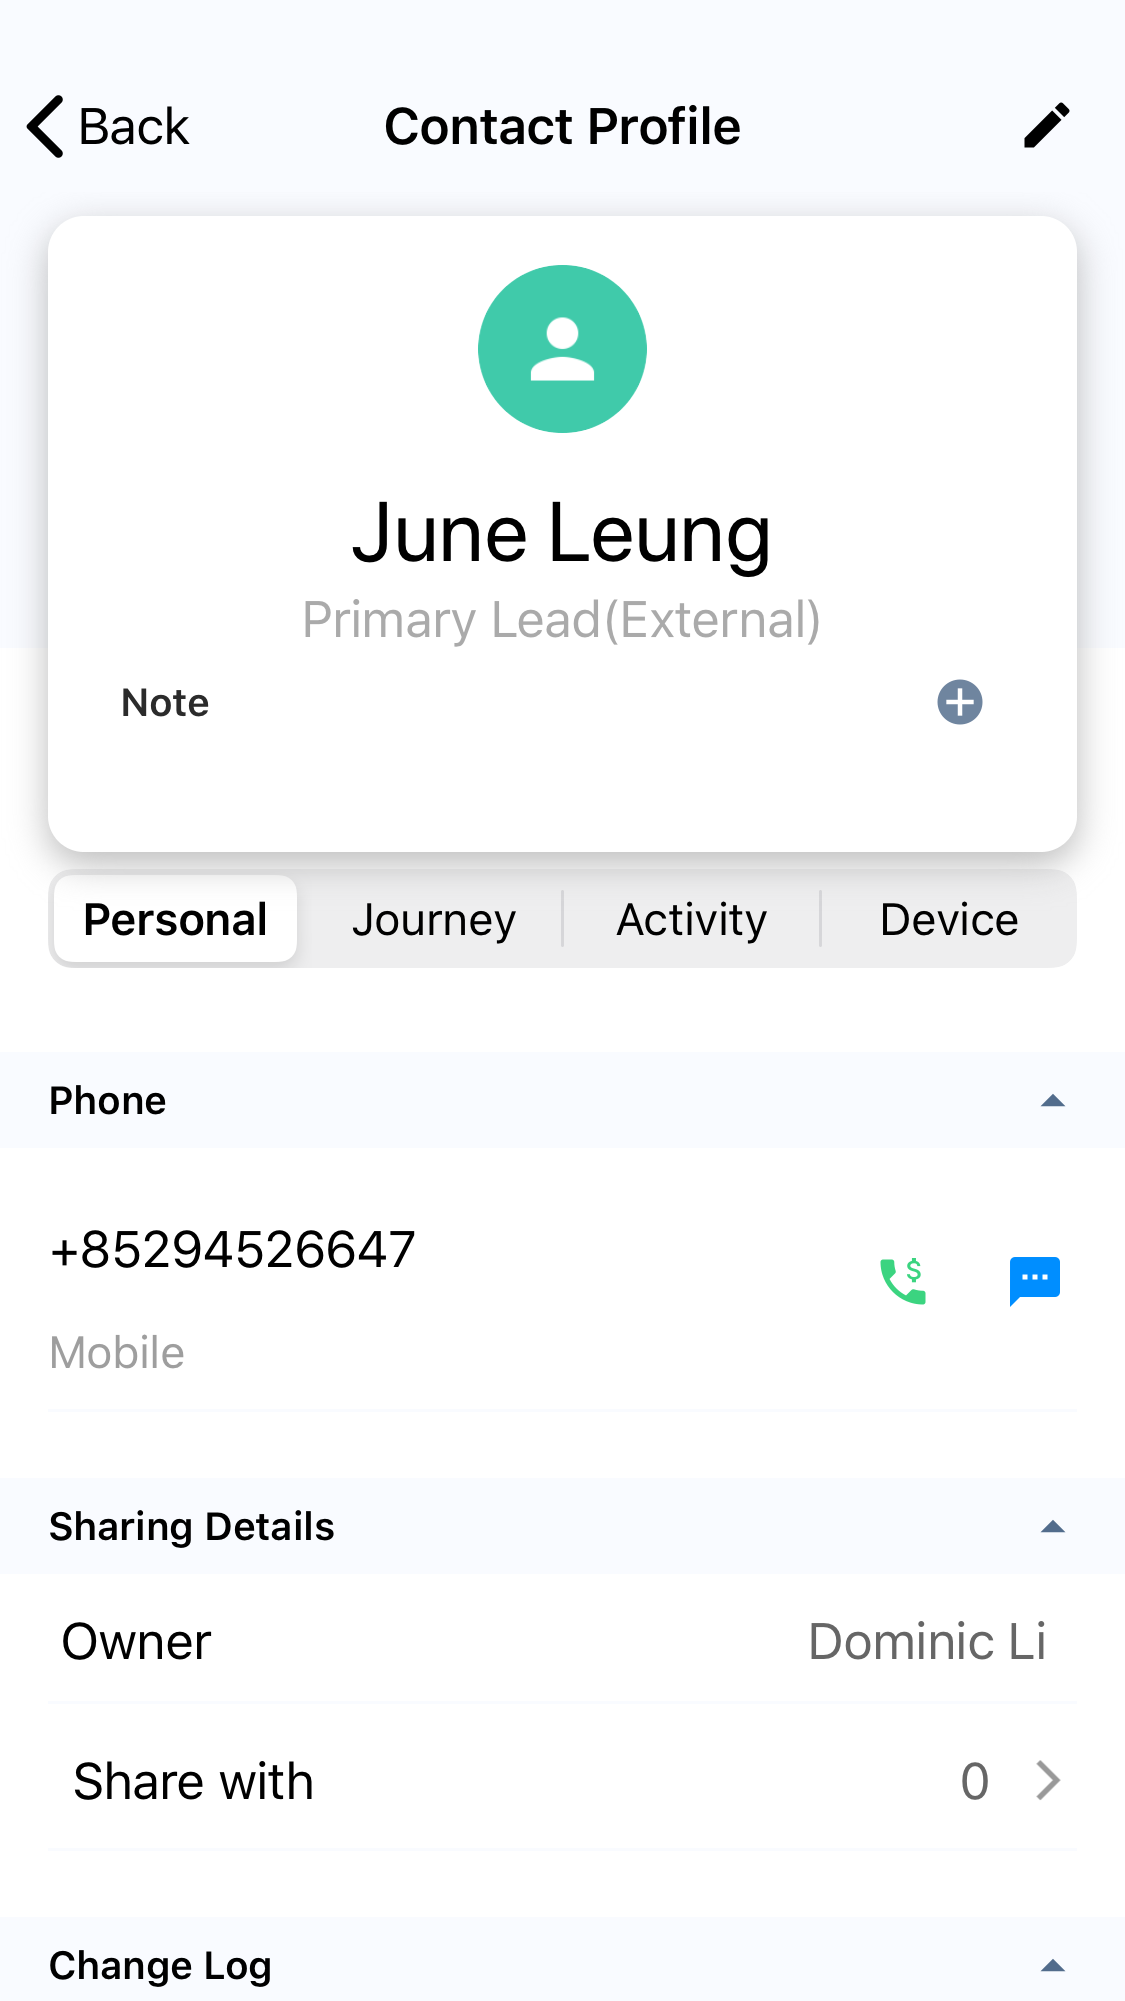
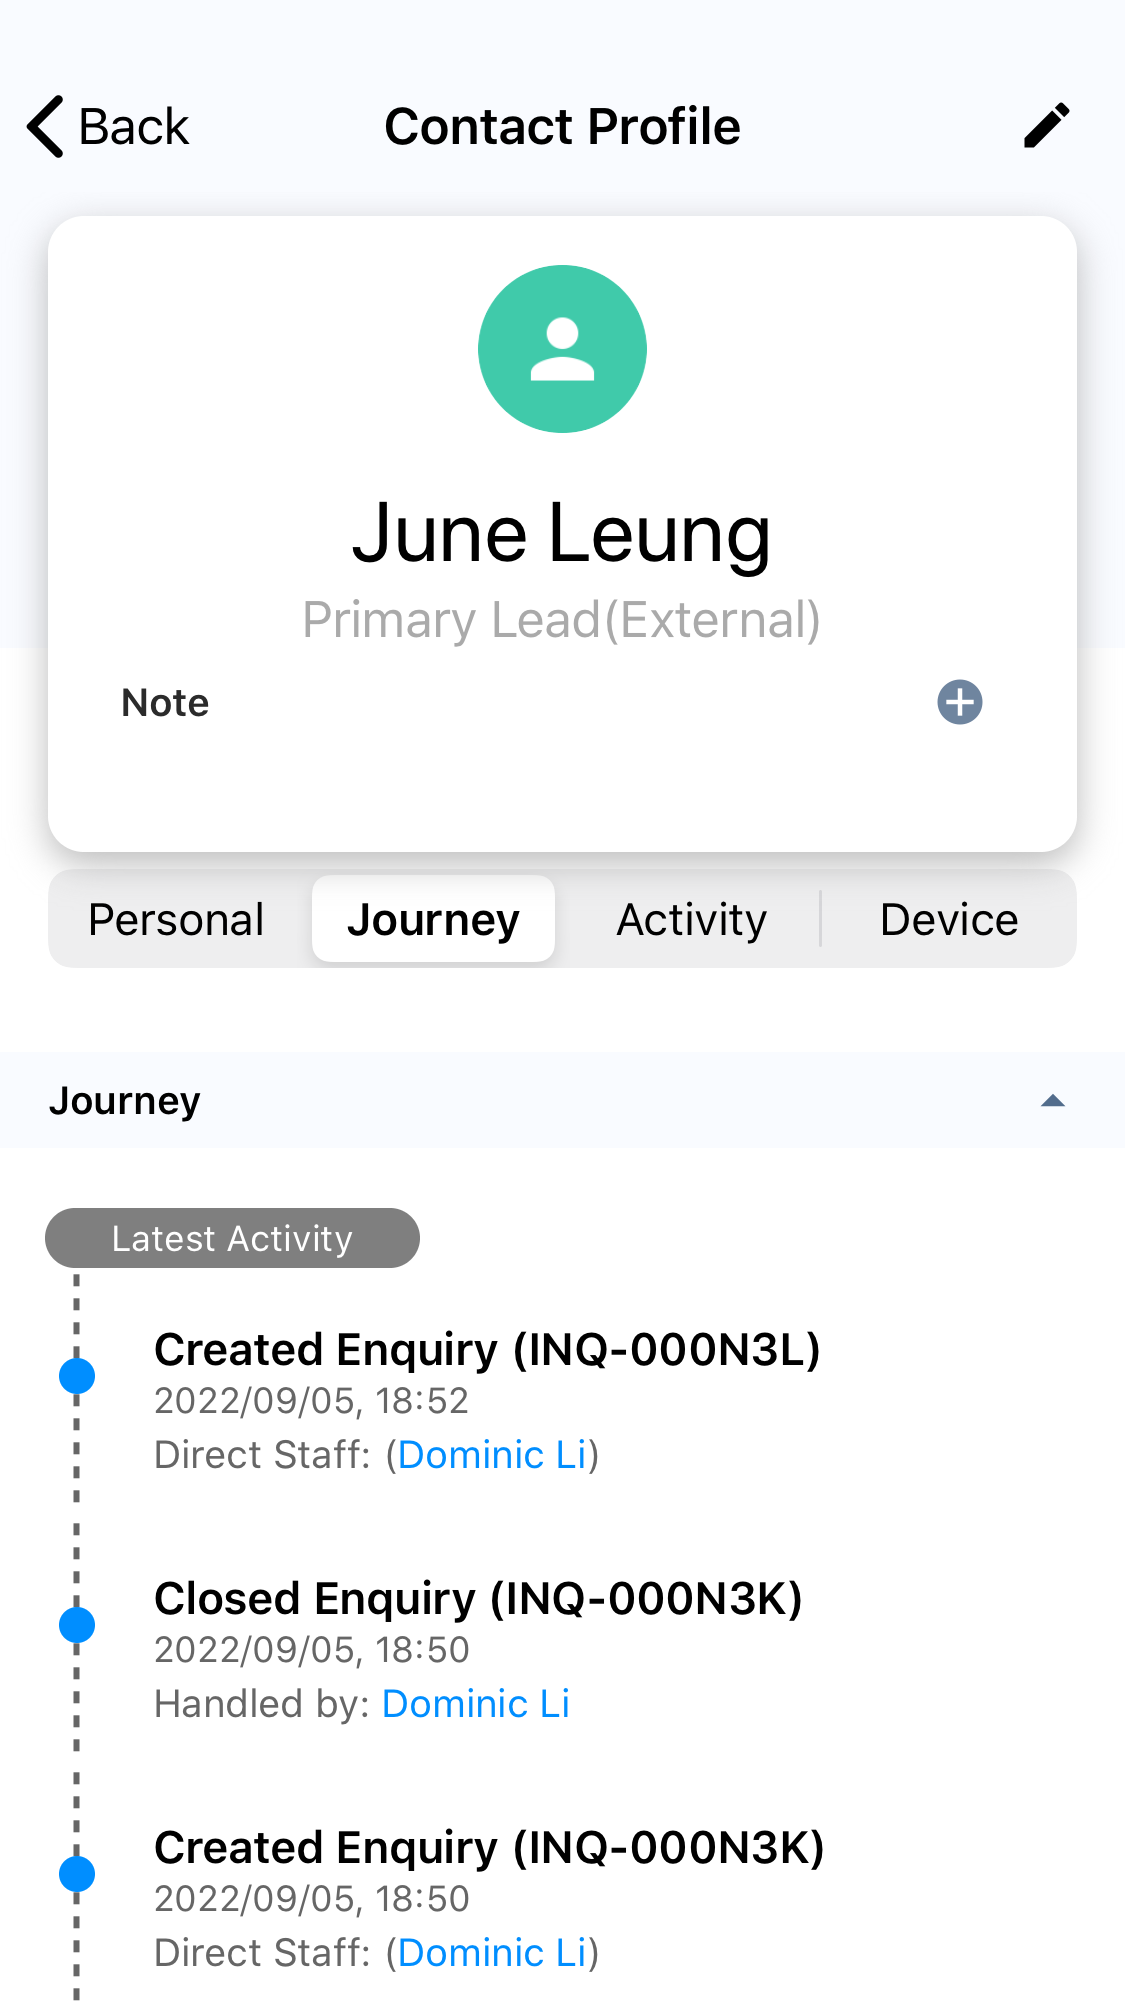
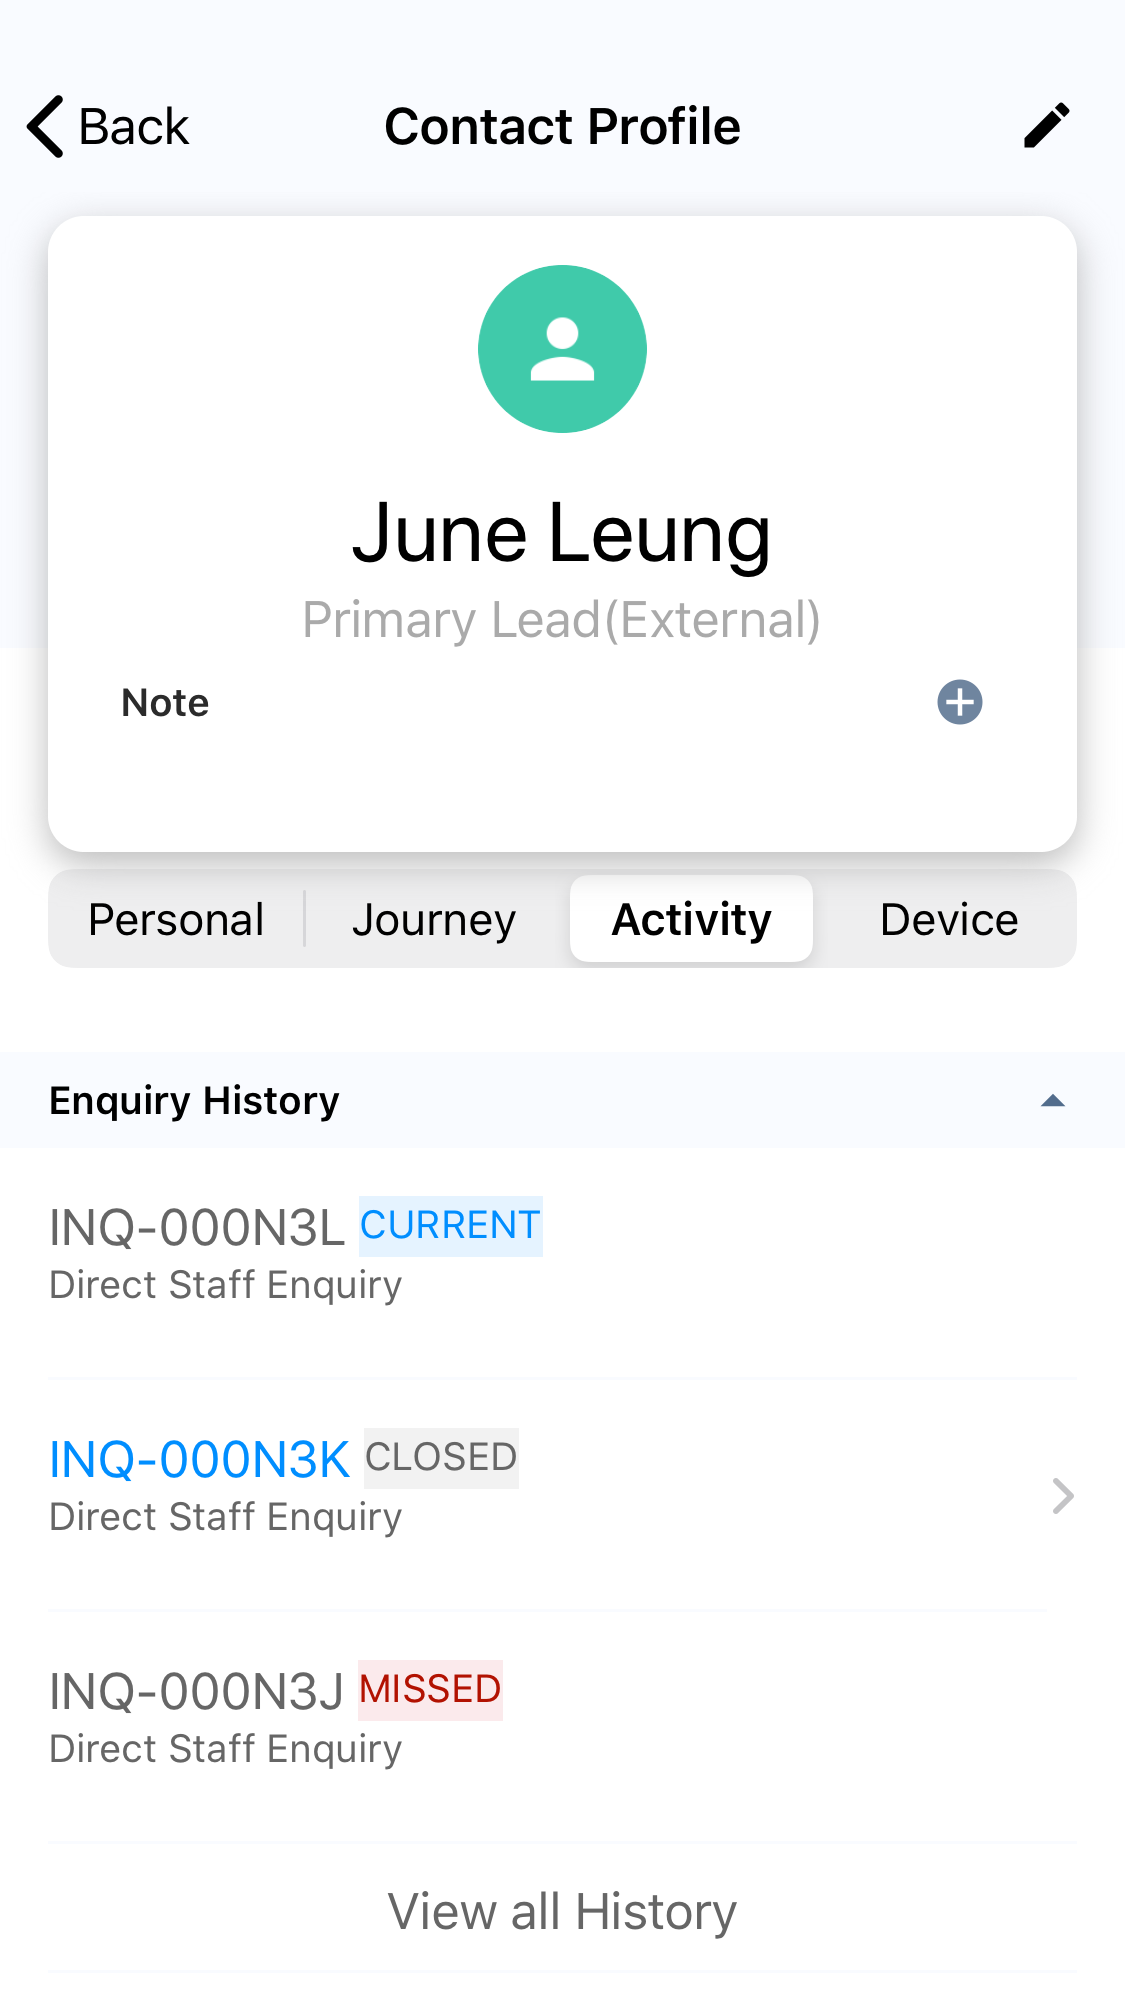
The Contact Details screen will display the following tabs:
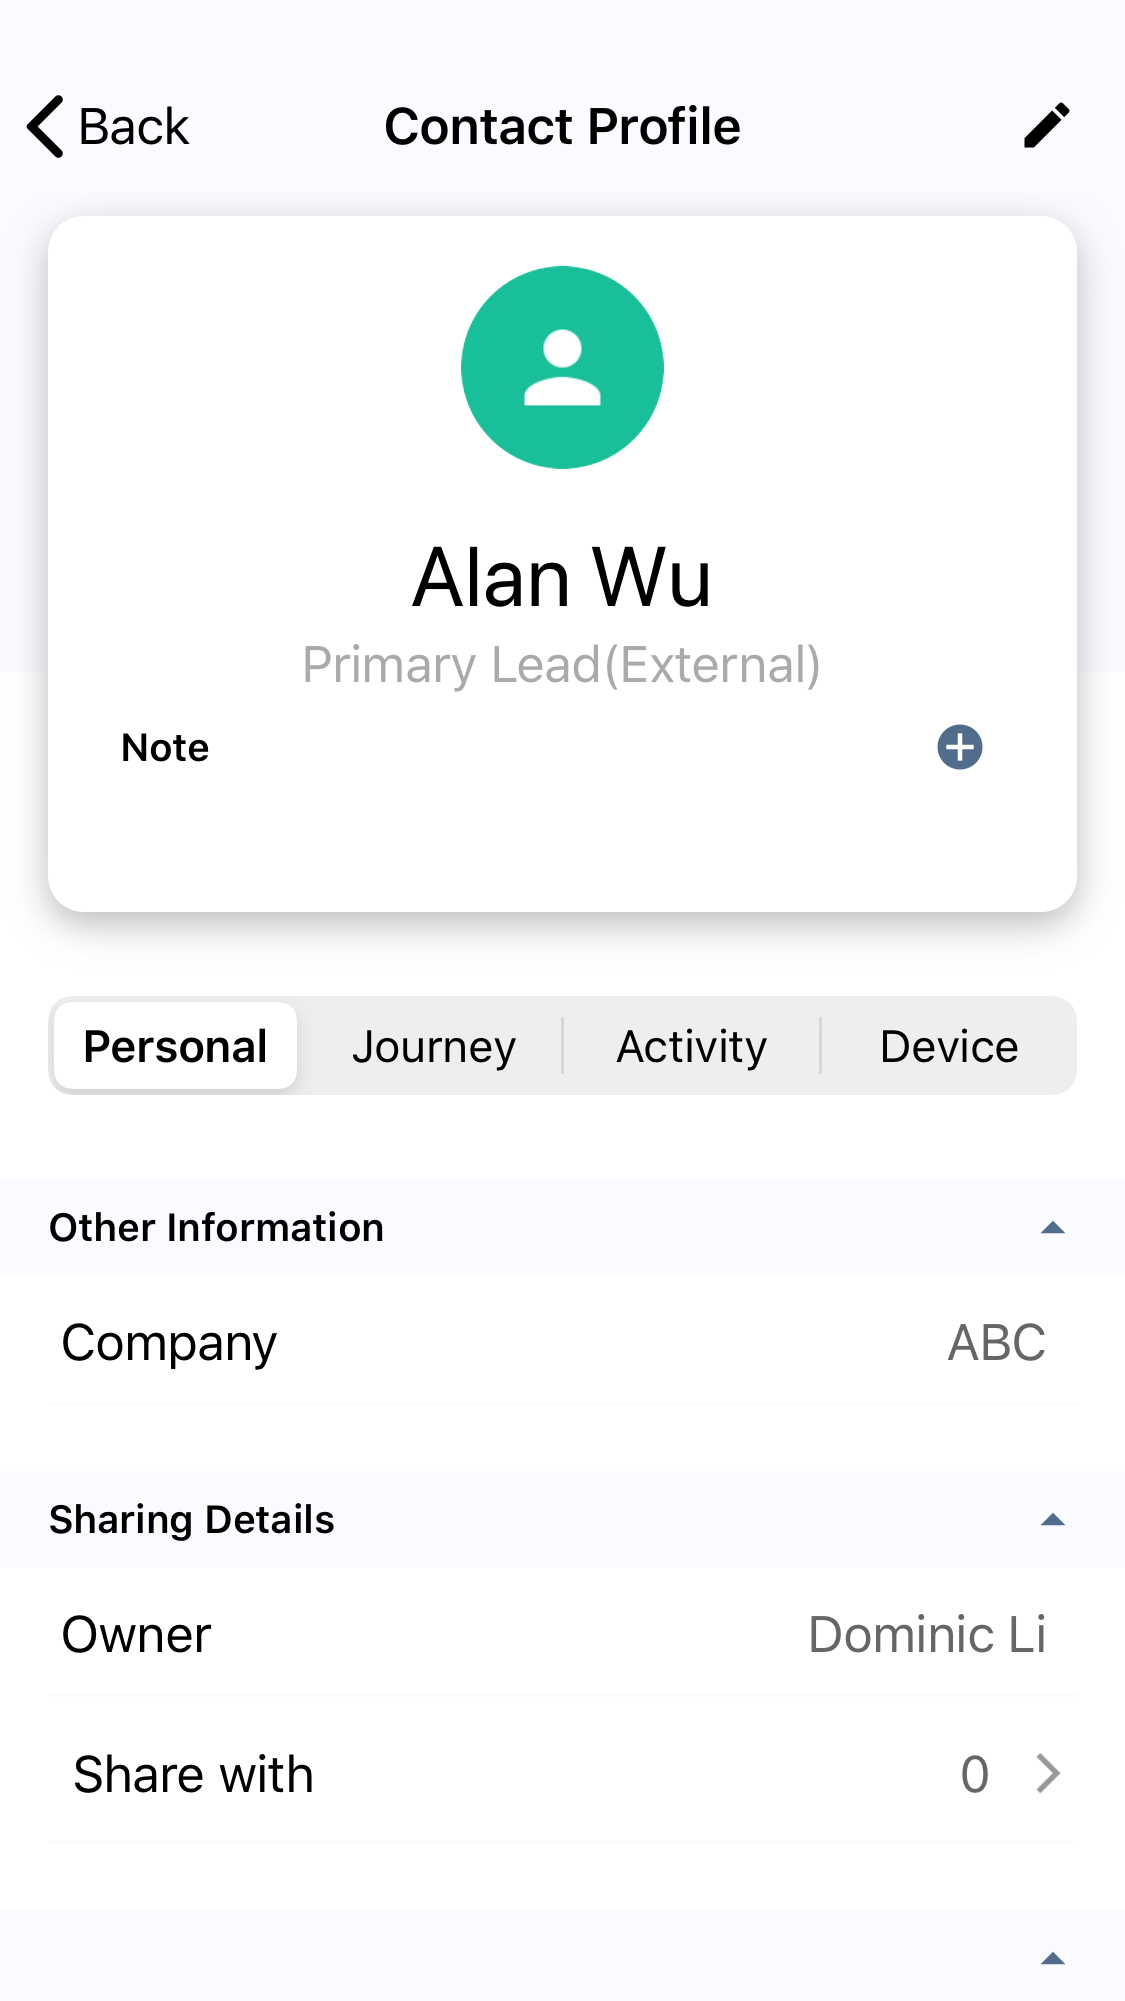
- Personal: Has the contact's first and last name, phone number, email address, Contact Owner, Share with information, and Change Log. The change log lists the five most recent updates made to the Contact.
- Journey: tracks the pages and actions your Contact has visited and done on your website.
- Activity: has the enquiry and engagement history details. You can see the conversation history in the enquiry room when you tap the closed enquiry.
- Device: had the Contact's device information when they started an enquiry.
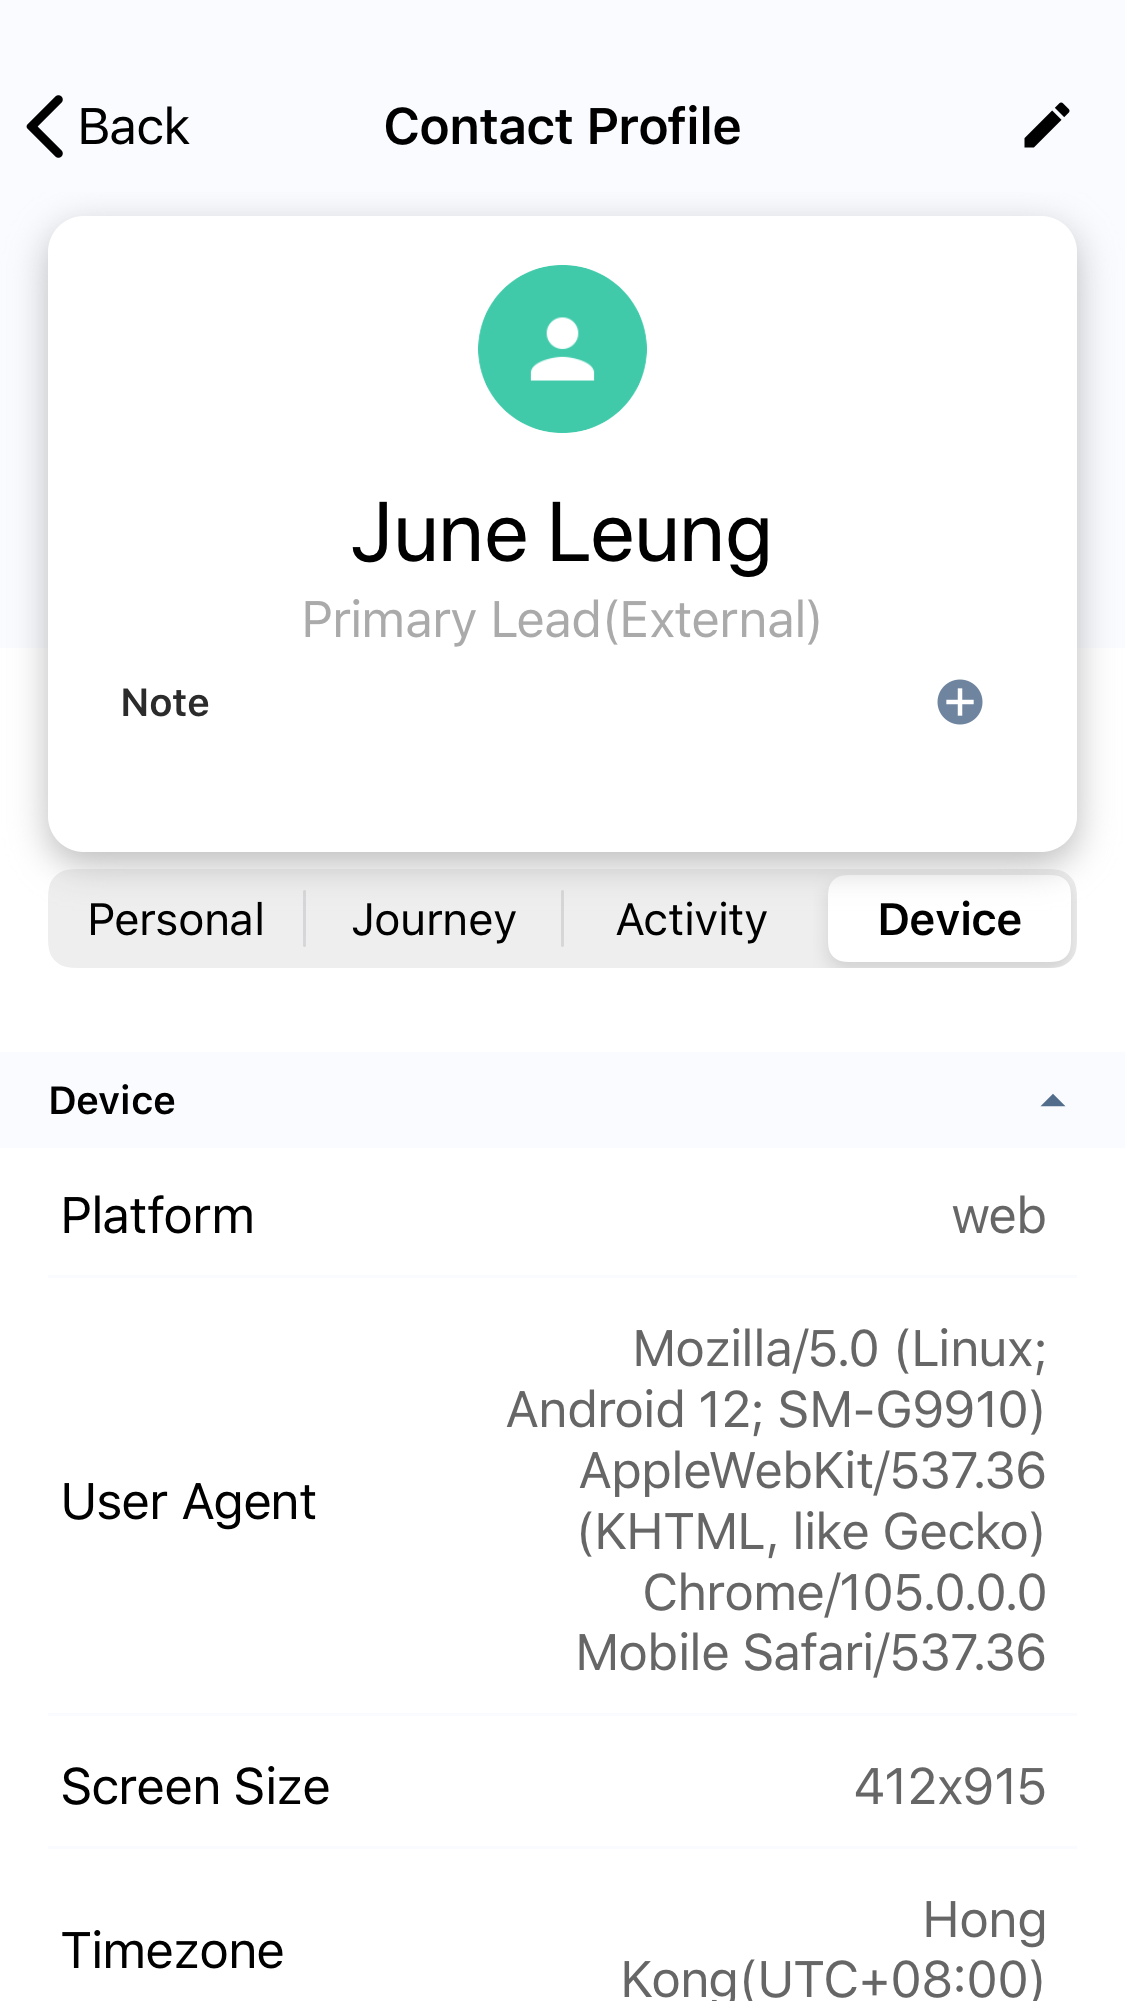
Contact Device Information
Editing External Contact Details
To edit an external contact's details:
- To view their details, tap an external contact's name on your Contacts screen.
- On the Contact Profile screen, tap the Edit icon of the external Contact.
- Enter the details you must add or update in the Contact's profile.
- Tap Save. A message that the Contact Details have been successfully updated will be displayed.
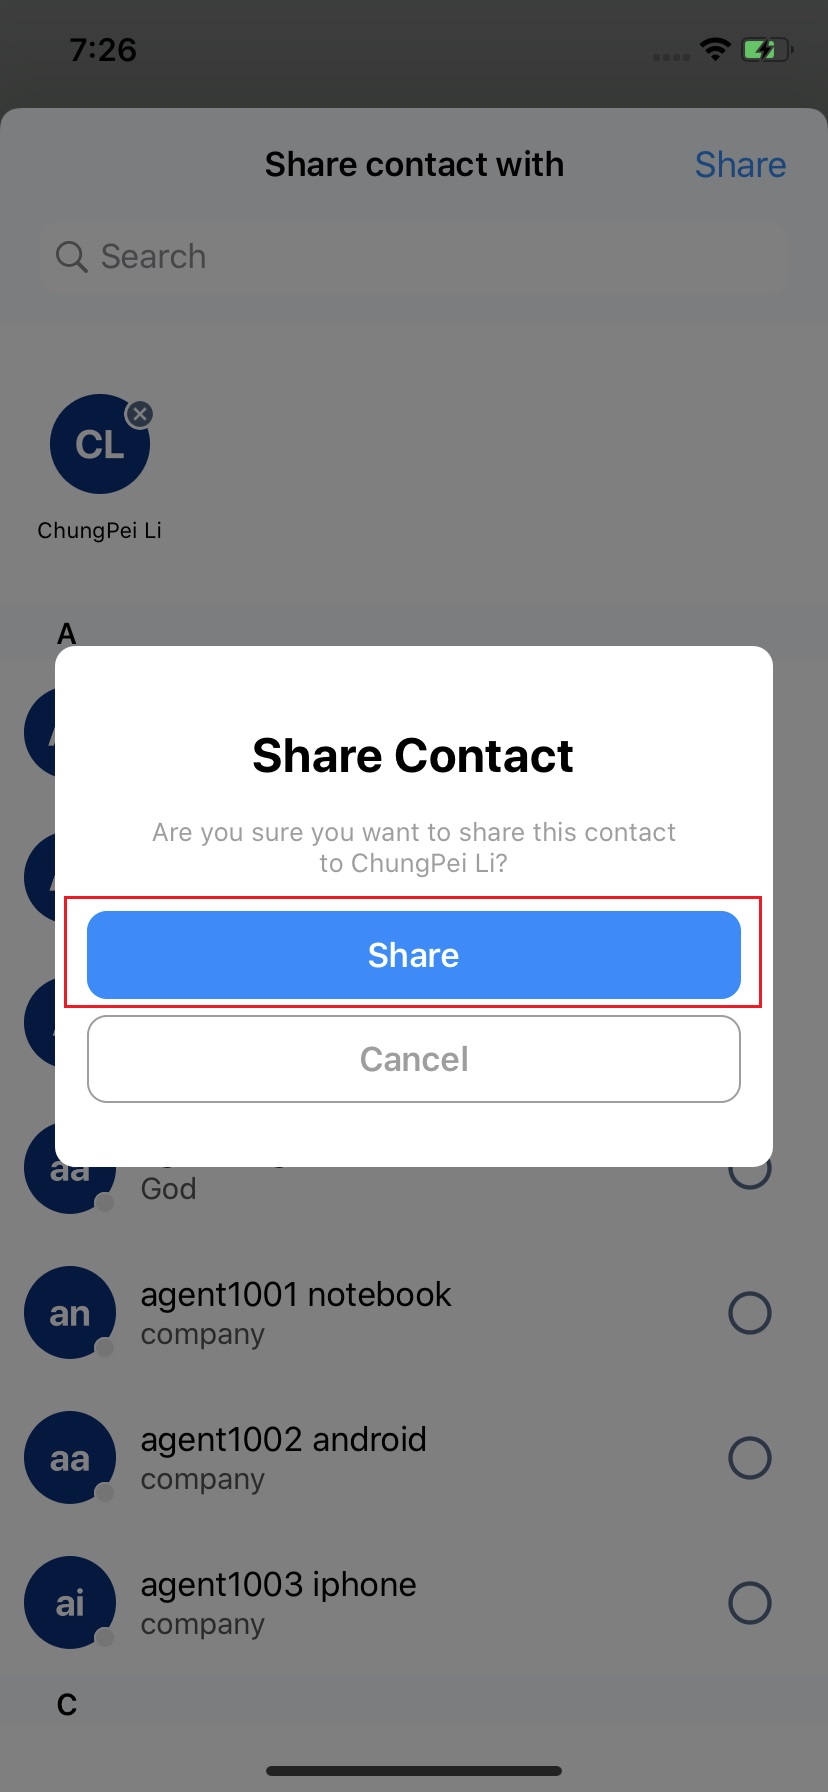
Sharing External Contacts
You can share External Contacts with fellow staff members as owners or administrators.
- To view their details, tap an External Contact's name on your Contacts screen.
- On the Contact Profile screen, scroll down and tap Share with

- Tap the Share contact with button.
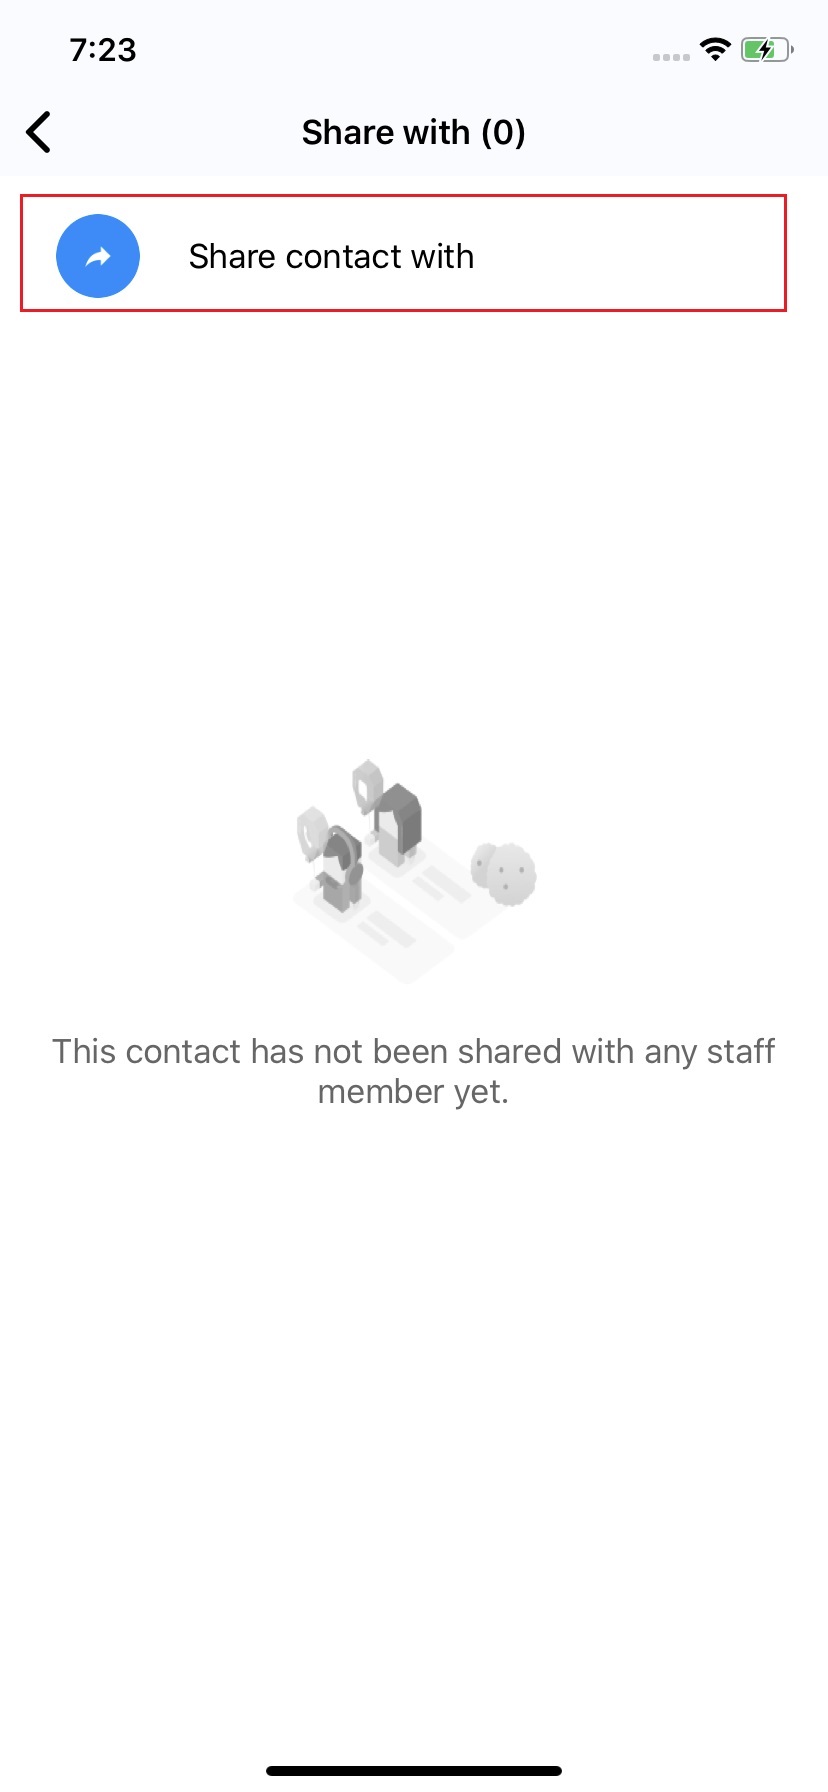
- Select the Staff member(s) you wish to share the External Contact's details with.
- Tap Share. A pop-up message will appear, asking you to confirm the action.
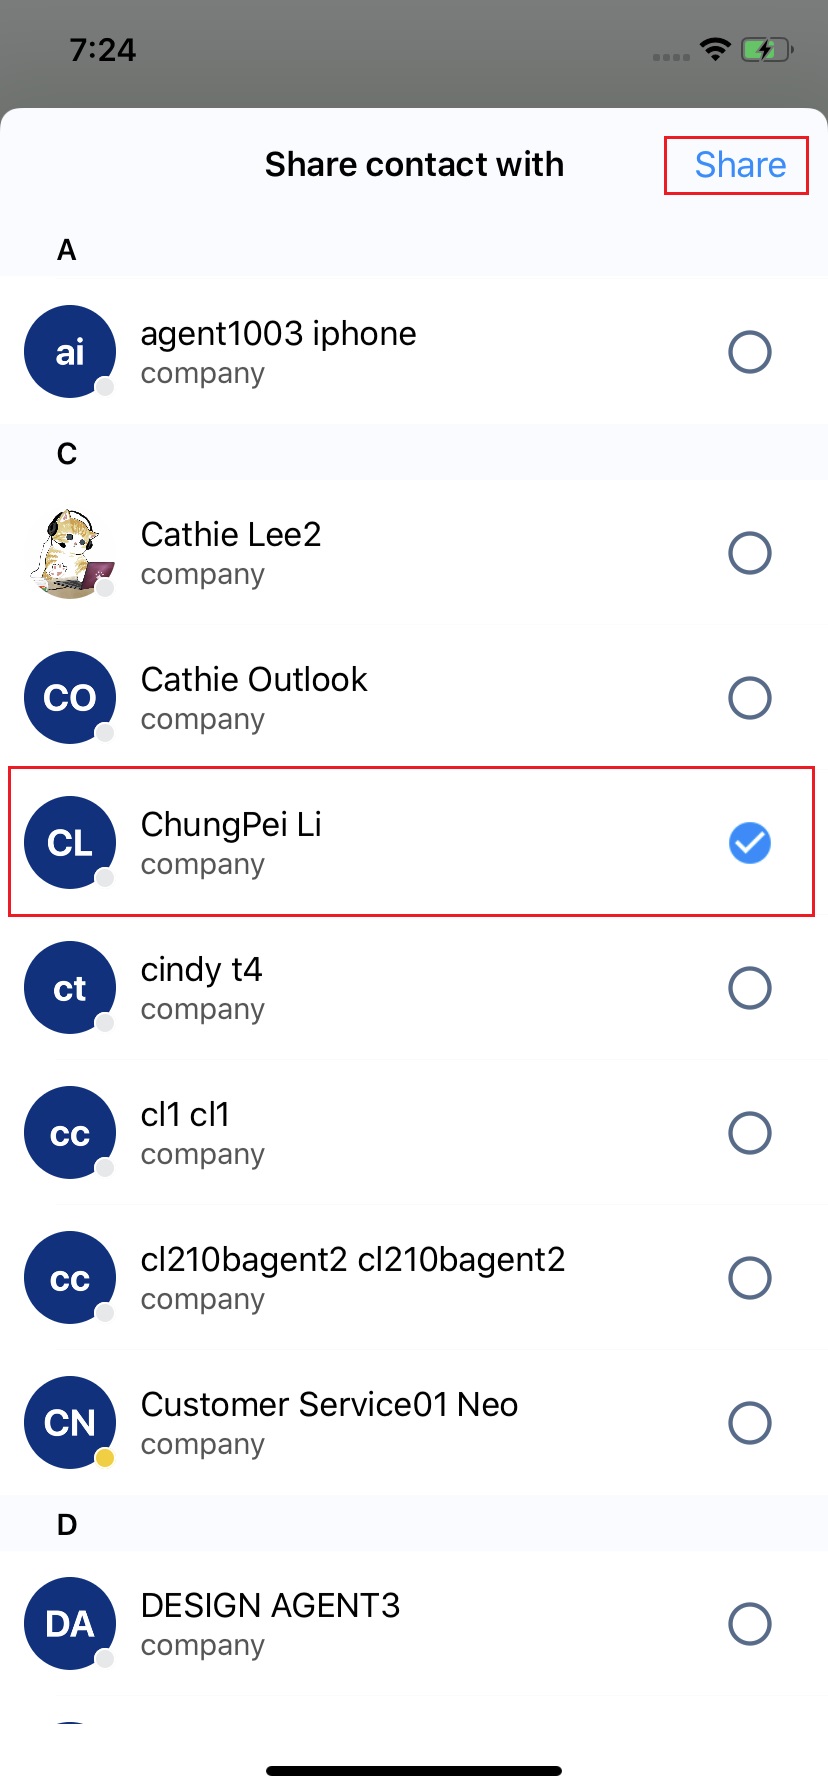
- Tap Share.
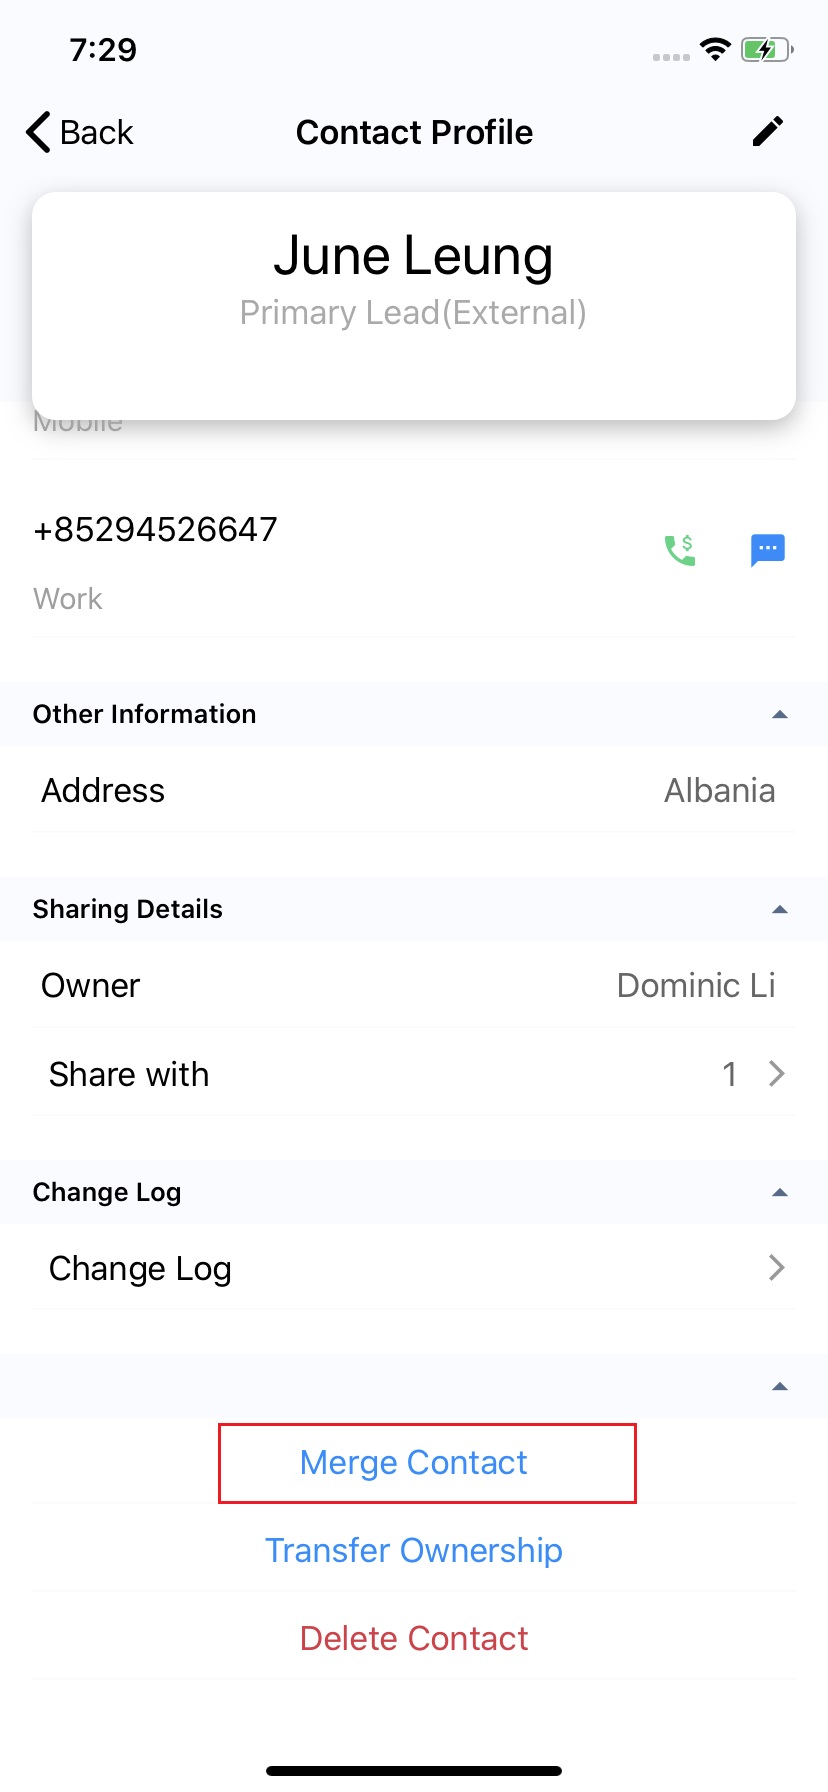
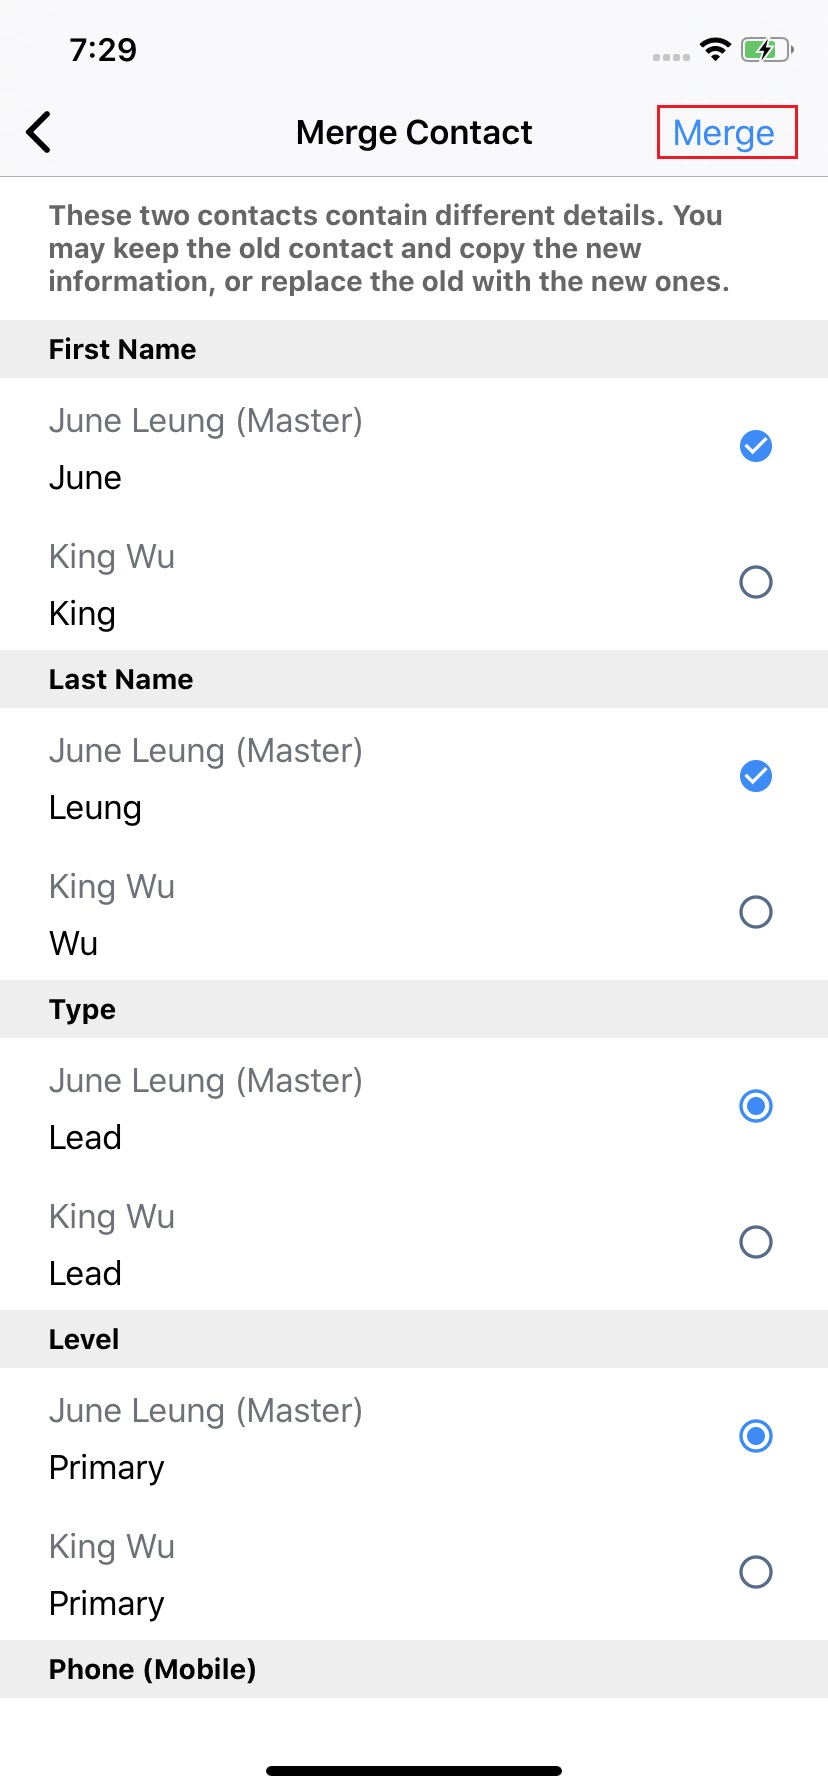
Merging Contacts
If you have duplicate contacts for the same person, you can merge them.
- Tap Merge Contact and search for the Contact (including the information stored in the custom field) you want to merge.
- Tap Merge Contact and search for the Contact you want to merge.
- Select the fields you want to keep from each Contact if one has information that the other does not.
- Tap Merge again to confirm the merging. A toast message "Contact merged" will appear once you successfully merge the two contacts, and all activities, including closed and ongoing enquiries, can be viewed in just one room.
Merging Contacts in the Contact List
For more details about merge contacts and rooms view, see the Merging Contacts section of this Guide.
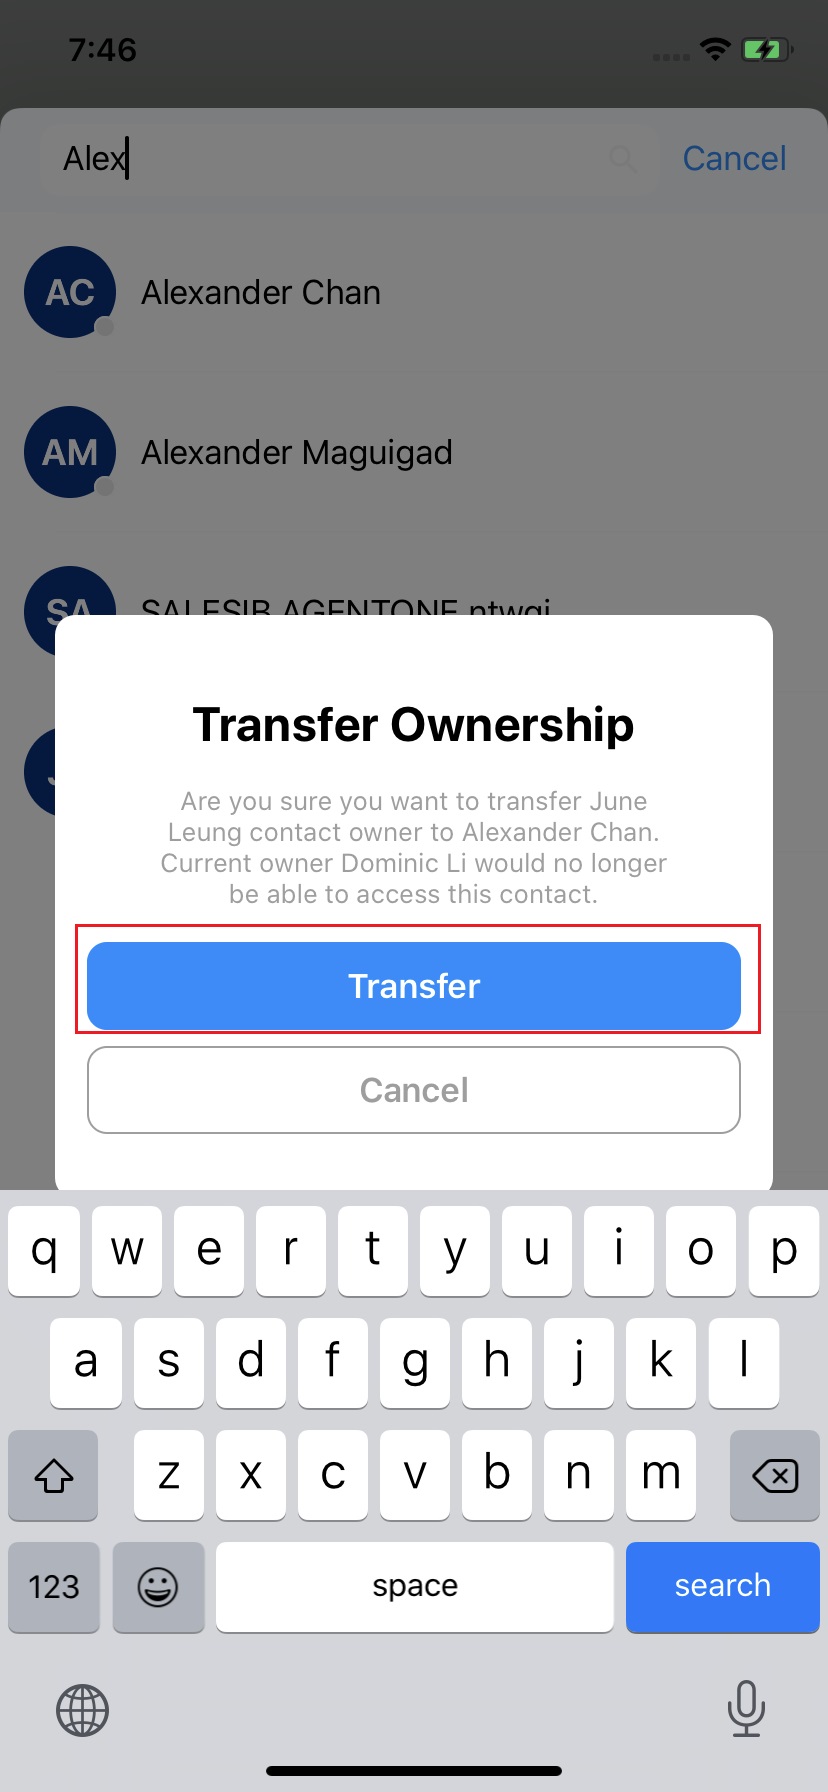
Transferring External Contact Ownership
You can transfer your External Contact ownership to a fellow Staff member as an owner or a Staff administrator role.
- To view their details, tap an External Contact's name on your Contacts screen.
- On the Contact Profile screen, scroll down and tap Transfer Ownership.
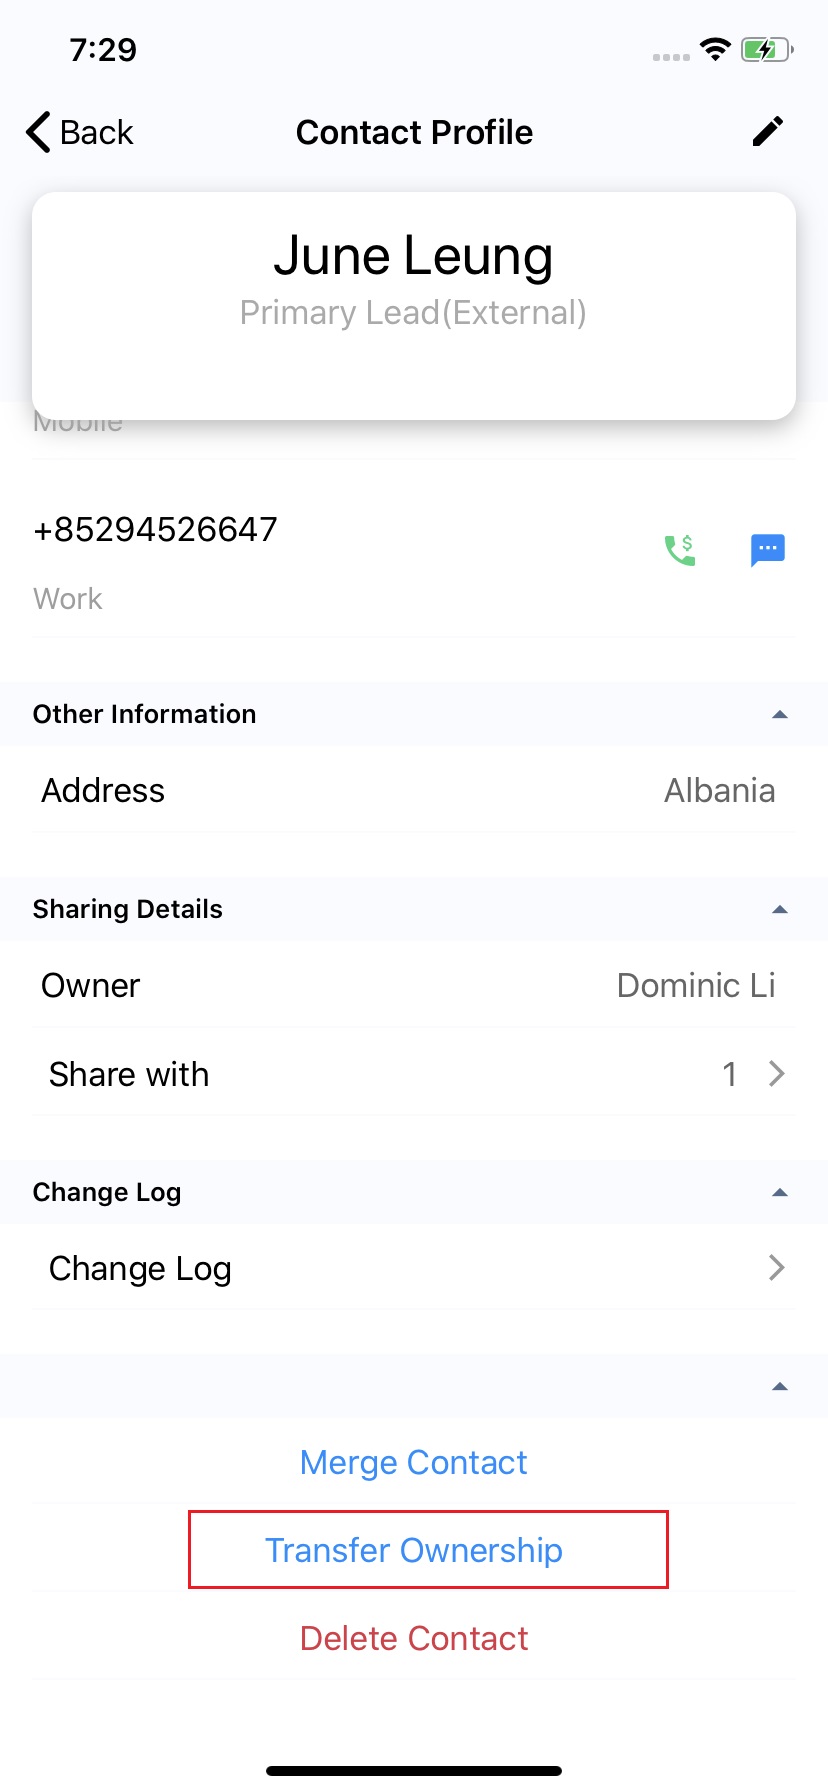
- On the Transfer Ownership window that will pop out, select the staff member to whom you wish to transfer your External Contact's details.
- Tap Transfer. A pop-up message will appear, asking you to confirm the action.
- Tap Transfer.
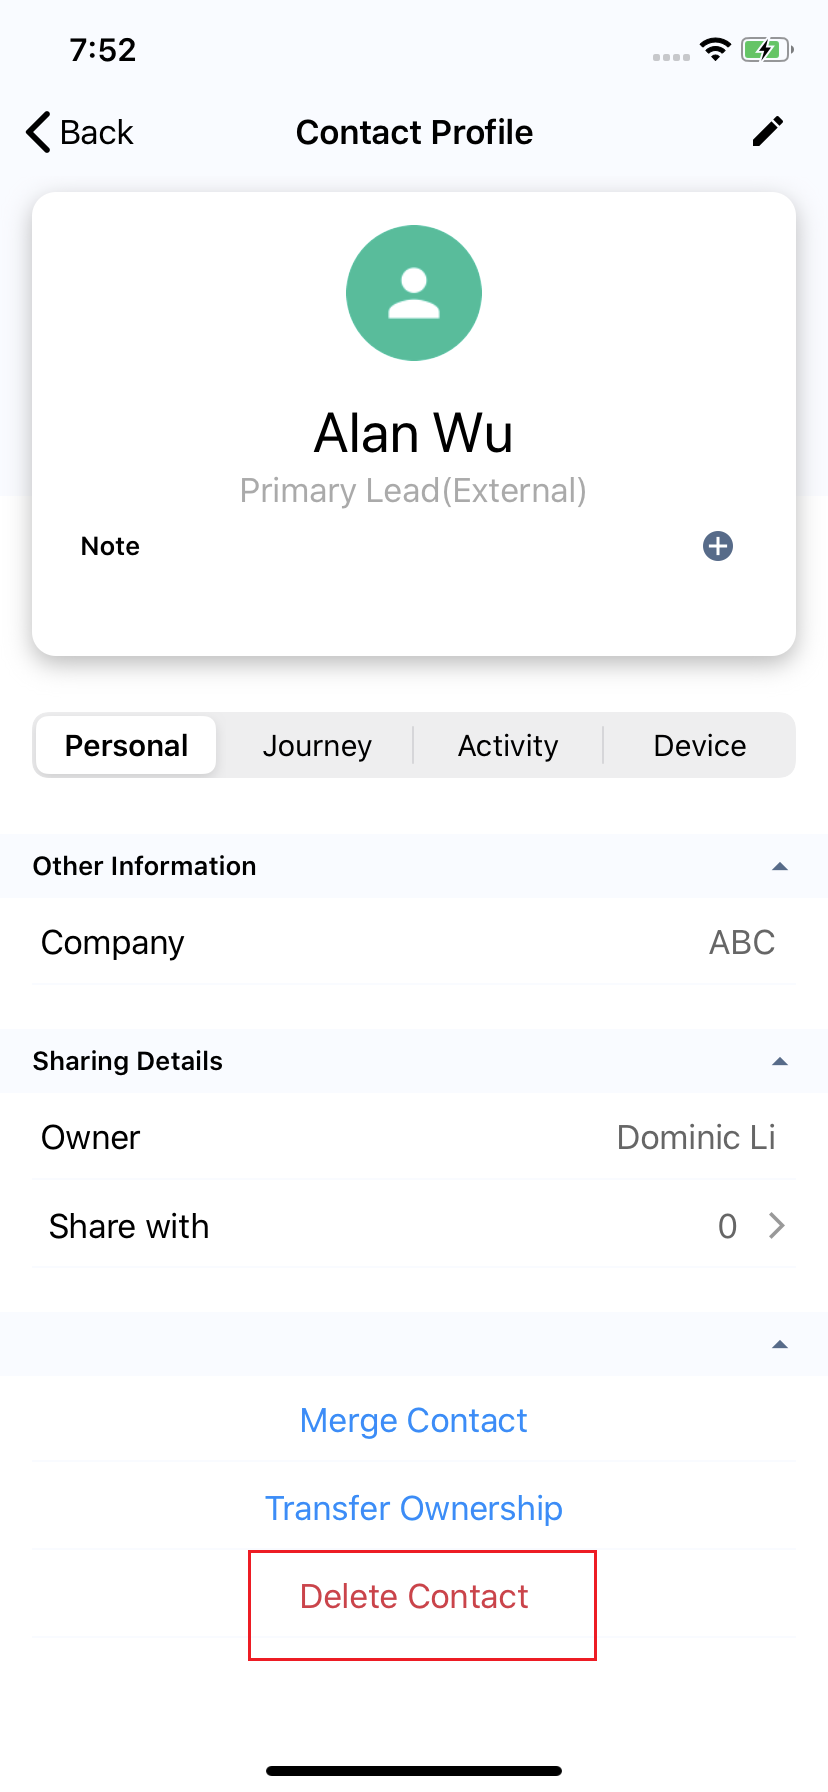
Deleting External Contacts
As an owner or a Staff administrator, you can delete External Contacts.
- To view their details, tap an External Contact's name on your Contacts screen.
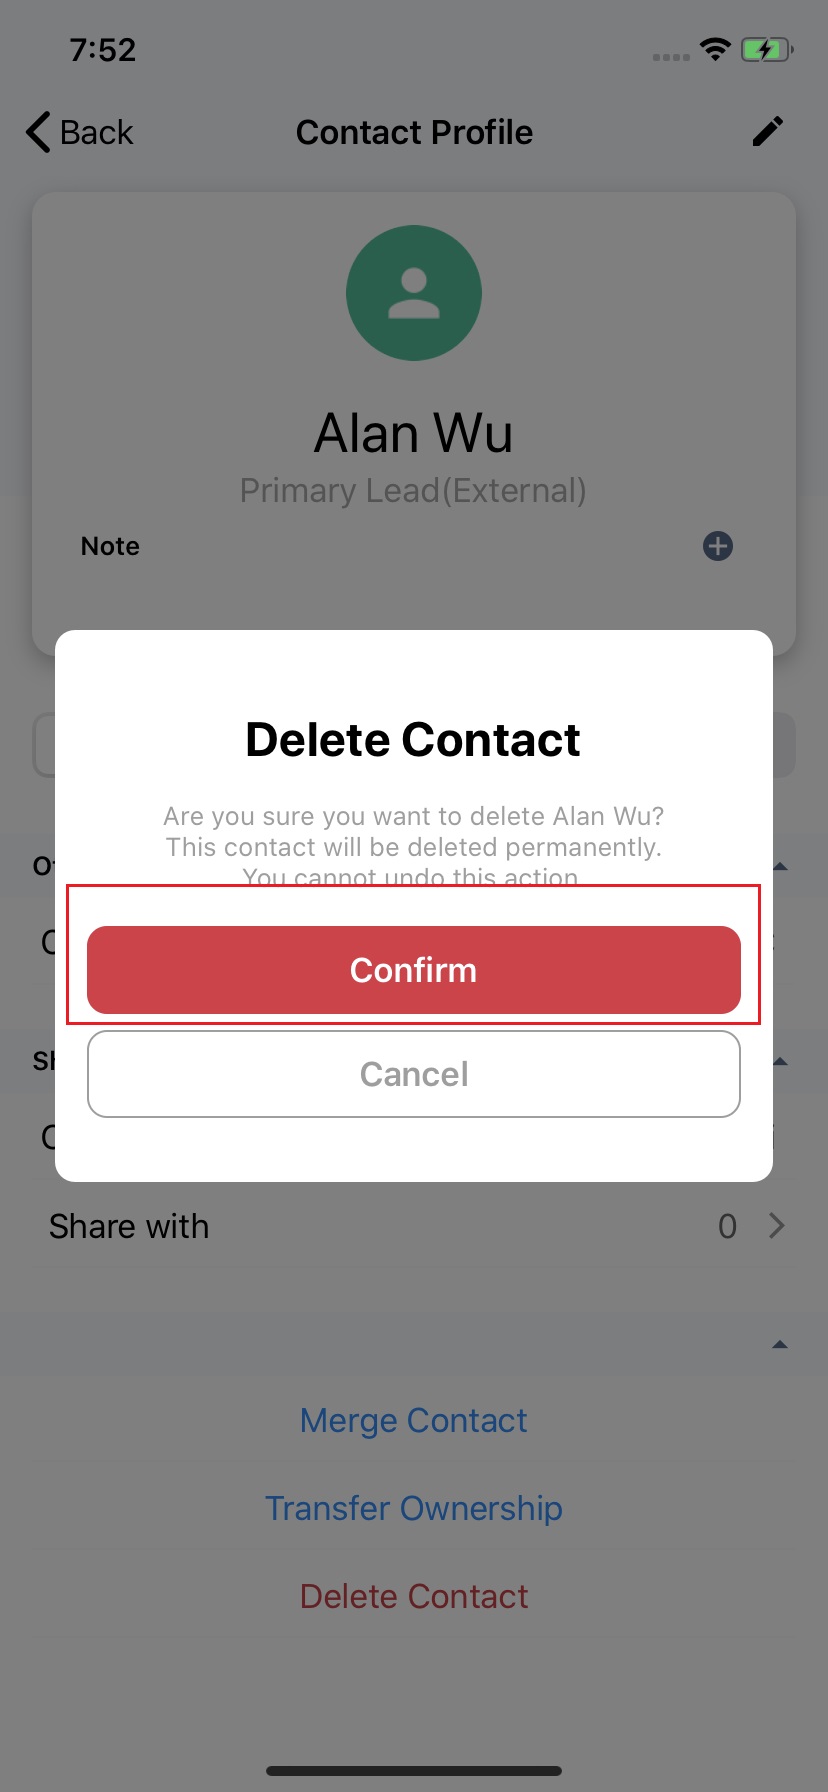
- On the Contact Profile screen, scroll down and tap Delete Contact. A pop-up message will appear, asking you to confirm the action.
- Tap Confirm.
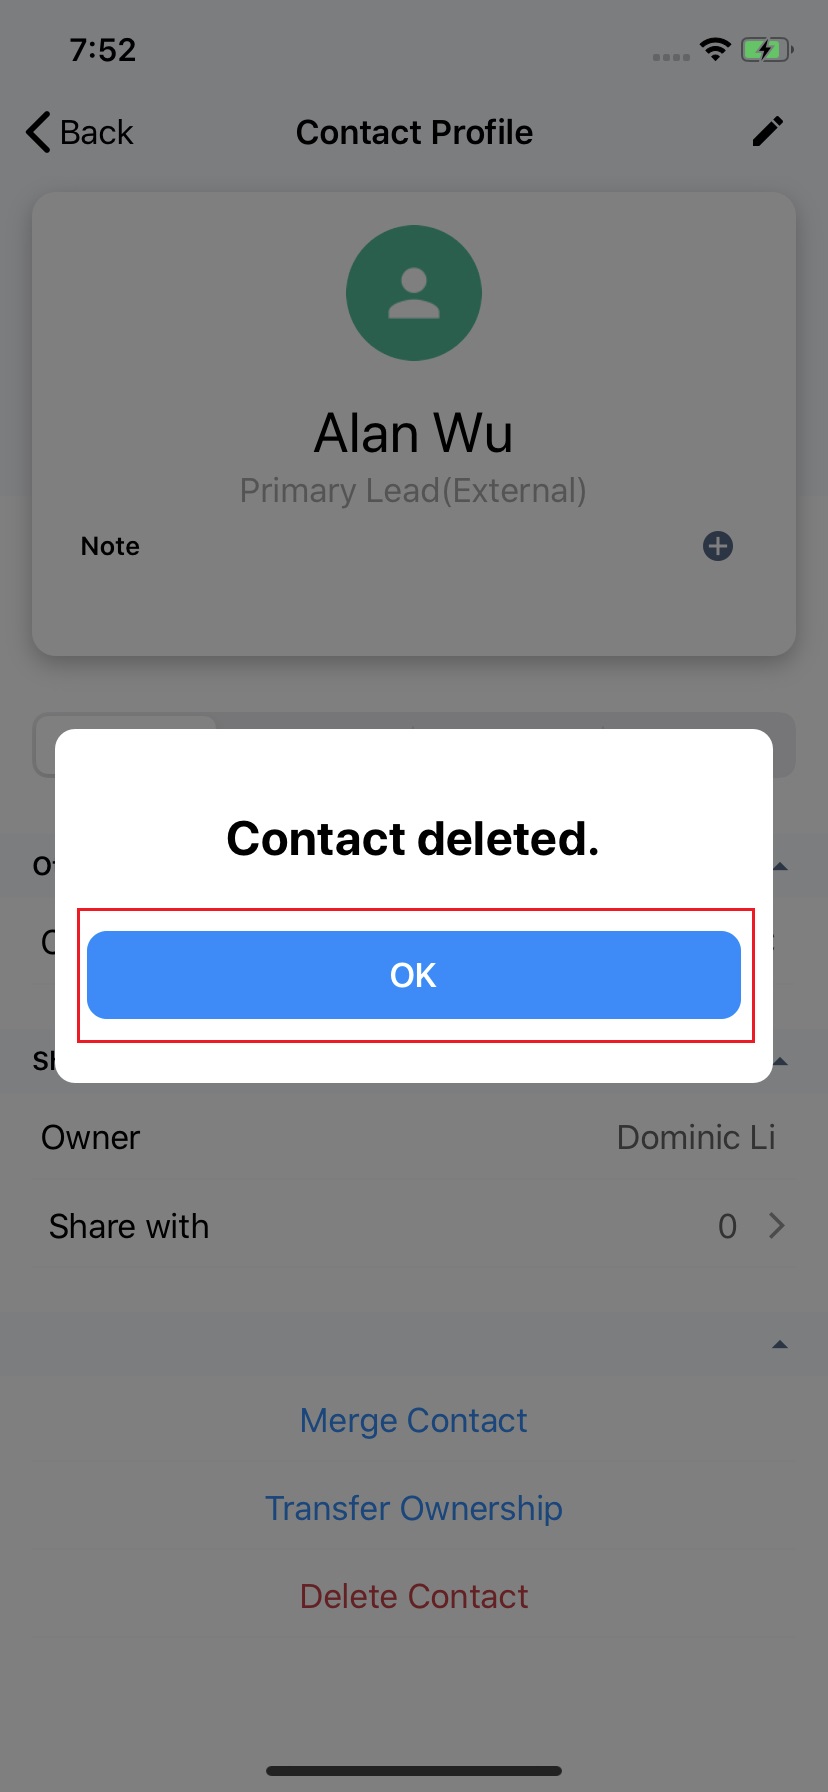
- Tap OK.
📘
When you delete an External Contact from your Contacts List, your chat room with them will remain in your Recent list unless their enquiry has been resolved and closed.