Webflow
Need Omnichannel Live Chat Support for your Webflow website?
CINNOX offers an omnichannel solution that seamlessly integrates with Webflow. Engage with your website visitors in real time through live chat, providing instant support and boosting customer satisfaction. With CINNOX, you can effortlessly handle customer enquiries across various channels and devices, including social media, email, and calls. Simplify your customer service with CINNOX's omnichannel solution today.
Webflow, Inc. is a software that provides website building and hosting services. Their online visual editor platform allows users to design, build, and launch websites.
For more details, go to www.webflow.com.
The CINNOX live chat and web call lets you instantly add call and chat functions on your Webflow site so you can promptly answer enquiries from your online visitors. It installs the CINNOX Widget and Click-to-action (CTA) on your page and lets you take advantage of the platform's core features.
Installing CINNOX Live Chat and Live Call Widget in Webflow
Here are the steps to follow when adding the CINNOX web widget on your Webflow website:
- Log in to your Webflow dashboard account.
Webflow Login Page
- Go to your website's settings page.
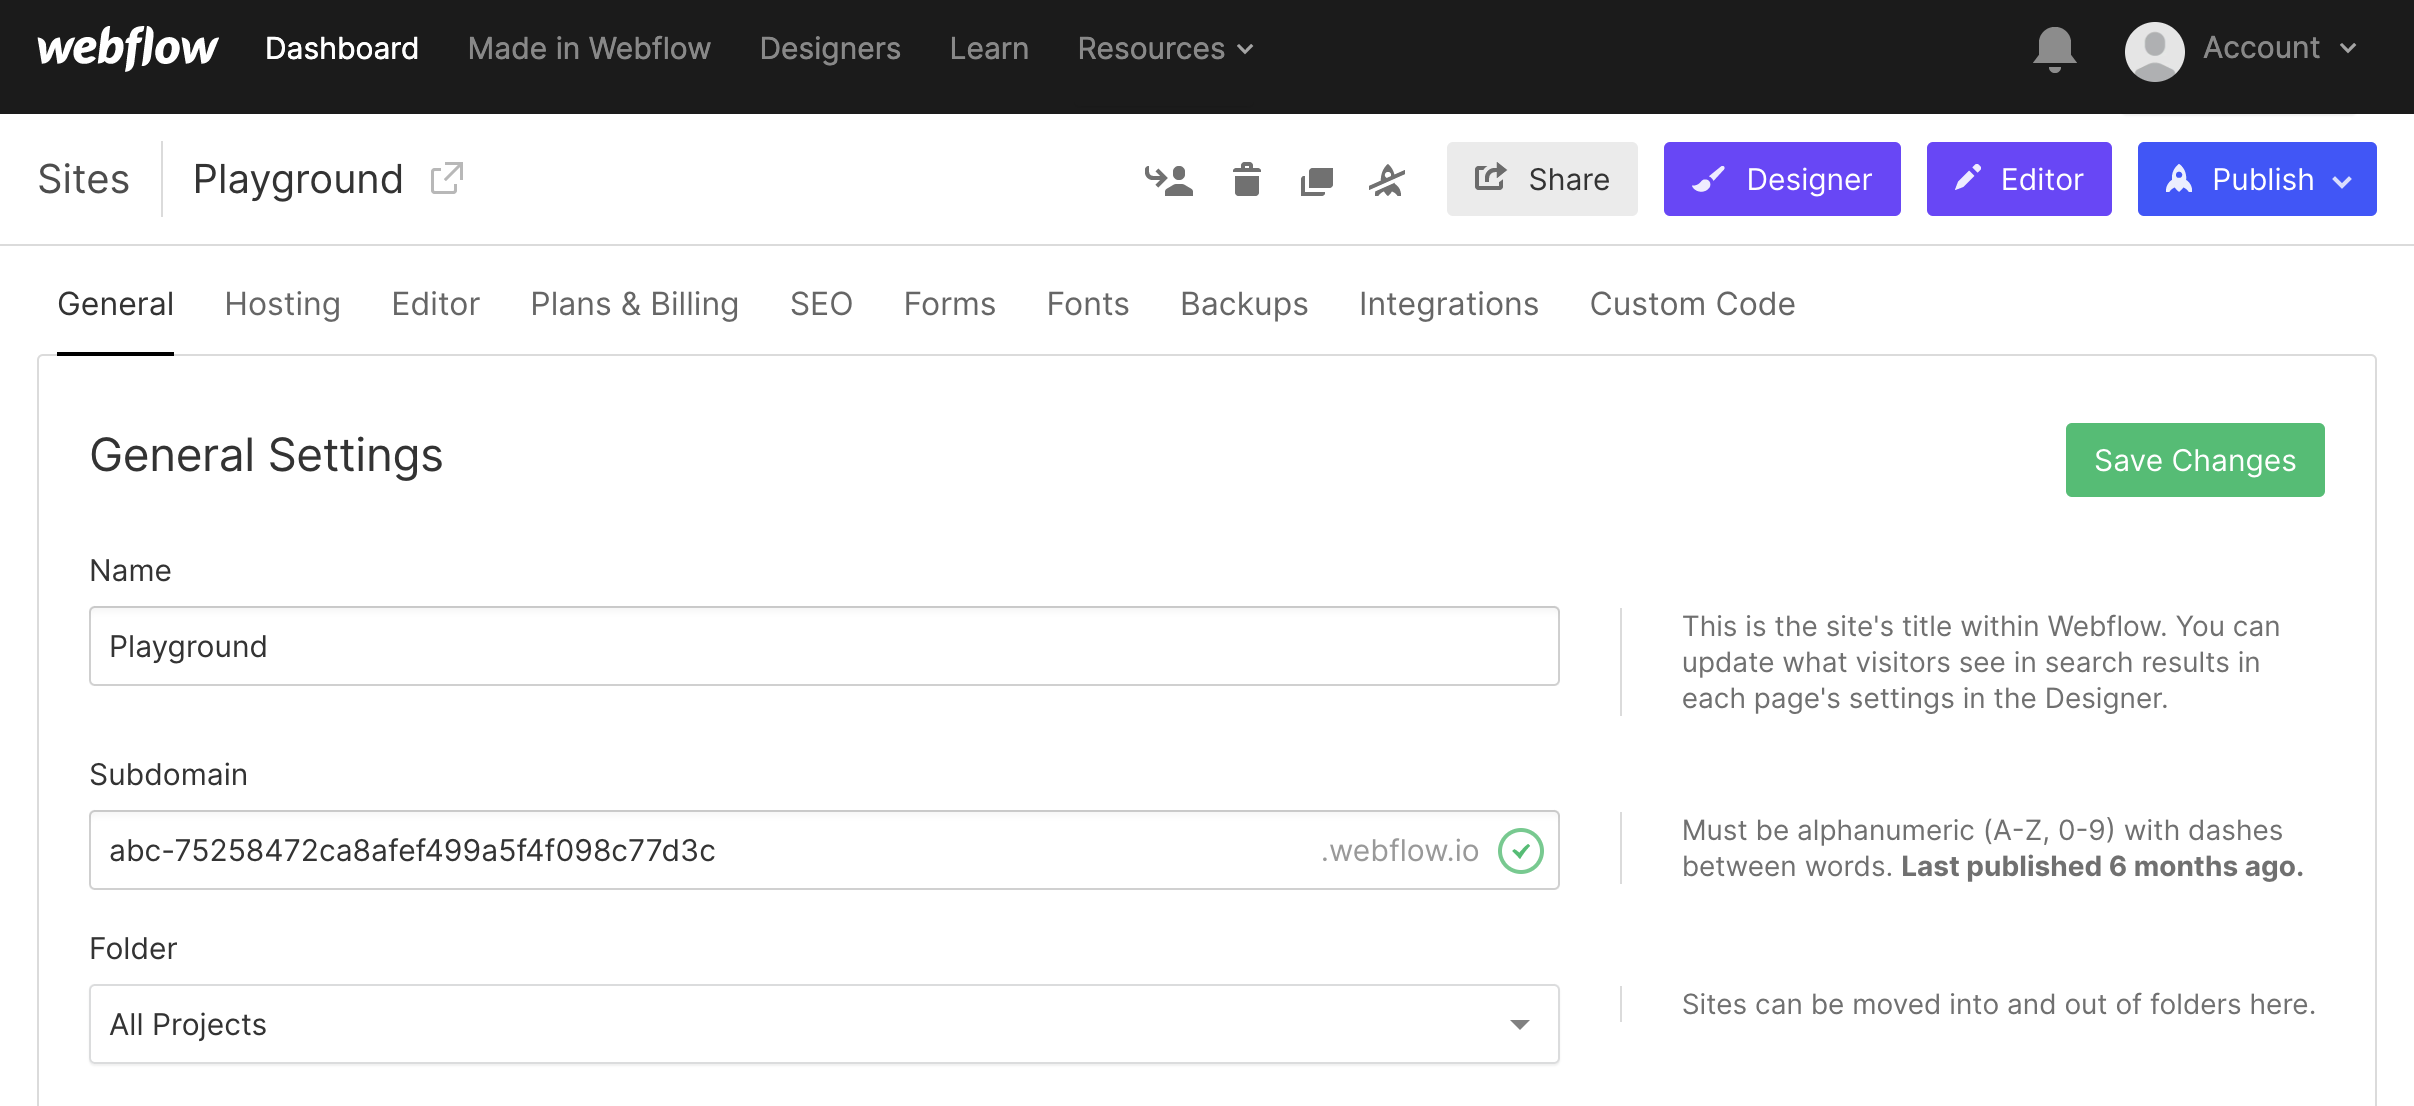
Webflow Settings Page
- Click on the Custom Code tab.
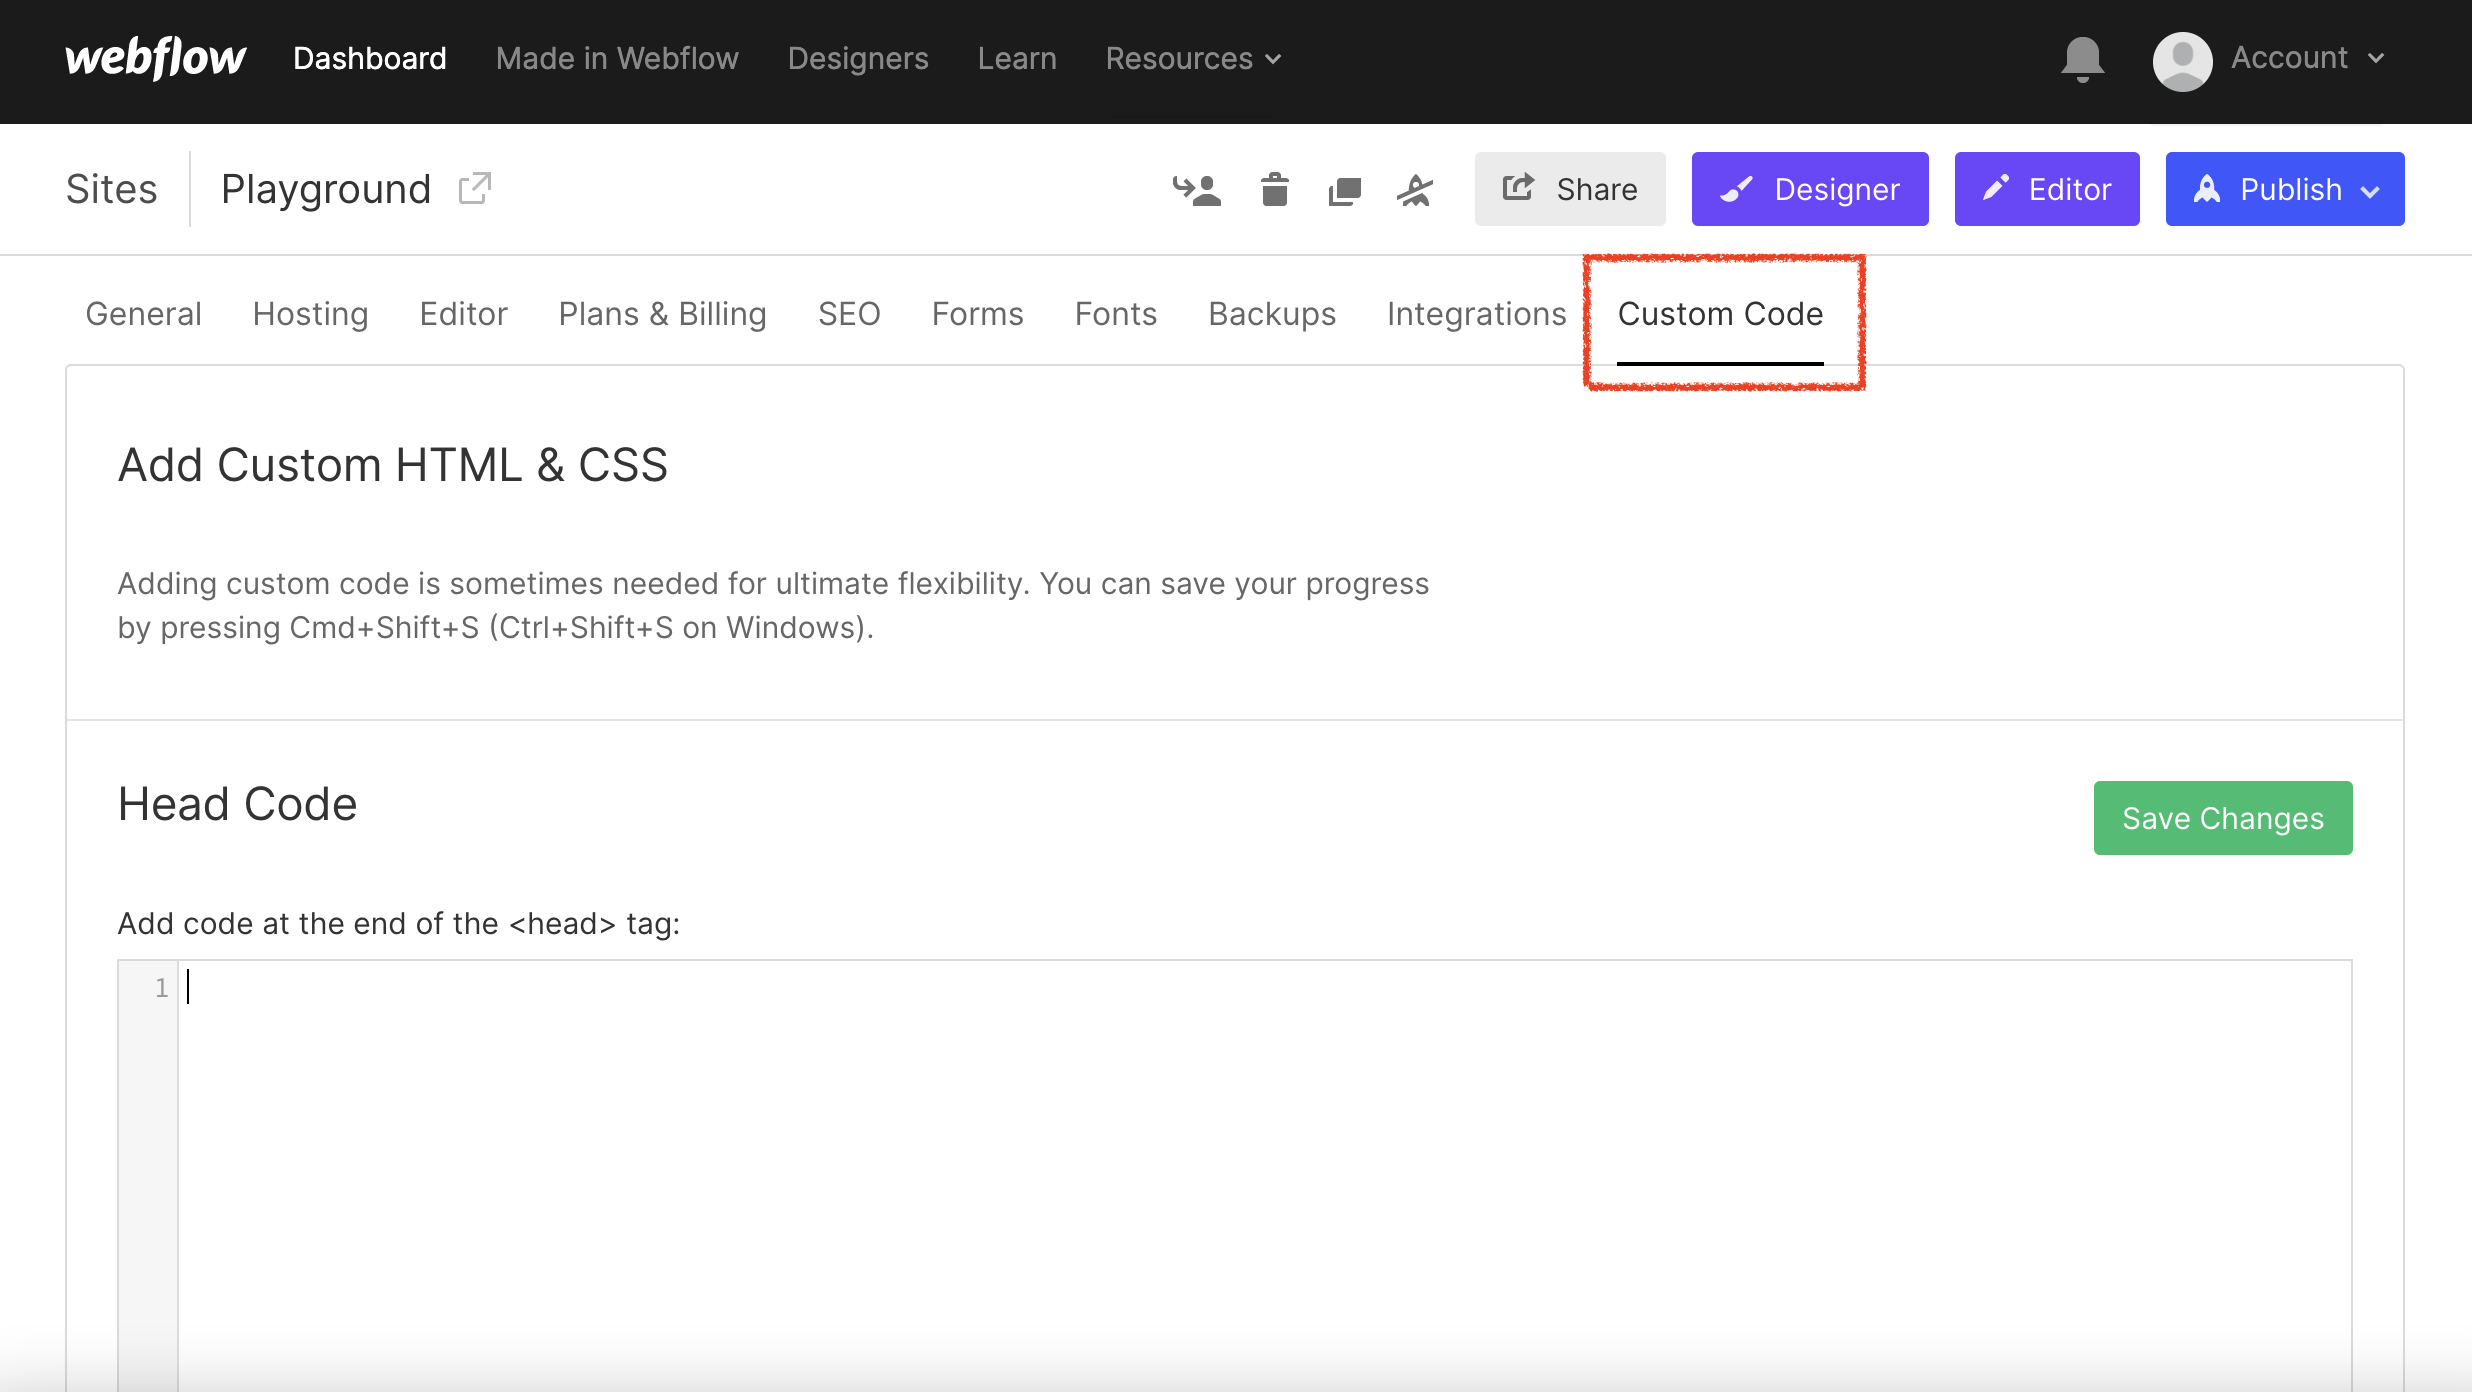
Webflow Custom Code
- Log in to your CINNOX Web Dashboard.
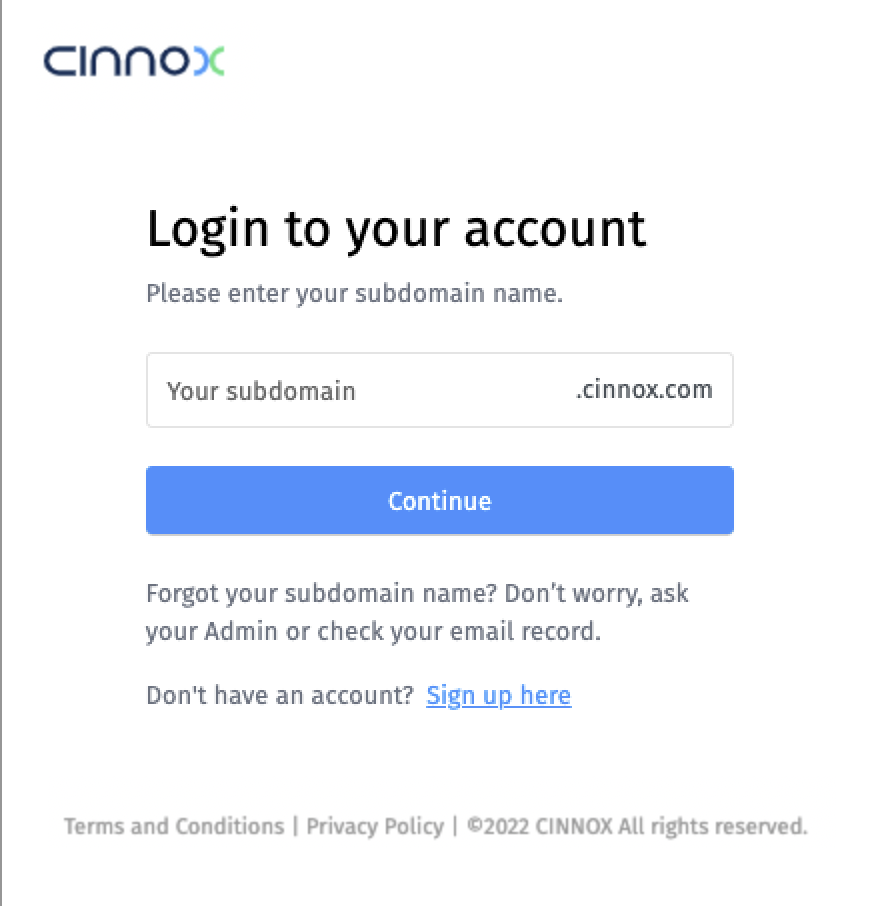
CINNOX > Login Page
- Navigate to Administration > Widget > Installation. From the Widget Installation > Web Widget, click on Copy.
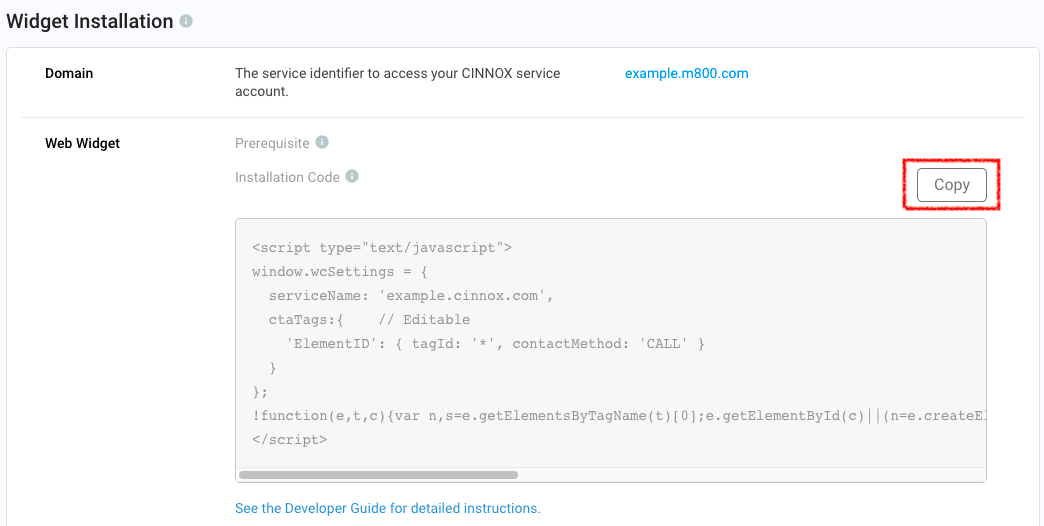
CINNOX Admin > Widget > Installation
- Back on your Webflow, under the Head Code, paste your CINNOX Widget code.
If there is already existing code in the Head Code, paste the CINNOX Widget code before or after the existing code.
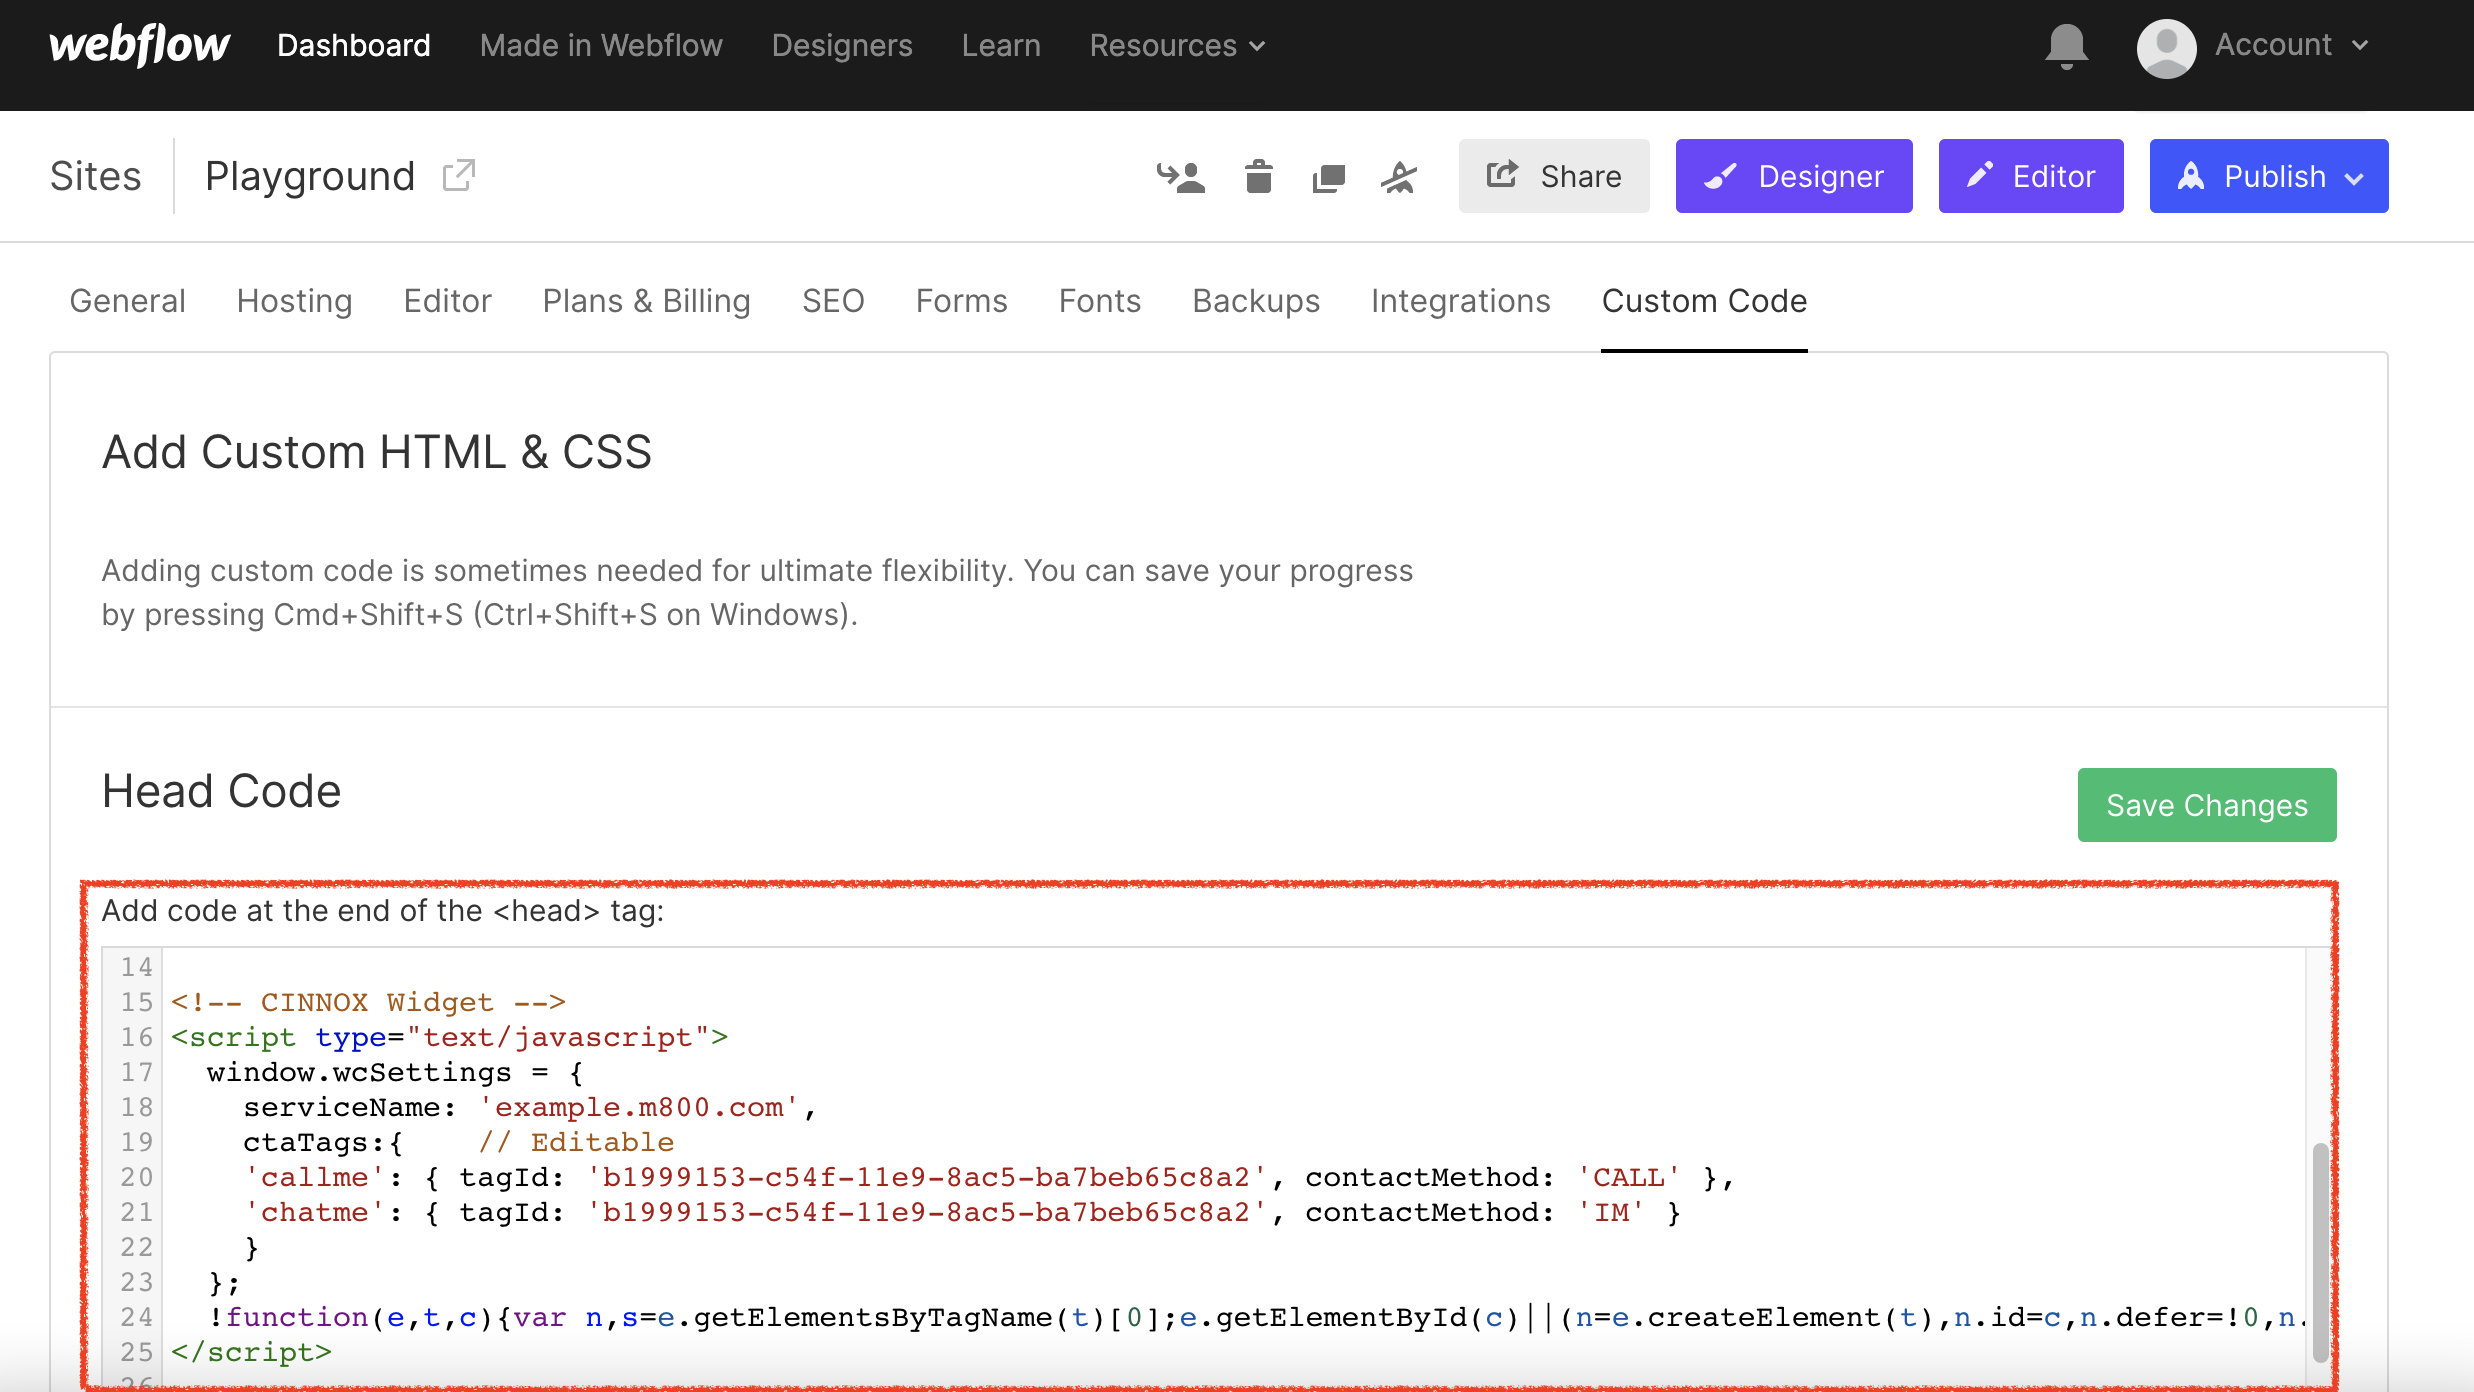
Webflow Head Code
- Click on Save Changes at the bottom right corner of the page.
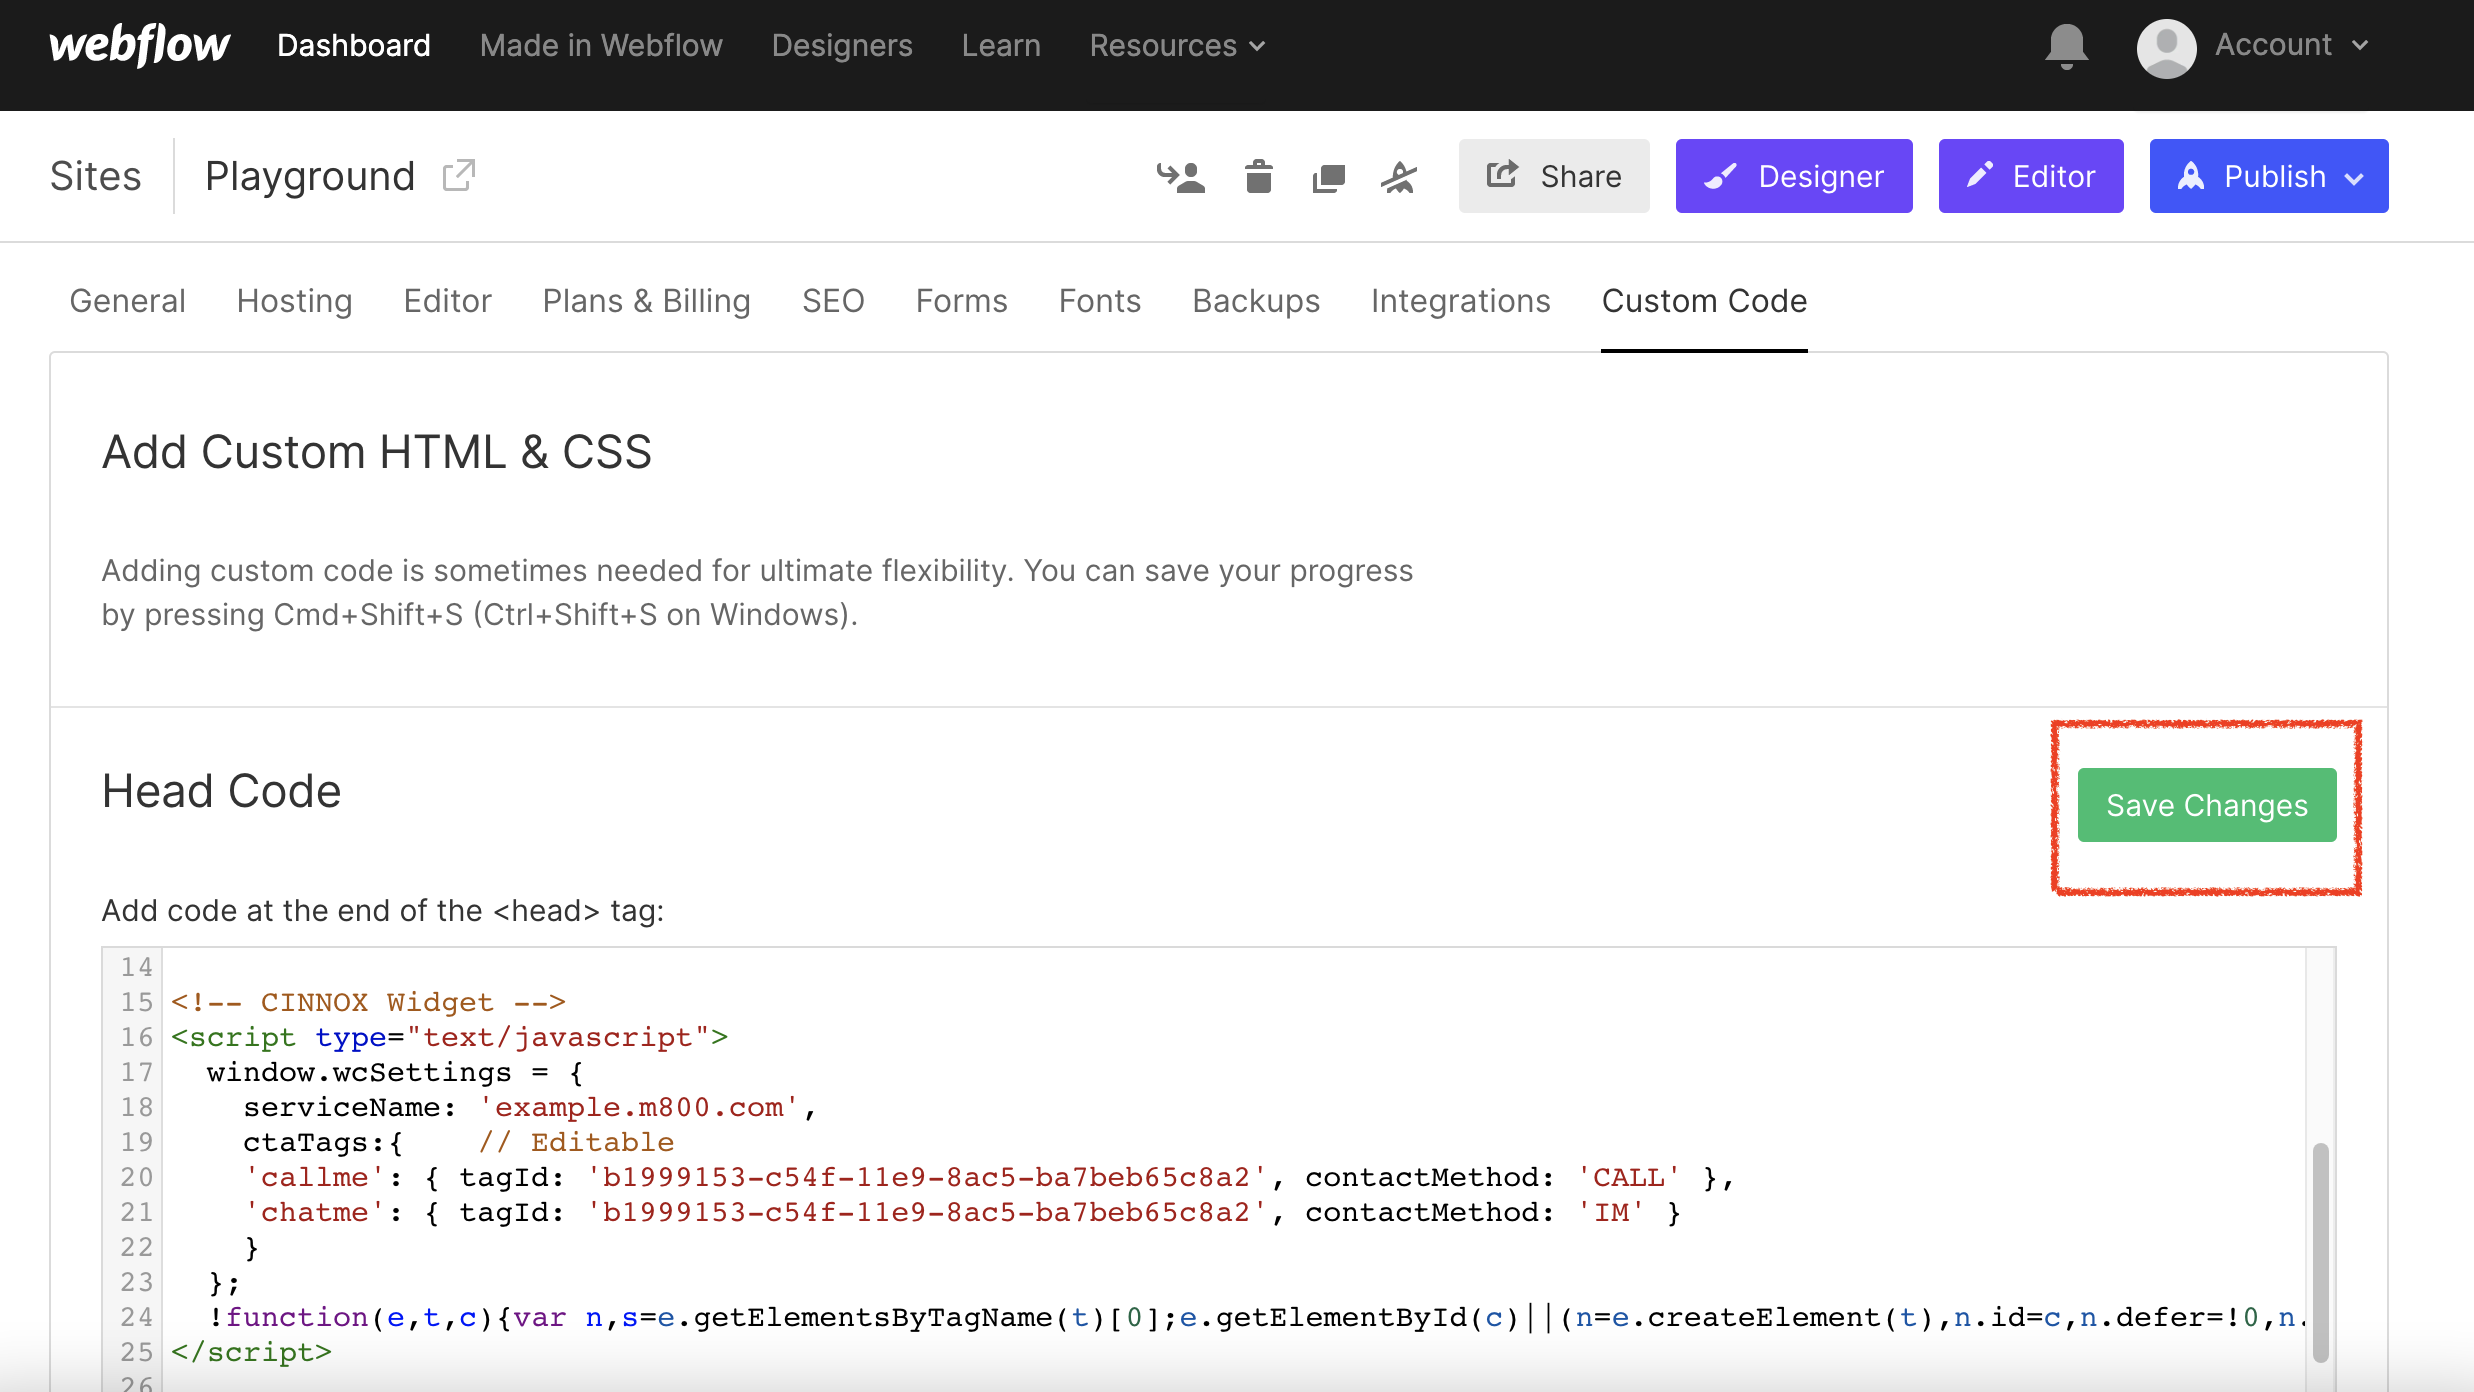
Webflow Head Code Save Changes
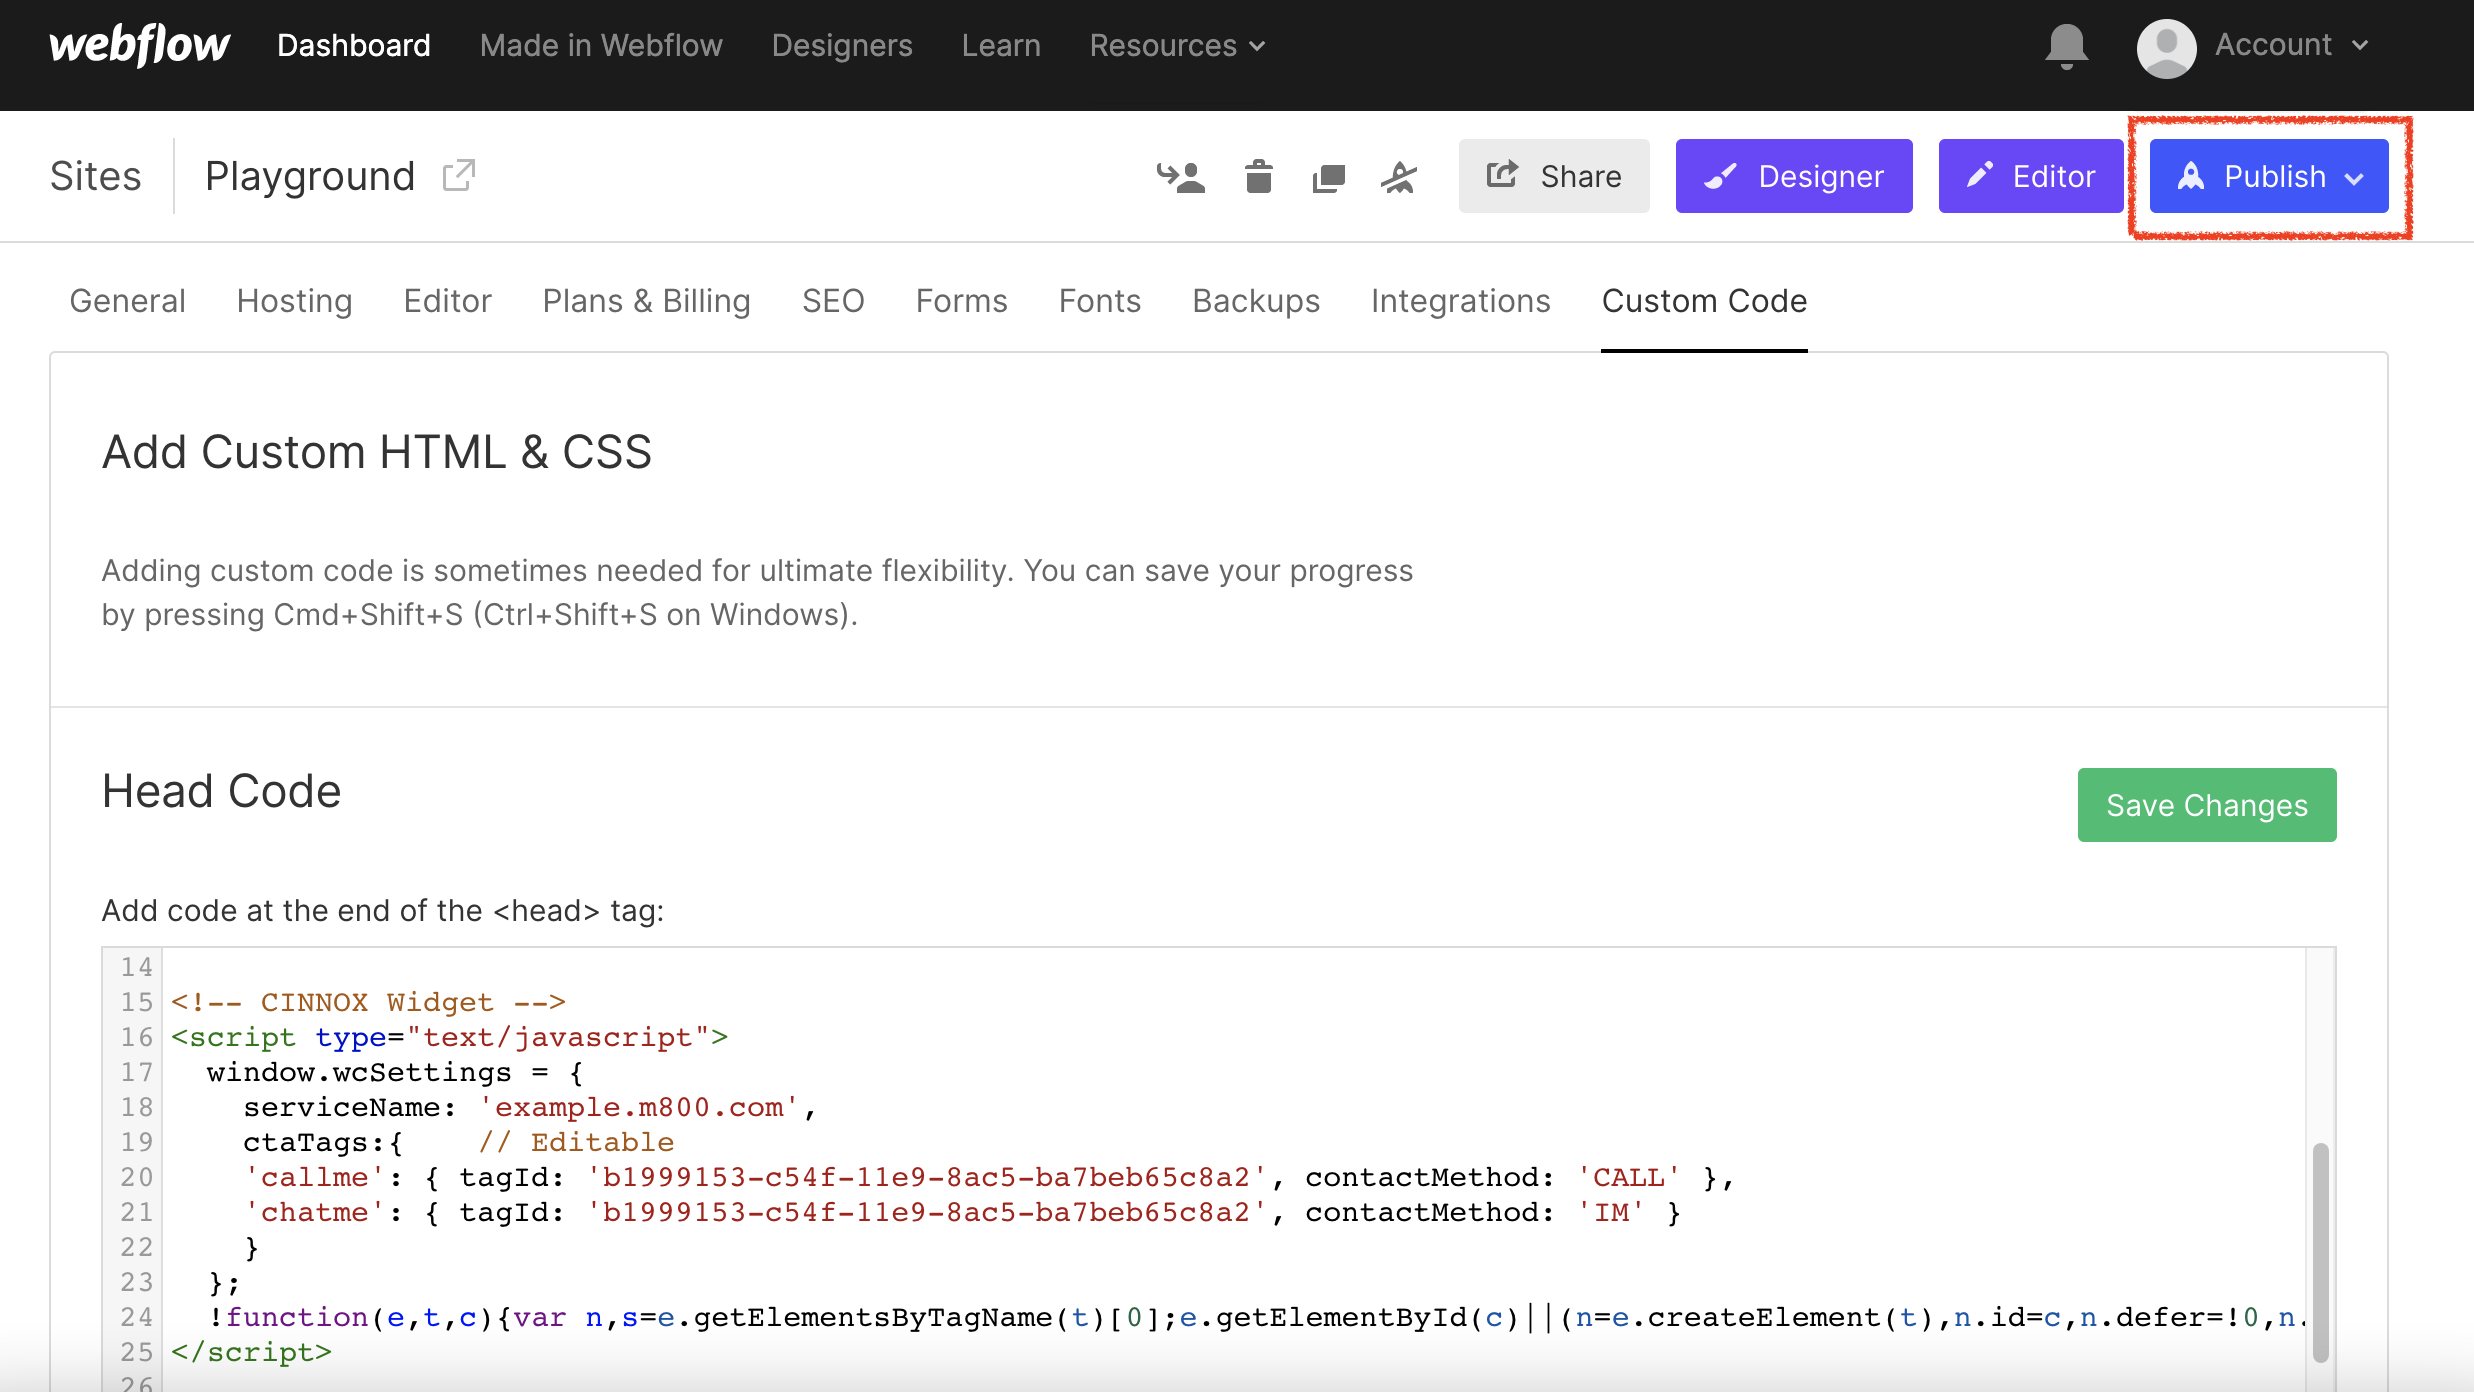
- Click on Publish, located at the upper right corner of the page.
21_at_5.40.17_PM.png "Screenshot 2022-10-21 at 5.40.17 PM.png")
Publish Webflow Site with CINNOX Widget
- Open your published website. The CINNOX Widget should appear at the bottom right corner.

Webflow Site with CINNOX Widget
From now on, visitors can contact you through live chat and call on your Webflow website.
📘
For more information on configuring your CINNOX widget, refer to this Guide's Customising Your Widget section.
📘
To know how to change the widget position from right to left, refer to this Guide's Dynamic Change of Installed Widget section.
Adding CINNOX Click-to-Action (CTA) in Webflow
A CTA button is an HTML5 button in your website that you can configure to trigger the following actions in the CINNOX web client without clicking on the widget:
- Open the CINNOX Directory
- Make a call or chat enquiry to a particular tag
🚧
Preconditions
- You have to create your CTAs in your CINNOX Web Dashboard. Refer to Adding Click-to-Action (CTA) Buttons for more details.
- Complete the Installation of the Installing CINNOX Live Chat and Live Call Widget in Webflow with the CTA codes before proceeding with the below steps if you want to create CTAs on your site.
- Log in to your Webflow dashboard account.
- Open your website > Designer view.
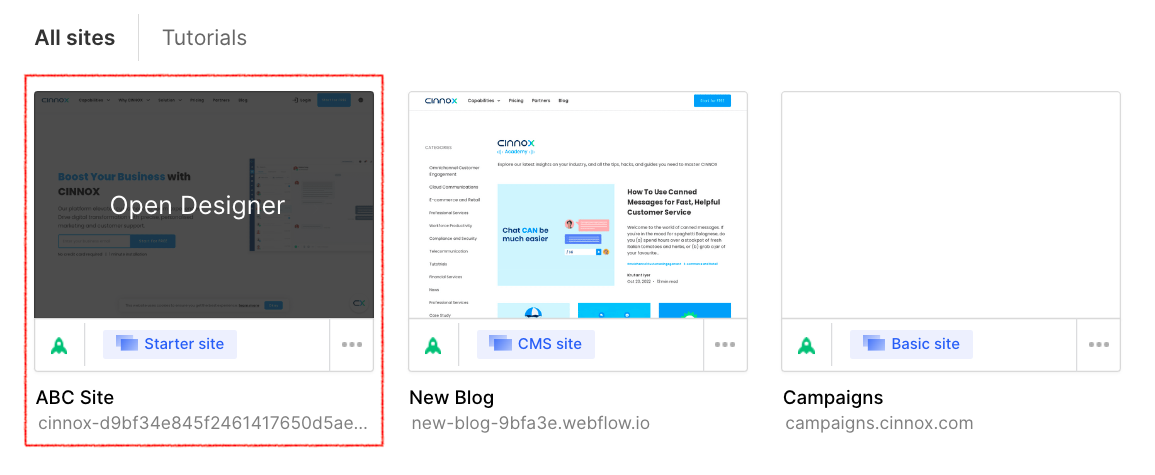
- Go to Pages and find the page you want to add CTA, e.g. Contact Us page.
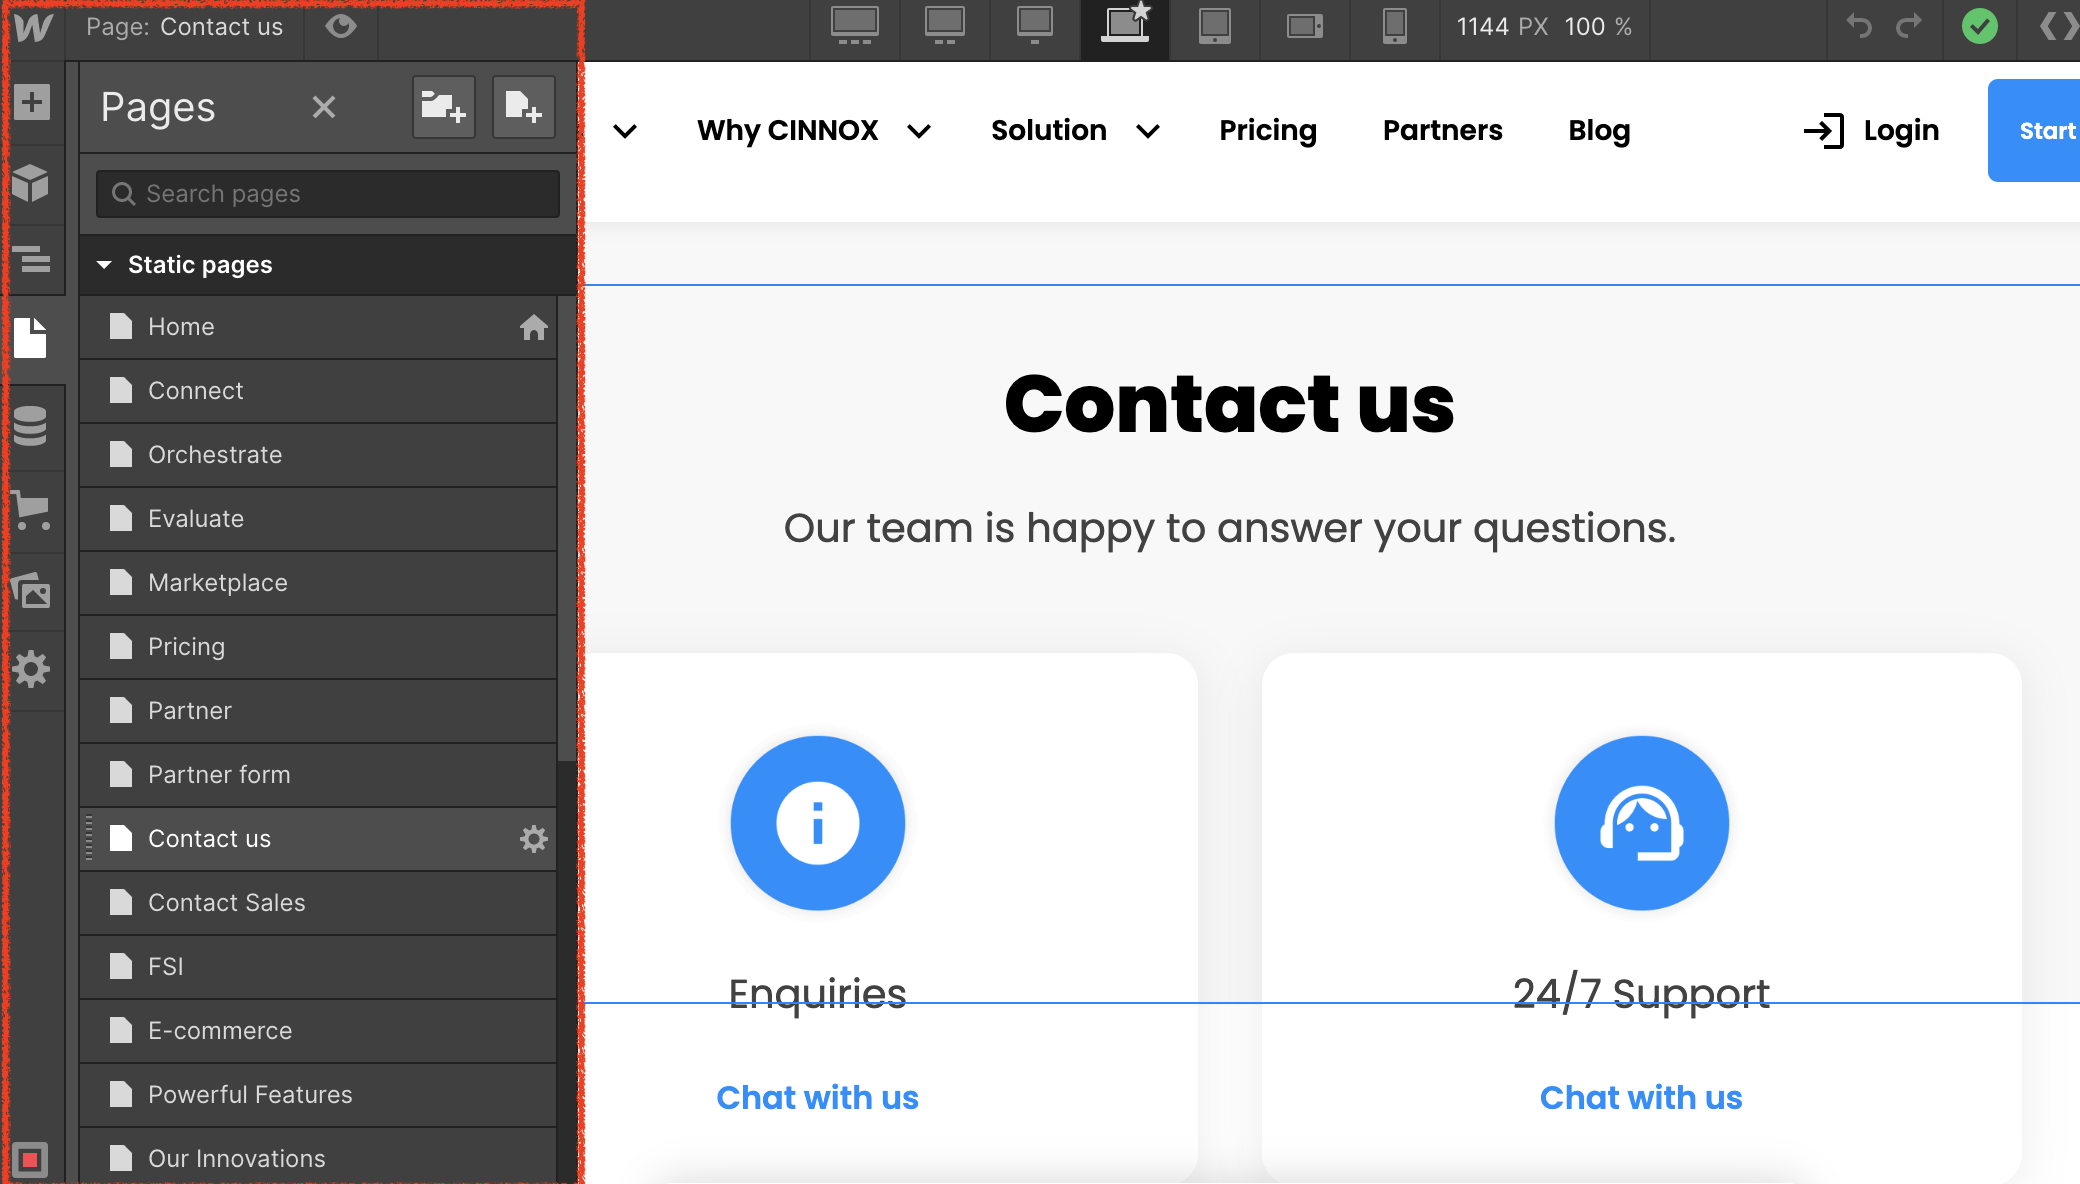
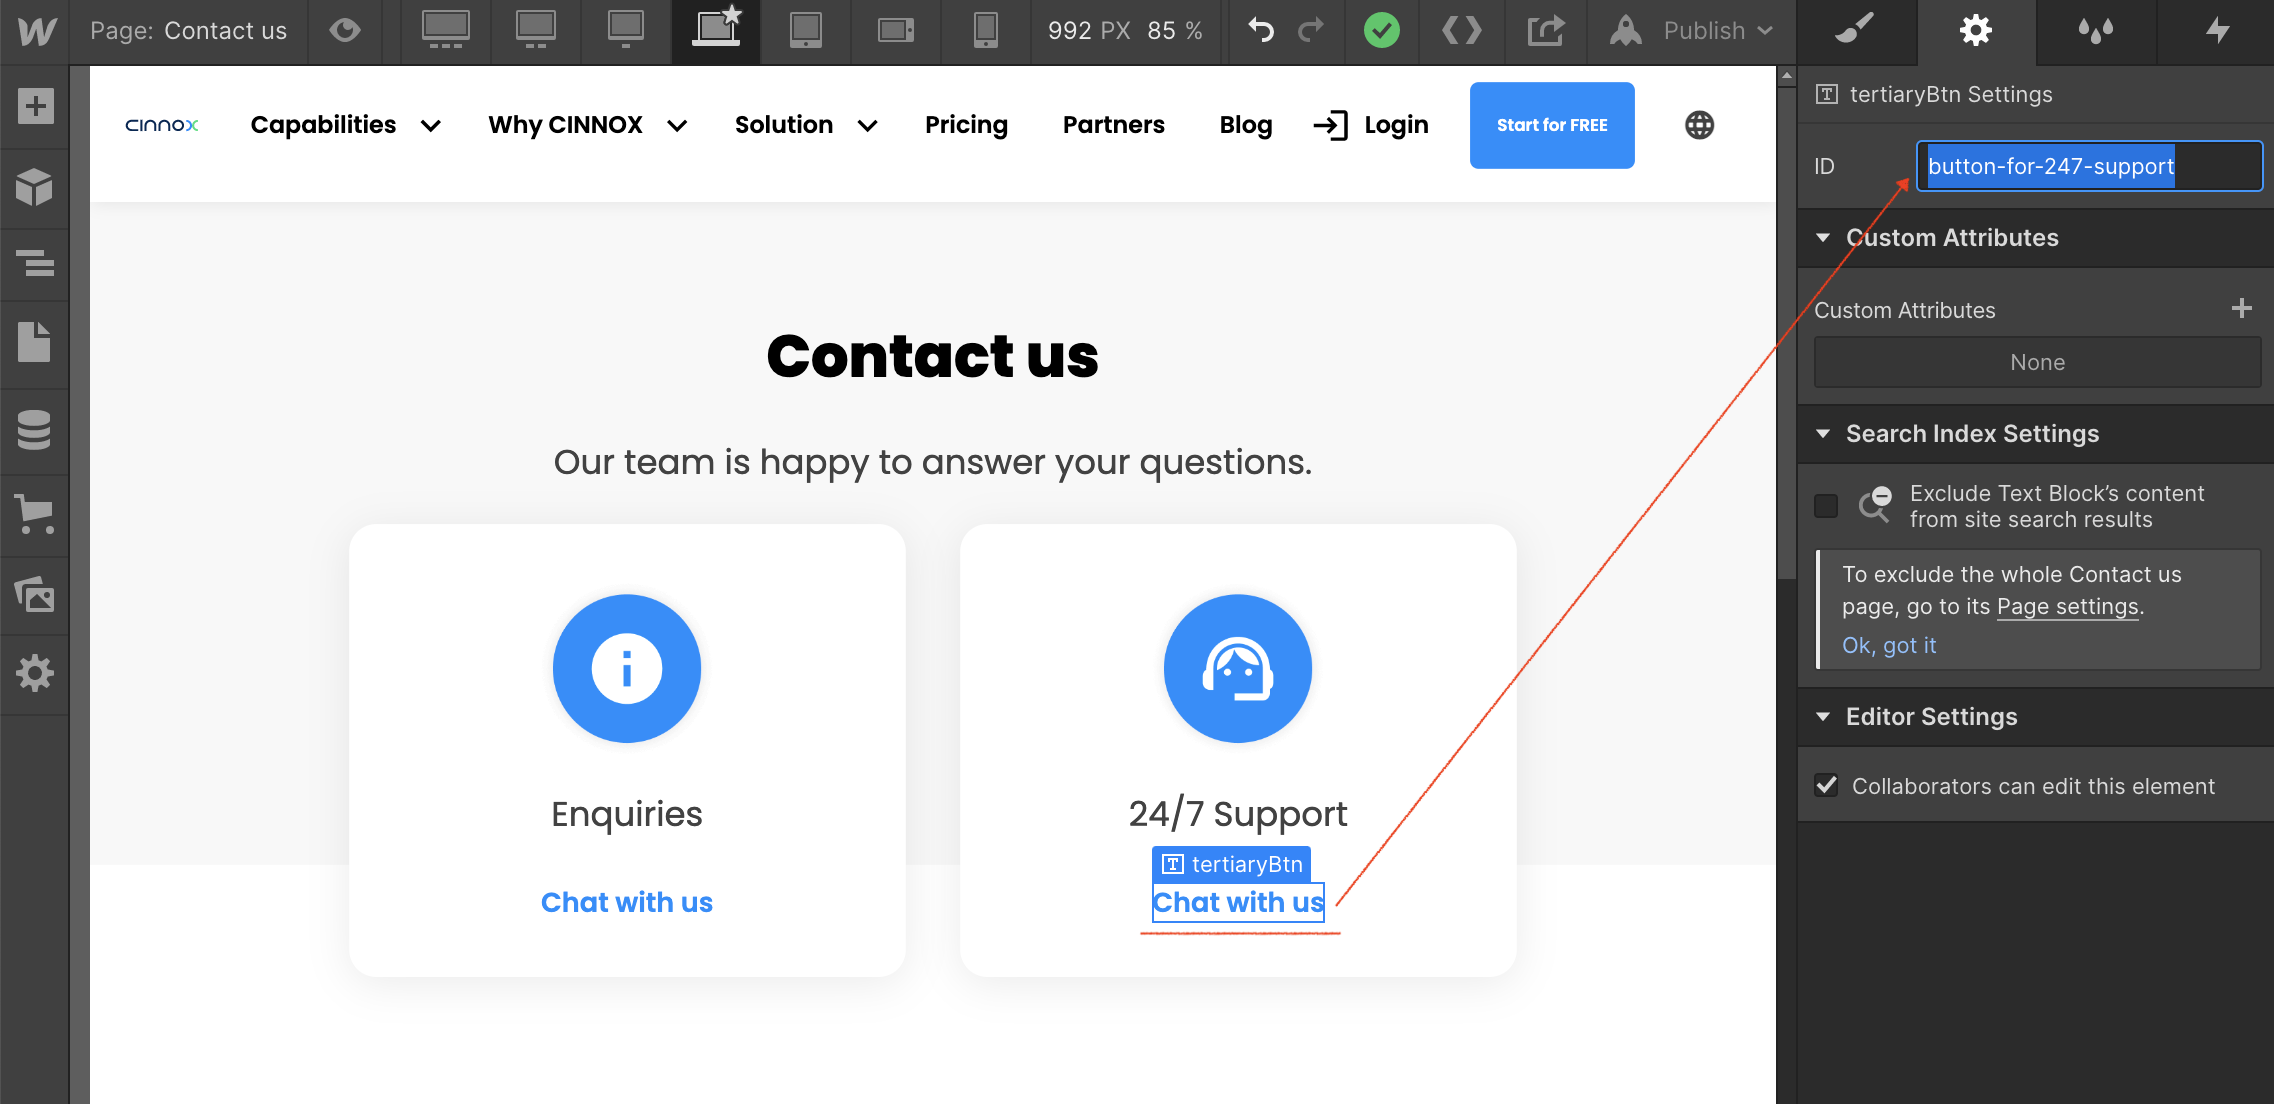
- Find and click the UI component/element on the selected page, e.g., button, text, image, and others.
- On the right side of the page, click the Settings icon, and the ID with placeholder For in-page linking should appear
- Log in to your CINNOX Web Dashboard.
- Navigate to Administration > Widget > Installation, from the Widget Installation > Web Widget, and copy the CTA Button ID.
If no CTA button has been created, create one and copy the button ID afterwards.
Refer to Adding Click-to-Action (CTA) Buttons to know more about how to create a CTA in the CINNOX Dashboard.
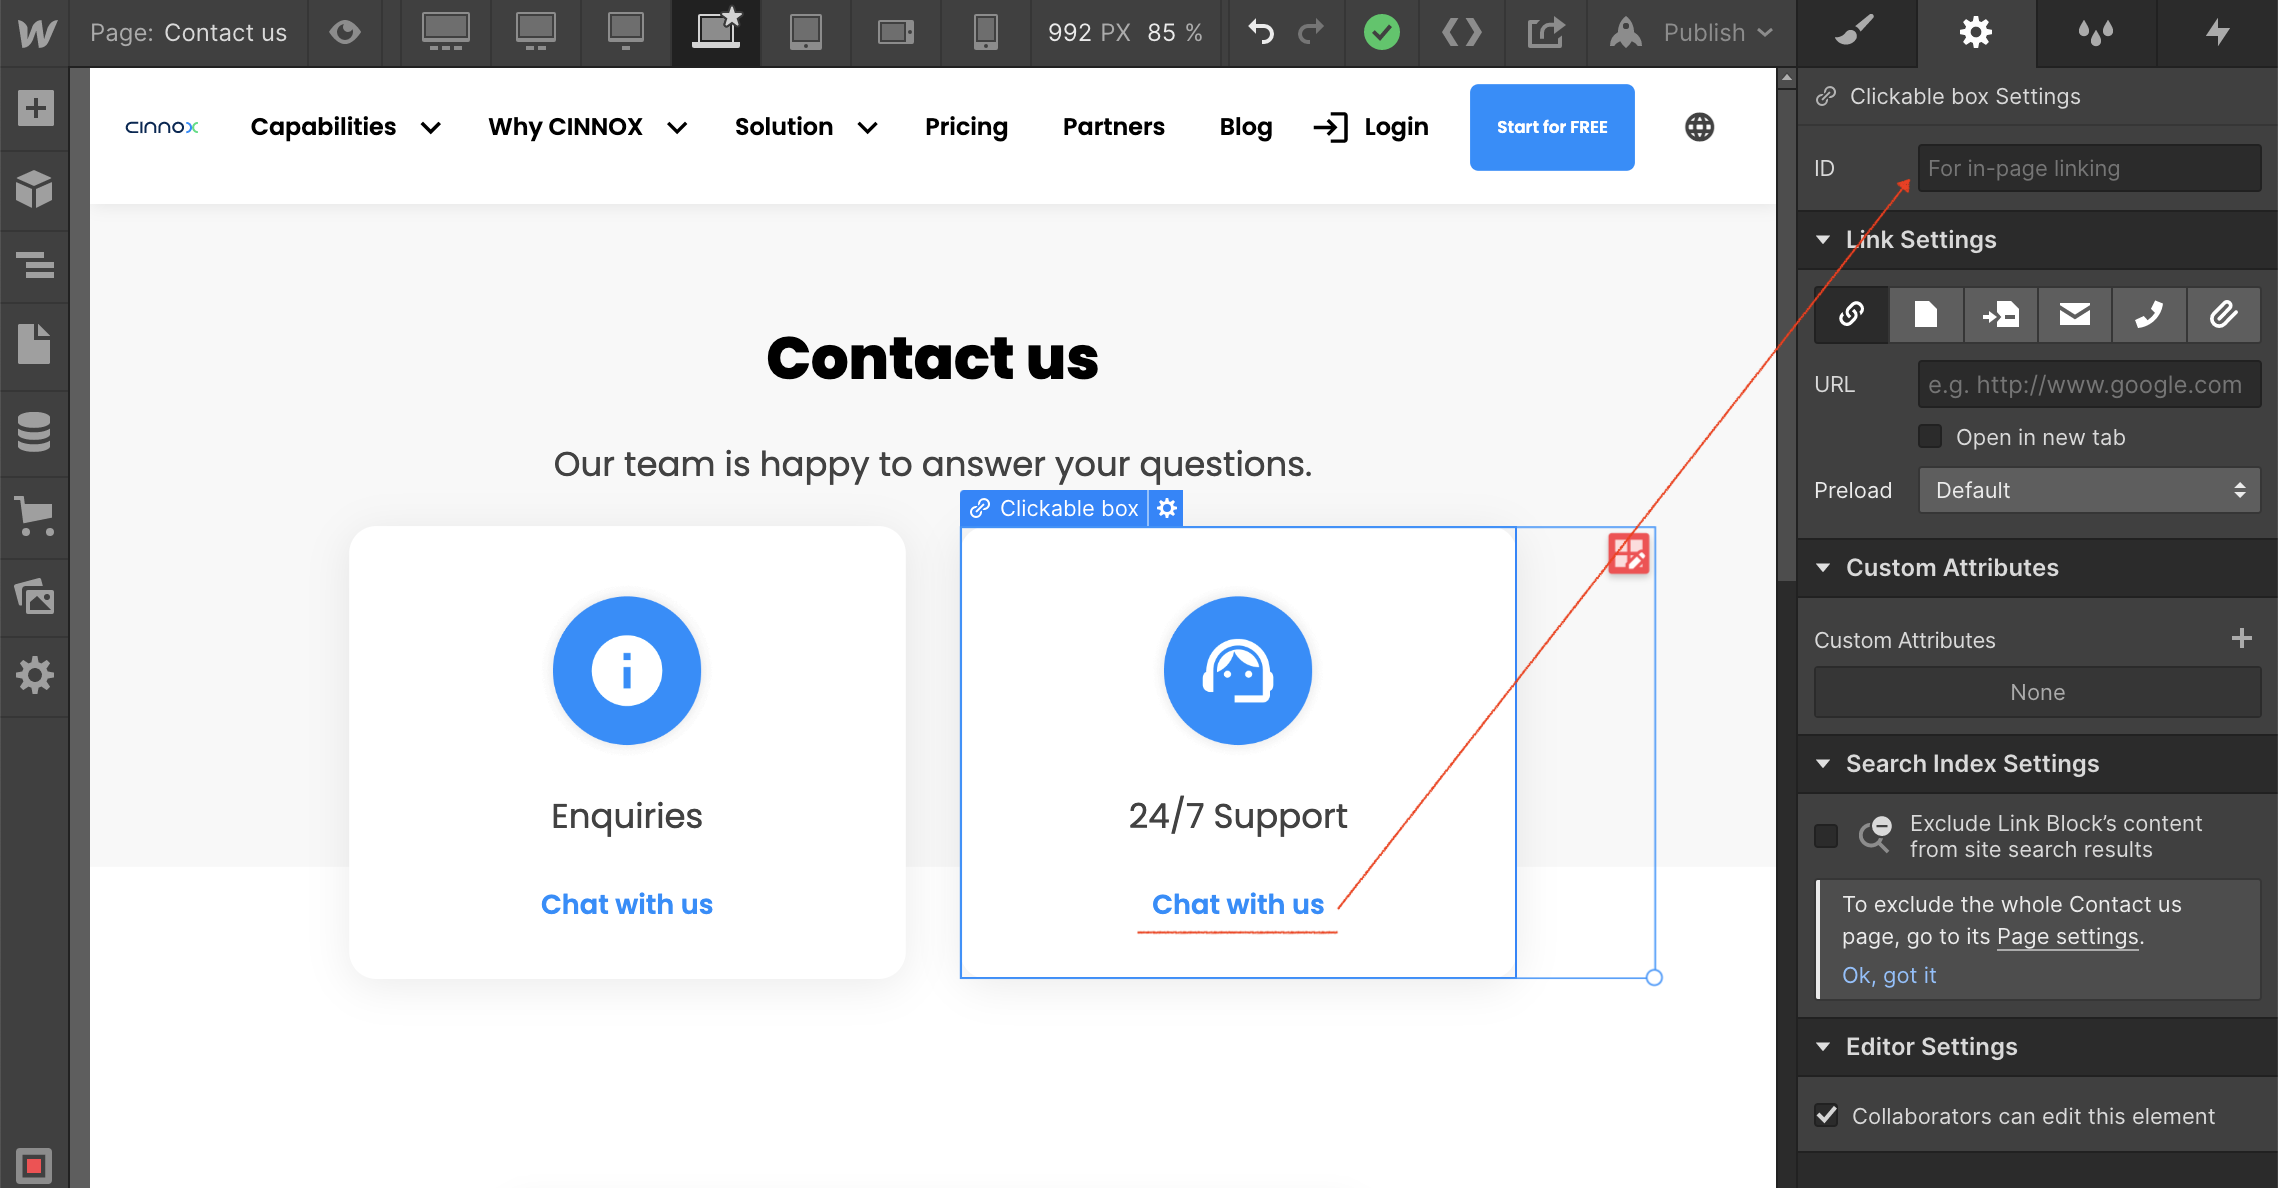
See below CTA Button ID examples for reference
- Back to your Webflow, paste the CTA button ID to the ID of your UI component. Please ensure the button ID is saved.
- Repeat the same steps above if you want to create more CTA. Please test it out on your website when published.
📘
To know how to hide the CINNOX Widget and just the CTAs on the website, refer to this Guide's Hiding or Disabling the Web Widget section.