Connecting Line
Looking for an Omnichannel Customer Service Solution?
Our competitive plans and high-quality service enable you to effortlessly handle customer enquiries and engage with them from any device, anywhere in the world. We've got you covered from LINE, WhatsApp, WeChat, and Facebook Messenger to other social media channels, live chat and calls, local and international calls, and emails. Simplify your customer service and enhance your reach with CINNOX.
Connect your LINE Official Account to your CINNOX service. Your visitors and customers' messages on your LINE Account become social enquiries in your CINNOX service, which any of your Staff can attend as one-on-one conversations.
Acquire your LINE Official Account
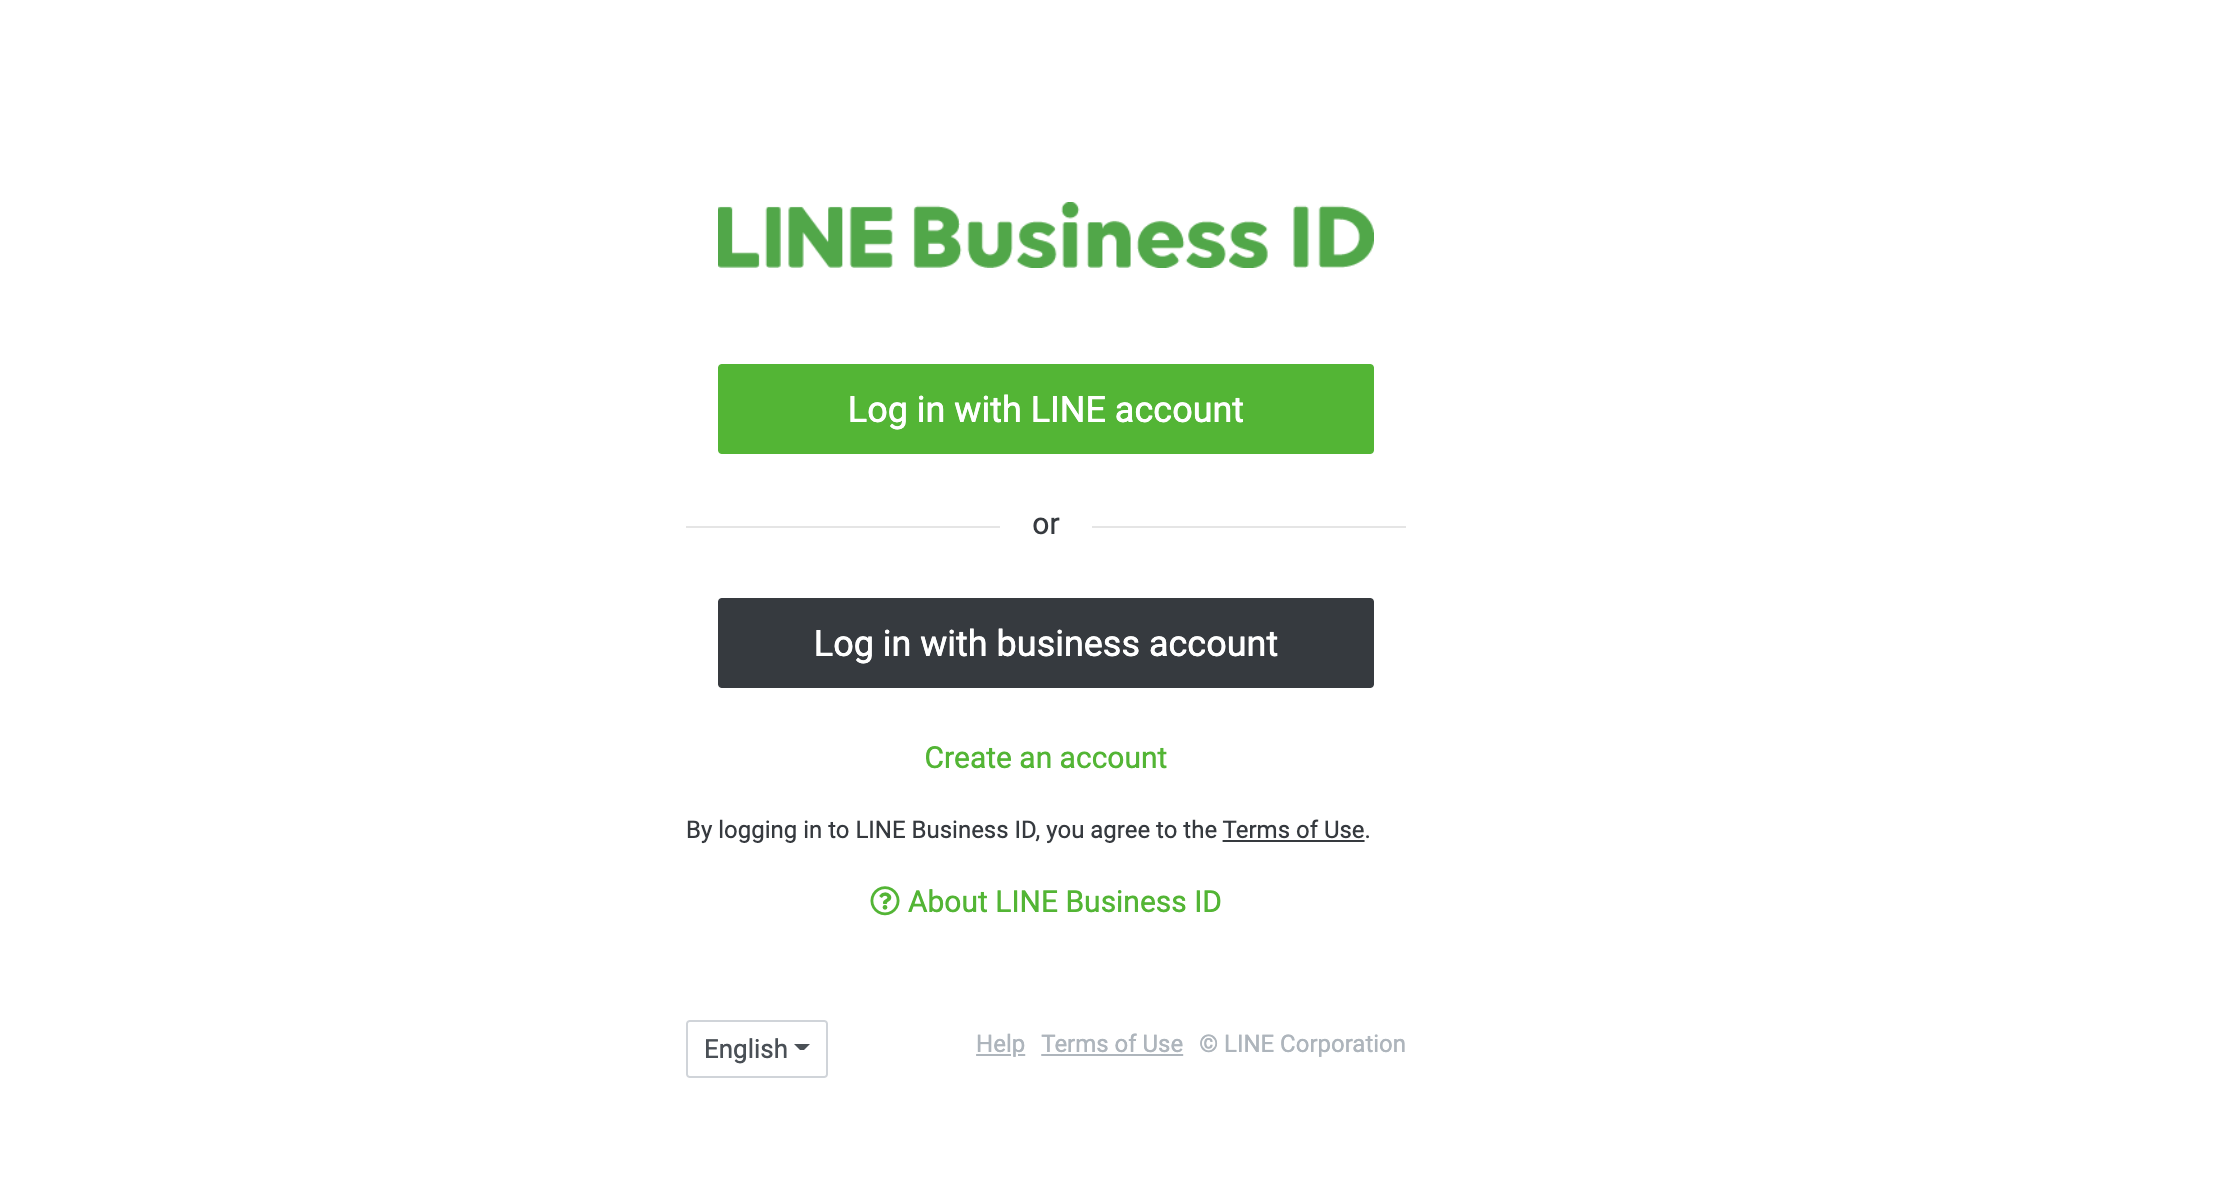
Please find the LINE Official Account login and sign up page here to log in or sign up for a LINE Official Account.
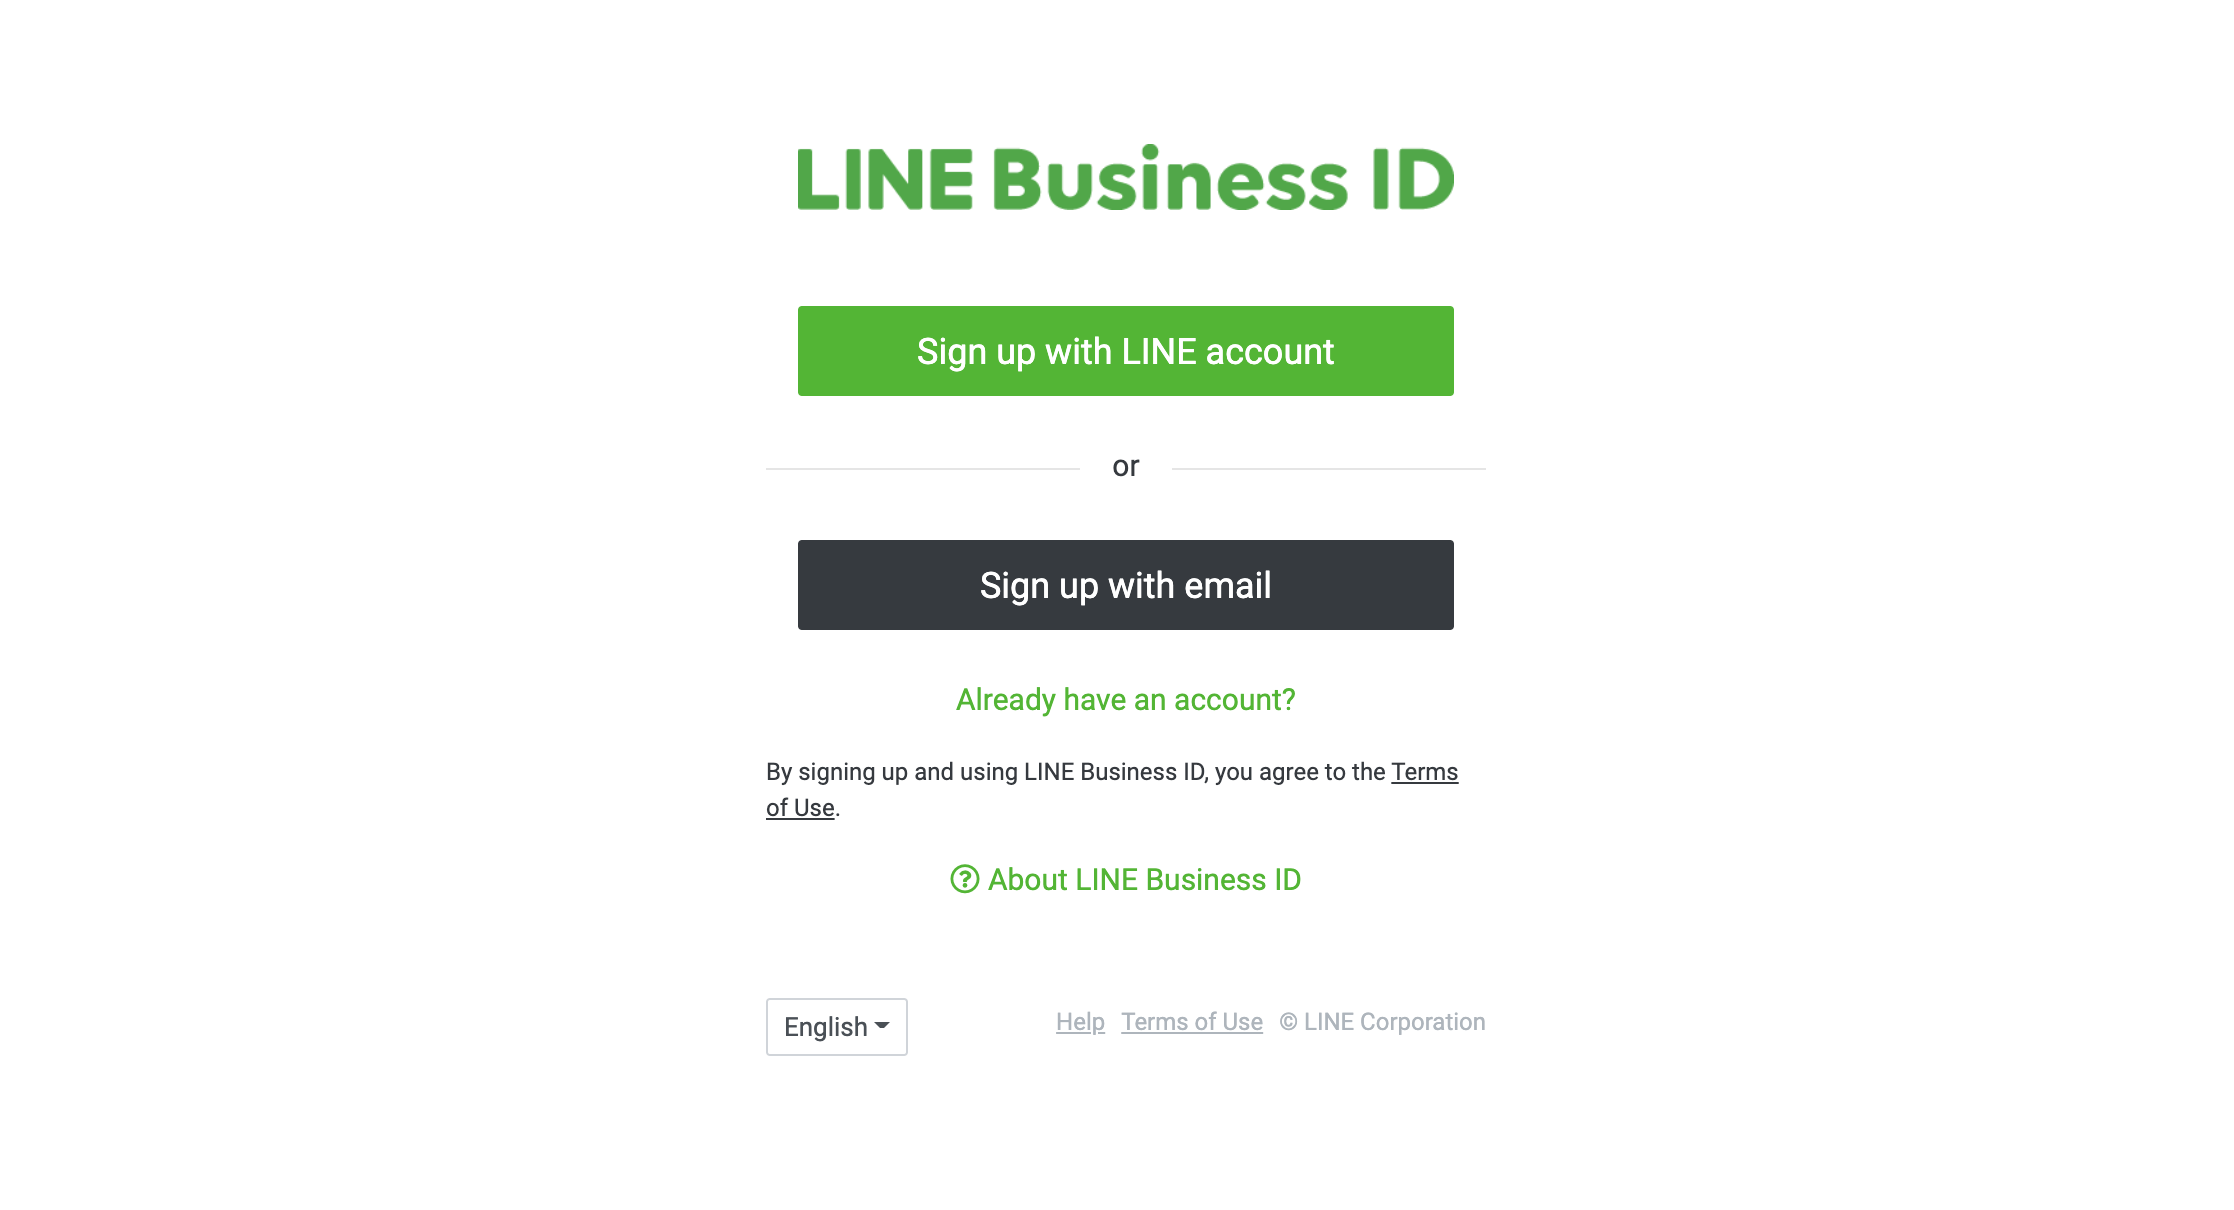
Sign up for LINE Business ID
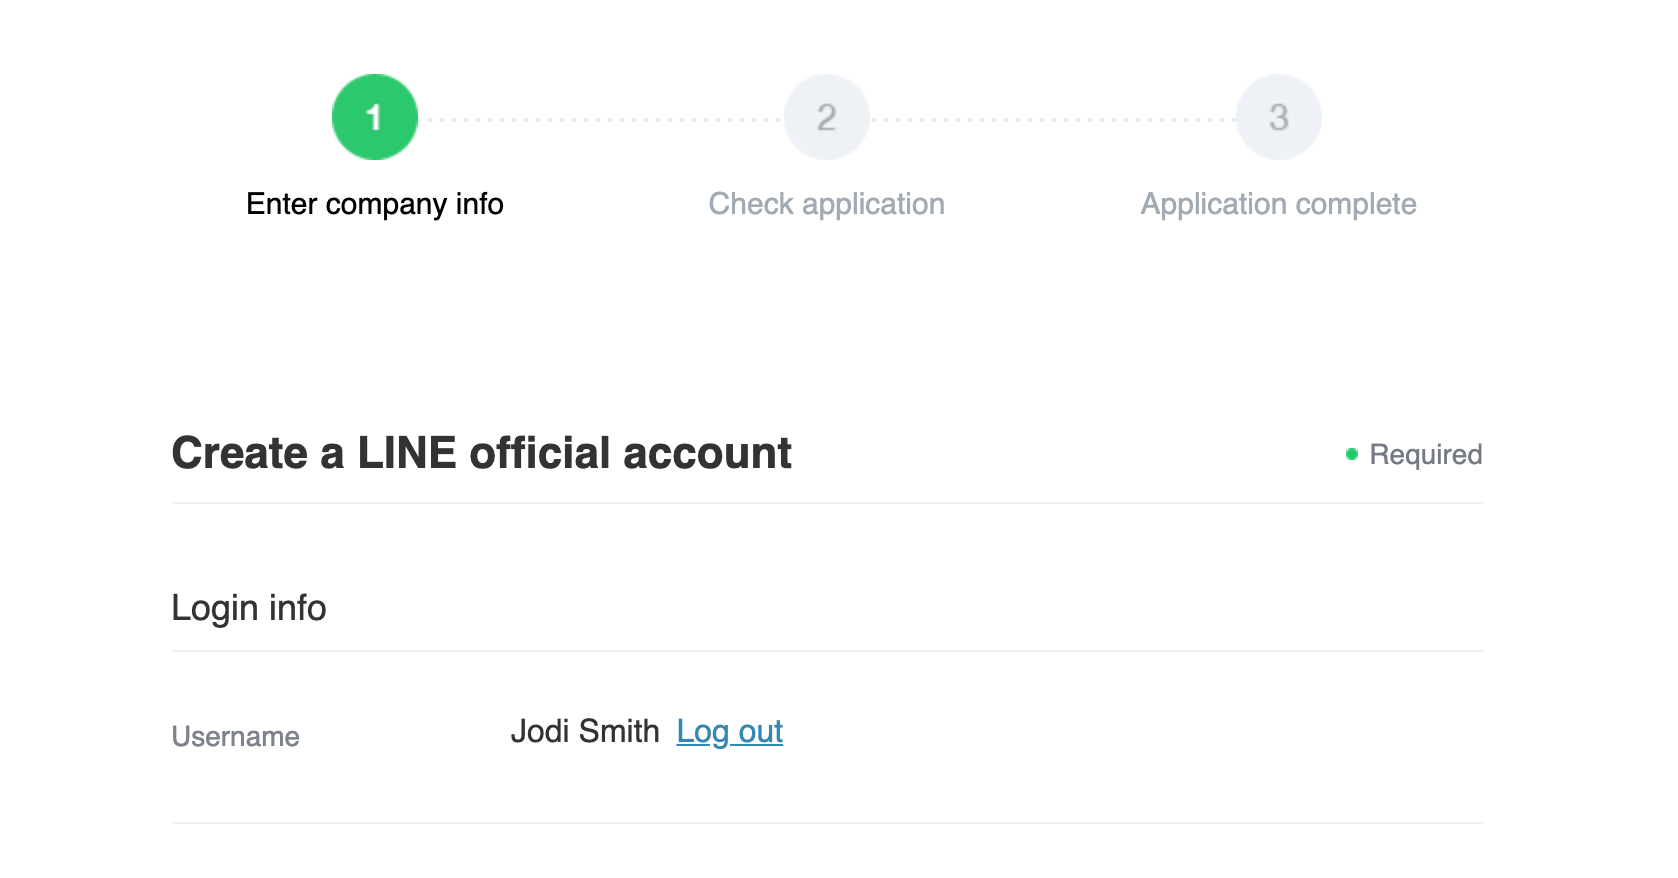
You will need to:
- Register your Company Information
- Check the application
- Complete and submit the application
LINE Official Account Application
A page will state that Your LINE Official Account has been created when you have completed the required steps from LINE.

Create a Provider and add a Channel
- Log in to the LINE Developers Console with the email address, LINE Account, and password.
- Click Create on the Console home page.
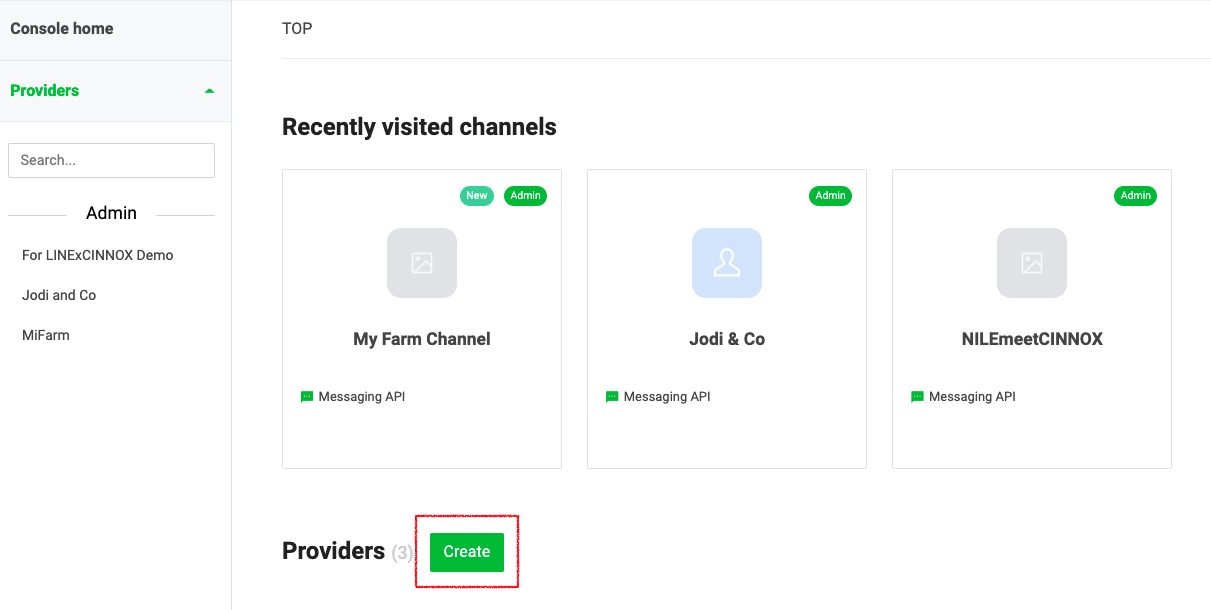
Create a LINE Provider and add a Channel
- Enter the name of the provider.
The provider is the entity that offers your app. For example, you can use your name or your company's name.
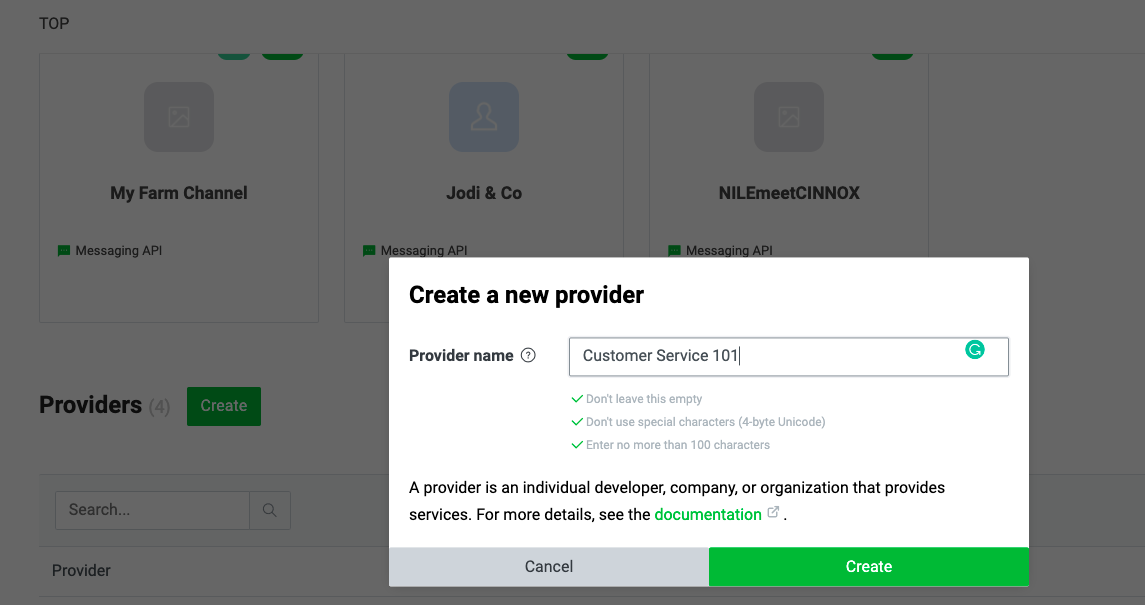
Create a new provider.
- Click Create. You will be redirected to the channel detail page.
- Select Create a Messaging API channel as your channel.
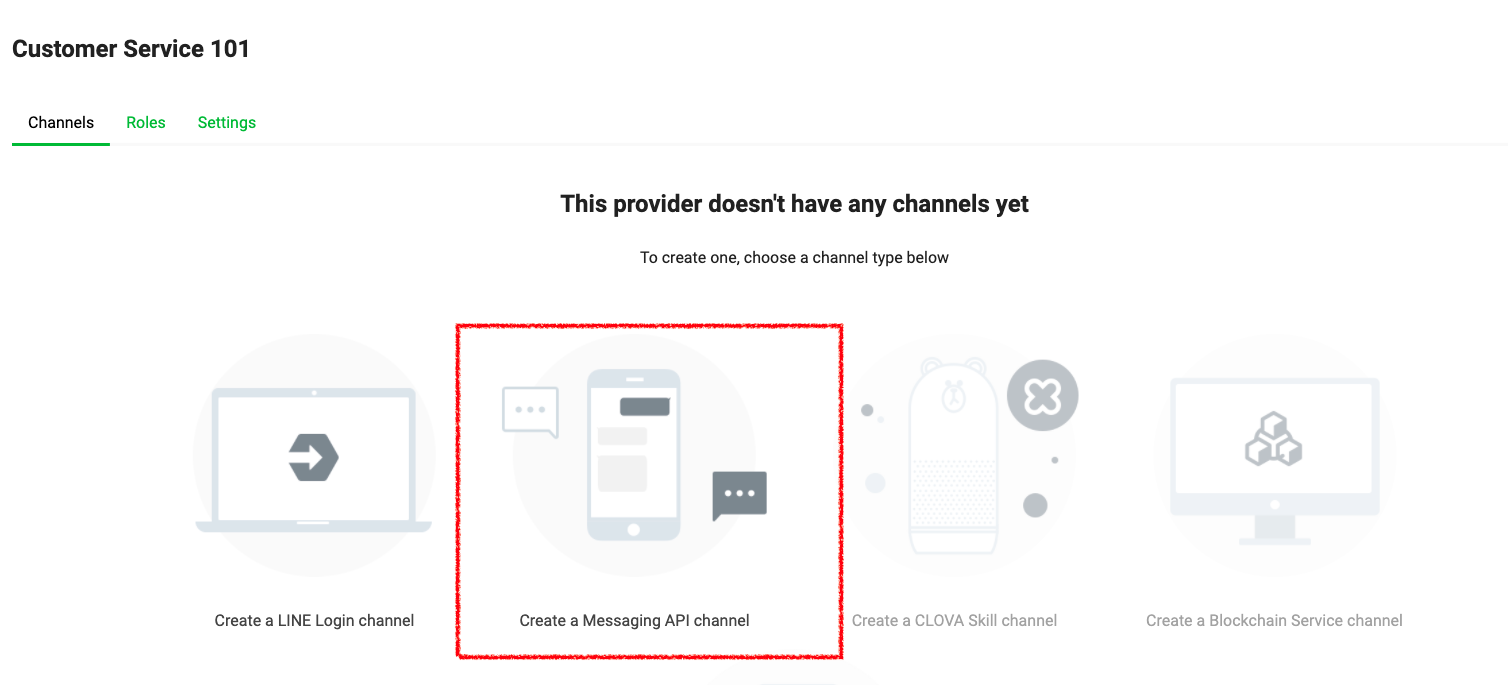
Add a Channel to your Provider
- Fill in the required information for your channel.
The channel name can't include "LINE" or a similar string.

Setting up a Provider Channel
- Click Create.
- A pop-up window will display to confirm the details of your channel
- Click OK to confirm your Messaging API channel details.
- A notification will display that your new channel has been created.
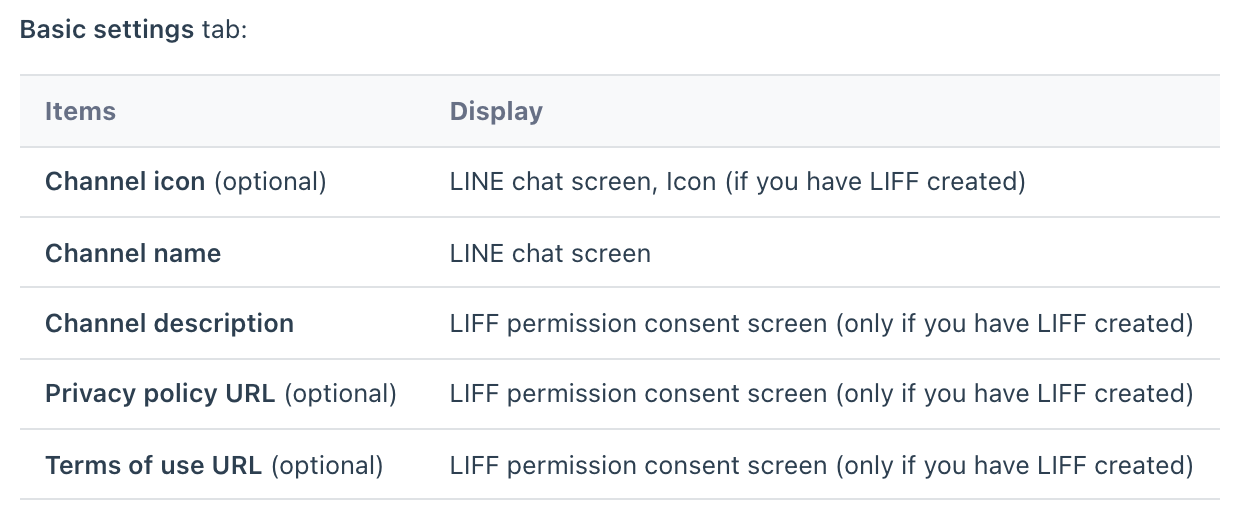
The following information on the LINE Messaging API channel settings is displayed to your users:
LINE Messaging API channel settings
Connect your LINE Official Account
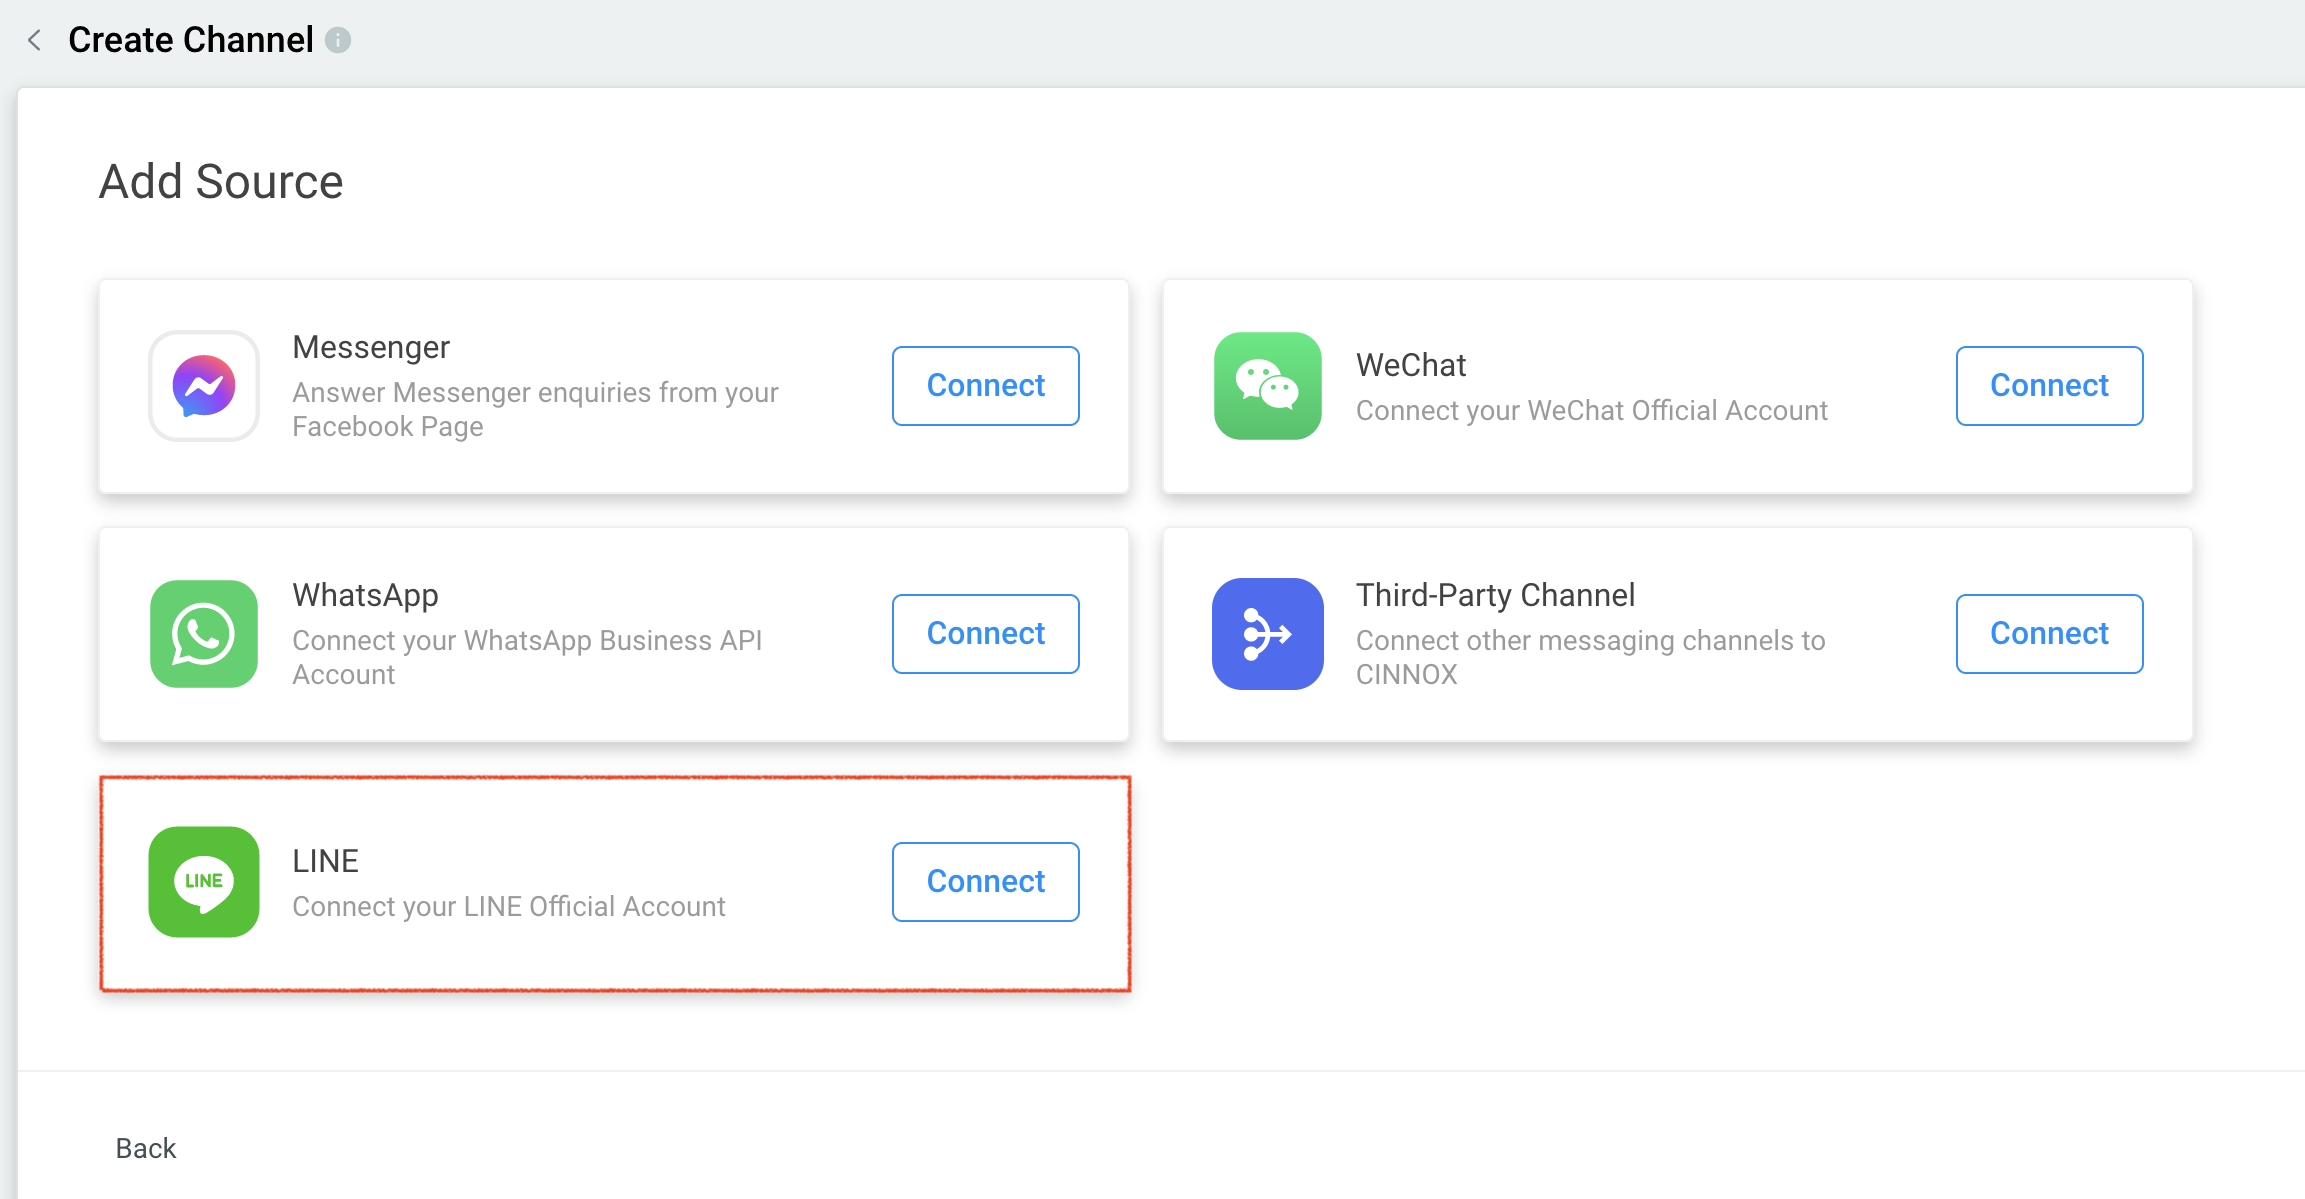
From the CINNOX Dashboard, navigate to Administration > Channels > Social.
- Click the Create Channel button on the Social page in the top-right corner. A pop-up window displays a list of sources that you can connect to.
- Click Connect on LINE.
Create a LINE Channel in CINNOX
- In the Create Channel Page, click Connect your official LINE Official Account.
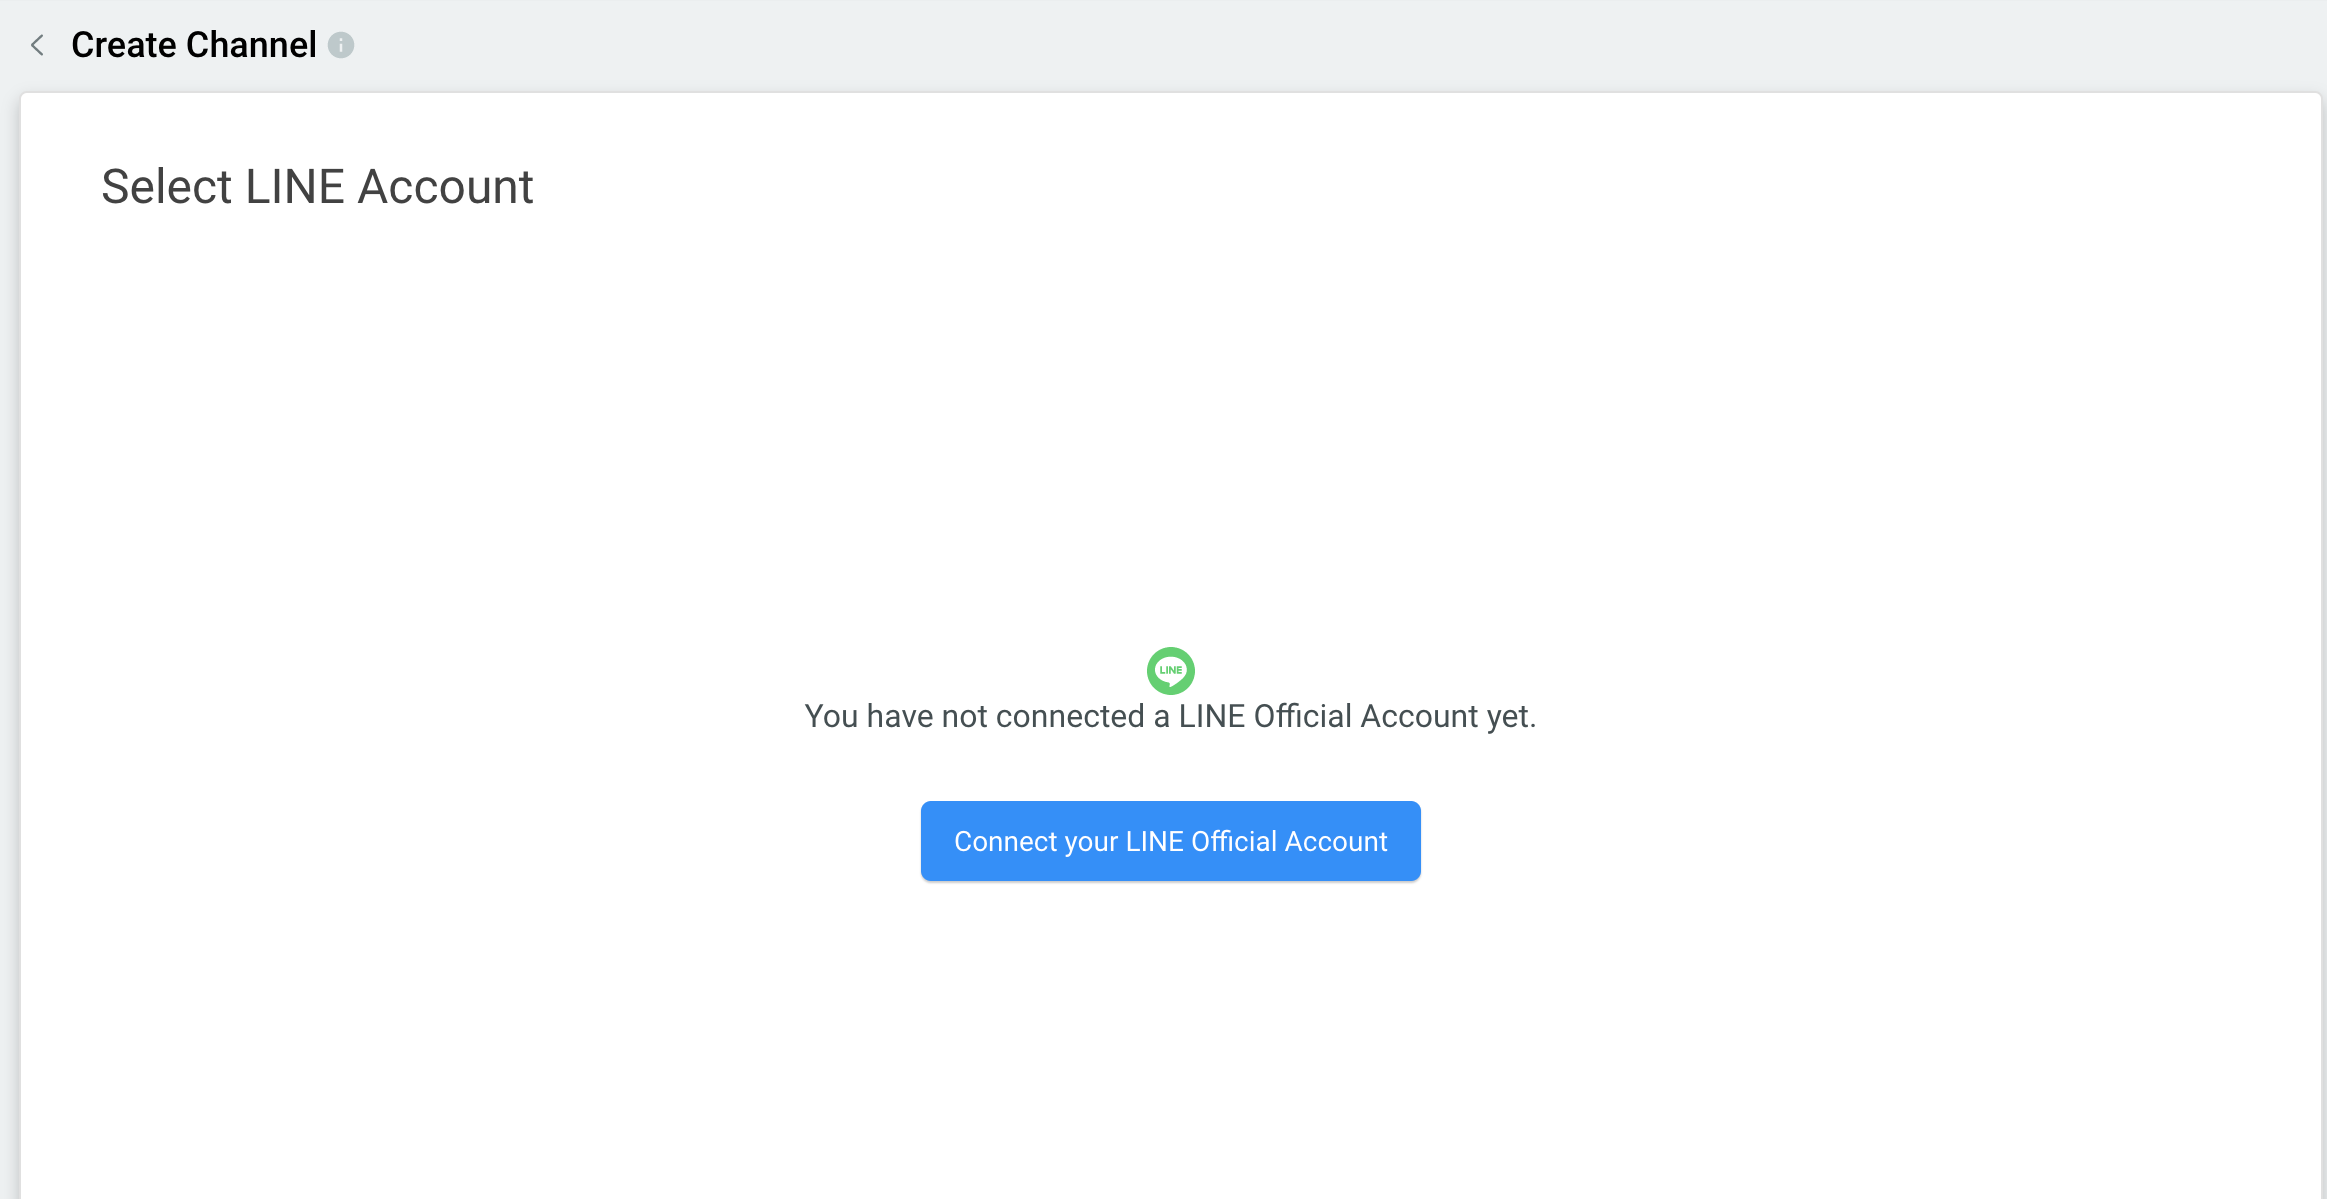
Create a LINE Channel in CINNOX
Source Details
- Log in to the LINE Developers Console with the email address, LINE Account and password.
Log in with the LINE Business Account
- From the Console home page, click the created provider.
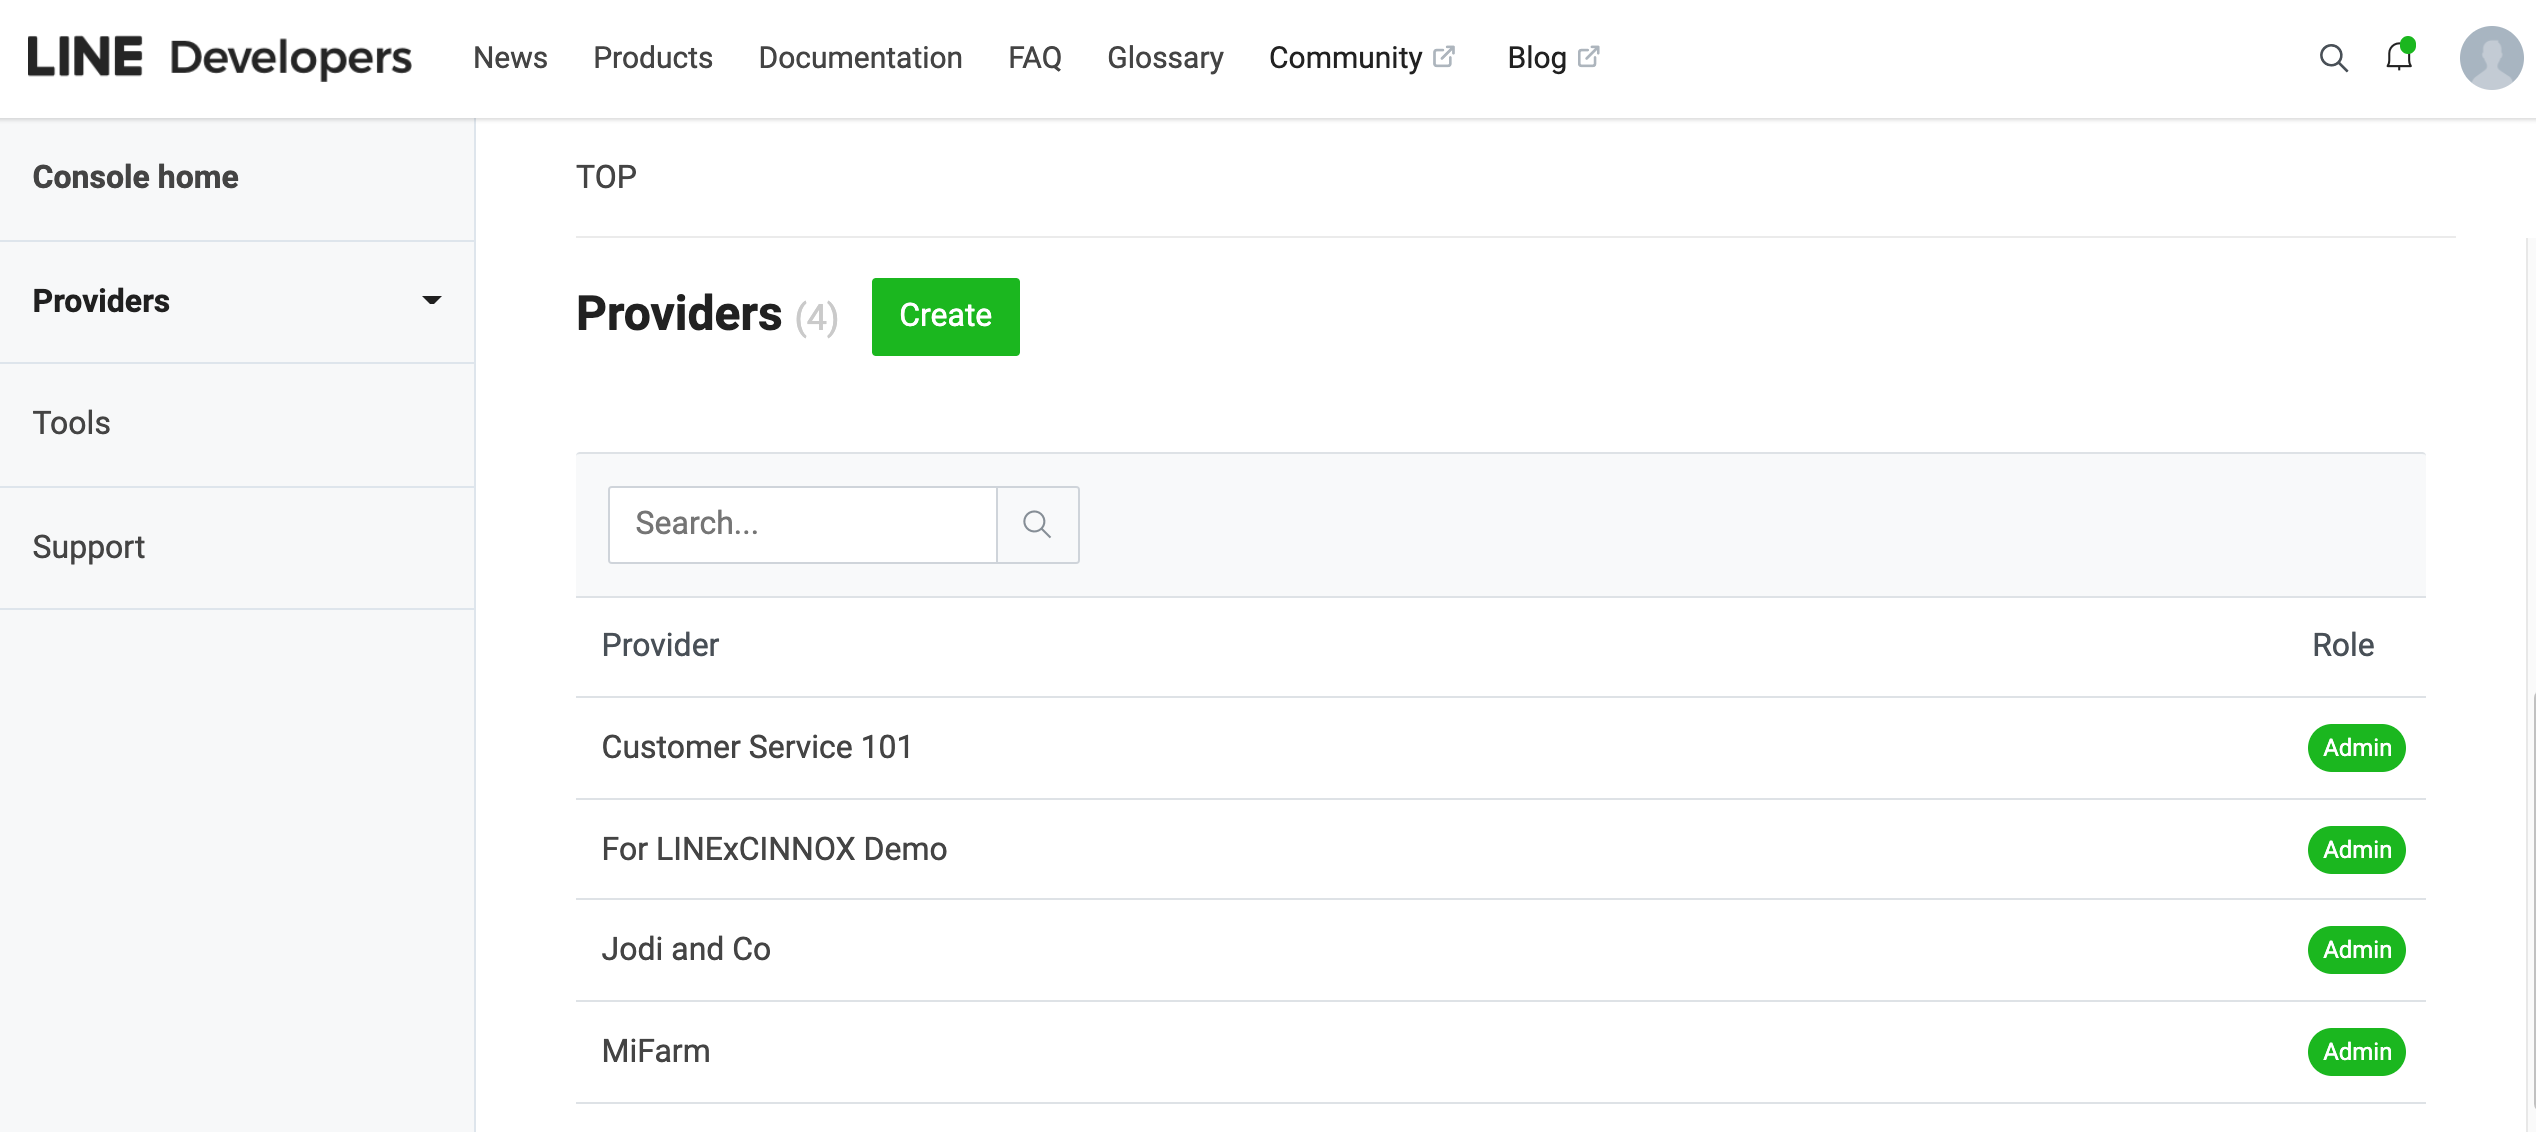
LINE Provider
Channel Secret
- Click the Basic Settings tab and navigate to the Channel Secret field.
- Copy the value of the Channel Secret and paste it into the CINNOX field.
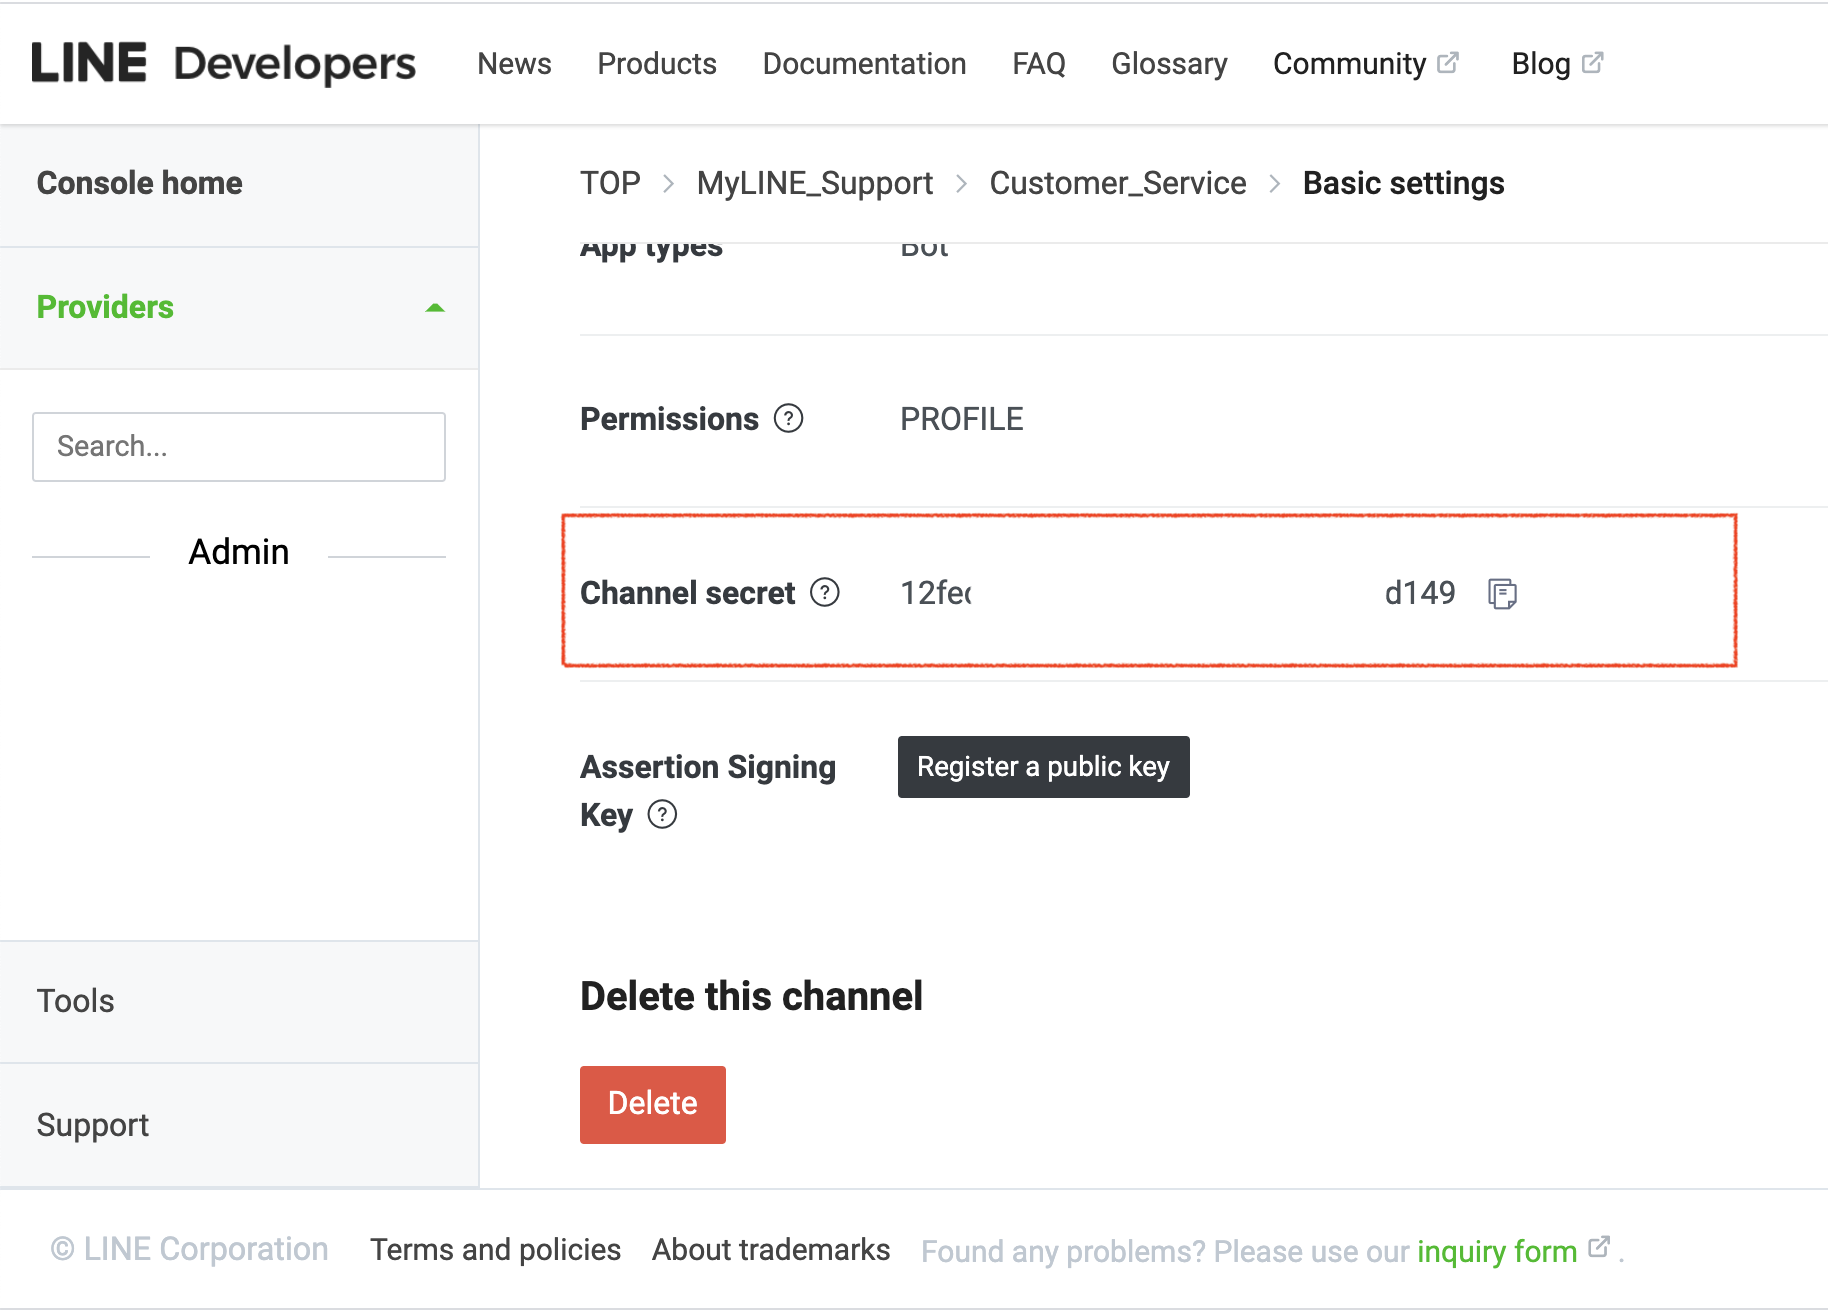
LINE Channel Secret
Channel Access Token
- Click the Messaging API tab, then navigate to the Channel access token field.
- You may need to click the Issue button for first-time use to get the Channel access token.
- Copy the Channel access token and paste it into the CINNOX field.
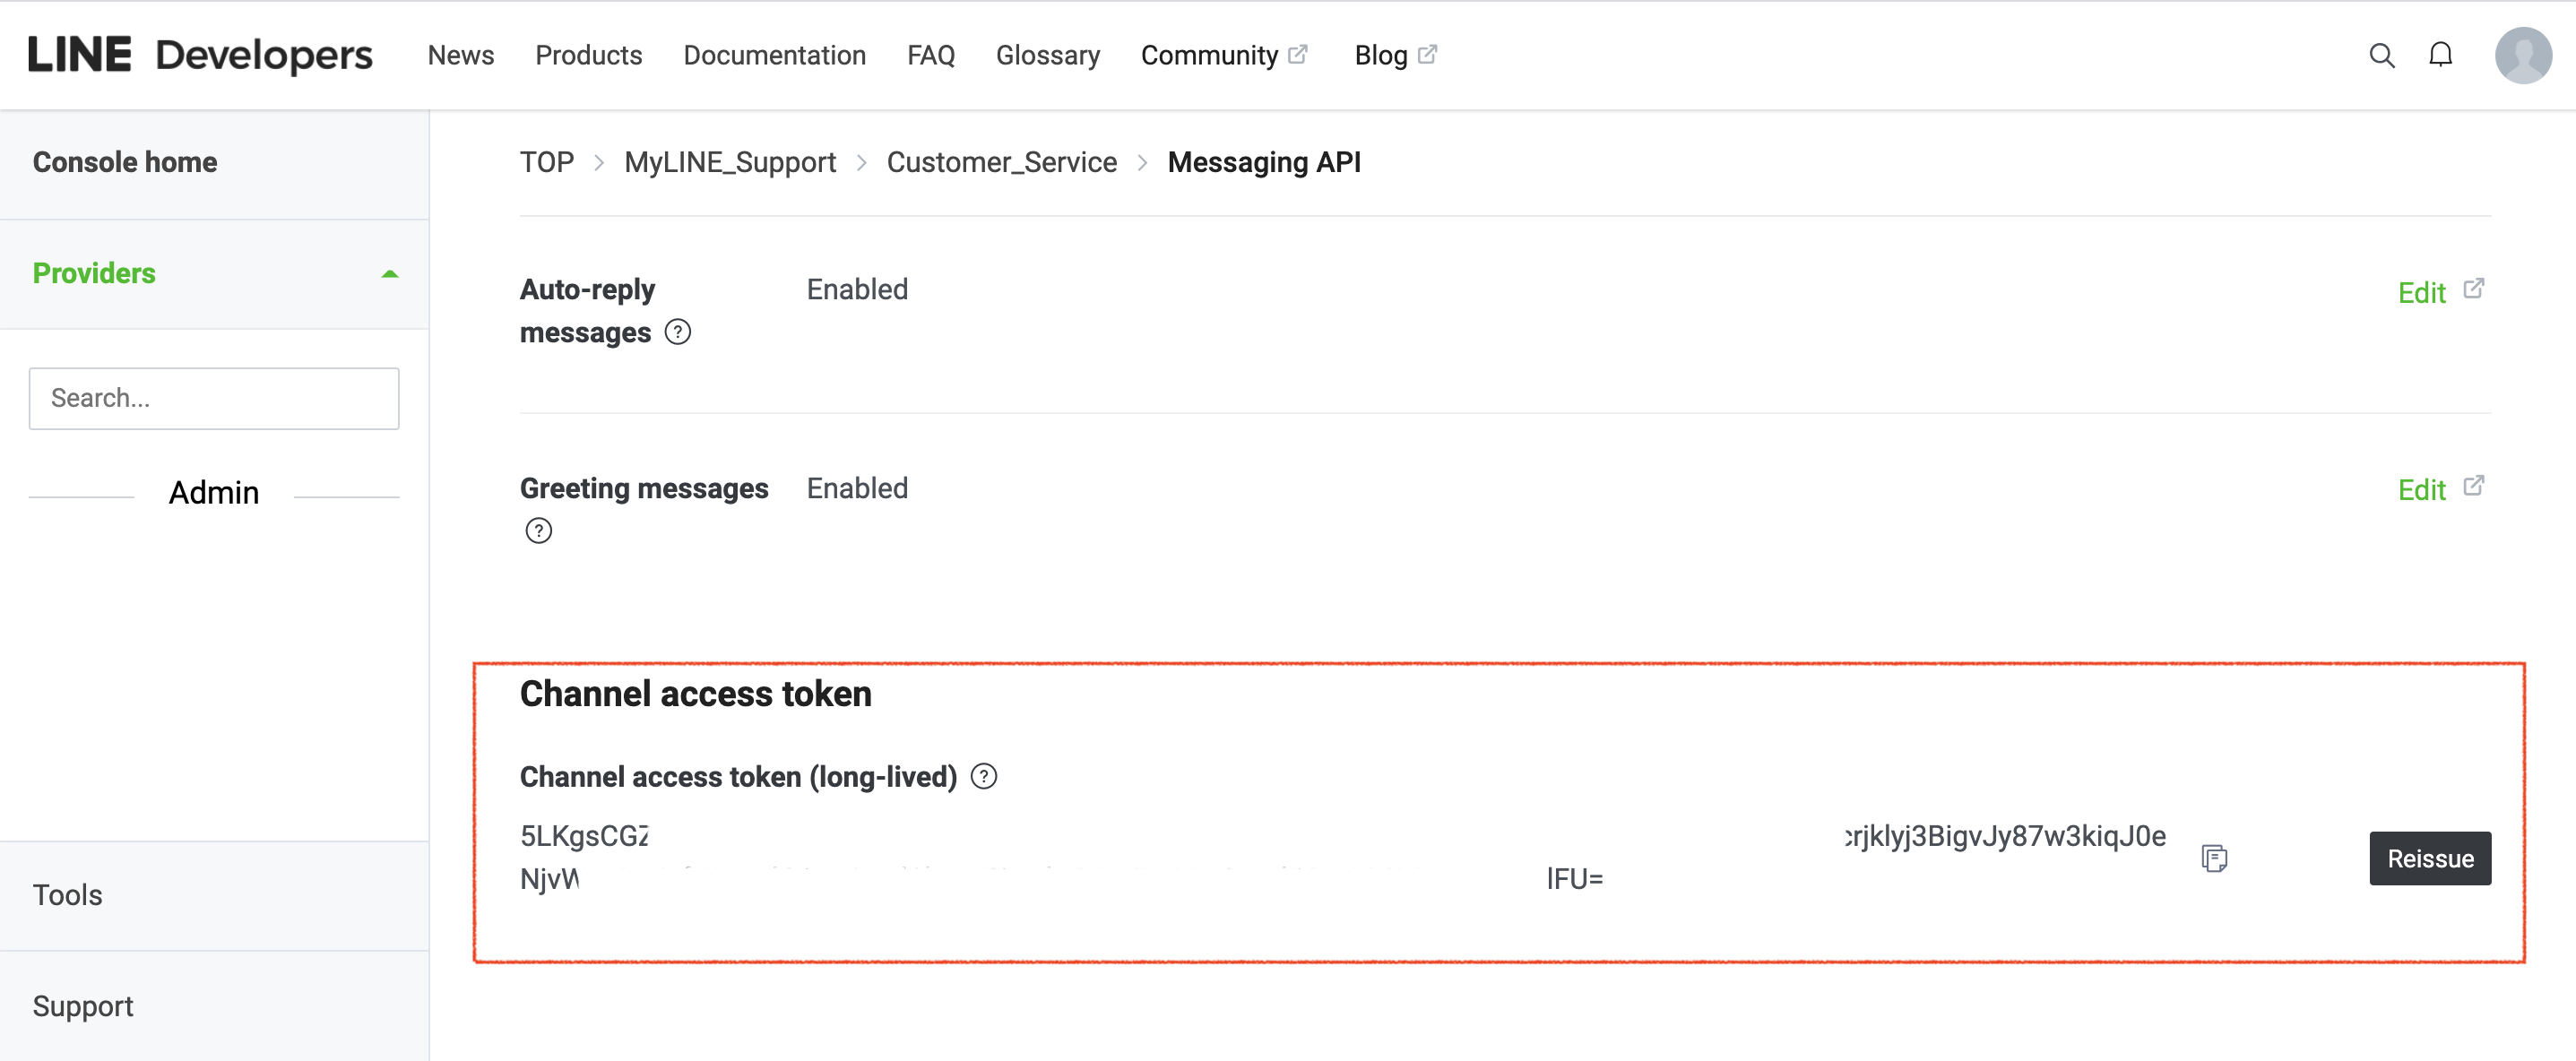
LINE Chanel Access Token
Webhook URL:
From the same tab, Messaging API, navigate to Webhook settings
- Click Edit
- Copy the Webhook URL value from the CINNOX page
- Paste it in the Webhook URL
- Click Update.
- Click Verify, and a verification success pop-up appears.
- Click OK.
Then,
- Toggle on to enable the Use webhook.
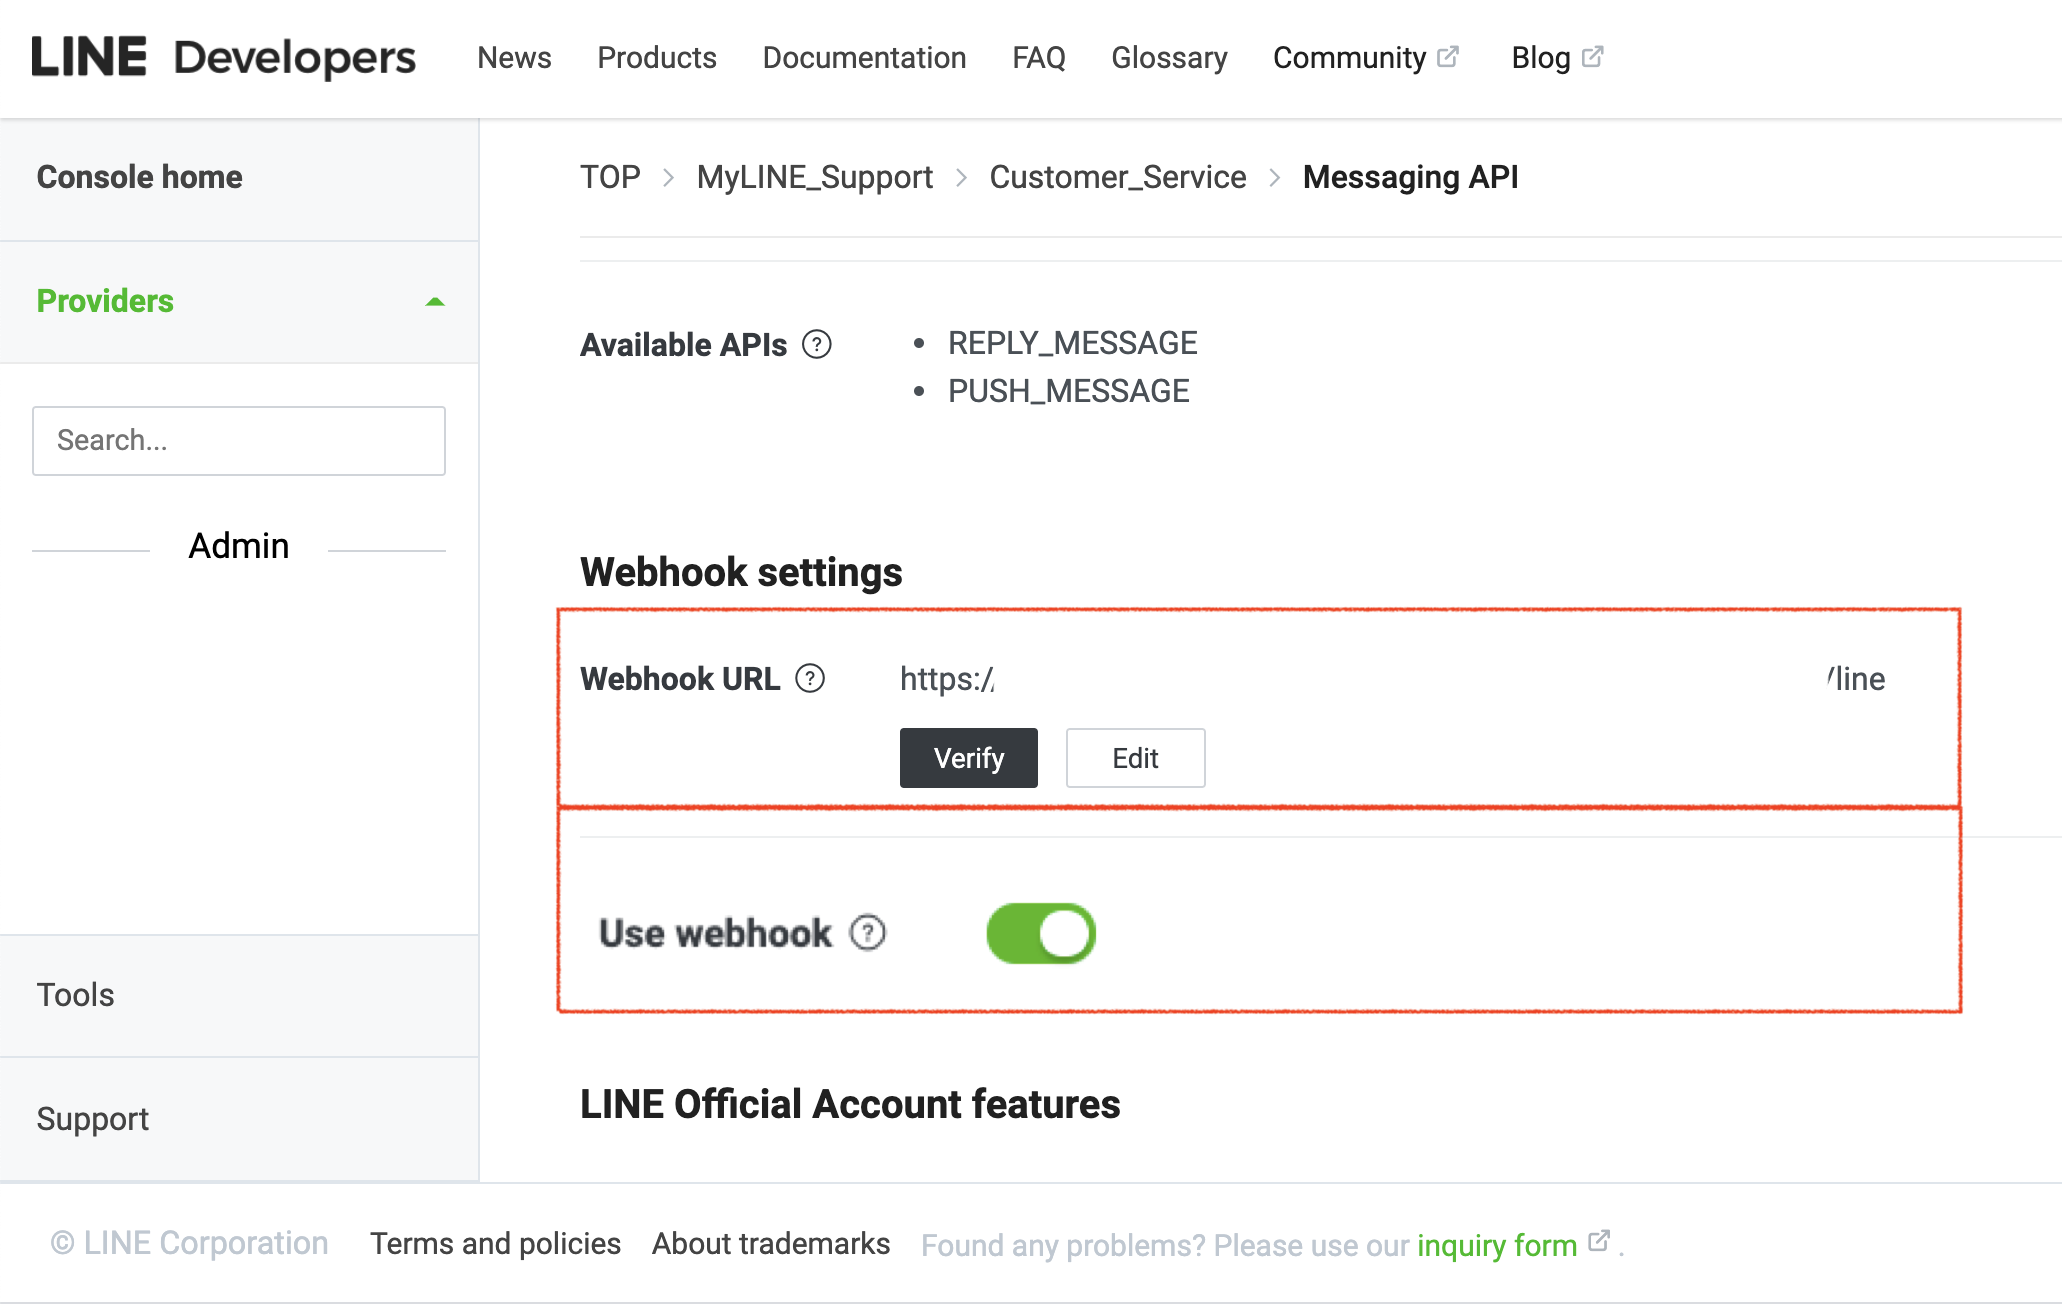
LINE Webhook URL
Lastly,
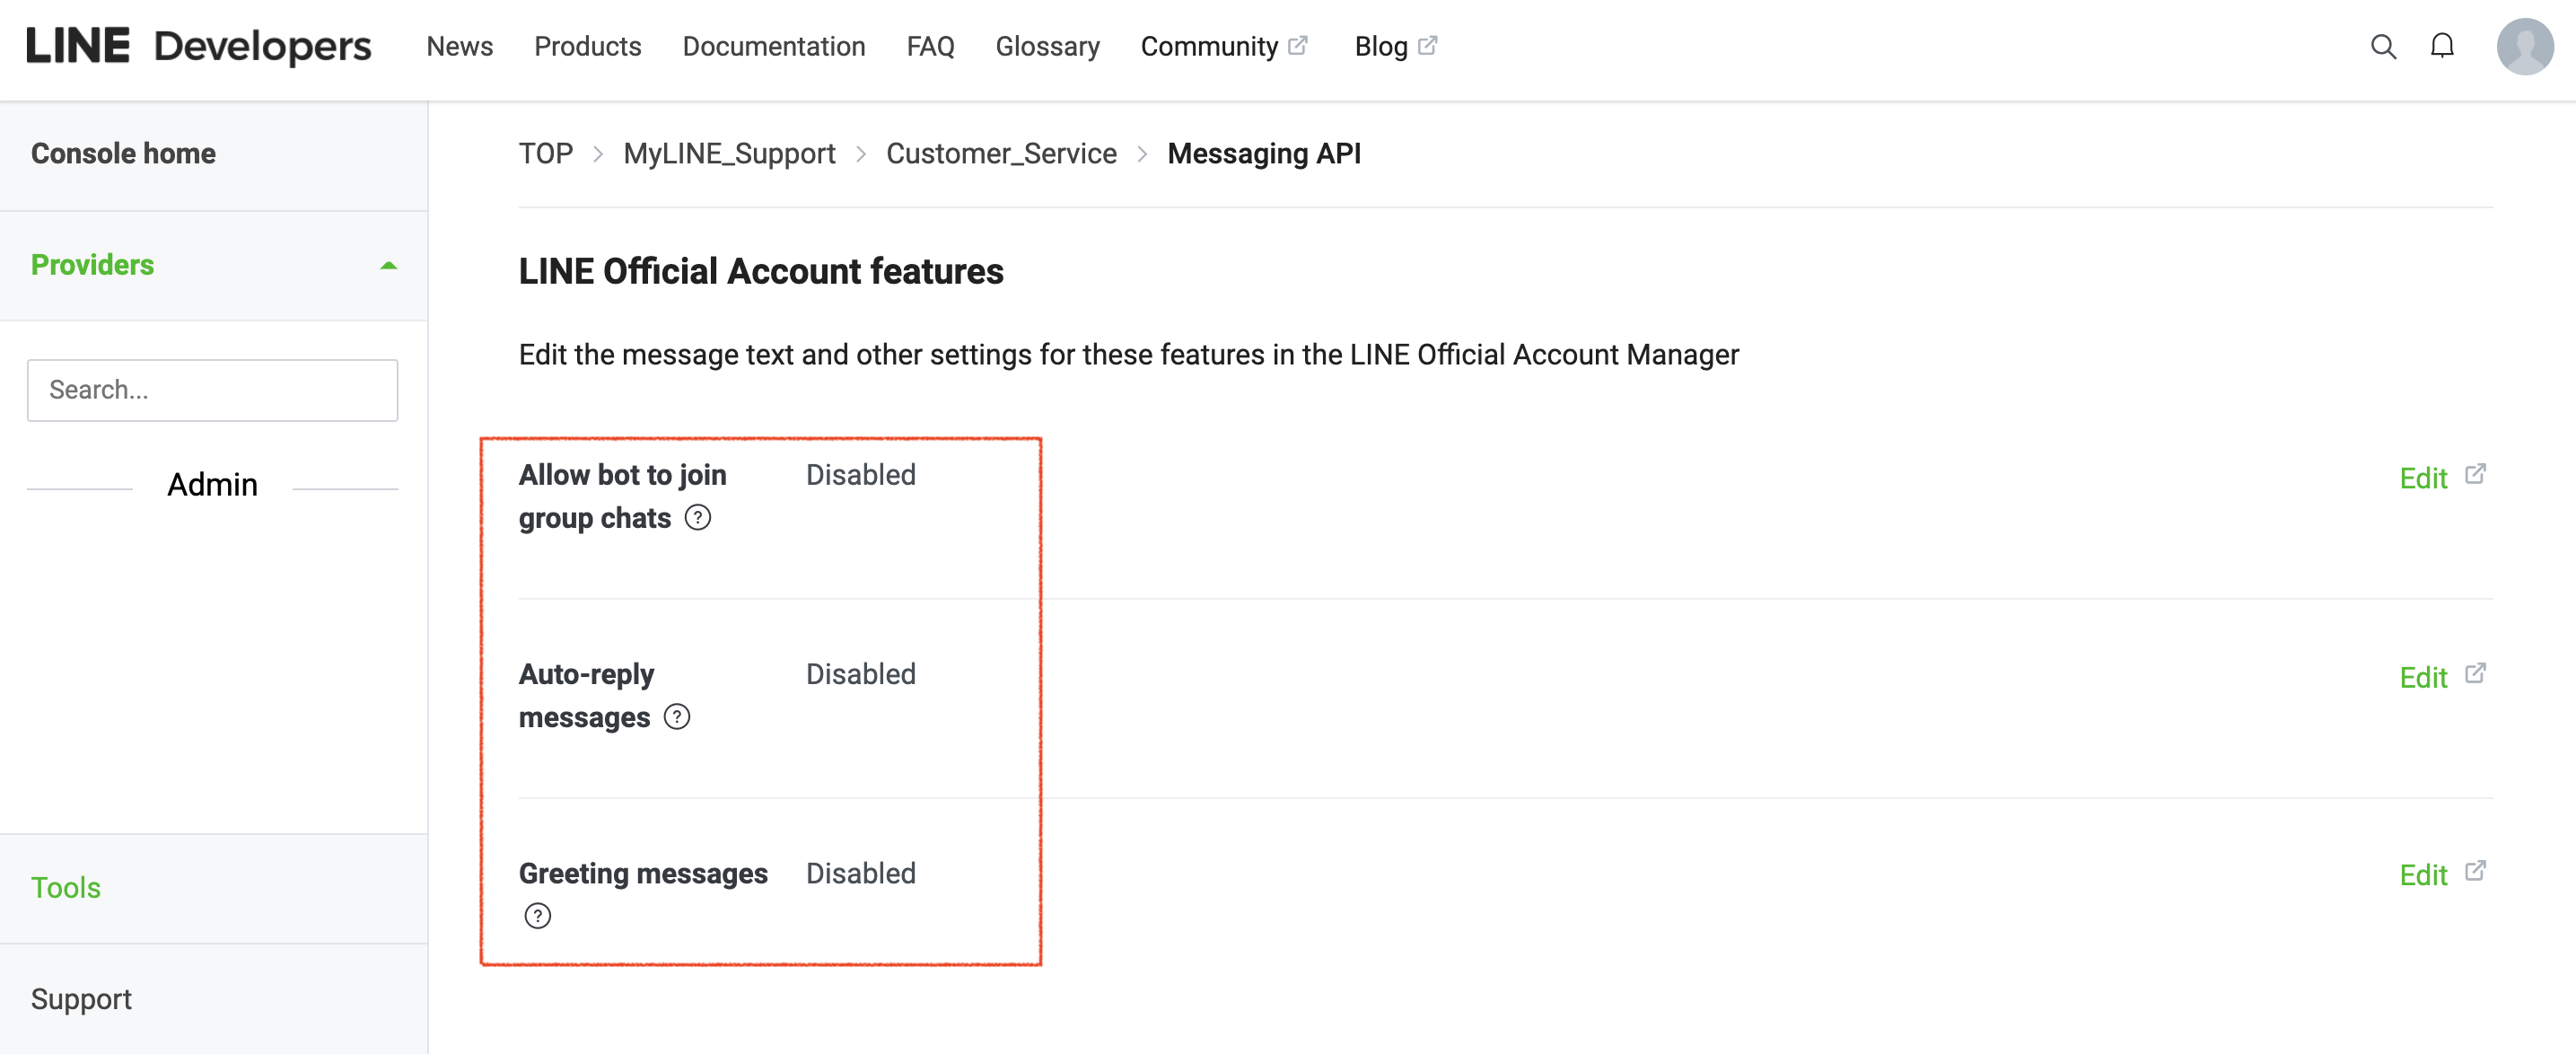
Please DISABLE the following functions under the LINE Official Account features to receive and reply to your LINE customer messages in your CINNOX Dashboard or App.
- From the Messaging API tab, navigate to LINE Official Account Features.
- Click Edit
- The Response settings page will be opened in another browser tab
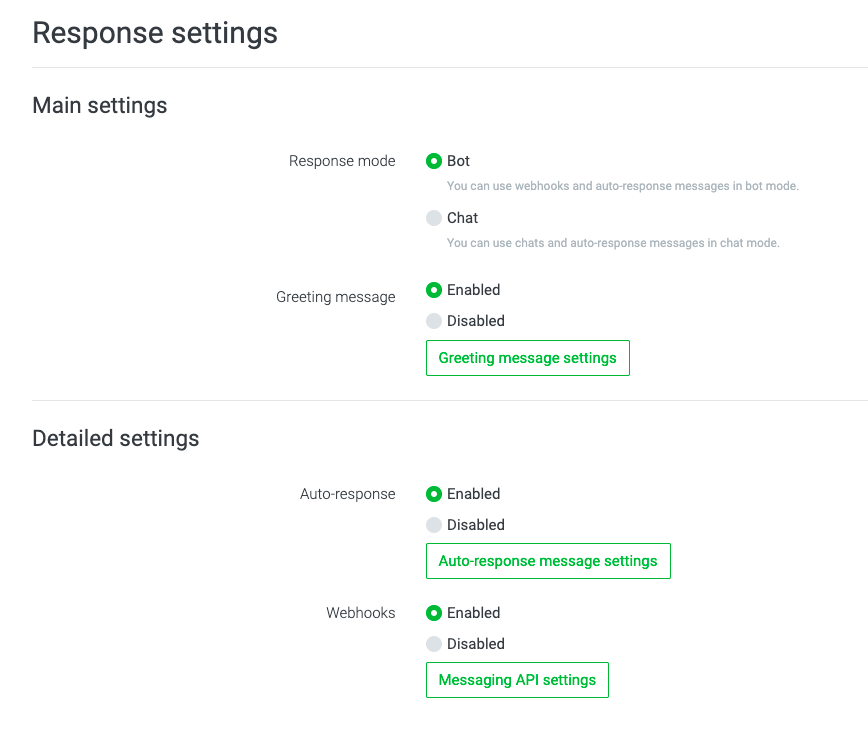
LINE Channel Response Settings
- Under the Main settings section, tick Disabled for the Greeting message
- Under the Detailed settings, tick Disabled for the Auto-response
- The changes will be saved
The "Allow the bot to join group chats" is disabled by default.
Back to the CINNOX Dashboard
- On the Create Channel Page, Click Next.
- Then, click Confirm to connect the LINE account with CINNOX.
Configure the CINNOX Channel and Routing Setting
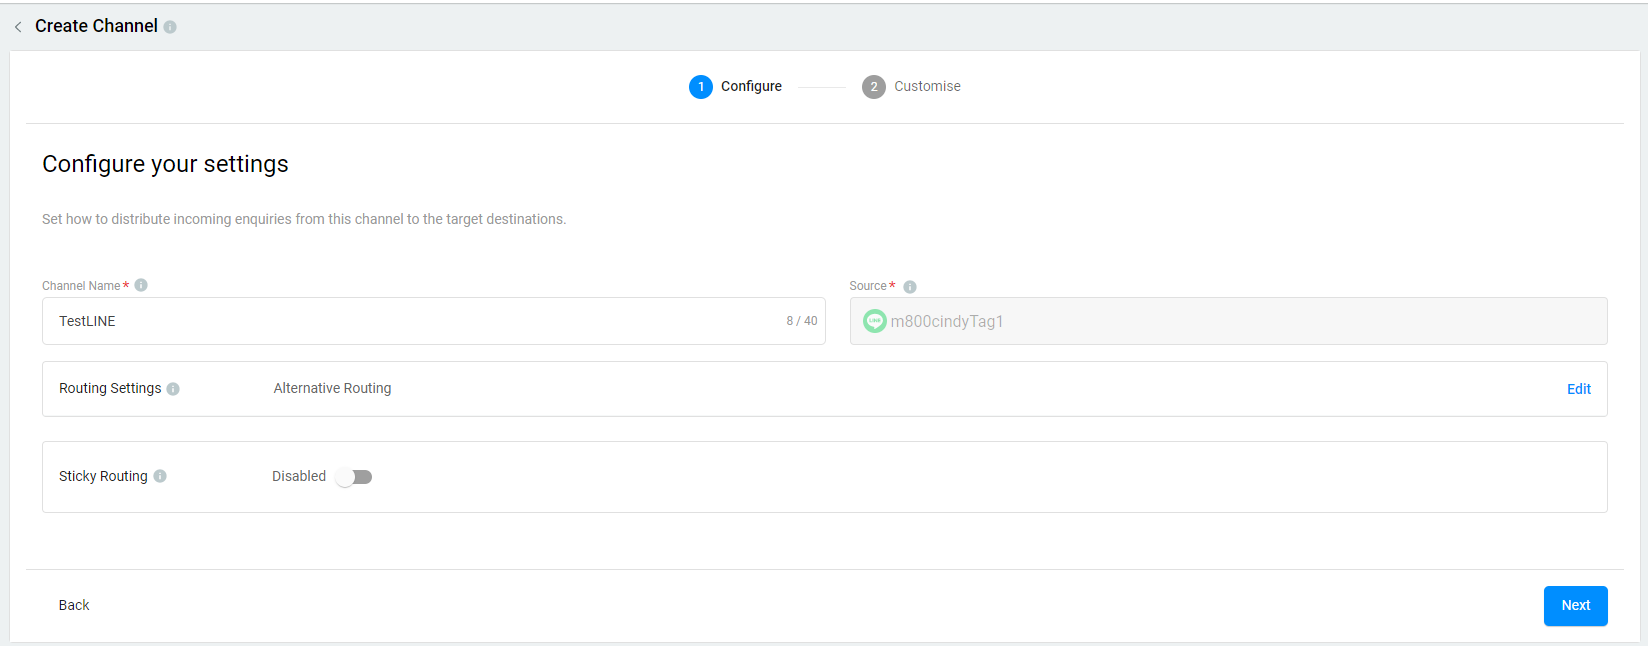
Channel Name
- Add a name for your LINE channel. The channel name can be up to 40 characters.
CINNOX Channel Name
Routing Settings
Select the Routing Rule and add Destinations based on the operational support to your channel.
For more information, please check our detailed guide Alternative, Percentage, Time and Sticky Routing.
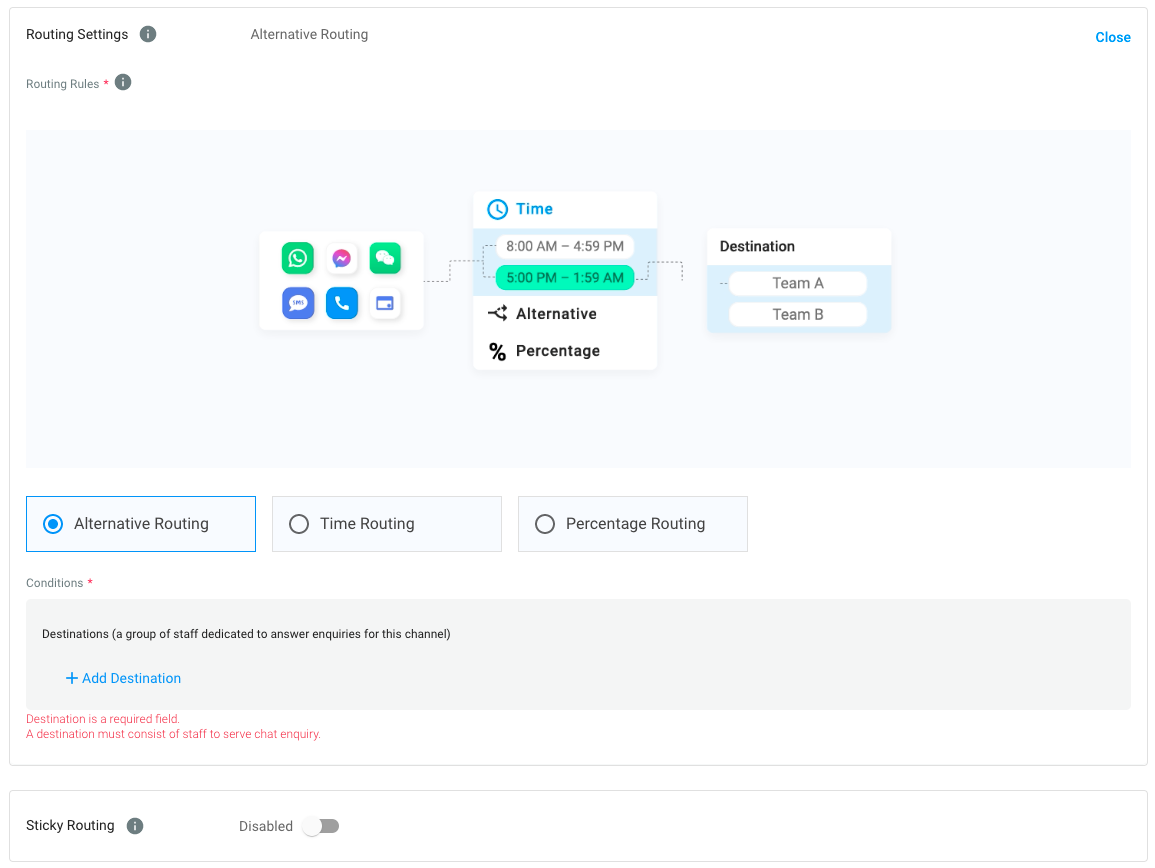
CINNOX Routing Settings
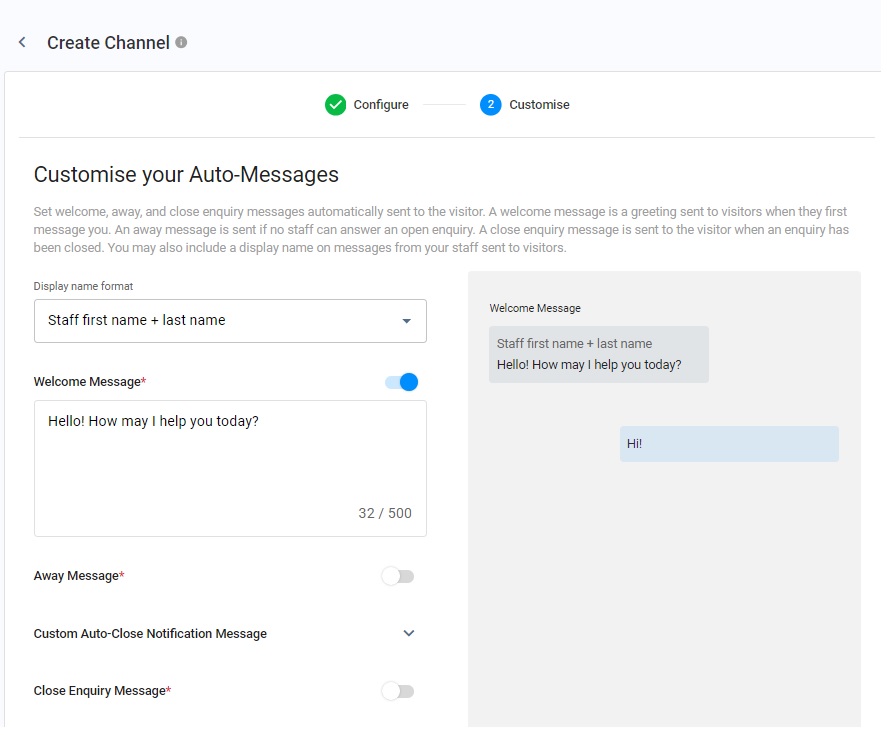
CINNOX Auto-Message Settings
You can enable and configure the following Auto-Reply Messages:
- Welcome Message: Greetings are sent to customers when they first message you.
- Away Message: It is only sent if no staff can answer an enquiry.
- Custom Auto-Close Notification Message: It is sent when the chat room doesn't have a new message after 2 min(s), and the enquiry will be closed when the notification has been sent after 1 min(s).
- Close Enquiry Message: This will be sent to the visitors' chatrooms when the staff or the system closes the enquiries.
📘
Reminder
- The limit of Welcome, Away, Custom Auto-Close Notification and Closed Enquiry Messages is 500 characters.
- Before configuring the Custom Auto-Close Notification Message function, you must enable the auto close feature for handled enquiries without new messages. For more information, please refer to the Managing Auto Close Enquiry page.
Display Name Format
You may include Staff display names in your messages. Choose from the following options:
- No name to display
- Staff first name
- Staff first name + last name
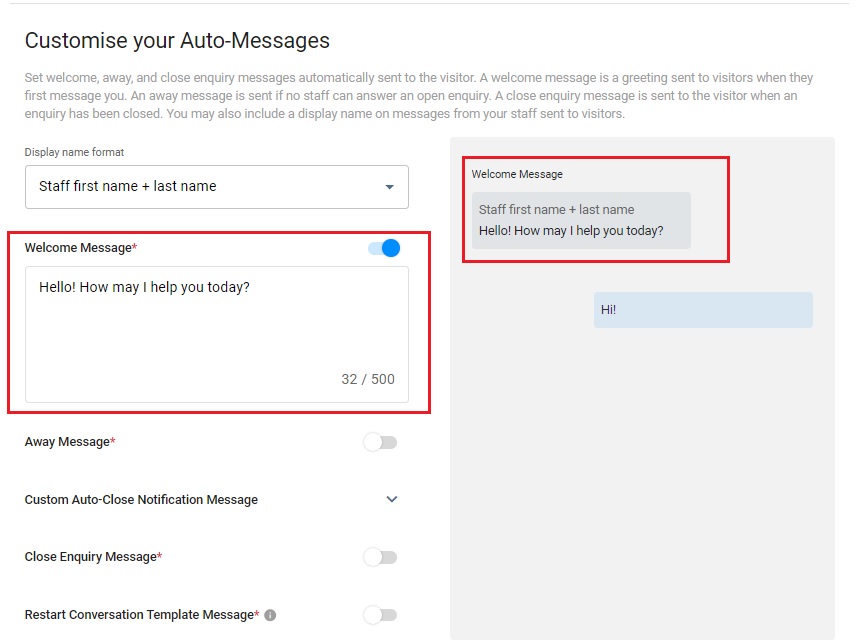
Welcome Message
- CINNOX provides a default welcome message.
- Toggle the switch on to enable it.
- After toggling on it, you can change the default message according to your needs.
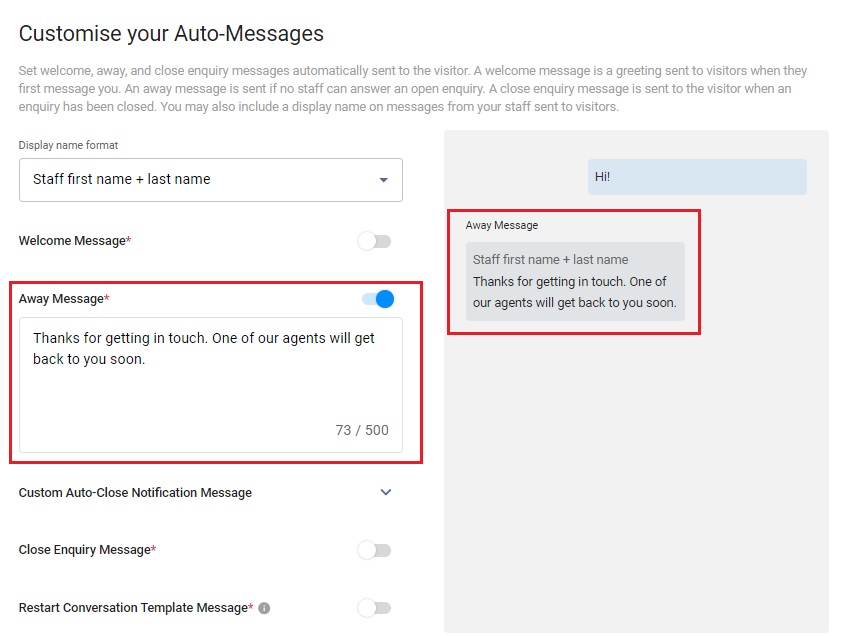
Away Message
- CINNOX provides a default away message.
- Toggle the switch on to enable it.
- After toggling on it, you can change the default message according to your needs.
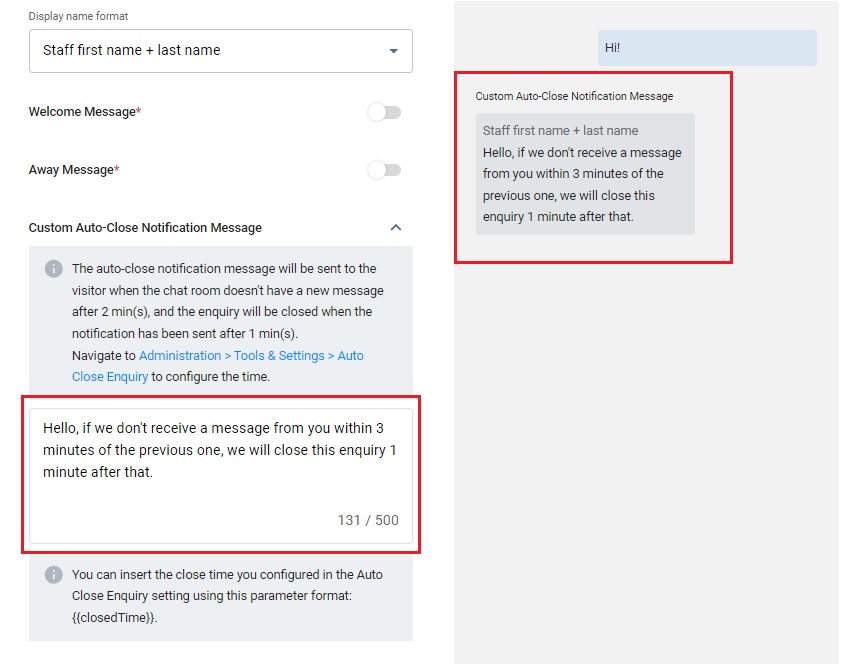
Custom Auto-Close Notification Message
- Click the downward arrow icon.
- Enter your Auto-Close Notification Message in the box.
- You can preview the message in the chat room on the right-hand side of the grey box.
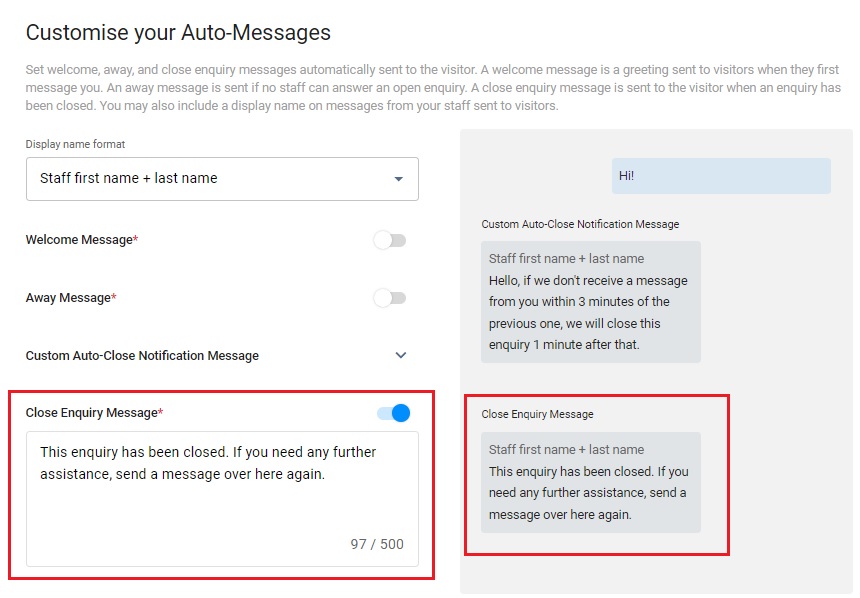
Close Enquiry Message
- CINNOX provides a default close enquiry message.
- Toggle the switch on to enable it.
- After toggling on it, you can change the default message according to your needs.
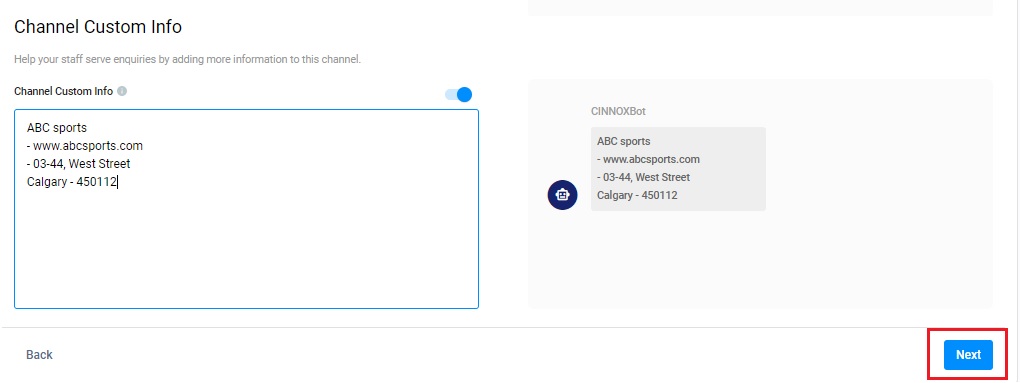
Enable CINNOX Channel Custom Info
Channel Custom Info allows you to add your channel details that your Staff would see in the call screen and chat room whenever they are serving an enquiry. The custom info can be about the standard procedure or operation details of handling the enquiry.
- Toggle on the switch to enable the Channel Custom Info.
- A blank space adds the required basic information about the channel.
- Click the Next button to complete all configurations, and the customised info appears on the Channel Custom Info.
The custom info is displayed on the staff side in the chat room section for the chat enquiry.
Channel Custom Info
The custom info is displayed on the staff side in the chat room section for the chat enquiry.
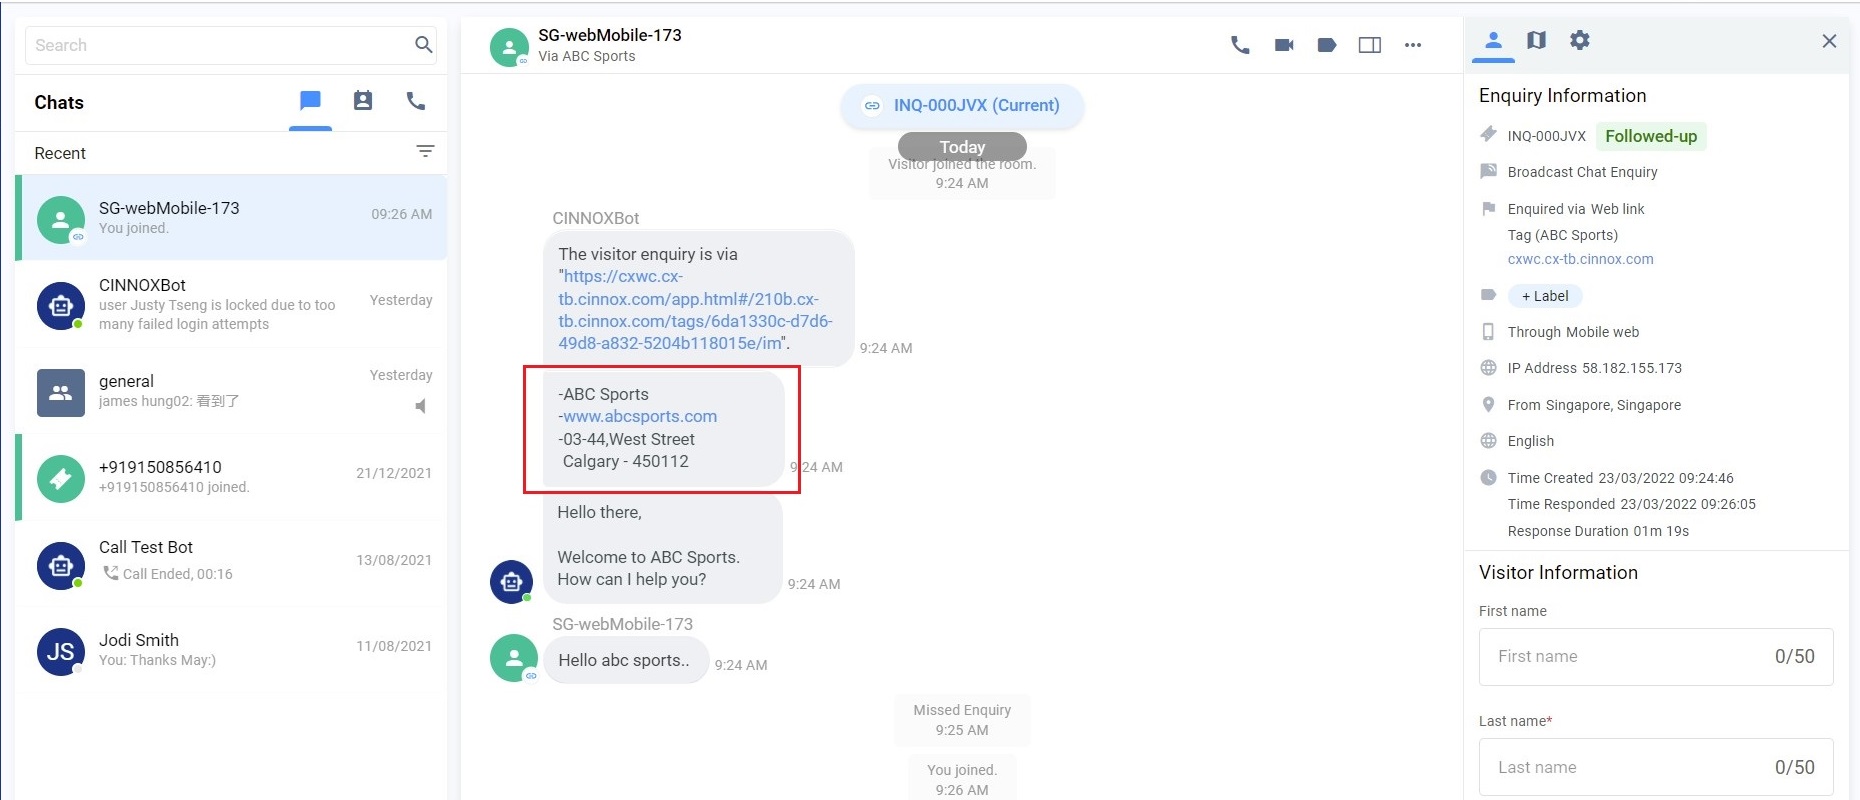
Channel Custom Info on the enquiry page-LINE
📘
Important Notes
- You can customise the Channel Custom Info per Channel - Directory/Tag, Number, Social and Third Party Channel.
- Channel Custom Info is available for call and chat enquiries.
- The Channel Custom Info does not support Direct Staff Enquiry and Enquiry from the Campaign Web Link.
- The Channel Custom Info you can add is 10,000 chars per channel. Please ensure it is not more than the limit to work correctly.
- The Channel Custom Info will still be displayed as a chatbot message in the enquiry room if an enquiry is missed.
Managing LINE Channels in CINNOX
To edit, suspend, or delete your LINE channels in CINNOX, refer to the Managing Social Pages section of this Guide.
Known limitations
📘
- Connect LINE for Business to CINNOX. You cannot connect to other LINE accounts (e.g., personal accounts).
- The administrator can connect or disconnect the LINE Official account to CINNOX. However, you cannot connect to the same LINE account with multiple CINNOX channels.
Supported Text, Media Content-Types and Size Limit
Maximum of 4,999 characters per message
Sending files is not supported
Image - PNG and JPG should not exceed 10 MB
Audio - AAC, M4A, MP3, WAV, and MPEG should not exceed 200 MB.
- The base audio/Ogg is not supported yet.
Video - MP4 and 3GP and should not exceed 200 MB
- Only H.264 video codec and AAC audio codec are supported.
- Only videos with a single audio stream are supported.
Download images of stickers are not supported
Location, Image Map, Template and Flex are not supported.
LINE has no idle conversation limit.
Help and Support
If your CINNOX service account is not receiving messages from your LINE customers:
- Log on to your LINE Developers Account and check the details of your Channel Secret and Channel Access Token, and please ensure all are the same with your CINNOX Channel Details.
- Send a test message to your LINE Official Account and check if your CINNOX service account receives it.
If your CINNOX service account still receives no messages, contact our CINNOX Support Team.