CINNOX Chrome Extension
Do you need a click to call or send an SMS Chrome Extension?
With the CINNOX Extension installed on your Chrome Browser, you can seamlessly make and receive calls and send SMS messages directly from your CRM, Helpdesk, Sales Software, and other web pages you are working on.
📘
To use the CINNOX Extension, you must be a user subscribed to Omnichannel Contact Centre or the above plan and acquired a Virtual Number as your Caller and Sender ID. Check our Pricing Plan for more details.
Adding CINNOX Extension on Chrome Browser
To install CINNOX Extension on your Chrome Browser
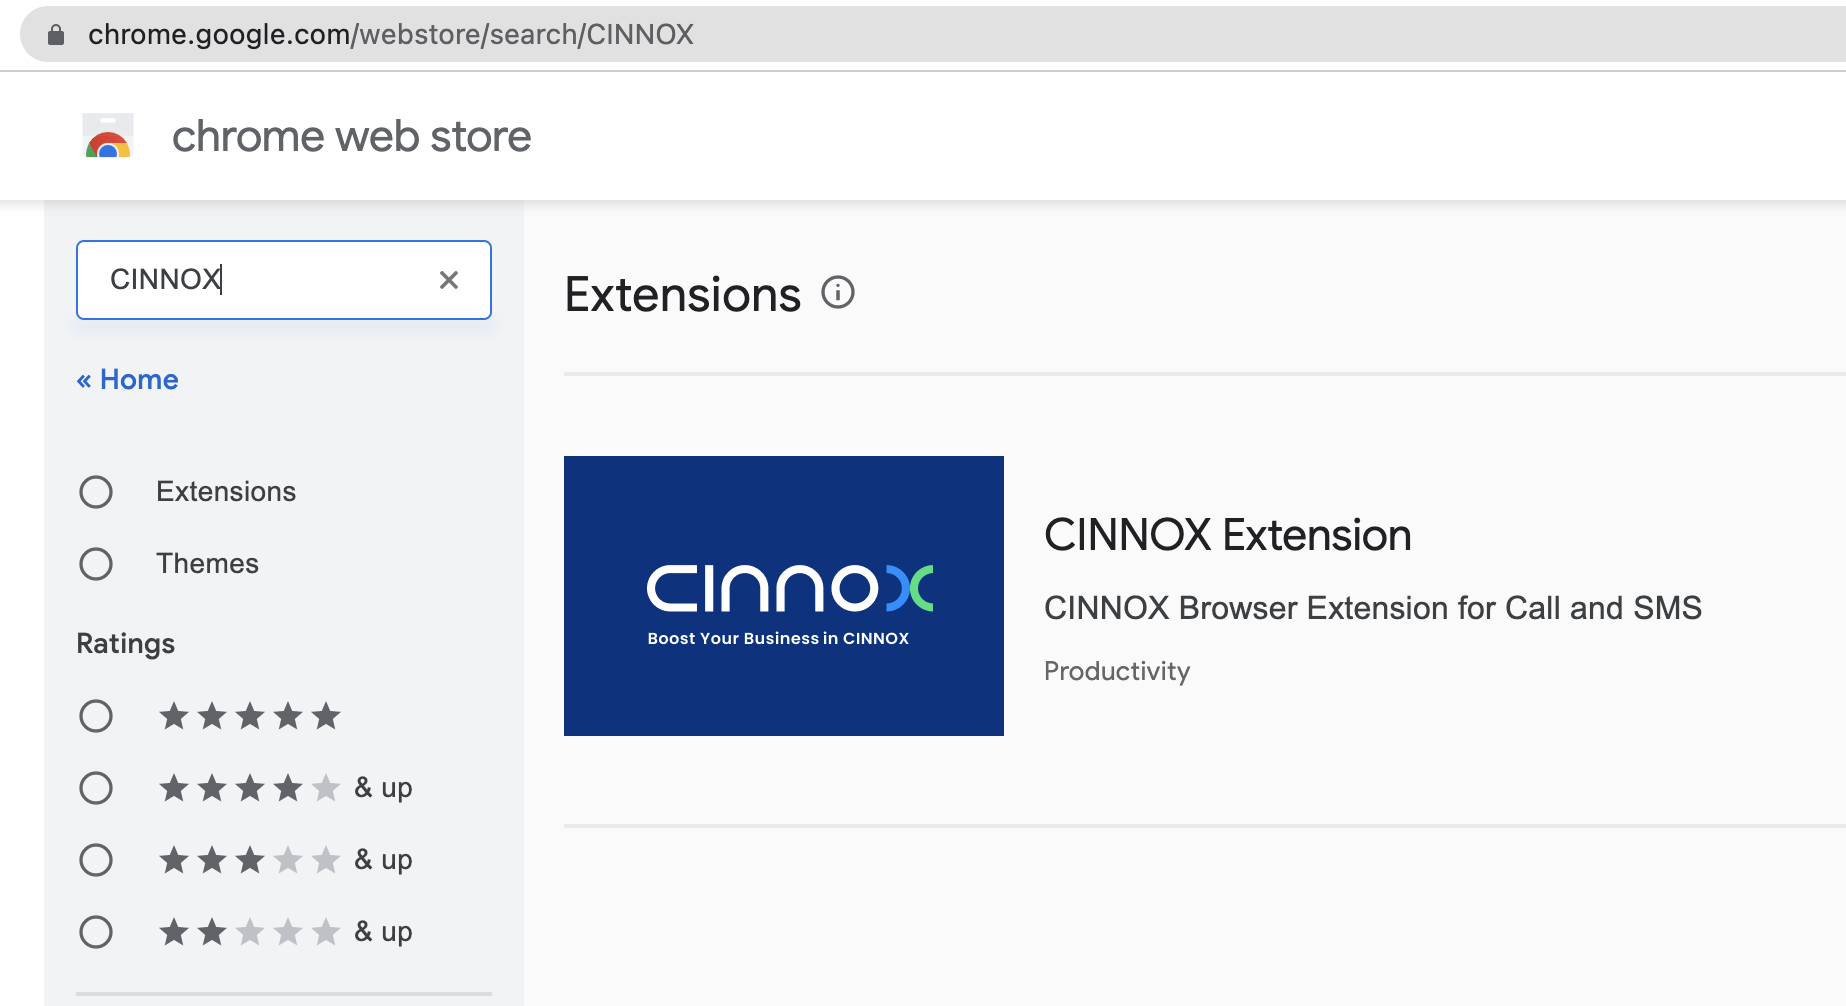
- Open the Chrome Web Store Extension page on your Chrome Browser, then search CINNOX. Alternatively, access this URL for easy navigation https://chrome.google.com/webstore/search/CINNOX.
- The CINNOX Extension result should appear. Click its image or title to view the full details.
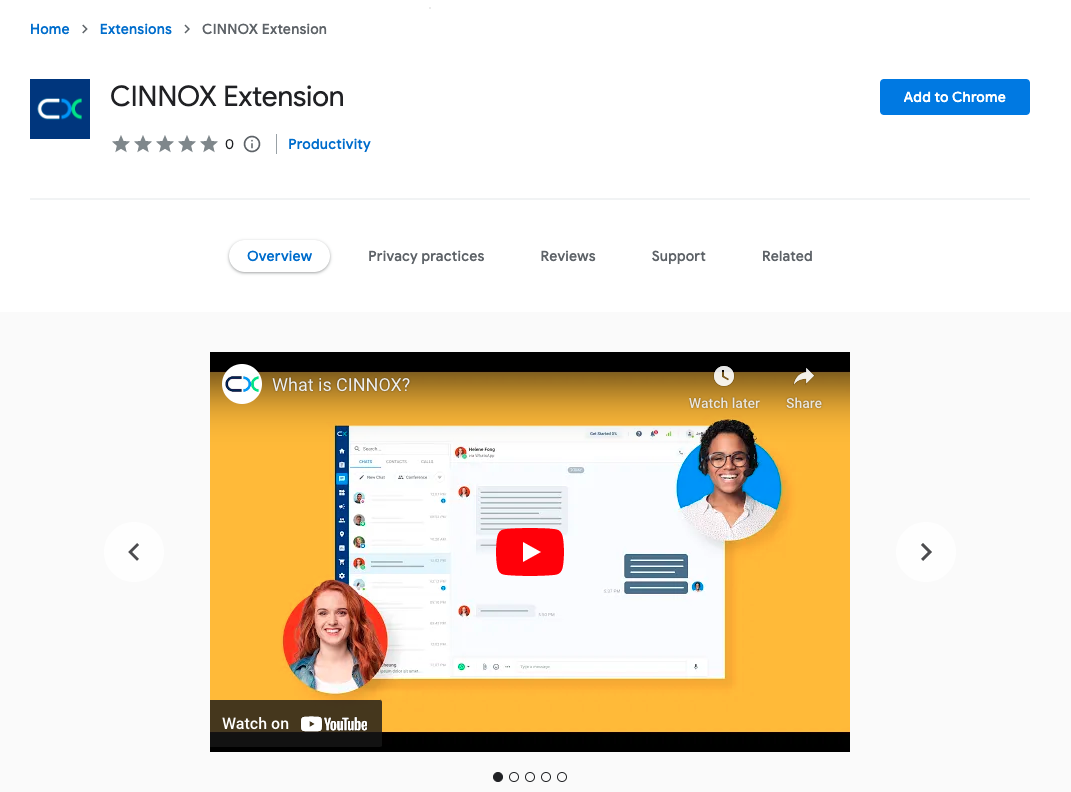
- Click Add to Chrome on the top right corner of the page.
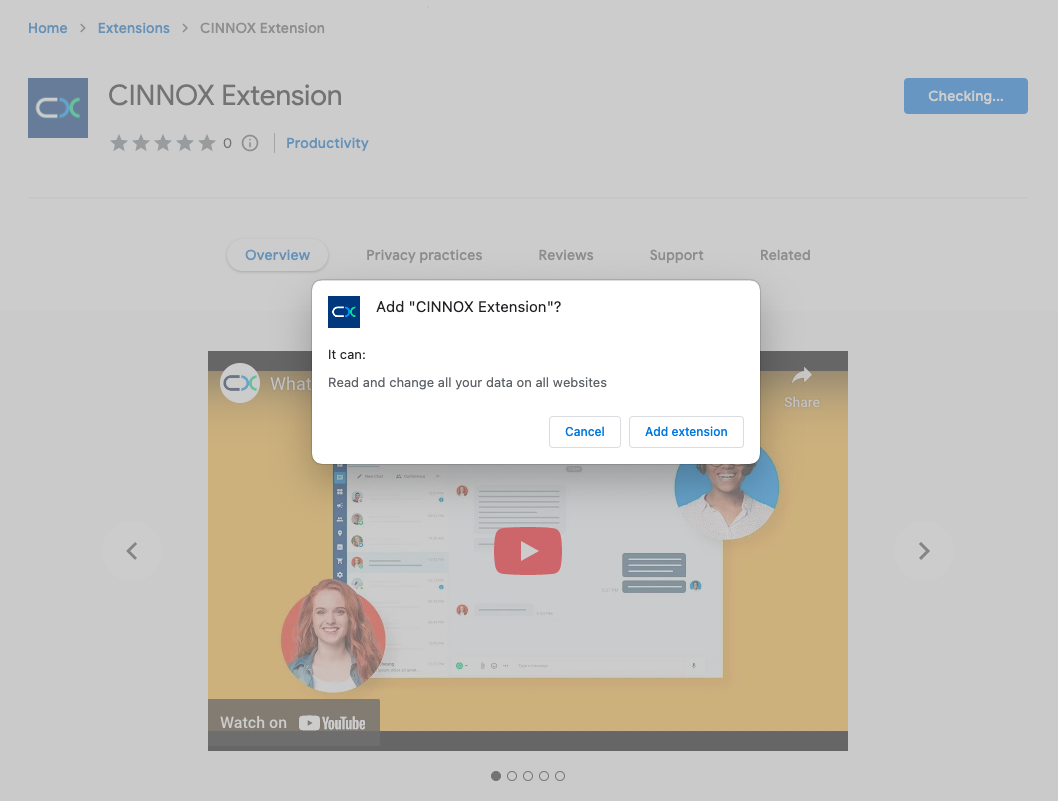
- A pop-up window will appear to confirm adding the extension. Click Add extension
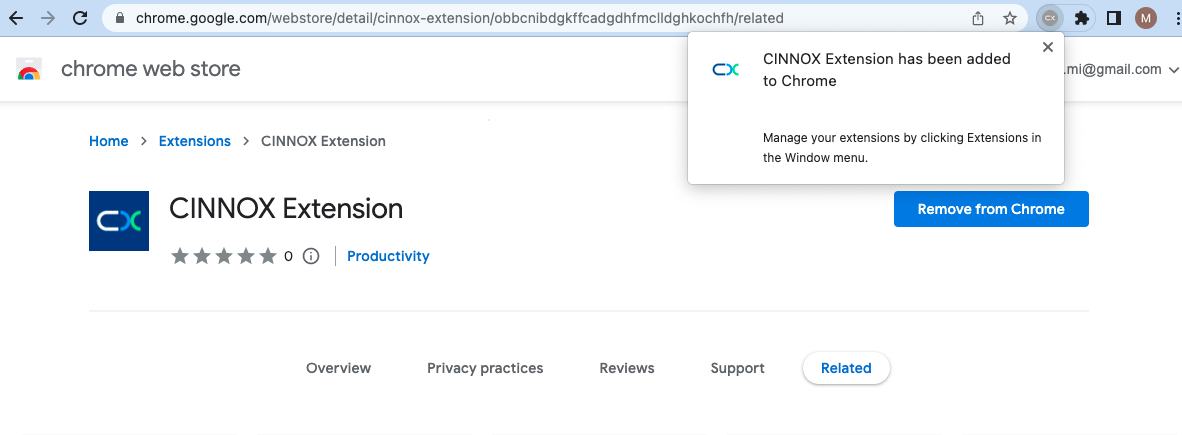
- A notification window will appear on the top right corner of the page for the successfully added CINNOX Extension to Chrome.
- Click the Extension icon. The list of Extensions added to your Chrome display is here.
- Click the PIN icon for the CINNOX Extension to display it on the tray.
📘
CINNOX Extension detects Browser's Language
CINNOX will auto-detect your Chrome Browser language and change it Traditional Chinese or Simplified Chinese if you are using them. Otherwise, the CINNOX Extension will display English (UK).
Log in using the CINNOX Staff Account
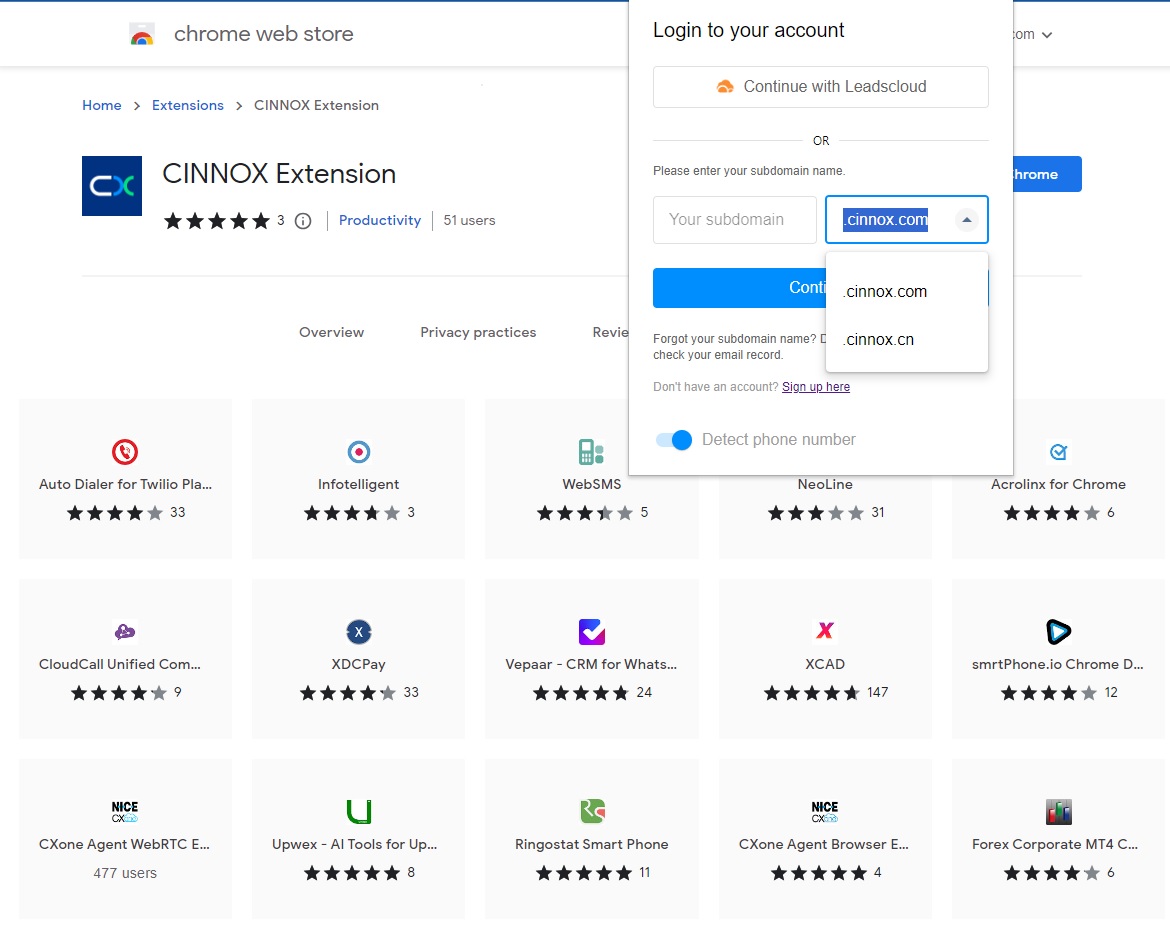
- Click the CINNOX Extension icon to log in to your account with your service account.
- Enter your Subdomain and select your domain .cinnox.com or .cinnox.cn in the drop-down list.
- Click Continue.
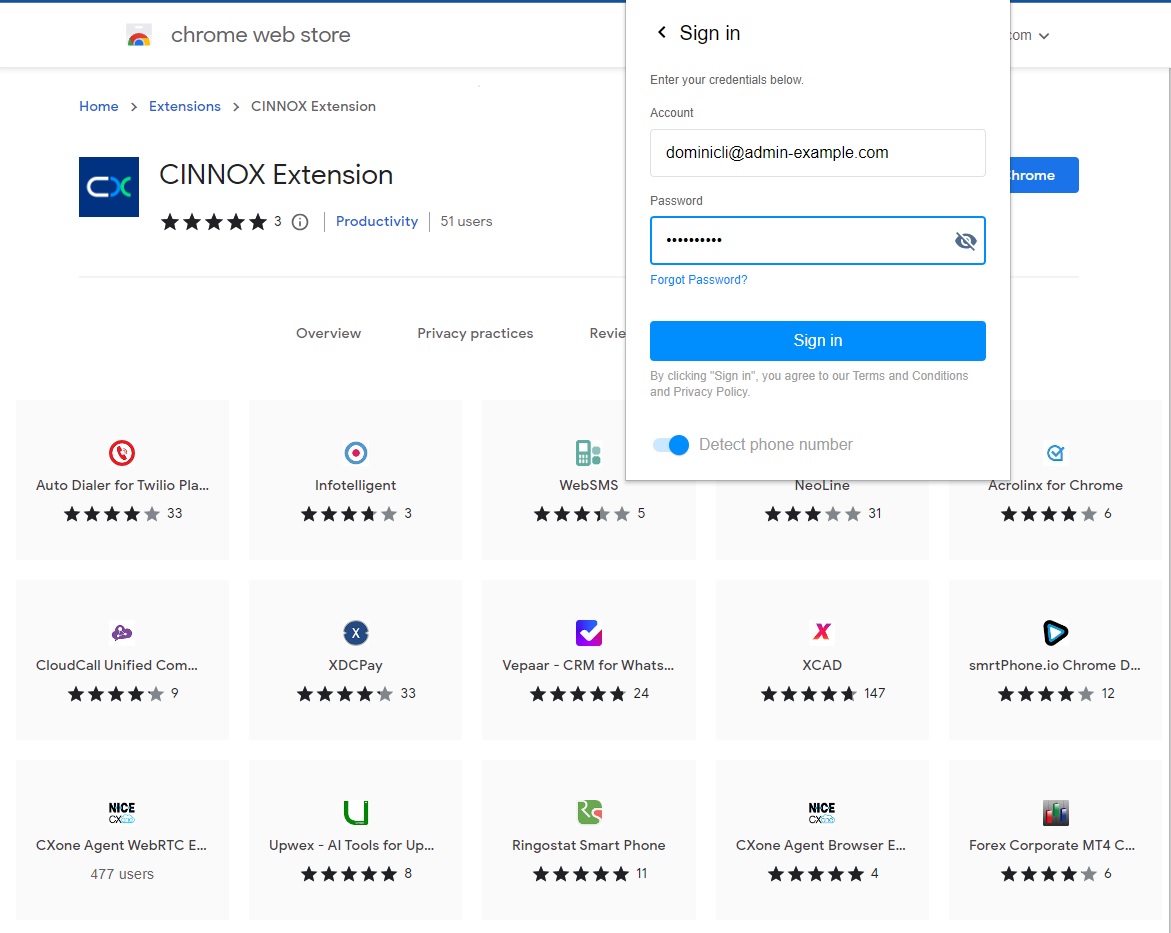
- Enter your Email address as your staff Account and your Password.
- Click Sign in.
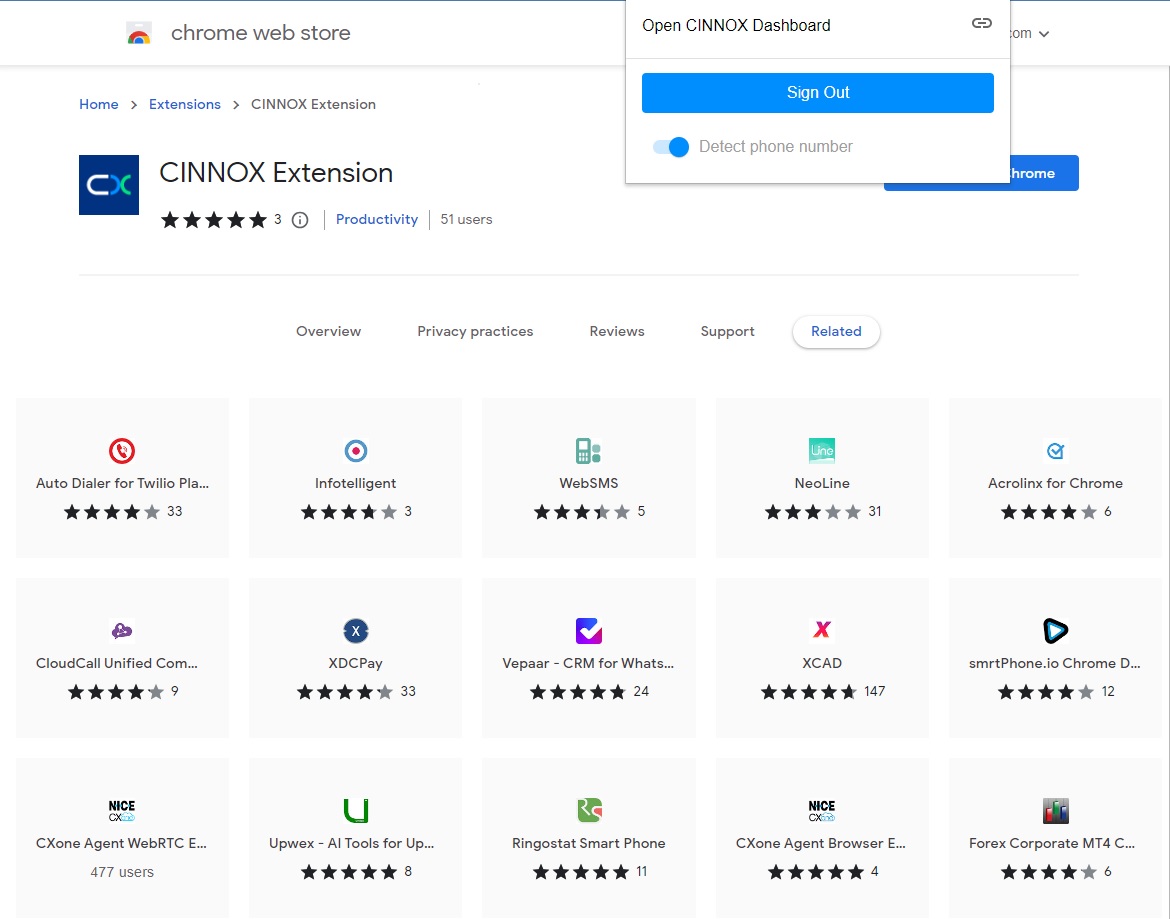
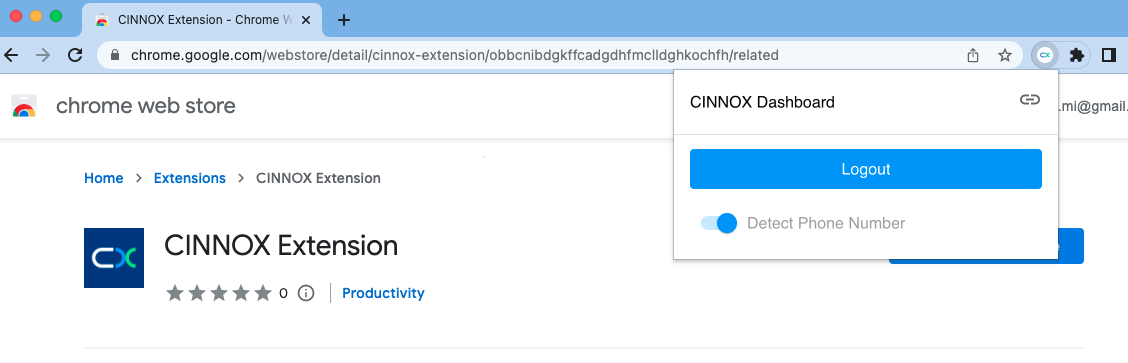
- Once you have successfully logged in, the small window will display the CINNOX Dashboard link, where you can open your CINNOX Web Dashboard and the Sign out button. And please keep the Detect Phone Number toggle ON.
Log in using Leadscloud OAuth
Alternatively, you can log in using the Leadscloud OAuth if your organisation uses it.
📘
Please note that Leadscloud OAuth sign-in is for CINNOX users bound with their CINNOX service for Single Sign-On (SSO).
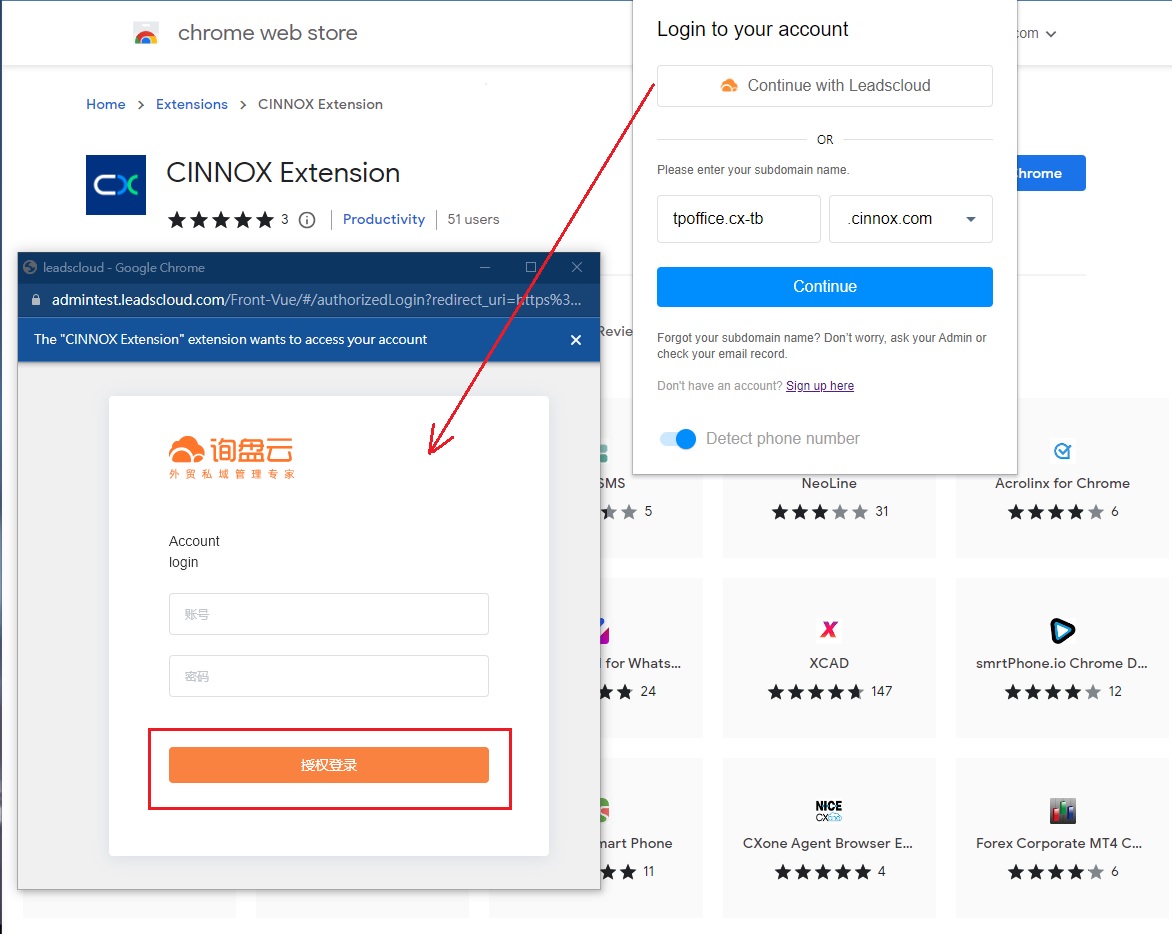
- Click the CINNOX Extension icon to log in to your account with your service account.
- Click Continue with Leadscloud, and a pop-up window will appear to log in with a Leadscloud account. Click 授权登录.
- Once you have successfully logged in, the small window will display the CINNOX Dashboard link, where you can open your CINNOX Web Dashboard and the Logout button. And please keep the Detect Phone Number toggle ON.
You are all set to use the CINNOX Extension on any website you may be working on.
Using CINNOX Extension
Voice Call Functions
CINNOX Extension supports the following voice call functions.
- Make an outbound call - with and without Engagement mode
- Receive an incoming call
- Reject an incoming call
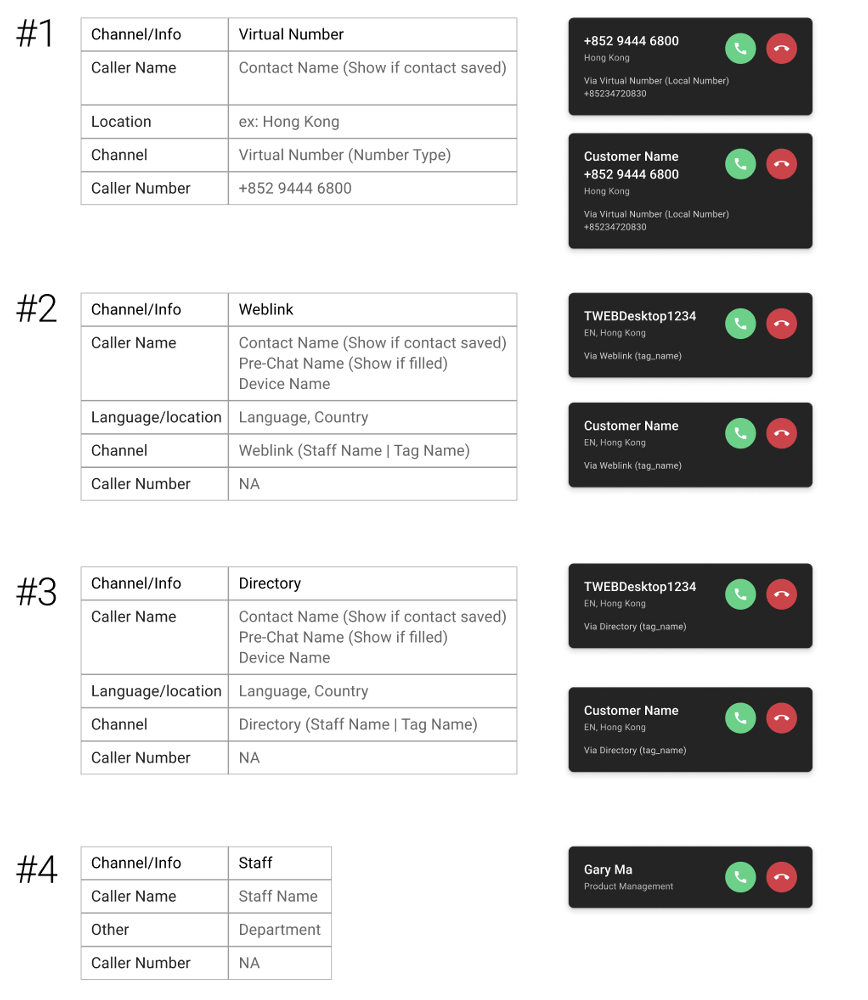
- Display the Contact Name for the caller or called party if it is saved in CINNOX.
- Mute an ongoing call
- Hold an ongoing call
- Record an ongoing call (if the system is set to manual recording)
- Configure the Device Settings for the Microphone and Speaker to use
- Hang up / End the ongoing call
SMS Function
CINNOX Extension supports the following SMS functions.
- Send an SMS of up to 200 chars
Make an Outbound Call (Regular Call)
To make an Outbound call (a regular call) with CINNOX Extension
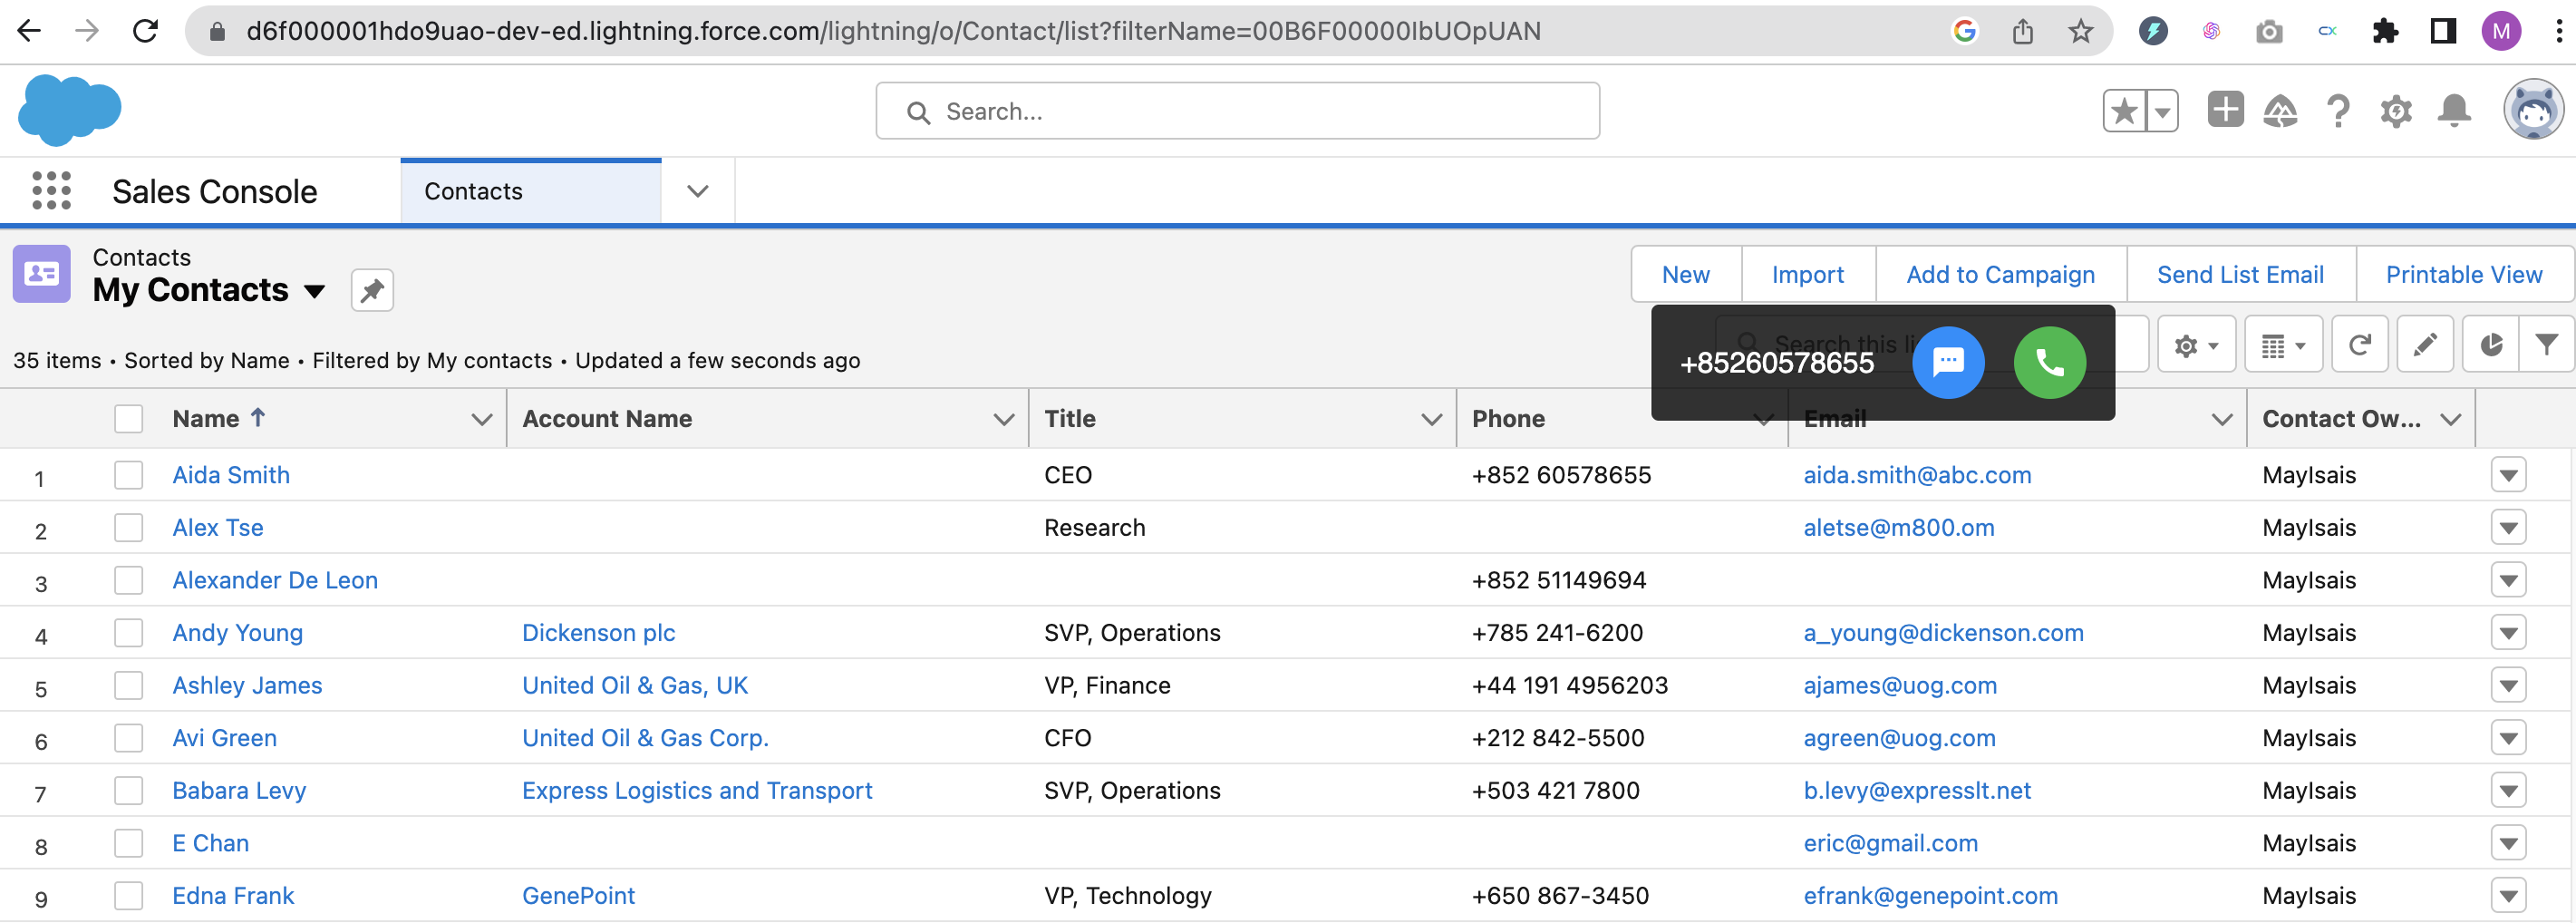
- Mouse over a phone number that starts with a country code on your current page, e.g., your CRM Contacts page or Accounts page.
- The widget will appear to Call or SMS to the mouse-over number.
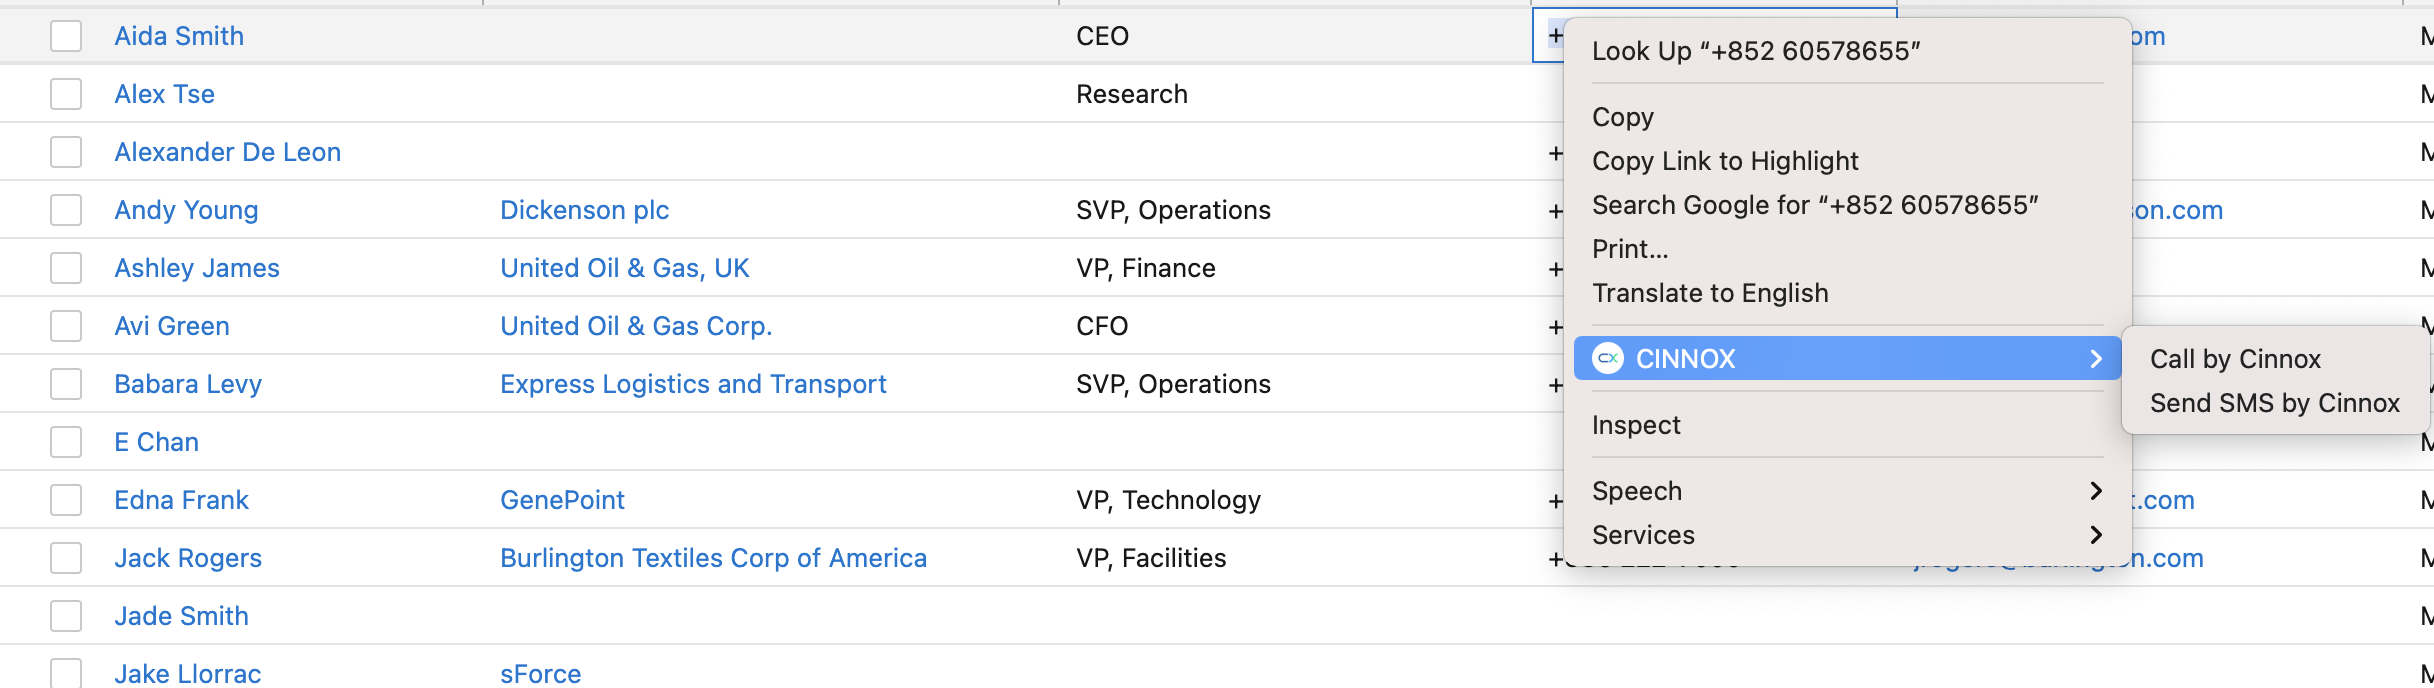
- Otherwise, you manually select a phone number and right-click to call or SMS the number with your mouse.
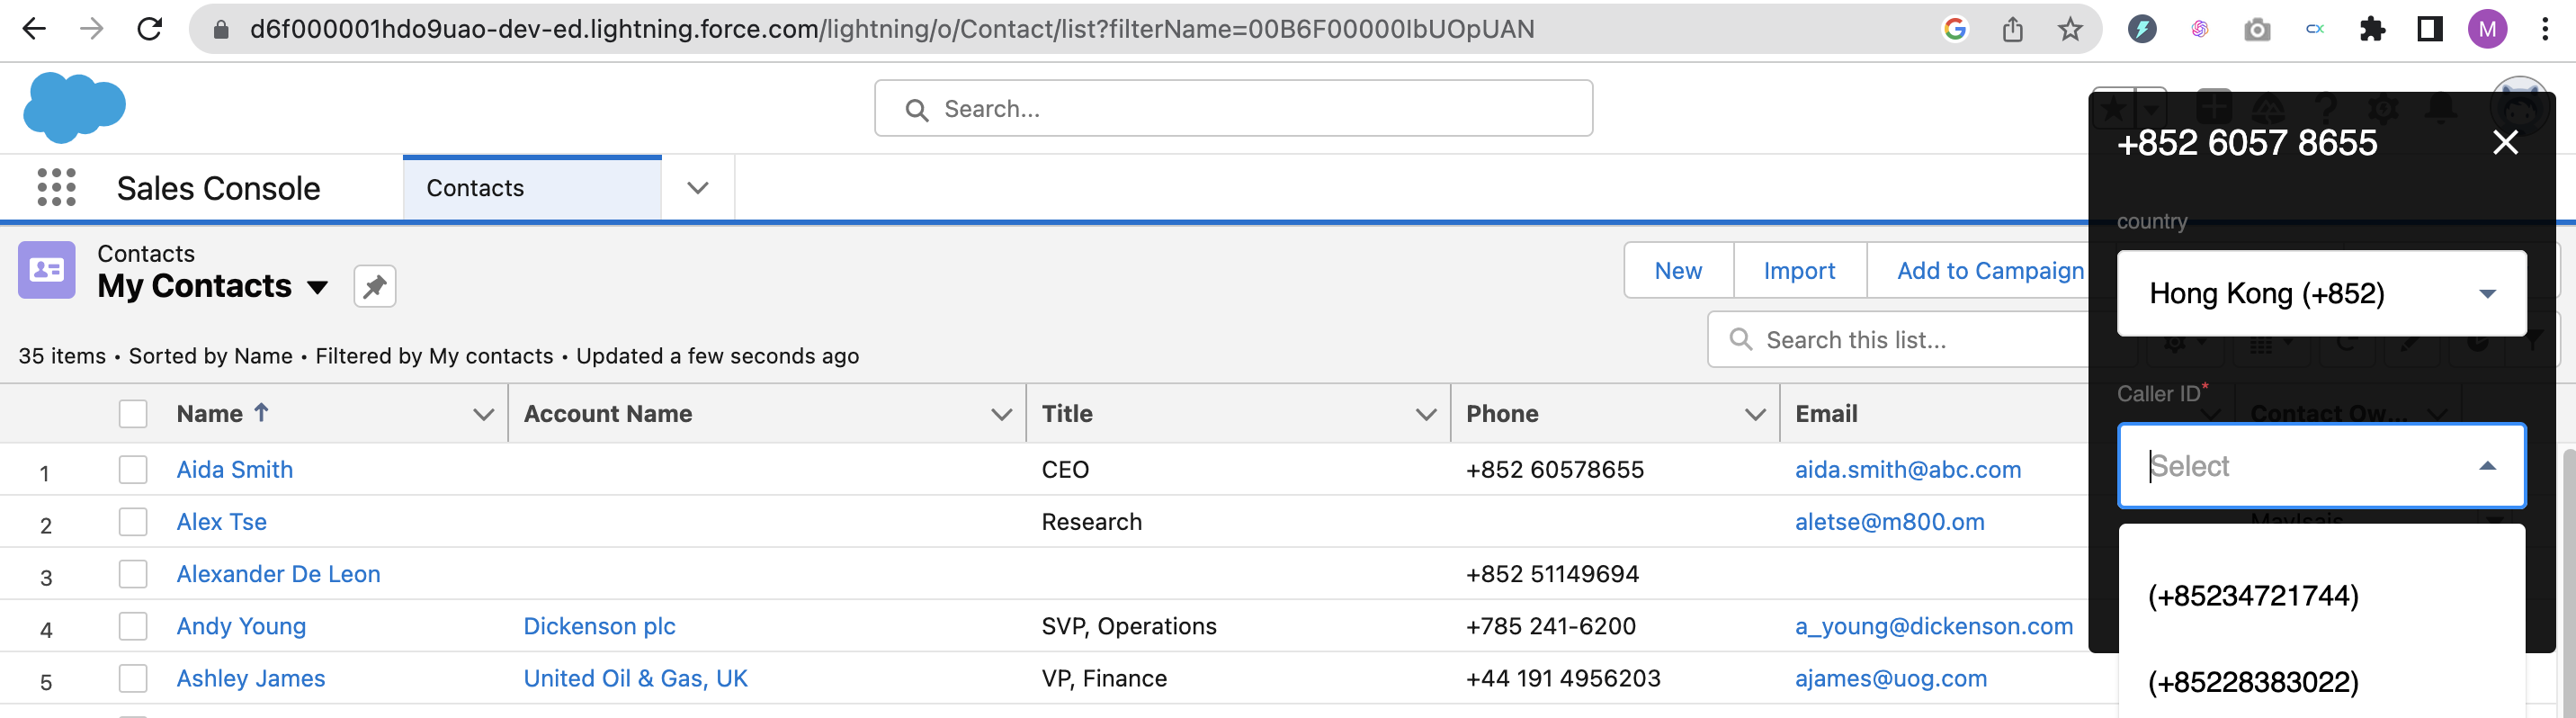
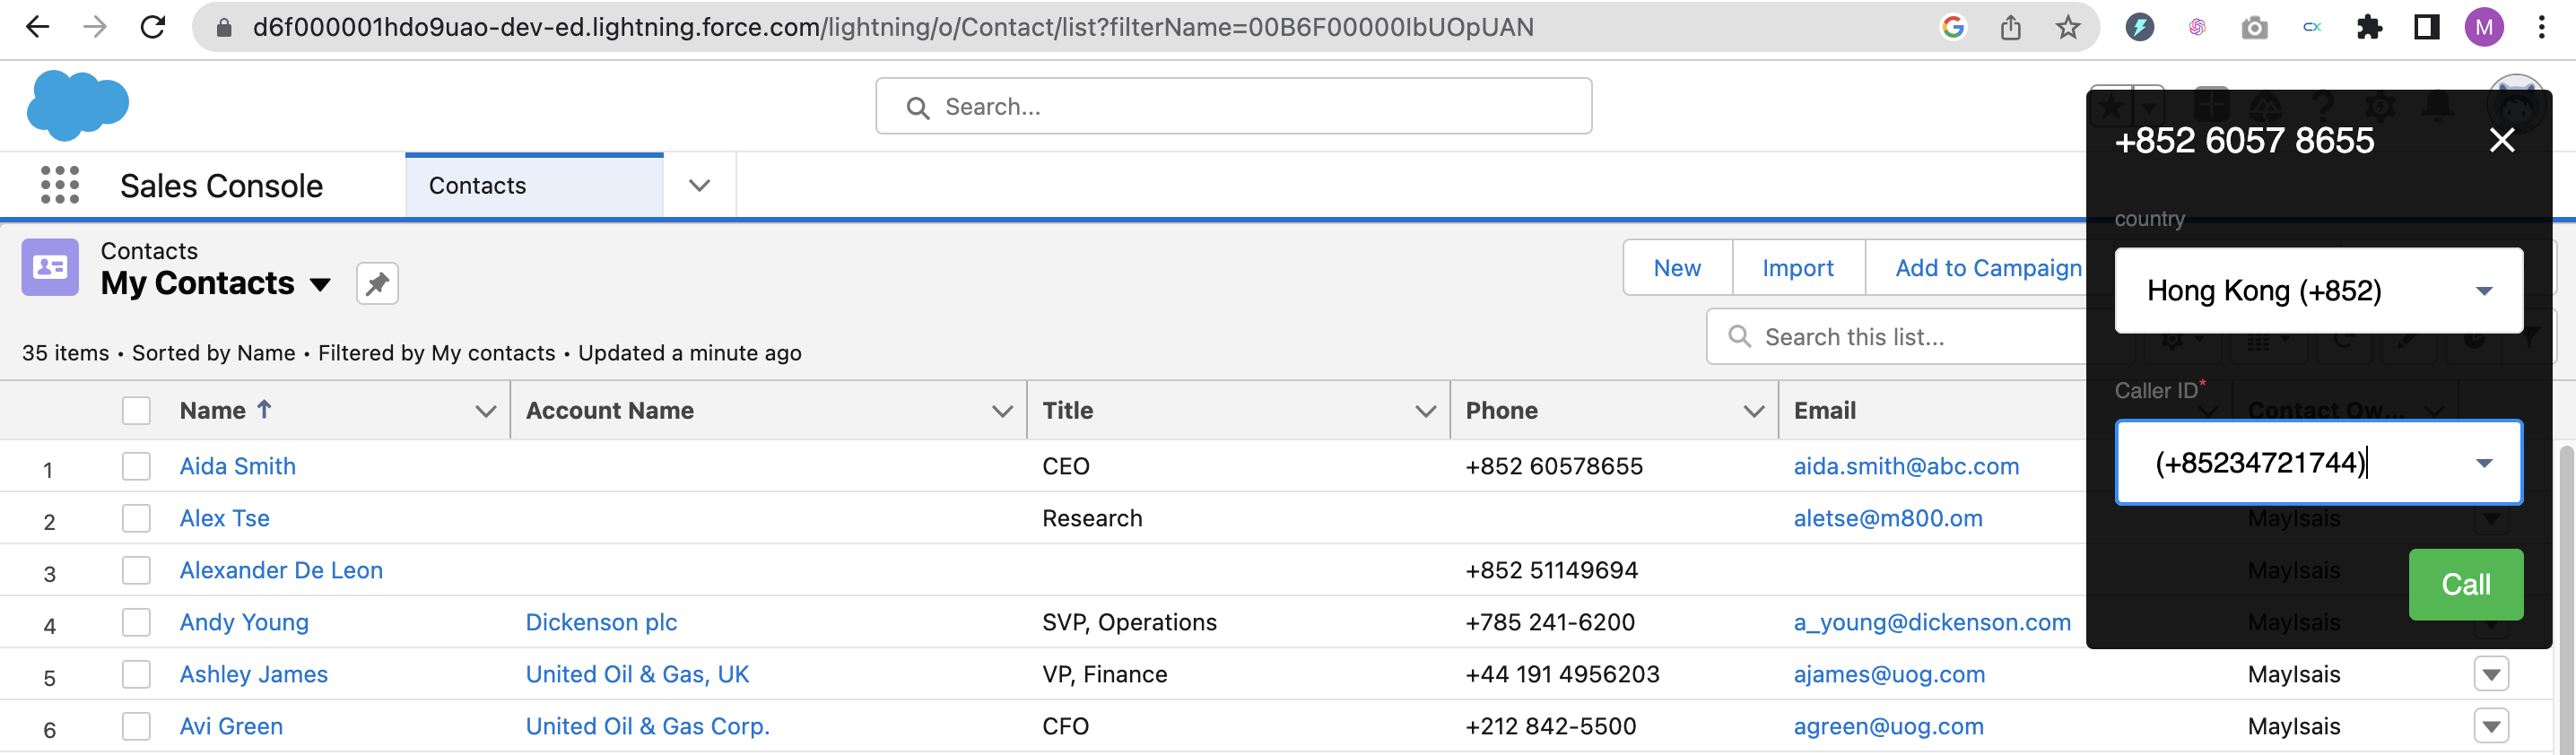
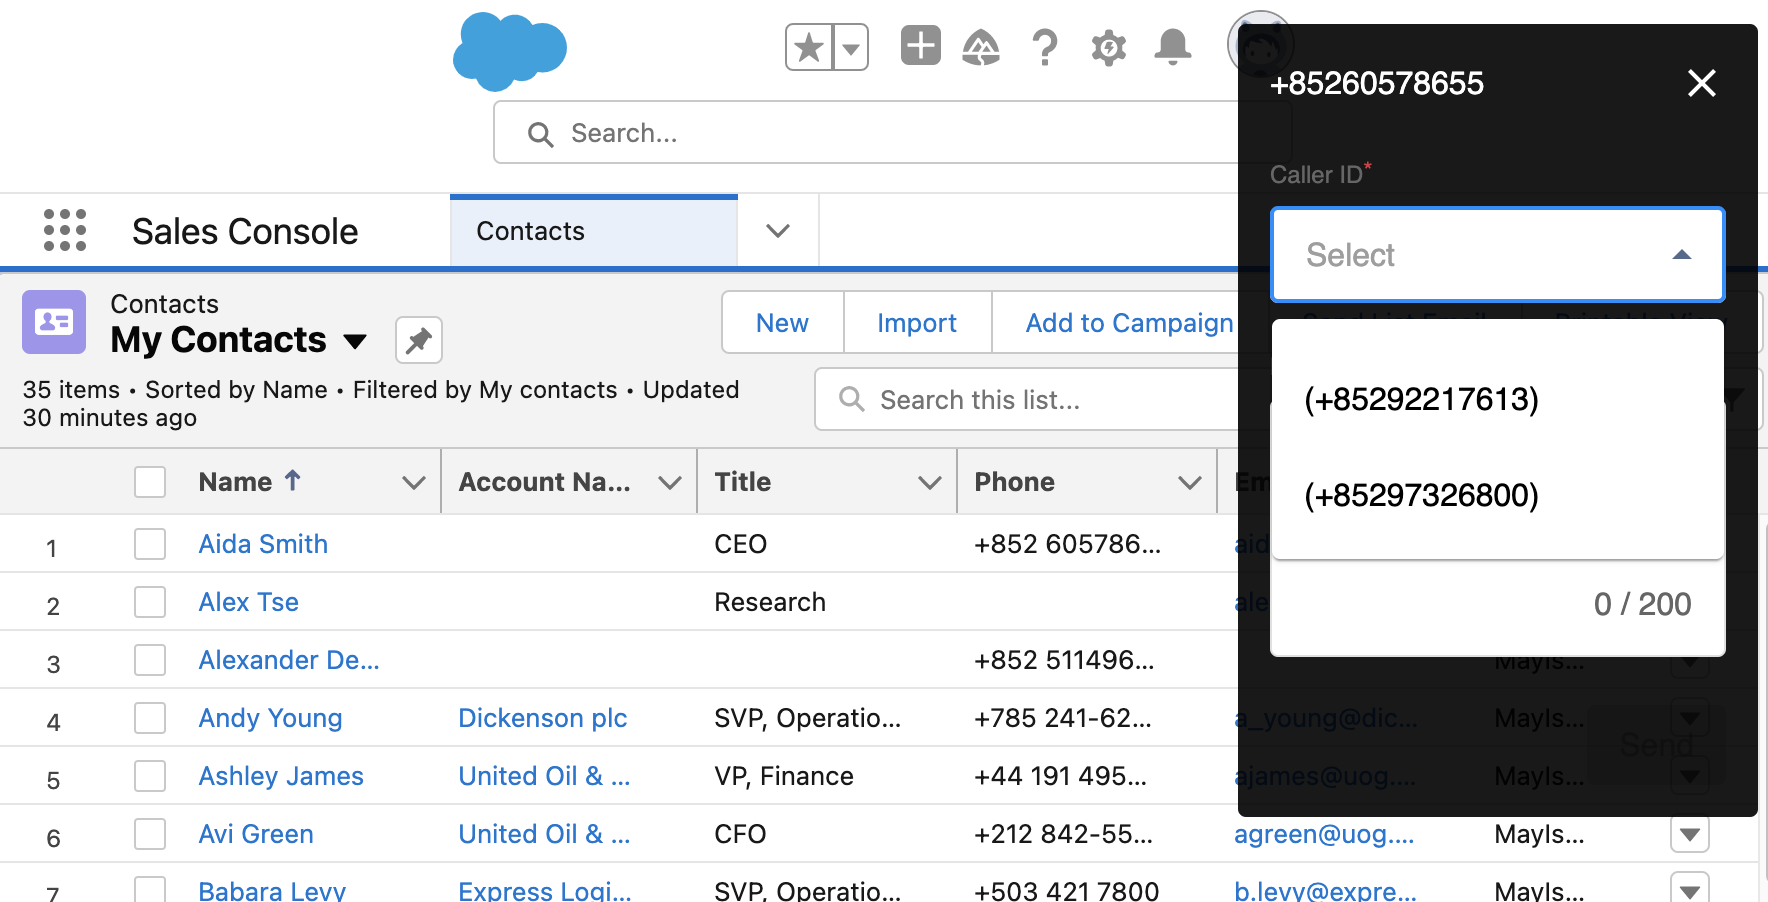
- Select Call, and you will be asked to select the Caller ID to be used. Please ensure that you have the Caller ID to proceed.
📘
Important
Due to Telecom Regulations varying from place to place, Virtual and Service Numbers set as a Caller ID or SMS Sender ID is not guaranteed to display to recipients. Refer to our Virtual Numbers - Caller ID Detailed Guide for more details.
- Click Call.
- A permission pop-up window may appear to allow the use of the Microphone. Click Allow.

- The call was initiated, and it will start dialling the phone number.
- The contact name will appear if saved to your CINNOX External Contact.
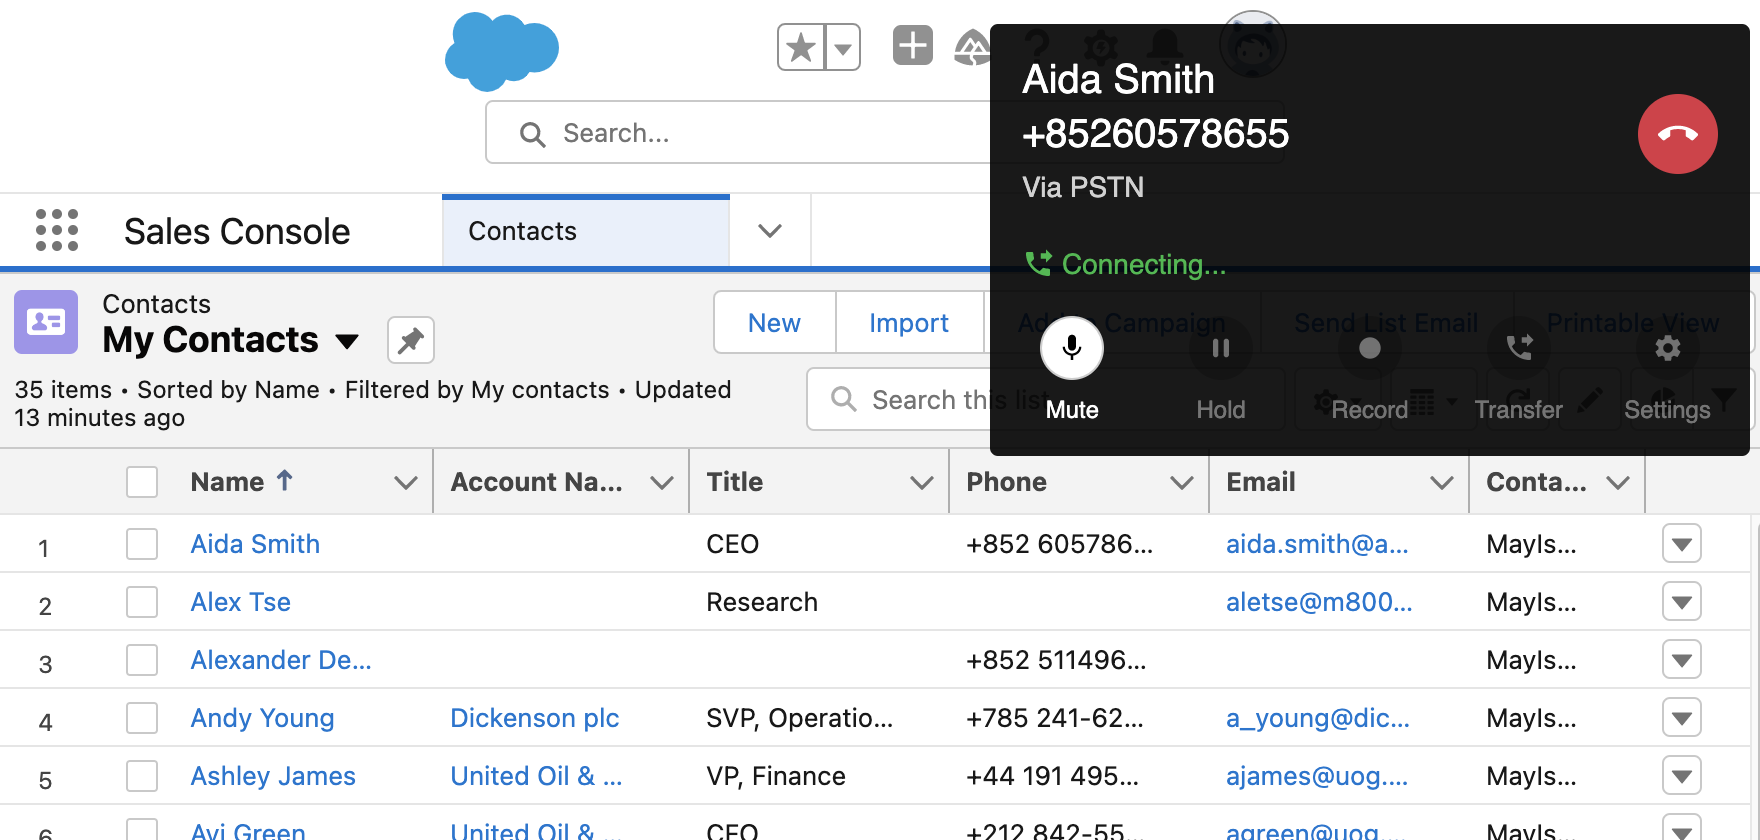
- When the called party answers, your call is connected, and your call time starts counting.
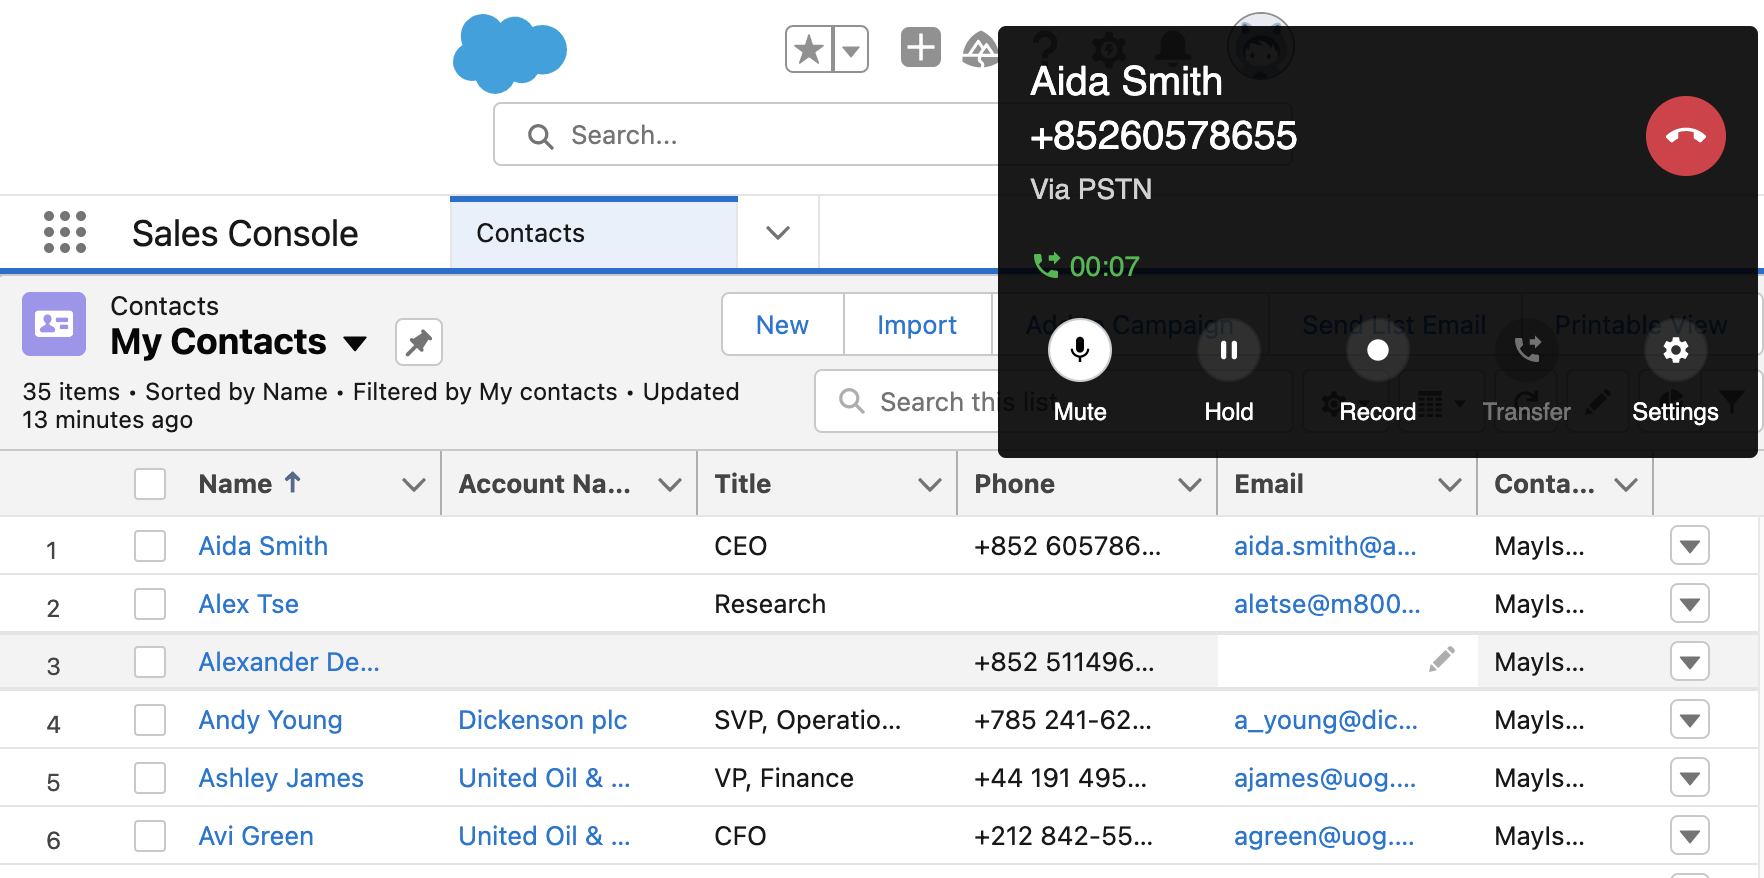
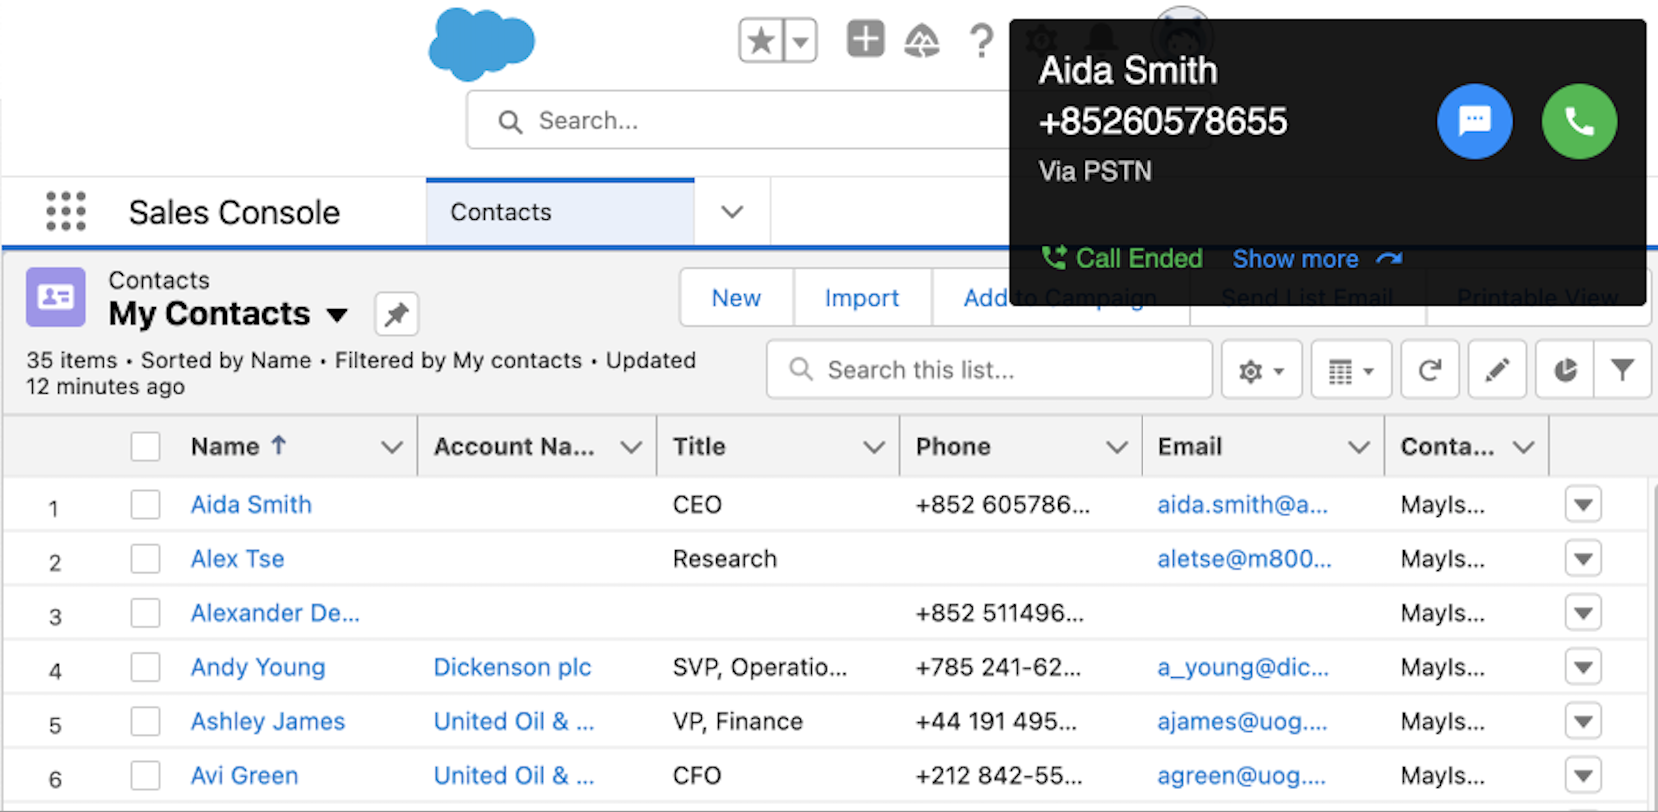
- Click the Hang Up Call icon to end the call.
- When the call ends, click Show more to open your CINNOX Dashboard with your Call log.
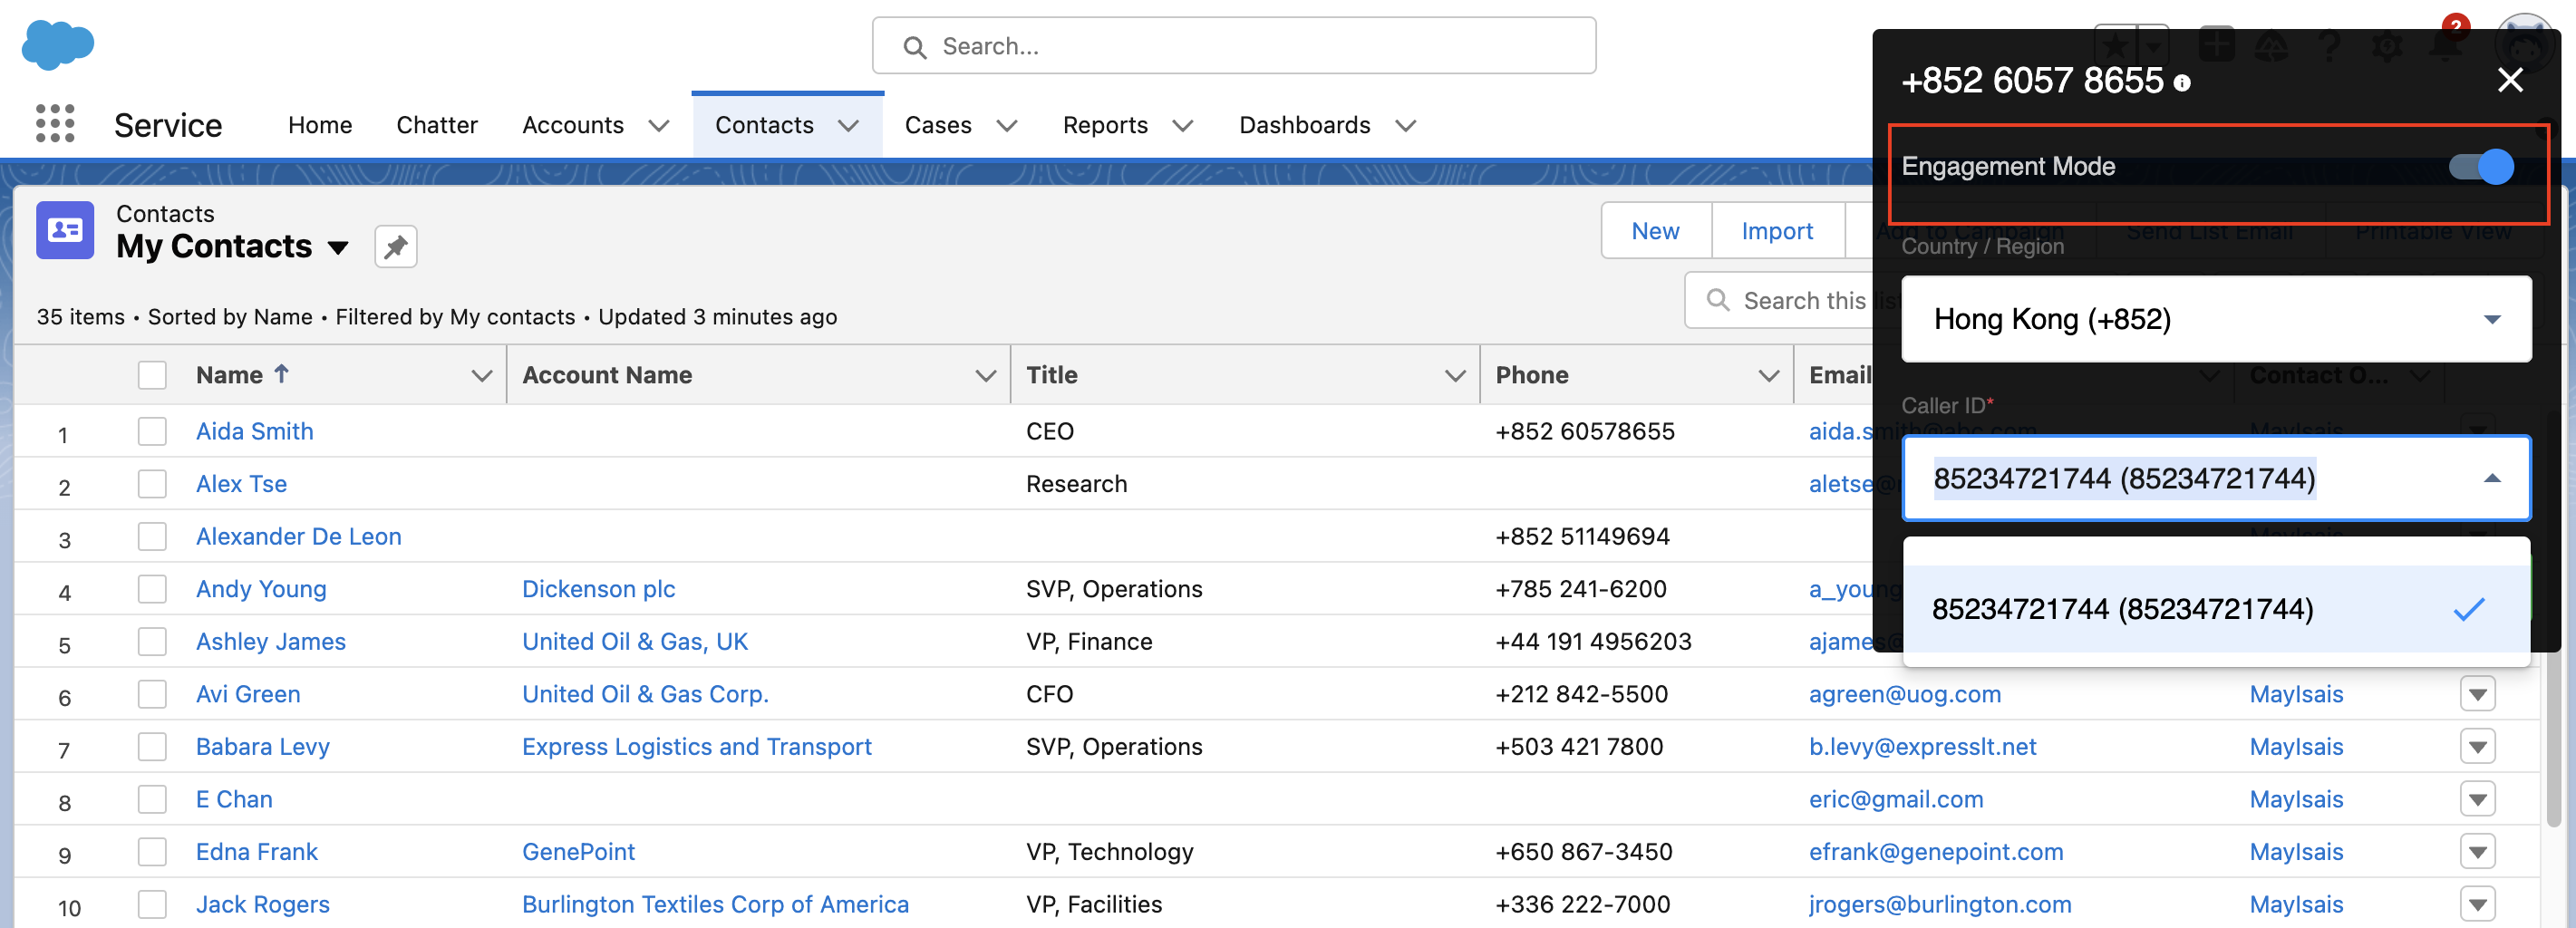
Make an Outbound Call (Engagement Mode Enabled)
Engagement Mode
When making outbound calls to customers or visitors, Staff members can set the virtual phone number they use as their Caller ID in Engagement Mode.
Engagement is a CINNOX call feature that creates an engagement binding between a visitor and the Staff member who called them using a virtual number. The next time the visitor calls using the same number, they will be directly routed to the Staff member who called them the first time.
To turn the Engagement Mode on or off on a virtual number, refer to theVirtual Numbers section of this Guide.
To make an Outbound call (with Engagement Mode) with CINNOX Extension
- Mouse over a phone number that starts with a country code on your current page, e.g., your CRM Contacts page or Accounts page.
- The widget will appear to Call or SMS to the mouse-over number.

- Otherwise, you manually select a phone number and right-click to call or SMS the number with your mouse.

- Select Call, and you will be asked to select the Caller ID to be used. The Engagement Mode toggle is enabled, and the Caller ID with engagement mode will appear in the list.
📘
Important
Due to Telecom Regulations varying from place to place, Virtual and Service Numbers set as a Caller ID or SMS Sender ID is not guaranteed to display to recipients. Refer to our Virtual Numbers - Caller ID Detailed Guide for more details.
- Click Call.
- A permission pop-up window may appear to allow the use of the Microphone. Click Allow.
- The call was initiated, and it will start dialling the phone number.
- The contact name will appear if saved to your CINNOX External Contact.
- When the called party answers, your call is connected, and your call time starts counting.
- Click the Hang Up Call icon to end the call.
- When the call ends, click Show more to open your CINNOX Dashboard with your Call log.
📘
When the called party dialled this caller ID, the call will be routed to the staff who called before.
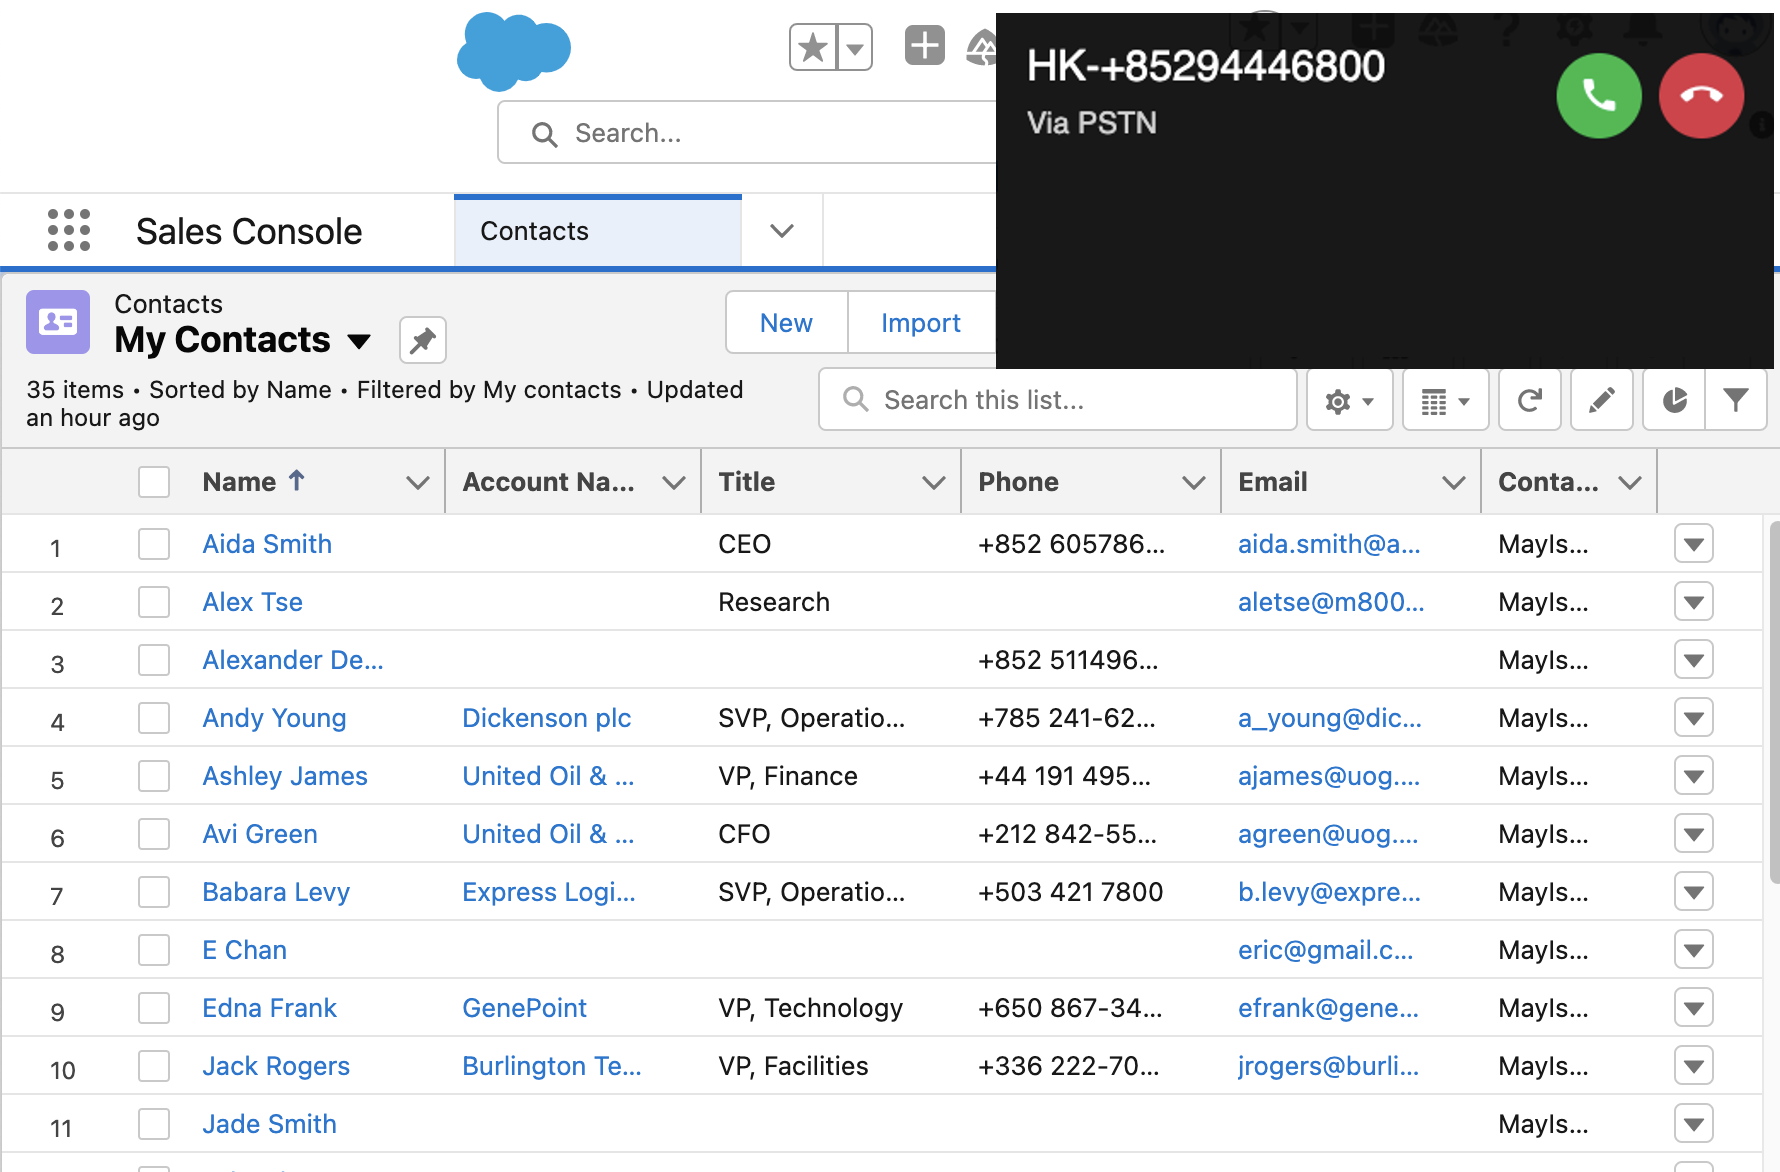
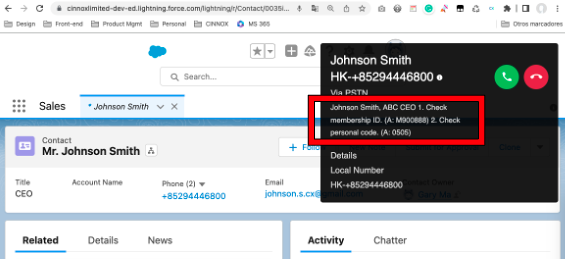
Receive an Incoming Call
- When a visitor calls your Virtual Number and is assigned to you as the Destination to handle the enquiry, the CINNOX Extension Call widget will display for you to answer or reject the call.
- The contact name will appear if saved to your CINNOX External Contact.
Below is the information available for incoming calls from the different channels.
Regular Incoming Calls
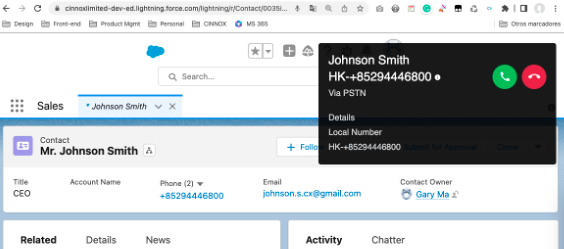
Incoming call with additional information from the web page
📘
A note as additional information of the visitor can be shown on the call screen when available for an incoming call.
During the Ongoing Call
When you are on an ongoing call, you can:
- Mute an ongoing call
- Hold an ongoing call
- Record an ongoing call (if the system is set to manual recording)
- Configure the Device Settings for the Microphone and Speaker to use
- Hang up / End the ongoing call
Send an SMS
To send an SMS call with CINNOX Extension
- Mouse over a phone number that starts with a country code on your current page, e.g., your CRM Contacts page or Accounts page.
- The widget will appear to Call or SMS to the mouse-over number.

- Otherwise, you manually select a phone number and right-click to call or SMS the number with your mouse.

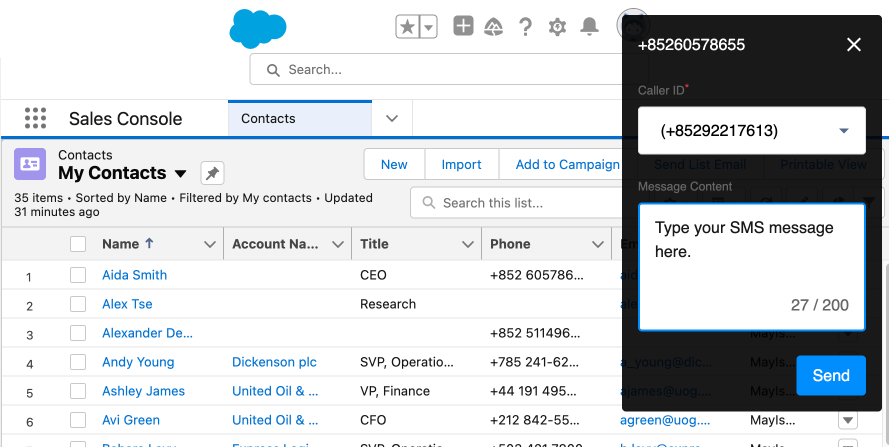
- Select SMS, and you will be asked to select the Sender ID to be used. Please ensure that you have the Sender ID to proceed.
📘
Important
Due to Telecom Regulations varying from place to place, Virtual and Service Numbers set as a Caller ID or SMS Sender ID is not guaranteed to display to recipients. Refer to our Virtual Numbers - Caller ID Detailed Guide for more details.
- Enter your SMS message in the Message Content box. You can enter an update of 200 chars per SMS.
- Click Send.
All Calls made and received and SMS sent via the CINNOX Extension will be recorded in your Service Account - Call, Enquiry, and SMS Reports.
Sample numbers where a widget will appear to call or send SMS:
+85260578655
+85234720805
👍
Know more how to streamline your web communication with the CINNOX Chrome Extension: Connect, Call, and Text with Ease!