Managing Call Prompts
Prompts are audio files played at various points within the call process, and there are several different types of prompts with specific purposes, including greeting, waiting, voicemail and end prompts. These prompts can be managed and customised using various tools such as Add Prompt, Edit Prompt, Set as a default, Apply to all, and Delete, and can be used in routing rules to provide a better experience for callers and visitors.
- Greeting Prompt - A welcome message prompt to the callers (e.g. "Hello and thank you for calling ABC Company, where excellent customer service is our priority.”)
- Waiting Prompt - Music plays when the customers or visitors wait for an agent to receive the calls.
- Voicemail Prompt - A recording informing customers or visitors you cannot accept the calls. It provides a 24-hour answering capability and ensures customers stay caught up. Staff members can immediately follow up on missed enquiries based on the details left on the voicemail messages.
- End Prompt - An end greeting to be played before the end of the call.
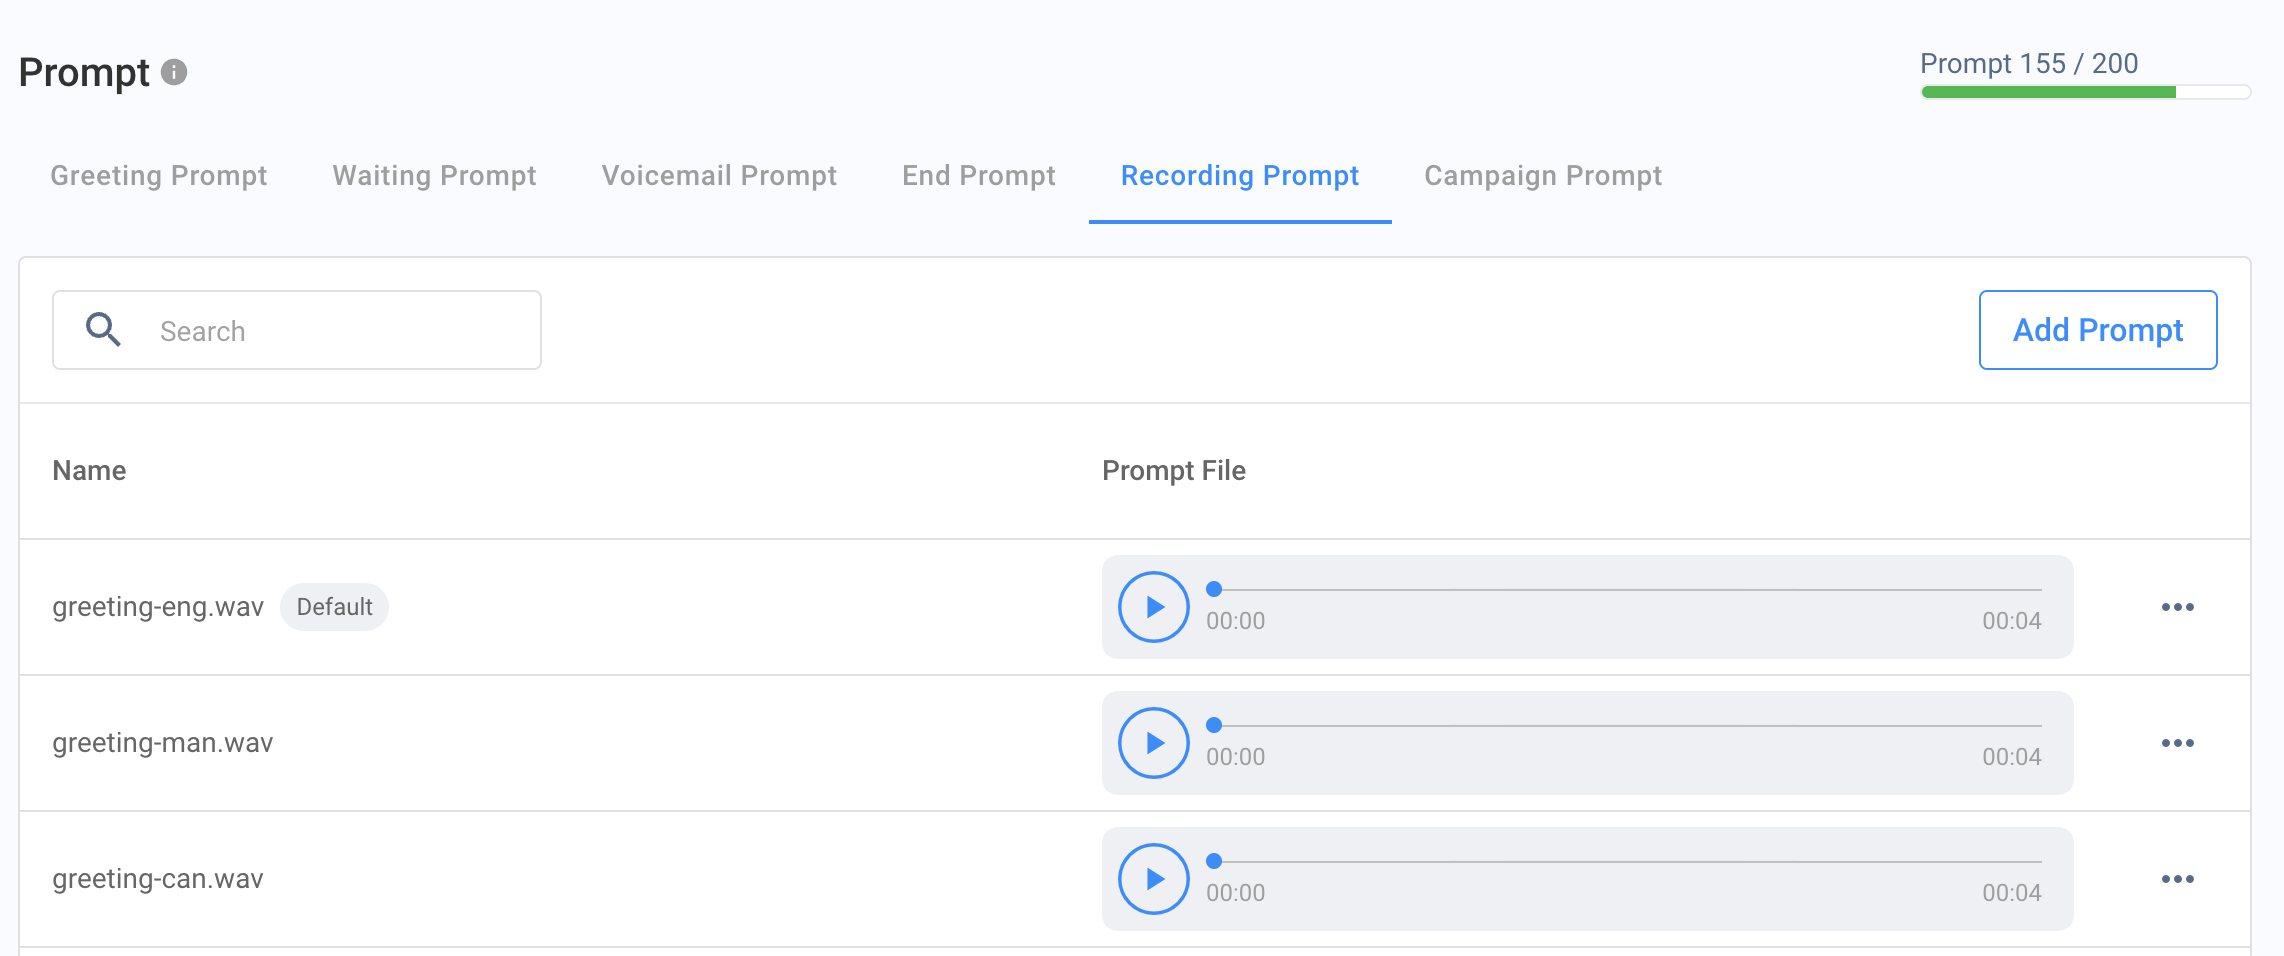
- Recording Prompt - A prompt for recording enquiry, outbound, internal, and conference calls. Reminder: For more information on recording and transcripts, please refer to the Recording and Transcript section in the CINNOX Dashboard and CINNOX App.
- Campaign Prompt - A prompt as a greeting for a call campaign that will play when the recipient answers the call.
You can manage prompts of each type with Add Prompt, Edit Prompt, Set as a default, Apply to all and Delete and use them in your Routing Rules, Call Recording and Call Campaign.
👍
The prompts added for different purposes like Greeting, Waiting, Voicemail and End can be used in the Virtual Number > Routing Settings.
Adding Prompt
To add a new prompt:
- Navigate to Administration > Tools & Settings > Prompt.
- Click Add Prompt.
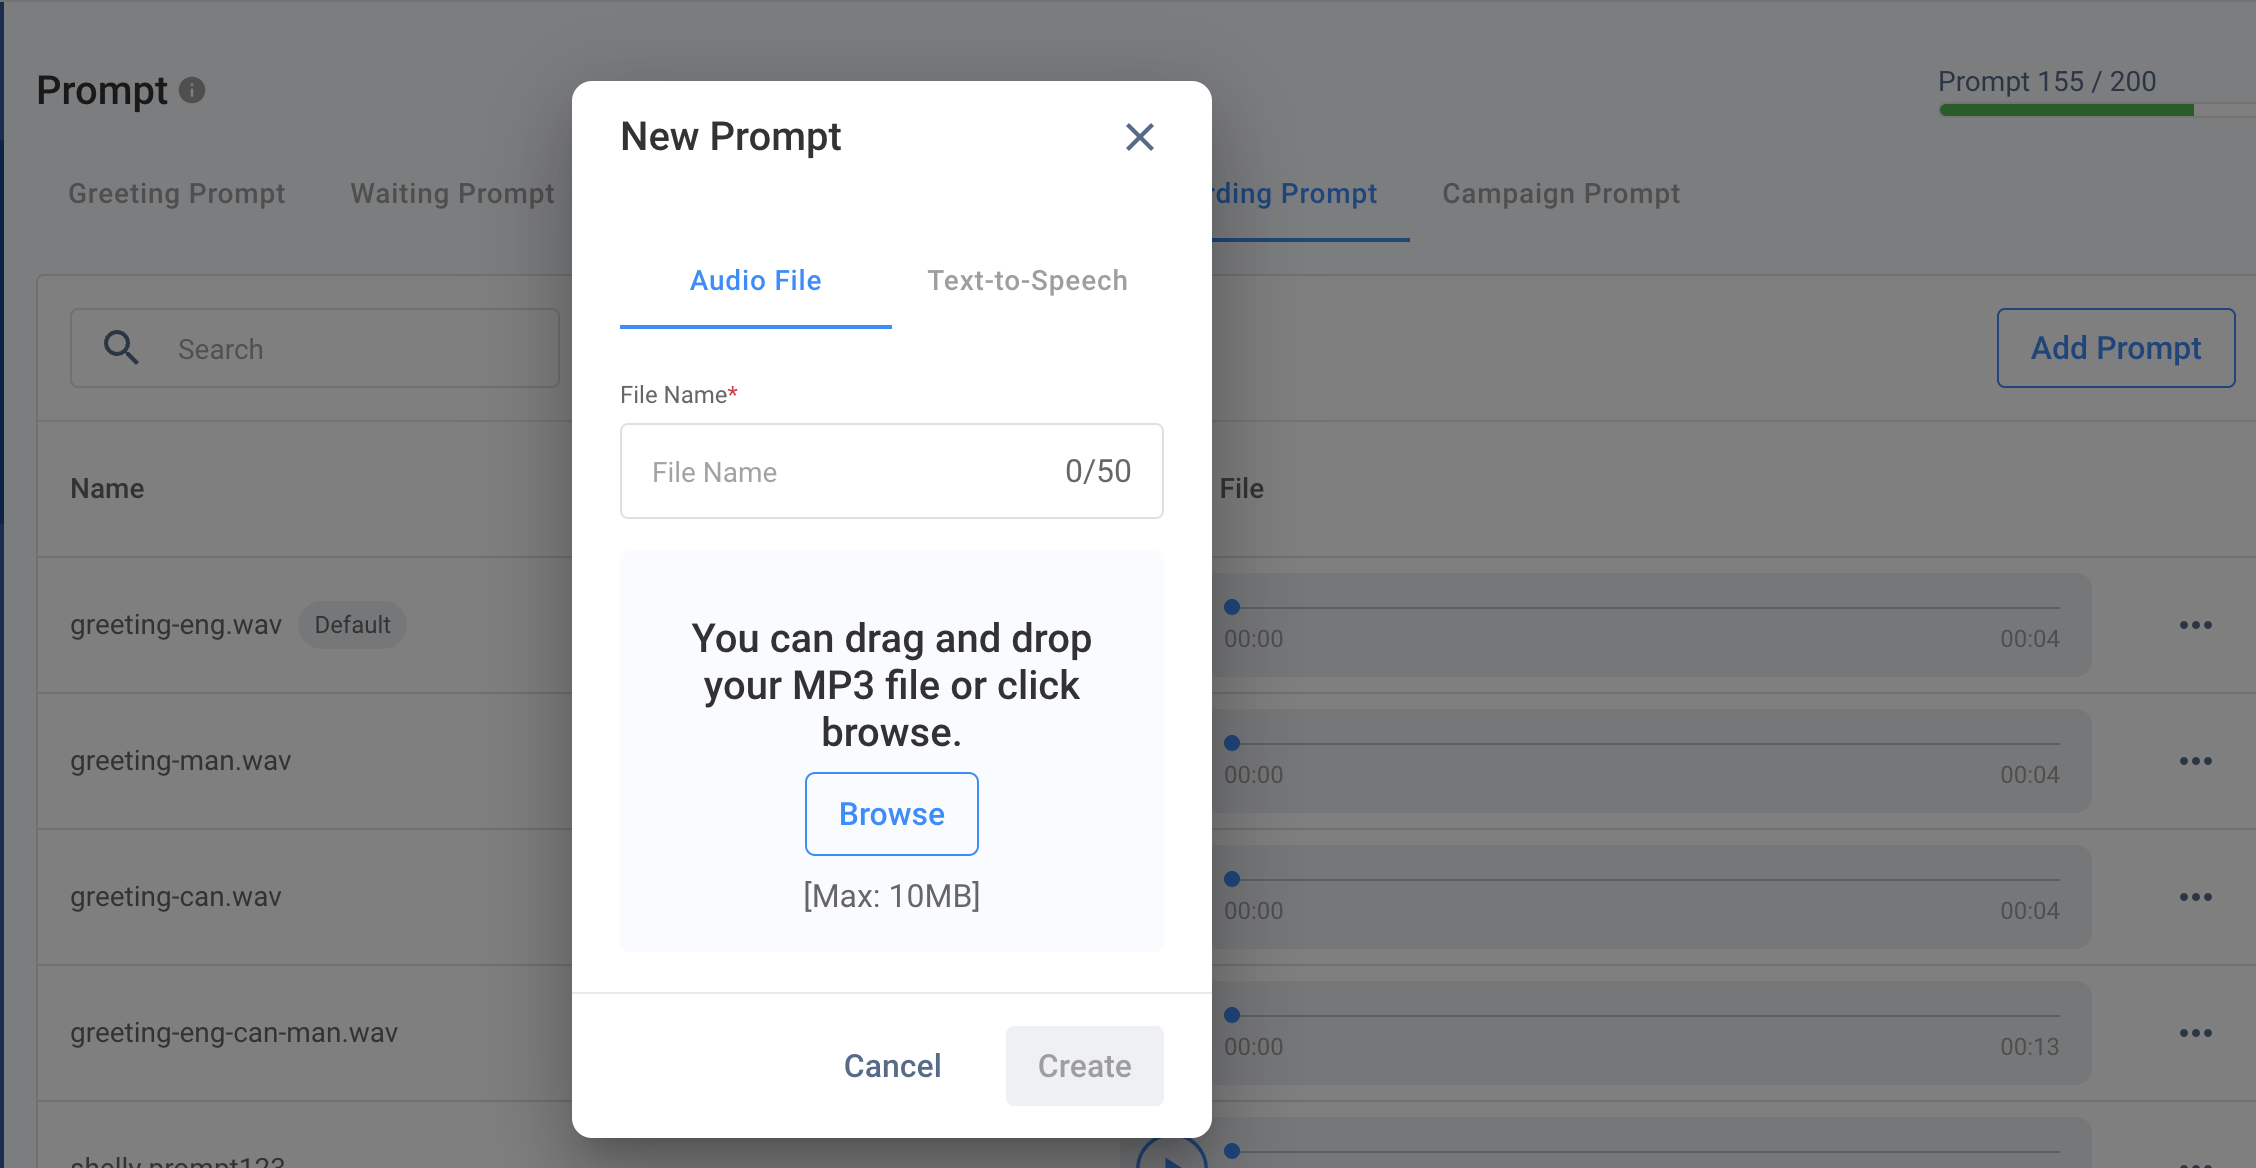
Add Prompt
- Choose the Audio File tab or the Text-to-Speech tab. The maximum number of prompts to be uploaded is 100.
Case 1: Audio File
- Type the file name of the greeting to upload; a file name can be of any name but should not exceed 50 characters as the maximum limit.
- Drag and drop the MP3 file, or browse and select the location of the MP3 file to upload.
- The MP3 file must not exceed 10 MB as the maximum limit.
- You may click the play button to listen to the uploaded audio file.
- You may upload a different file to replace the current file if necessary.
- Click on Create to complete the new prompt creation.
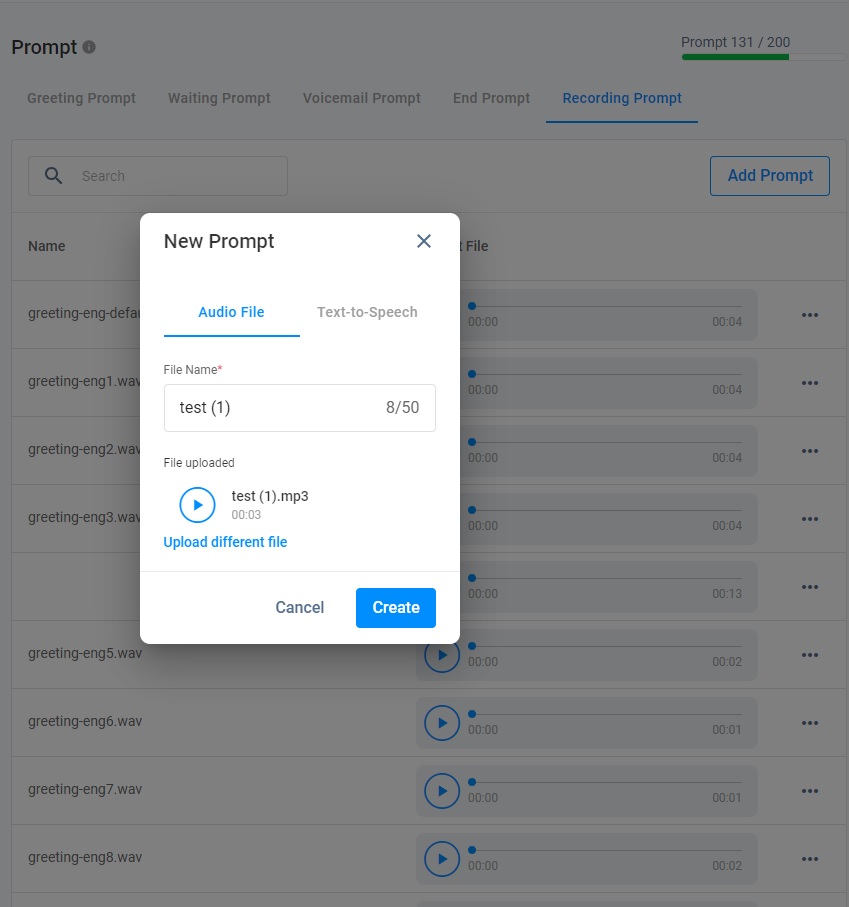
Add new audio as a new prompt
Case 2: Text-to-Speech
- Type the file name of the greeting to upload. A file name can be of any name but should not exceed 50 chars as the maximum limit.
- Type or paste the text you want to convert to a voice message. The maximum limit must not exceed 700 characters.
- You may click the play button to listen to the voice message.
- Click the gear icon to expand the page and display the Language and Voice Name drop-down list to select the preferred language and Voice Name.
- Select Language in the drop-down list.
- Select Voice Name in the drop-down list.
- Click the play button to listen to the selected language and voice name.
- Refine the text message to fine-tune the message if necessary.
- Click on Create to complete the steps of uploading a TTS greeting.
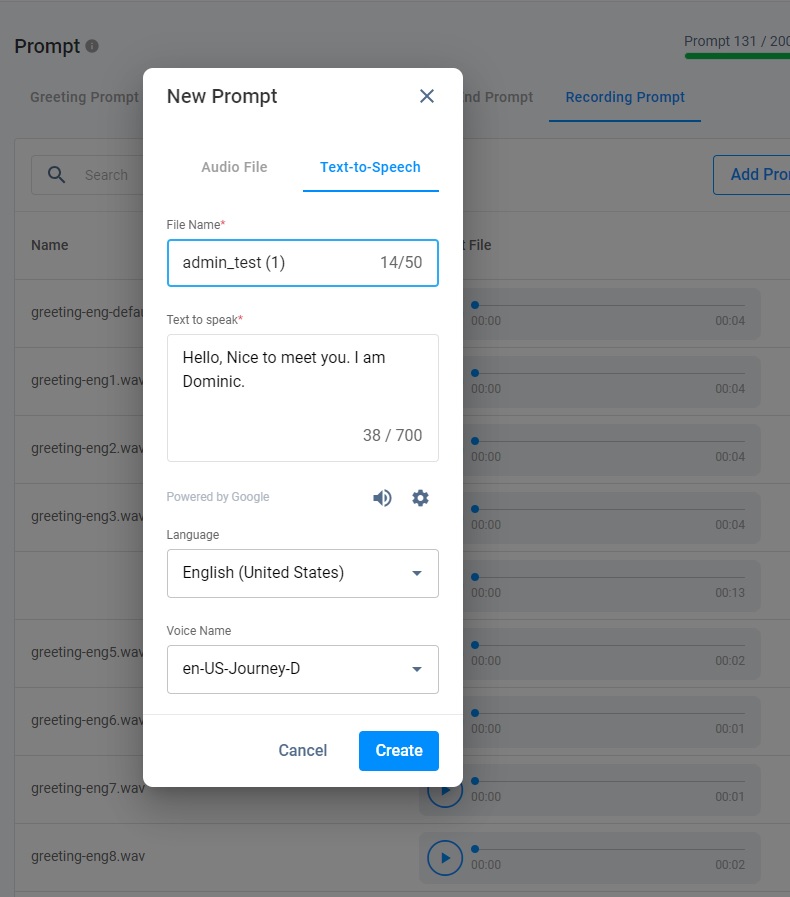
Add text as a new prompt
Editing Prompt
- Navigate to Administration > Tools & Settings > Prompt.
- Click on More (...) and select Edit to a prompt that needs editing.
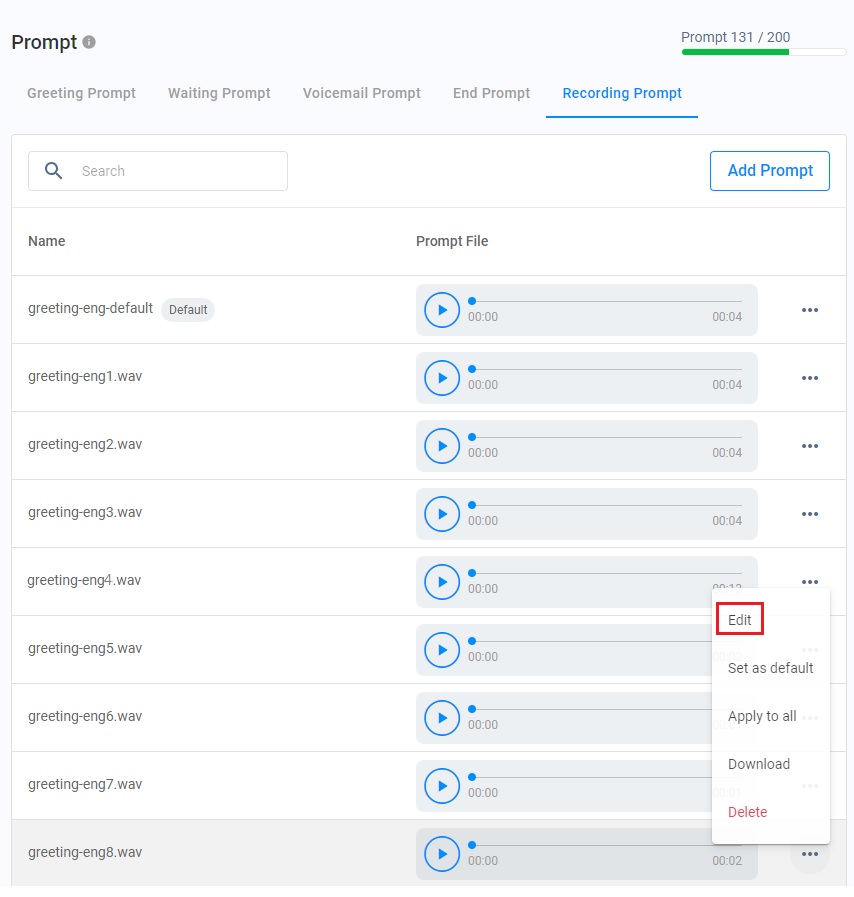
Click on Edit
- Click on the Audio File or Text-to-Speech tabs. You can edit the File Name, File uploaded for Audio File or File Name, Text-to-speak, Language and Voice Name for Text-to-Speech.
- Click on Save to complete the editing.
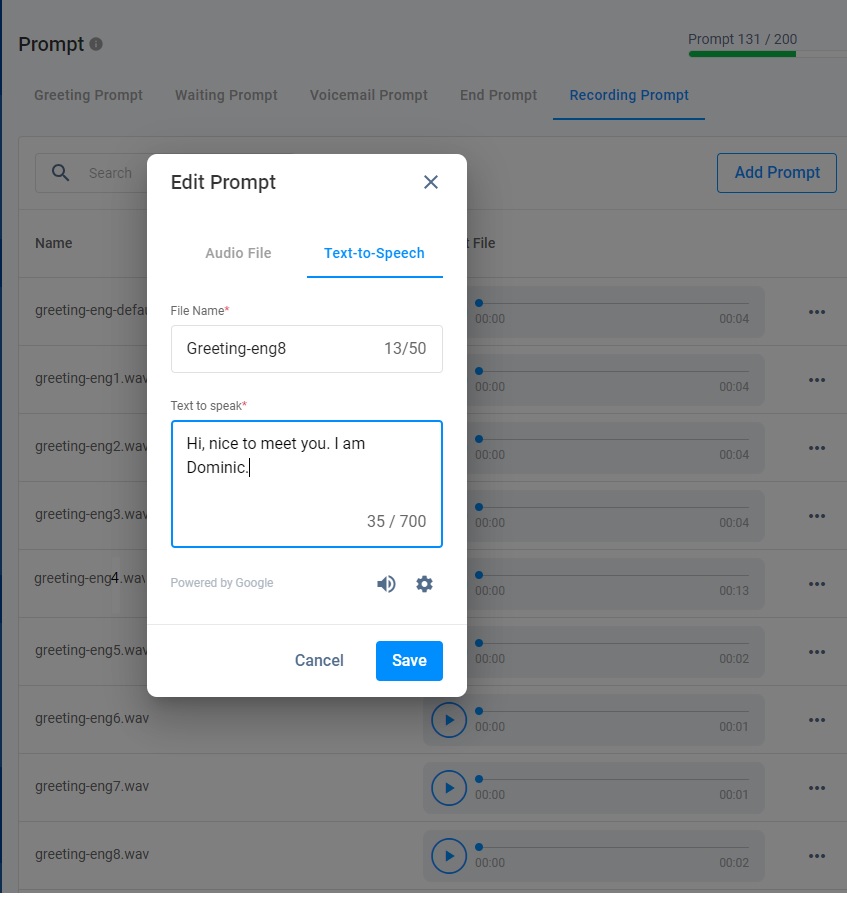
Edit Prompt pop-up message
- The toast message indicates your prompt editing is successful.
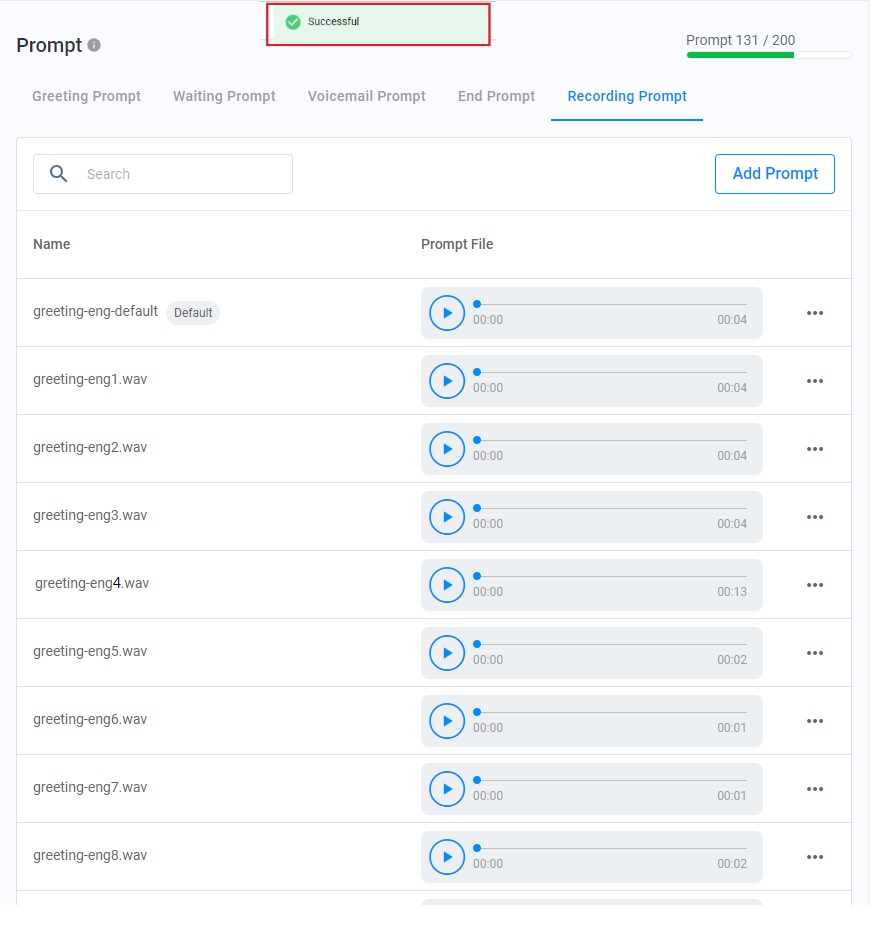
Prompt editing is successful
📘
CINNOX Waiting prompt and Voicemail/End Prompt, the only always-on prompts already uploaded in the system and set as a default, are not editable and deletable.
Setting Default Prompt
The added prompt can be set as a default prompt. For example, the Greeting prompt will automatically be applied as a greeting prompt once you enable the Greeting Prompt in Prompt Settings.
- Navigate to Administration > Tools & Settings > Prompt
- Click on More (...) and select Set as default to a prompt you want to make a default.
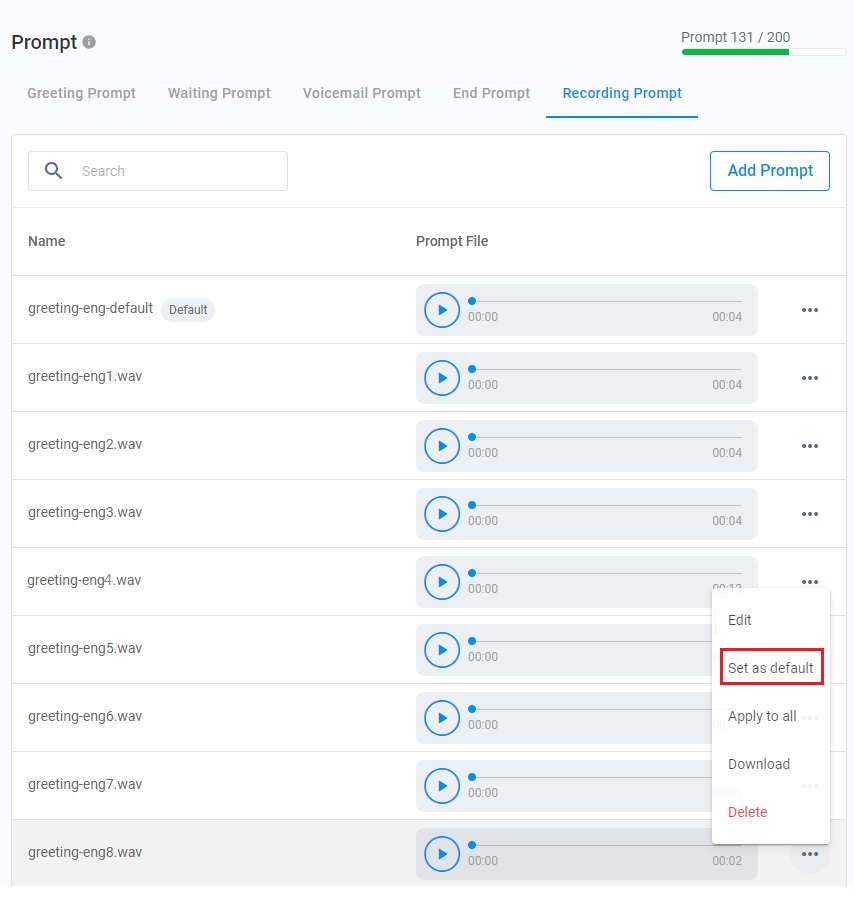
Click on Set as default
- Click on OK
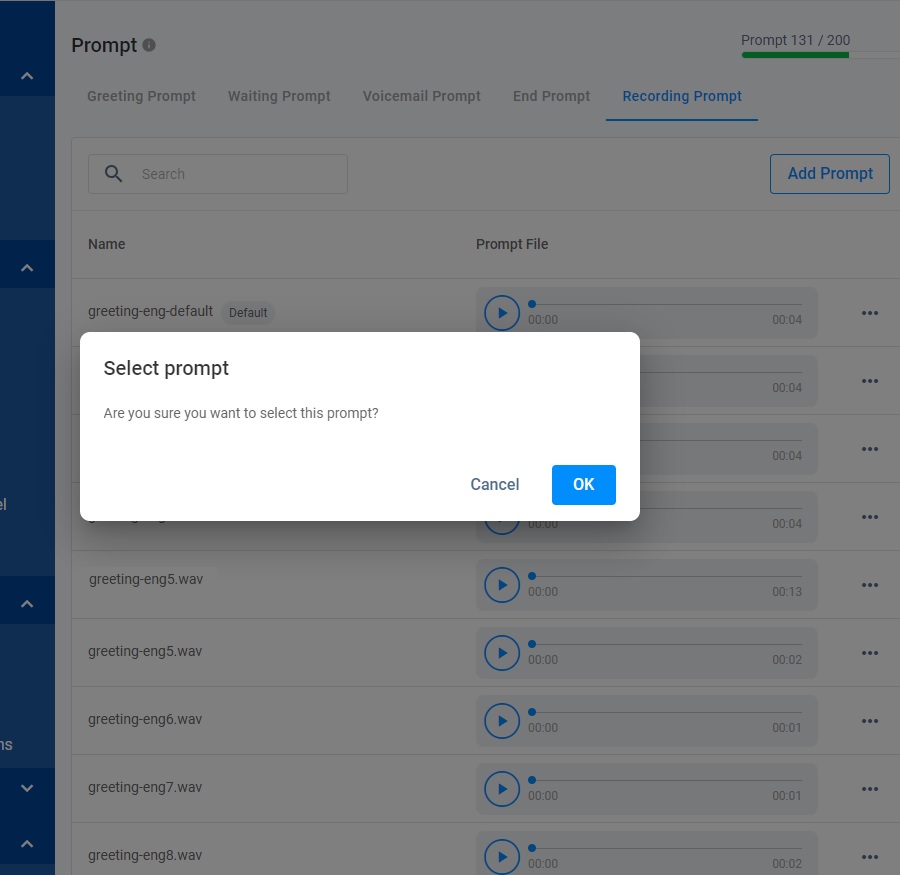
Click on OK
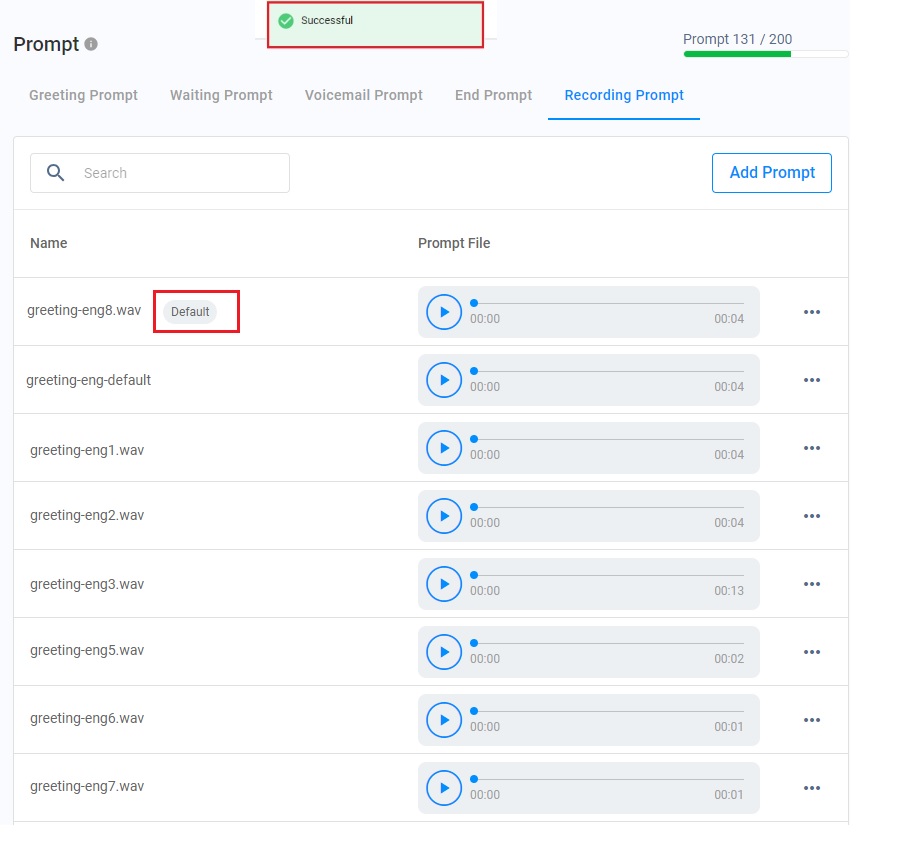
A toast message indicates that Set as default is successful. The default prompt is displayed in the first row with a Default label.
Default prompt
📘
Notes
- The original CINNOX default prompt will be displayed in the second row when the new prompt is set as a default. As the new prompt becomes the default, the CINNOX prompt is no longer set as a default.
- Following the CINNOX prompt, the other added prompts are displayed in order of their creation time.
Applying Prompts to all Prompt Settings
Apply to all helps users save time when updating a particular prompt to all Prompt Settings. For example, the required prompt, like the end prompt, will be applied to all Prompt Settings to become the assigned end prompts. Users need not update the end prompts in different Prompt Settings individually.
To apply the prompt to all Prompt Settings:
- Navigate to Administration > Tools & Settings > Prompt
- Click on More (...) and select Apply to all to a prompt.
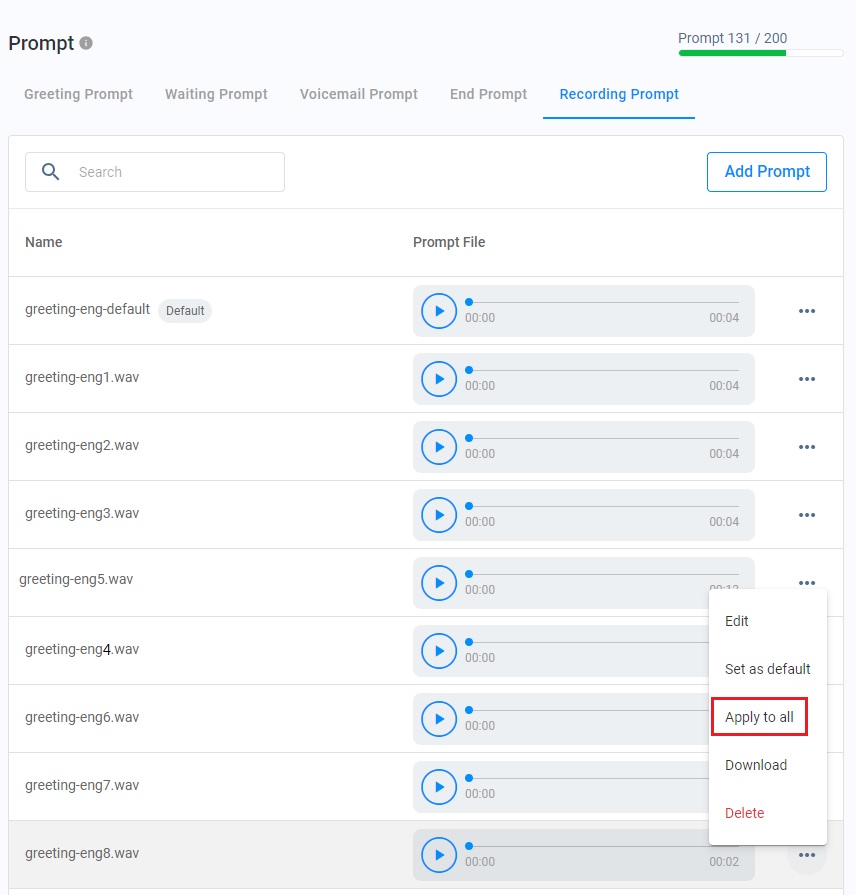
Click on Apply to all
- Click on OK.
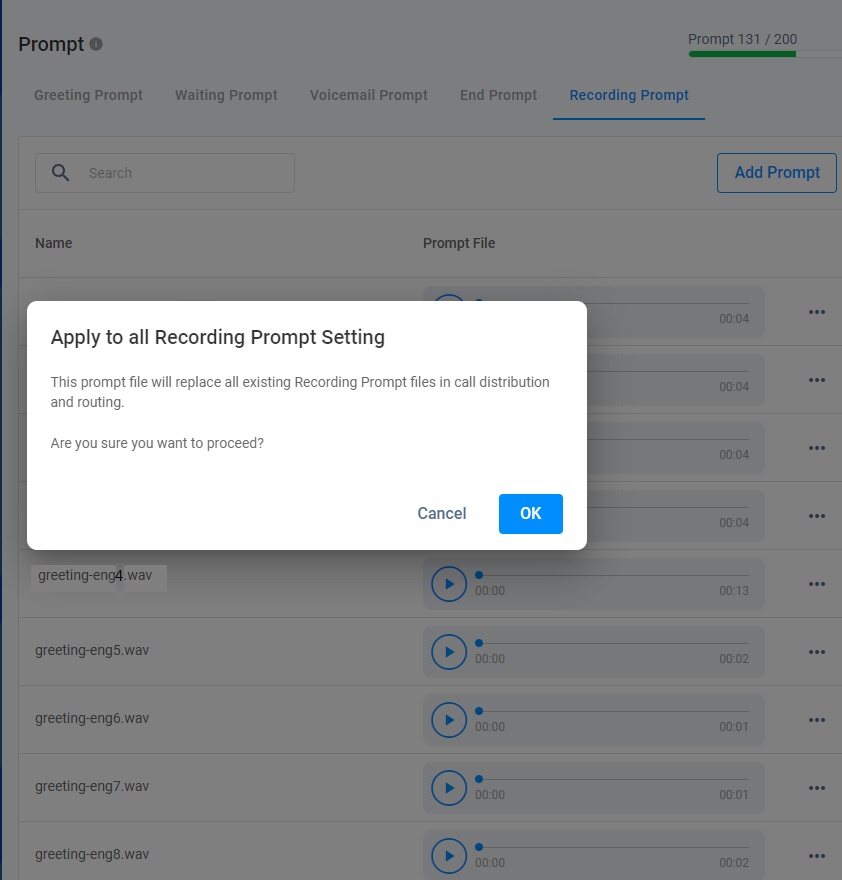
Apply to all is successful
- The toast message indicates that Apply to all is successful.
📘
Note
After Apply to all takes effect, the prompts will override the original prompt settings and be applied to the same prompt type in different Prompt Settings.
Downloading prompts
Download facilitates users to save the required prompt files to the local device for their records or future use.
To download the prompt file:
- Navigate to Administration > Tools & Settings > Prompt
- Click on More (...) and select Download to a prompt. The file will be downloaded to your local device.

Click on Download
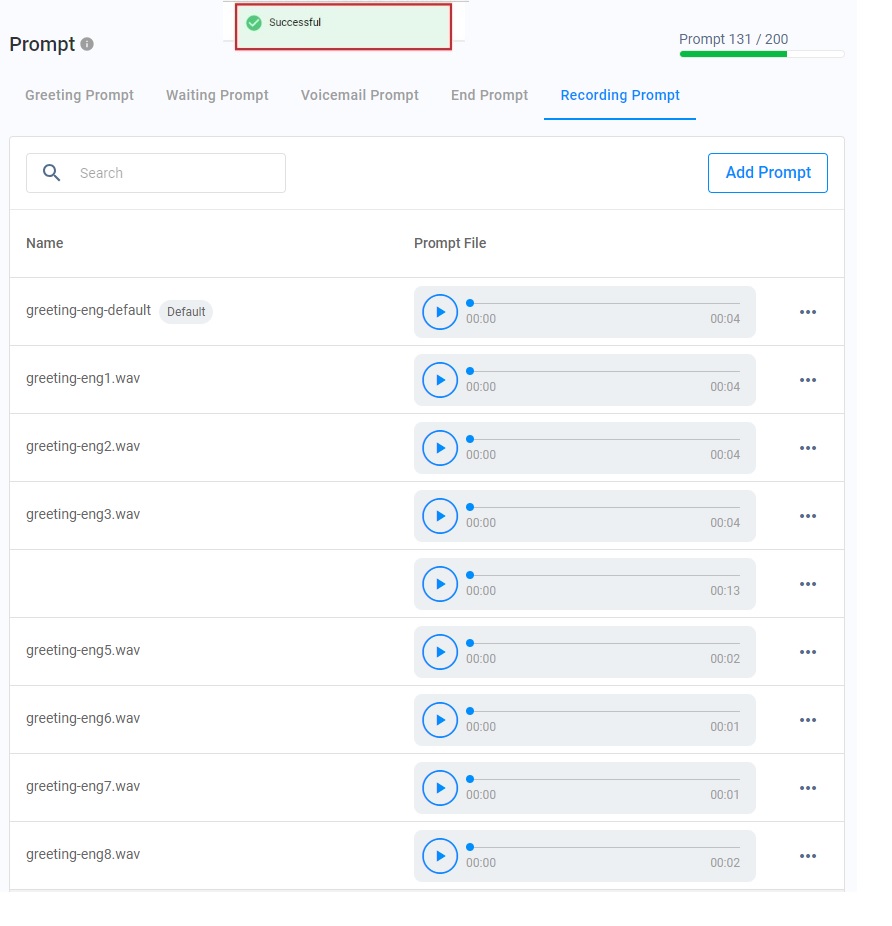
Deleting prompts
To delete the required prompt:
- Navigate to Administration and Click on Prompt.
- Click on Delete.
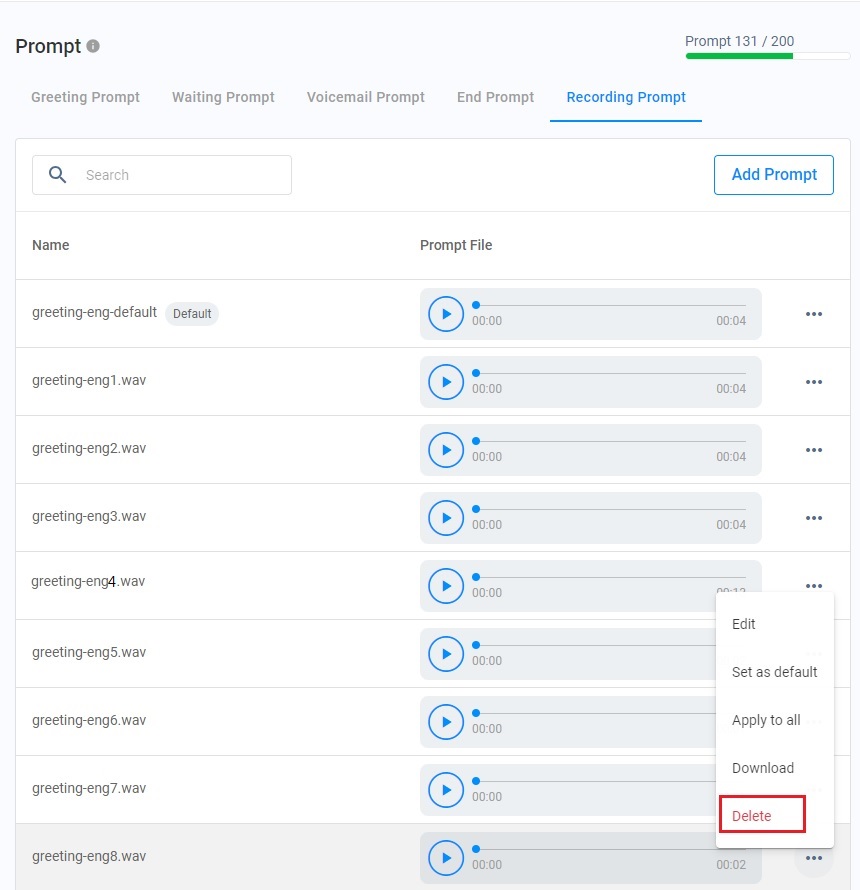
Click on Delete
- Click on Delete again.
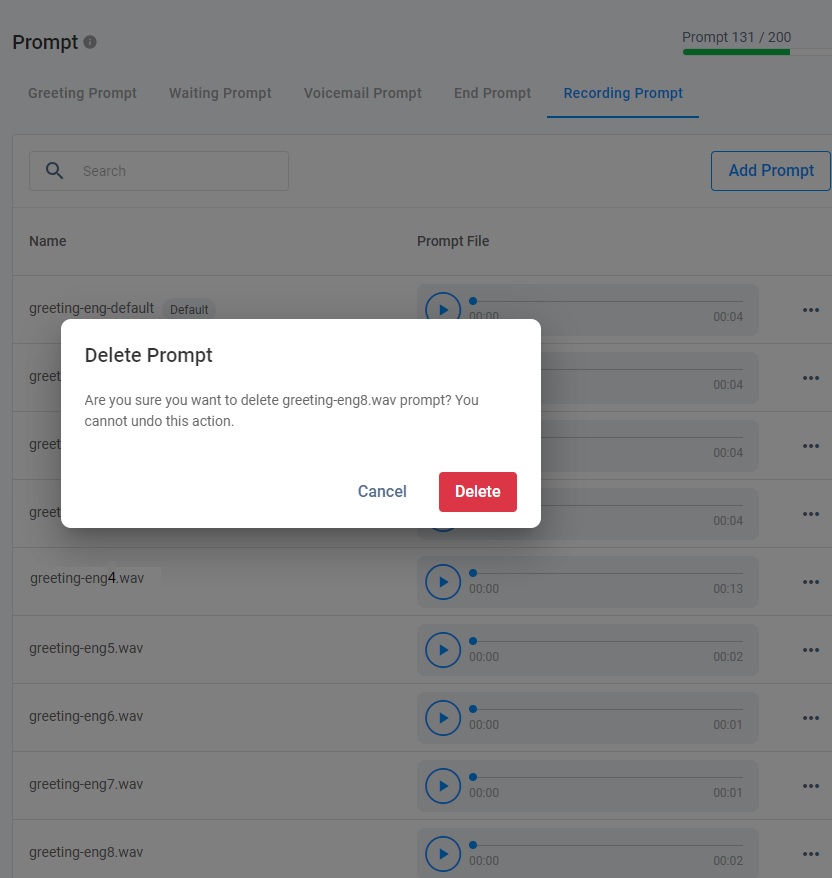
Click on Delete
- The toast message indicates the required prompt has been deleted successfully. The deleted prompt file does not appear on the list.
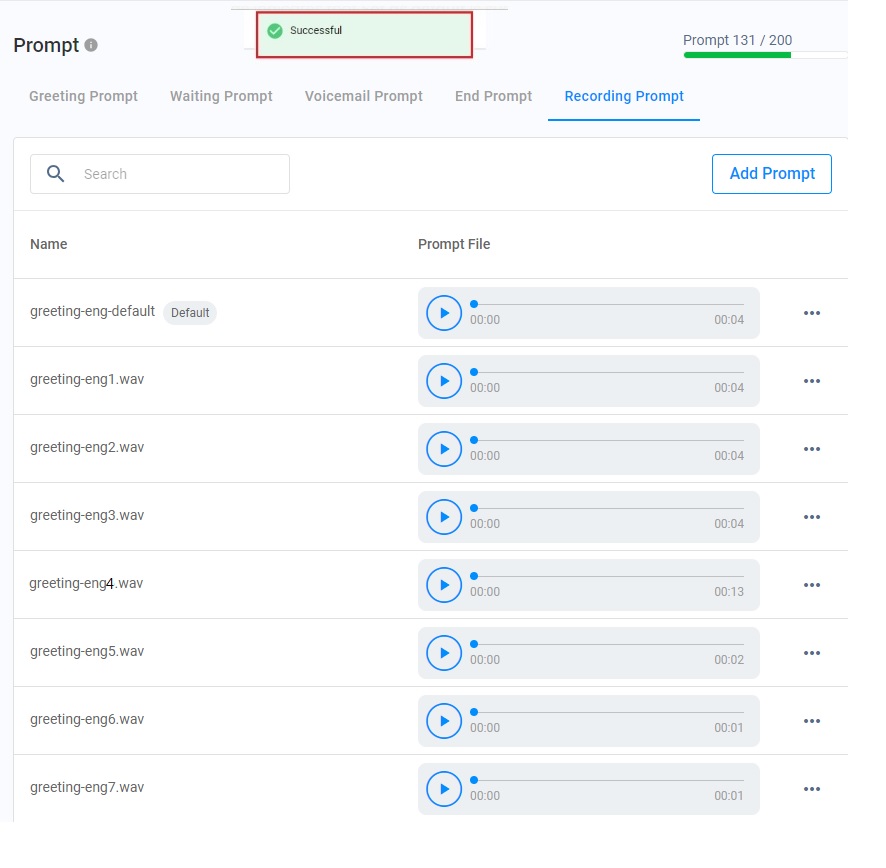
Deleting the required prompt is successful.
📘
- Prompts are not allowed to be deleted until they are being used in the Routing Setting and as default prompts.
- Permission to view, edit, delete, and download prompts must be granted in the Roles & Permissions. Refer to the Managing Roles and Permissions page for details.