Viewing the Enquiry Detail Report
CINNOX Enquiry Detail Report provides all the fields as attributes for the columns in the table, giving you a clear idea of what is going on with your visitor enquiries. The agent handled your visitor enquiries, such as the enquiry status, the channel enquiry details, the created date and time down to the closed date and time, and the destination details down to the endpoint. More information is provided for the visitor details that are useful for knowing them.
As to this information, you can create multiple custom views to save specific display table views (such as selecting related columns and filters) for different purposes and cases and download the records accordingly.

Enquiry Detail Report
Enquiry Report Columns
This section lists and defines all the CINNOX enquiry records available in your Enquiry Report.
| Column Name | Definition |
|---|---|
| Enquiry ID | The unique system-generated identifier for the enquiry |
| Enquiry Status | An enquiry status can be: * Open * Handling (Ongoing and Followed-up) * Missed * Closed |
| Created Date & Time | The date and time when an enquiry was created |
| Updated Date & Time | The date and time when the status of an enquiry was last updated |
| Closed Date & Time | The date and time when an enquiry was closed |
| Enquiry Type | An enquiry type can be: * Broadcast Chat Enquiry * Broadcast Call Enquiry * Direct Chat Enquiry * Direct Cal Enquiry |
| Enquiry Label | The labels applied to an enquiry. |
| Channel ID | The unique system-generated identifier for every created Channel |
| Channel Type | The origin/entry point of the enquiry, i.e., Directory (Widget), Social page, Weblink, Campaign, or Virtual Number |
| Channel Detail | Additional details about the Channel, such as whether the visitor accessed the Tag or Staff Directory and which specific item on the list they click |
| Channel Additional Info | Additional details about the Channel, such as the website URL where the Directory is installed |
| Destination Name | A Destination Name can be: * Service Group Name * Chatbot Name * IVR Menu Name * Advanced Call System from your Destinations or WOZTELL settings. |
| Destination Type | A Destination type can be: * Staff * PSTN Phone * SIP Trunk * Chatbot * IVR * Advanced Call System |
| Destination Endpoint | A Destination Endpoint can be: * Staff * PSTN Phone * SIP Trunk * Chatbot * IVR Menu * Advanced Call System from your Destinations or WOZTELL settings. |
| Duration | The time in days, hours, minutes and seconds spent by the staff handling an enquiry. |
| Staff EID | The unique system-generated identifier for the staff |
| Staff Role | The staff role can be: * Administrator * Supervisor * Agent * Custom Role |
| Staff Team | The team or department the staff belong |
| Transferred To | The details for the transferred enquiry from one to another, such as: * Staff to Staff * Staff to PSTN * IVR to Staff * Chatbot to Staff |
| Participants | The other staff join the enquiry conversation for faster resolution. |
| Visitor EID | The unique system-generated identifier for the visitor |
| Visitor Name | The visitor's name or their system-generated Visitor ID, depending on whether the Visitors Forms are enabled or not |
| Visitor Location | The country or region where the visitor is located |
| Visitor IP Address | The System detects the IP Address when the visitor initiates an enquiry. |
| Visitor Language | The language selected by the visitor from the website |
| Visitor Phone Number | The phone number added by the agent to the visitor as an external contact |
| Visitor Social Messaging | The agent adds the social account to the visitor as an external contact. |
| Visitor Email | The email address added by the agent to the visitor as an external contact |
| Visitor Company | The company name added by the agent to the visitor as an external contact |
| Visitor Job Title | The job title added by the agent to the visitor as an external contact |
| Visitor Platform | The platform (e.g., Desktop Web, Social, PSTN and others) detected by the System when the visitor initiates an enquiry |
| Room ID | The unique system-generated identifier for the enquiry room |
| Visitor Contact Type | A visitor contact type can be: * Lead * Prospect * Customer * Others when saving the visitor as an external contact |
| Label | The label was added to the enquiry. The staff can add more than one label to an enquiry. |
| Closed By | An enquiry can be closed by: * Visitor * Staff * IVR * System |
| More (...) | Clicking on the vertical ellipsis icon on the far-right side of an enquiry detail brings up the following additional options: * Follow up - for missed enquiries * Chat History - for closed enquiries * Download Chat History - for closed enquiries |
Enquiry Report - Custom View
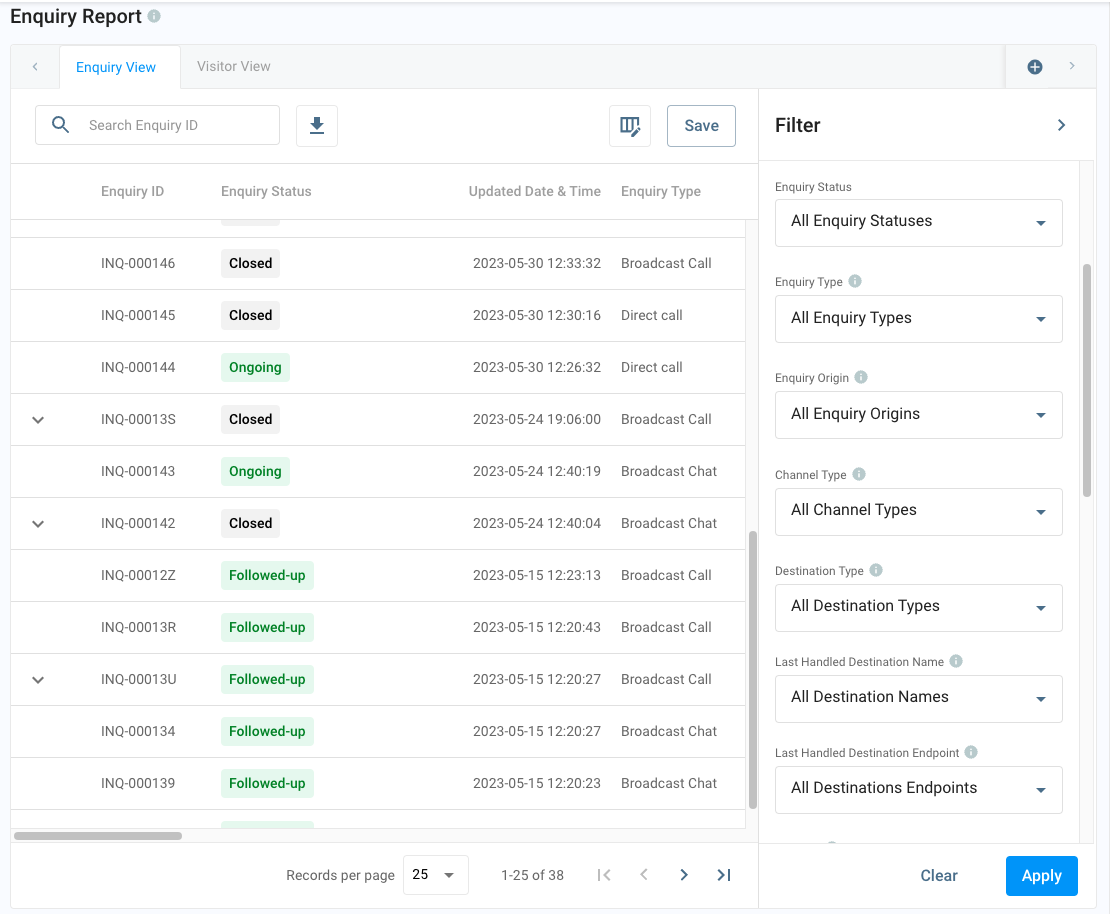
You can select columns and filters in the Enquiry Report and save them as a personalised view.
Enquiry View (Initial view)
CINNOX provides an Enquiry View, an initial tab in the Enquiry Report with columns with the last 7 days updated date & time enquiry data.
You can modify the columns and filters in the view according to the expected data.
Create a New View
To create a new view:
- Go to Reports > Enquiry Report.
- Click the icon ➕ located at the top right of the page. A pop-up window will appear for the "Create a new view".
- Enter a name for the new view.
- Select the columns you want to include in the new view. Otherwise, you can tick the Show All checkbox to have all columns.
- Click on Create. A new view will be created.

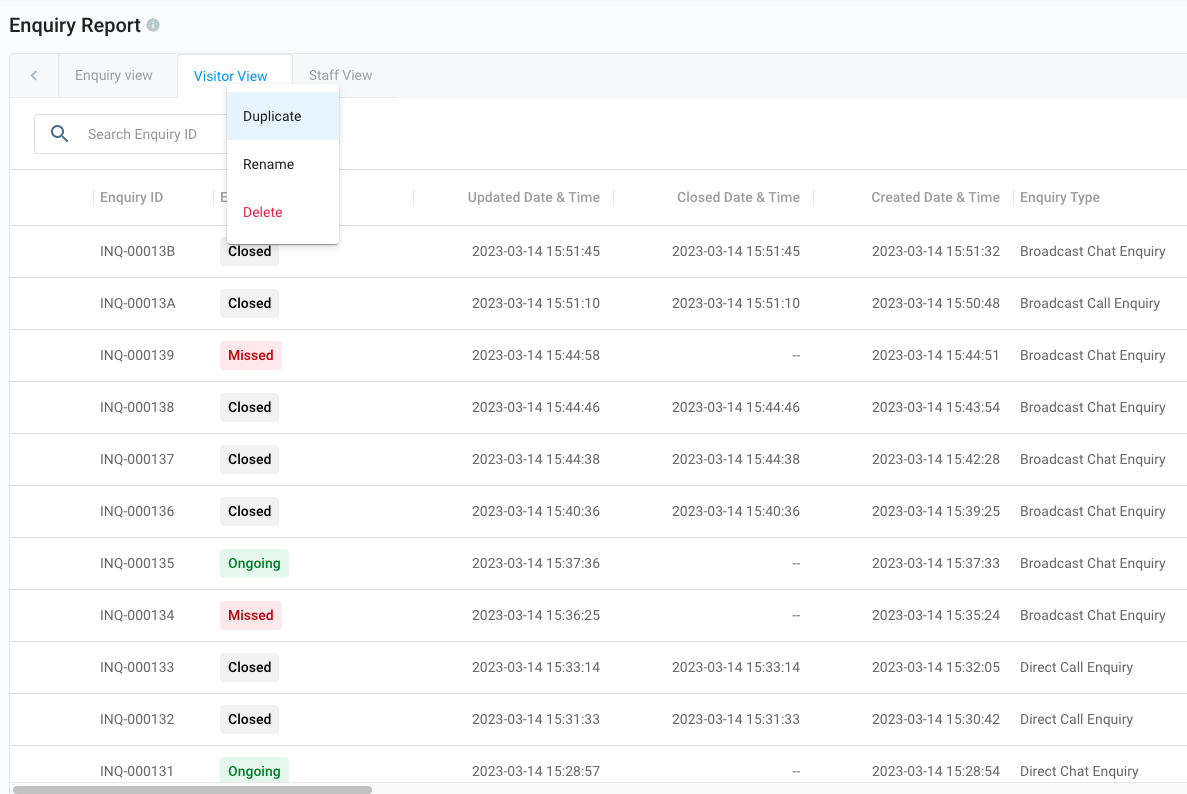
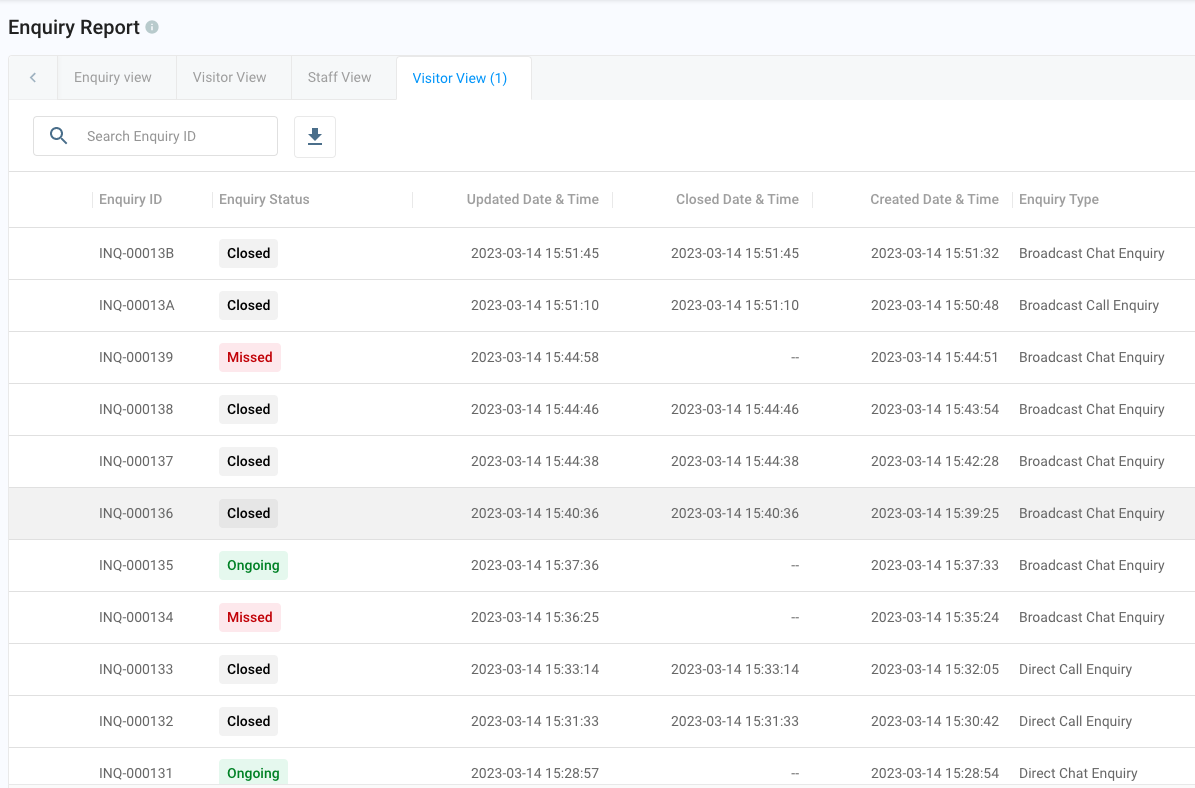
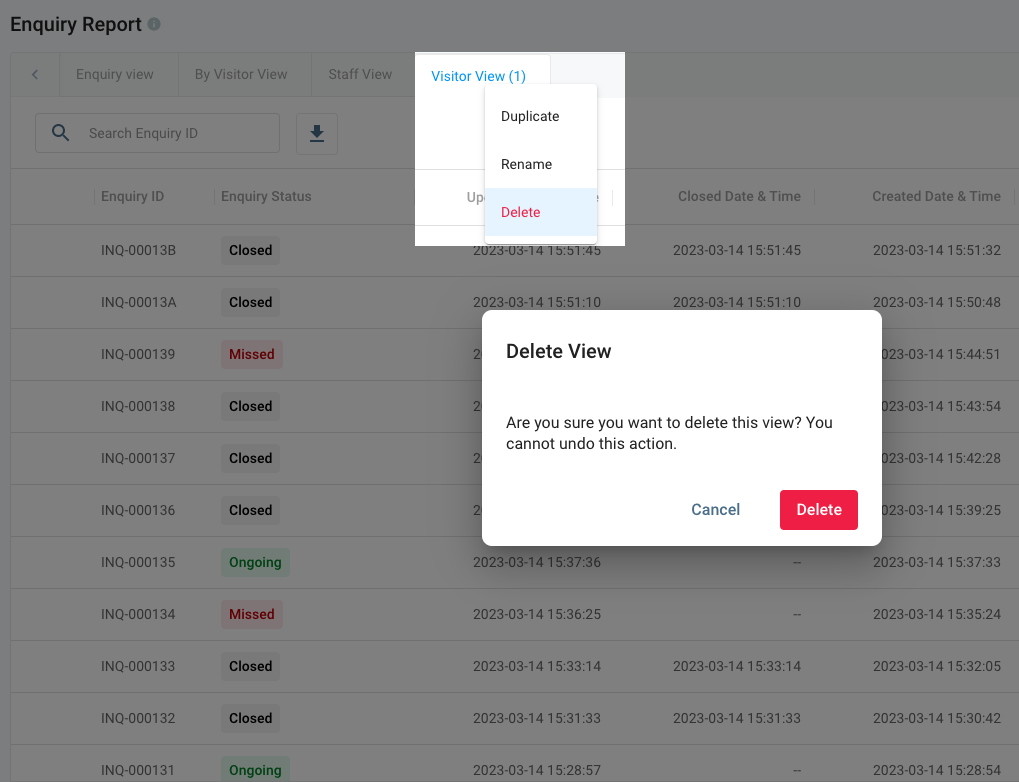
Duplicate an existing view
To duplicate an existing view:
- Go to Reports > Enquiry Report.
- Find the view you want to duplicate and click the small arrow ⬇️ to view the options list.
- Click on Duplicate.
A new view, e.g., Visitor View (1), will be created.
Edit an Existing View
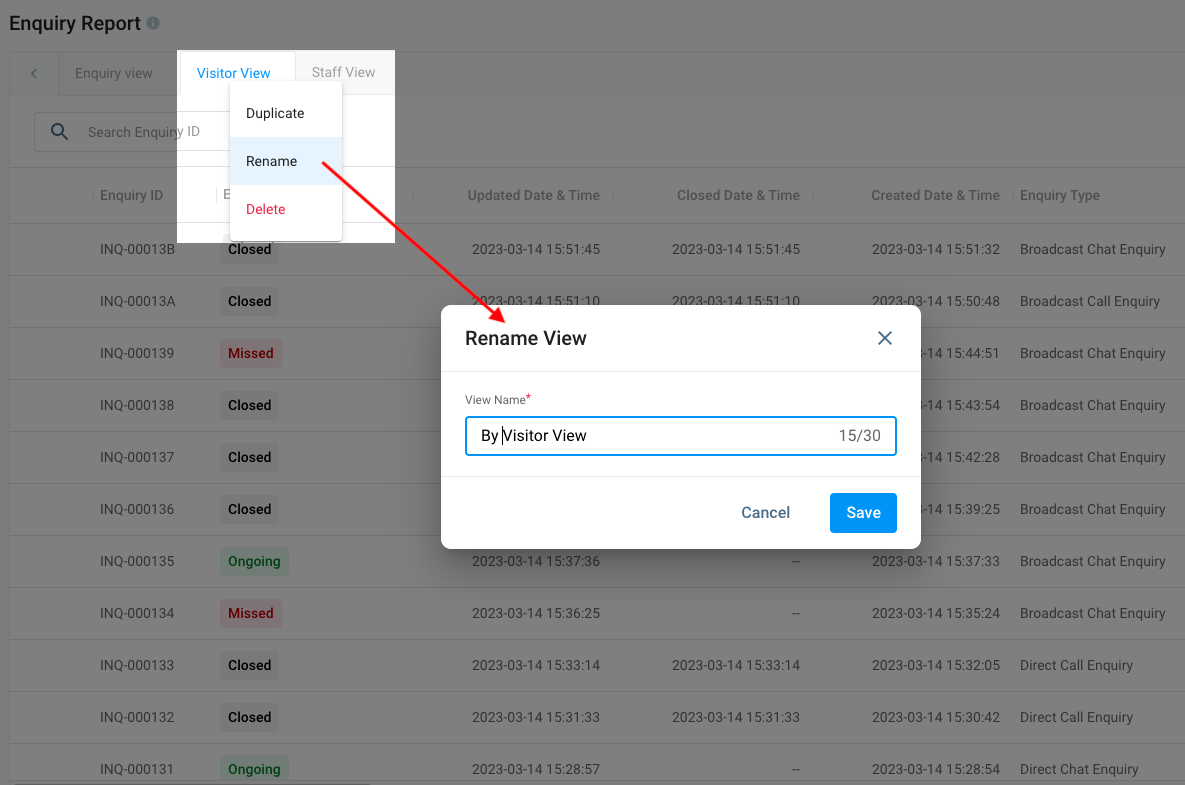
Rename a View Name
To rename a view:
- Go to Reports > Enquiry Report.
- Find the view you want to rename and click the small arrow ⬇️ to view the options list.
- Click on Rename. A pop-up window will appear for the "Rename View".
- Enter a new name for the view.
- Click on Save. The view name will be renamed.
Edit the Columns of a View
To edit the columns of a view:
- Go to Reports > Enquiry Report.
- Select the tab for the view to edit the columns.
- Click the Show/Hide Columns at the page's top right. A pop-up window will appear for the "Show/Hide Columns".
- Tick the checkbox for the columns you want to include in the view.
- Untick the checkbox for the columns you want to remove in the view.
- Click on Apply.
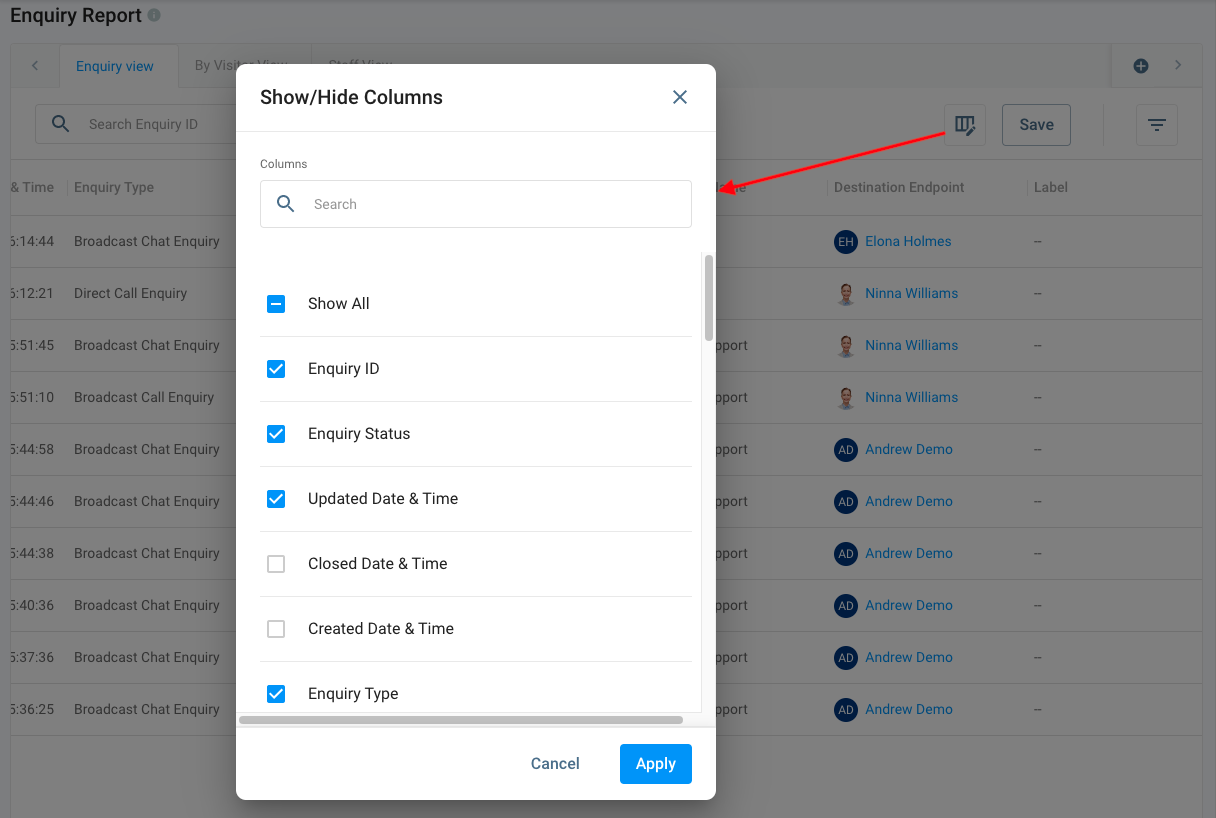
- Click on Save. The view columns will be updated according to the changes made.
Rearrange the columns
To rearrange the columns in the table:
- Go to Reports > Enquiry Report.
- Select the tab for the view to rearrange the columns.
- Select the column you want to move.
- Put the mouse pointer to the edge of the selection.
- Press and hold the column, and then drag the column to a new location.
- Click on Save. The view columns will be updated according to the changes made.

Search and Filters
Use the Filter to view the enquiry data according to your desired results with your respective tab view.
- Go to Reports > Enquiry Report.
- Select the tab for the view to use filters.
- Click the filter icon at the page's top right. The Filter slide panel will be displayed.
- You can filter the enquiry details with the following and then click on Apply.
- Click on Save. The filters will be updated according to the changes made.
| Filter By: |
|---|
| Updated Date & Time - default to last 7 days |
| Closed Date & Time - default to All |
| Created Date & Time - default to All |
| Enquiry Status - default to All Enquiry Statuses |
| Enquiry Type - default to All Enquiry Types |
| Enquiry Origin - default to All Enquiry Origins |
| Channel Type - default to All Channel Types |
| Destination Type - default to All Destination Types |
| Last Handled Destination Name - default to All Destination Names |
| Last Handled Destination Endpoint - default to All Destination Endpoints |
| Duration - default to All |
| Label - default to Maches any labels |
| Staff Name - default to All Staff |
| Staff Role - default to All Staff Roles |
| Staff Team - default to All Staff Teams |
| Visitor Name - search by entering a visitor name |
| Visitor Platform - default to All Platforms |
| Visitor Location - default to All Locations |
| Visitor Language - default to All languages |
| Closed By - default to All Closed By |
📘
Your enquiry record in the table will be adjusted according to the filter made.
Delete a View
To delete a View:
- Go to Reports > Enquiry Report.
- Find the view you want to delete and click the small arrow ⬇️ to view the options list.
- Click on Delete. A pop-up window will appear to confirm the deletion.
- Click on Delete again. The view tab will be removed from the Enquiry Report.
Closed Enquiry - Export Chat History
You can export the closed enquiry - chat history in the enquiry detail report list or inside the chat history room.
- Go to Reports > Enquiry Report.
- Select the closed enquiry to download the chat history.
- Navigate to the end of the table and click the three-dot icon.
- Click on Download Chat History. The downloaded file will be saved to your Download Folder.
For other browsers or devices: a pop-up window for saving the CSV file on your local machine will appear. You can rename the file name if needed. Click on Save.

Export Closed Enquiry Chat History in Enquiries List
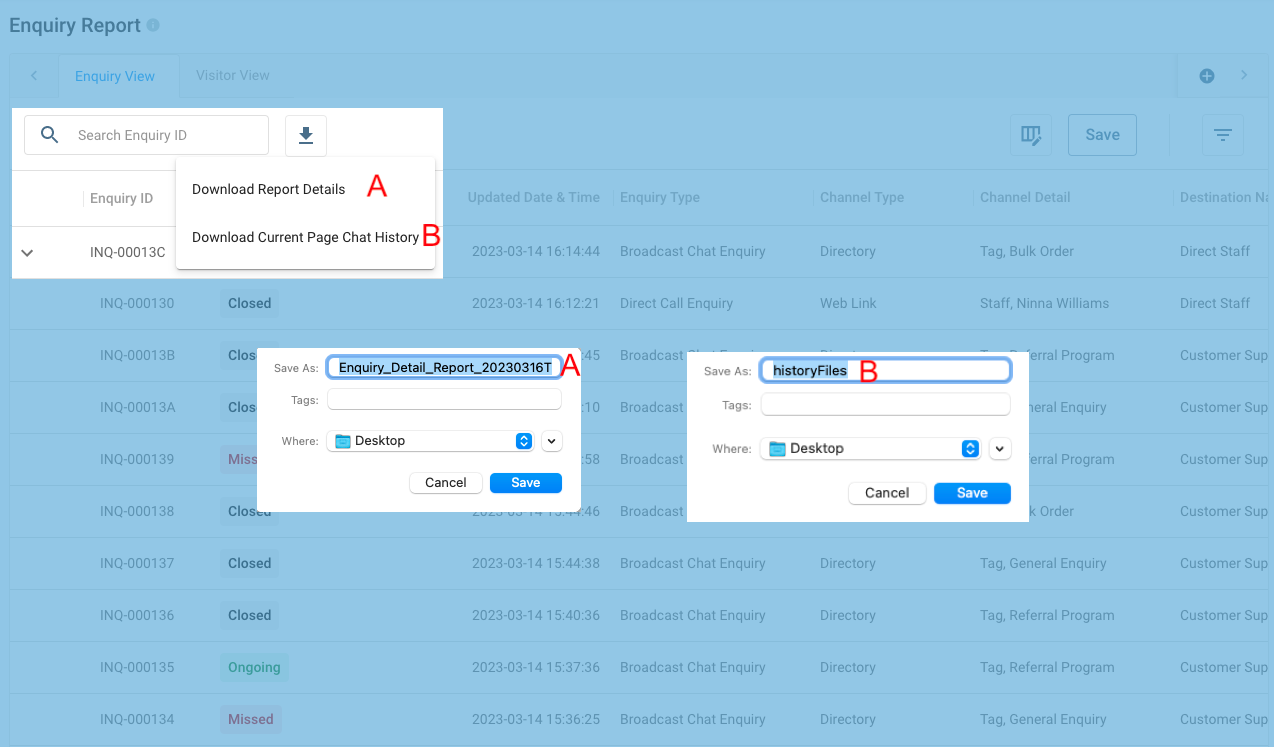
Enquiry Report - Download Enquiry Records
You can download the Enquiry Report Details and the Chat History. There are two options for downloading files:
A Download Report Details - This option is to download all enquiry records in an Excel (XLS) file format.
B Download Current Page Chat History Files - This option is to download chat history files of the current page in a zip file. Each enquiry will be downloaded in a CSV file format.
📘
You can download enquiry records up to 20,000 per file.
For over 20,000, please select the shorter date range and download them by batch.
To download enquiry details:
- Go to Reports > Enquiry Report.
- Click on the Download icon at the top of the page.
- Choose Download Report Details or Download Current Page Chat History Files.
The downloaded Report and the Chat history will be saved in the selected location as an Excel and zip folder.
Unzip the zip folder to extract the contents in a CSV file per enquiry.
Others
Transferred Enquiry
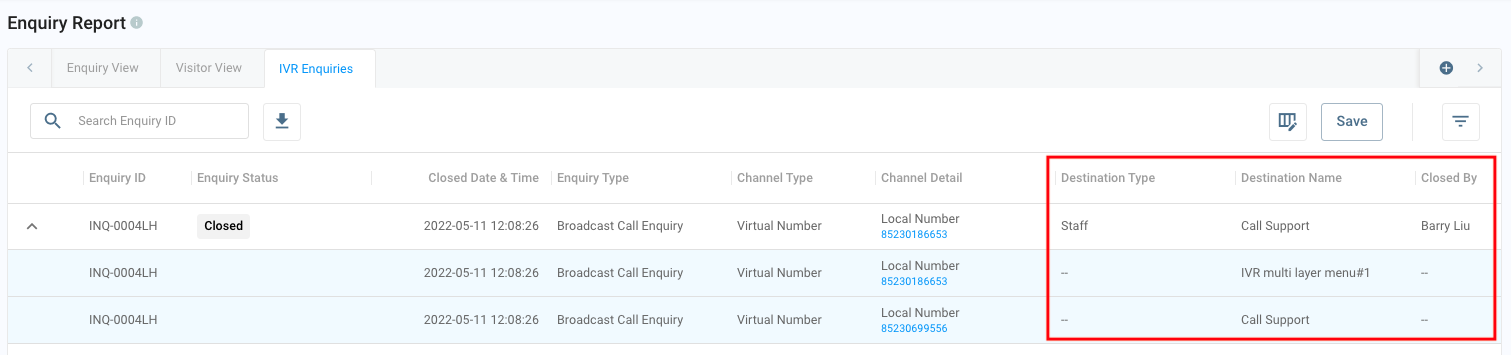
There will be an arrow ⬇️ on the table's left side for enquiries transferred from one destination to another. Click it to expand its details.
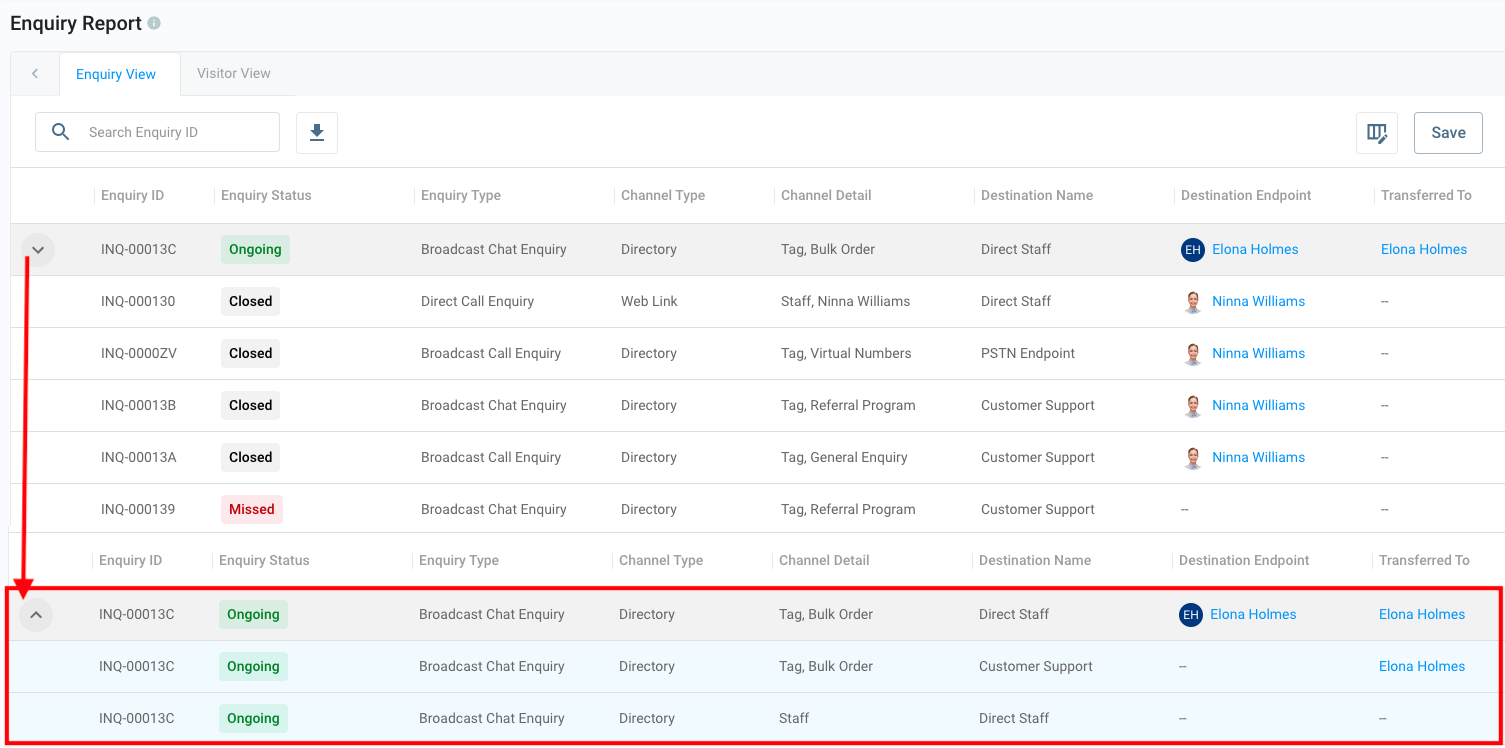
Transfer Enquiry in the Report
Enquiry with IVR
Different call scenarios exist when a customer calls and is routed to the IVR.
- Customer > IVR System > Call Ends in the IVR Menu
- Customer > IVR System > Routes to Agent A > Call Ends by Agent A or Customer
- Customer > IVR System > Routes to Agent A > Caller Transfers to Agent B > Call Ends by Agent B or Customer
- Customer > IVR System > Routes to Agent A > Switch to Conference Call > Call Ends in the Conference Call
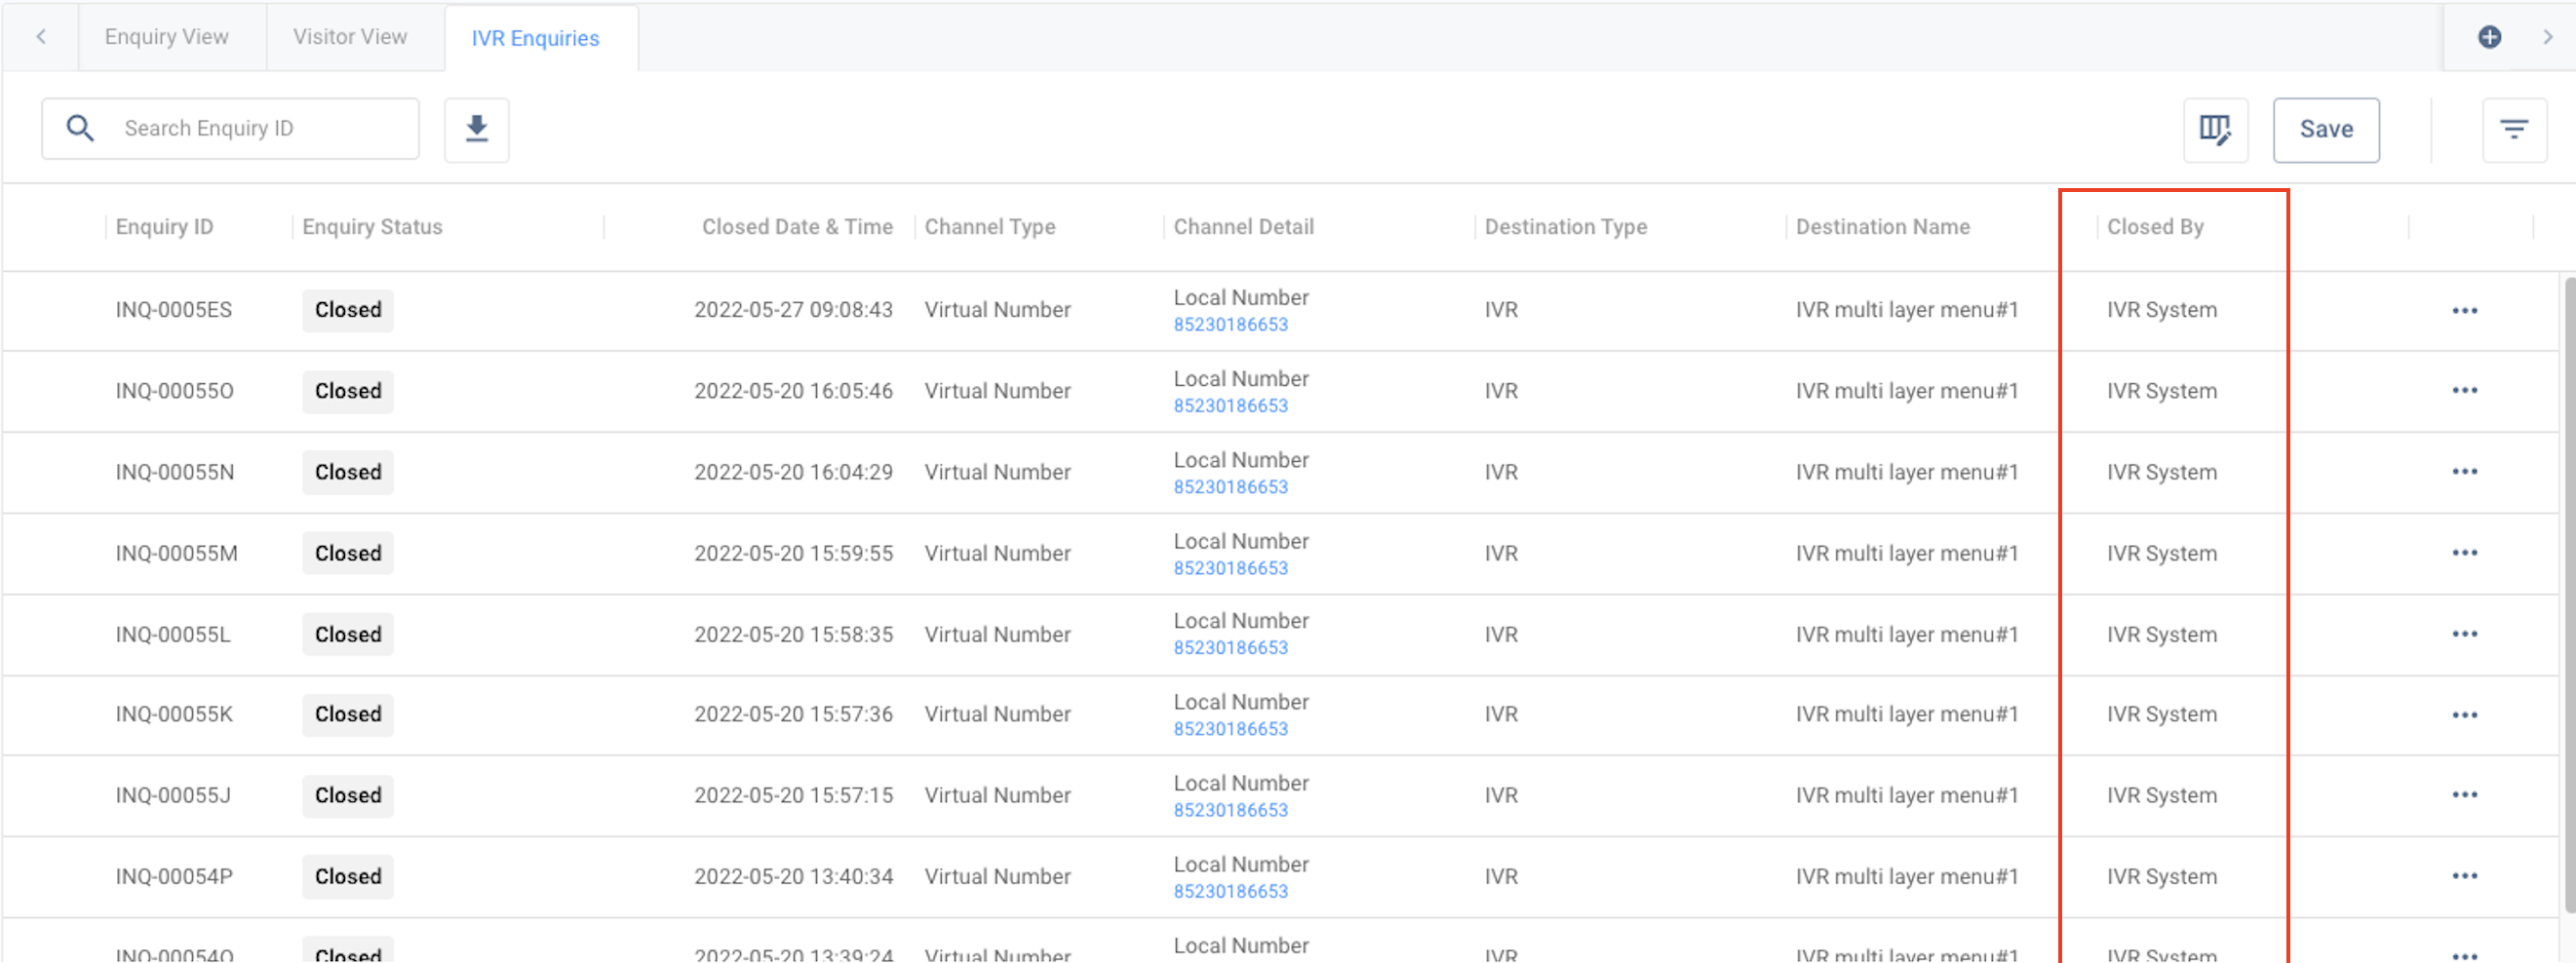
IVR to IVR
IVR to the Staff
Enquiry Flow and Status
Refer to the CINNOX Enquiries section of this Guide for more information about the enquiry flow and status definitions.
Enquiry Overview
Refer to the Enquiry Overview section of this Guide for more information about enquiry handling.