Creating a Tag
This section will guide you on how to create new tags.
To create a new tag:
- From the CINNOX Dashboard, navigate to Administration>Channels > Directory.
- Click Create Tag located in the top-right corner.
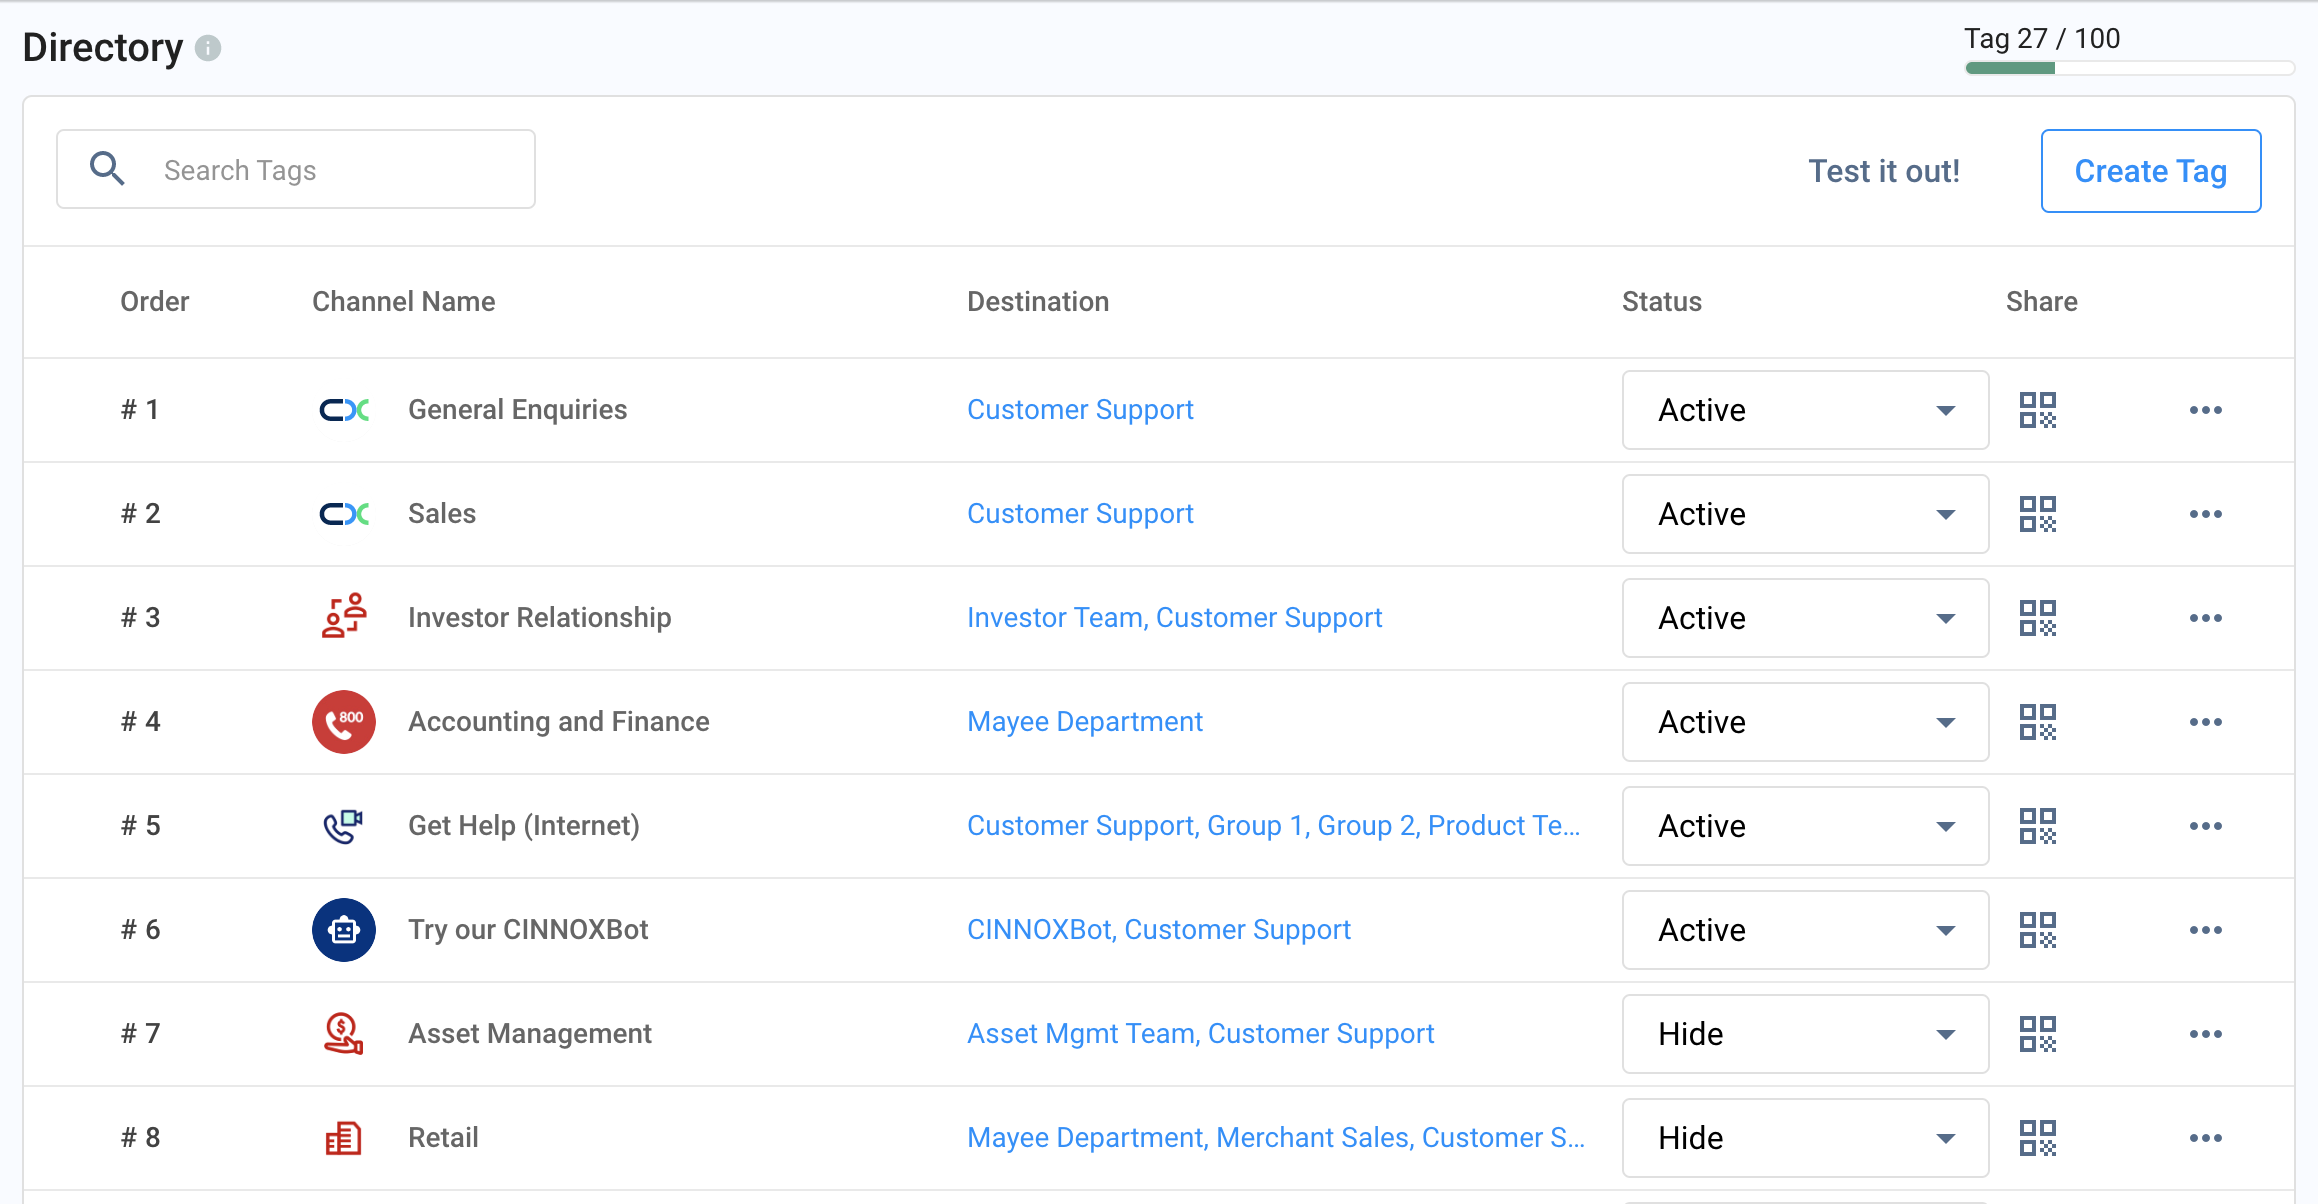
- This action will launch the Create New Tag wizard with the following sequential workflow:
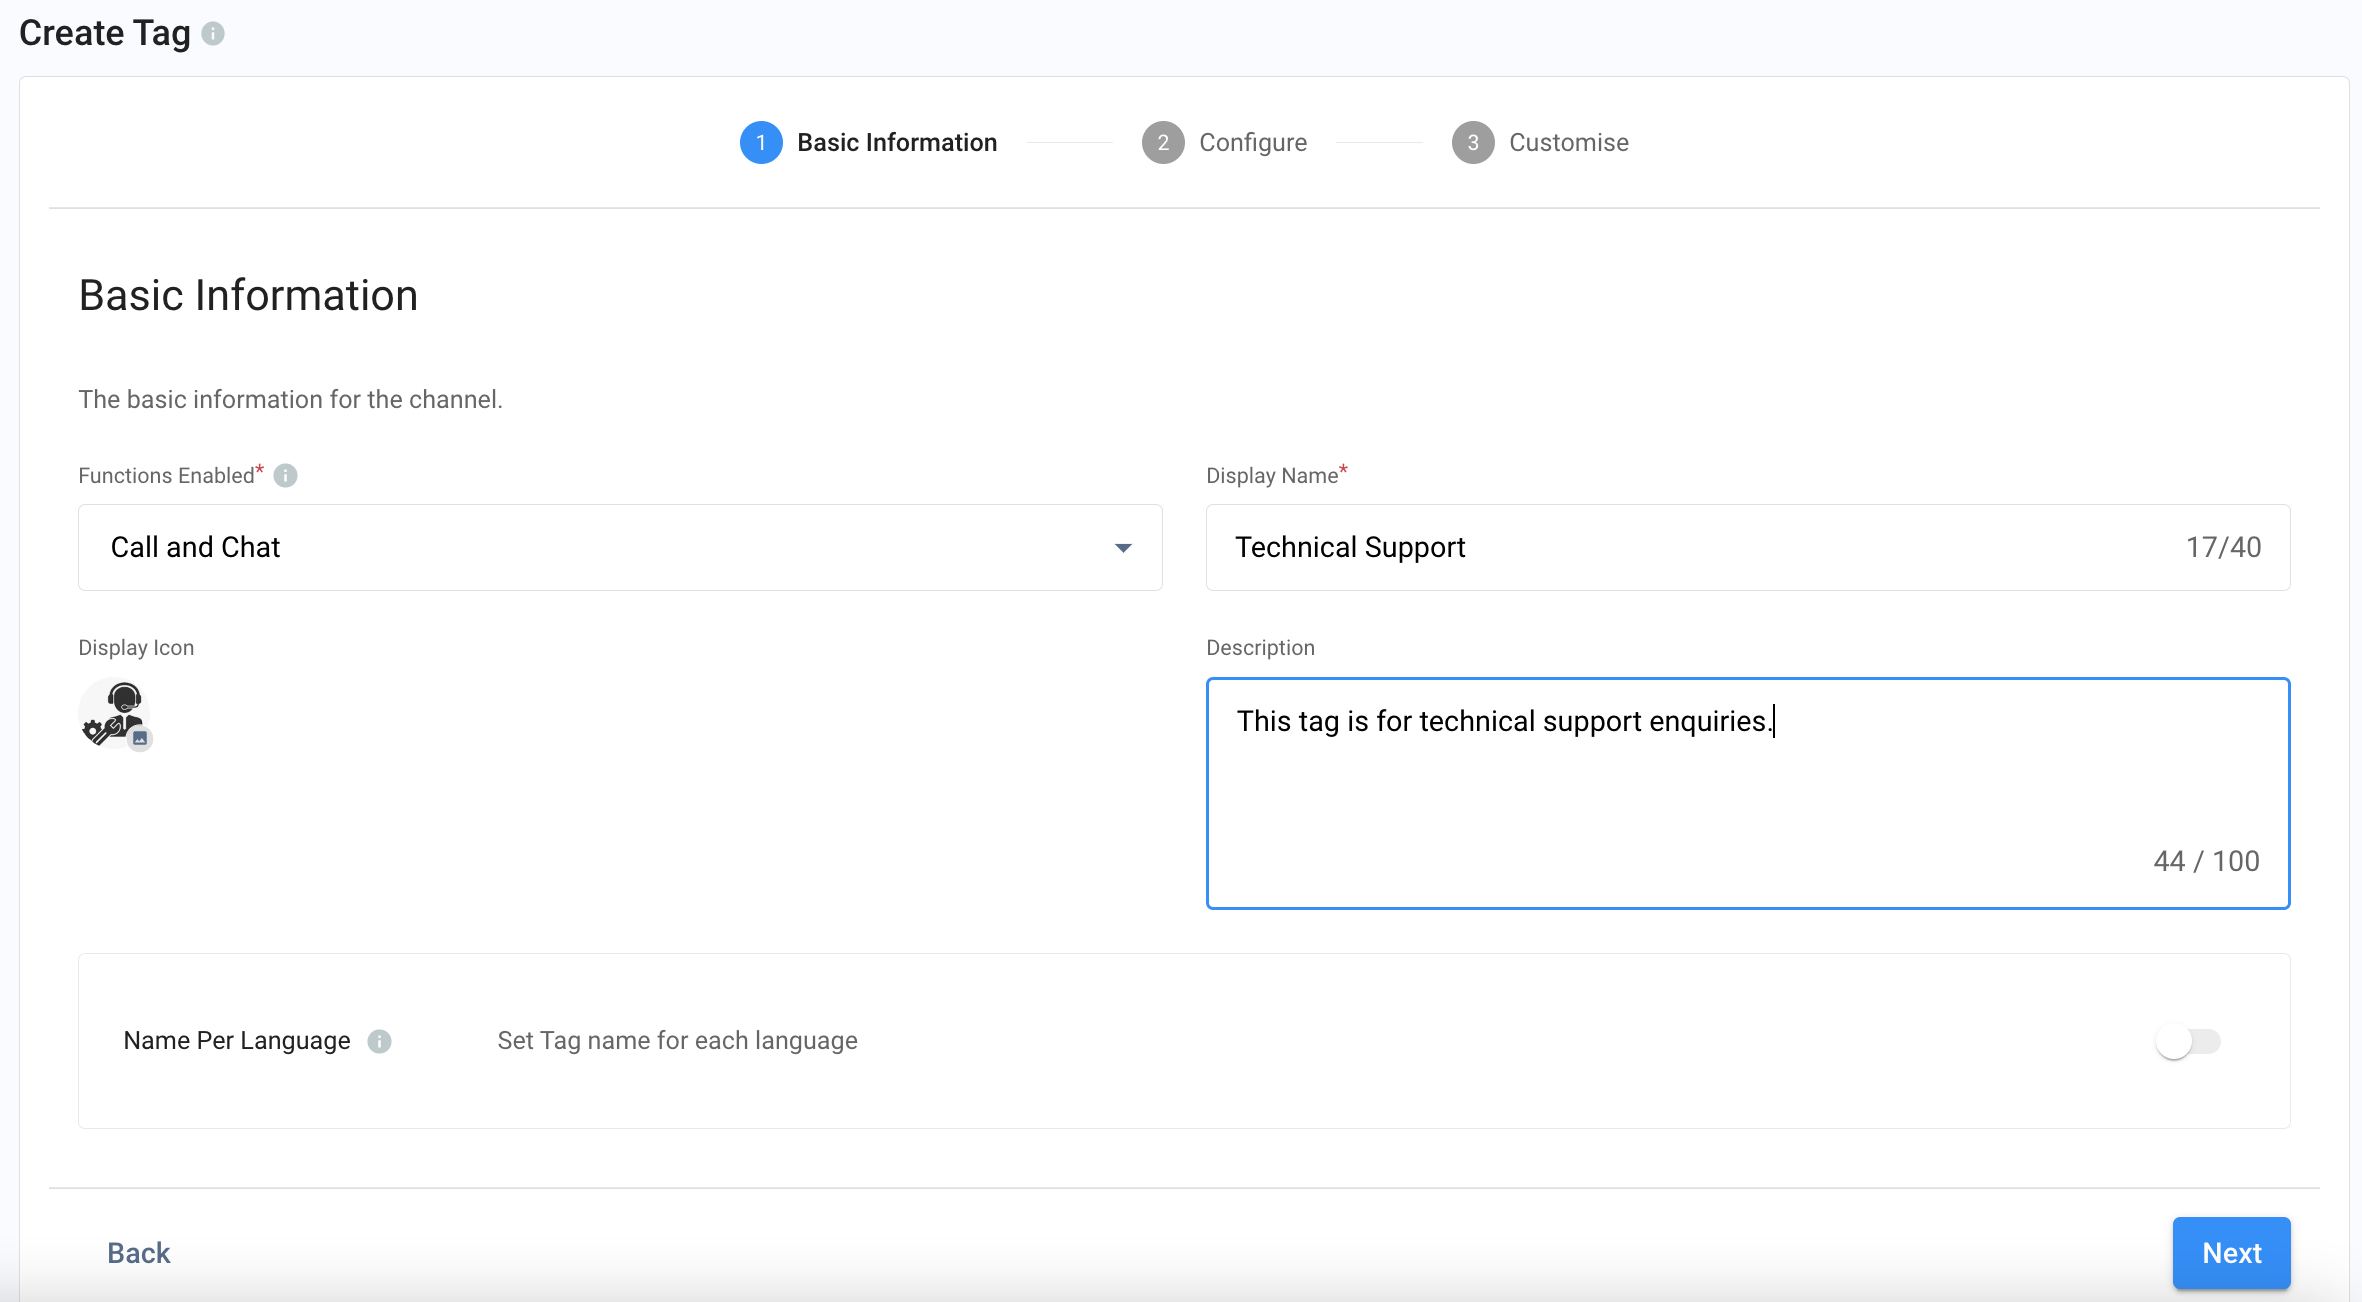
Tag Basic Information
-
Select the function the Tag should be available
- Call and Chat
- Call
- Chat
-
Name your Tag. This will be the name to be displayed in our Widget Directory and Web link.
-
Upload Tag Icon (optional)
-
Enter a description to your Tag (optional)
-
Create a tag name in a different language (optional)
-
Click Next
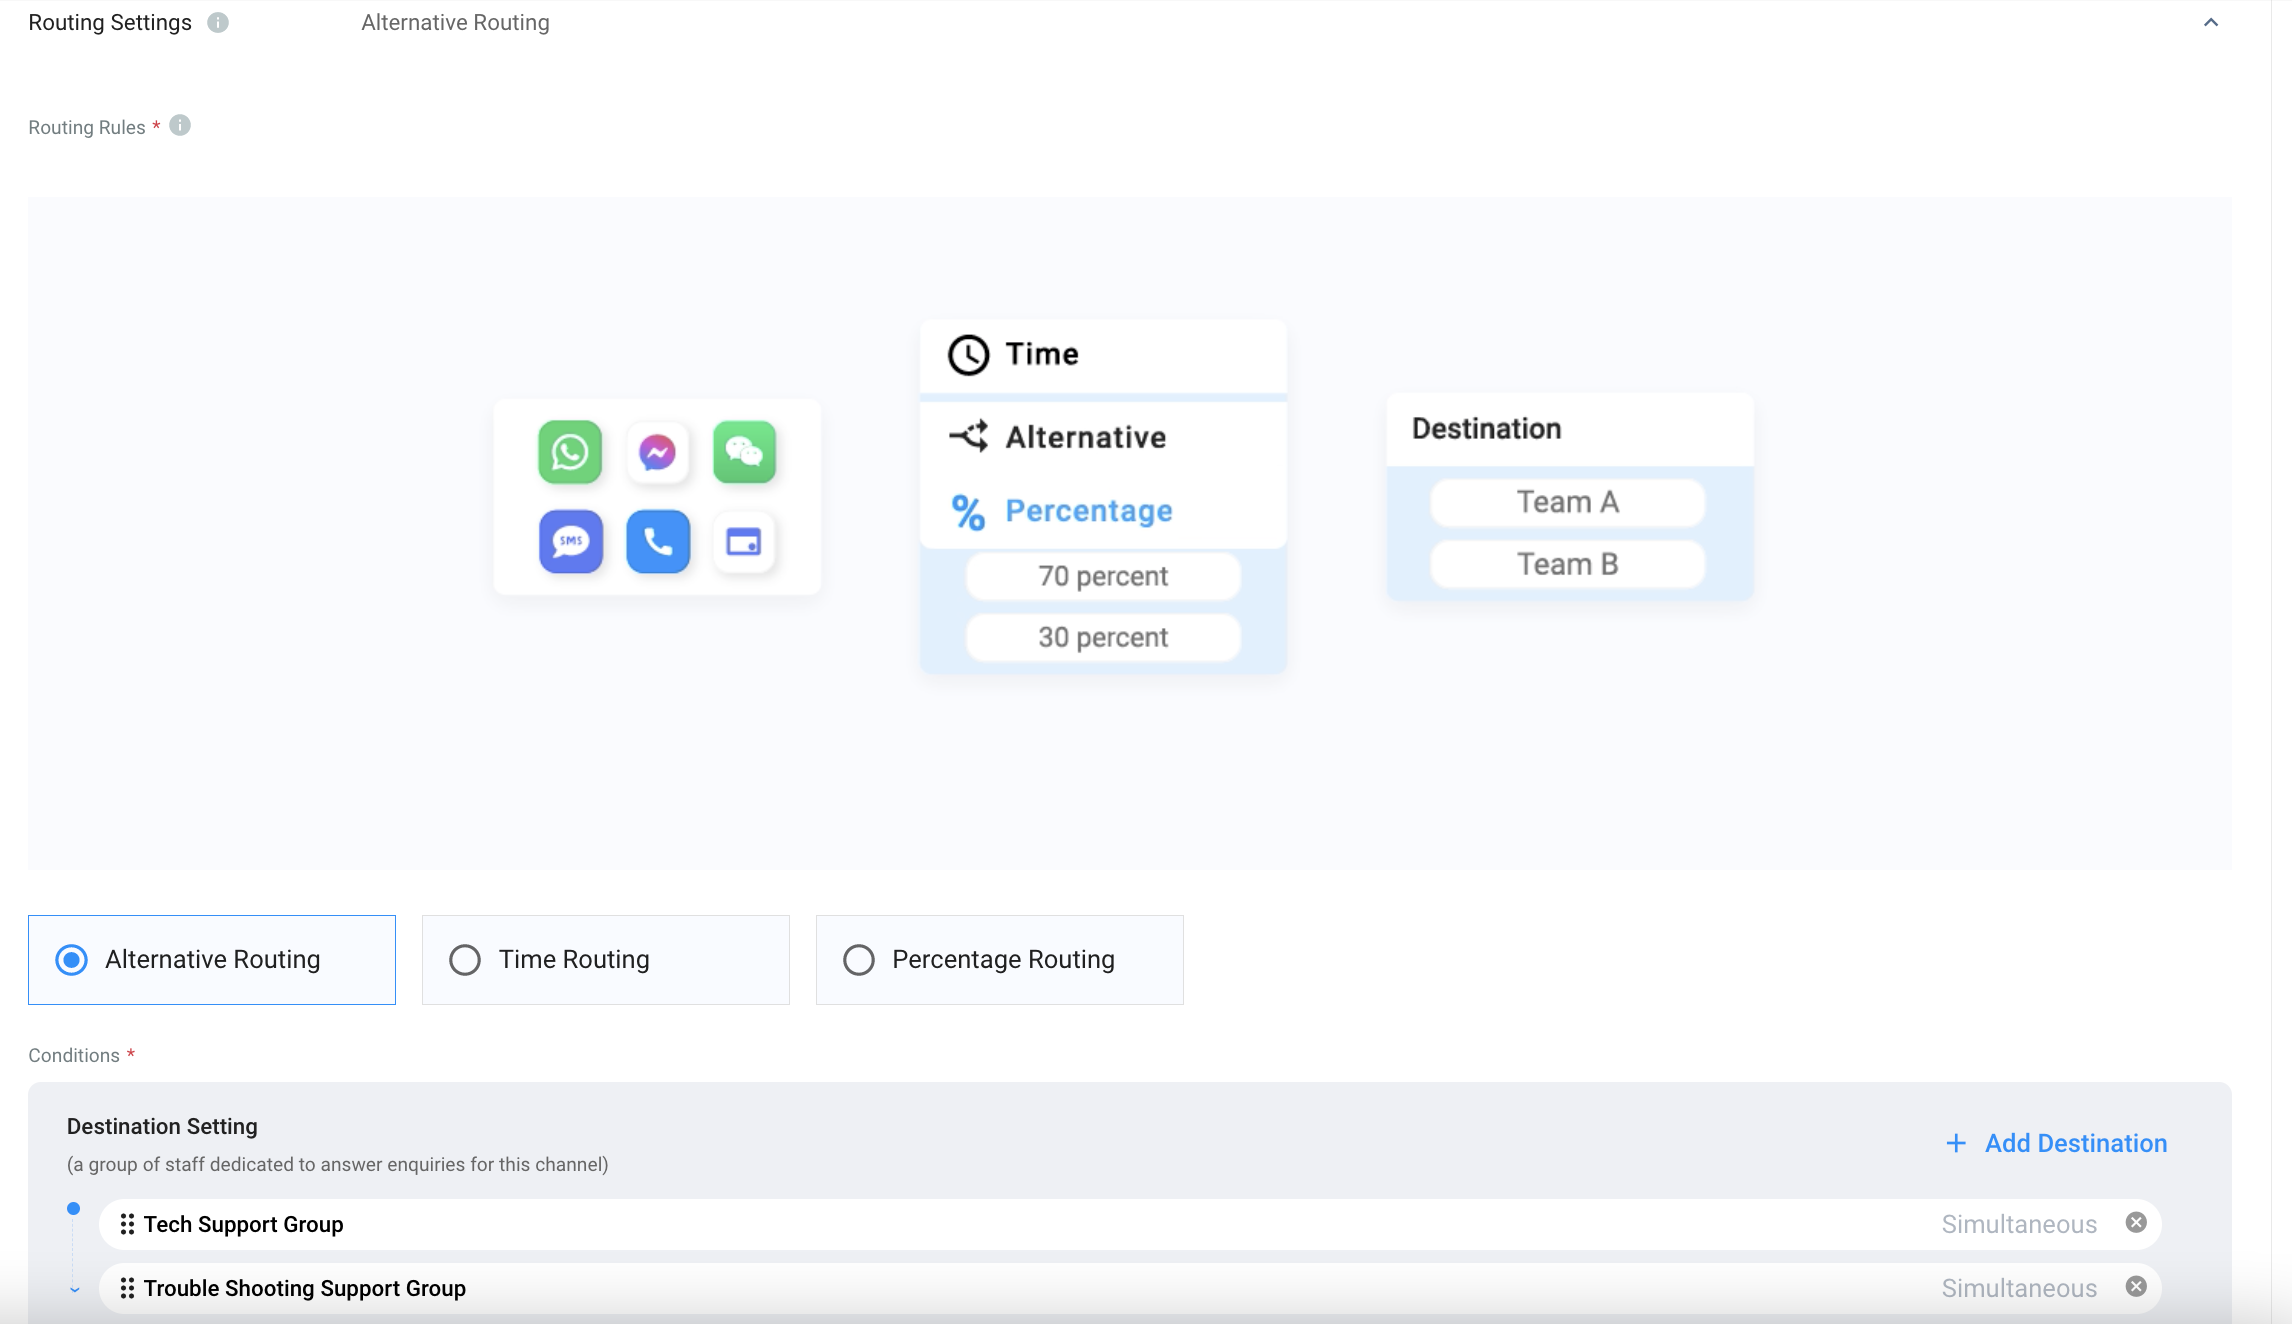
Routing Settings and Sticky Routing
Select the Routing Rule and add Destinations based on the operational support to your channel.
For more information, please check our detailed Guide Alternative, Percentage, Time and Sticky Routing.
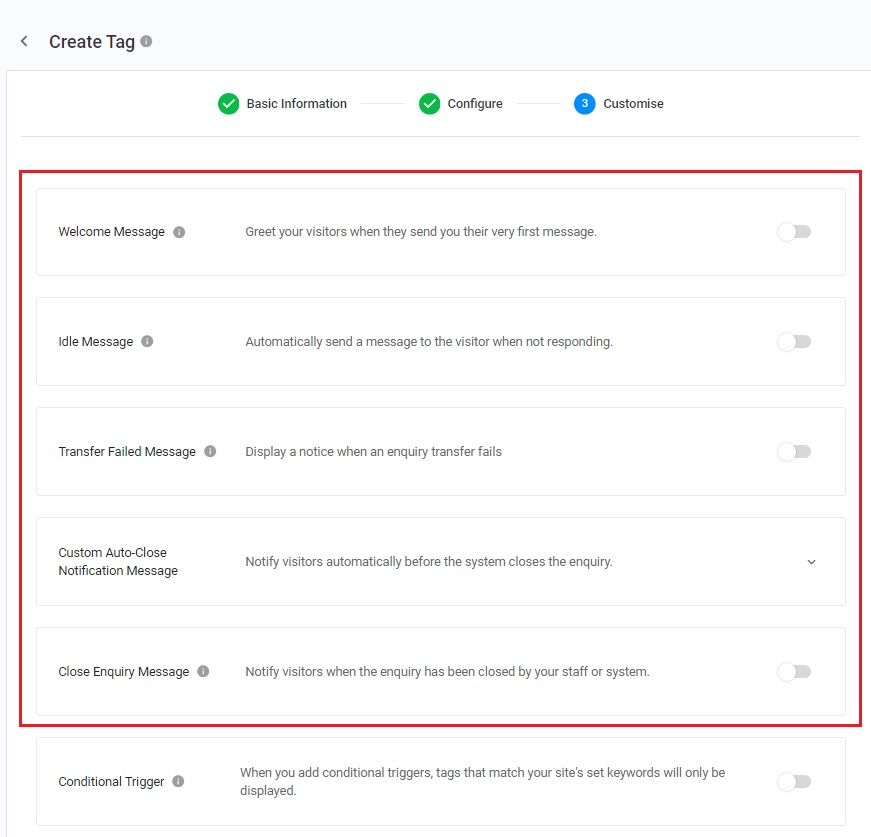
Auto-Message Message Settings
You can enable and configure the following Auto-Reply Messages:
- Welcome Message: Welcome messages are greetings sent to customers when they send you their messages first.
- Idle Message: Idle messages will be sent to follow up with their enquiry when your visitors become idle in your conversation.
- Transfer Failed Message: Transfer failed messages will be sent when transferring their enquiry to another destination or when a staff member fails.
- Custom Auto-Close Notification Message: Automatically notify visitors before the system closes the enquiry.
- Close Enquiry Message: The close enquiry message will be sent to the customers when the enquiry has been closed by the staff or the system.
📘
Reminder
- The limit of Welcome, Idle, Transfer Failed, Custom Auto-Close Notification and Closed Enquiry Messages is 500 characters.
- Before configuring the Custom Auto-Close Notification Message function, you must enable the auto close feature for handled enquiries without new messages. For more information, please refer to the Managing Auto Close Enquiry page.
Welcome Message
- Toggle ON the button for the Welcome Message
- Choose a general message, buttons or quick replies message type as an automated response to your visitors.
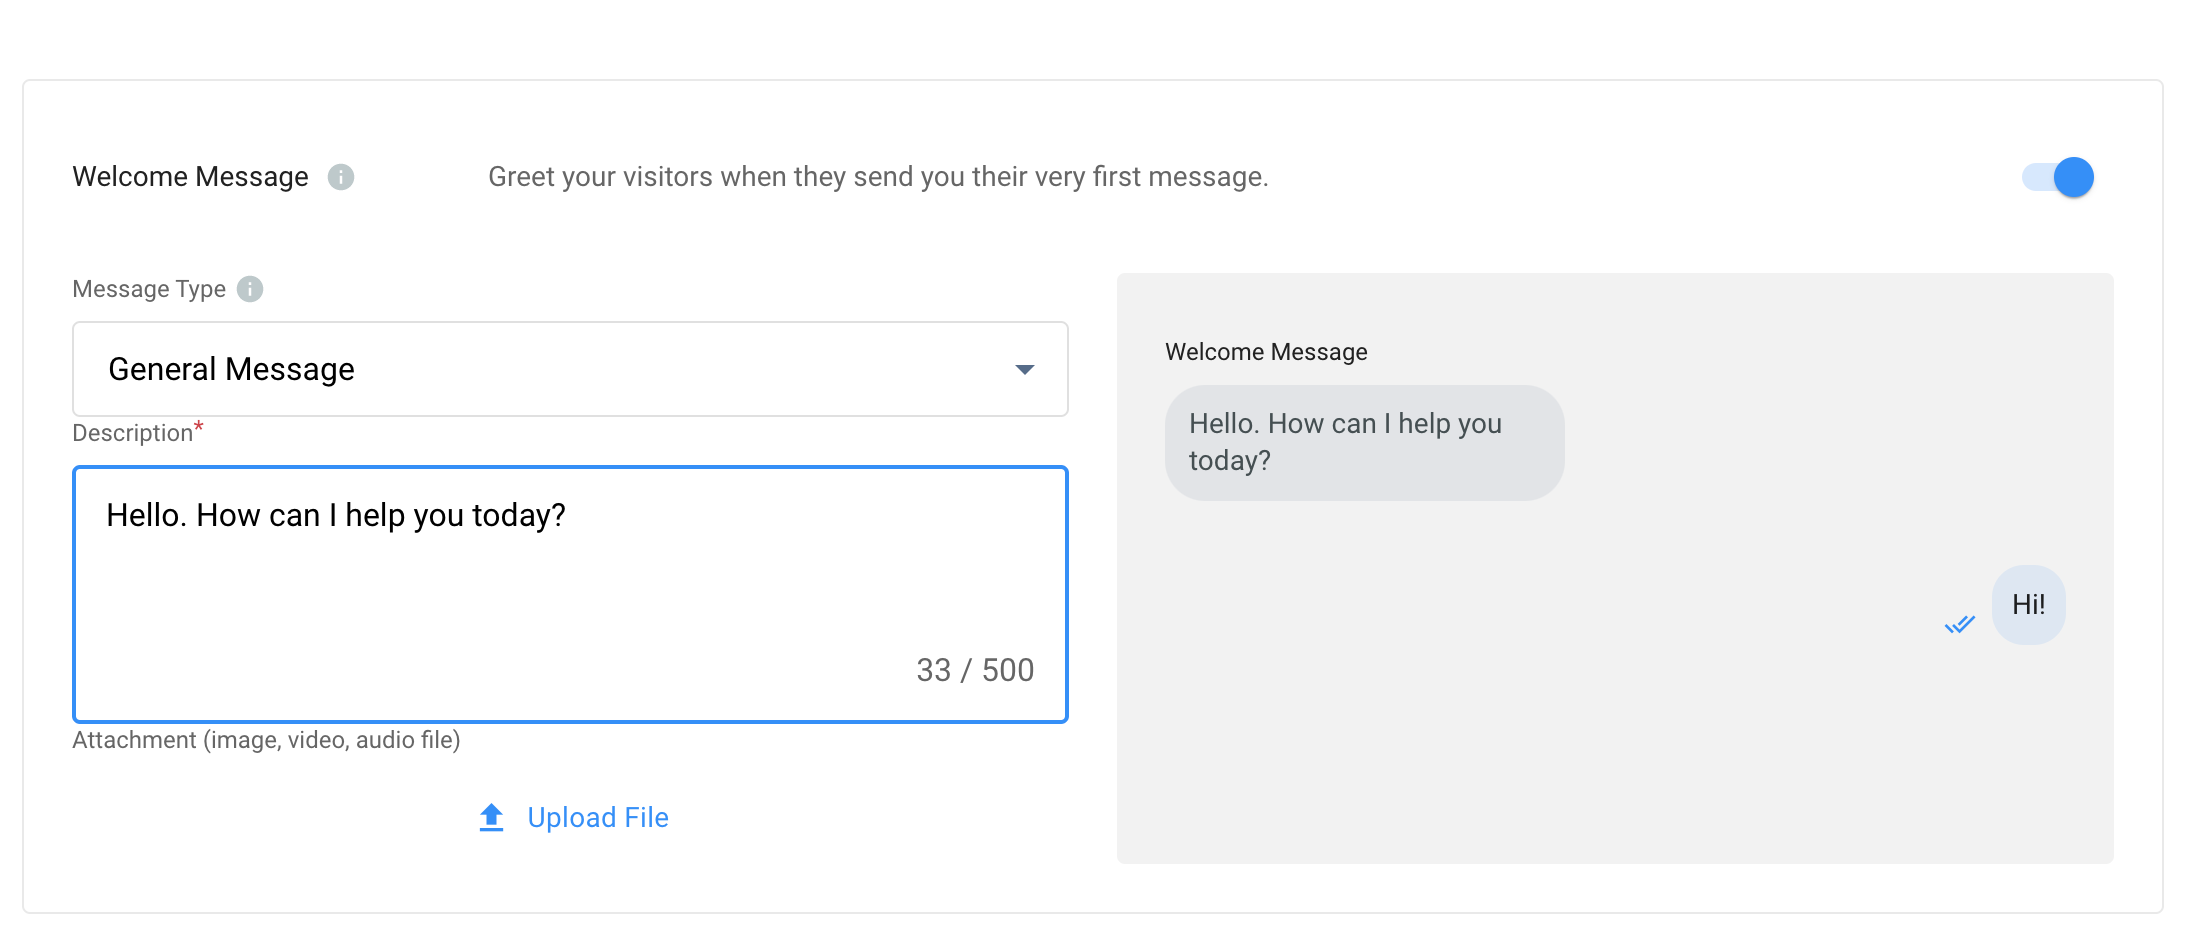
Welcome Message
Idle Message
- Toggle ON the button for the Idle Message
- Set the time (minutes or hours) to send the automated response.
- Choose a general message, buttons or quick replies message type when setting up an automated response to your visitors.
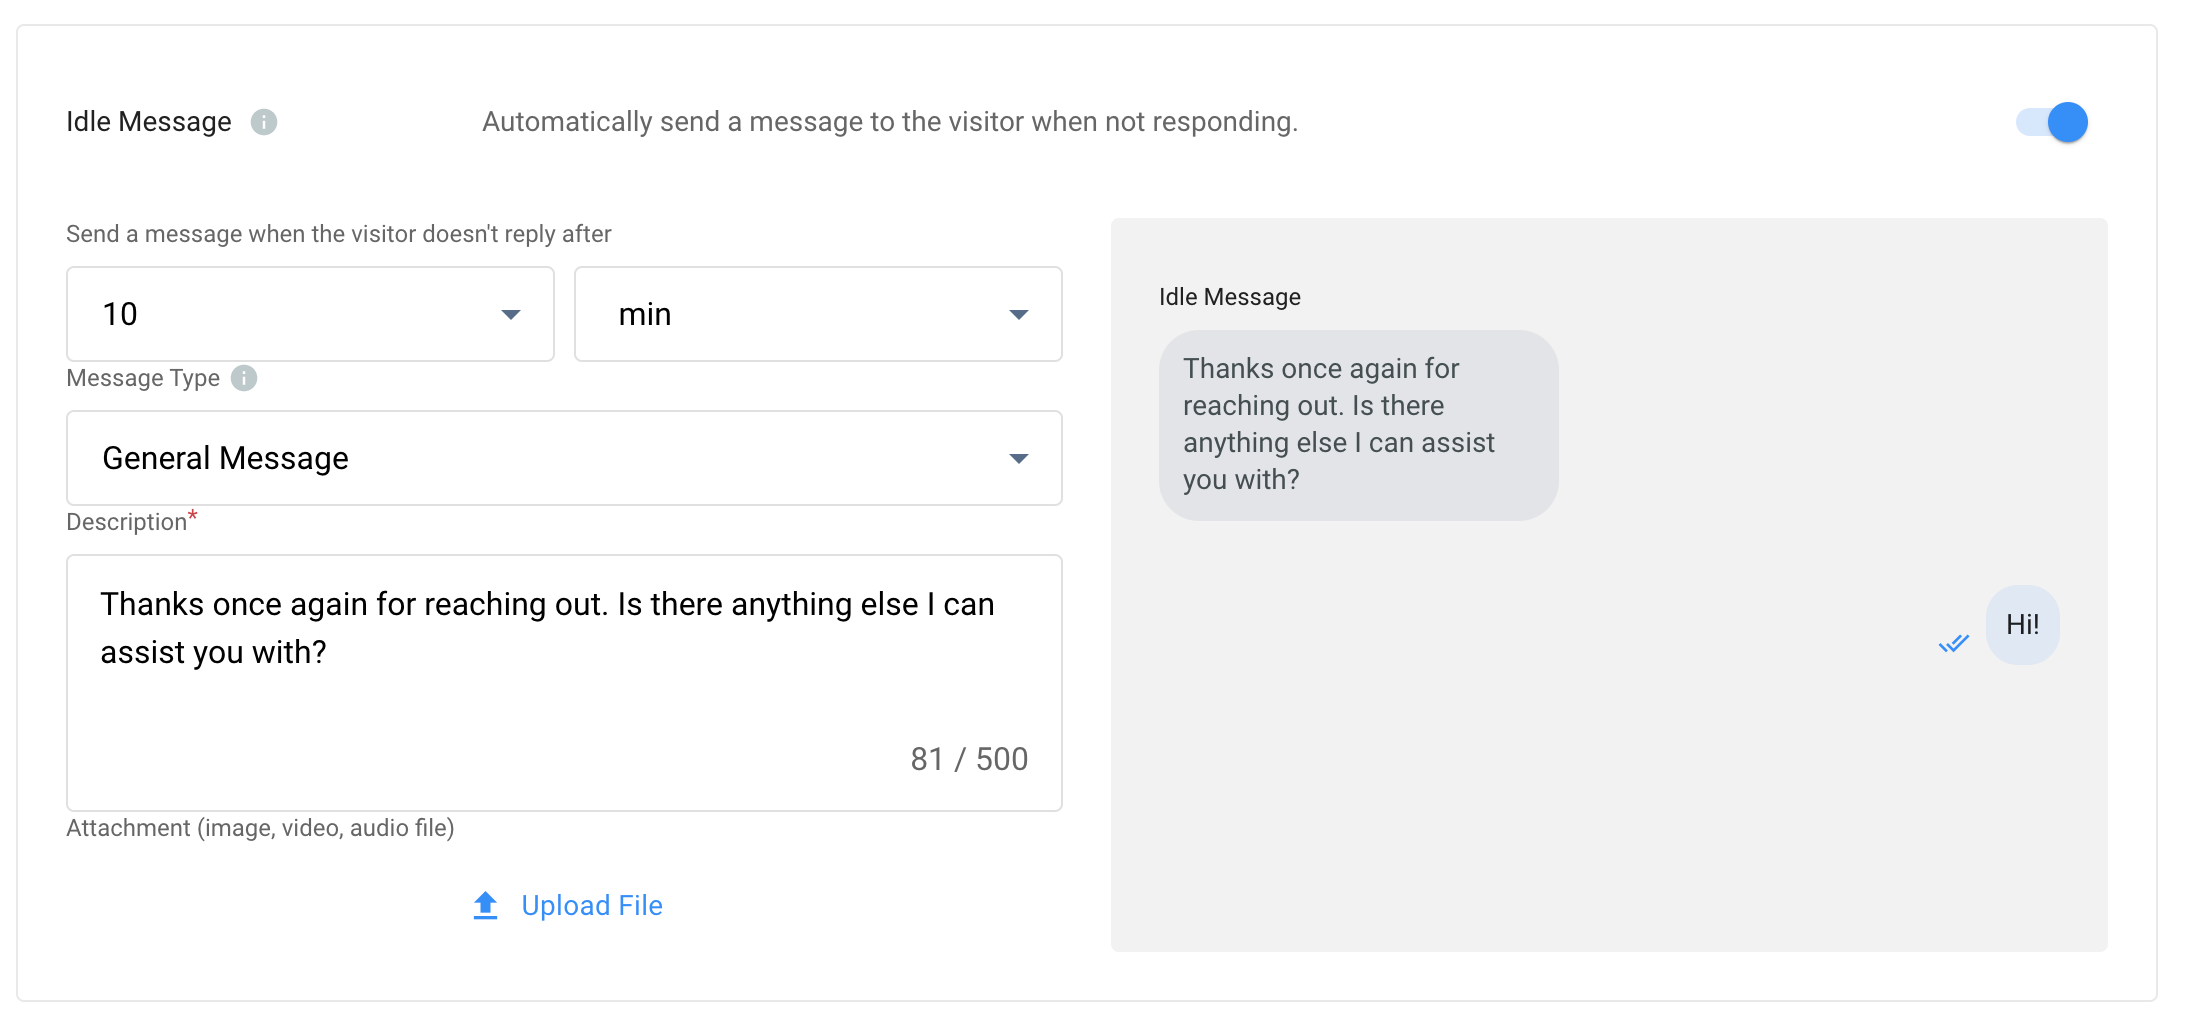
Idle Message
Transfer Failed Message
- Toggle ON the button for the Transfer Failed Message
- Choose a general message, buttons or quick replies message type as an automated response to your visitors.
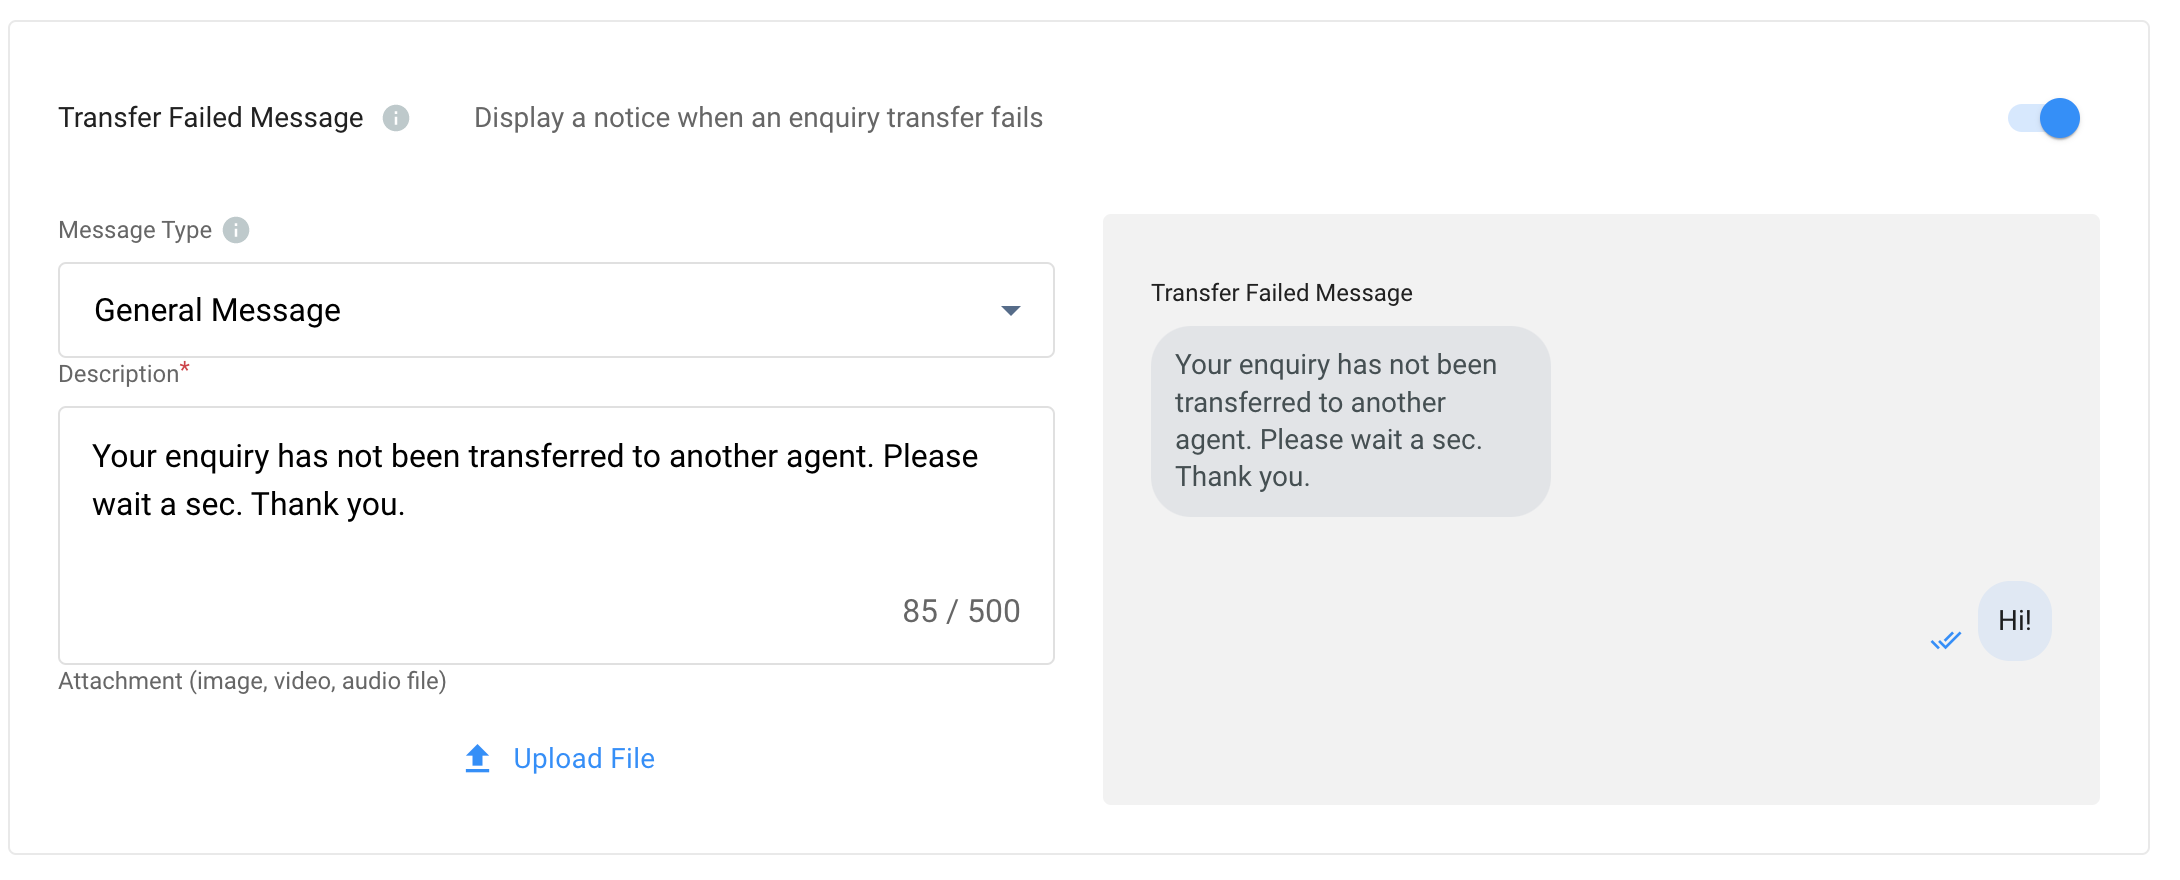
Transfer Failed Message
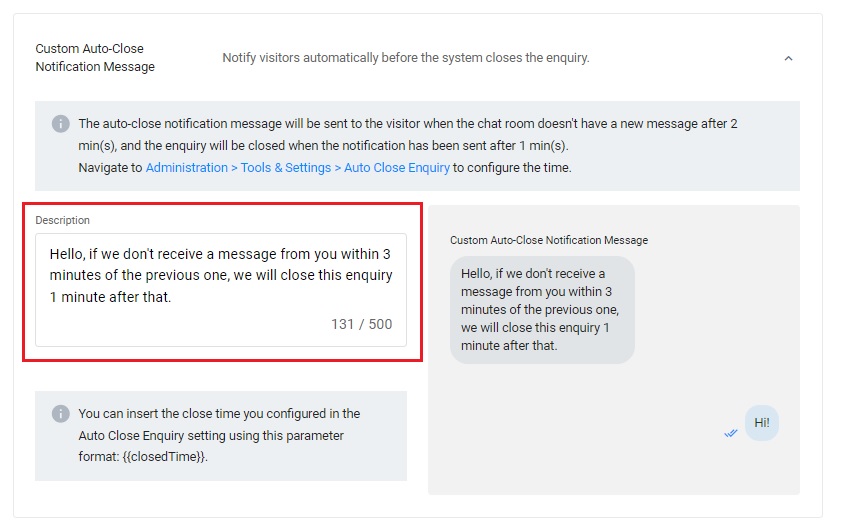
Custom Auto-Close Notification Message
- Click the downward arrow icon to expand this section.
- Enter the auto-close notification message in the Description box. You can preview the message in the chat room on the right-hand side of the grey box.
Close Enquiry Message
- Toggle ON the button for the Close Enquiry Message
- Choose a general message or button as the automatic response to your visitors when the staff or system closes the enquiry.
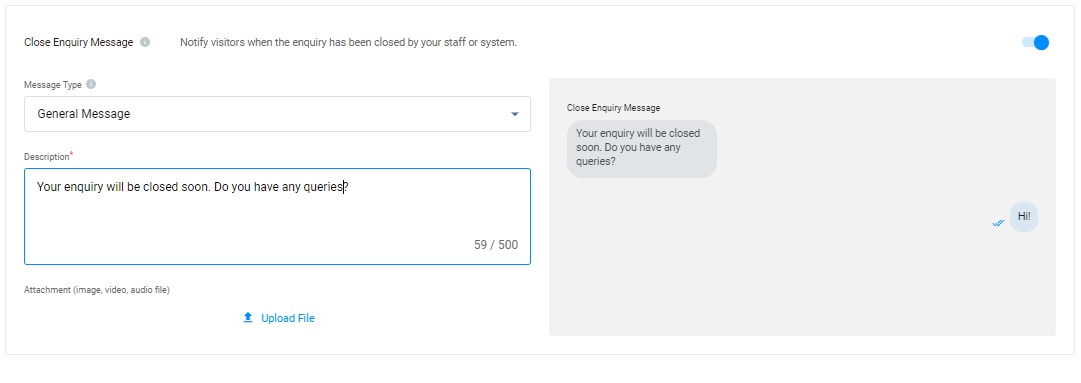
Close Enquiry Message
Auto-Message Message Types
When the message type is Quick Reply and the Button Type is Text in the Welcome Message and the Transfer Failed Message settings, there is a Payload field in the Button setting box.
It allows users to define a "payload value" for each button name to trigger different chatbot flows depending on which button the user clicks when a chatbot is configured as the distinction (e.g. "View Product Catalog" button, "FAQ" button...).
When the Chatbot is configured as the destination, there are 2 examples of this setting:
Example 1:
- Message type: Quick Reply
- Button type: Text
- Button Name: Contact support team
- Payload: Blank (empty field)
Result: The "Contact support team" value is sent to the destination chatbot. And the corresponding chatbot flow will be triggered based on this value to send the reply message.
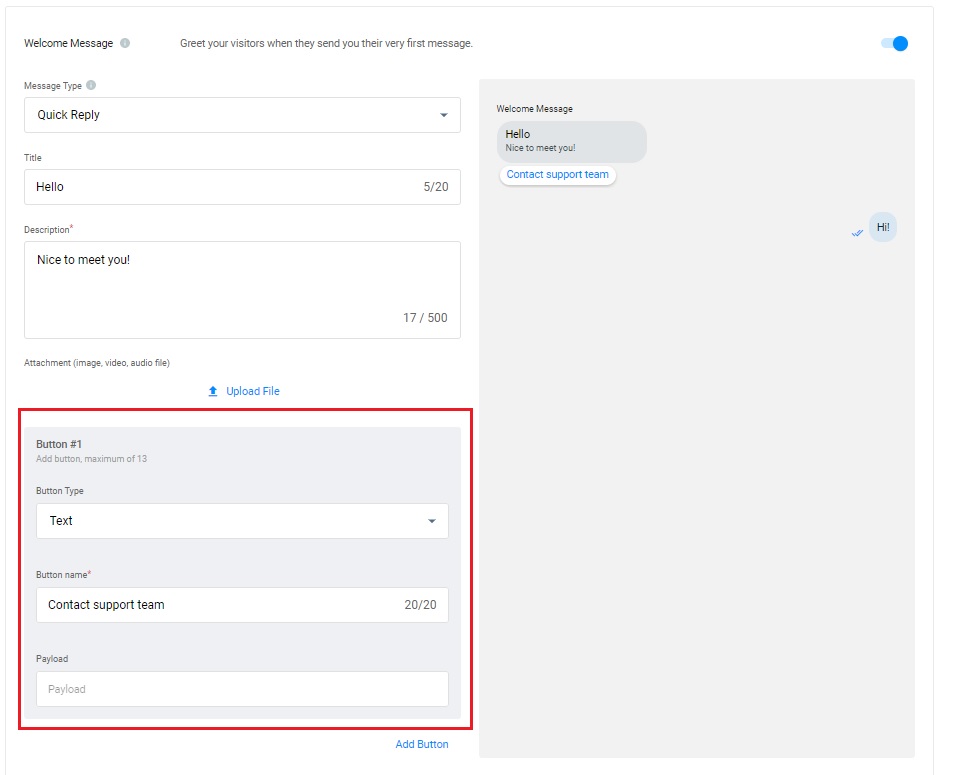
Empty payload field
Example 2:
- Message type: Quick Reply
- Button type: Text
- Button Name: Hotel Address
- Payload: Send hotel address to customer
Result: The unexposed payload value "Send hotel address to the customer" is sent to the destination chatbot. Based on the configuration, the chatbot can be triggered, for example, to send the hotel address as the reply message like "Our address is 5F-C, No. 4-7, Sec. 5, Xinyi Road, Xinyi District, Taipei City."
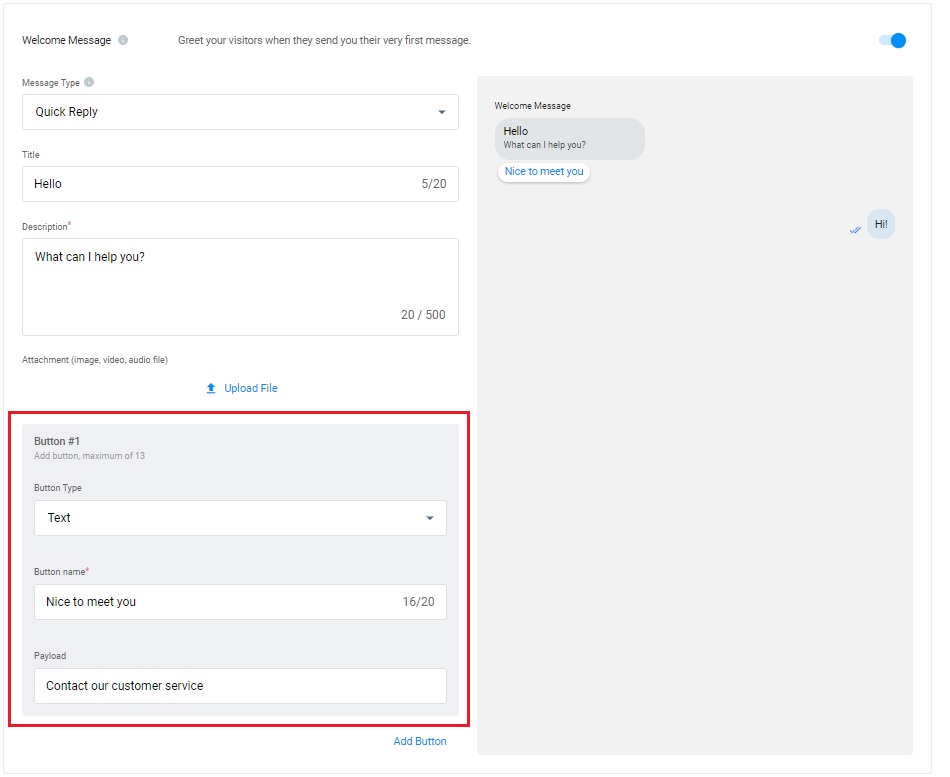
With the payload value
👍
Suggested use cases of the advanced configuration of Welcome and Transfer Failed Message
- When the visitors click on the button in example 1, the text of the pre-defined button name as the value will prompt the distinction chatbot to generate the appropriate reply based on this value swiftly. This configuration is helpful when the chatbot flows, or responses are required to be triggered based on the text of the button name.
- When the visitors click on the button in example 2, the payload value unexposed to the visitors will be sent to the distinction chatbot to generate the appropriate reply based on this value swiftly. This is a helpful configuration when the chatbot flows or responses must be triggered based on this unexposed value.
📘
Please refer to the Managing Auto Close Enquiry detail guide to configure the system to close enquiries automatically.
Setting Up Conditional Trigger
Trigger metadata treats keywords as criteria to show or hide the Tag. If left blank, the Tag will default in the Tag Directory.
See this Guide's Tag Conditional Trigger section.
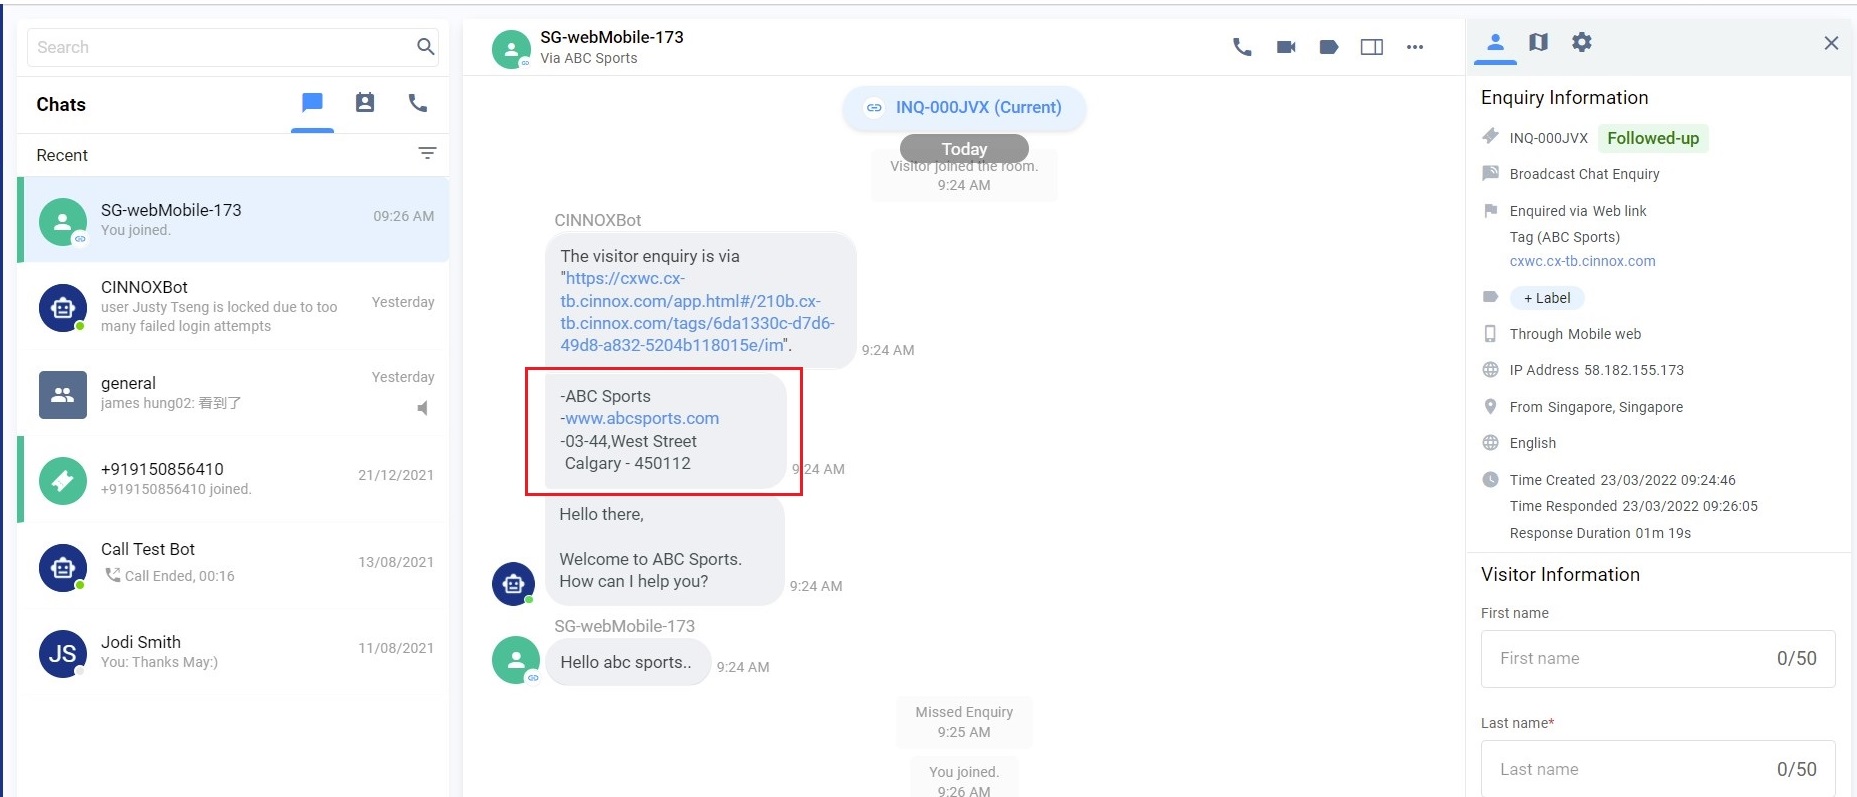
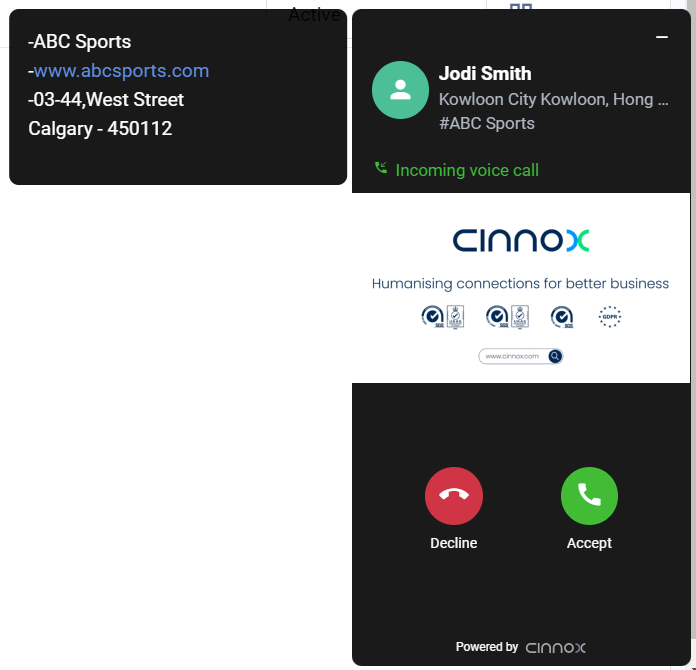
Channel Custom Info
Channel Custom Info allows you to add your channel details that your staff would see in the call screen and chat room whenever they are serving an enquiry. The custom info can be about the standard procedure or operation details of handling the enquiry.
- Click on the edit button.
- Toggle on to Enable the Channel Custom Info.
- Enter your channel's information in the right-side window with an open field. You can type any information helpful to your staff.
- Click the Save button, and the customised info appears on the Channel Custom Info.
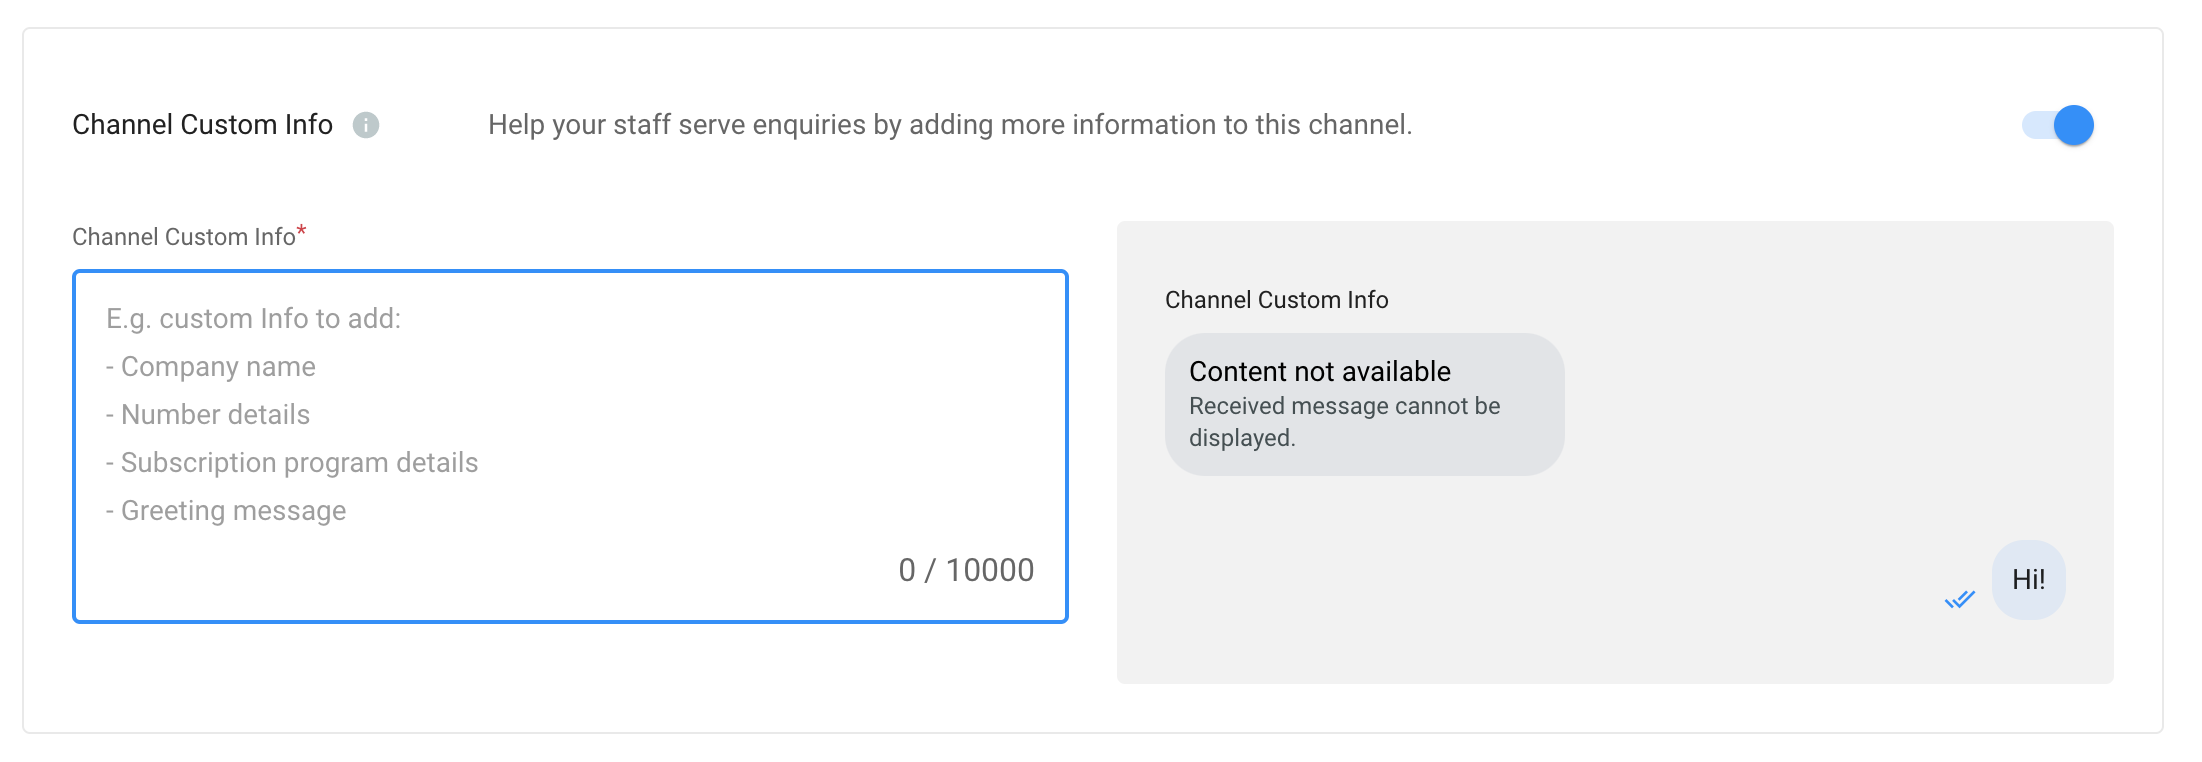
The custom info is displayed on the staff side in the chat room section for the enquiry.
The custom info is displayed on the staff side at the left side window of the call screen for the call enquiry.
📘
Important Notes
- Channel Custom Info can be customised per tag.
- Channel Custom Info is only available for inbound service.
- In addition to the Directory weblink, Channel Custom Info does not apply to other agent and campaign weblinks.
- The system is limited to 10,000 characters; if exceeded, the chatbot message will not be sent.
- Channel Custom Info will still be displayed as chatbot messages in the room of missed enquiry.
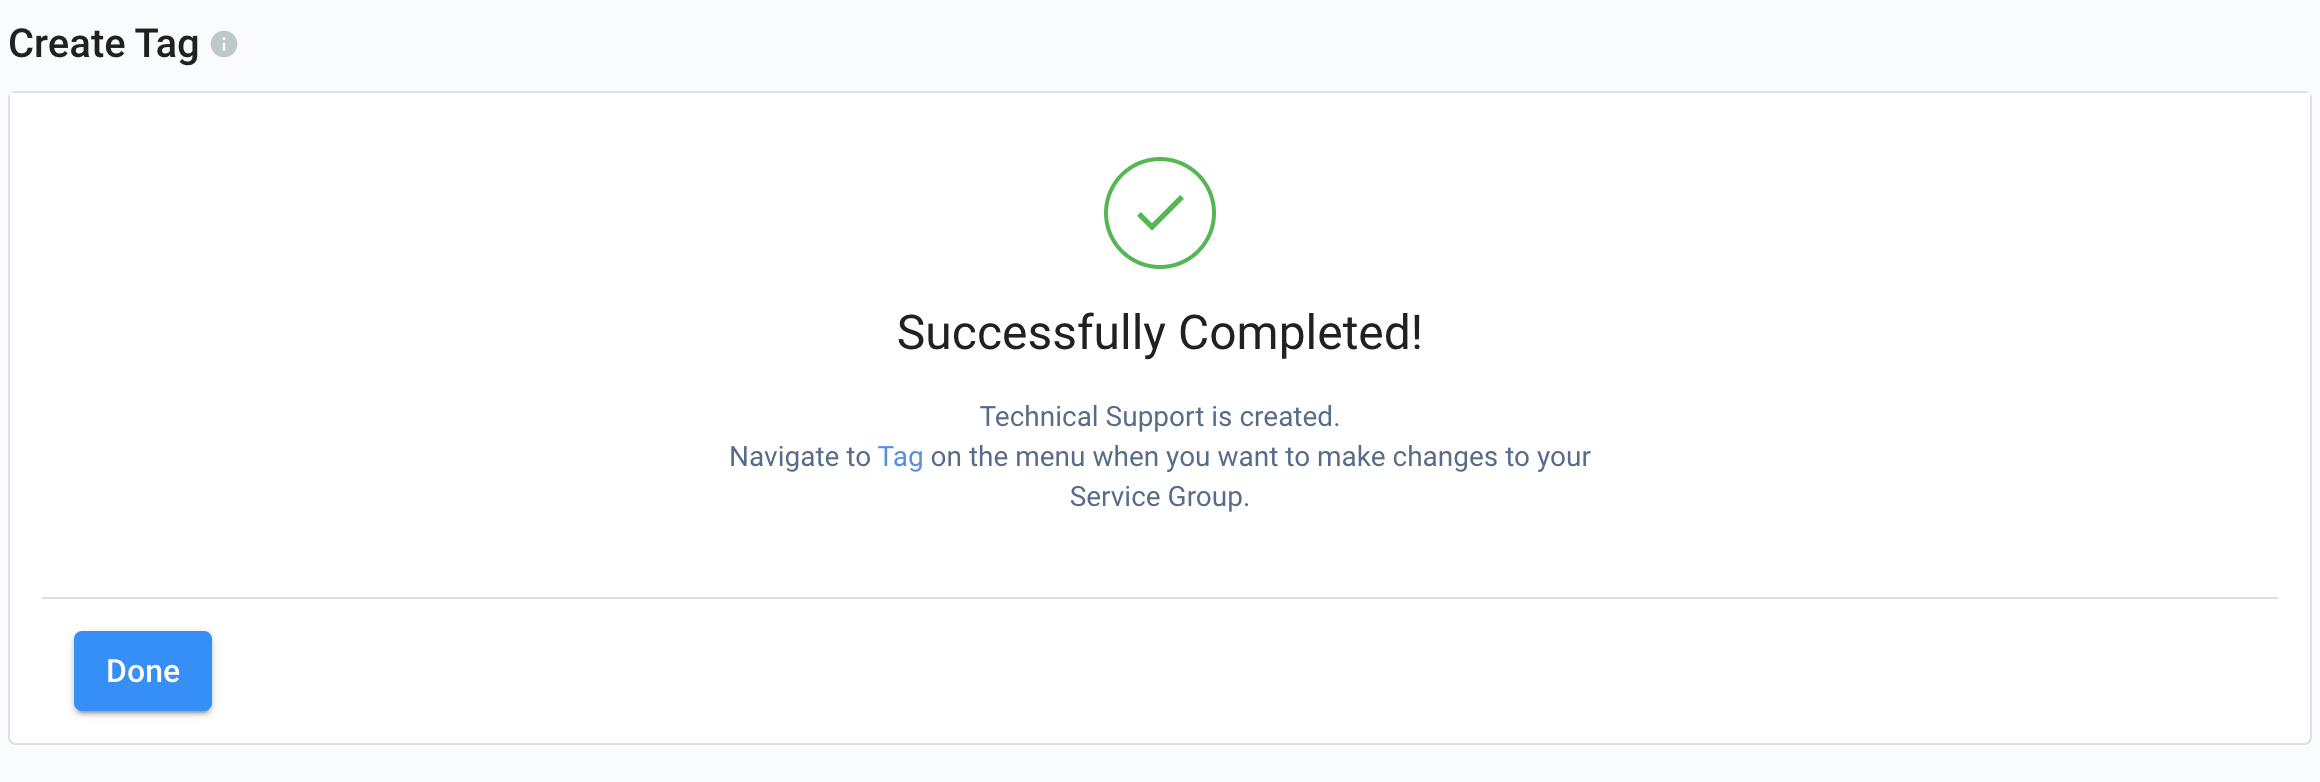
- Click Create.
And that's it! Your Tag is now created.
QR Code & Web Link (.com & .cn)
You can download your Tag's QR Codes (in PNG and SVG formats) and copy the Web Link so you can share them with your Visitors and Contacts to reach out to you. Attend to their queries via the QR code and web link in your CINNOX Workspace.
The QR Code and Web Link for enquiries are auto-generated for every created Tag.
Web link with .com
By default, your Tag's web link is with .com, which is best for visitors, customers and other contacts outside Mainland China.
- From the CINNOX Dashboard, navigate to Administration > Channels > Directory.
- Open the created Tag to view the Tag Details
- Scroll down the page until the QR Code & Web Link
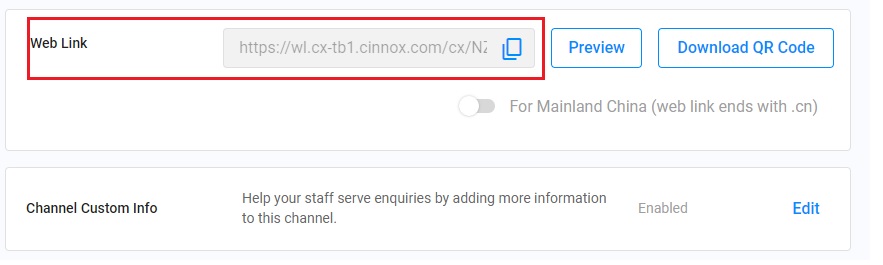
QR Code & Web Link
Web link with .cn
Your Tag's web link with .cn is best for visitors, customers and other contacts inside Mainland China.
- From the CINNOX Dashboard, navigate to Administration> Channels > Directory.
- Open the created Tag to view the Tag Details
- Scroll down the page until the QR Code & Web Link
- Toggle ON the button for the For Mainland China (web link ends with .cn) to change the weblink to .cn.
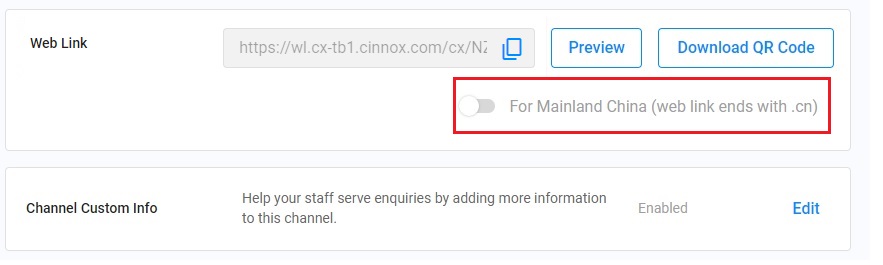
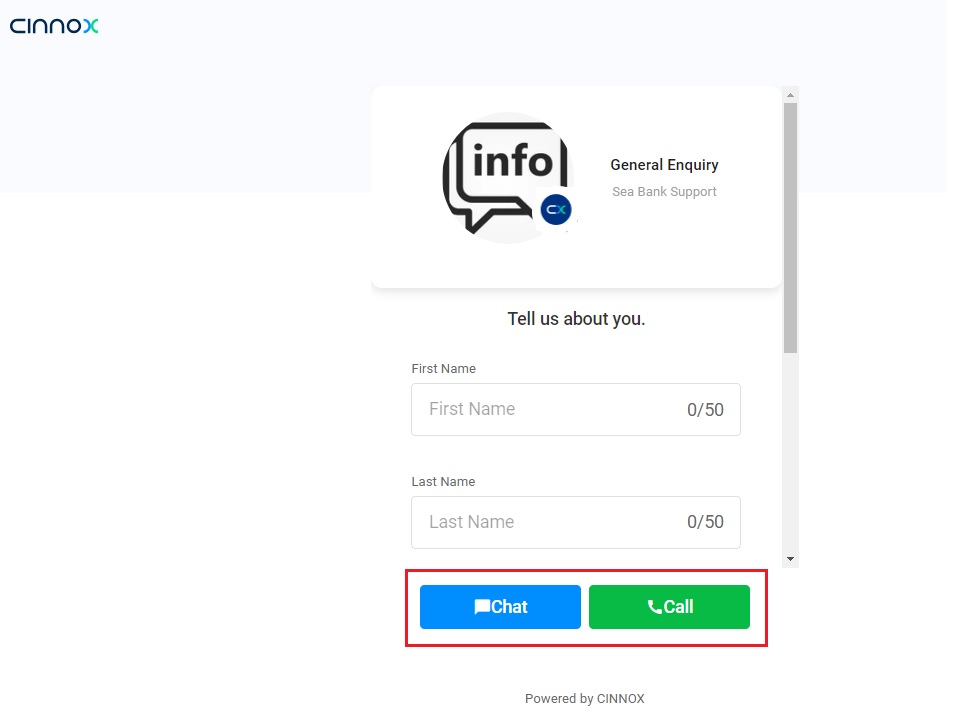
- Through the web link, visitors or customers can interact with the tag via Chat or Call.