Managing Call Recording an Transcript
When on a call with visitors, customers, or colleagues, taking notes helps you keep track of essential details but may prevent you from listening attentively.
Voice and video call recording let you save your conversations to the cloud and transcribe them using the Speech-to-Text engine powered by Google to revisit your discussions when you need to after the actual call.
CINNOX lets you choose your recording and transcription preferences, select or upload a voice greeting and automatically set a recurring schedule to delete call recording files from your Service Storage.
🚧
You are responsible for configuring and using the recording and transcript features to comply with applicable laws, including jurisdictions requiring prerecording consent.
📘
- The audio transcription usage will incur additional charges.
- Conference Call will only record voice calls in the conference room.
- Navigate to Administration > Tools & Settings > Recording & Transcript.
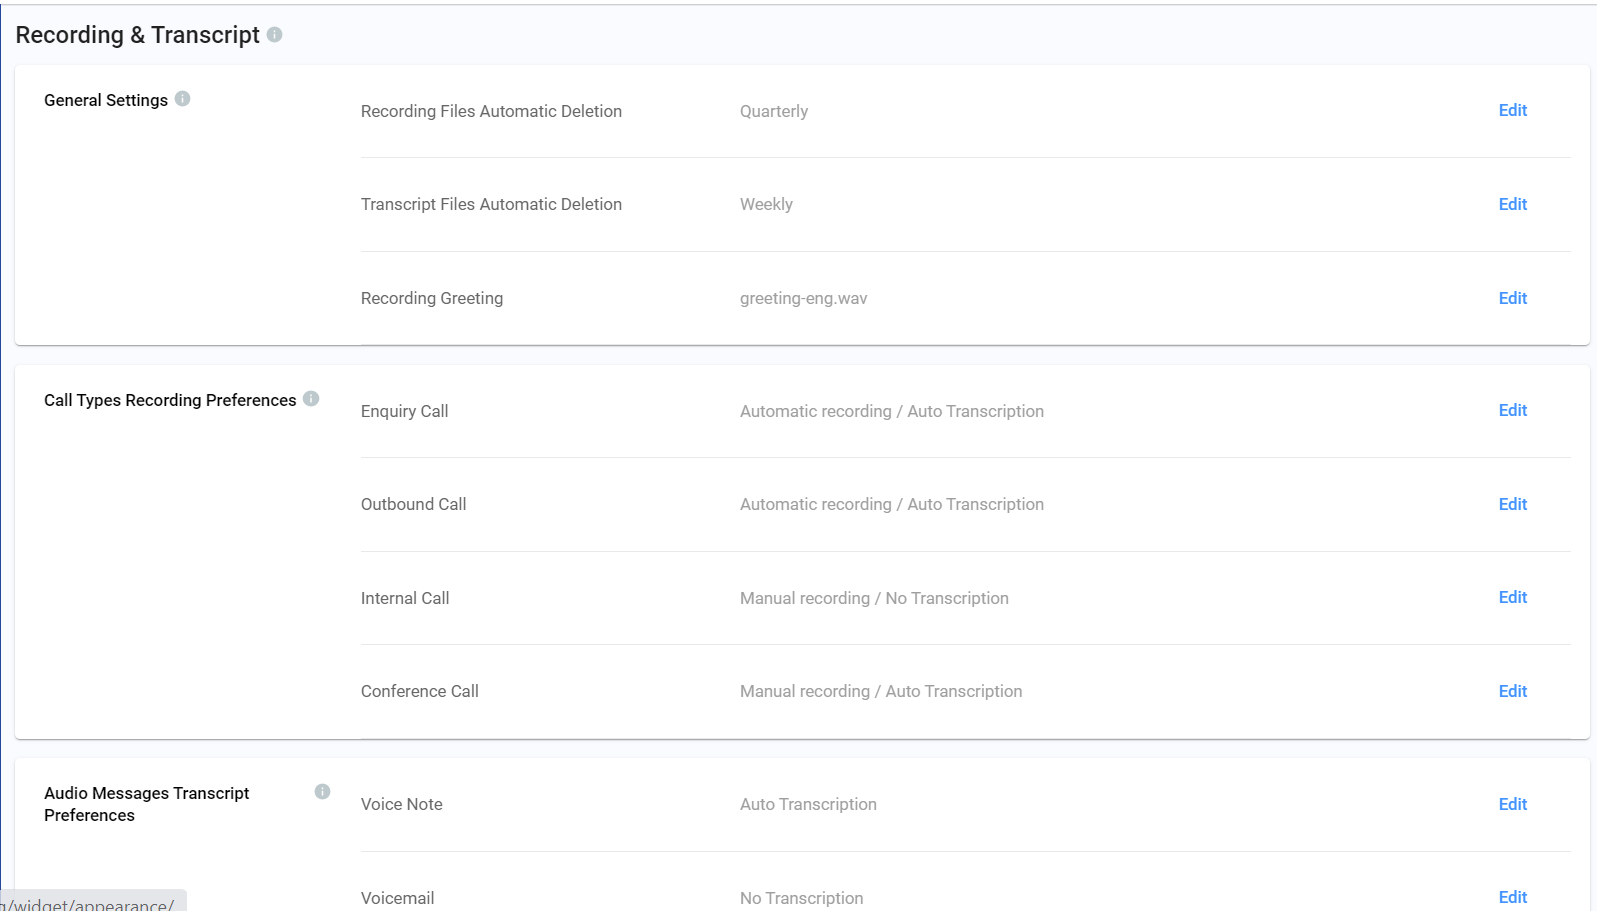
Recording & Transcript Settings
General Settings
Recording Files Automatic Deletion
Select how often you would like to automatically delete your call recording files to free up your storage:
- Never - manually select and delete recording files in storage (default selection)
- Weekly - automatically delete all recording files in storage after a week
- Biweekly - automatically delete all recording files in storage after two weeks
- Monthly - automatically delete all recording files in storage after a month
- Quarterly - automatically delete all recording files in storage after three months
- Semiannually - automatically delete all recording files in storage after six months
- Annually - automatically delete all recording files in storage after a year
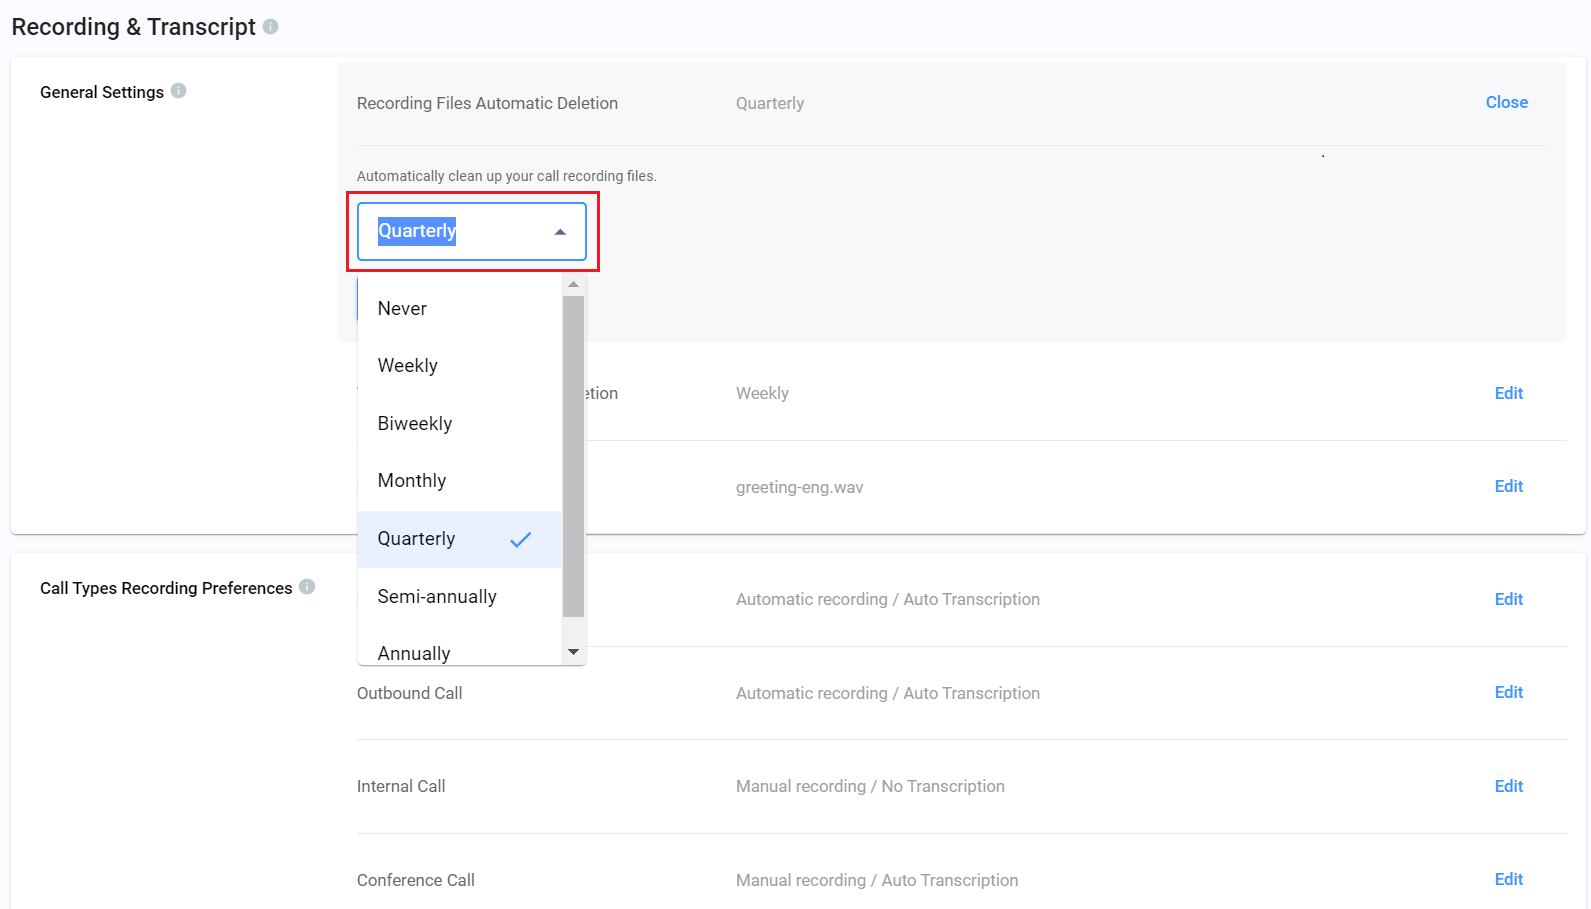
Recording Files Automatic Deletion
Transcript Files Automatic Deletion
Select how often you would like to automatically delete your call recording files to free up your storage:
- Never - manually select and delete recording files in storage (default selection)
- Weekly - automatically delete all recording files in storage after a week
- Biweekly - automatically delete all recording files in storage after two weeks
- Monthly - automatically delete all recording files in storage after a month
- Quarterly - automatically delete all recording files in storage after three months
- Semiannually - automatically delete all recording files in storage after six months
- Annually - automatically delete all recording files in storage after a year
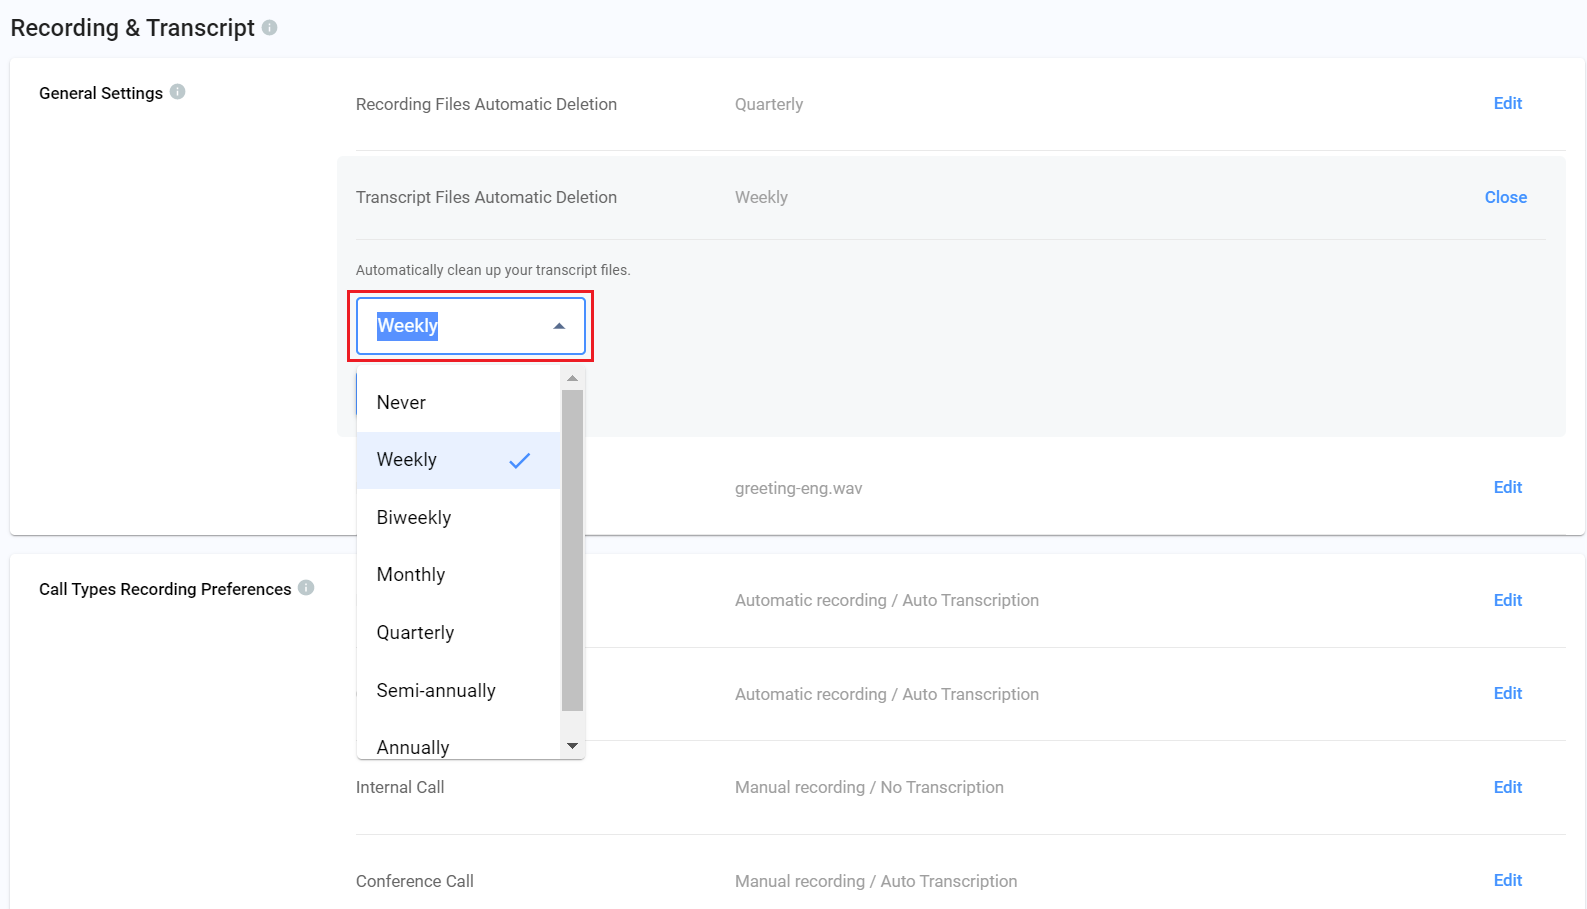
Transcript Files Automatic Deletion
Recording Greeting
CINNOX provides default voice greetings to select that let your visitors and fellow staff members know that the call is being recorded.
In the Recording Greeting pane, select the voice greeting you want to use.
By default, greeting-eng.wav is the chosen greeting that will play when call recording is enabled.
You can listen to the available greetings and select which will fit your call recording needs.
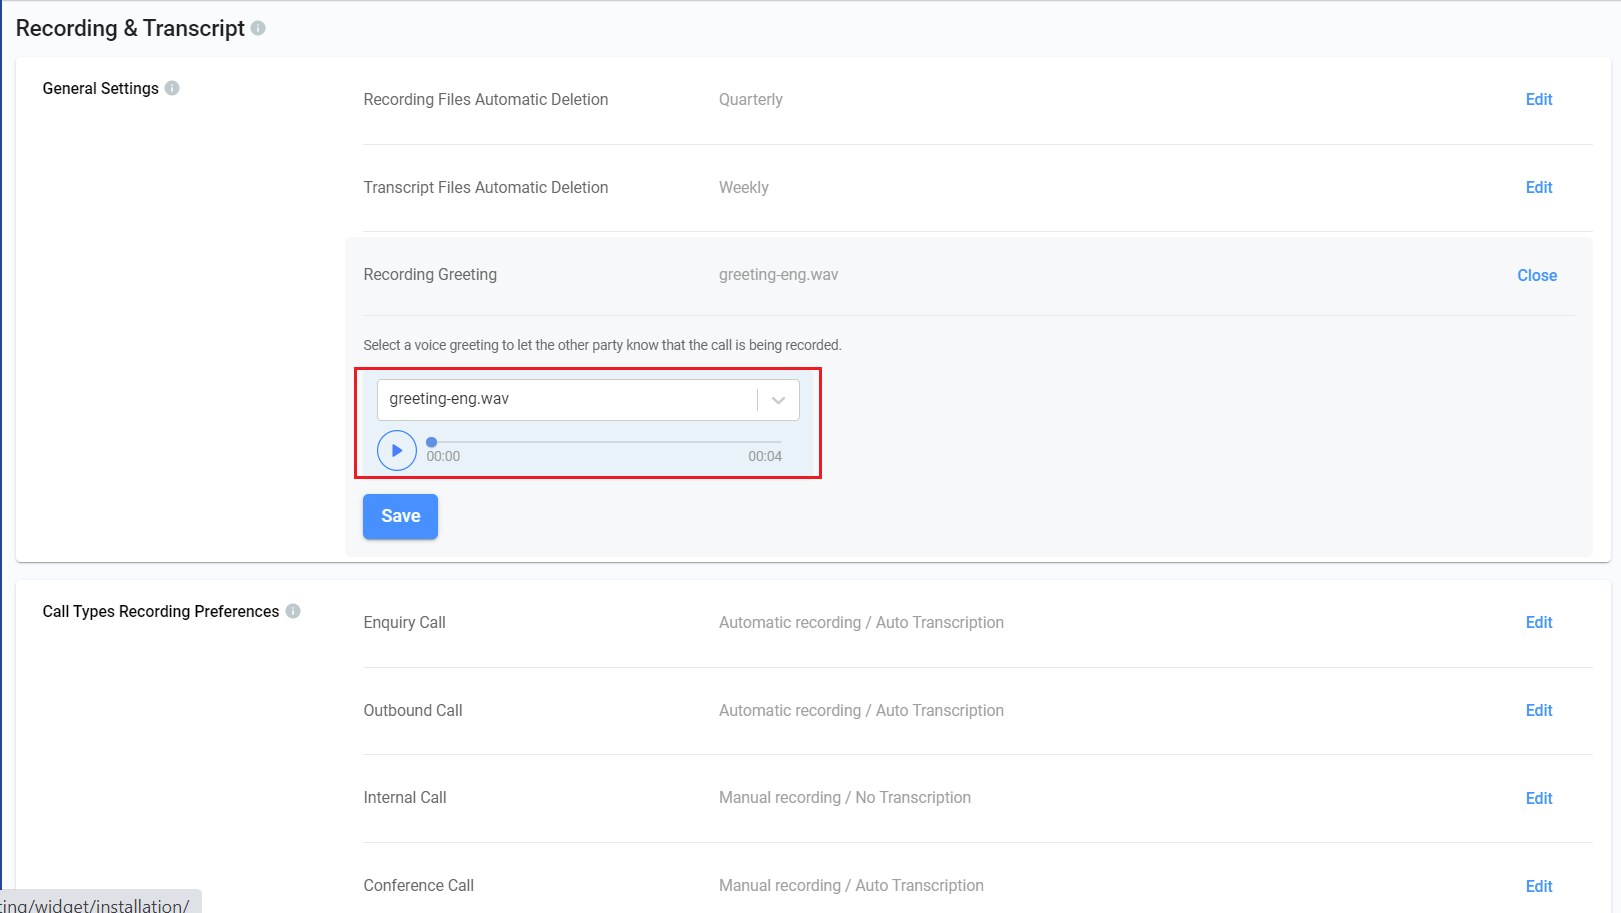
Recording Greeting
Besides, CINNOX allows you to add your recording greeting via uploading an MP3 file or using Text-to-Speech powered by Google.
- In the Recording Greeting pane, select (+) Add new greeting
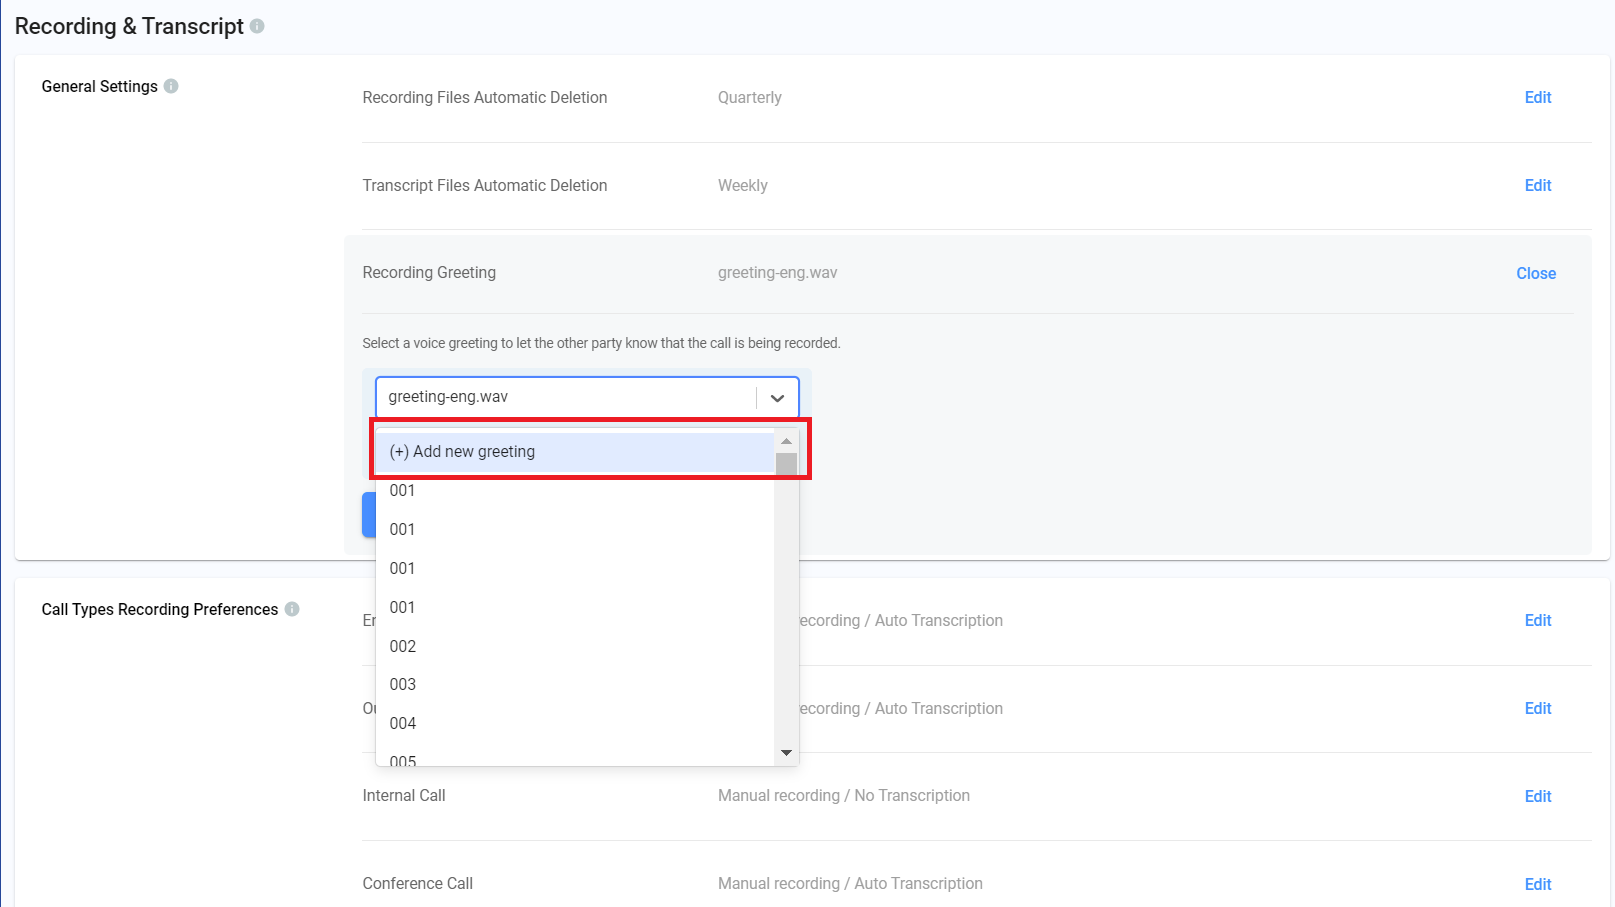
Add new greeting
A pop-up window will display to upload a new greeting.
A. Audio File
- Type the file name of the greeting to upload; a file name can be of any name but should not exceed 50 chars as the maximum limit.
- Drag and drop the MP3 file or browse and select the location of the MP3 file to upload.
- The MP3 must not exceed 10 MB as the maximum limit.
- You may click the play button to listen to the uploaded audio file.
- You may upload a different file to replace the current file if necessary.
- Click the Create button to complete uploading an audio file greeting.
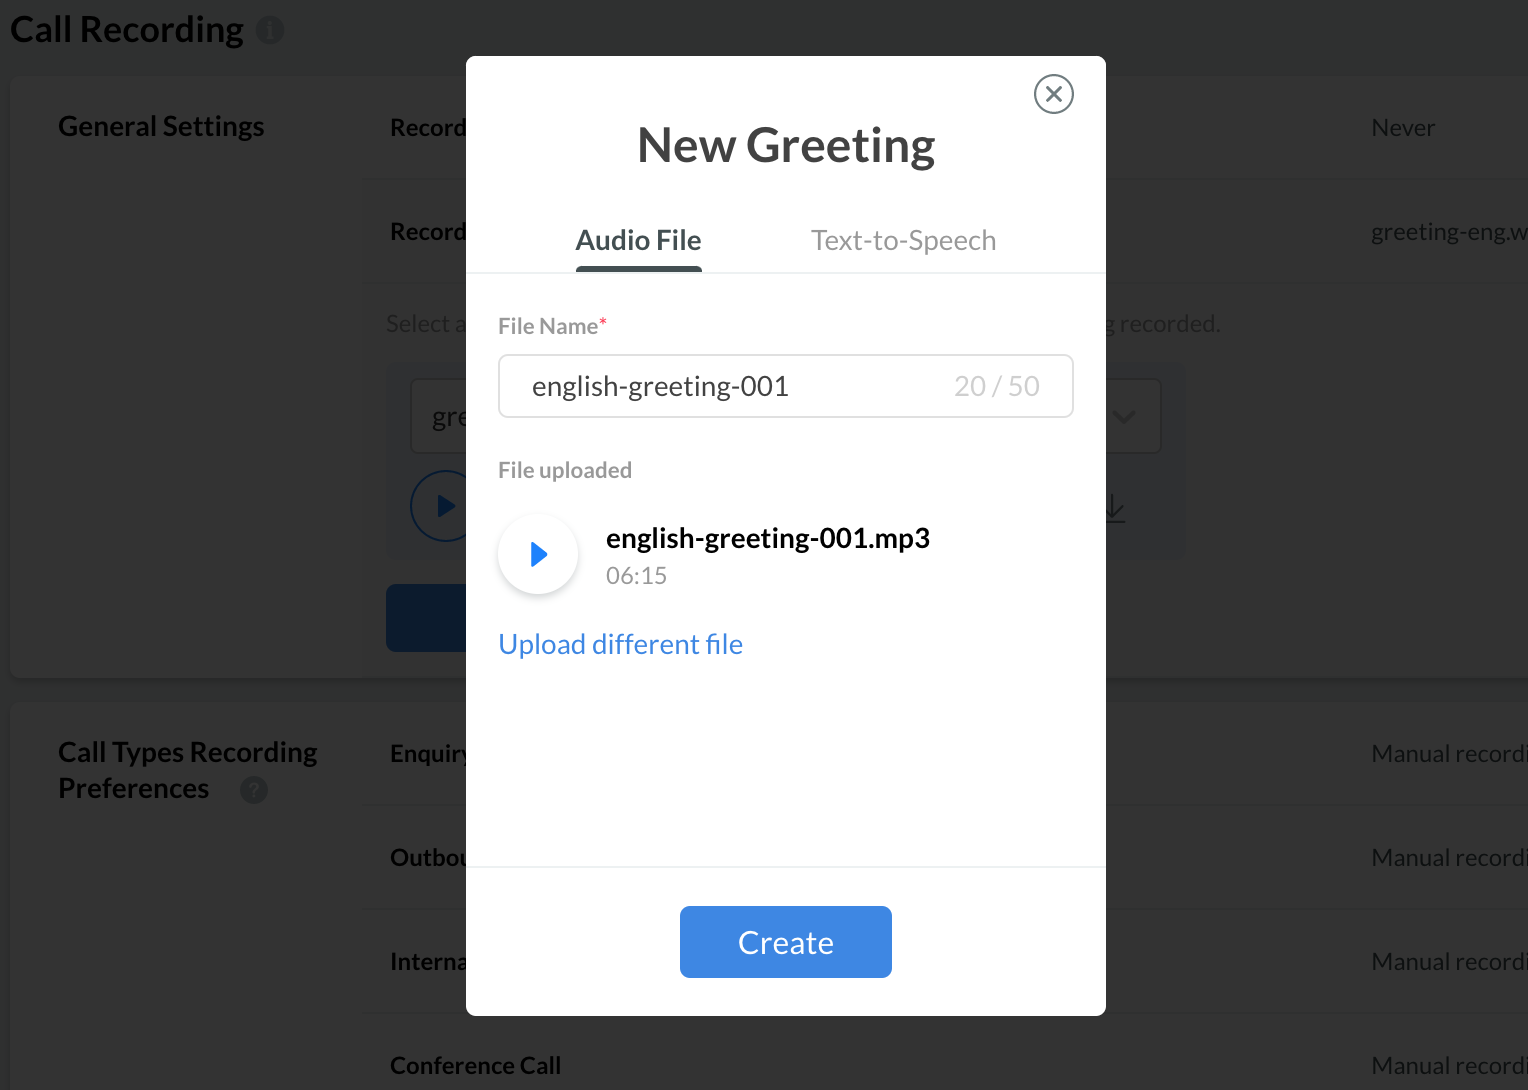
MP3 Greeting
B: Text-to-Speech
- Type the file name of the greeting to upload; a file name can be of any name but should not exceed 50 chars as the maximum limit.
- Type or paste the text you want to convert to a voice message. It must not exceed 700 characters as the maximum limit.
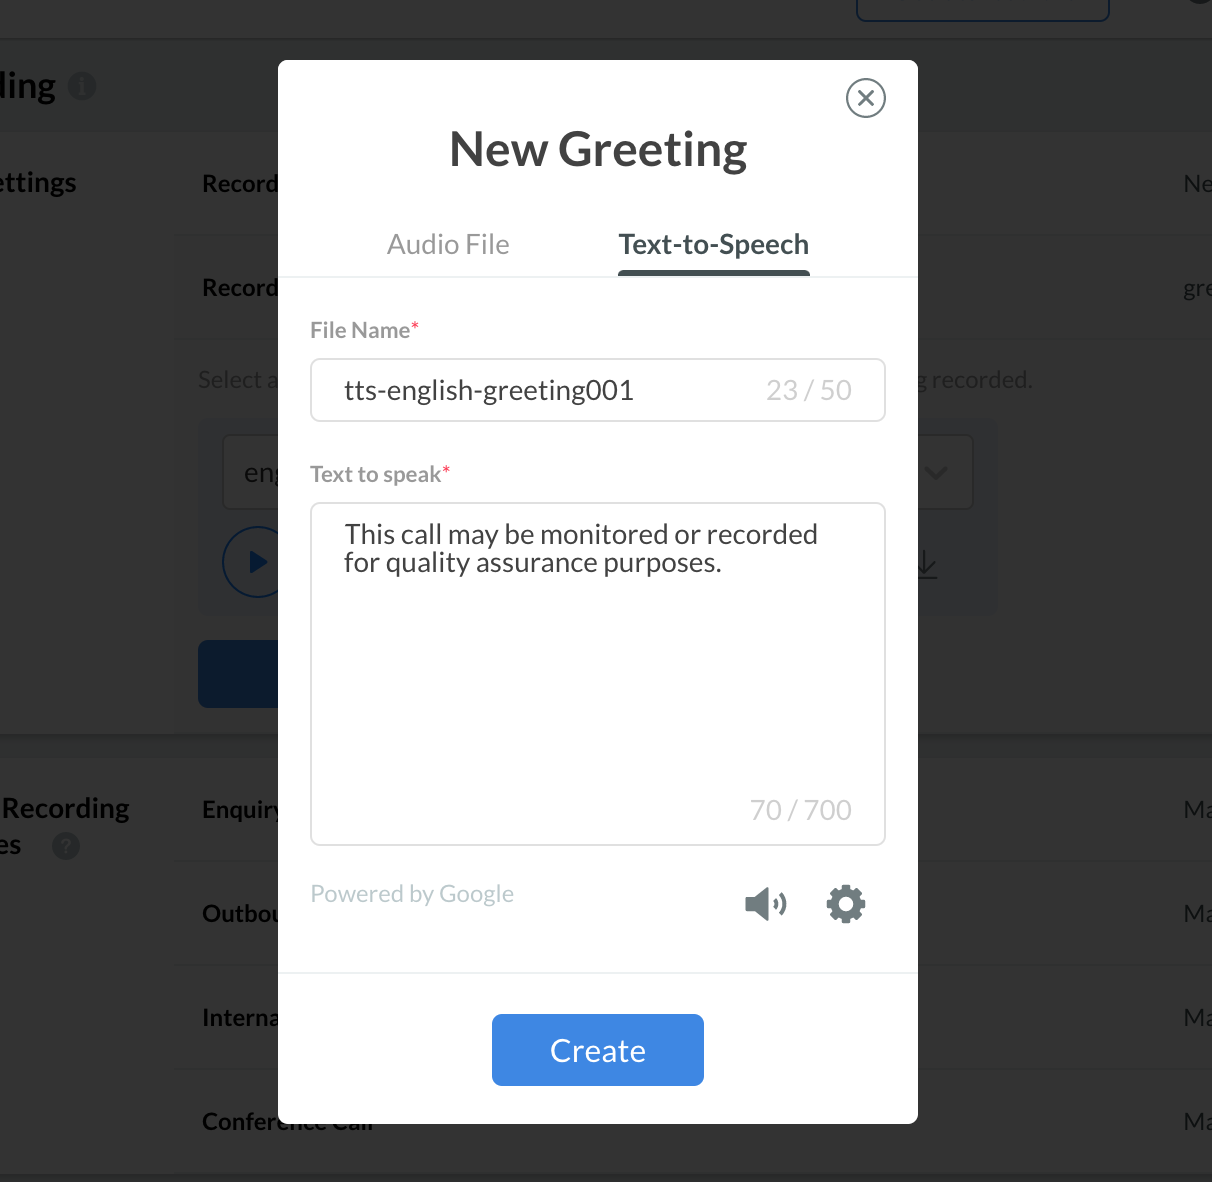
TTS Greeting
- You may click the play button to listen to the voice message.
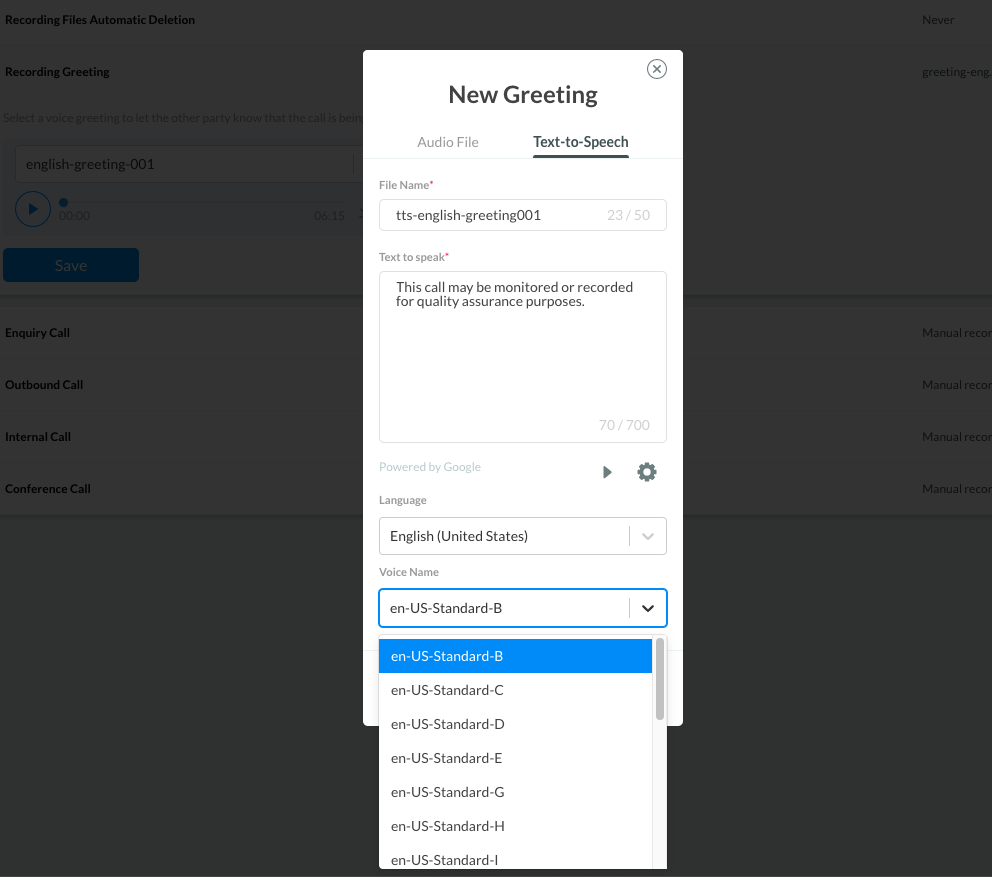
- To select the preferred language and Voice Name, click the settings gear icon to expand the page and display the Language and Voice Name drop-down list.
- Select the language in the drop-down list
- Select the voice Name in the drop-down list
- You may click the play button to listen to the selected language and voice name.
- You may refine the text message to fine-tune the message if necessary.
- Click the Create button to complete the steps of uploading a TTS greeting.
TTS Greeting
Once new call recording greetings are uploaded, they will be available in the recording greeting drop-down list to be selected.
Default Transcript Language
The system will automatically detect the language for your audio transcript using the Speech-to-Text engine powered by Google. You can select your preferred language to have a higher accuracy of the audio transcription.
- In the Default Transcript Language pane, click on the drop-down list and select your preferred language.
- Click Save.

Default Transcript Language
Call Types Recording Preferences
There are four call types that you can record:
- Enquiry Call - record voice and video calls (VoIP-to-VoIP Calls among Visitors and Staff members) in the enquiry room.
- Outbound Call - record outbound (PSTN) voice calls from Dial pad and Contacts.
- Internal Call - record voice and video calls (VoIP-to-VoIP calls among Staff members), including when dialled from an extension number.
- Conference Call - record voice calls in the conference room.
Setting up the Call Recording and Transcript
Select how you want to record these call types
In the Call Types Recording Preferences pane, select in the list to set each type to automatic, manual or no recording.
📘
By default, each type is set to Manual recording.
- Automatic recording means automatically recording a call once it connects.
- Manual recording means you must manually click or tap the call recording icon on the call screen.
- No Recording means there is no call recording icon on the call screen to click or tap in the call screen.

Call Types Recording Preferences
📘
The call recording function will be disabled when your service data storage becomes full.
Enabling the Audio Transcription
Your recorded calls will be converted to transcriptions or written text when enabling the call transcription. After the call, the conversation will be accessible as text, and you can download transcript files or take notes on CINNOX to record important information.
- Navigate to Administration > Tools & Settings > Recording & Transcript.
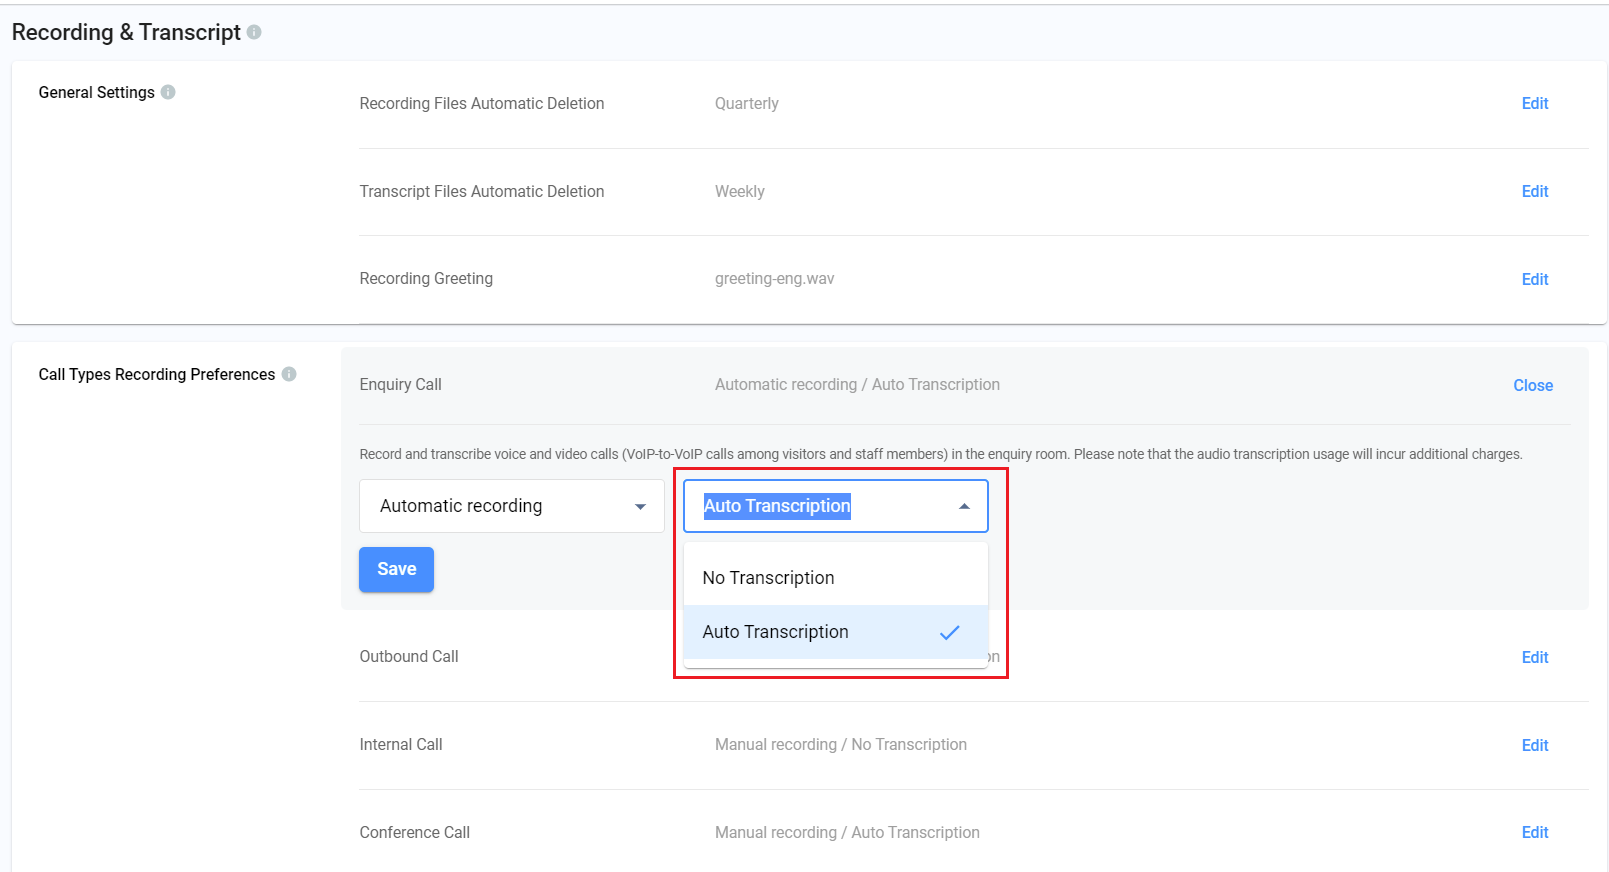
- In the Call Types Recording Preferences, click the Edit button in the Enquiry Call.
- By default, all call types are set as No Transcription.
- Choose Auto Transcription from the drop-down list to allow Enquiry Calls to convert into transcription, then click the Save button.
Enquiry Call Transcription
- Click on the Edit button in the Outbound Call.
- Choose Auto Transcription from the drop-down list to allow Outbound Calls to convert into transcription, then click the Save button.
- Click on the Edit button in the Internal Call.
- Choose Auto Transcription from the drop-down list to allow Internal Calls to convert into transcription, then click the Save button.
- Click on the Edit button in the Conference Call.
- Choose Auto Transcription from the drop-down list to allow Conference Calls to convert into transcription, then click the Save button.
📘
Note
Depending on the call record settings, your calls may or may not be recorded. Only recorded calls will be converted into text. While enabling the Auto Transcription, make sure that the call recording for the particular call types is set as Manual recording or Auto recording.
Audio Messages Transcript Preferences
You may sometimes find yourself in situations where you cannot listen to voice notes or voicemails sent, or you may not understand your customer's or team member's voice. This is when your voice note and voicemails support.
- Navigate to Administration > Tools & Settings > Recording & Transcript
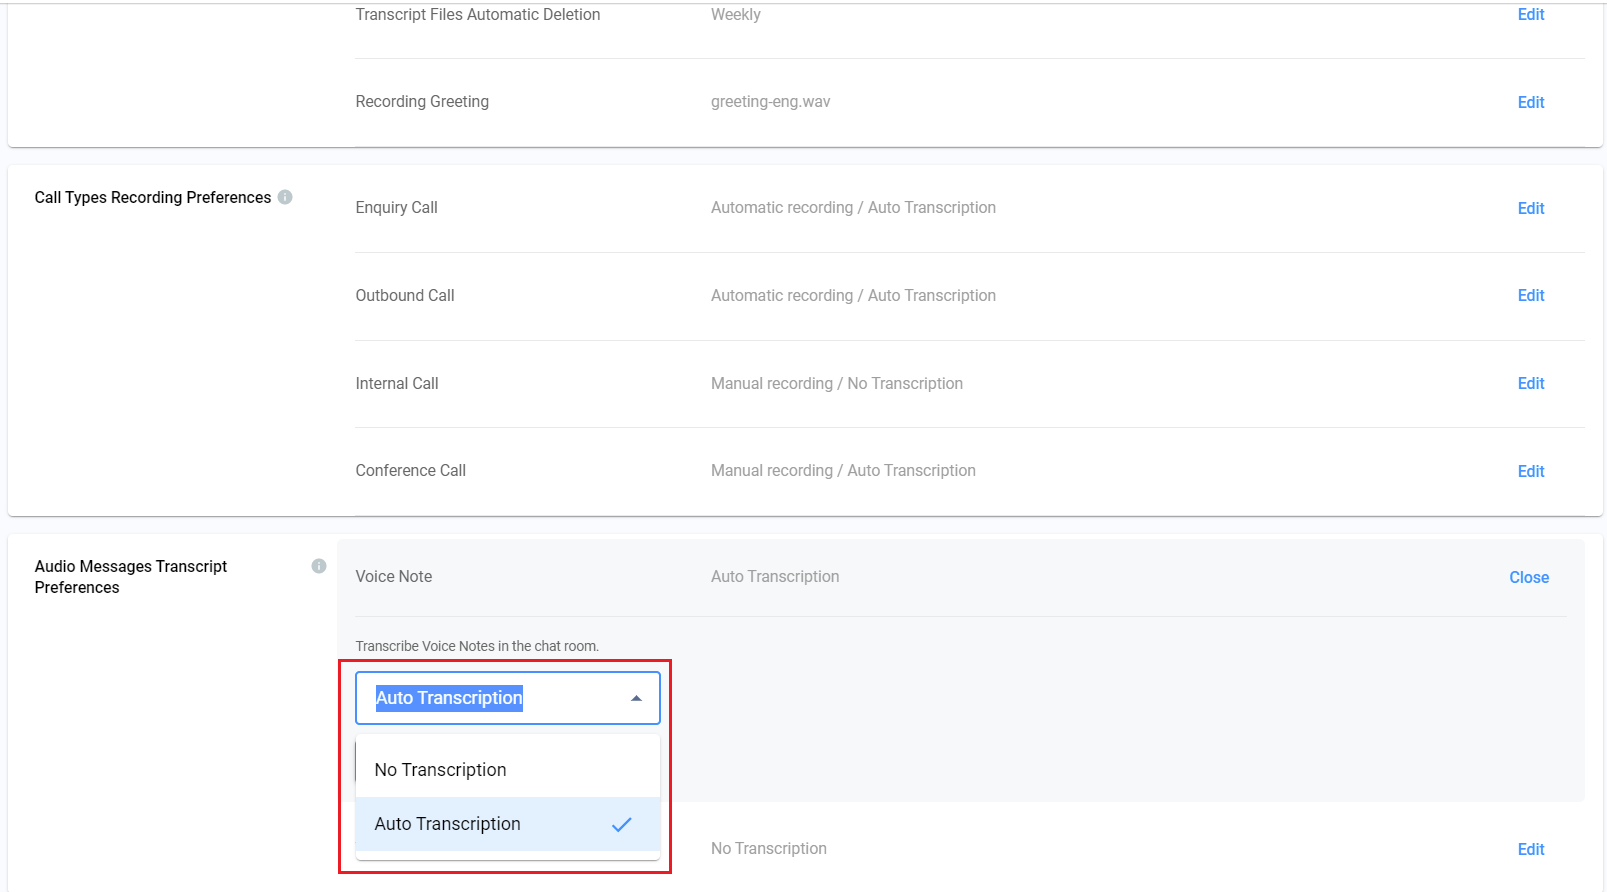
- In the Audio Messages Transcript Preferences, click the Edit button in the Voice Note pane.
- Choose Auto Transcription from the drop-down list to allow the voice notes to be converted to text, then click on the Save button.
Voice Note Transcription
- Click on the Edit button in the Voicemail pane.
- Choose Auto Transcription from the drop-down list to allow the voicemails to be converted to text, then click on the Save button.
Call Detail Report with Call Recording Details
The call detail report will be updated to include calls (inbound and outbound) and call recordings.
Refer to the Call Detail Report inside the Viewing the Call Report section of this Guide to listen to and download recorded calls.
Service Storage with Recording Files
Your service storage will keep the recordings made during calls. Refer to the Managing Storage section of this Guide for more details.
Recording File Size
| Call Type | Recording File Size per minute |
|---|---|
| 1 to 1 audio call (VoIP or PSTN) | 2 MB |
| 1 to 1 video (1 camera on) | 2 MB |
| 1 to 1 video (2 cameras on) | 4 MB |
| Conference audio | 1 MB |