Installing the Web Widget
After you sign up for the CINNOX service, a provisioned JavaScript code snippet includes your CINNOX Subdomain, and other pre-filled parameters are automatically generated.
Subdomain refers to the login URL or instance used to access your CINNOX service.
You can immediately add the CINNOX widget or use its click-to-action (CTA) features (i.e., Click-to-call or Click-to-chat buttons) on your website.
- Widget - a widget, i.e., a small application interface, located at the bottom of a web page that lets your customers or visitors immediately interact with your business through call or chat.
- Click-to-call - a CINNOX widget feature that automatically calls a specific Tag or Staff member whenever a customer or visitor clicks on a web object, i.e., a button, a text, an image, or an icon.
- Click-to-chat - a CINNOX widget that automatically launches a chat room for a specific Tag or Staff member whenever a customer or visitor clicks on a web object, i.e., a button, a text, an image, or an icon.
Here is a step-by-step guide for:
- Implementing and displaying the CINNOX widget
- Adding CINNOX widget and CTA buttons
- Hiding or turning off the widget and using the CTA buttons
🚧
Your website needs to have an SSL certificate for secure HTTPS connection to enable CINNOX's call service.
Web Widget Installation Video Tutorial
This video tutorial will walk you through a step-by-step guide to the web widget installation covering everything you need to know. So sit back, relax, and let's get started!
Installing and Displaying the CINNOX Widget
- Log in to the CINNOX Dashboard using your subdomain and administrator account credentials.
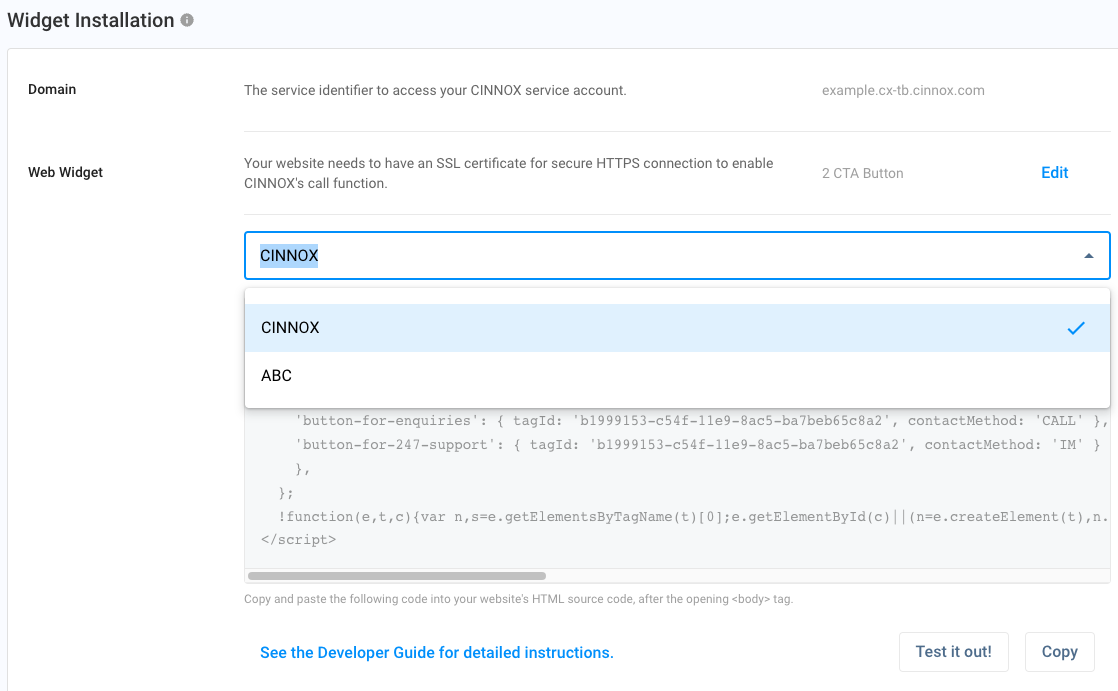
- Go to Administration > Widget > Installation to view the installation code enclosed in the snippet box.
- If you have created and set up multiple widgets, please select the Web Widget in the dropdown.
- Manually copy the widget code from the snippet box from start to end by clicking the Copy button.
- Paste the widget code into the HTML source code of your web page right after the opening
<body>tag on every page where you want the CINNOX widget to appear. - Save, publish, and reload your web page.
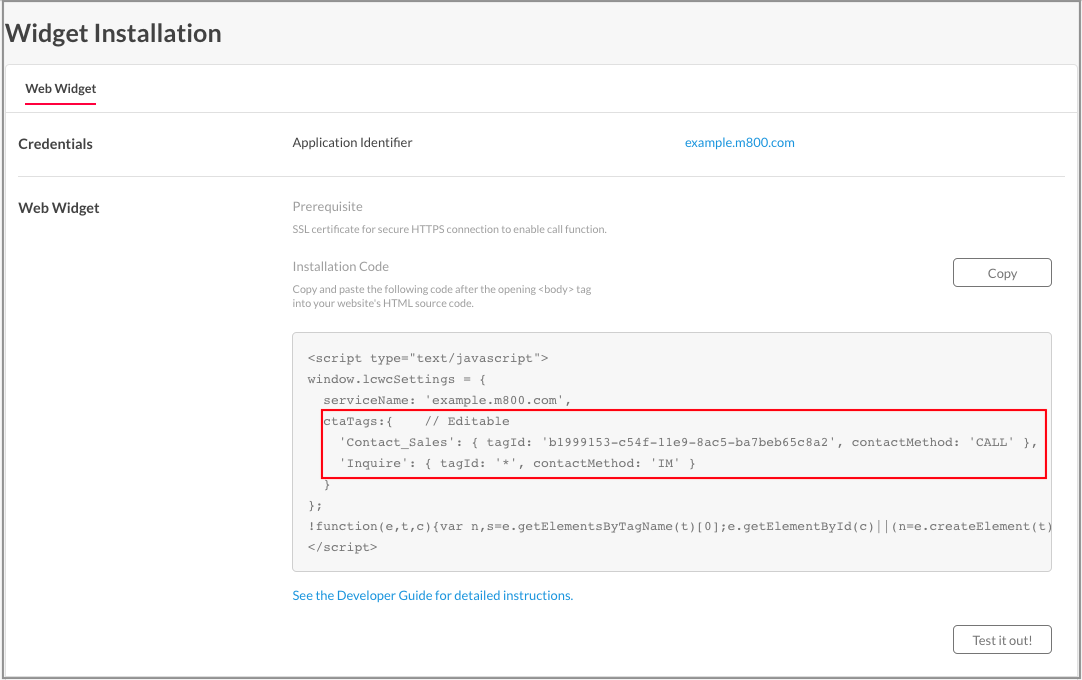
Widget Installation code
👍
Clicking Test it out! will open a demo page that will show you how exactly the widget and the tags in the Directory will look like on your actual website. This will help you fix any issues before it goes live and is seen by your visitors and customers.
</> Code Snippet Parameters
Web Widget Code Snippet
<script type="text/javascript">
window.mcwcSettings = {
  serviceName: 'YOUR_SERVICE_NAME_HERE',
  ctaTags:{    // Editable
    'YOUR_TRIGGER_ELEMENT_ID':'TAG_ID'
  }
};
!function(e,t,c){var n,s=e.getElementsByTagName(t)[0];e.getElementById(c)||(n=e.createElement(t),n.id=c,n.defer=!0,n.src="https://mcwc.mc.cinnox.com/mcwc/mcwc.js",s.parentNode.insertBefore(n,s))}(document,"script", "mcwc-sdk");
</script>
HTML
<body>

  //Place the CINNOX installation code right after the opening body tag
  //... Your website's source code ...

</body>
👍
Paste the script right after the opening
<body>tag.
The CINNOX floating widget should appear at the bottom-right corner of the page.
CINNOX Widget
Adding Click-to-Action (CTA) Buttons
A CTA button is an HTML5 button in your website that you can configure to trigger the following actions in the CINNOX web client without clicking on the widget:
- Open the CINNOX Directory
- Make a call or chat enquiry to a particular tag
Below are live examples of CTA links, buttons, and icons. Try clicking on them to see how it works:
Trigger the Directory
Have Questions?
Trigger the Chat function of a Tag
Chat with Us
Trigger the Call function of a Tag
Talk to an Expert
To add a CTA button:
- Log in to the CINNOX Dashboard using your domain URL and login credentials.
- Go to Administration > Widget > Installation to view the installation code enclosed in the snippet box.
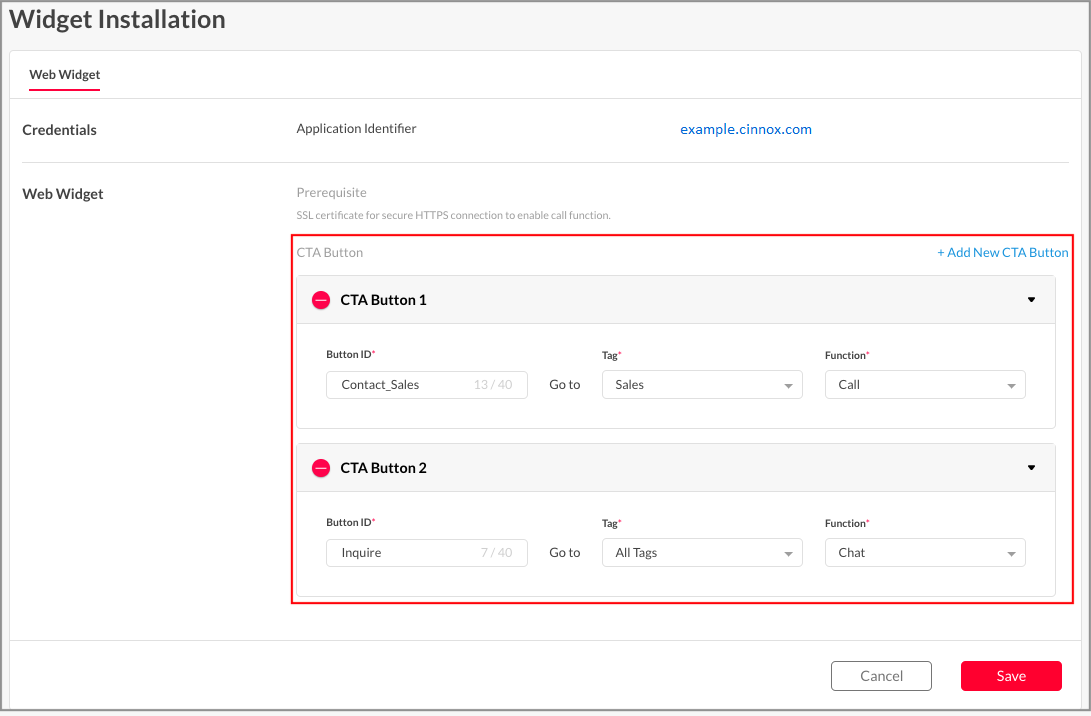
- Click the Edit button, then click on + Add New CTA Button.
- Enter a Button ID. This should match the button ID defined in your HTML code.
- Select the Tag and Function the CTA button will be associated with. All created tag(s) will be available in the Tag dropdown list.
- If you select All Tags, the CTA button will open the widget Directory.
- If you select a particular Tag and Function, the CTA button will call or chat about that tag.
Add CTA Button
📘
The Button ID is the HTML element's ID that you want to have the trigger effect. Therefore, by setting this ID to your HTML element, you can trigger CINNOX any way you want, i.e., through buttons, images, texts, or even videos.
Make sure that your Tag setting is enabled with the same function as your CTA. Refer to How to Create New Tags section of our User Guide for more details.
- Click on Save.
- Manually copy the widget code from the snippet box from start to end. Click the Copy button to copy the code snippet automatically.
- Paste the widget code into the HTML source code of your web page right before the closing
</body>tag. - Apply the CTA trigger by putting the same Button ID to the element you want to trigger:
CTA Triggers
<button id='elementID'>Talk to Us</button>  // A button
<text id='elementID'>Find an Expert</text> // A Text
<image id='elementID'>Find an Expert</image> // An Image
<span id='elementID' class='fa-happy-face' ></span> // An icon- Save and reload your web page.
- The CINNOX floating widget should appear at the bottom-right corner of the page.
- When clicked, the elements (buttons) should be functional with a call or chat function.
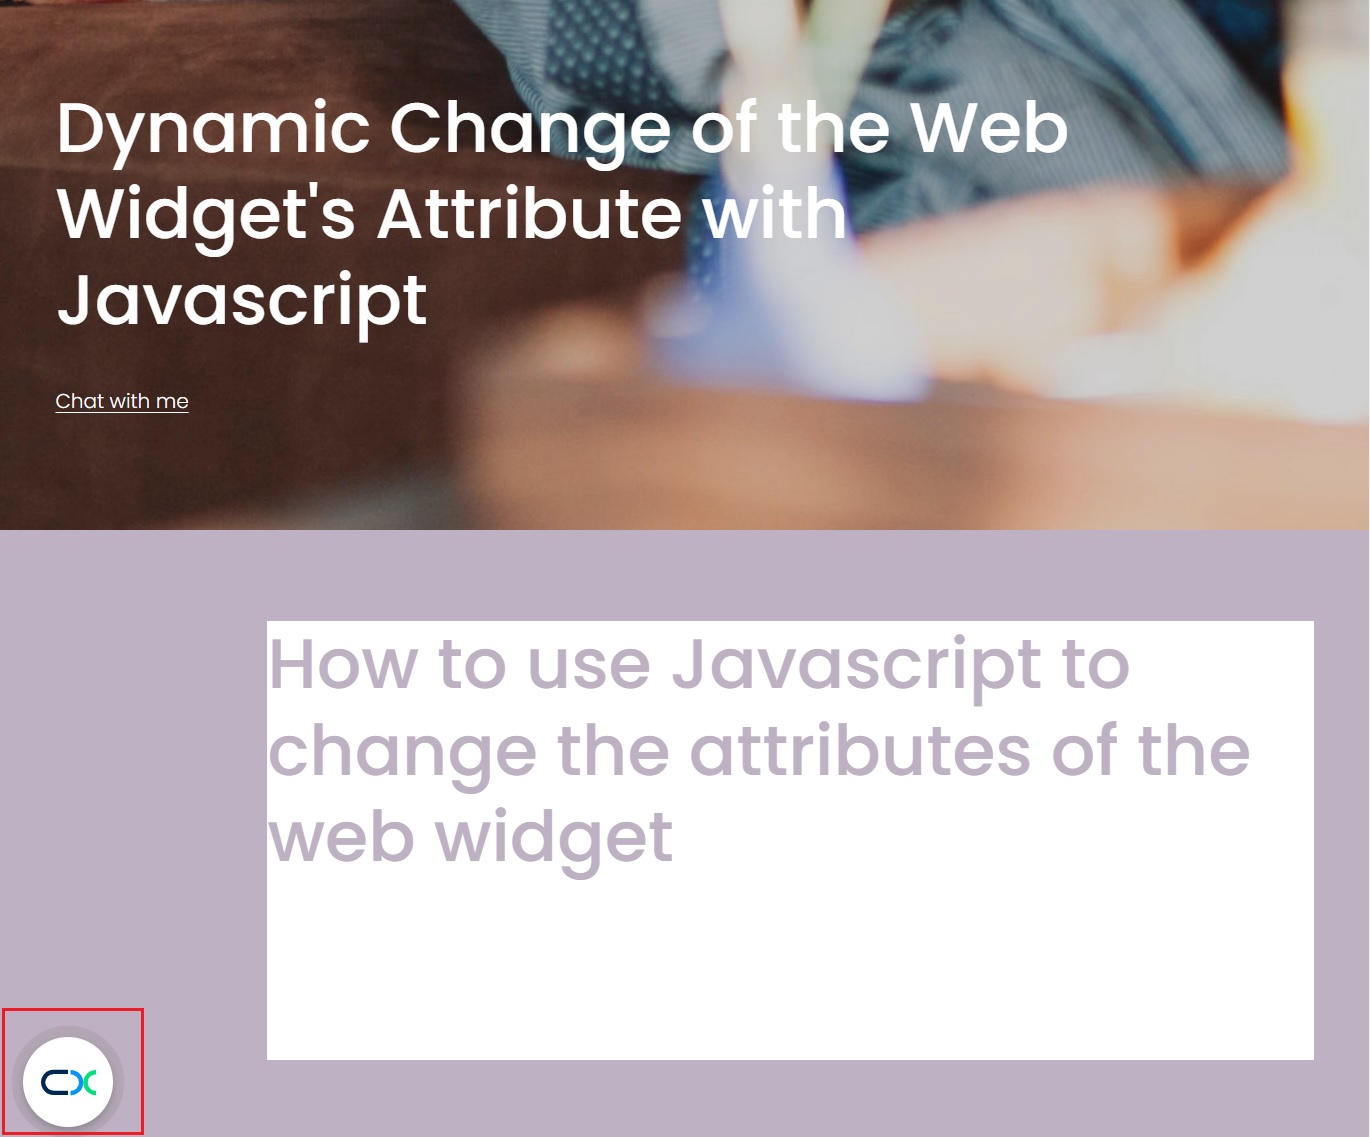
Dynamic Change of the Installed Web Widget's Attribute with Javascript
CINNOX allows you to change the attributes of the installed web widget, e.g. its position, visibility and language on your web page, using the CINNOX widget API framework.
How to change the attributes
After installing the Web Widget and completing the Widget initialisation, you can call window.onCinnoxReady function to change the Web Widget's attributes.
JavaScript
//After the installation code

window.onCinnoxReady = (cinnox) => {
	// Add the CINNOX Javascript Functions here
}
CINNOX Javascript Functions
| Functions | Description | Supported Value |
|---|---|---|
| cinnox.widget.setWidgetPosition(value) | To set the position of the installed widget displayed on the current page. | String * bottom-left * bottom-right |
| cinnox.widget.setWidgetDisplay(value) | To set the visibility of the installed widget displayed on the current page. | Boolean * true * false |
| cinnox.widget.setWidgetLanguage(value) | To set current widget display language. Precondition is that you have enabled the targeted languages in the language setting, otherwise, it will fall back to the default language set in Dashboard. Detail in here | String * en * zh-hant * zh-hansThe full list of supported languages is here |
The complete example of the installation code below shows how to set your widget to the bottom left or force the page to hide the installed web widget on the current page:
JavaScript
<script type="text/javascript">

//Your widget installation code first
window.mcwcSettings = {
	serviceName: 'YOUR_SERVICE_NAME_HERE'
};
!function(e,t,c){var n,s=e.getElementsByTagName(t)[0];e.getElementById(c)||(n=e.createElement(t),n.id=c,n.defer=!0,n.src="https://mcwc.mc.cinnox.com/mcwc/mcwc.js",s.parentNode.insertBefore(n,s))}(document,"script", "mcwc-sdk");

//After the installation code, you can call the CINNOX widget API framework to customise the experience
window.onCinnoxReady = (cinnox) => {

  //You can call the javascript function below with the expected parameters

  //Example A, this code will set your web widget to the bottom left on the current page
  cinnox.widget.setWidgetPosition('bottom-left');

  //Example B, this code will force your current page to hide the installed web widget
  cinnox.widget.setWidgetDisplay(false);

  //Example C, this code will force your current page to change the web widget language
  cinnox.widget.setWidgetLanguage(‘zh-hans’);

}
</script>
After the function"cinnox.widget.setWidgetPosition('bottom-left')" is called, the web widget is installed at the bottom left of the page.
👍
CINNOX widget API framework provides flexibility to the position of the Web Widget on the web page, avoiding blocking visibility of the important content on the web page, especially when the screen's smaller size is detected on various devices.
Display only the Tags with Matched Conditional Trigger
If you have multiple websites and need to install the widget with different tags while avoiding the display of default or general tags, follow these steps after integrating the installation code:
// After the installation code, you can call the CINNOX widget API framework to customise the experience.
window.onCinnoxReady = (cinnox) => {
cinnox.widget.directory.setDefaultTagDisplay(false);
}
This code snippet is valuable for assigning distinct tags to various websites without conditional triggers.
Hiding or Disabling the Web Widget
When CTA buttons work better on your web page, you can hide the latter without affecting the HTML CTA button.
To hide the CINNOX widget:
- Go to Administration > Widget > Customisation, then click Edit at the bottom of the page.
- Toggle the Widget Display button OFF.
- Click on Save.
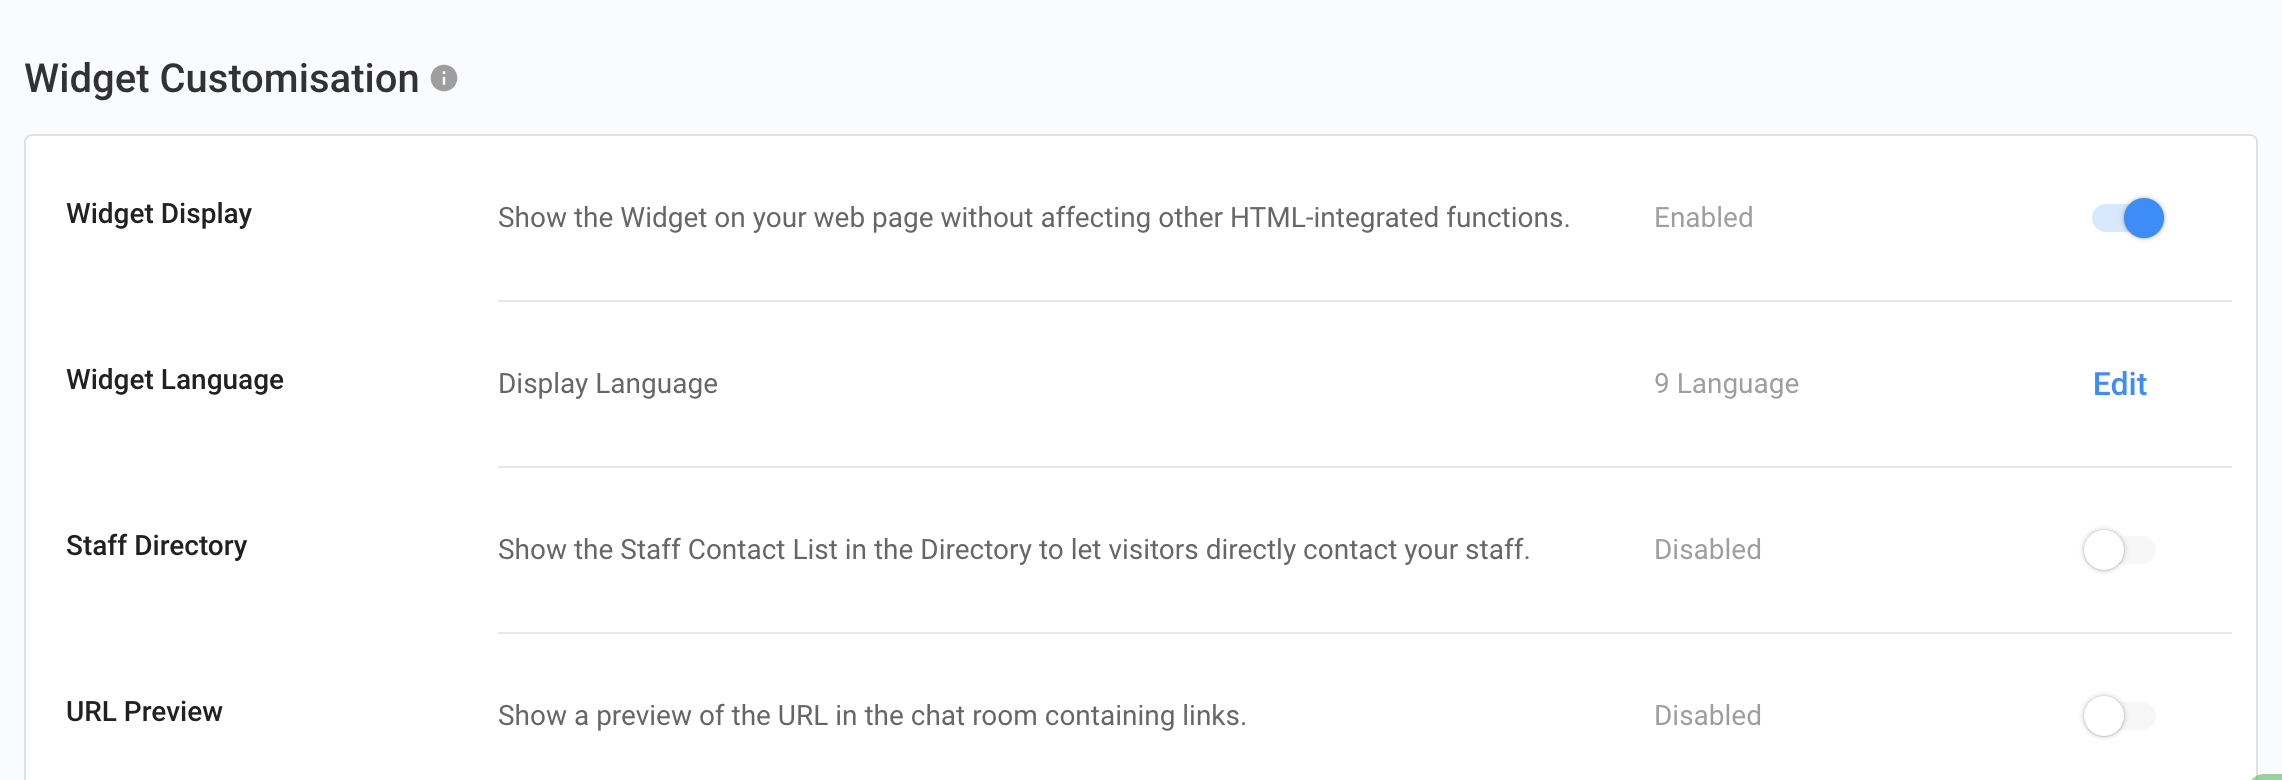
Widget Settings
📘
Any changes in the widget will take effect on the widget where it is installed.
To force remove the CINNOX widget from a web page:
- Delete the code snippet from the web page, then save and reload the page.
Note that this action will also affect any HTML CTA buttons enabled on the page.
For more information on configuring your CINNOX widget, refer to the Customising Your Widget section of this Guide.