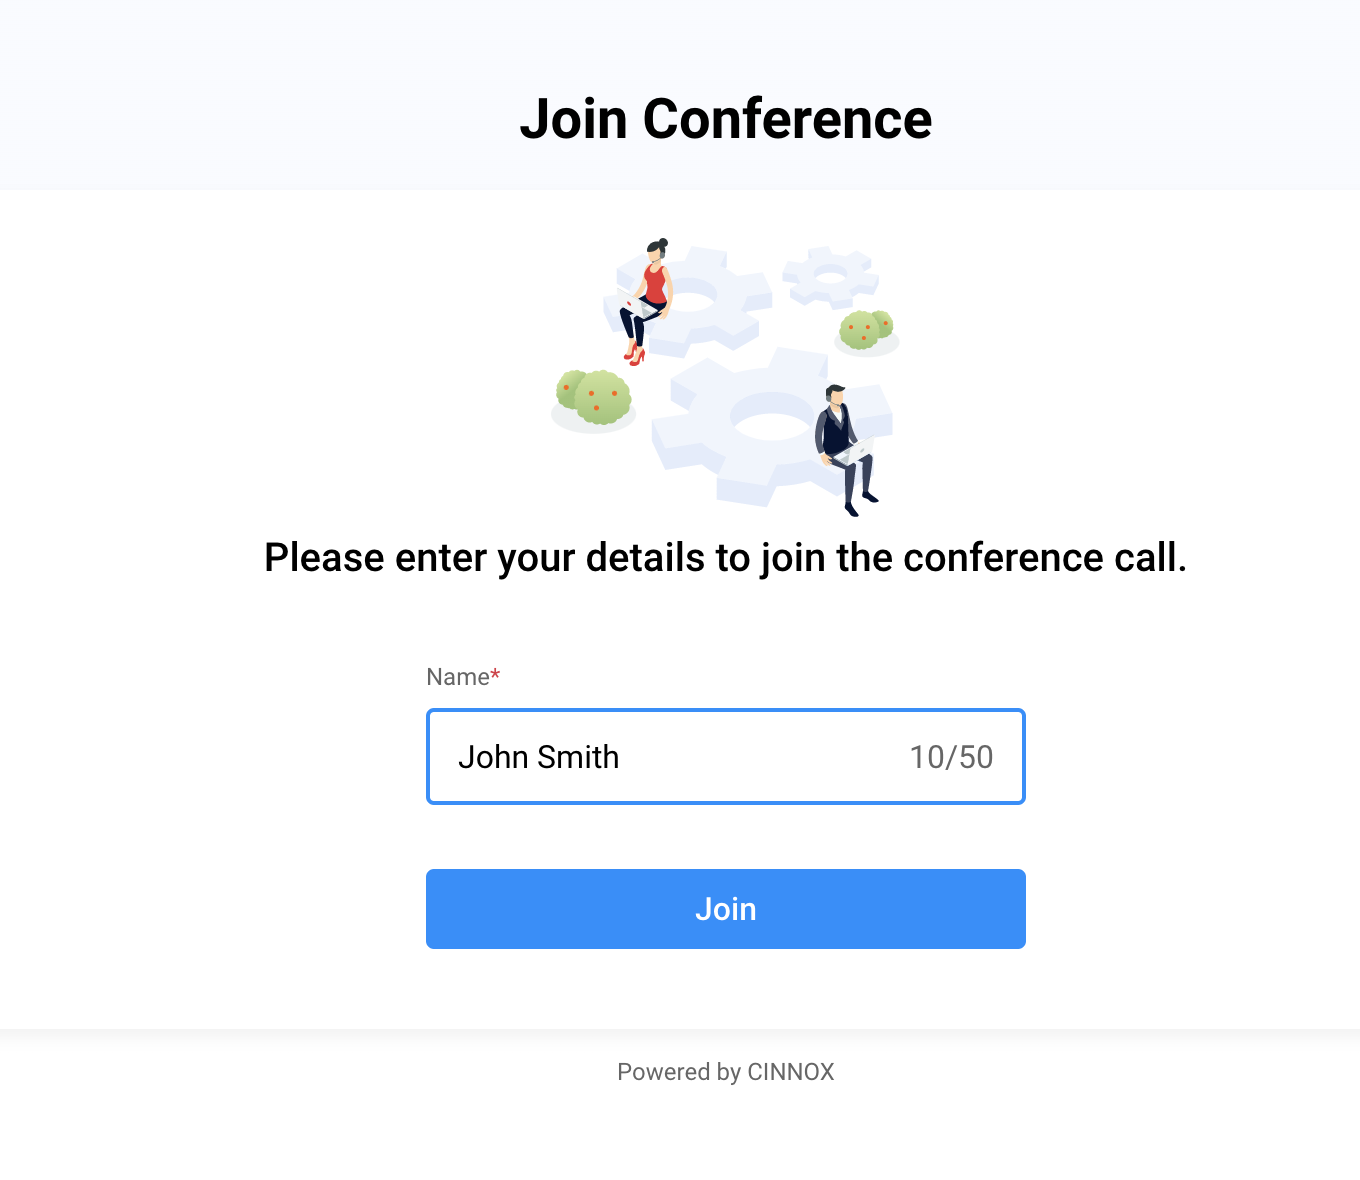
Schedule Conference Call
CINNOX Scheduled Conference lets you arrange a call in advance by setting the conference topic, start date and time, end date and time, adding the conference description and inviting participants to the conference with the calendar integration. After scheduling the conference, you can edit the conference details, immediately start the scheduled conference ahead of schedule and cancel the conference for your need.
Schedule a Conference
To schedule a conference:
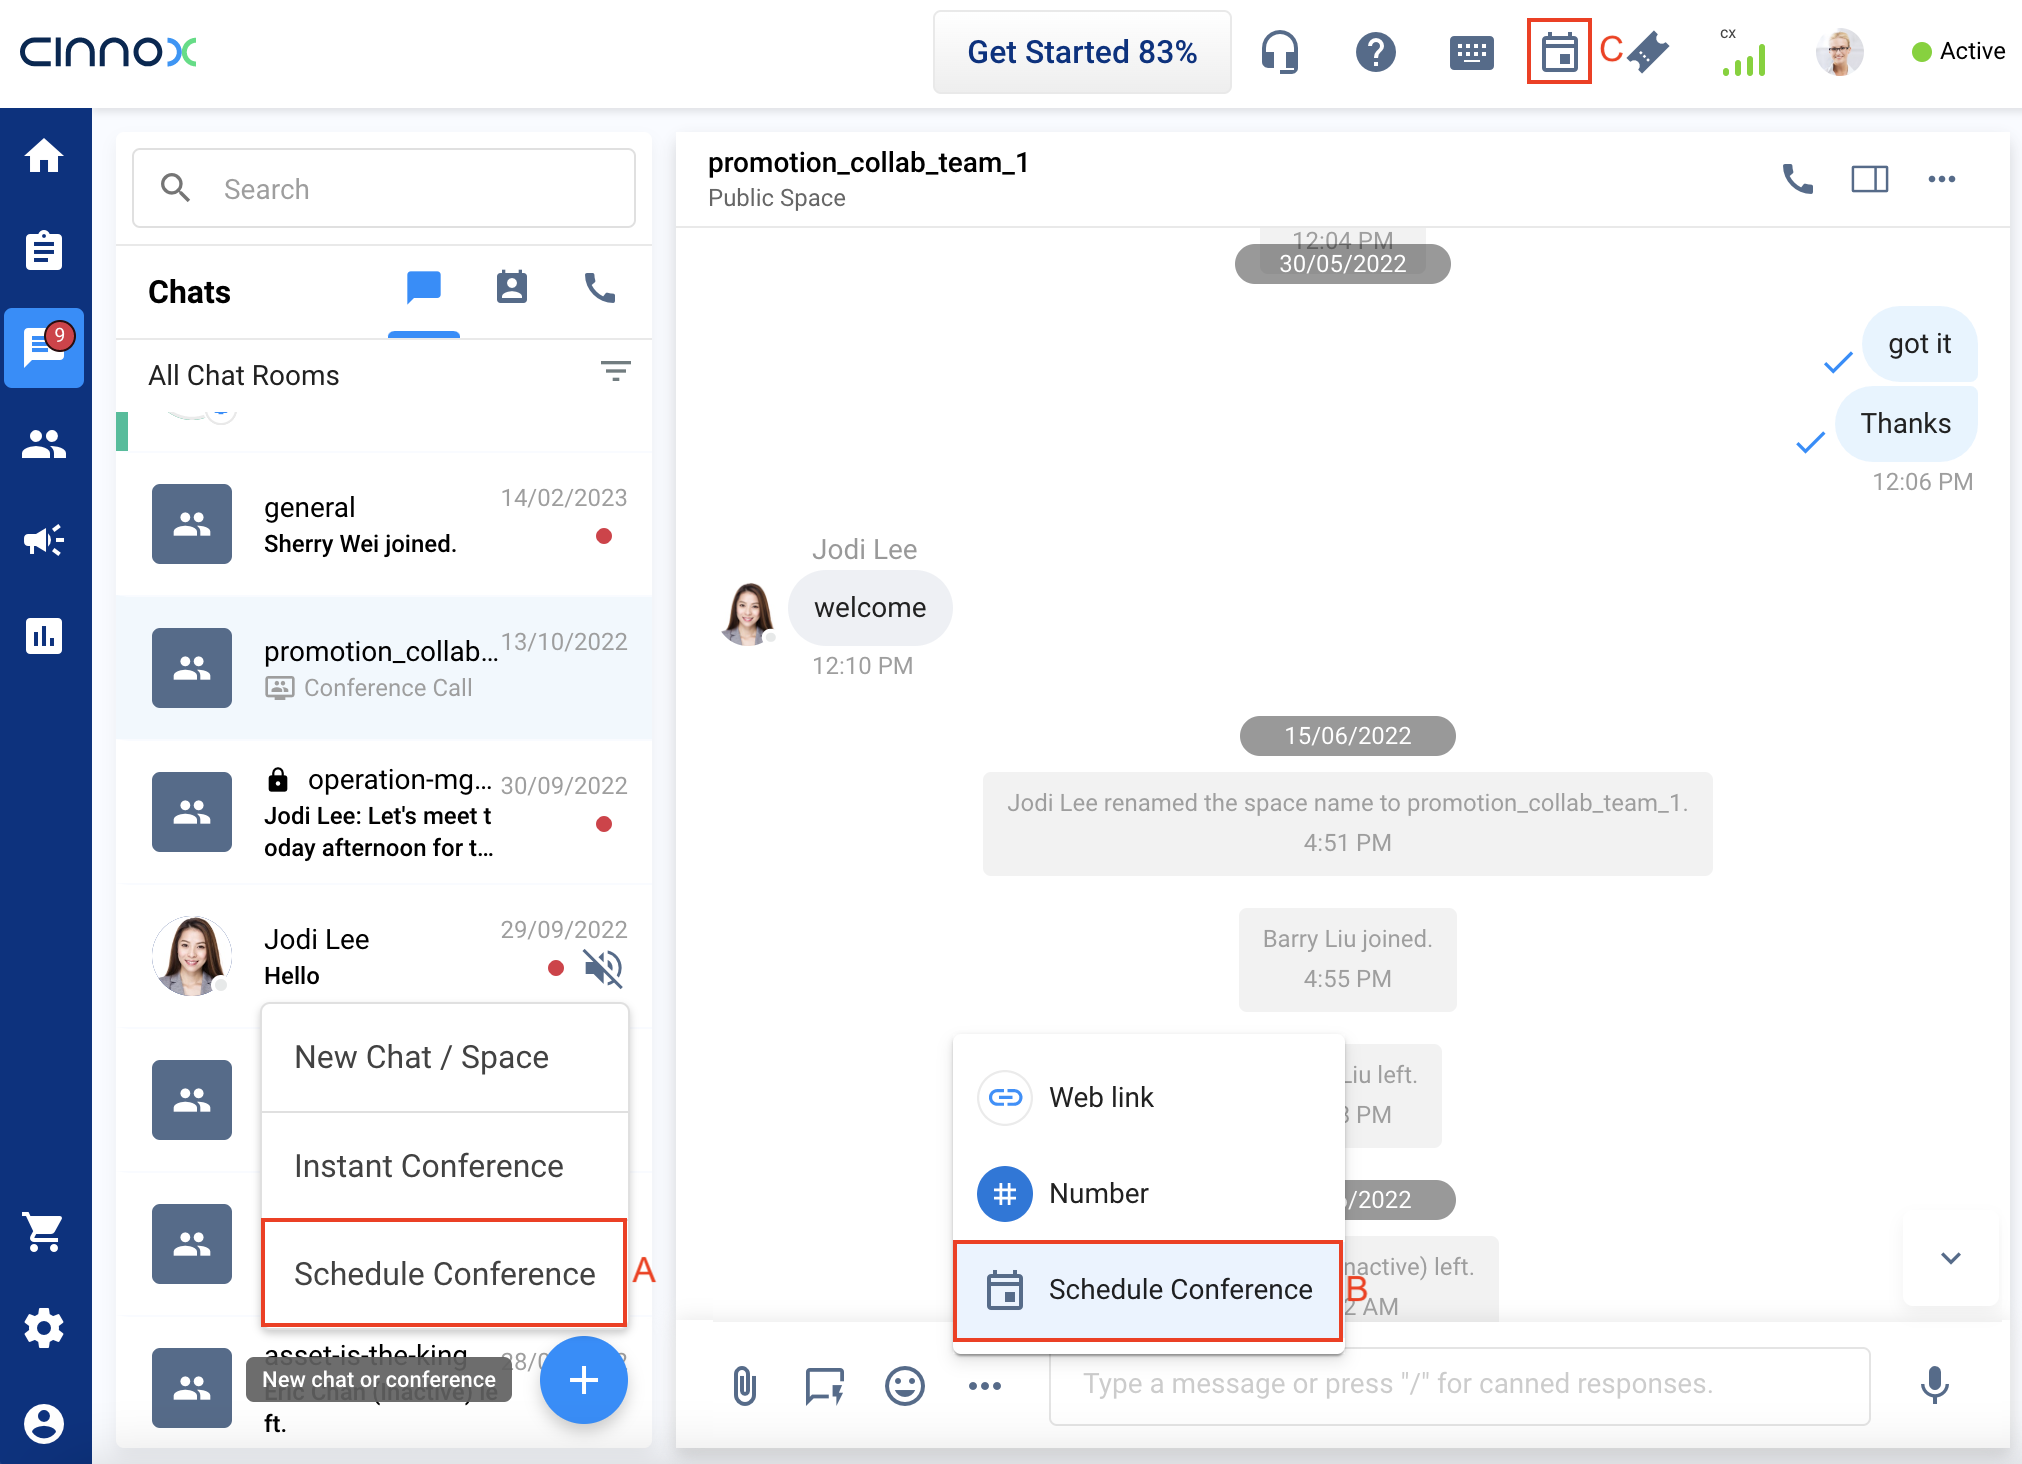
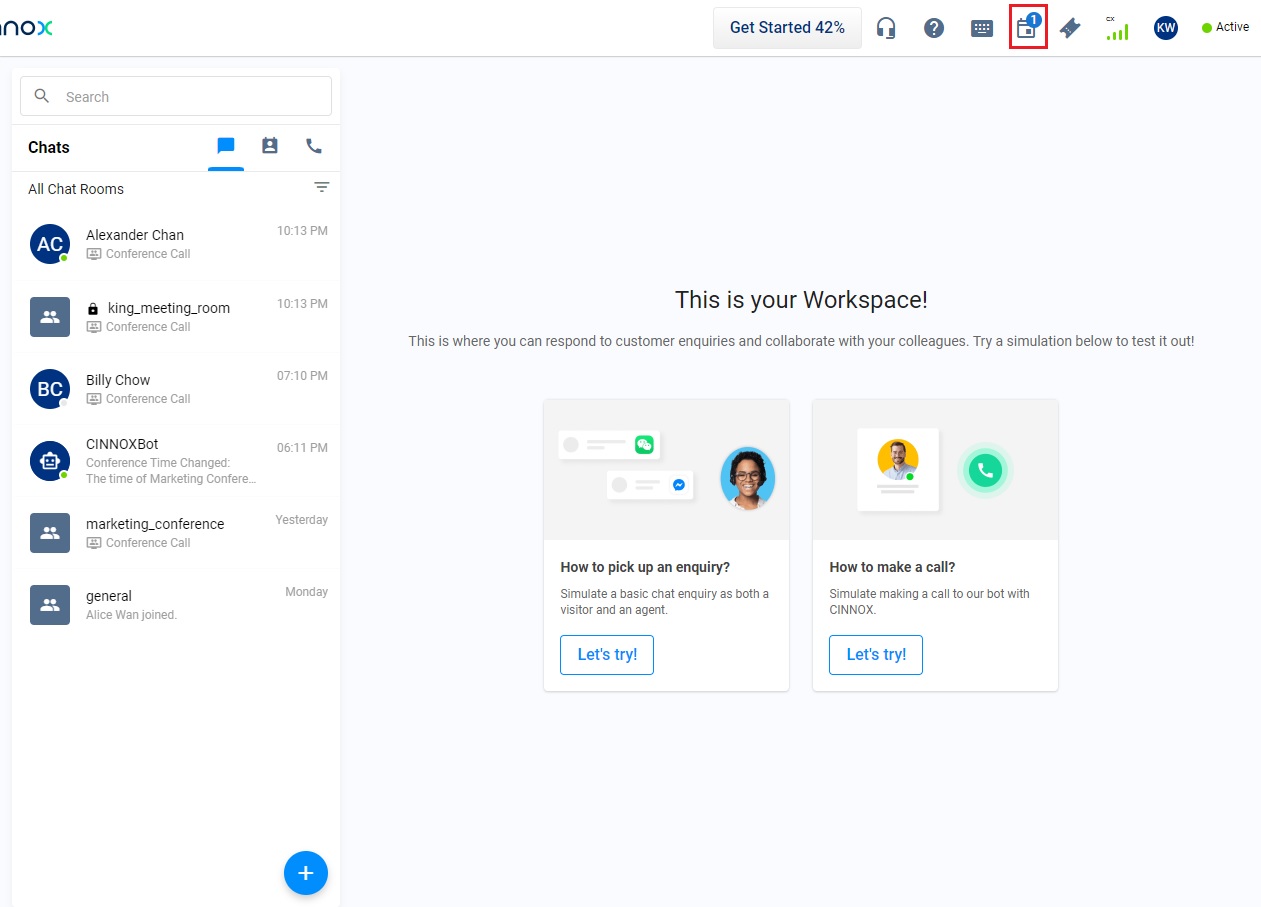
- Log in to your CINNOX Dashboard, then navigate to Workspace > Chats.
- The first option (A) is to click the + icon on the Chats section's bottom corner, then select Schedule Conference.
- Another option (B) is in the Recent Chat Rooms.
- Enquiry chat room with your visitor
- 1-1 chat room with your colleague
- Private or public group spaces with your team
- Click the 3-dot menu ... beside the input bar, then select Schedule Conference. The conference details will be sent directly to the chat room, and members in the Space can join, add themselves to the scheduled conference call and download the ICS file to add to their Calendar as a new event.
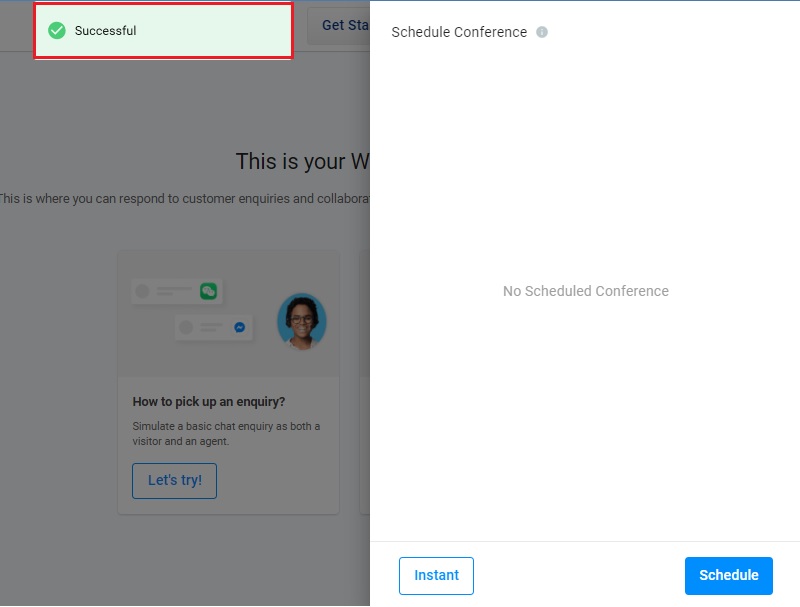
- Last Option (C), click the Schedule Conference icon on top of the Web Dashboard, then click Schedule.
- The Create Schedule panel will display coming from the left panel of the window.
Refer to our Mobile App -Scheduled Conference Guide on scheduling a conference call in the mobile app.
📘
Scheduling a Call with Calendar
Please be advised when scheduling a call with your Calendar.
- Sign in to your Outlook or Gmail Calendar first.
- If using Safari, disable the pop-up window blocker to ensure the Calendar opens in another tab.
- If selecting "Other Calendars," an ICS calendar file will be downloaded to your desktop.
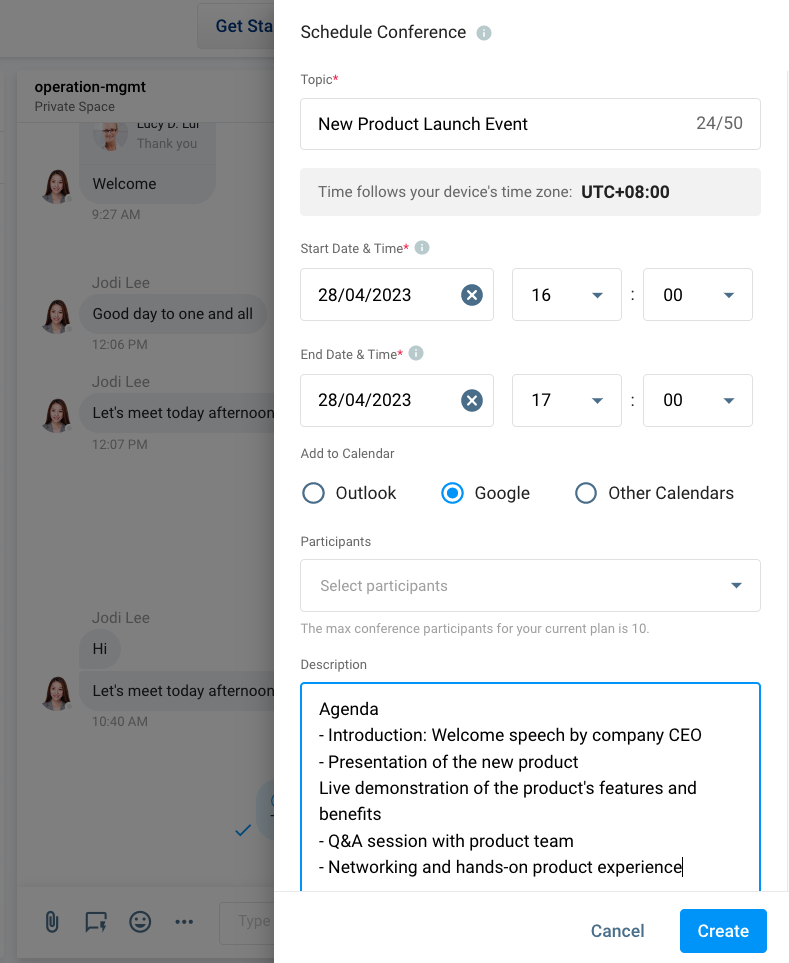
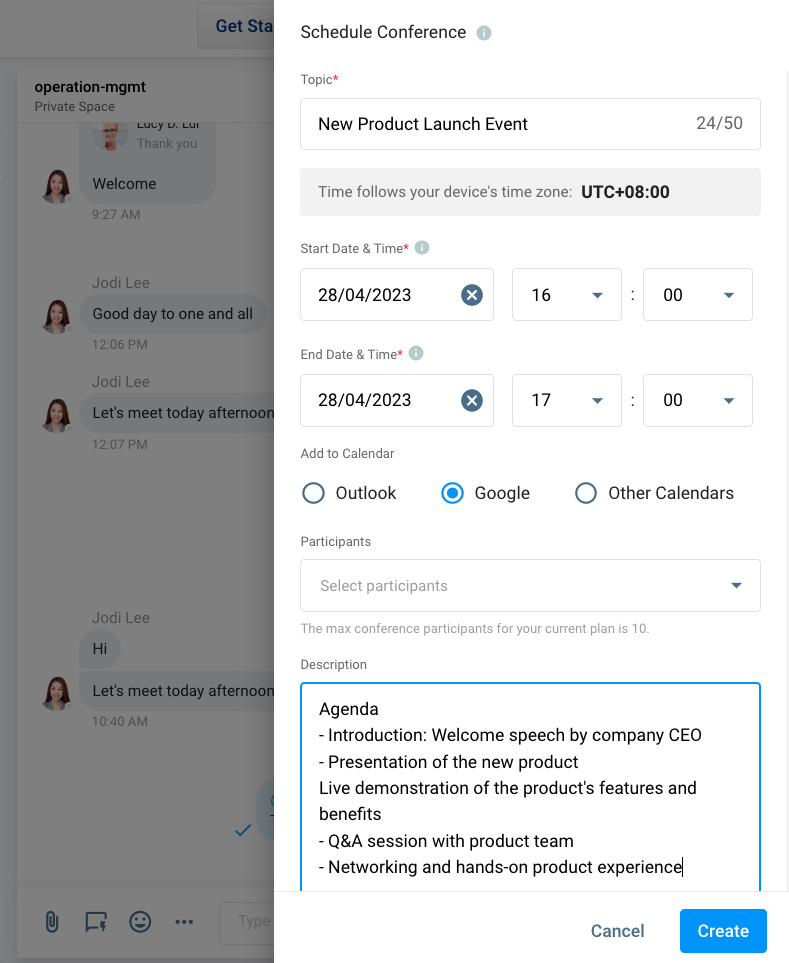
- Next, you must provide the following information on the Create Schedule Conference Page.
| # | Item Name | Description |
|---|---|---|
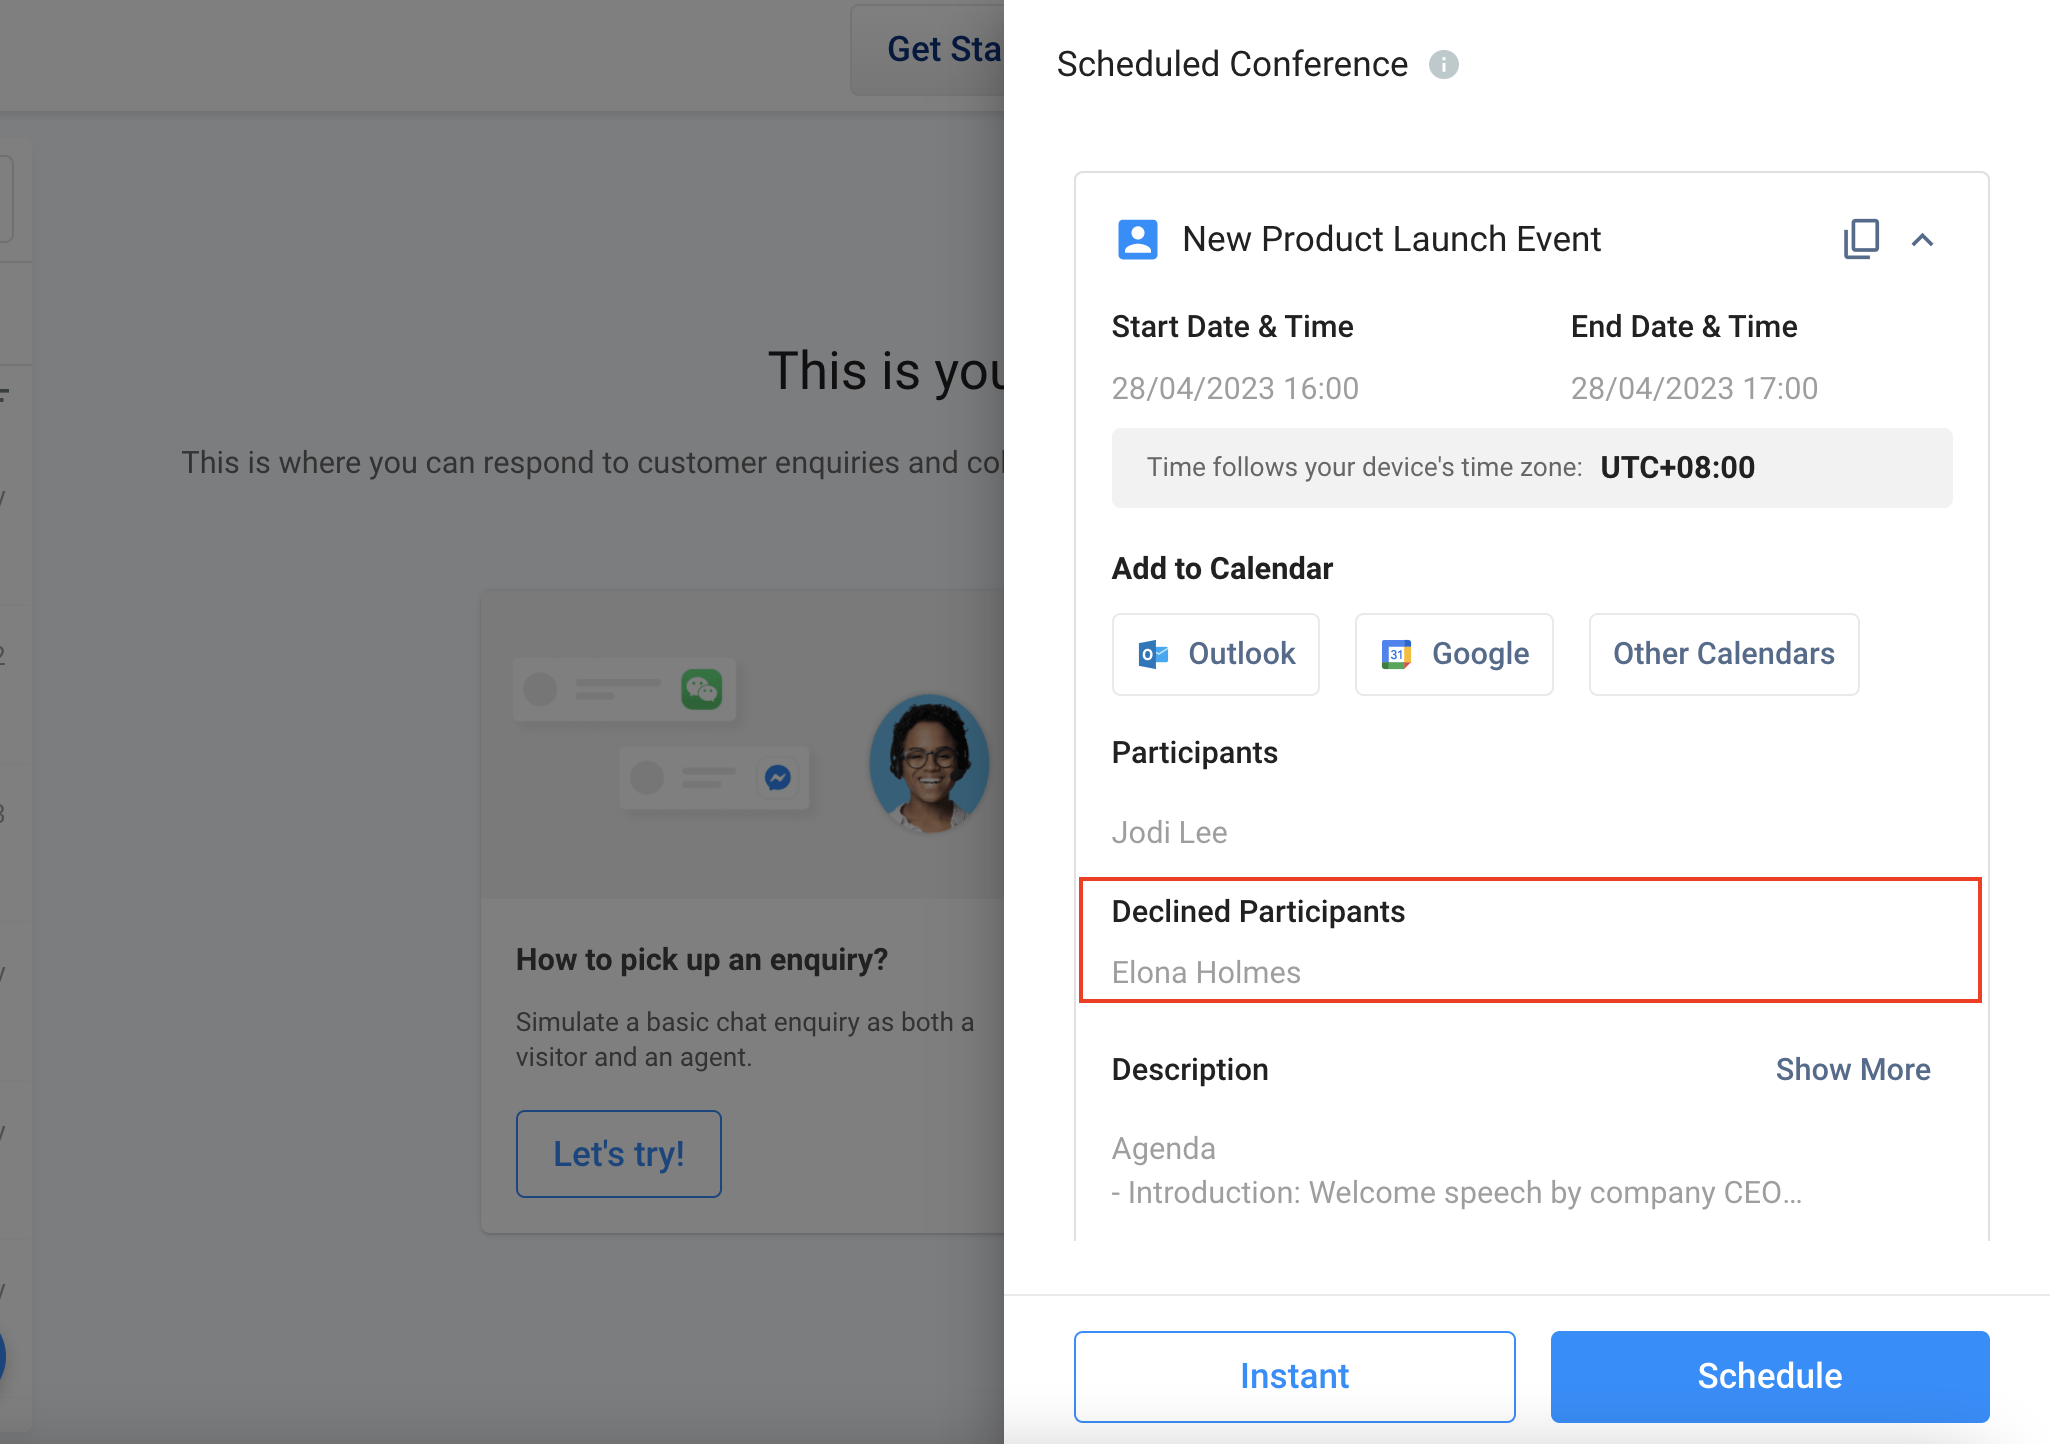
| 1 | Topic | Add the topic of your call. It is up to 50 chars. The default topic includes your (Staff Name's) and CINNOX conference. E.g., New product Launch Event |
| 2 | Start Date & Time | The pre-set Start Date & Time is the next o'clock of your current time. E.g., When you set the Start Time at 10:15, the pre-set Start Time will be 11:00 |
| 3 | End Date & Time | The End Date & Time is pre-set 1 hour after the Start Date & Time. While the End Date & Time will be 12:00 |
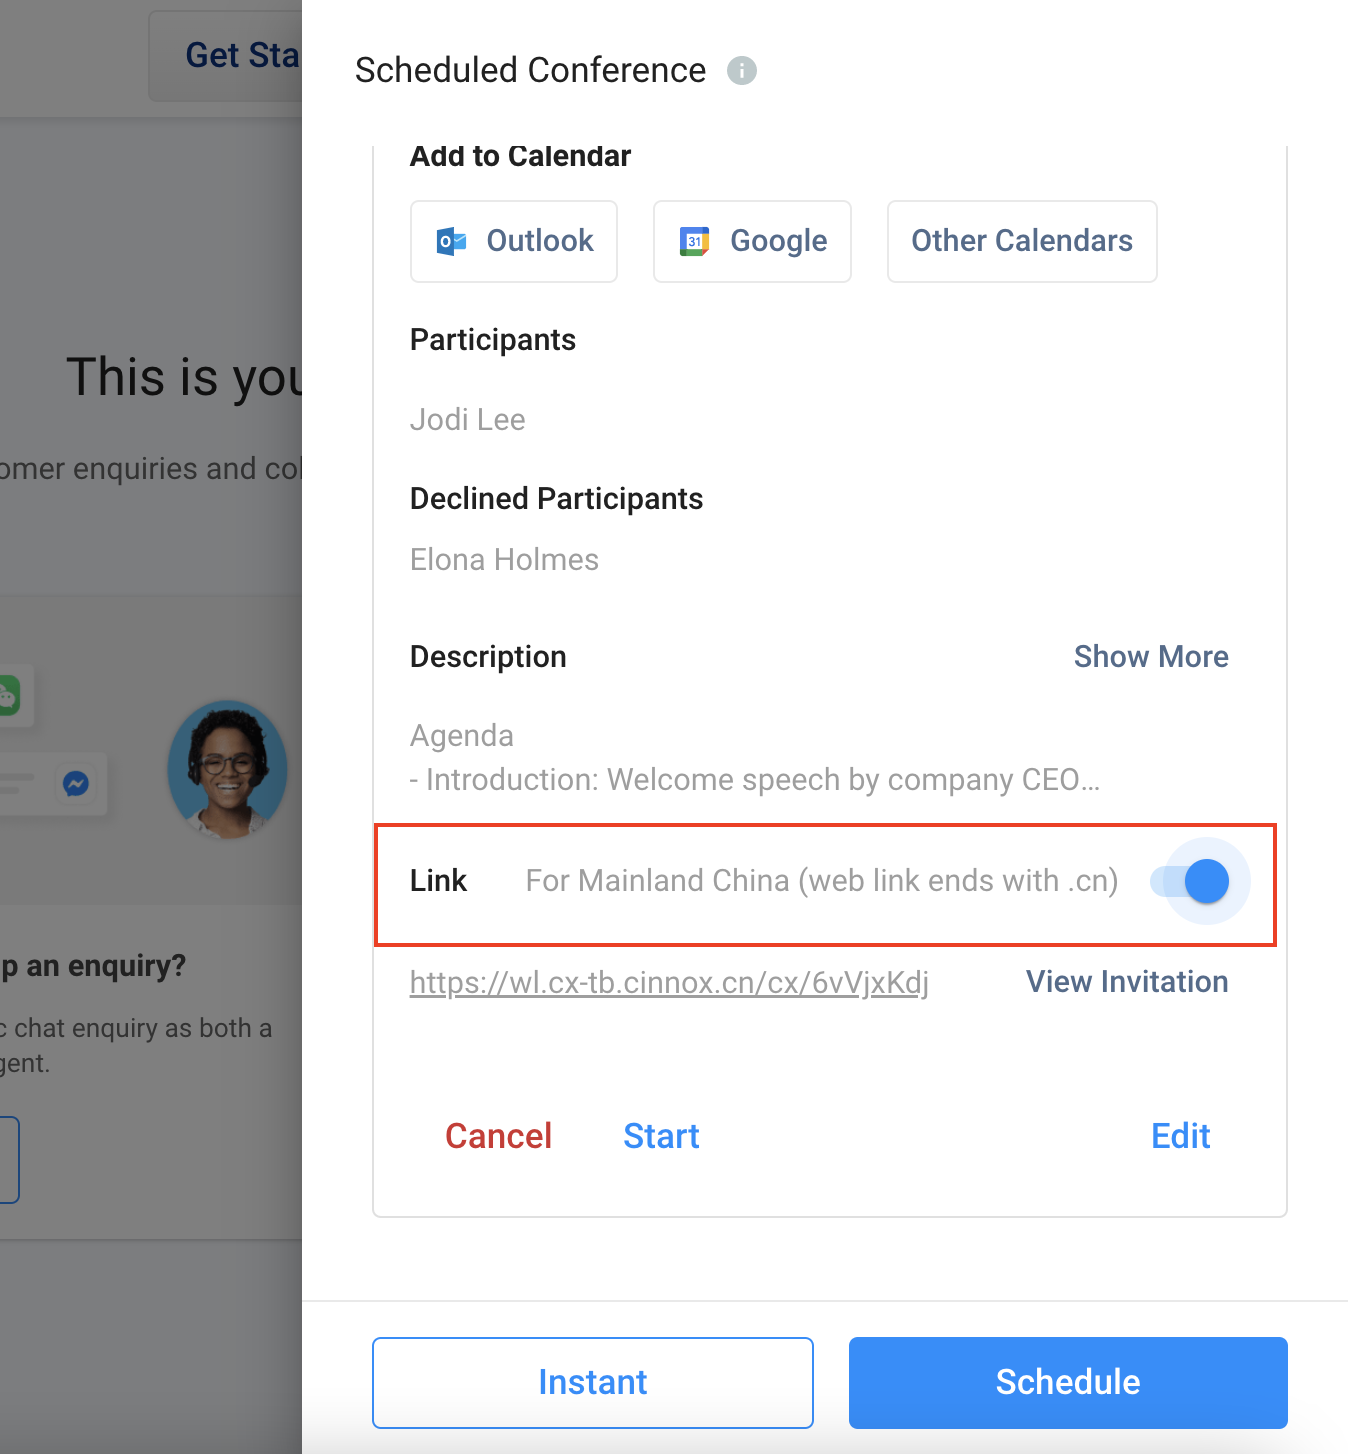
| 4 | Add to Calendar | Select the Calendar you want to use to send invitations to your participants. * Outlook Ensure you're logged into your Outlook Calendar to insert a meeting successfully * Google: Ensure you're logged into your Google Calendar to insert a meeting successfully. * Other Calendars: this will be an ICS file that you will need to download to your desktop, and you can share it in the chat room or other third-party apps. |
| 5 | Participants | Search to add your colleagues as your participants. The maximums number of participants to join your conference depends on your current plan. |
| 6 | Description | Add the agenda of your meeting,but optional. It is up to 500 chars. |
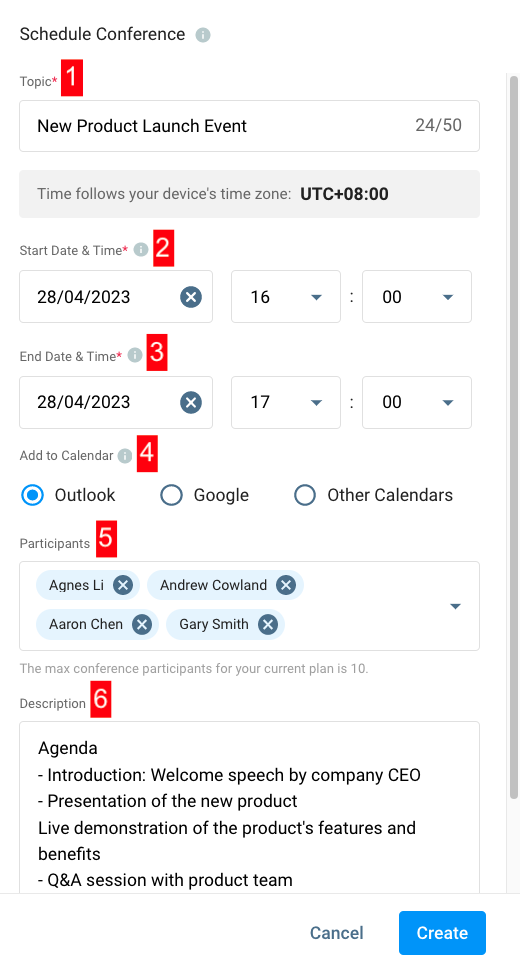
- If your Schedule Conference details are all set, click Create. The scheduled conference is created, and a toast message Successful will display.
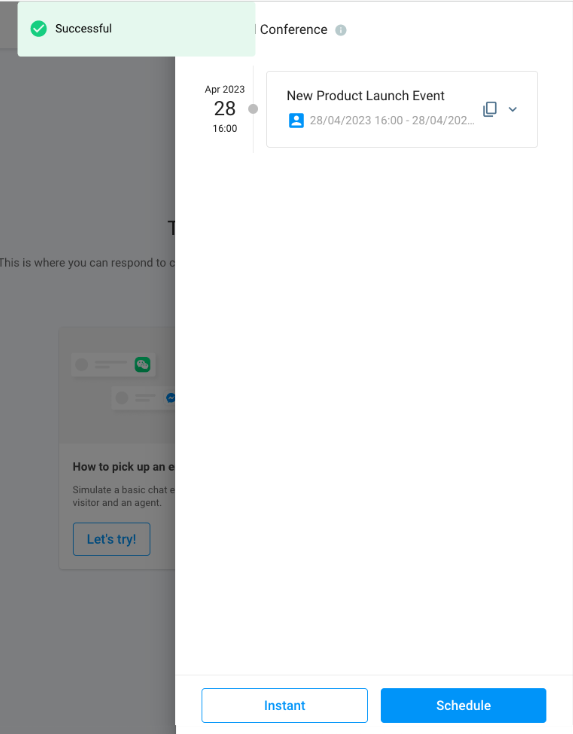
With Calendar
Another tab from your browser opened for your email calendar to create a new event in your Calendar. Please ensure you have signed in.
👉
If you have not signed in to your Outlook or Google Calendar account, another tab from your browser routes you to the sign-in page instead. Please sign in to proceed with adding the event to your calendar.
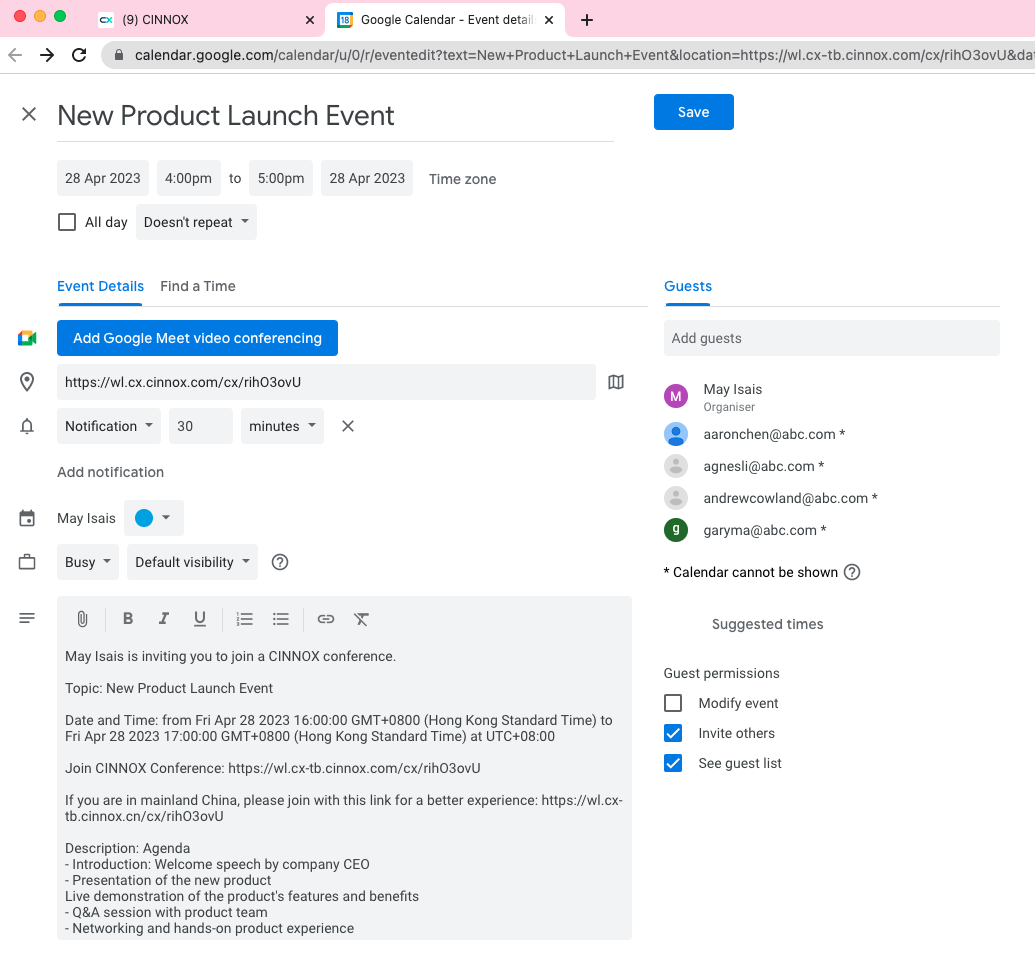
For OUTLOOK:
- CINNOX will create a new event for your Outlook Calendar; you can modify the invitation description if needed. Please ensure you have signed into your account. Otherwise, you will need to sign in before you can proceed.
- Click Send located at the top left corner.

Once successfully sent, a calendar invitation will be received by your participants.
For GOOGLE:
- CINNOX will create a new event for your GOOGLE Calendar; you can modify the invitation description if needed. Please ensure you have signed into your account. Otherwise, you will need to sign in before you can proceed.
- Click Save located at the top right corner.
FOR OTHER CALENDARS
- An ICS file that you will need to download to your desktop.
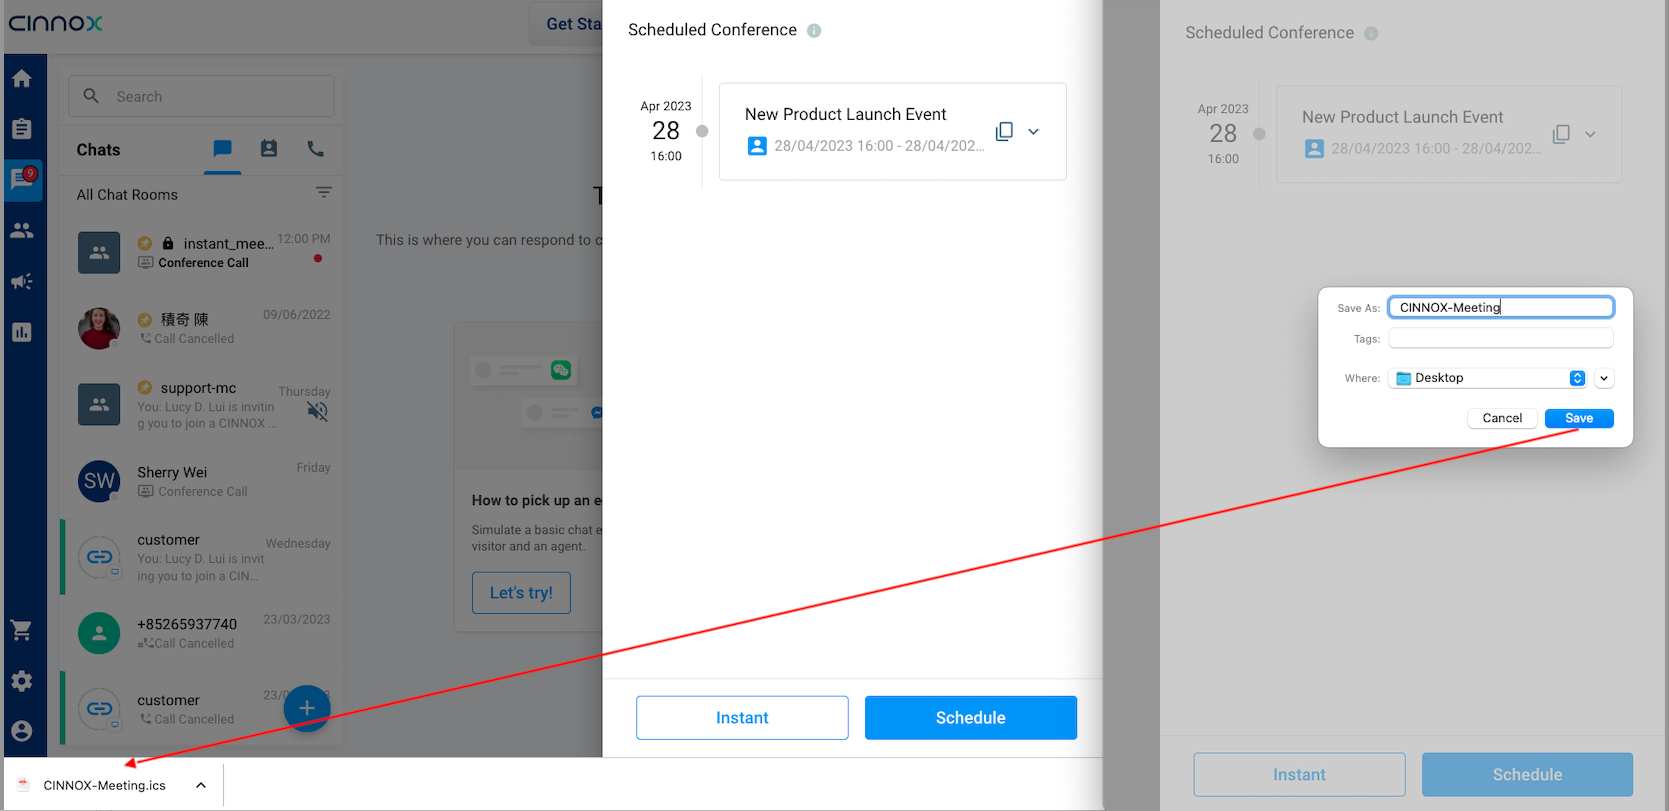
- Open the ICS and add it as an event to your Calendar, and you can attach it to the chat room or other third-party apps to share with your participants.
In the Recent Chat Room
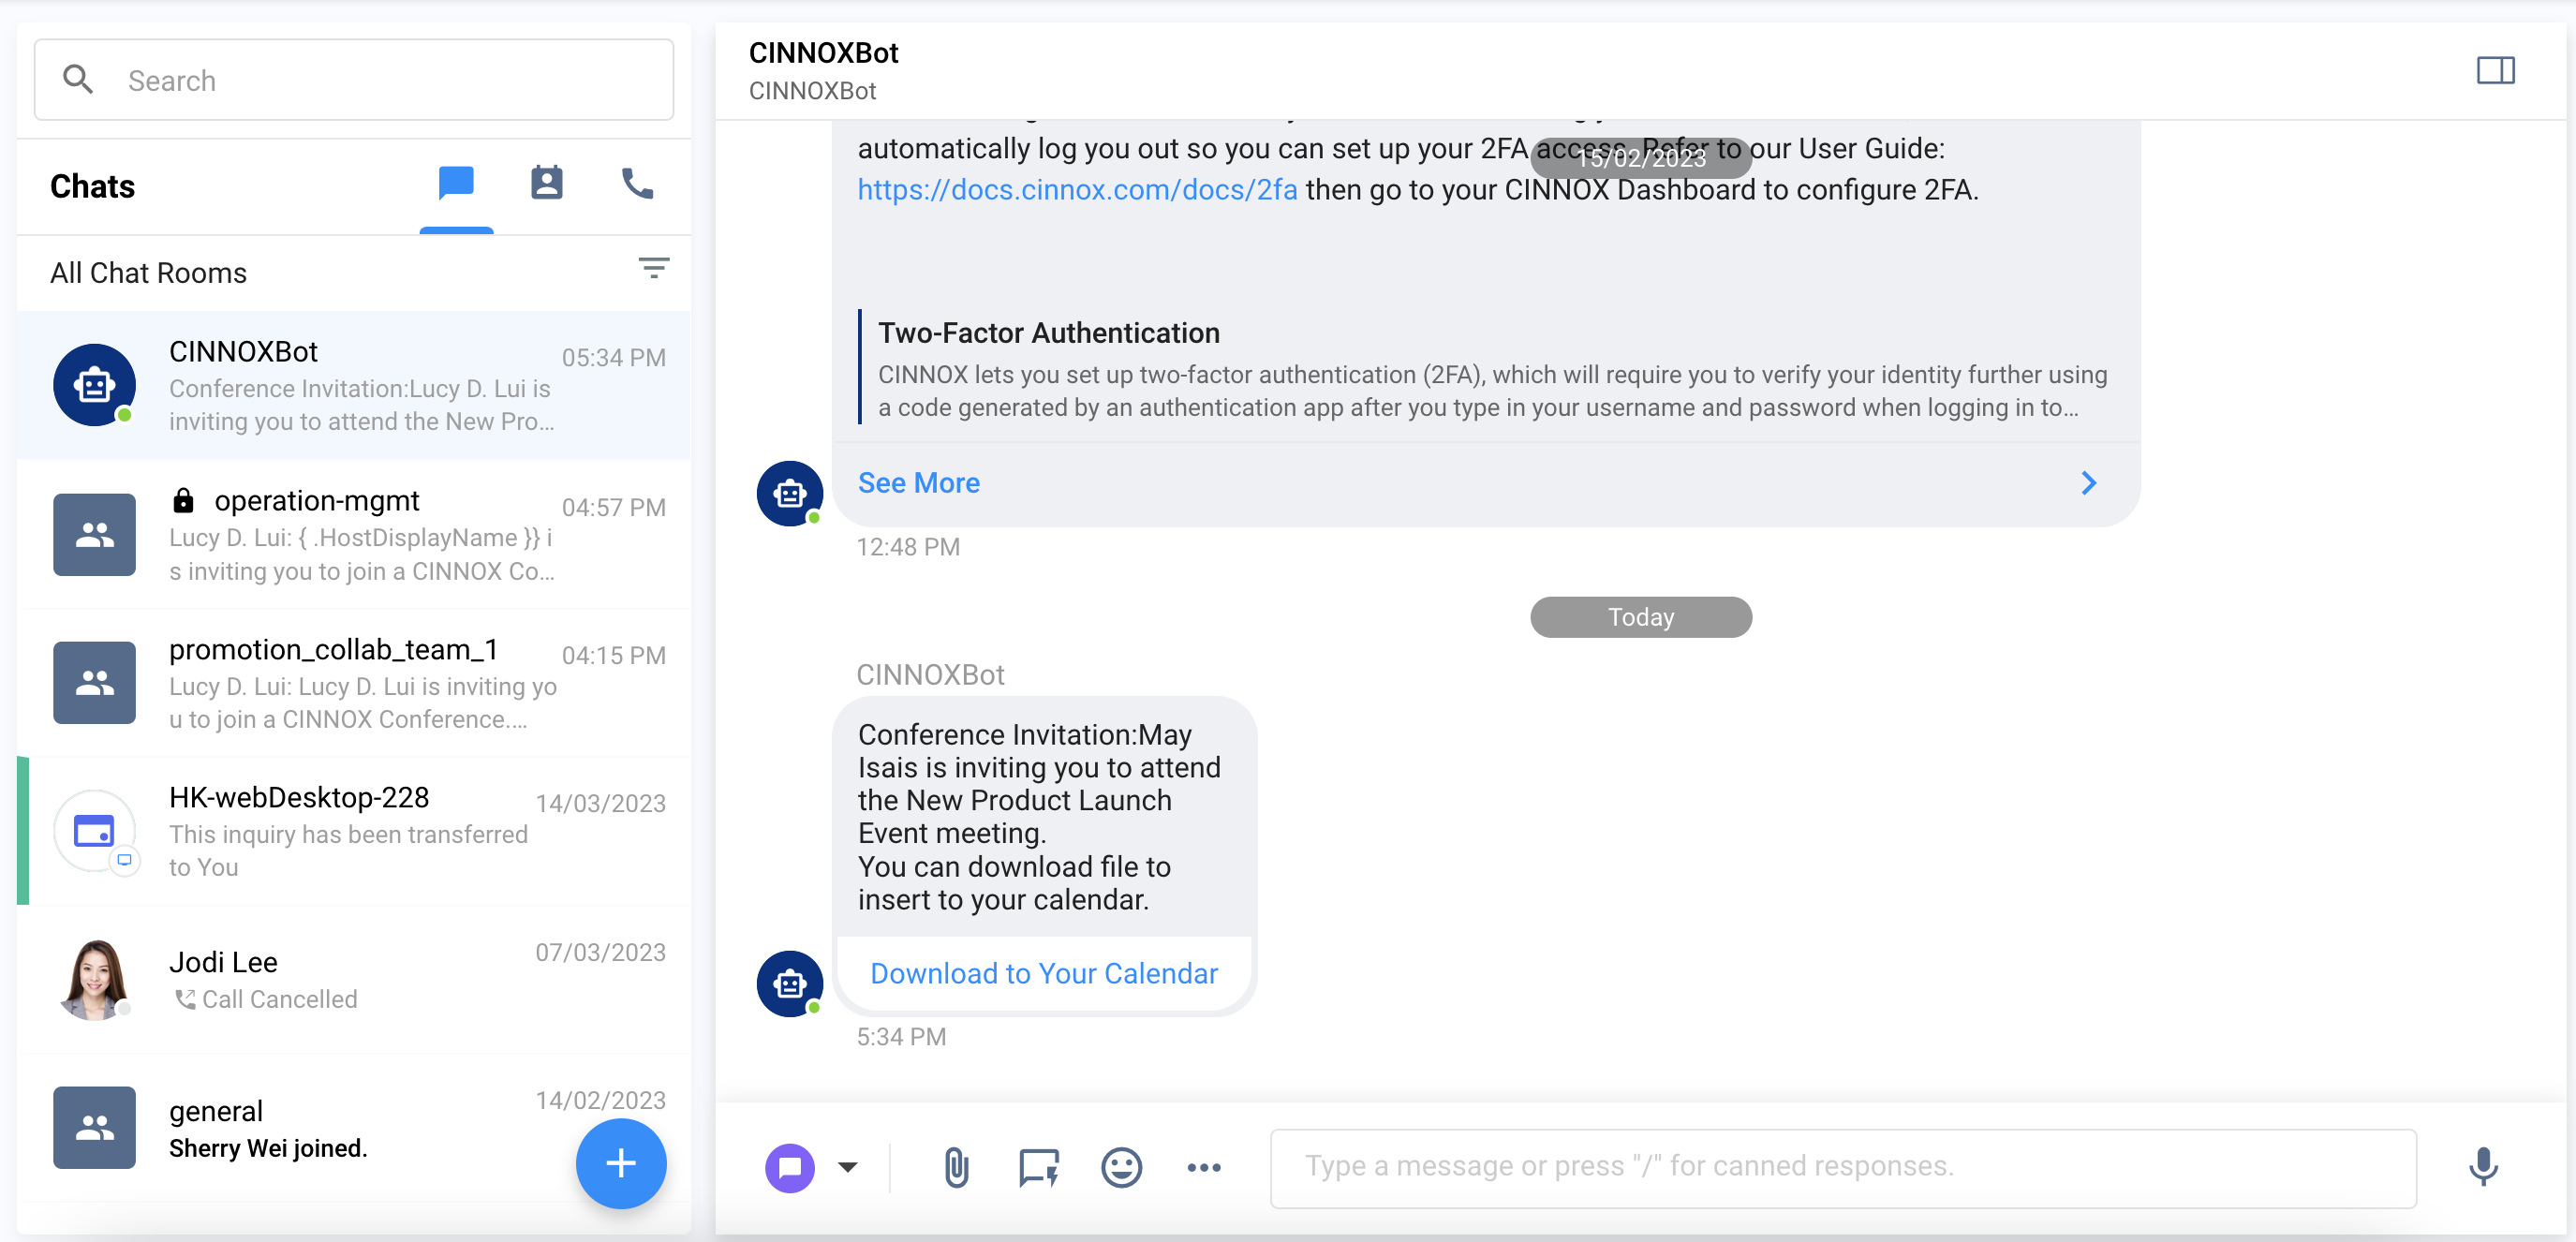
As mentioned above, you can schedule a call in your recent chat room:
- Enquiry chat room with your visitor
- 1-1 chat room with your colleague
- Private or public group spaces with your team
- Click the 3-dot menu ... beside the input bar, then select Schedule Conference. The Create Schedule panel will display coming from the left panel of the window.
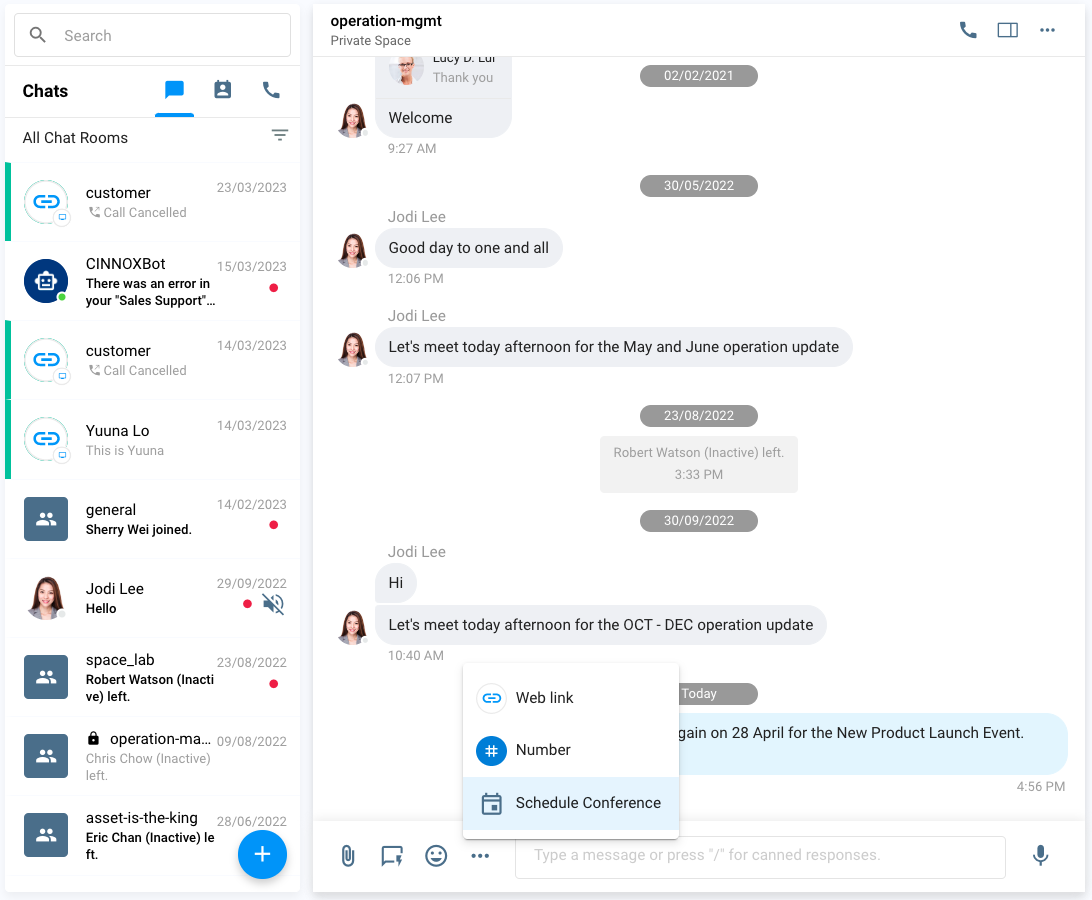
- In the Create Schedule, provide the information from the Topic down to Description (see above table create schedule conference specification).
- Click Create.
- The conference details will be sent directly to the chat room.
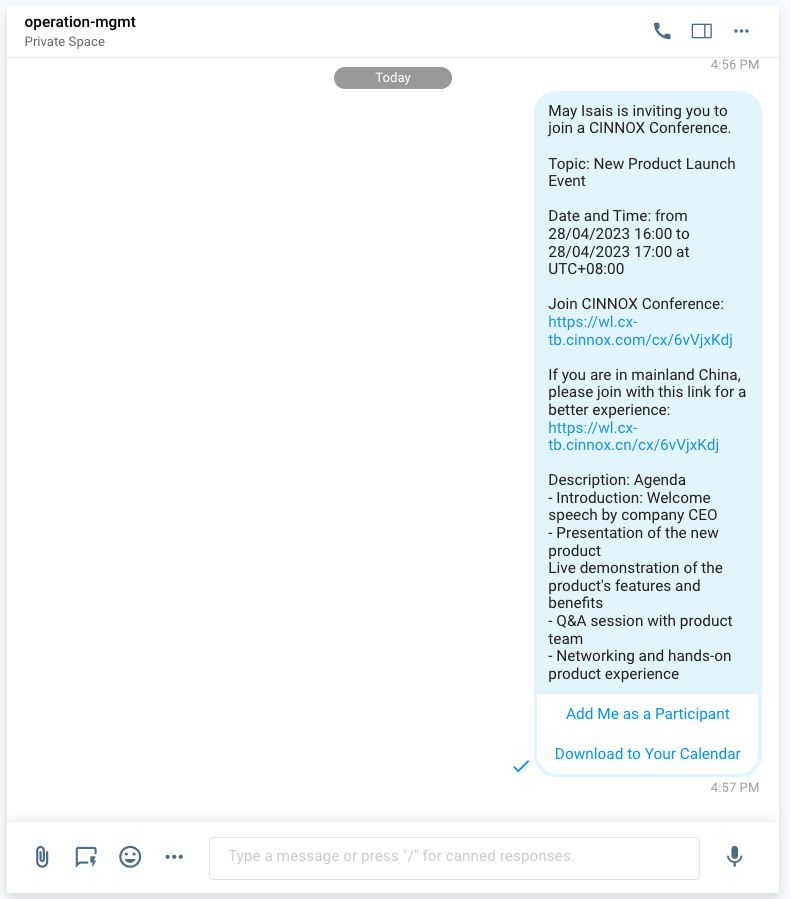
- Click Add Me as a Participant for the members in the Space to add themselves to the scheduled conference call by
- Click Download to My Calendar to download the ICS file to add to their Calendar as a new event.
📘
IMPORTANT
- The maximum number of participants to join your scheduled conference depends on your service plan. Please contact your account manager if you need to increase your participant numbers.
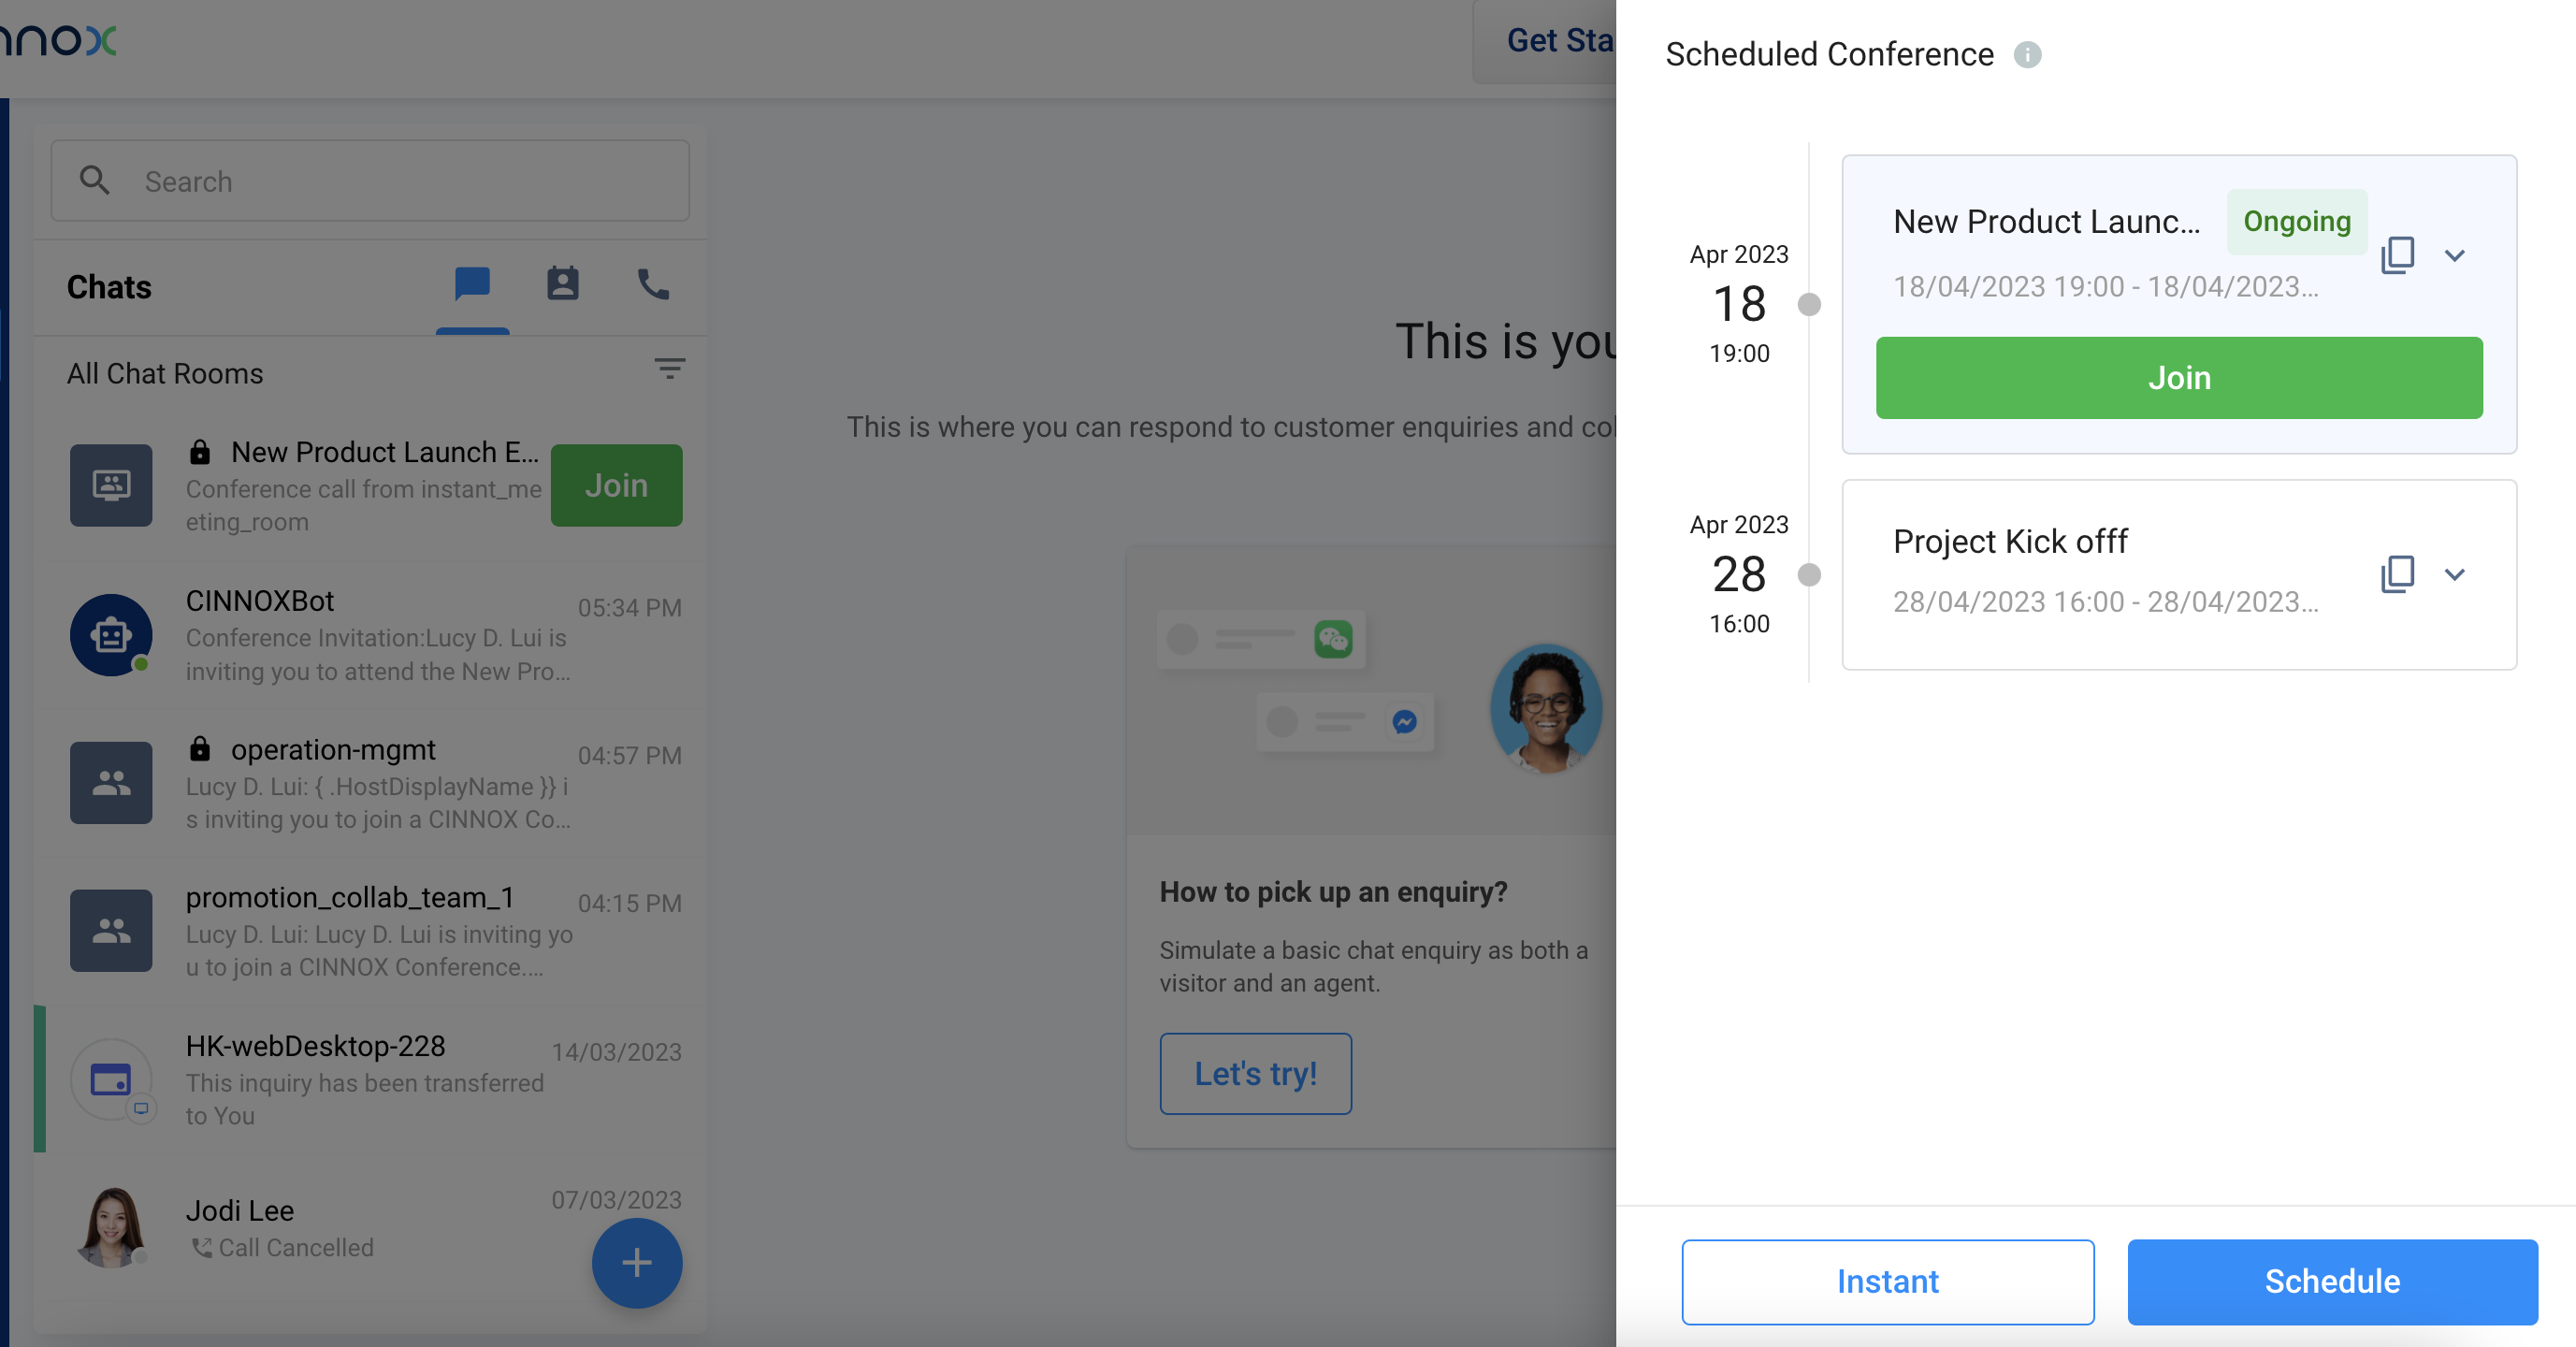
- The order of the scheduled conference details is based on the created date and time of the scheduled conference.
- When you edit the scheduled call details, e.g., the Start and End Date and Time in CINNOX, please ensure you edit your Calendar and resend it to your participants. Otherwise, when you edit the call details in your Calendar, please also ensure you edit the call details in CINNOX.
- Like any other App, it does not have Update and Delete Sync to the Calendar after the scheduled call has been created.
- When a scheduled call has been cancelled or ended, a participant tries to join; there will be a toast message Sorry. The scheduled conference does not exist. Please get in touch with the host. appearing in the Workspace.
- The scheduled conference participants will receive a system message mentioning that they are invited to the scheduled conference once the conference is successfully scheduled.
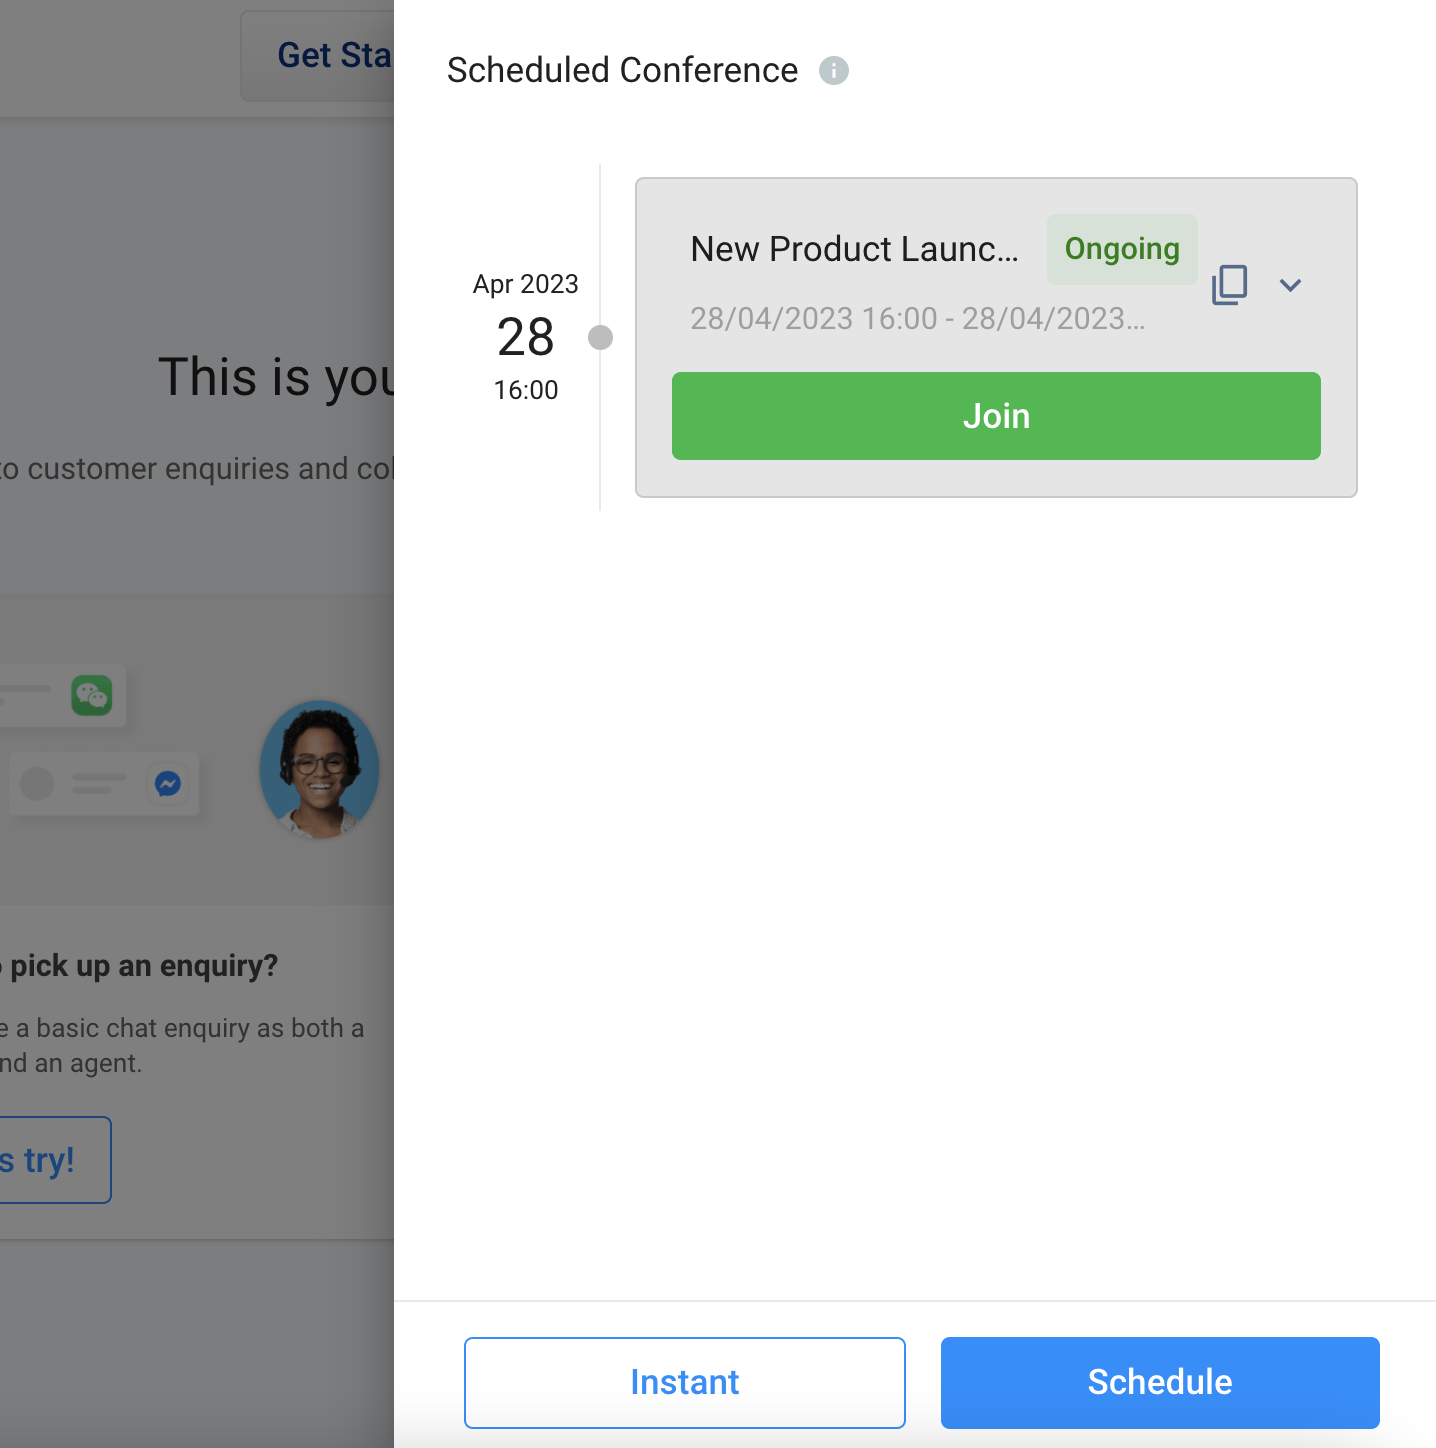
- When the scheduled conference call starts, click the Join button in the Workspace > Chat Room or by navigating to the Scheduled Conference list.
Manage the Conference Call
Edit the Conference
The host can edit the details of the scheduled conference.
- Log in to your CINNOX dashboard.
- Click the Scheduled Conference icon.
- Click Edit for the scheduled conference you are required to edit.
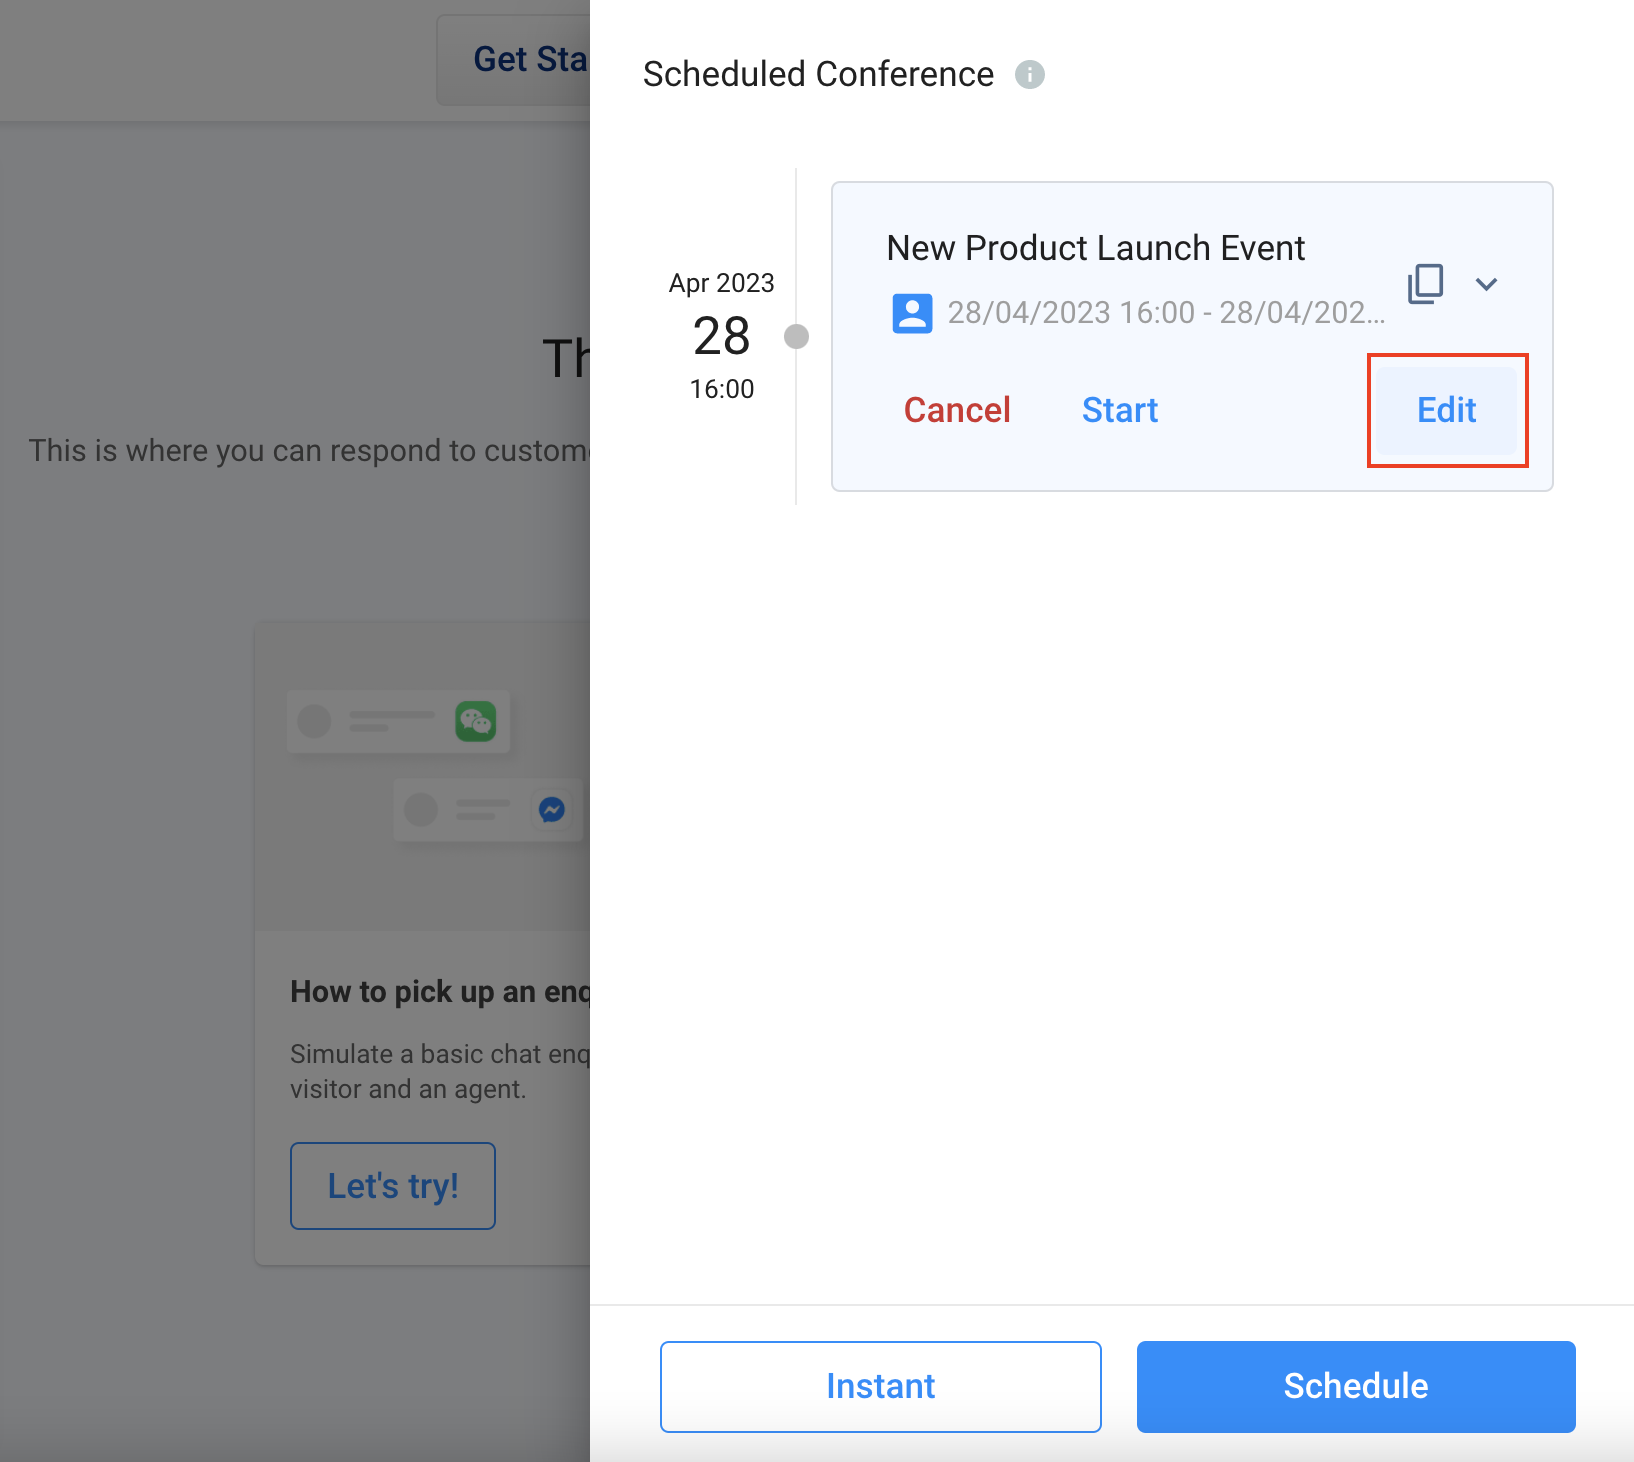
- You can edit the scheduled conference details, including the Conference Topic, Start Date & Time, End Date & Time, Participants and Description.
- Click Save after editing the details.
📘
When you update the details of a scheduled call in CINNOX, such as the start and end date and time, it's important to also manually update your calendar and resend the updated details to your participants. This is because CINNOX, like most apps, does not automatically sync updates or deletions to the calendar once a scheduled call has been created.
- Open your calendar and manually update the same details for the scheduled call.
- Resend the updated calendar invite to your participants.
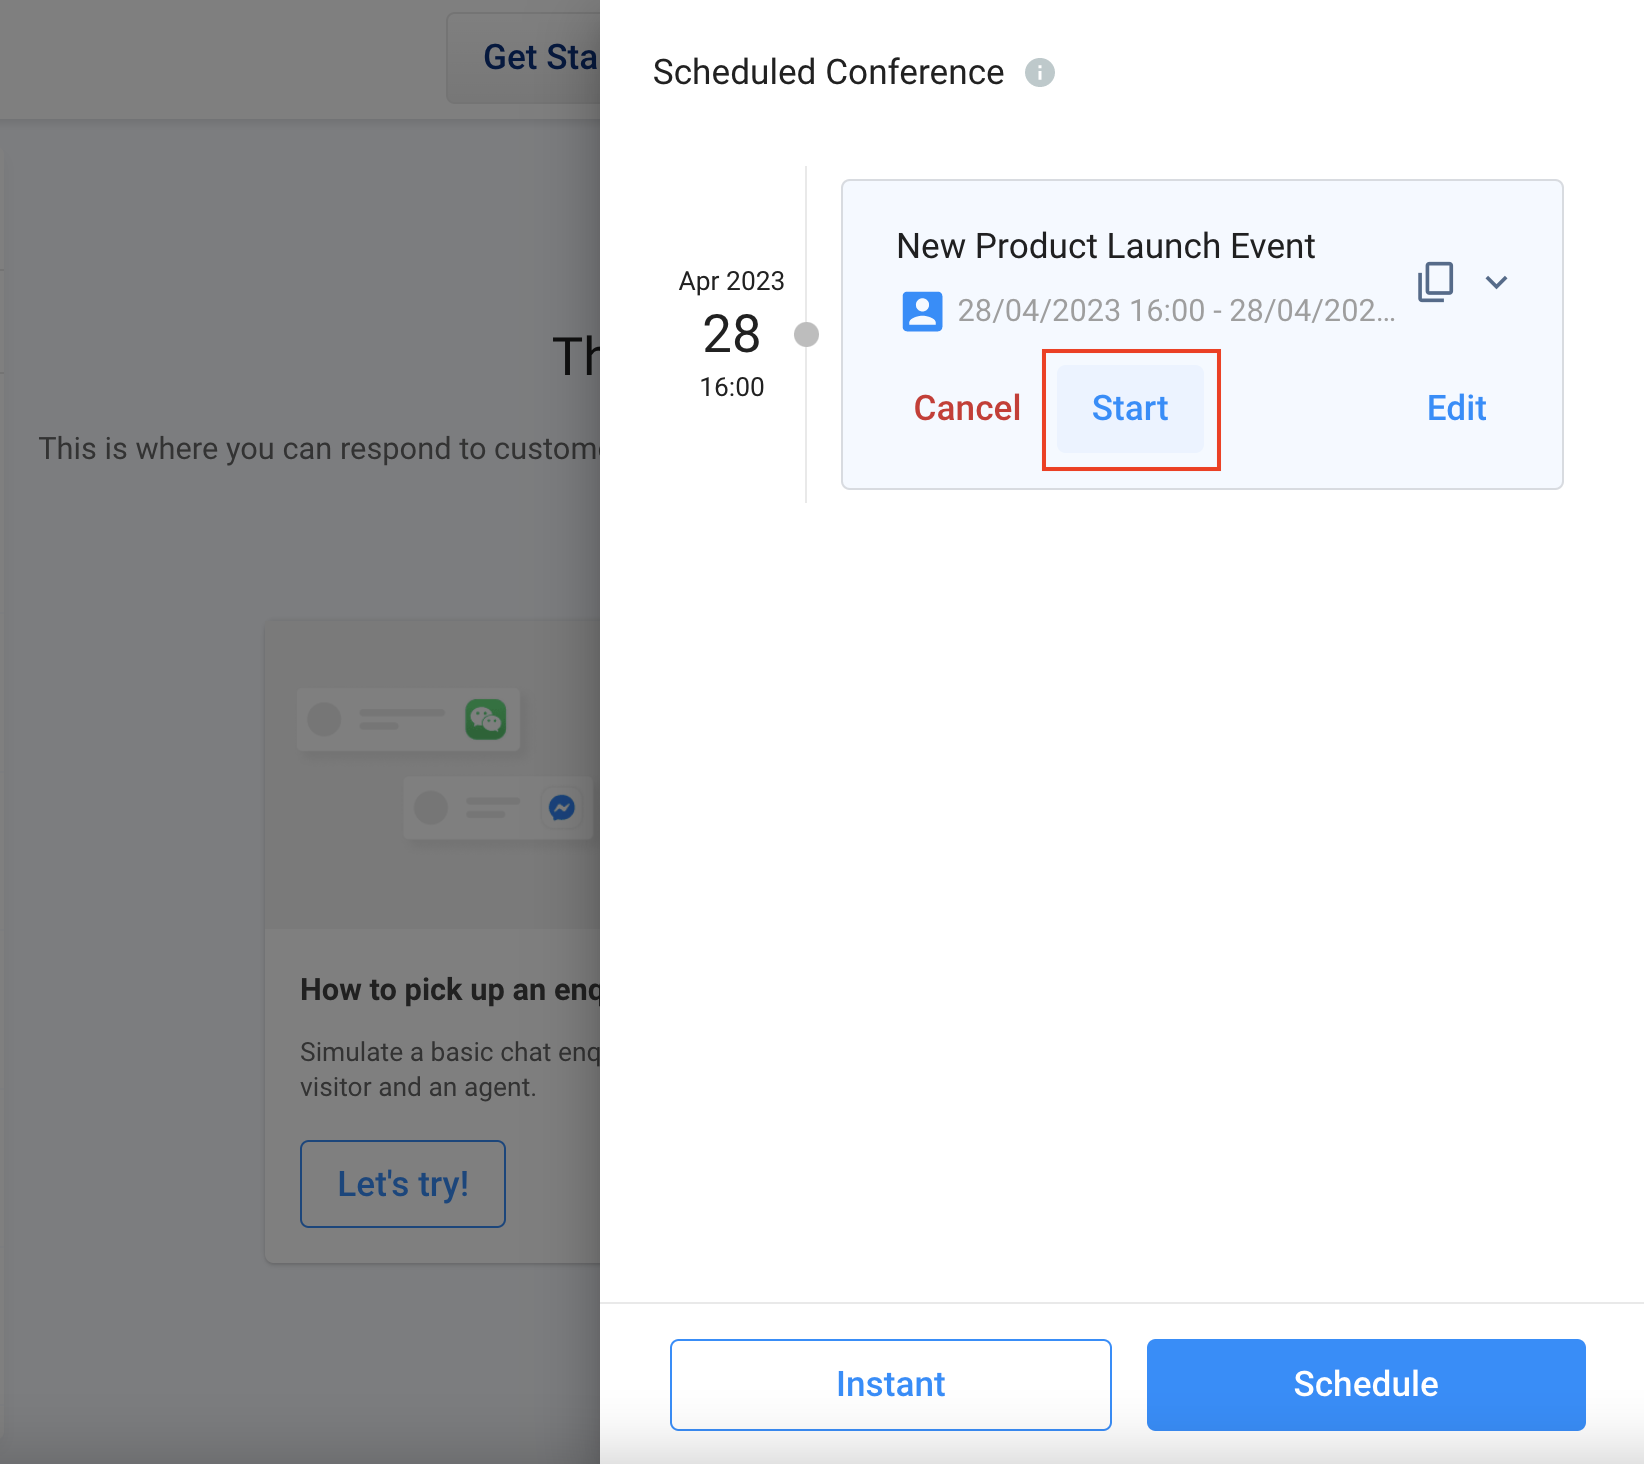
Start the Conference ahead of schedule
- Log in to your CINNOX Dashboard.
- Click on the Scheduled Conference icon at the top of the Dashboard.
- Find the scheduled conference you want to start
- Click Start to begin the scheduled conference.
- The conference starts ahead of schedule when the host clicks Confirm.
Cancel the Conference
The host can cancel the scheduled conference, and no one can access this cancelled conference.
- Log in to your CINNOX dashboard.
- Click the Scheduled Conference icon.
- Click Cancel on the scheduled conference panel you will cancel.
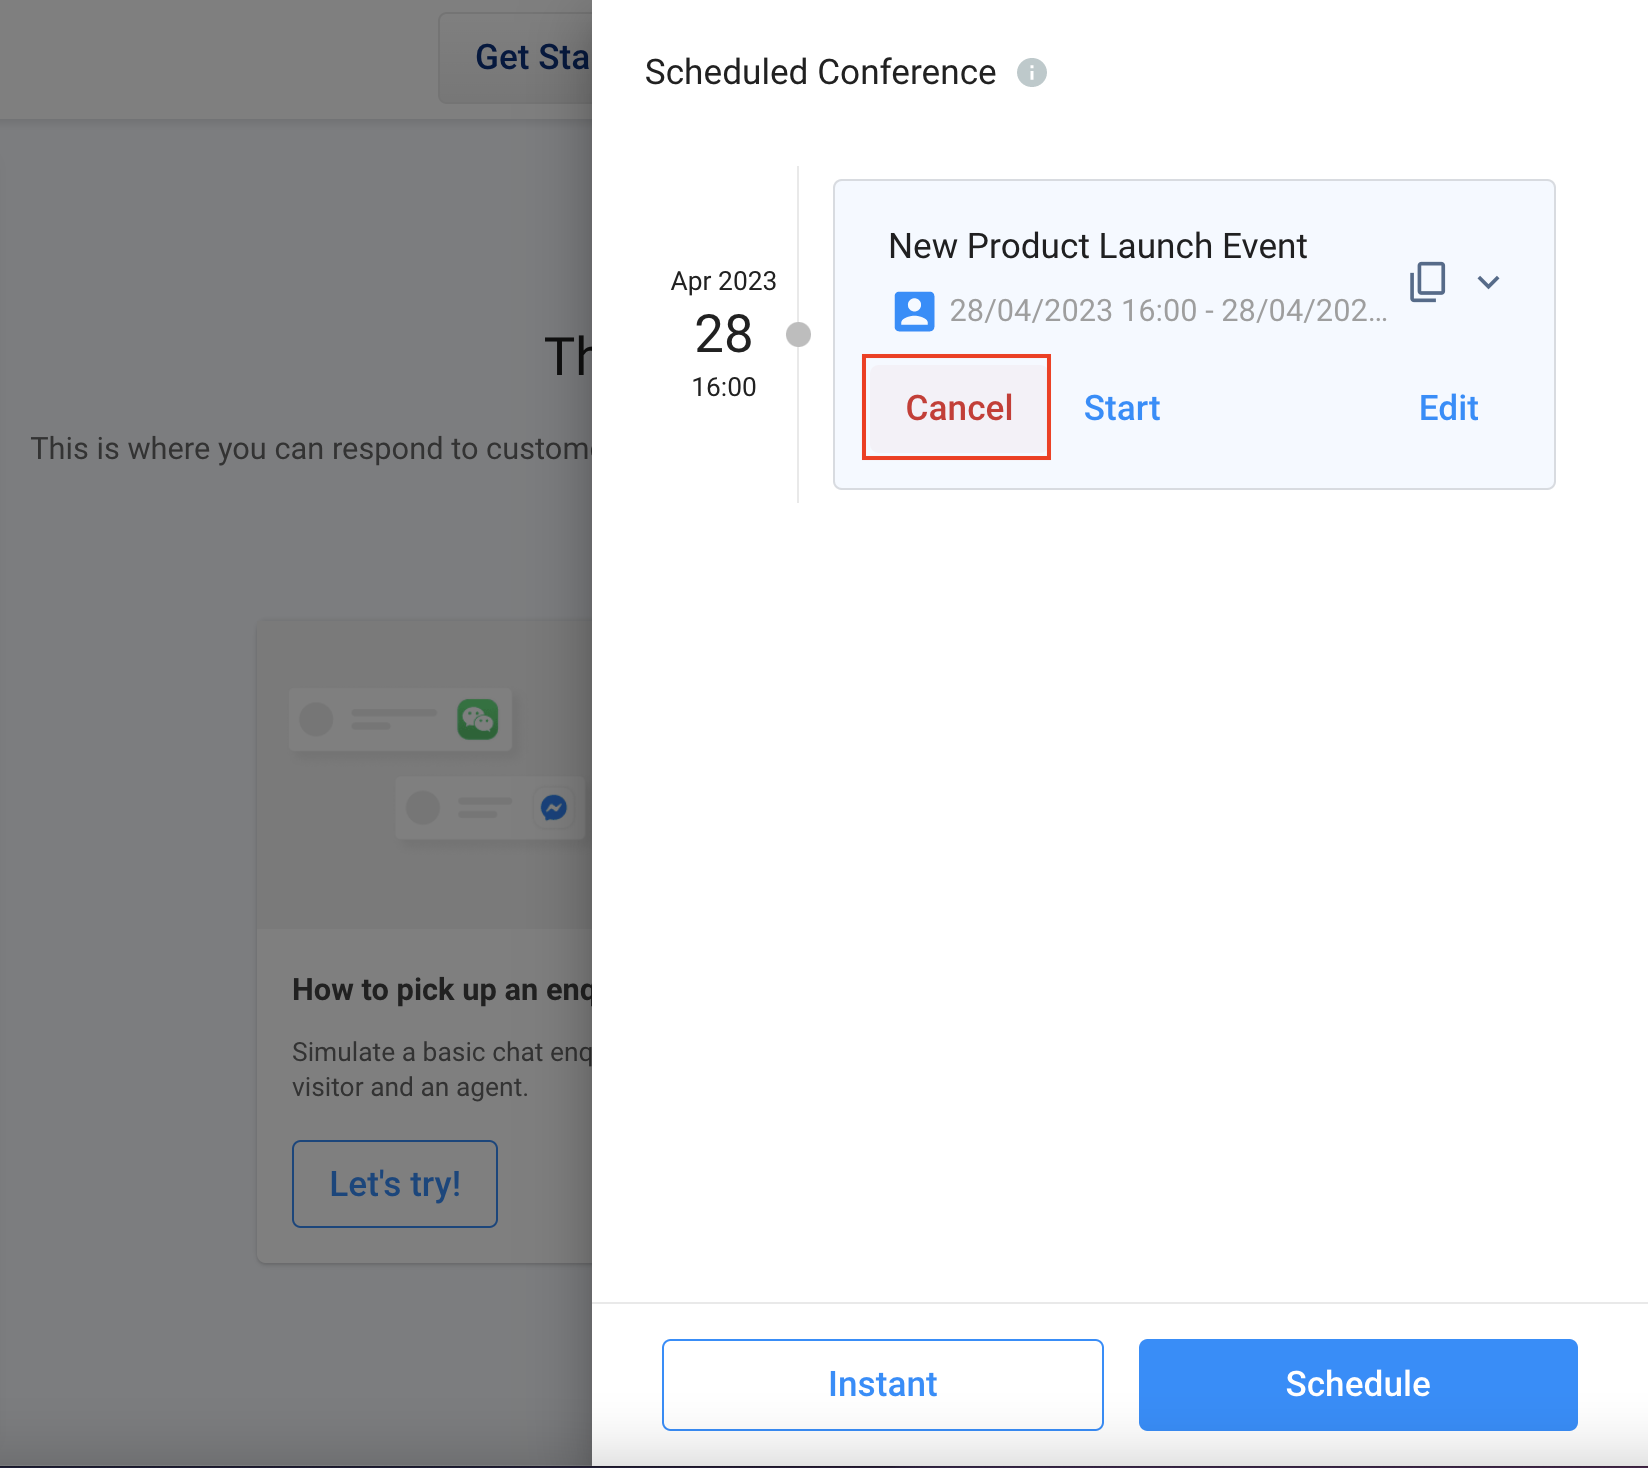
- Click OK to confirm the scheduled conference cancellation.
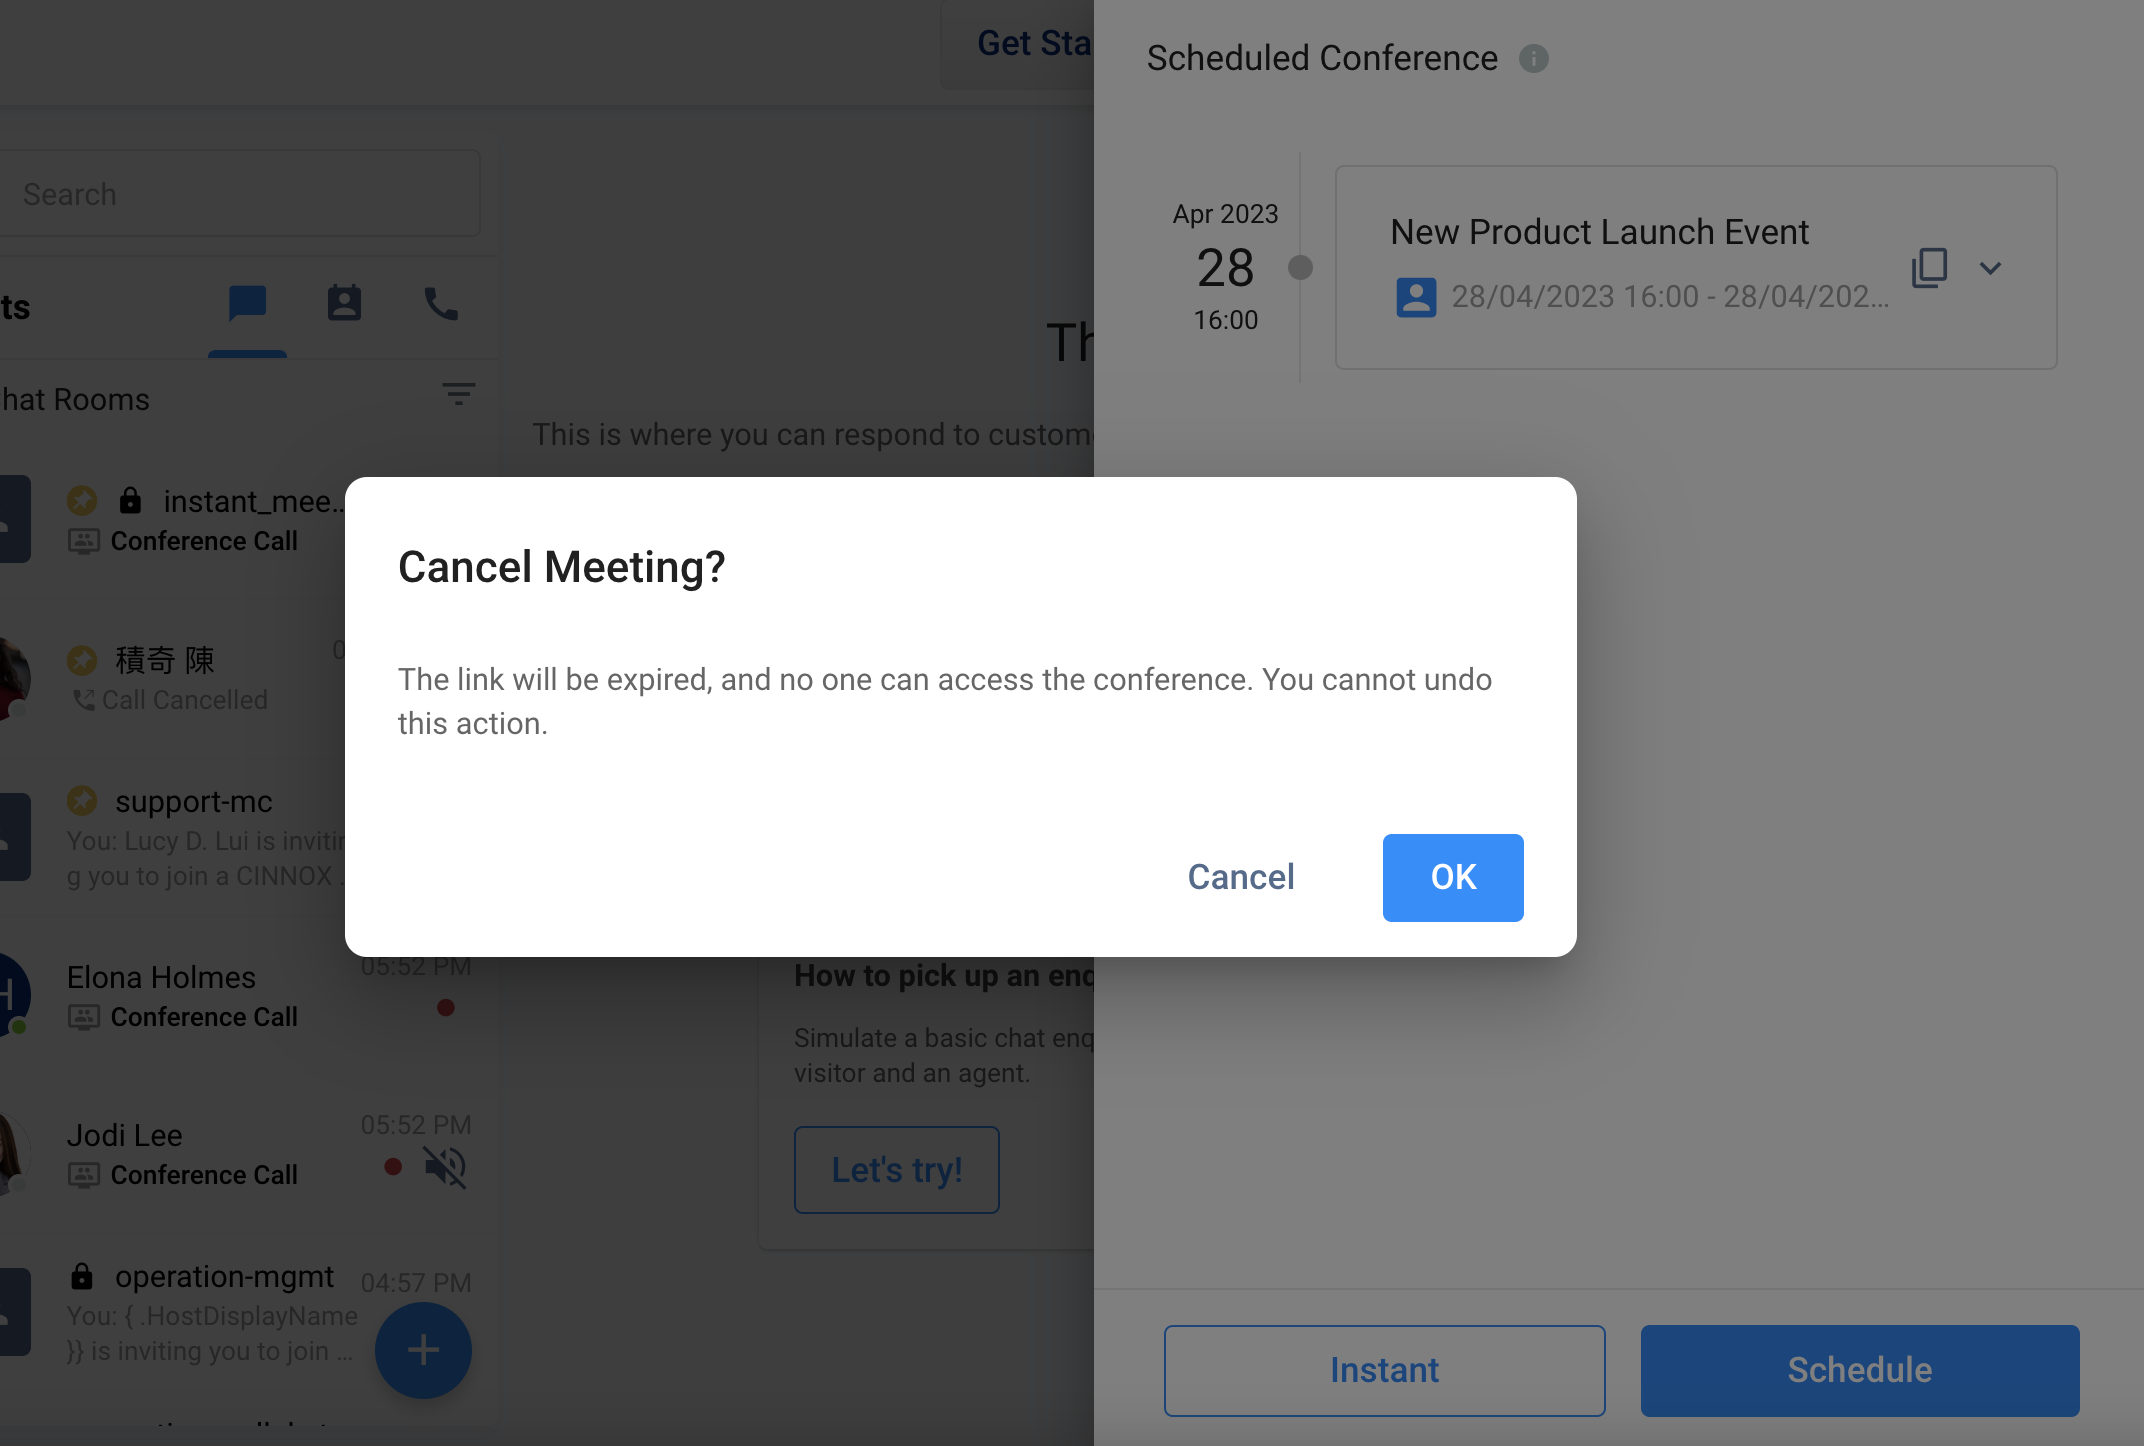
- After the scheduled conference is cancelled, the toast message indicates the scheduled conference cancellation is successful. The scheduled conference will not be listed on the host's and participant's right-side panel.
Invite Staff to the Conference
The host and the participant can invite other staff to the scheduled conference.
- Log in to your CINNOX Dashboard.
- Click the Scheduled Conference icon.
- Select the scheduled conference you are going to invite other staff too.
- Click the Copy icon to copy the invitation.
- When you successfully copy the invitation, the toast message indicates Invitation copied.

- You can toggle on the link to change it with .cn. Participants inside Mainland China should join the scheduled conference using the link with .cn.
- Paste and send the copied invitation to the input bar of a chat room.
- The invitation is received as a chat. When it starts, the participants can click the link to join the CINNOX Conference.
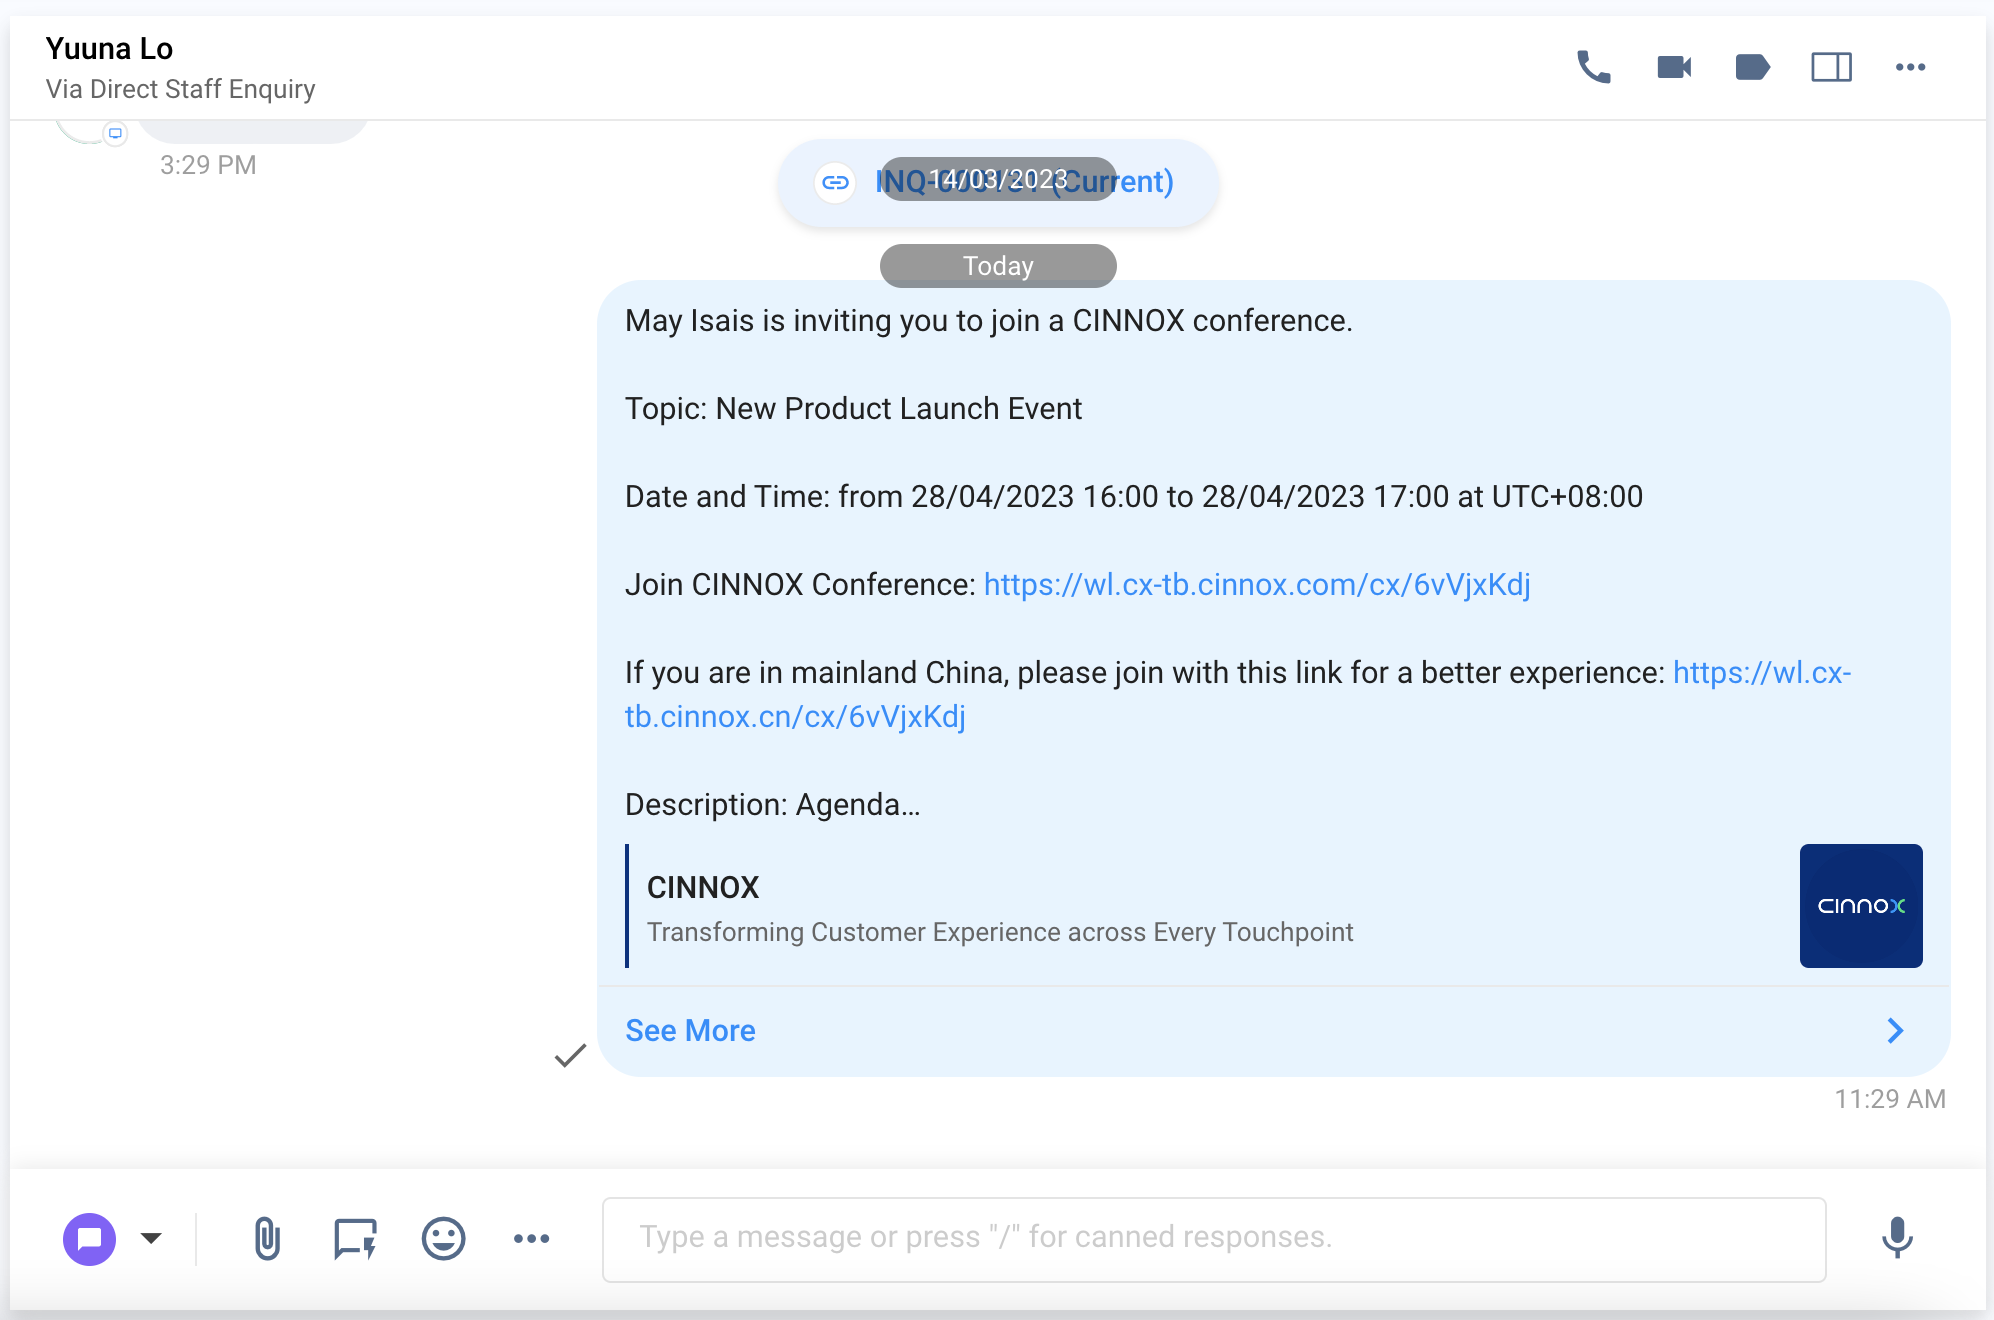
- When the scheduled conference starts, participants not using CINNOX can join by opening the Conference Link using Chrome or Safari.
Decline and Revoke the declined conference invitation
To decline a conference invitation:
- Log in to your CINNOX dashboard.
- Click the Scheduled Conference icon.
- Click Decline for the scheduled conference whose conference you may need to decline due to schedule conflict or other reasons.
- The toast message shows Successful, meaning that you successfully declined the scheduled conference invitation.
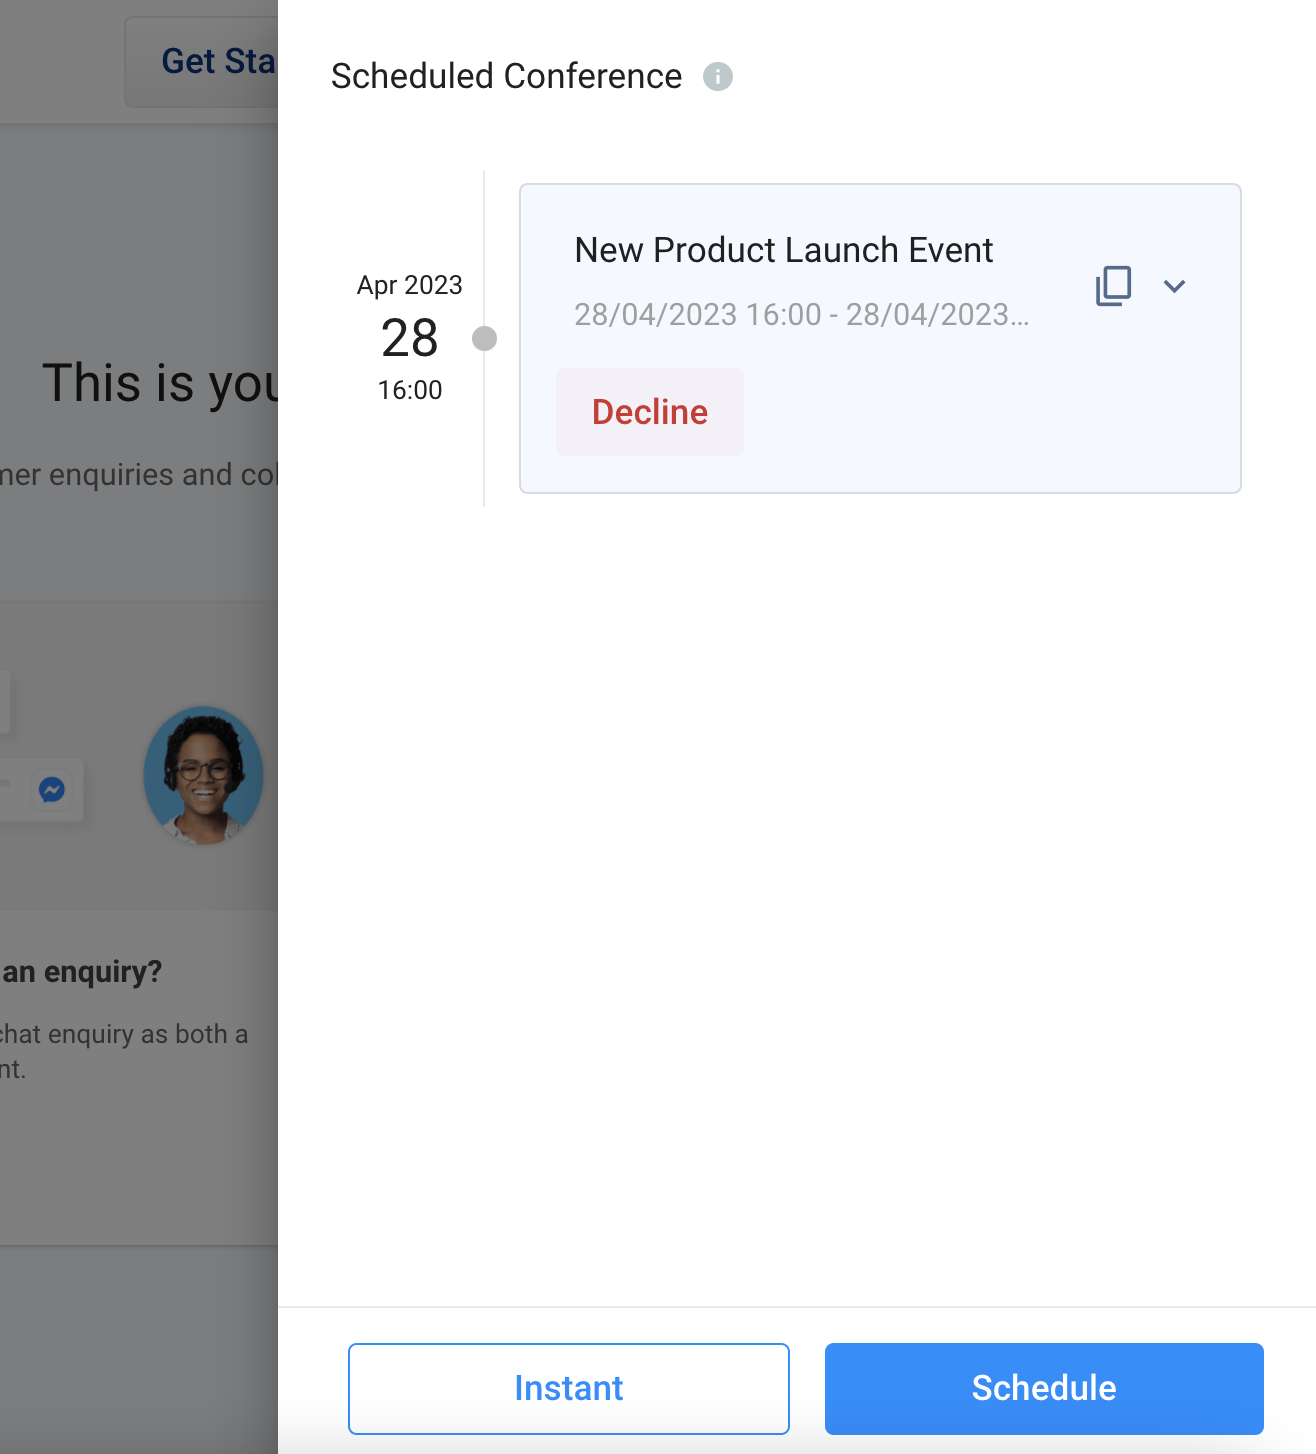
- After you declined the scheduled conference invitation, its details show your name as the Declined Participants.
📘
You can still click join on the Scheduled call even was declined before. Go to the Schedule Call panel and click the Join for the ongoing call.
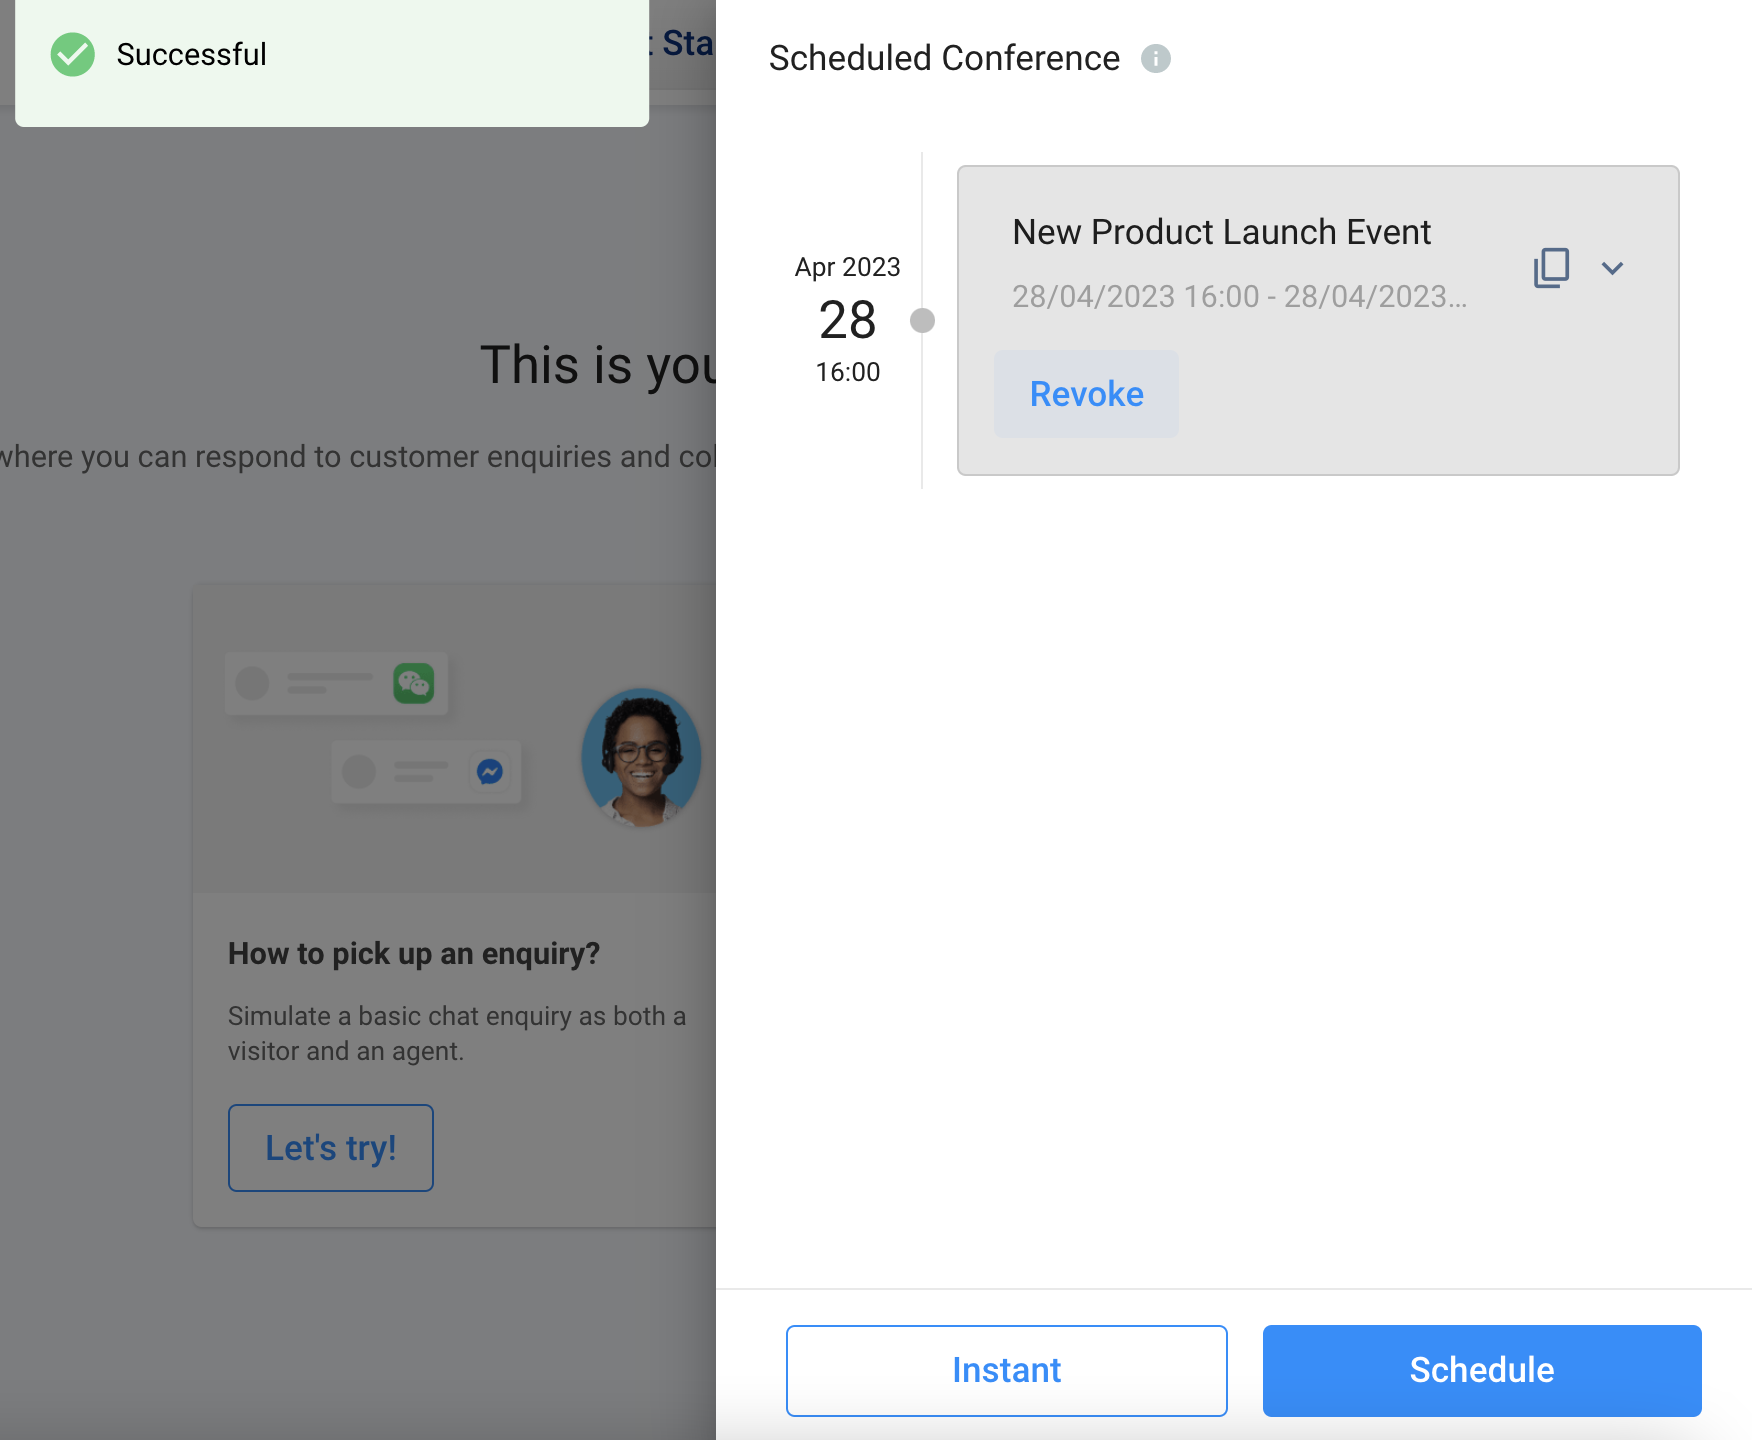
To revoke the declined invitation to join the conference:
- Log in to your CINNOX dashboard.
- Click the Scheduled Conference icon.
- Click Revoke.
- The toast message shows Successful, meaning that you successfully joined the scheduled conference again.
📘
- Declining the scheduled conference invitation, you will not receive its notification.
Notifications
📘
As a participant, you will receive a notification when:
- You were invited to a scheduled conference.
- The conference schedule date or time has changed.
- You were removed from the scheduled conference.
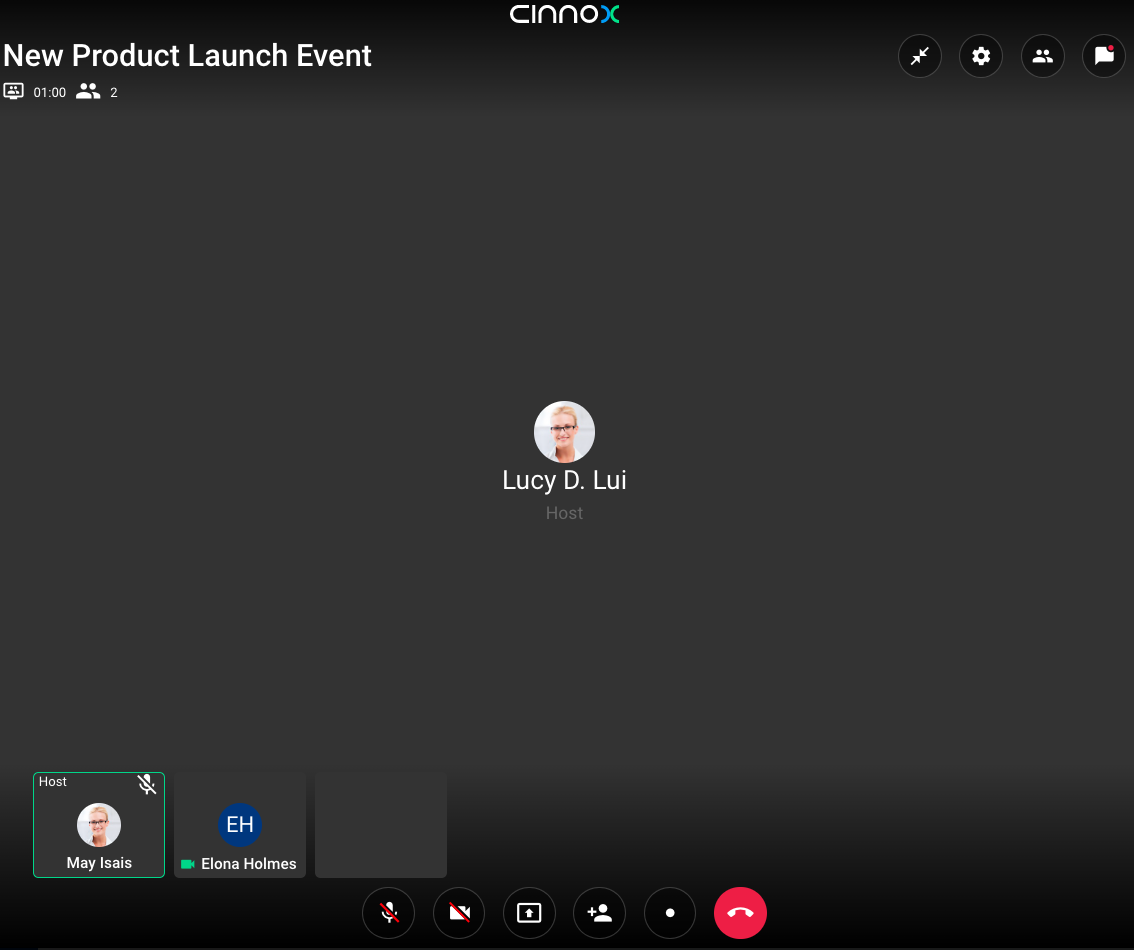
- When the scheduled conference starts, CINNOX launches a conference call room and notifies the members of the Space to join the conference.
- Staff members can click Join to join the conference call from their CINNOX Dashboard.
Ongoing Conference Call
📘
Create an Instant Conference
📘
Scheduled conference NEXT PHASE
📘
- Calendar View
- Search and filter scheduled conference
- Recurring scheduled conference
- Waiting room and pre-configuration settings for participants
- Options to display conference more information, such as location and attachment
- Allowing visitors to book a demo and generate scheduled conference
- More invitation & integration methods, such as via SMS, 3rd party and Open API