Wix
Need Omnichannel Live Chat Support for your Wix website?
CINNOX offers an omnichannel solution that seamlessly integrates with Wix. Engage with your website visitors in real time through live chat, providing instant support and boosting customer satisfaction. With CINNOX, you can effortlessly handle customer enquiries across various channels and devices, including social media, email, and calls. Simplify your customer service with CINNOX's omnichannel solution today.
Wix provides customizable website templates and a drag-and-drop HTML5 website builder that includes apps, graphics, image galleries, fonts, vectors, animations, and other options.
For more details, go to www.wix.com.
Here are the steps to follow when adding the CINNOX web Widget on your Wix site:
📘
Adding a Live Chat in WIX via the Custom Code required a premium plan in WIX with a connected domain.
To know more, please refer to the Wix Help Center.
- Sign in to your Wix dashboard.
Wix > Login
- Click Edit Site at the page's upper right corner. The Wix Website Editor will be displayed in a separate tab.
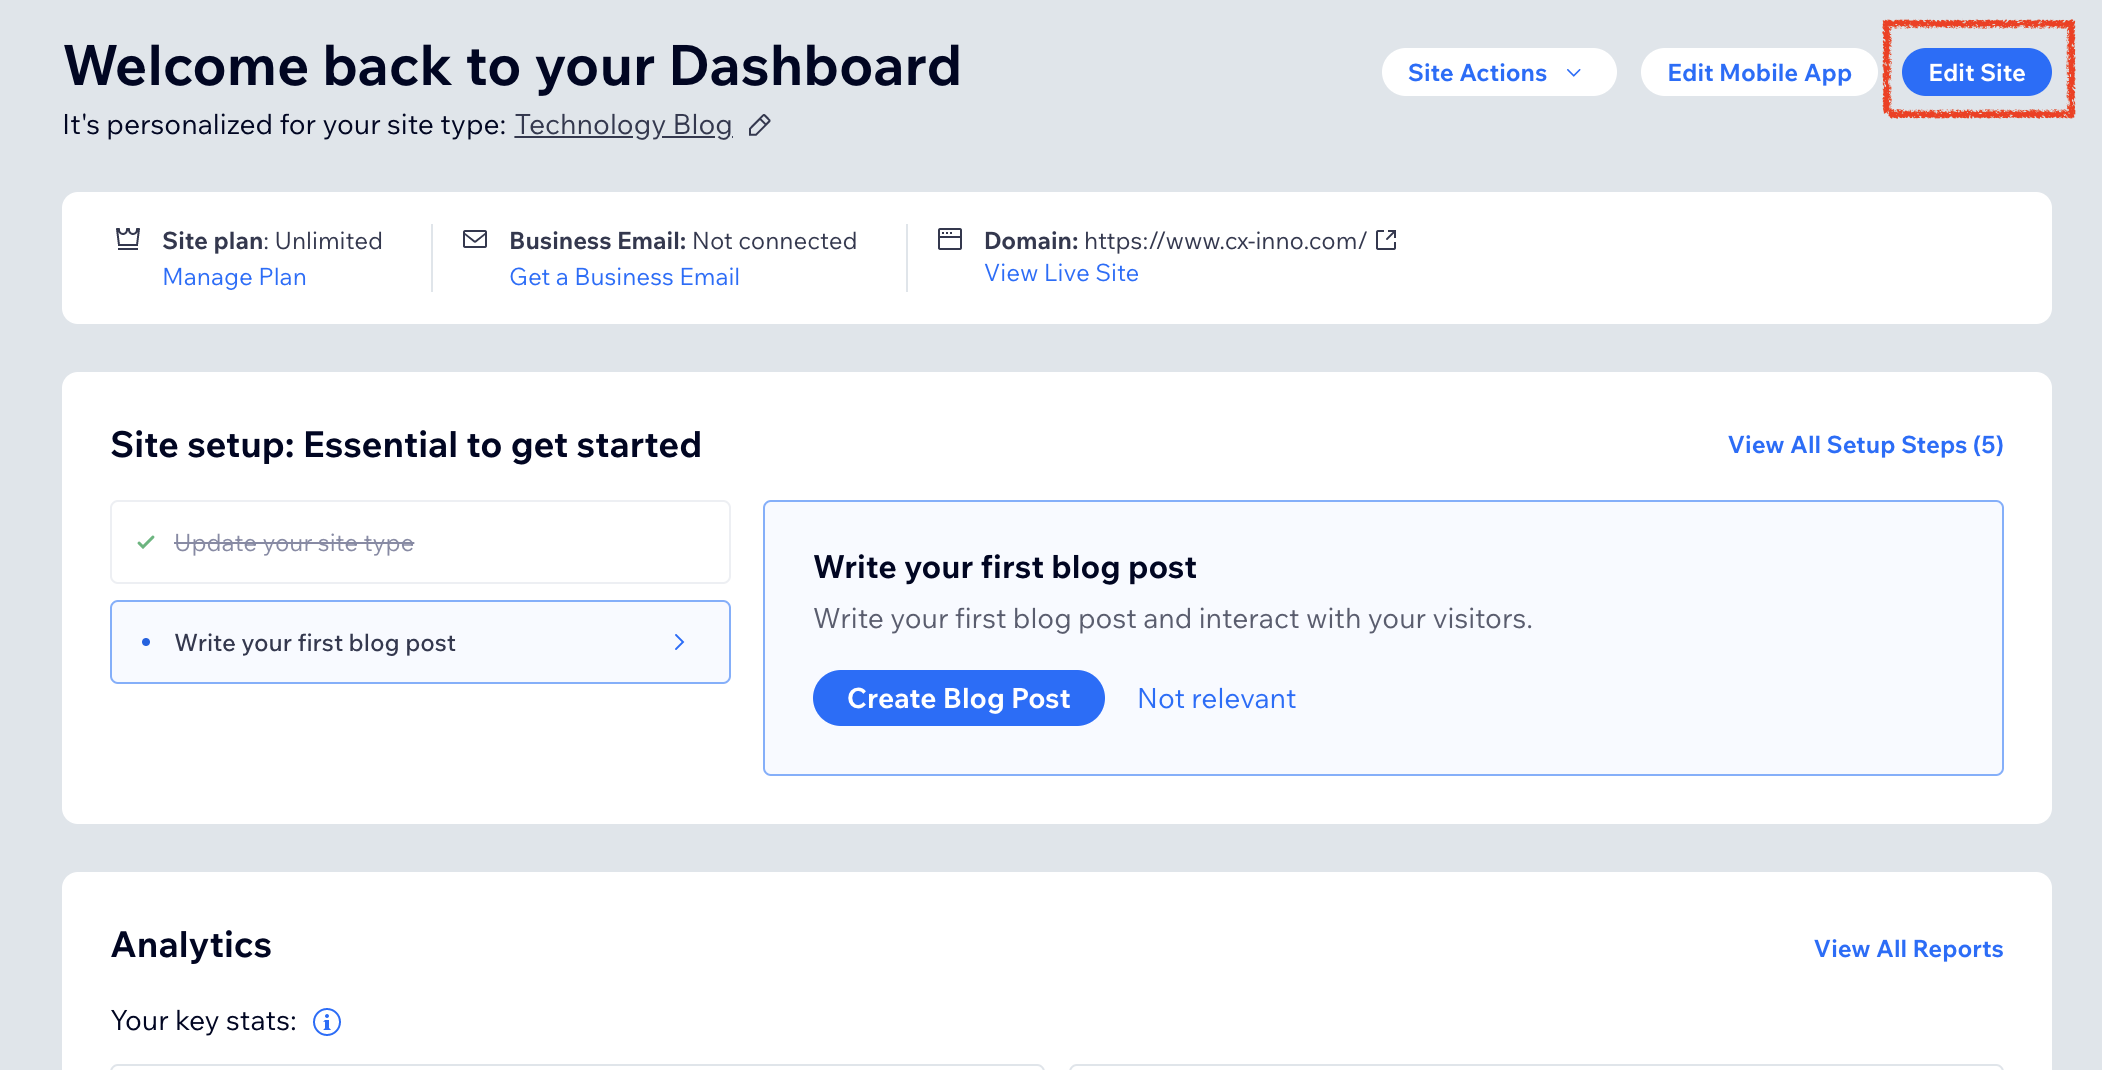
Wix Dashboard > Edit Site
- Click the plus icon:heavy_plus_sign: - Add to Site in the left menu.
- Find and select Embed.
- From the Embed list, find and select </> Custom Code. The Settings pop-up window will be displayed to add a custom code.
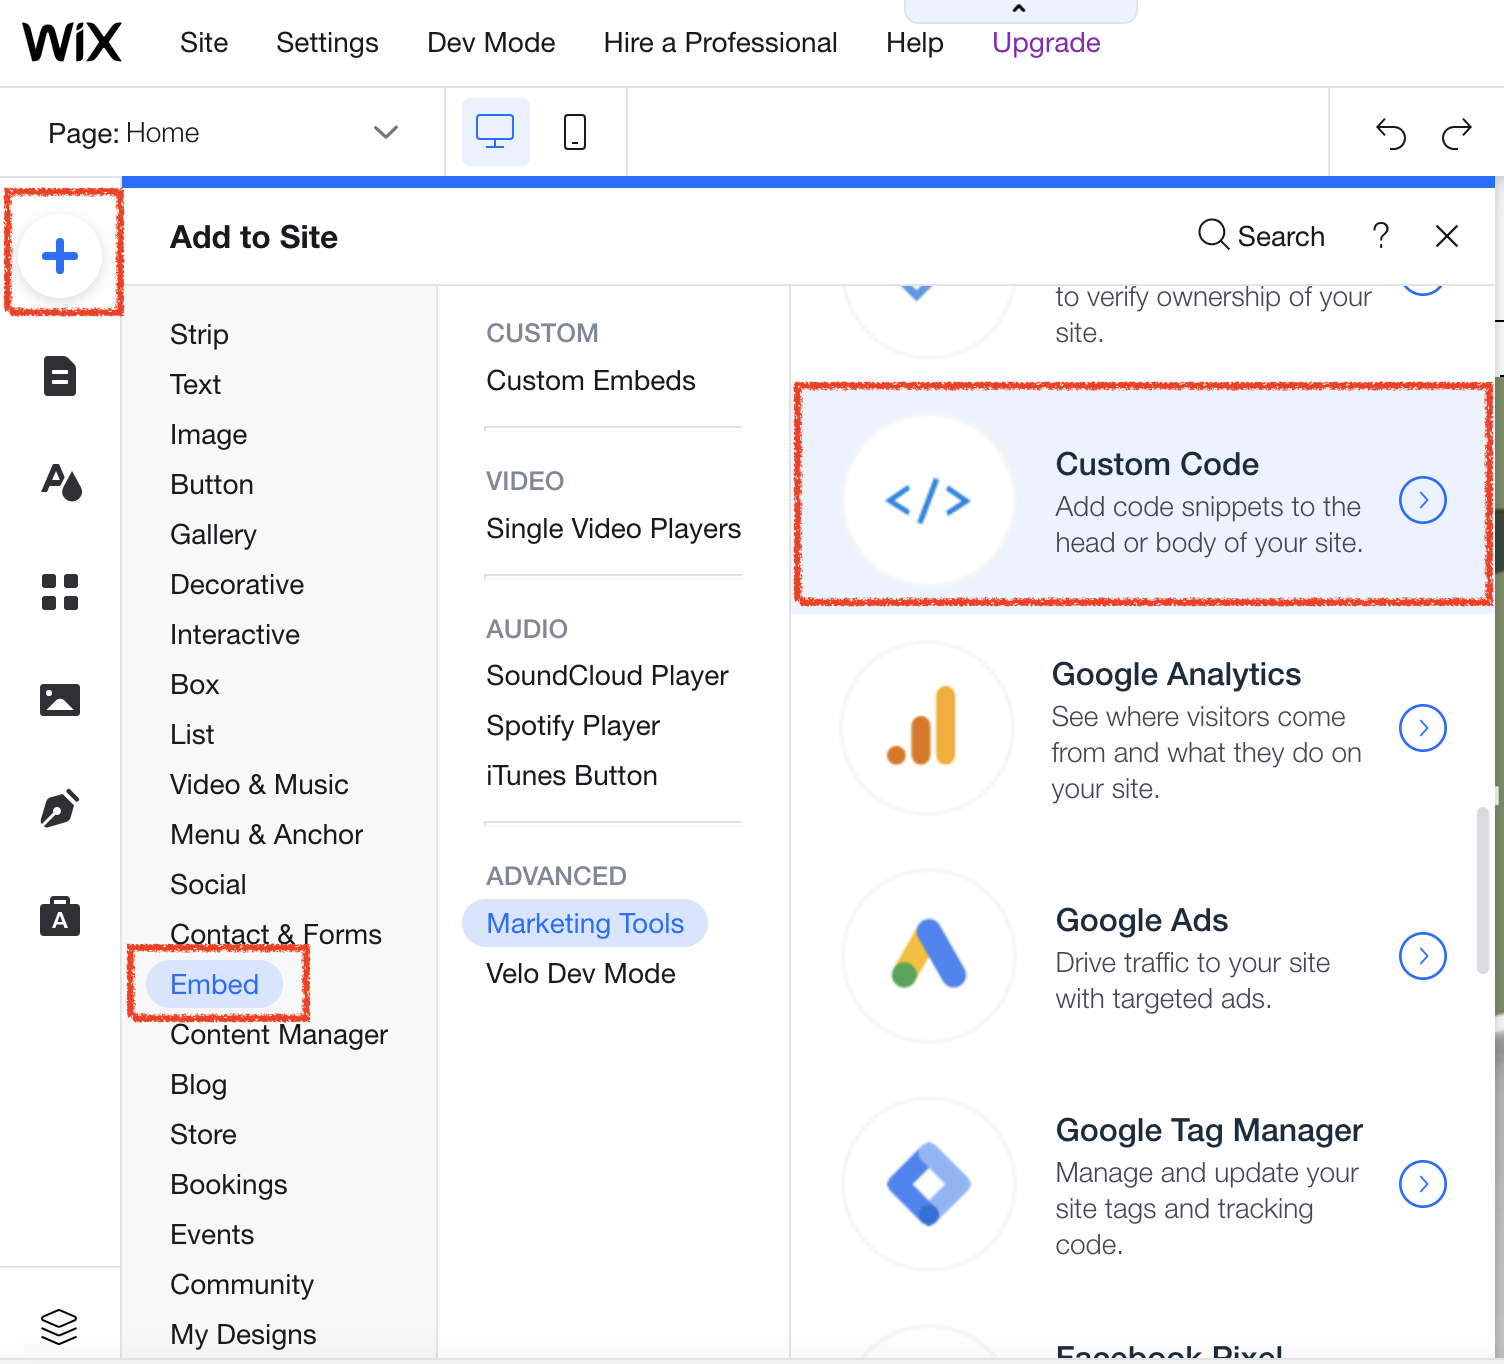
Wix Website Editor > Add Site > Embed > Custom Code
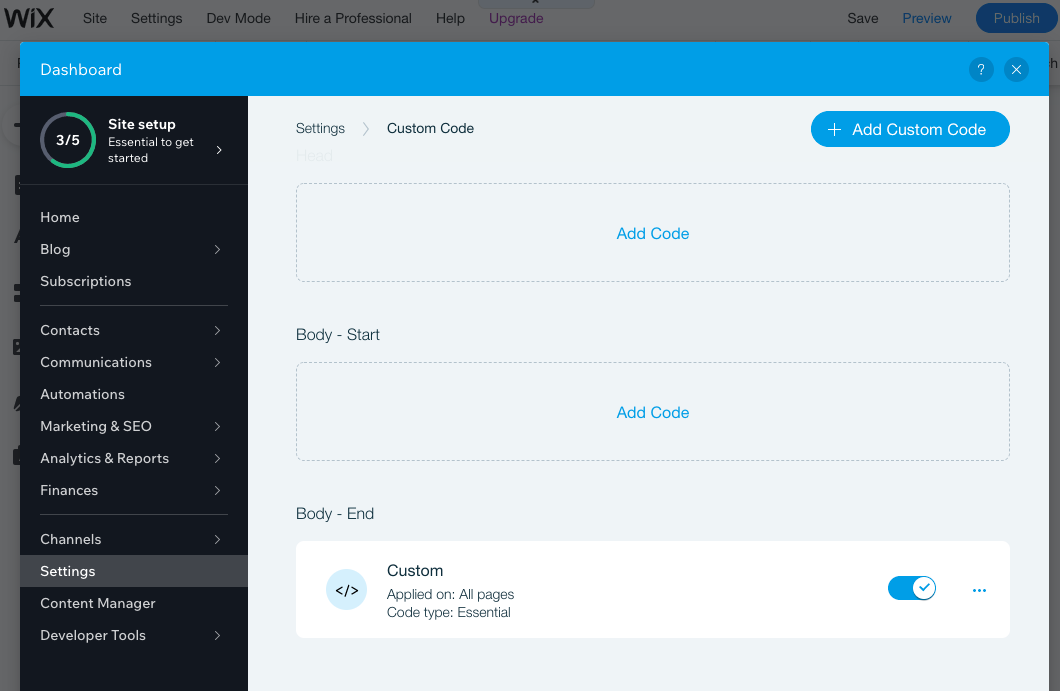
- In Settings > Custom Code age, under the Body - End, click Add Code.
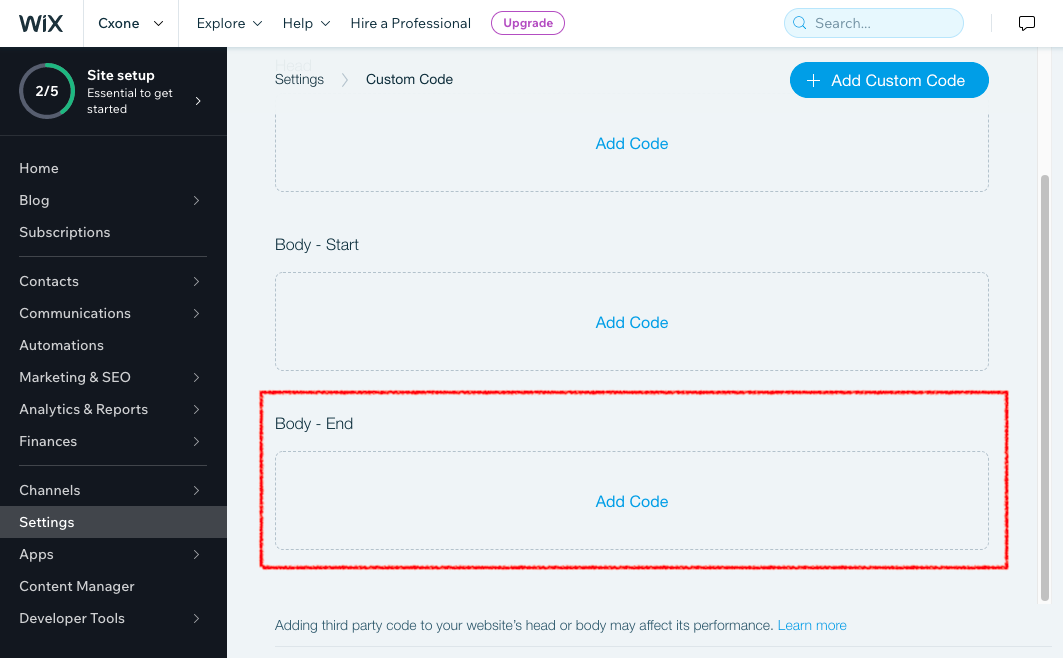
Wix Settings > Custom Code
🚧
Notice
Embedding CINNOX widget code as an HTML iFrame won't work in the Wix site. It is most suitable to use the custom code to make the CINNOX live chat and web call work.
- Log in to your CINNOX Web Dashboard.
CINNOX > Login
- Navigate to Administration > Widget > Installation. From the Widget Installation > Web Widget, click on Copy.
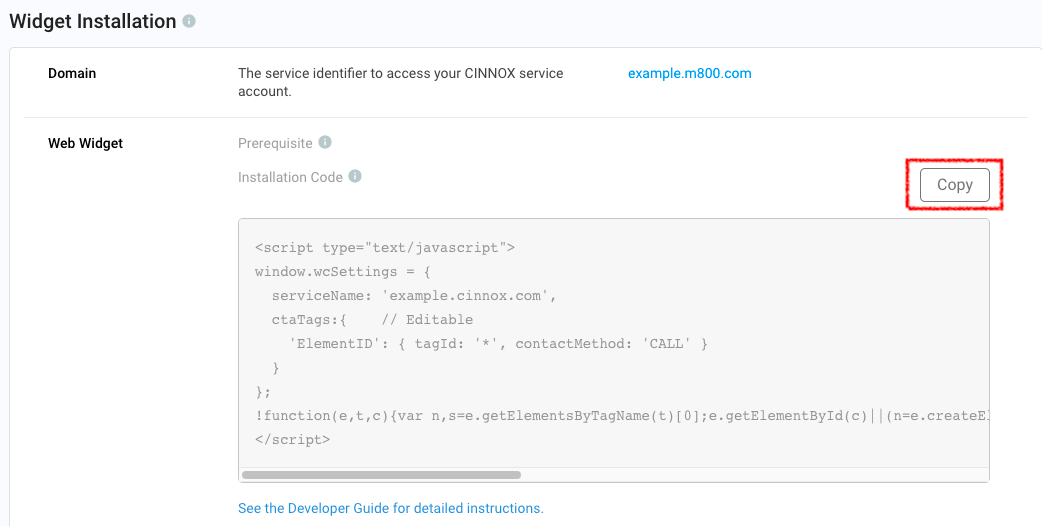
CINNOX Admin > Widget > Installation
- Back on your Wix Website Editor > Settings > Custom Code, paste your CINNOX Widget code in the code snippet box.
- You can change your Custom code's name from "Custom" to another name, but it is optional.
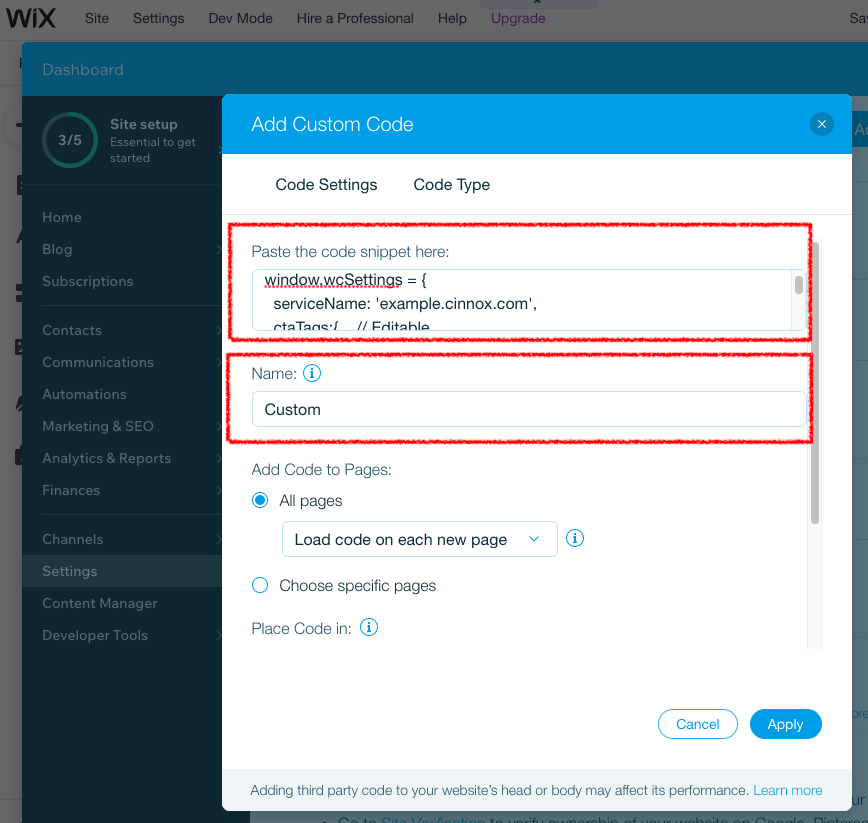
Wix Settings > Custom Code
- Under the Add Code to Pages section, All pages select Load code on each new page in the drop-down list.
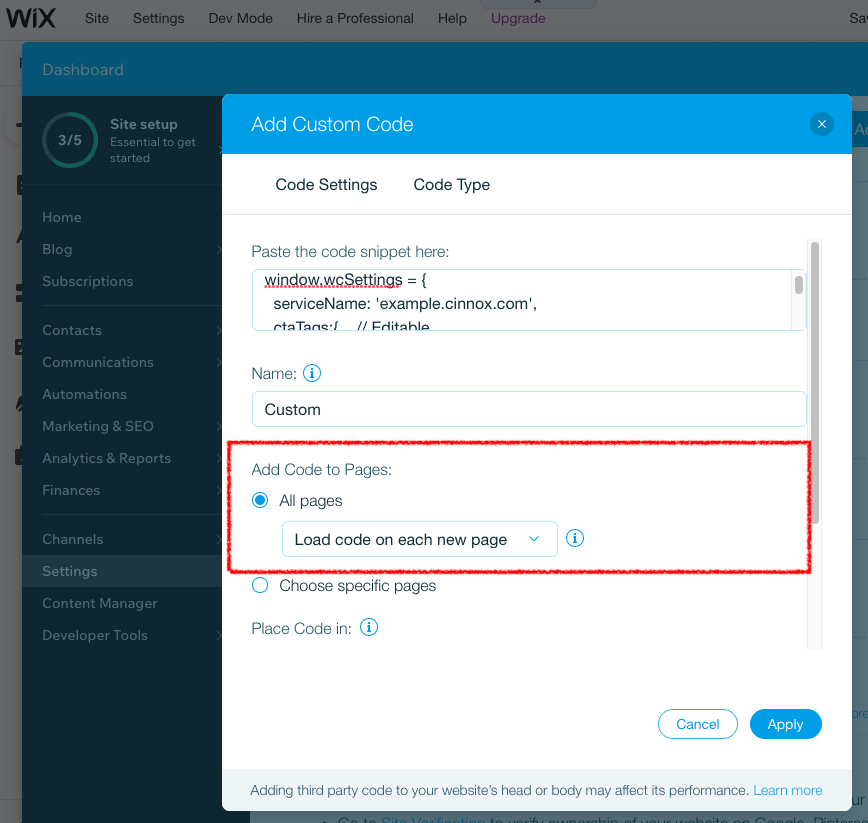
Settings > Custom Code
- Under the Place Code in, ensure that Body - end is selected.

Wix Settings > Custom Code
📘
In the Code Type tab, ensure that Essential is selected.
- Click Apply to save the changes and close the Settings page.
Wix Settings > Custom Code
- Back to your Wix Website Editor; if the Wix Chat is enabled and showing, right-click on it and select delete to remove it from the display.

Wix Website Editor
-Click Save, which is located at the upper corner of the page. A pop-up window will display to confirm that your changes have been saved.
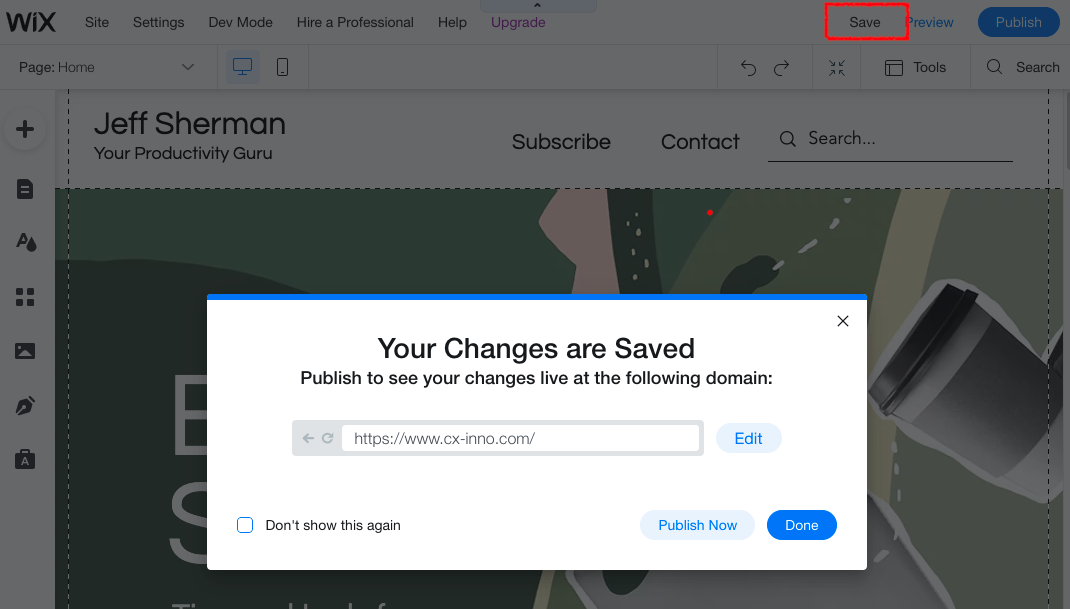
Wix Website Editor
- Click Publish Now. A confirmation that your site is published and live online will be displayed.
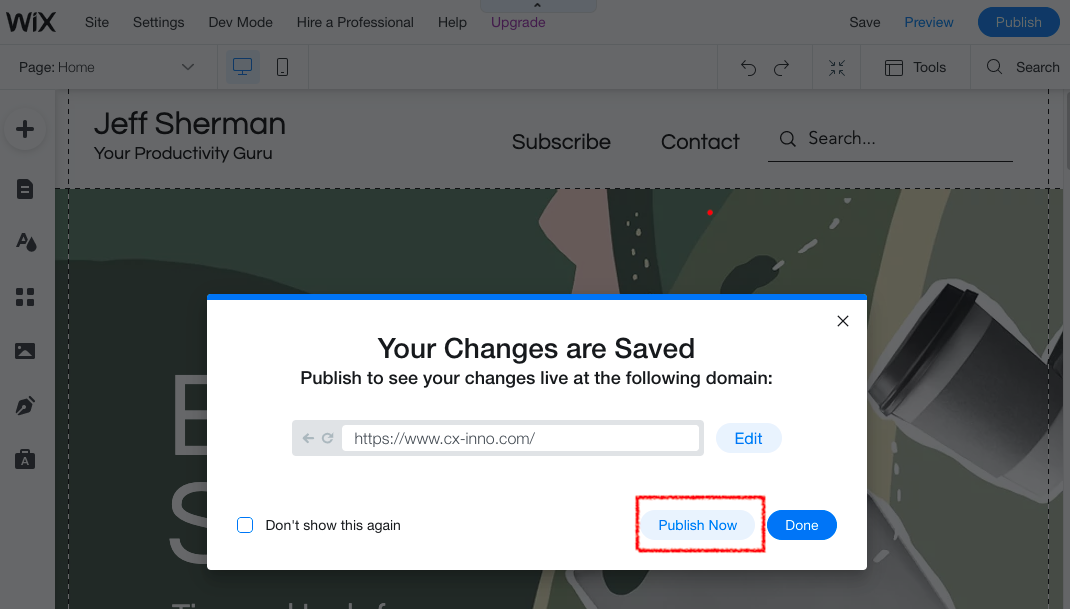
Wix Website Editor
- Click View Site. The CINNOX Widget should appear at the bottom right corner.

Publish Wix Site with CINNOX Widget
From now on, visitors can contact you through live chat and call on your Wix website.
📘
For more information on configuring your CINNOX widget, refer to this Guide's Customising Your Widget section.
📘
To know how to change the widget position from right to left, refer to this Guide's Dynamic Change of Installed Widget section.