CINNOX Q&A Bot
Need a game-changer in the world of virtual assistance?
CINNOX Q&A Bot, powered by OpenAI, can act as your ultimate partner in effortlessly handling customer and staff enquiries, ensuring top-notch service and support. Experience the simplicity of clear and concise custom prompts, and rely on the CINNOX Q&A Bot to expertly deliver first-hand customer service, provide comprehensive user manual guides, and ensure your customers have all the information they need at their fingertips. Unleash the power of AI with the CINNOX Q&A Bot today.
Start for FREE Get a Demo
CINNOX Q&A bots are AI-powered Virtual Assistants that give accurate and relevant answers to user questions. They use a knowledge base (KB) as their data source of information and follow custom prompts (instructions) to understand and retrieve the best answers for each query.
The Chatbot's data source can be the Enterprise's product and service details, frequently asked questions (FAQ), marketing content, and other relevant content.
The Chatbot's custom prompts are clear and concise instructions as if talking to the Bot about its roles, responsibilities, and scopes.
CINNOX Q&A Bots can be valuable partners in managing customer and staff enquiries about your products and services. They can assist with providing first-hand customer service, offering user manual guides, streamlining internal processes, and more. By relying on these bots, your Staff can effectively manage their time and workload, allowing them to focus on other important tasks.
Step 1: Get your Azure OpenAI Account
Before integrating your Azure OpenAI Account with CINNOX, you must sign up for an Azure OpenAI account. Please refer to the Get your Azure OpenAI Account details.
Step 2: Integrate your Azure OpenAI Account with CINNOX
Please refer to Integrate your Azure OpenAI with CINNOX using API Key for the detailed steps.
Step 3: Set the CINNOX Q&A Bot
Entry Point 1
- Navigate to Administration > Service Integration > Third Party Integration.
- Select the Azure OpenAI and Azure OpenAI Related Features tab.
- Select CINNOX Q&A Bot.

Entry Point 2
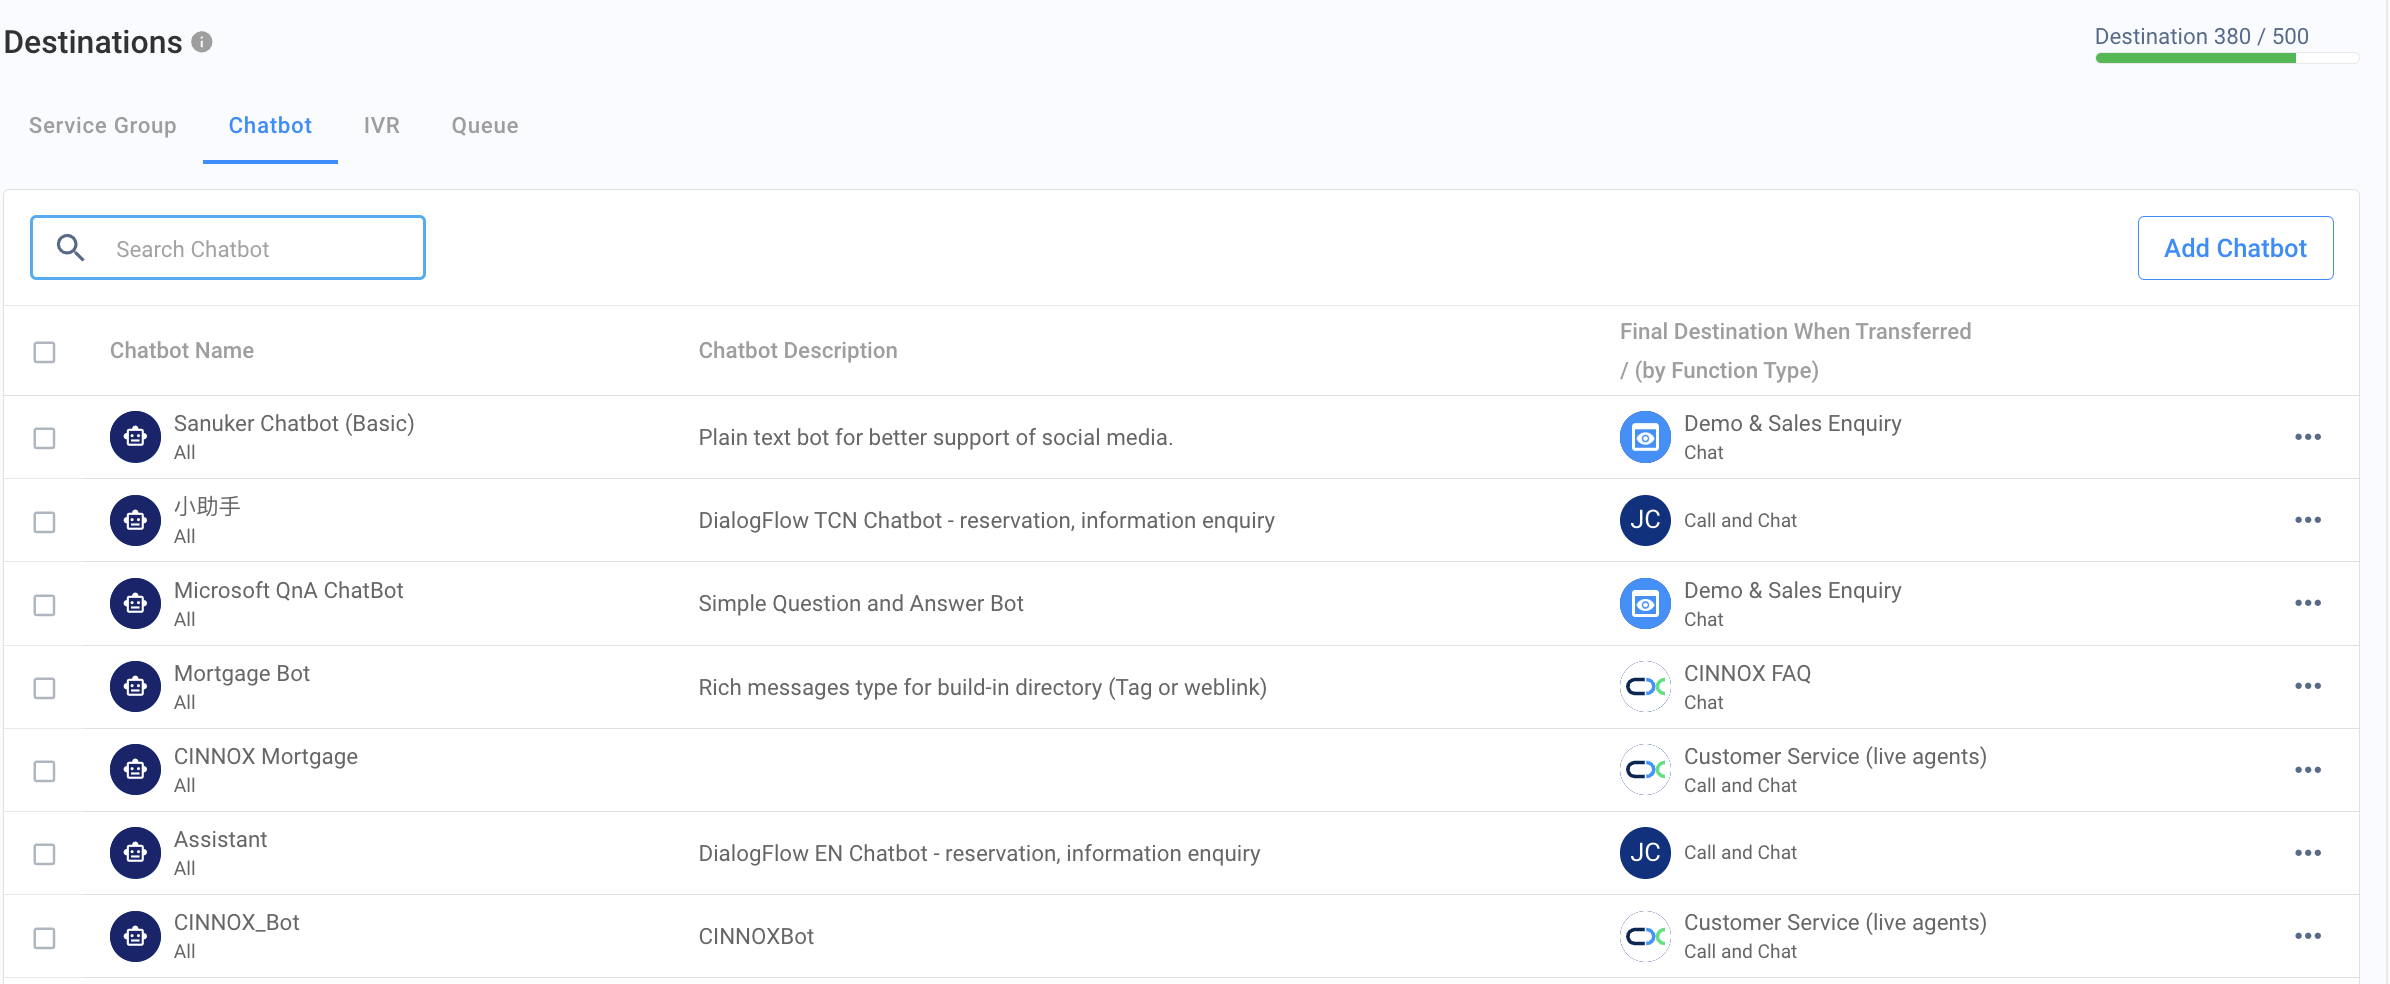
- Navigate to Administration > Channels > Destinations from the navigation menu and click the Chatbot tab.
- Click Add Chatbot at the right-hand top corner of the chatbot list.
Chatbot Source
- Select CINNOX Q&A Bot as the Chatbot Source by clicking the dropdown list.
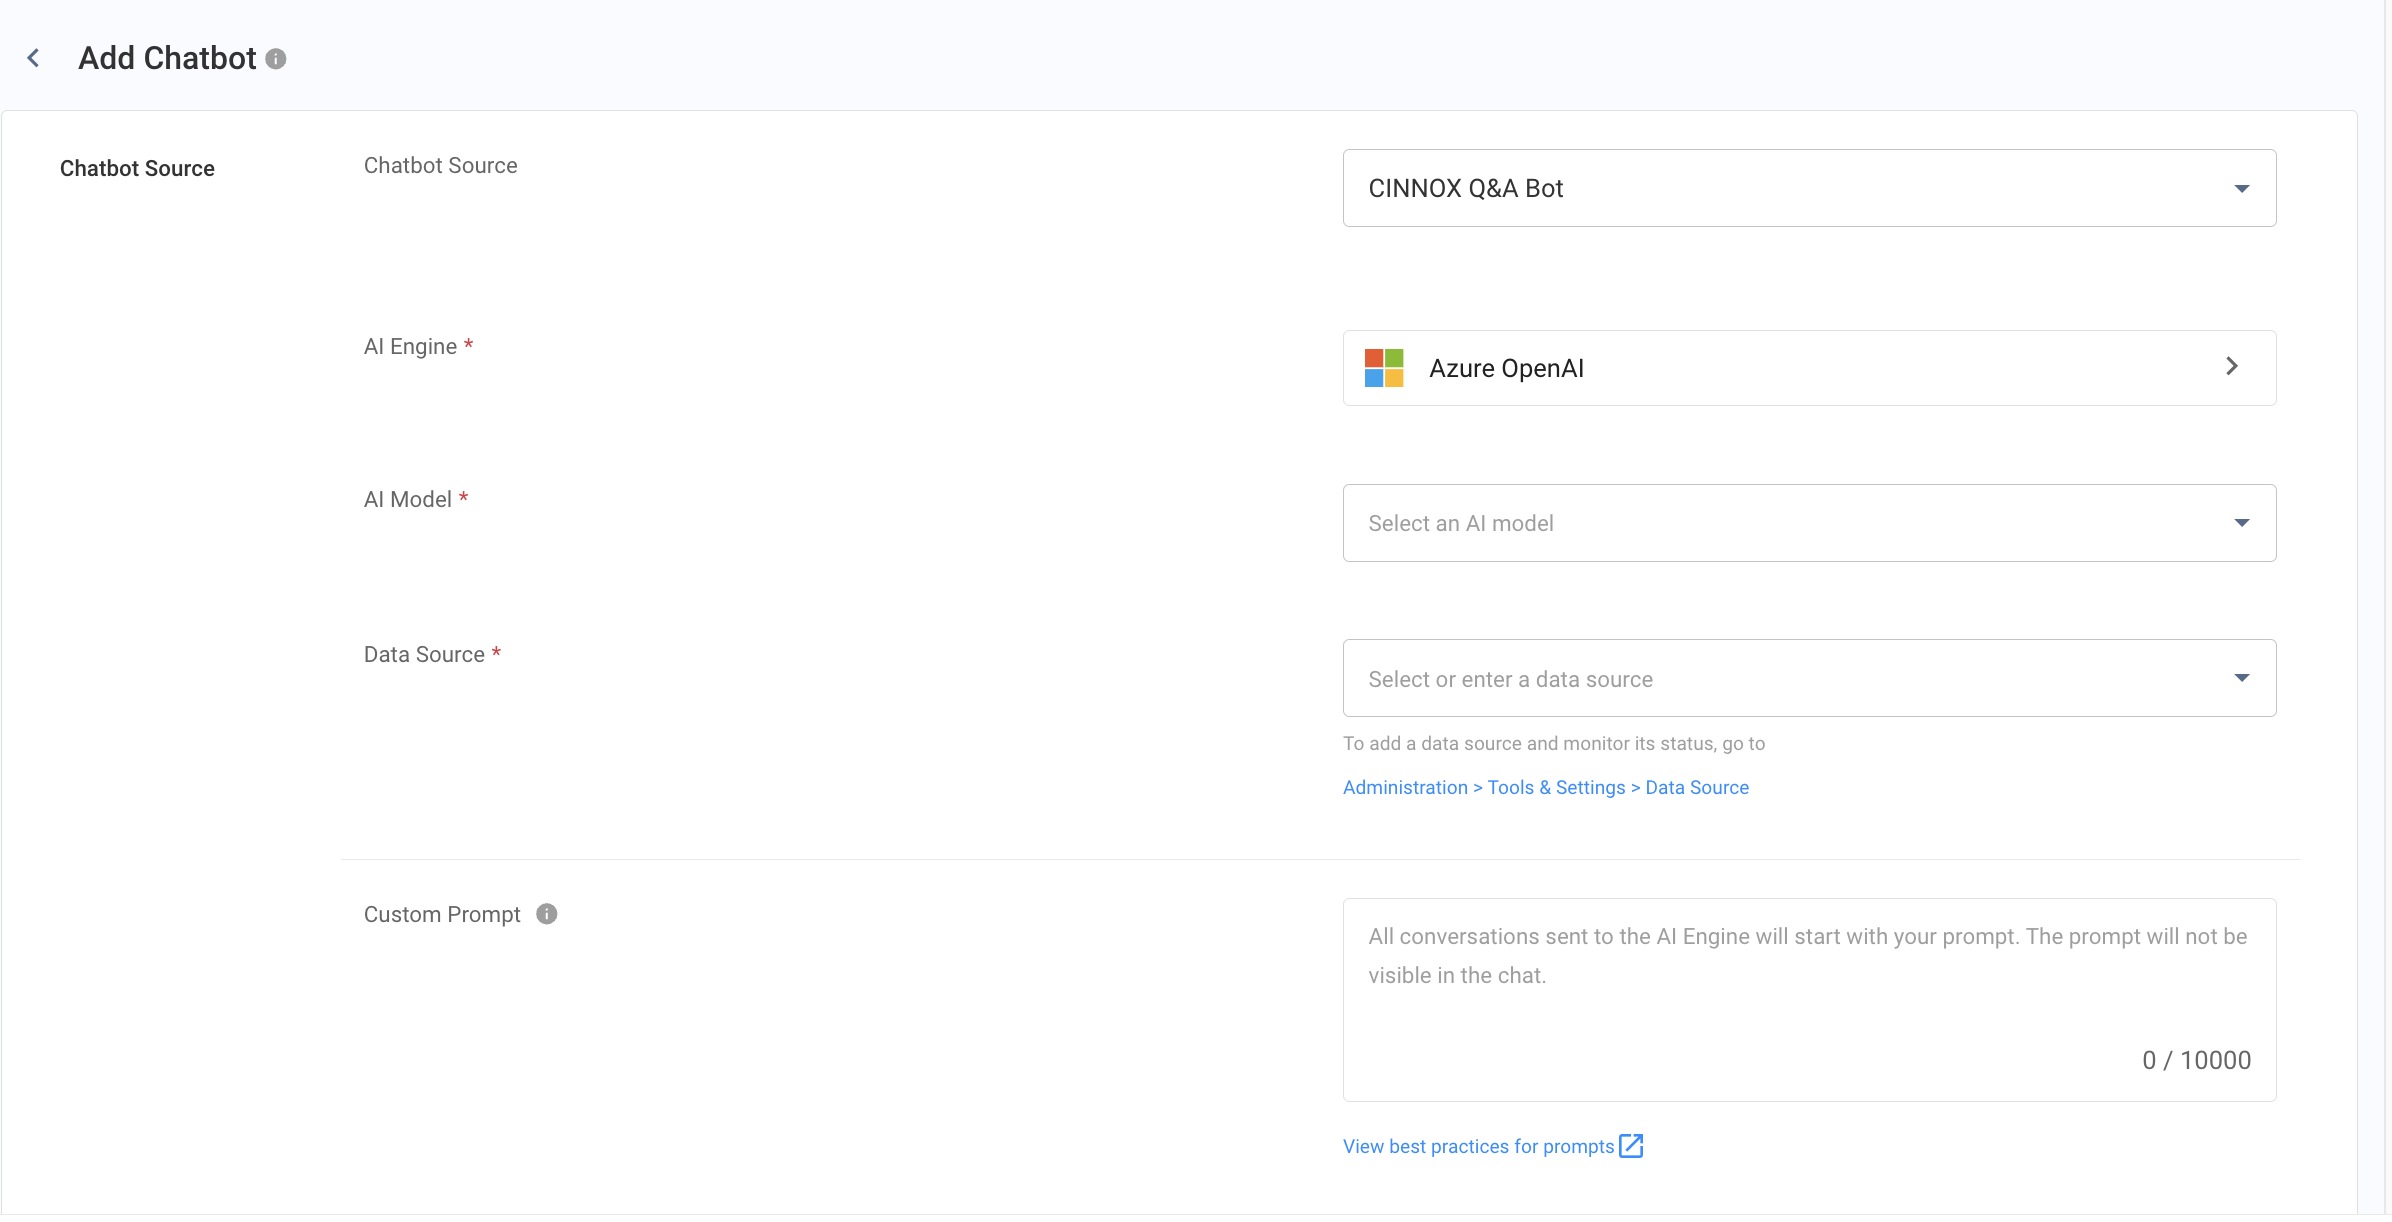
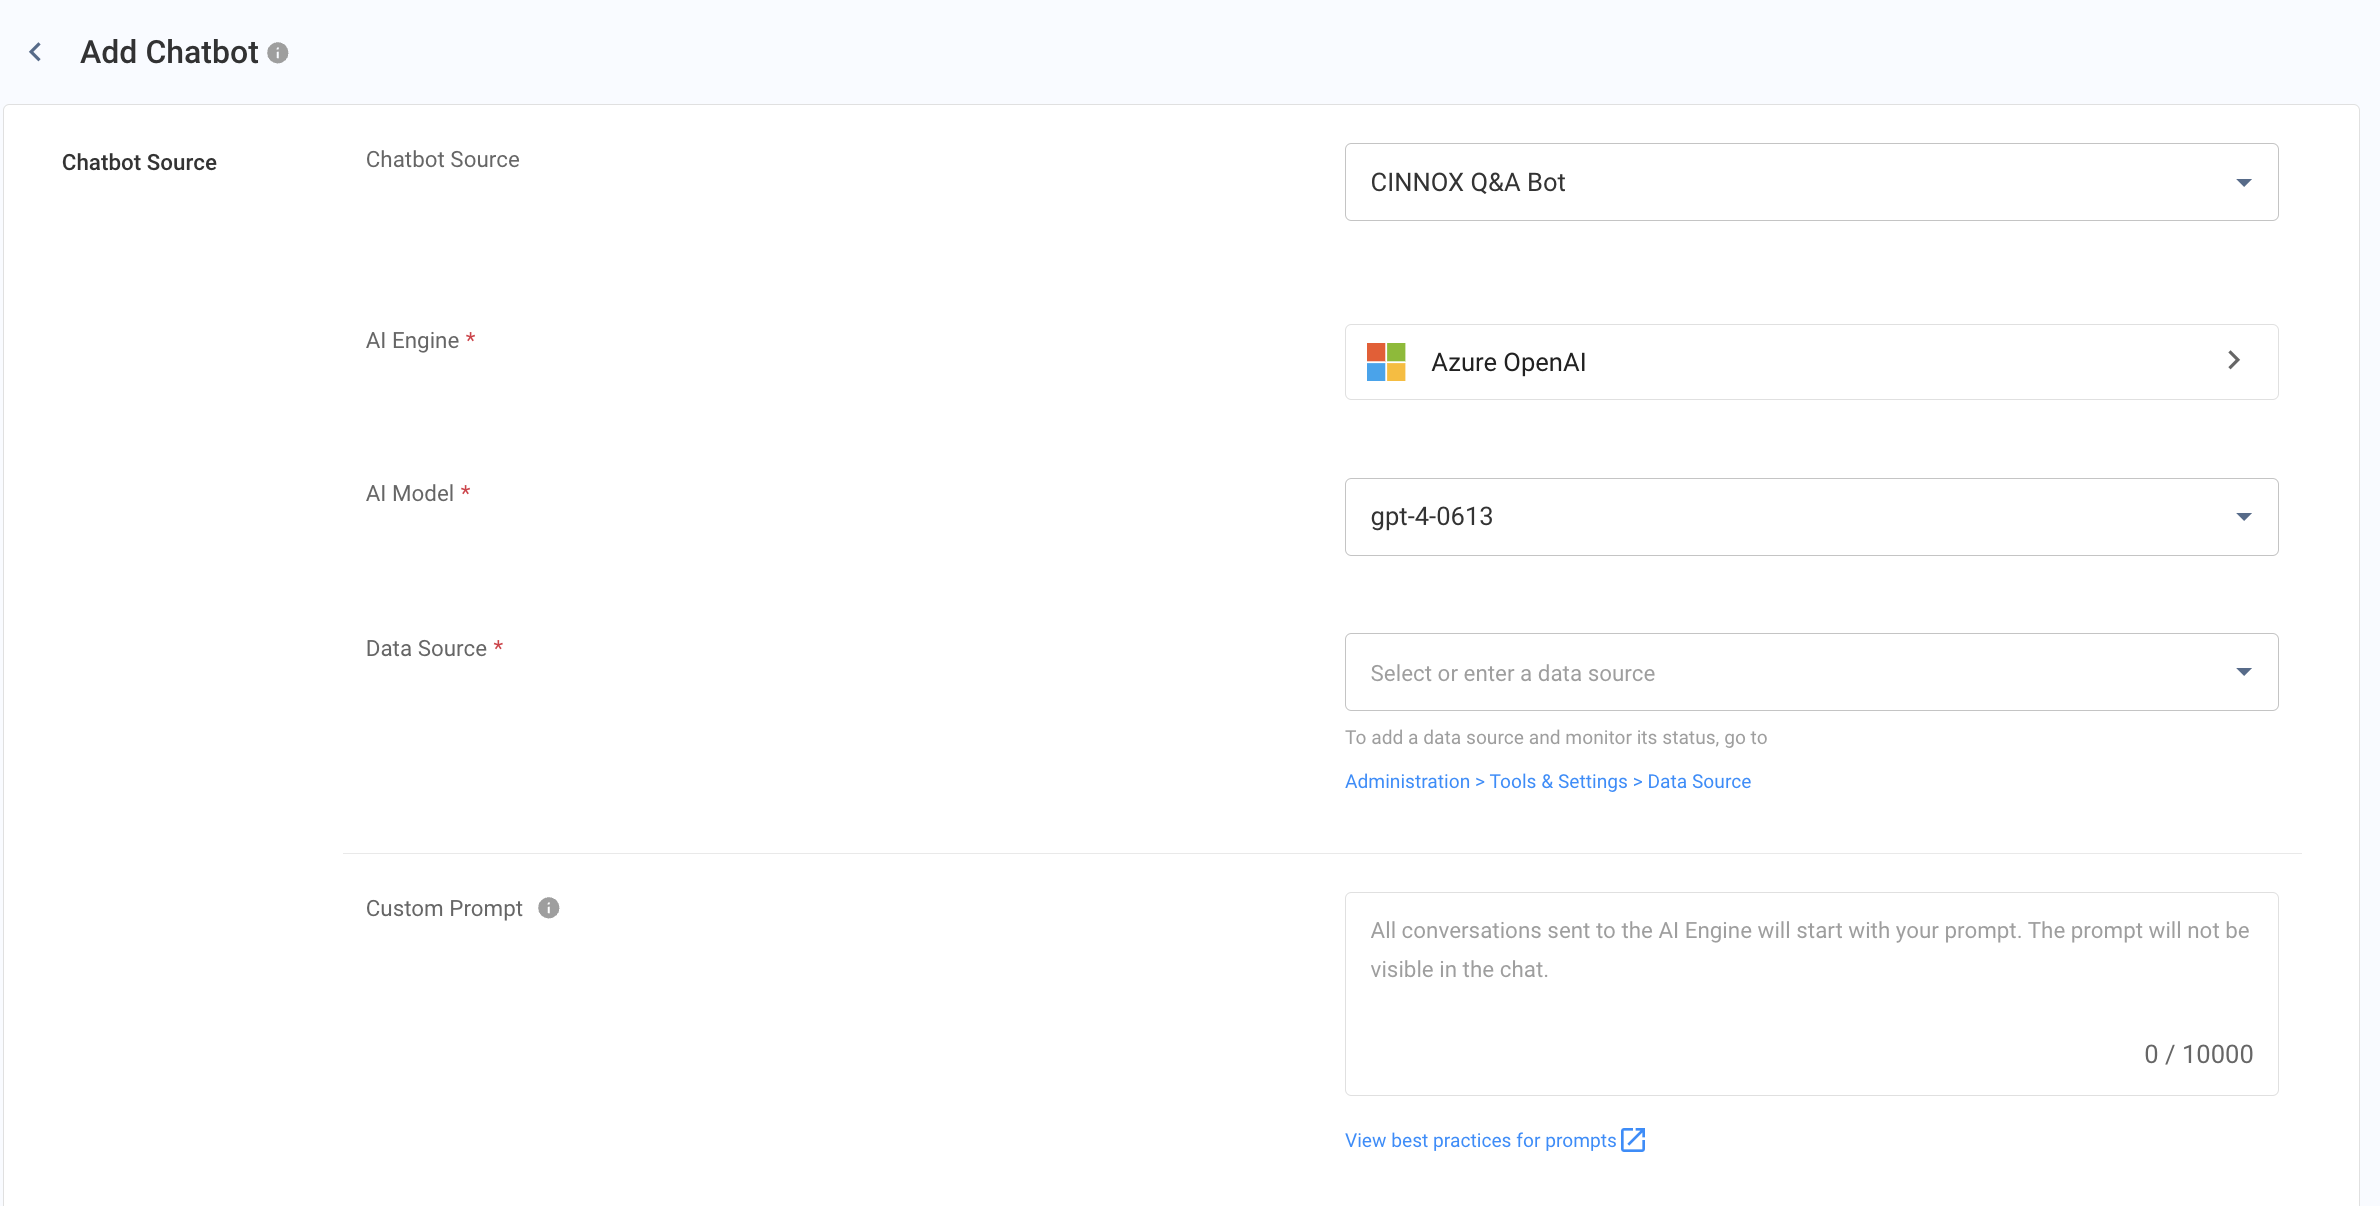
AI Engine and AI Model
- Select an AI Engine as the AI Engine supporting your CINNOX Q&A bot by clicking the dropdown list.
- Select an AI Model as the model of your selected AI Engine by clicking the dropdown list.
Reminder
- Before selecting an AI Engine and its model, please ensure the AI Engine and its model align its strengths with your specific needs.
- We recommend using model 4 or a newer version, preferably the latest model, for improved chatbot accuracy.
Data Source
- Select up to 5 Data Sources supporting your Chatbot role and scope.
Please refer to the Q&A Bot Data Source page for details on uploading your data source.
Custom Prompt
Custom Prompt refers to a specific, user-defined input or instruction the Chatbot gives to generate a particular response or result.
The prompt allows you to provide context and specify the tone, style, and type of content you want to generate from the data source and how the chatbot model behaves.
- Enter the Bot's prompt content in the Custom Prompt content box.
Reminder
- The prompt will serve as input for OpenAI to generate bot responses, but OpenAI does not guarantee that all answers will strictly adhere to the prompt.
Example Custom Prompt for a Customer Service Chatbot.
You are the Customer Service Support of our e-commerce platform, ShopSmartOnline. Your role is to assist customers by answering queries efficiently. The details from the data source consist of all the details about ShopSmartOnline products as your Knowledge Base.
- Please provide answers that are easy to understand with a consistent tone that is professional, approachable, and friendly.
- Please use Markdown for structured message formatting.
- If customers have specific queries or need assistance, offer detailed instructions to help them achieve their goals effectively.
- Please respond in the customer's preferred language to enhance their experience.
- Focus primarily on ShopSmartOnline-related enquiries and nothing else.
- If the questions are not your domain and responsibility, please say you can't help.
- Acknowledge and politely enquire if the user has additional questions.
- If a user signals the end of the conversation, provide a polite goodbye message.
- Refer to the Bot Prompts Best Practices page for more guidelines.
- The Chatbot responses supports markdown syntaxes. Refer to the CINNOX Markdown Guide for details.
- Azure OpenAI implemented the Content Filtering Policy aimed at detecting and filtering harmful content to the chatbot. For more details, please refer to Azure - Content Filtering.
Chatbot in Workspace
- Toggle it ON so the Chatbot will be visible in the Staff's Workspace's contact list. The staff member can send messages to the Bot directly as a lookup to the internal knowledge base.
- After toggling it ON, your contact list will show the created CINNOX Q&A Bot.
- Search for your required CINNOX Q&A Bot from the Contacts.
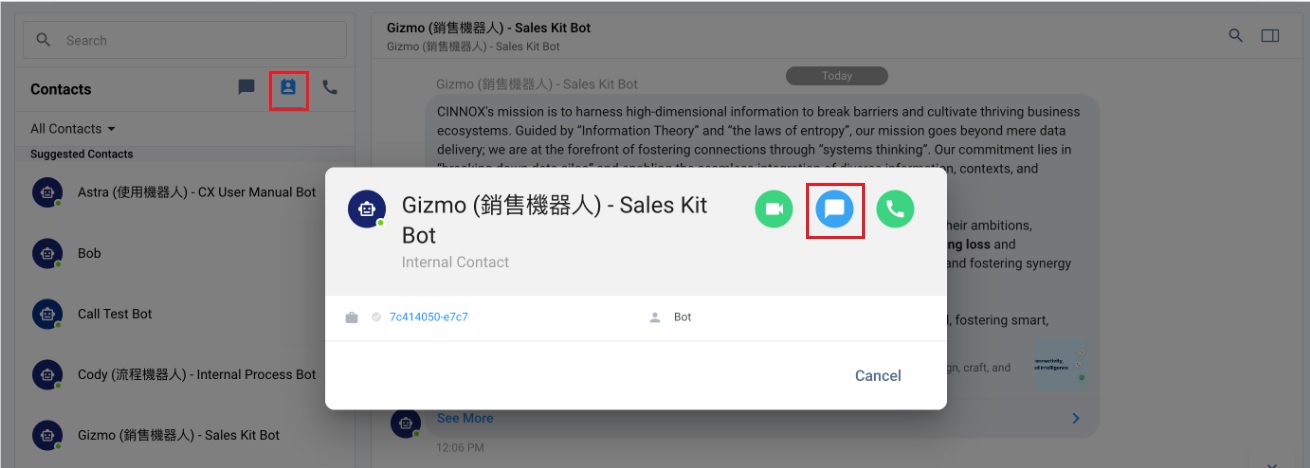
- You can send a message to the CINNOX Q&A Bot in the staff contact list in the Workspace.
- The CINNOX Q&A Bot will reply to your messages based on the selected data source.
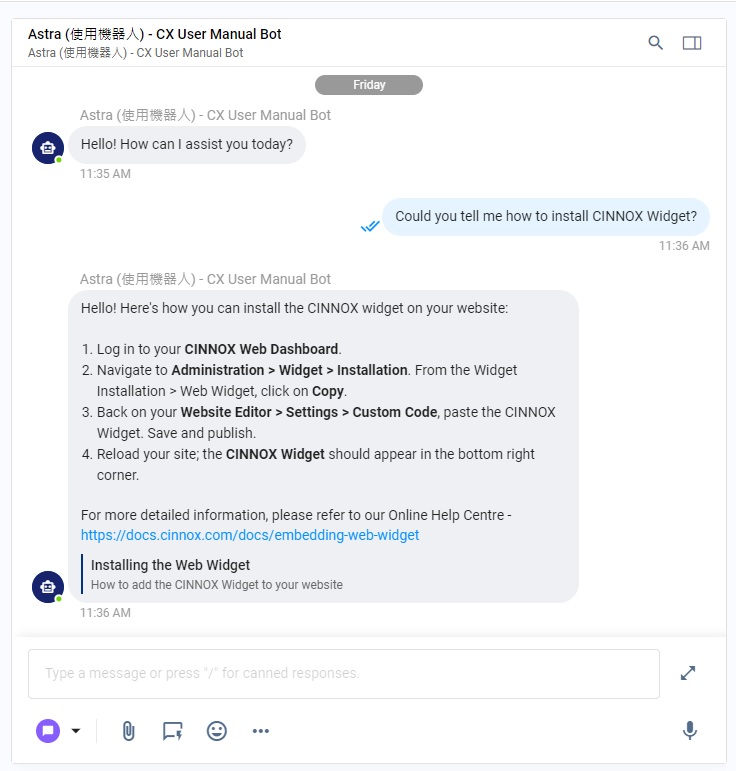
- The CINNOX Q&A Bot also supports audio messages, responding to your audio messages with text messages based on the selected data source.
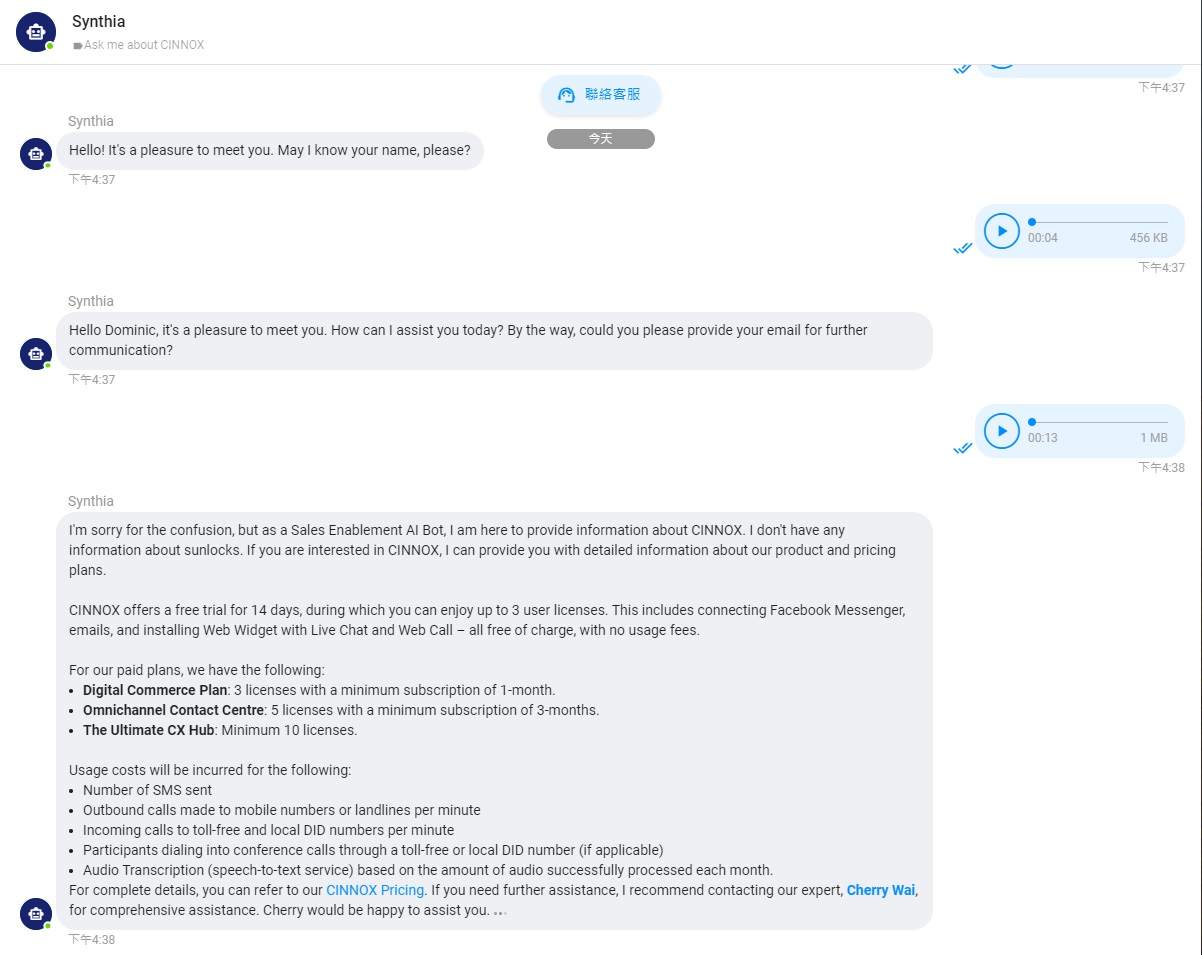
- After setting up the CINNOX Q&A Bot, you can proceed with the Chatbot Settings on the Add Chatbot page. Refer to the Chatbot Settings section for details of the remaining settings.
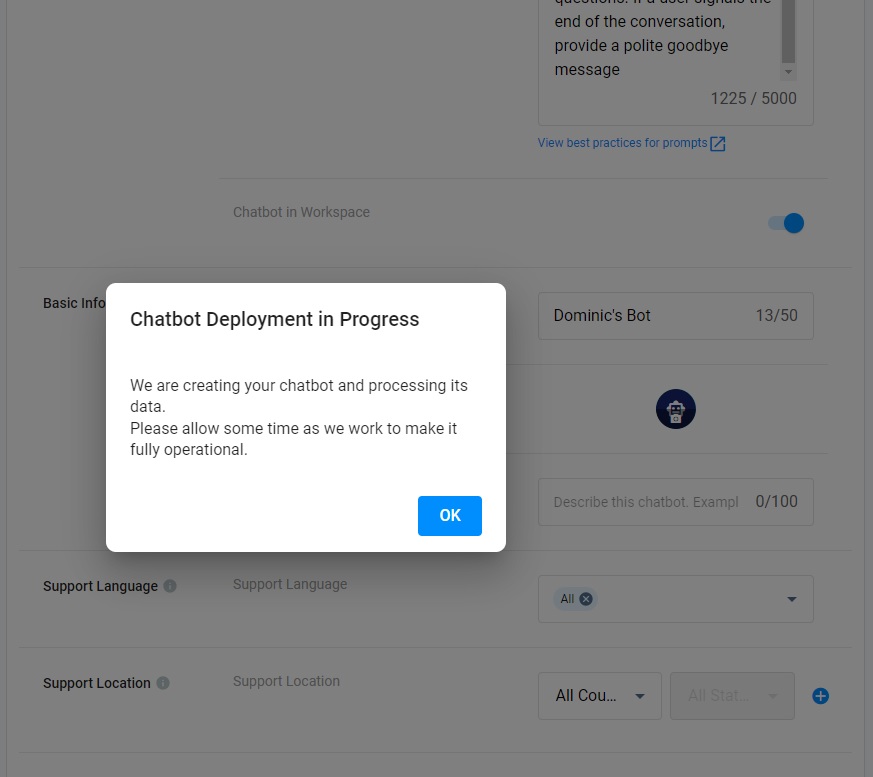
- After completing the Add Chatbot page settings and clicking the Create button, a pop-up message indicates you must wait for the CINNOX Dashboard to create your Chatbot and process the data. Click OK to close the pop-up message.
- After saving the Chatbot configuration, wait a few minutes and test it by chatting with the bot either as a staff member in the Workspace or as a visitor to the Channel where it is designated as a Destination. Please refer to the Using Chatbot to Channel section for details on adding the chatbot as a channel.
- Customise the chatbot's prompt to match your expectations.
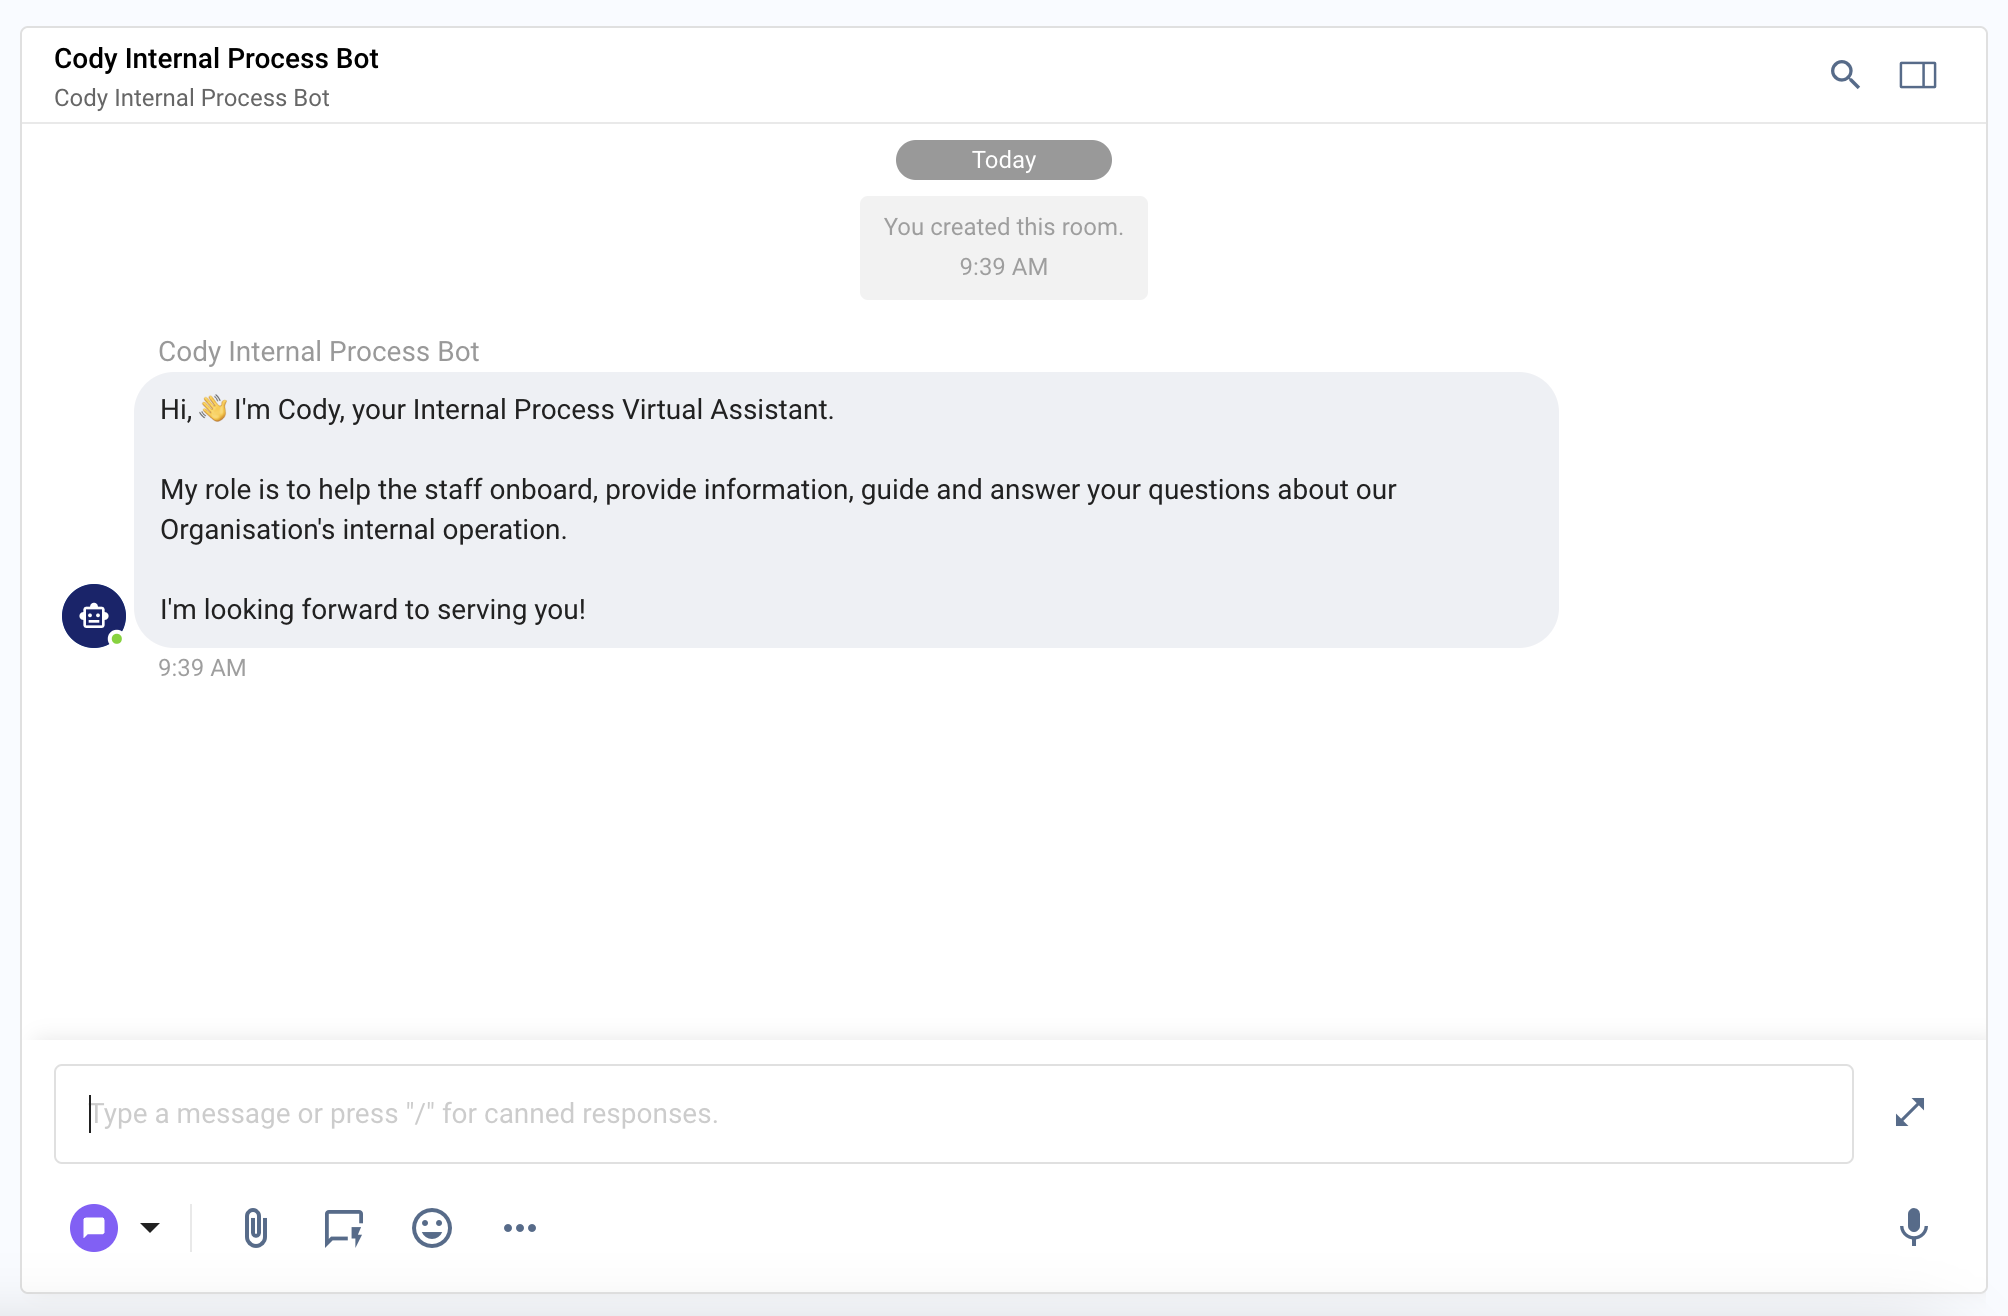
Introductory Message to Staff
The Bot's introductory message is automatically sent to Staff when the Chatbot is enabled in their Workspace. Please briefly introduce the Chatbot, including its name, role and purpose.
Example:
Hi there, 👋 I'm Cindy, your Virtual Assistant. You can chat with me if you have questions regarding CINNOX products and services.
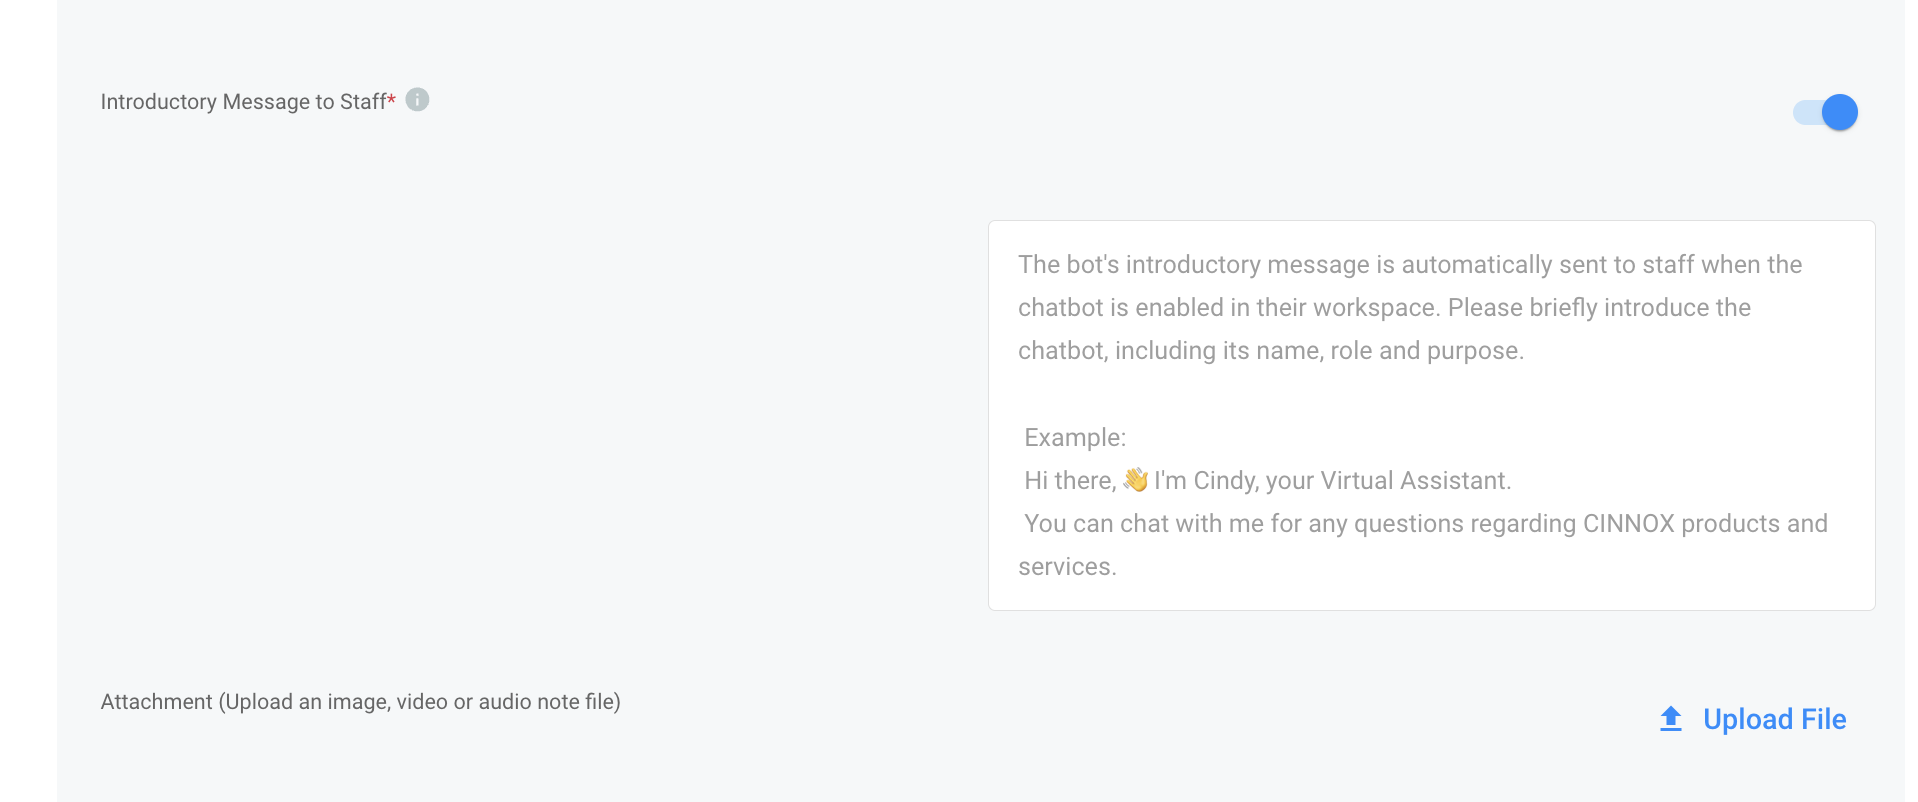
- Enable the toggle to ON.
- Add the introductory message the Staff will receive when they start chatting with the CINNOX Q&A Bot.
Transfer Ongoing Enquiries to Agents
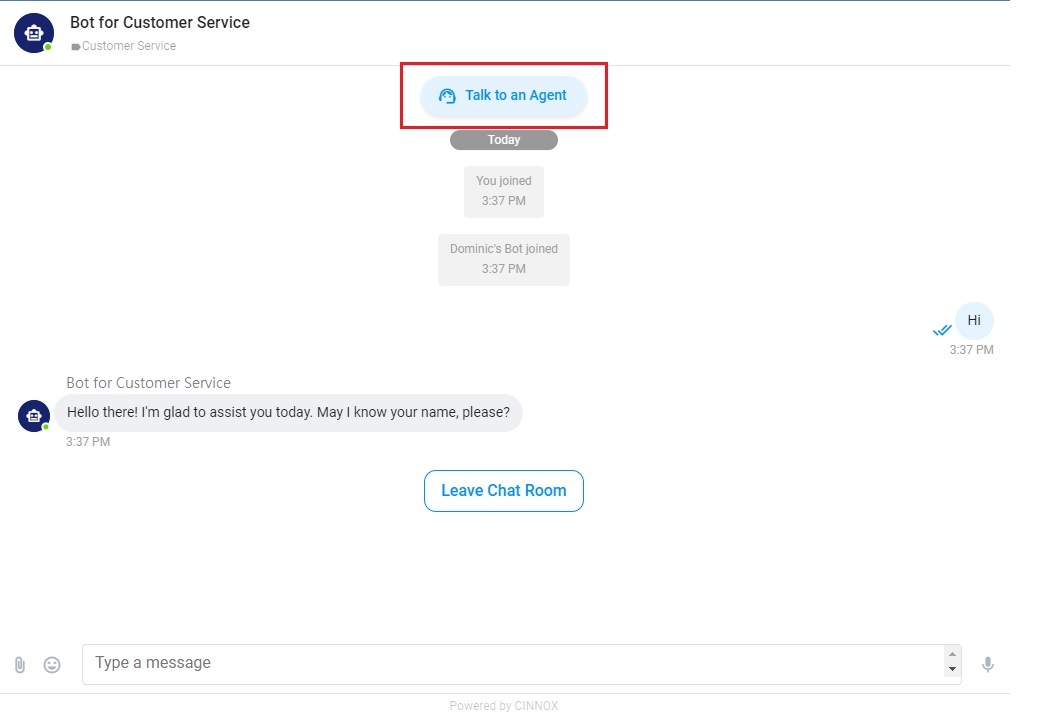
The CINNOX Q&A Bot allows visitors to transfer the ongoing chatbot-handled enquiries to agents for further assistance. Visitors have two options: click the Talk to an Agent button or enter keywords.
Click the Talk to an Agent button
- Visitors can click the Talk to an Agent button to transfer enquiries and select Make a call or Start a chat with the selected Staff or tag.
Reminder
- The Talk to an Agent button is only available in the CINNOX Widget.
Keyword Trigger
-
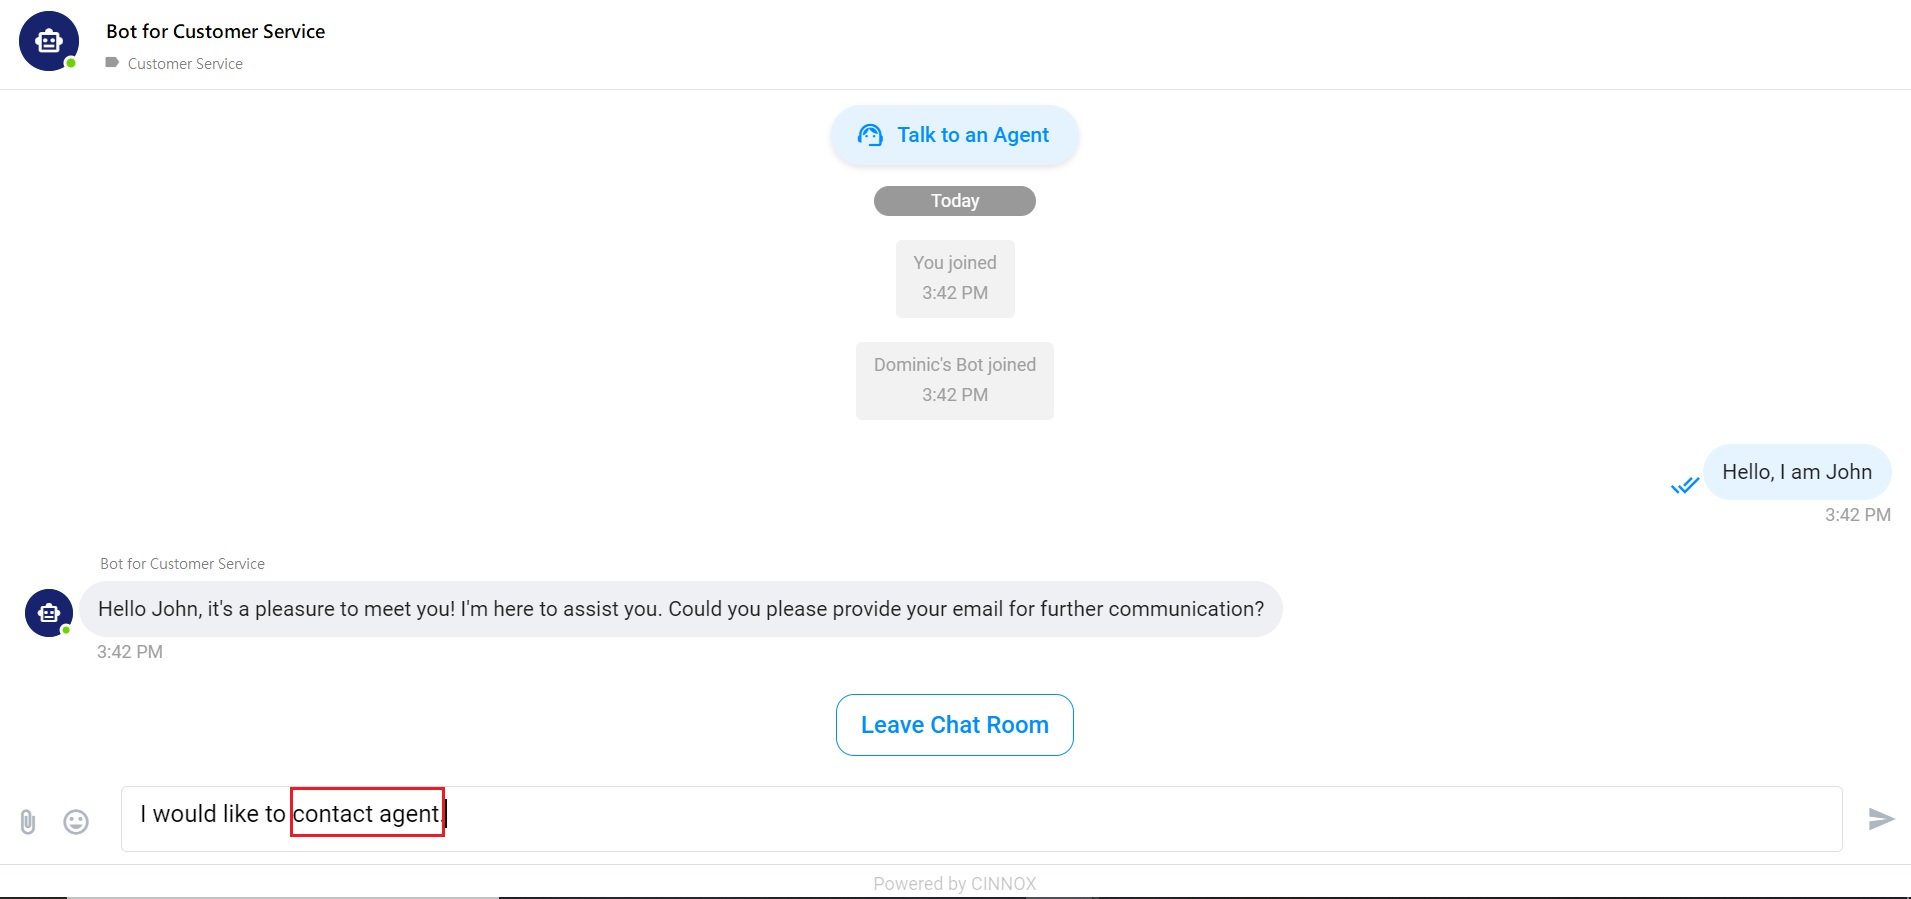
Enquiry transfers to selected Staff or tags are triggered when visitors input any of the following keywords or sentences that contain these keywords:
Keywords to initiate enquiry transfers
- contact agent (It also supports the Traditional Chinese keyword "聯絡客服" and Simplified Chinese keyword "联络客服".)
- contact an agent
- transfer to an agent (It also supports the Traditional Chinese keyword "轉移到線上客服" and Simplified Chinese keyword "转移到线上客服".)
- transfer to an agent
- contact a real person
- contact a human
- to a human
- live agent (It also supports the Traditional Chinese keyword "線上客服" and the Simplified Chinese keyword "线上客服".)
- transfer to Staff
- contact a staff
- live representative
- customer service representative
- human representative
- customer support agent
- contact an operator
- talk to an agent
Reminder
- The use of uppercase or lowercase letters has no impact on the results.
- Keyword triggers are supported in the CINNOX Widget and various social channels, including WhatsApp, Messenger, LINE, and WeChat.
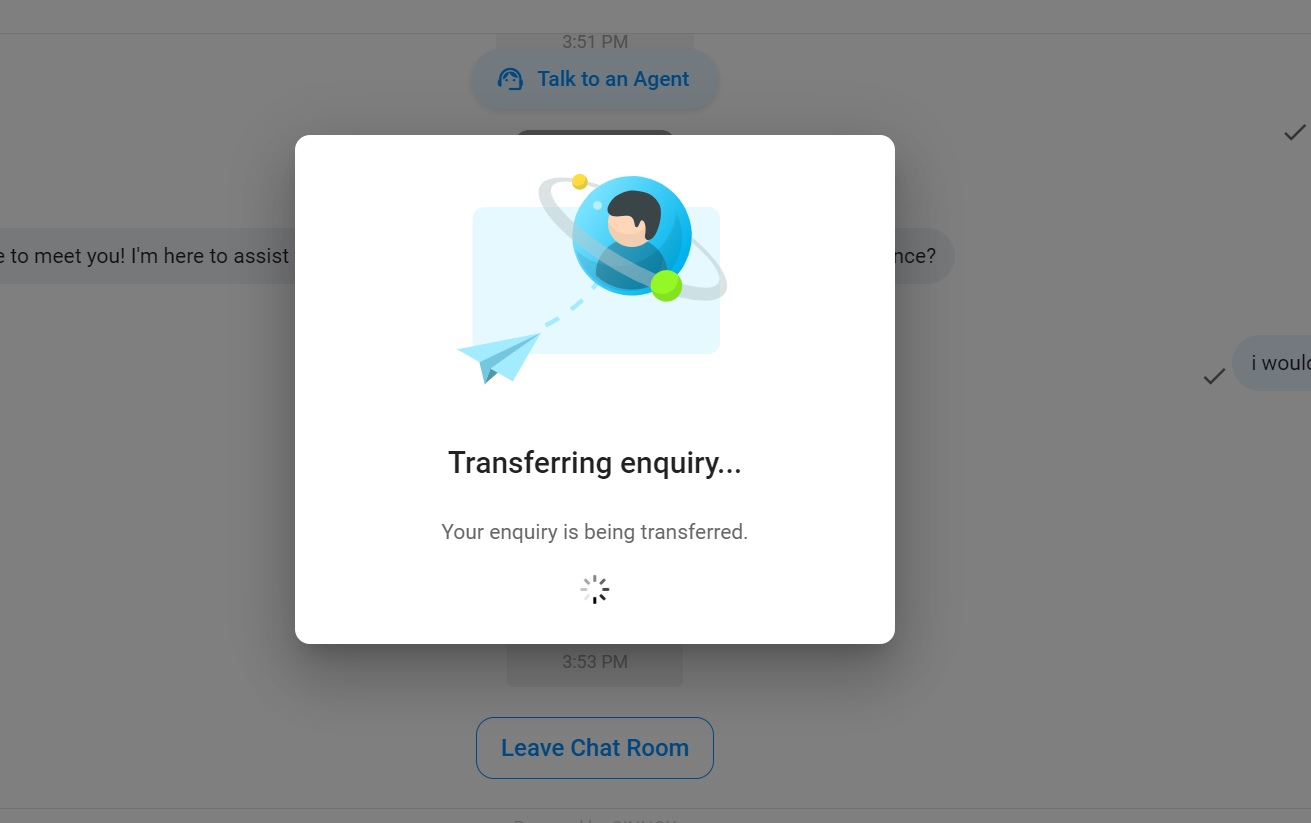
- After visitors click the Talk to an Agent button or enter keywords to transfer enquiries, a pop-up window will show Your enquiry is being transferred.
- Once the selected Staff or tag picks up the enquiries, they are successfully transferred. For more details on selecting Staff or tag to receive the transferred enquiries, please refer to the Transfer Enquiry - Chatbot to Live Agent section.
Known Limitations
- The answers provided by the Q&A Bot are generated by Azure OpenAI's ChatGPT models, which, while sophisticated, may not always be accurate. CINNOX does not ensure the precision of these responses.
- We recommend using GPT-4 or higher version for more accurate chatbot responses for AI Model selection.
- Although Azure OpenAI aims to deliver answers in the customer's language, this cannot be guaranteed. To enhance results, we advise that the data source content, description, and the visitor's language be consistent and have the same vocabulary. The Chatbot should use monolingual data sources. To handle multiple languages, users are encouraged to utilise custom prompts to input their instructions accordingly.
- The Chatbot may respond with an incorrect or broken link from time to time, according to the data source provided.
Refer to Azure Documentation and Azure OpenAI FAQ for more details
Updated 6 months ago