Joomla
Need Omnichannel Live Chat Support for your Joomla website?
CINNOX offers an omnichannel solution that seamlessly integrates with Joomla. Engage with your website visitors in real time through live chat, providing instant support and boosting customer satisfaction. With CINNOX, you can effortlessly handle customer enquiries across various channels and devices, including social media, email, and calls. Simplify your customer service with CINNOX's omnichannel solution today.
Joomla is a free and open-source content management system for publishing web content developed by Open Source Matters, Inc. It is built on a model–view–controller web application framework that can be used independently of the CMS. ~ source Wikipedia
For more details about Joomla, visit their website at www.joomla.org.
The CINNOX: Live Chat and Call for Joomla lets you instantly add call and chat functions on your Joomla site so you can promptly answer enquiries from your online visitors. It installs the CINNOX Widget on your page and lets you use the platform's core features without editing Joomla's page templates.
Here are the ways to install CINNOX Widget and the CTA on your Joomla Site:
Install CINNOX Widget via Joomla Extension
The following is a step-by-step guide to installing the CINNOX Widget on your Joomla-based website using the CINNOX Extension:
- Log in to your Joomla administrator panel.
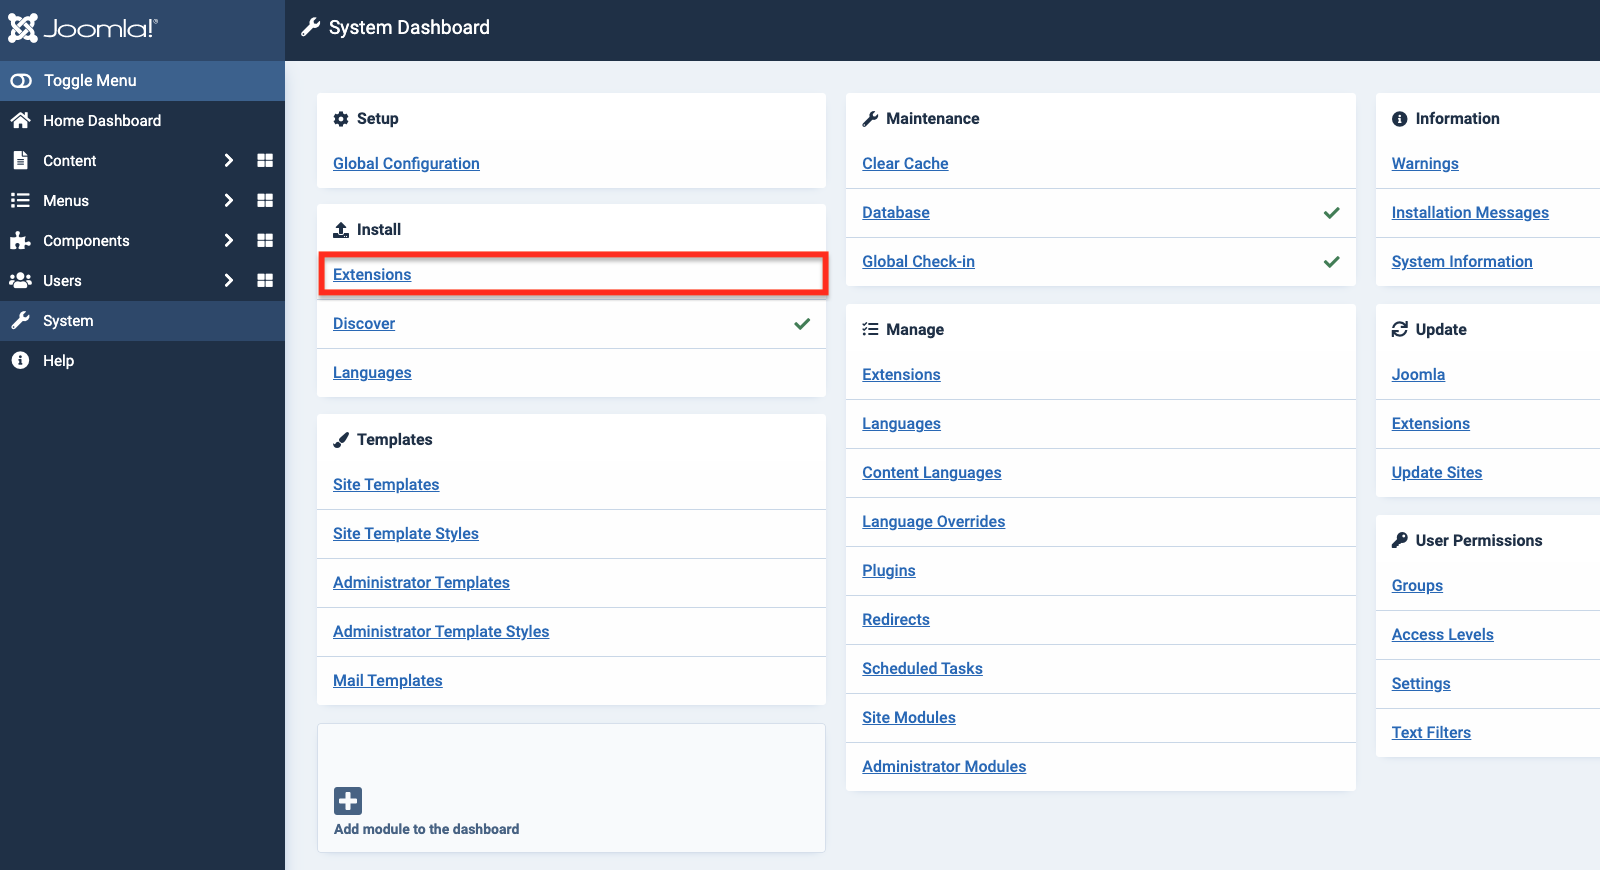
- On the System menu, go to Install > Extensions.
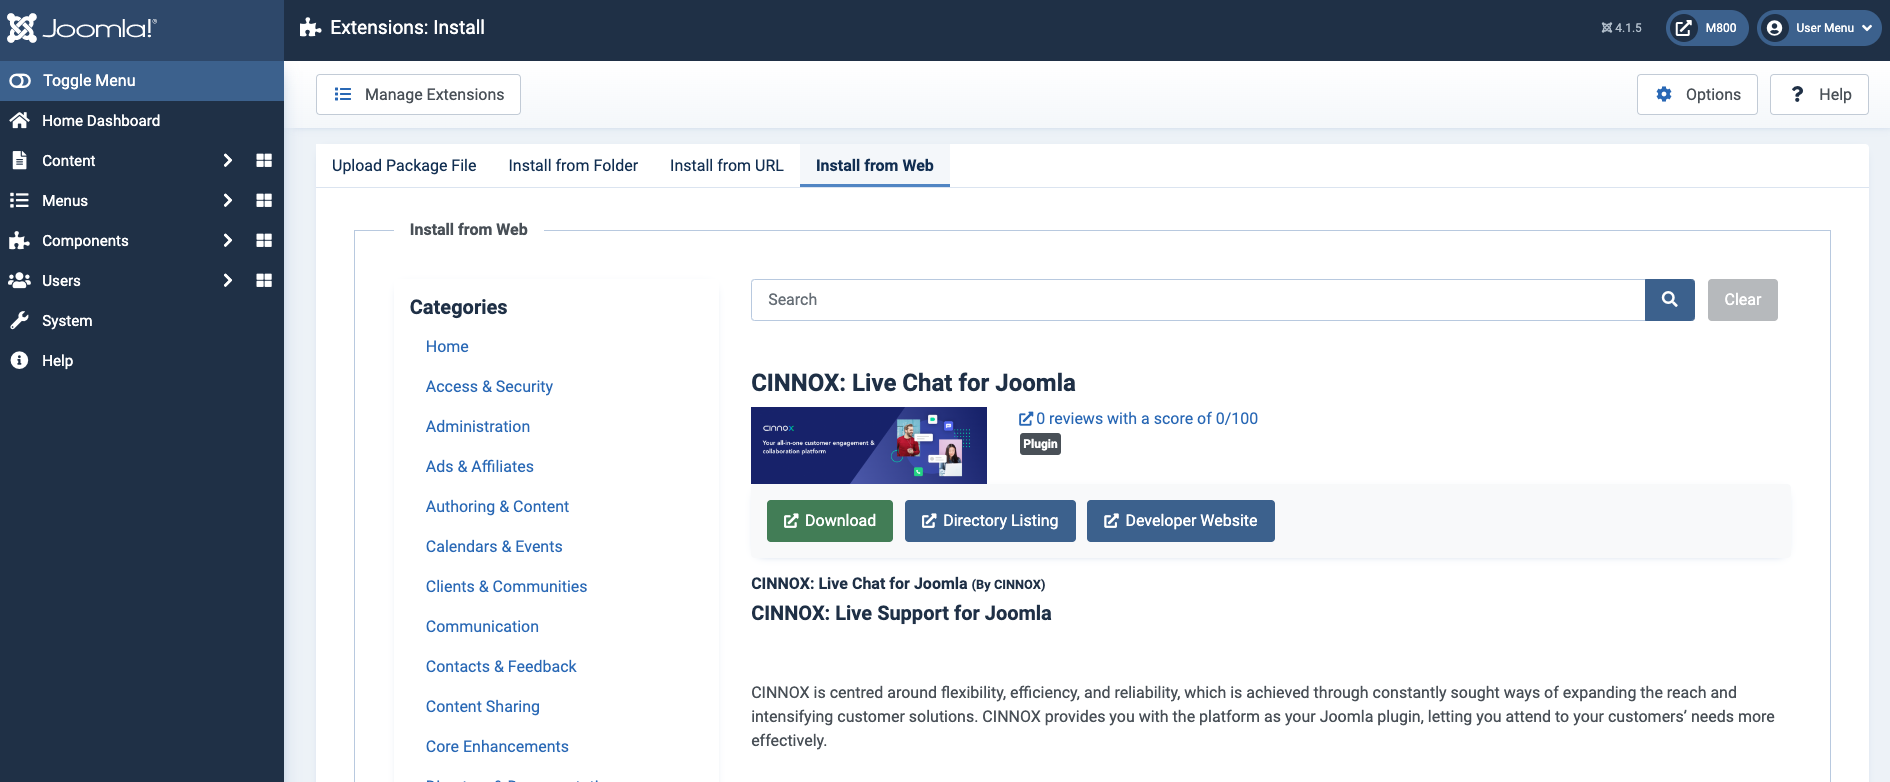
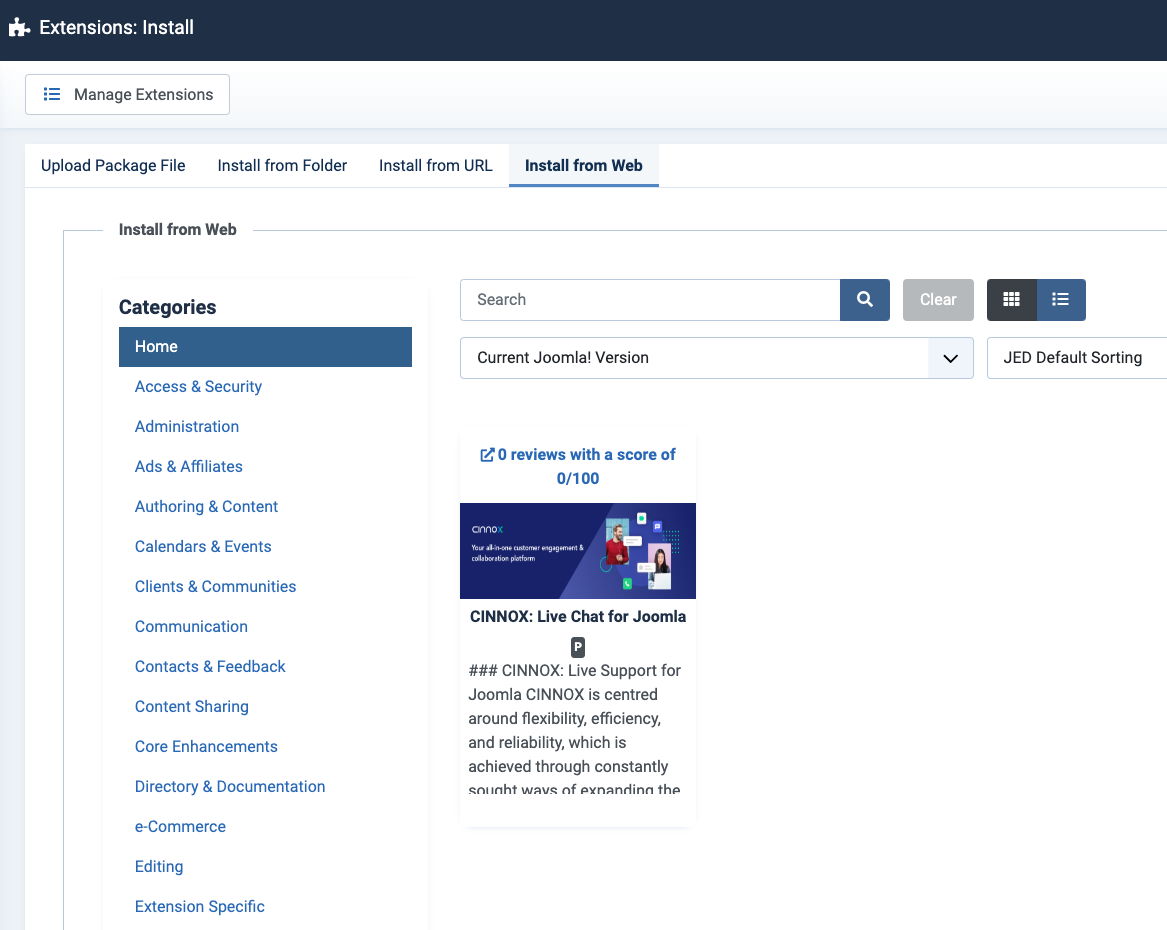
- On the Extensions: Install page that will appear, click on the Install from Web tab
- Type CINNOX in the search bar and click the Search icon.
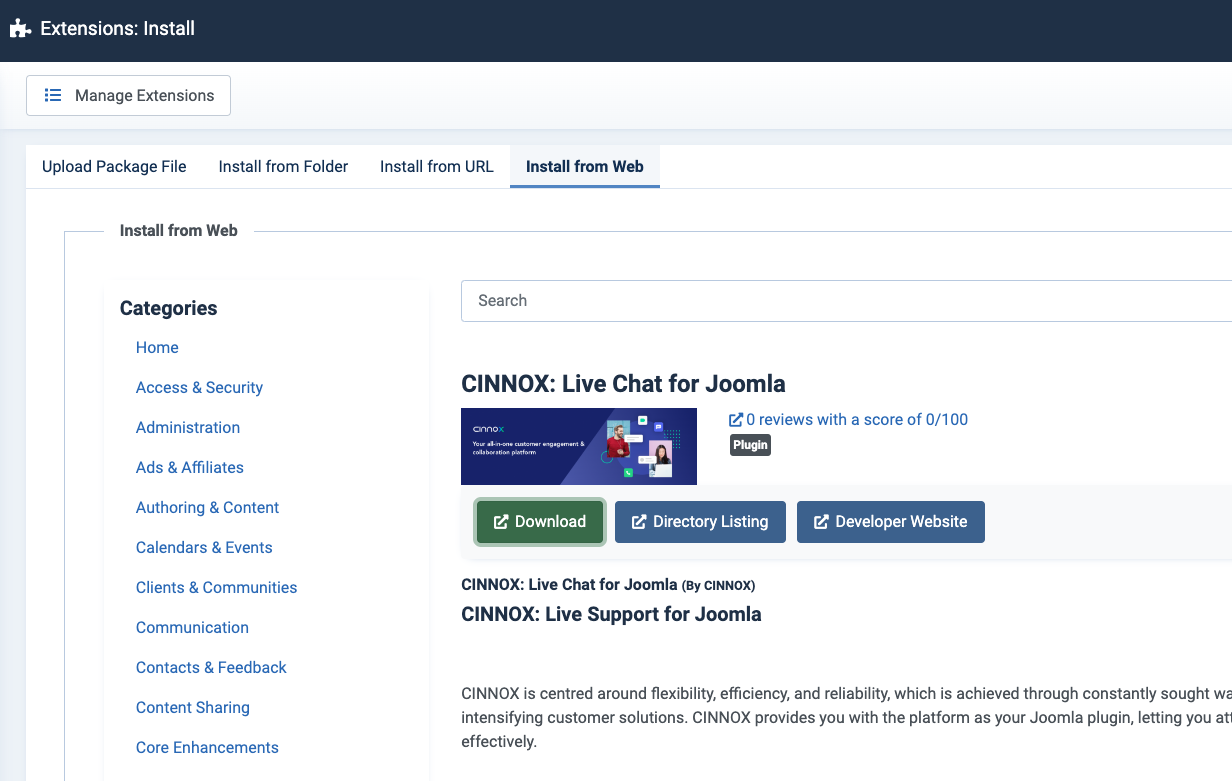
- From the search results, click from within the CINNOX extension description.**
- Click Download on the CINNOX extension page.
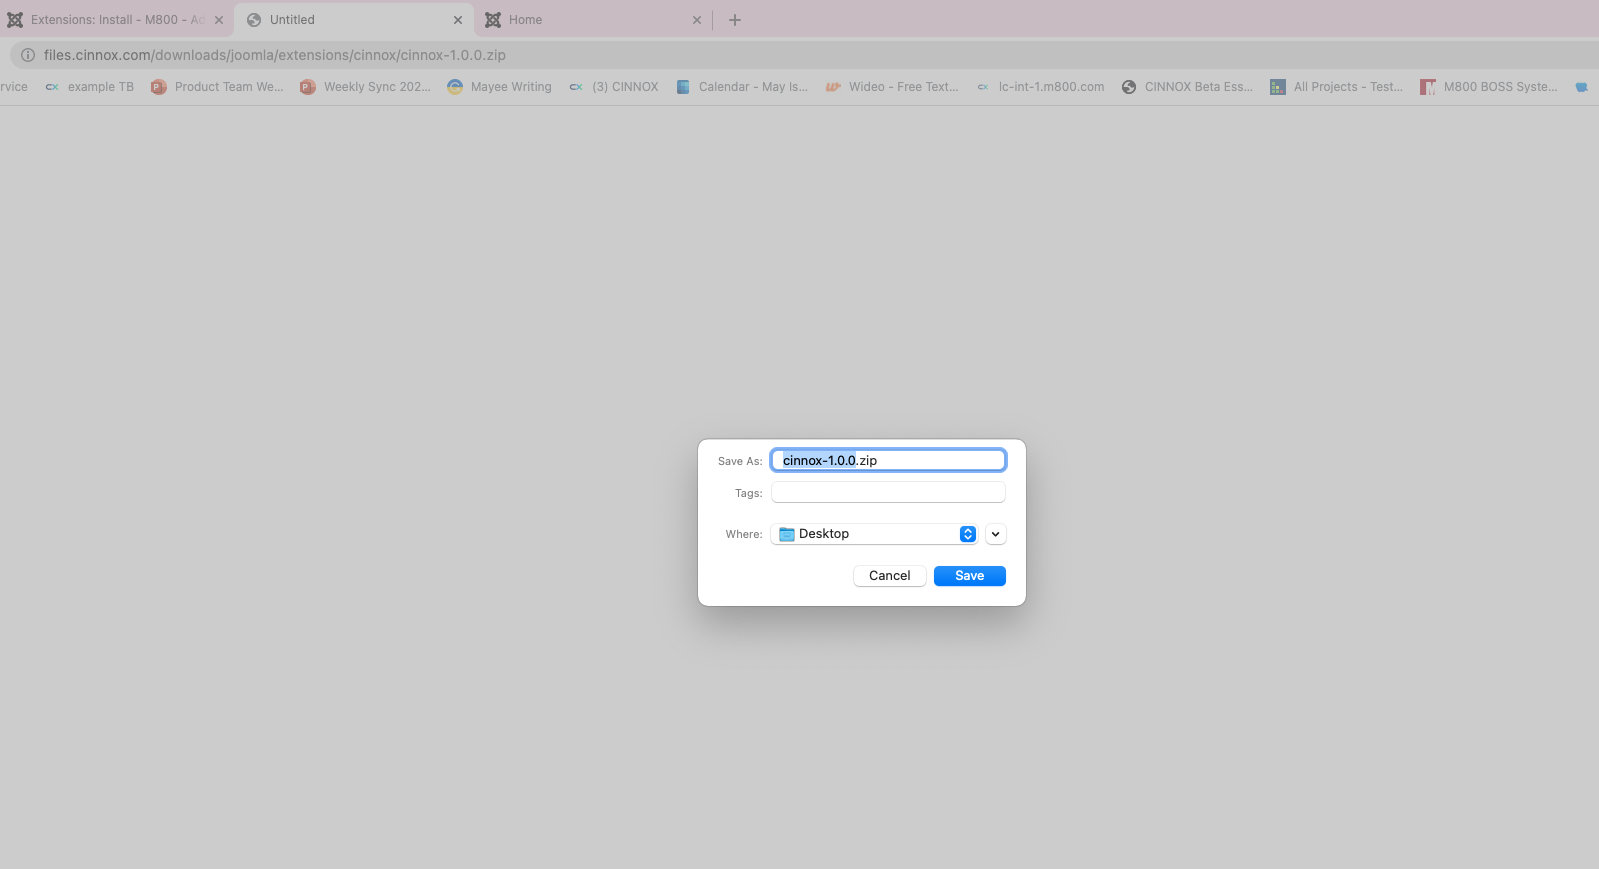
Another tab will appear to download the CINNOX extension zip file.
- Choose the file's location to be saved and click Save.
- Back on the System menu, go to Install > Extensions

- Select the Upload Package File tab.
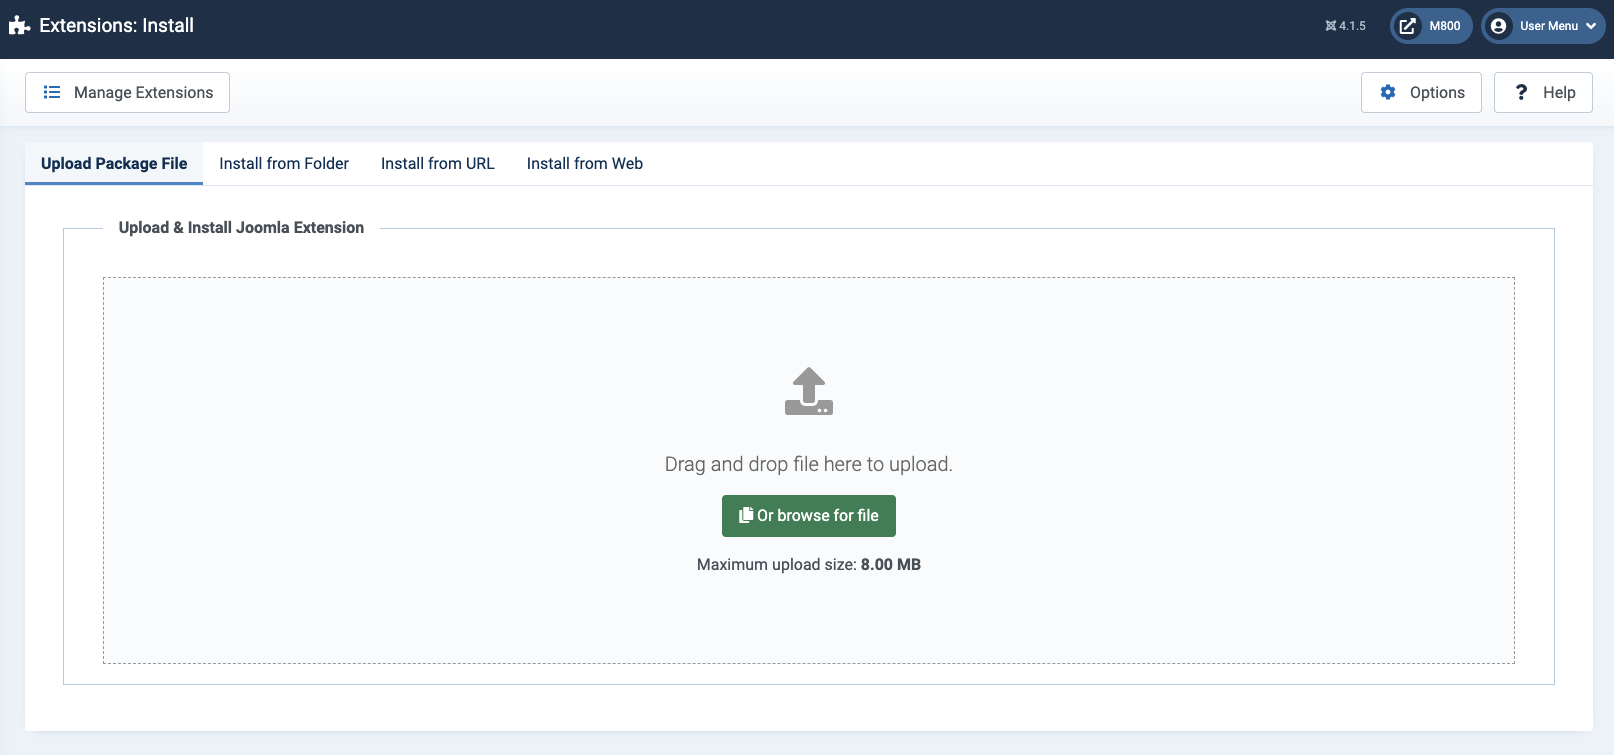
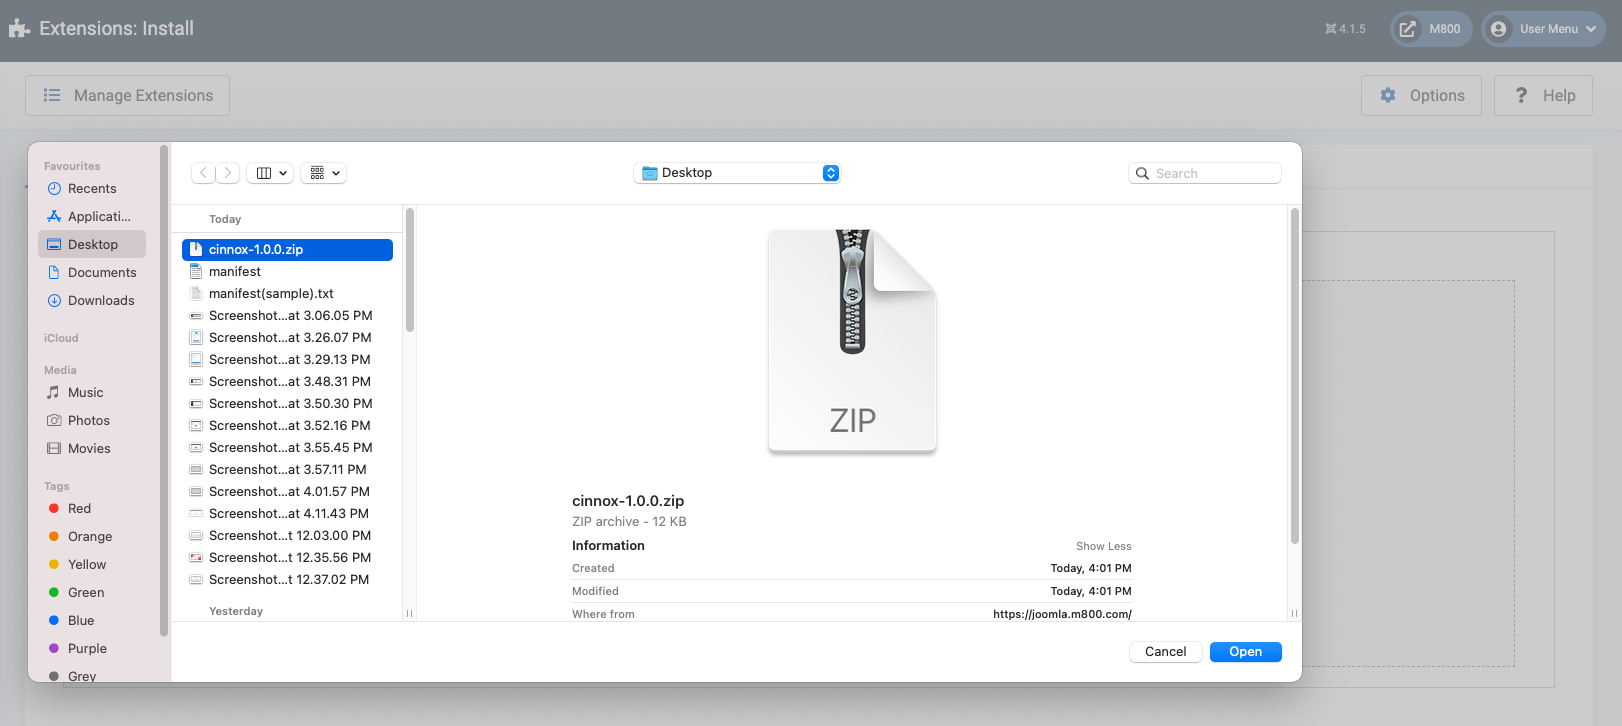
- Drag and drop the file here to upload or click Or browse for file of the CINNOX zip file that has been downloaded
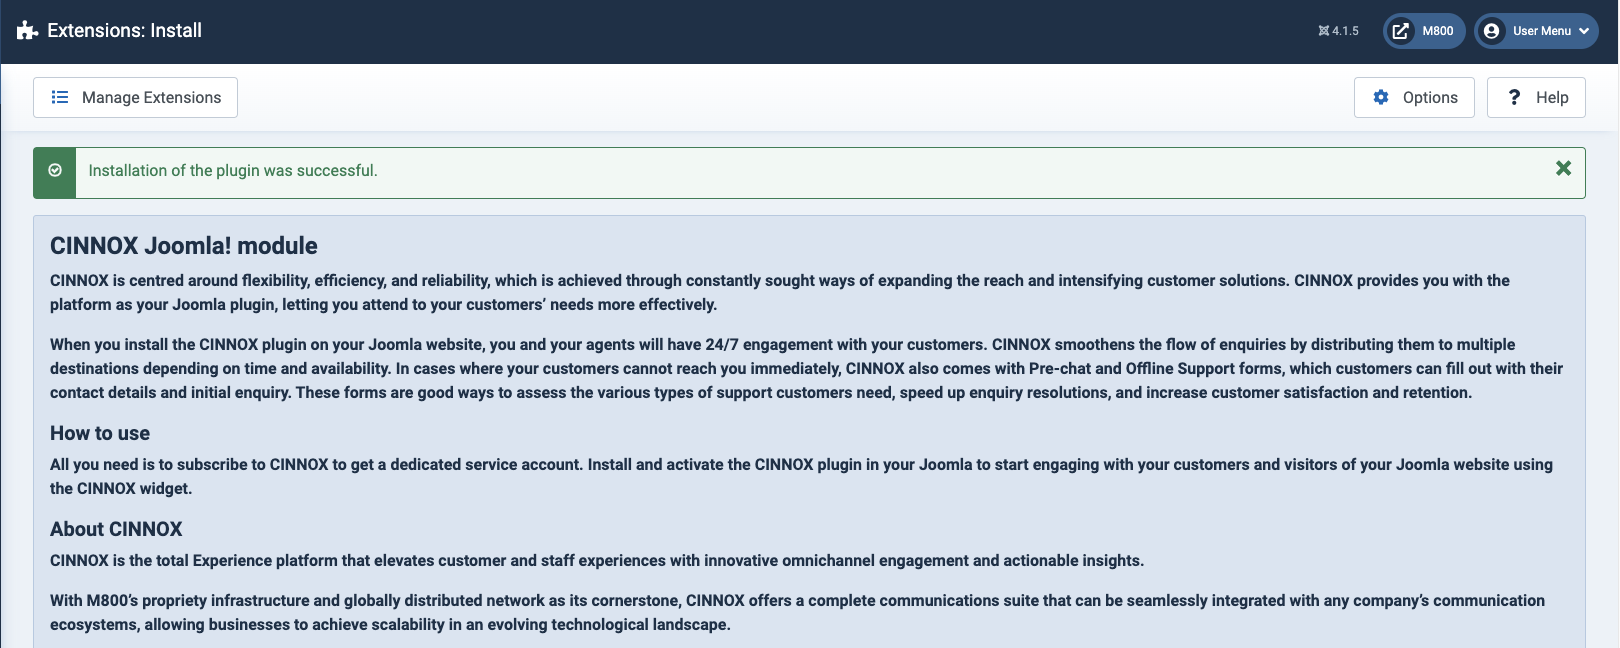
A toast message will display on top of the page for the successful plugin installation.
- Back on the System menu, navigate to Manage > Plugins
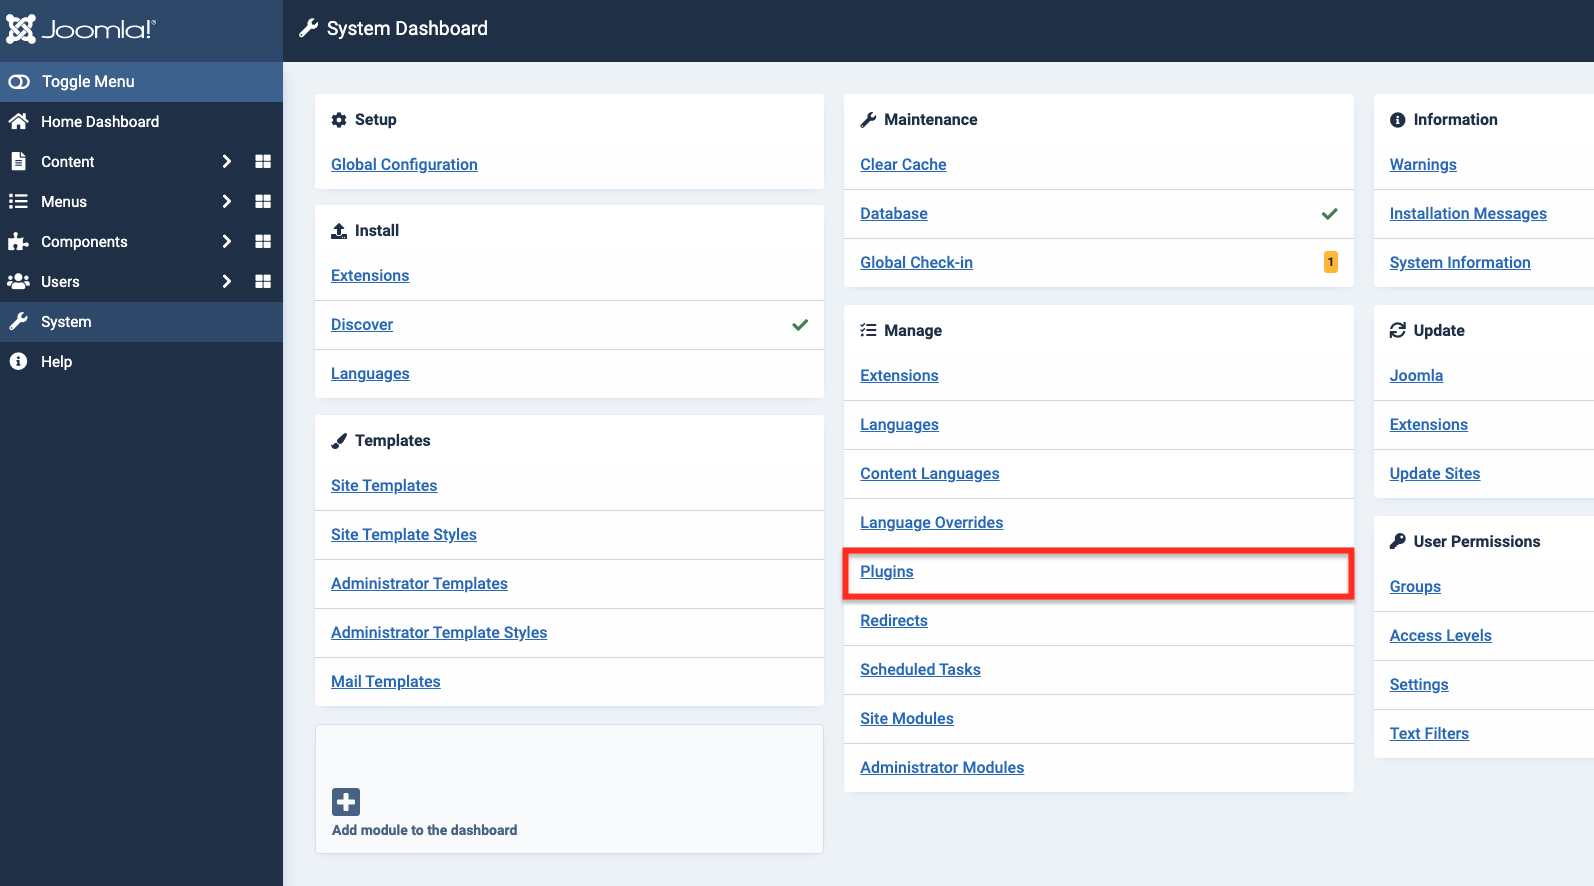
You will be redirected to the Plugins list
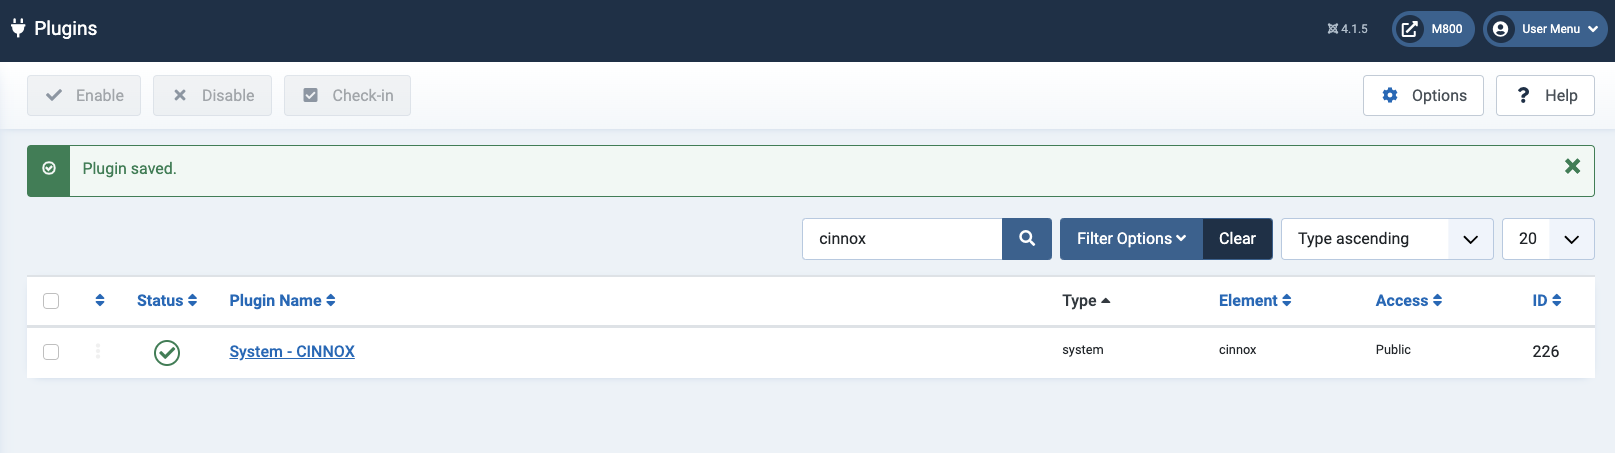
- Type CINNOX in the search bar and click the Search icon.
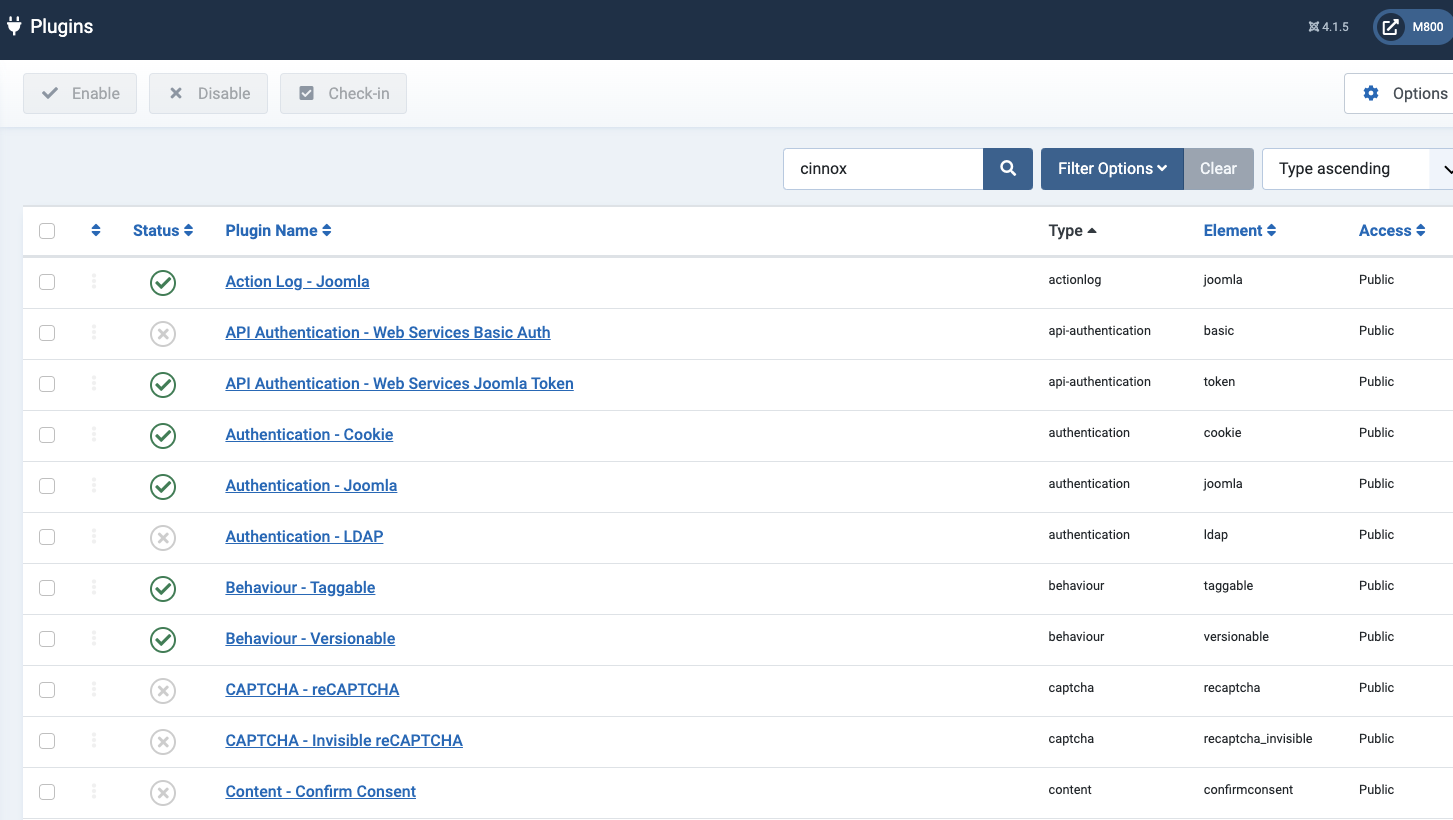
The CINNOX plugin will appear after the search.
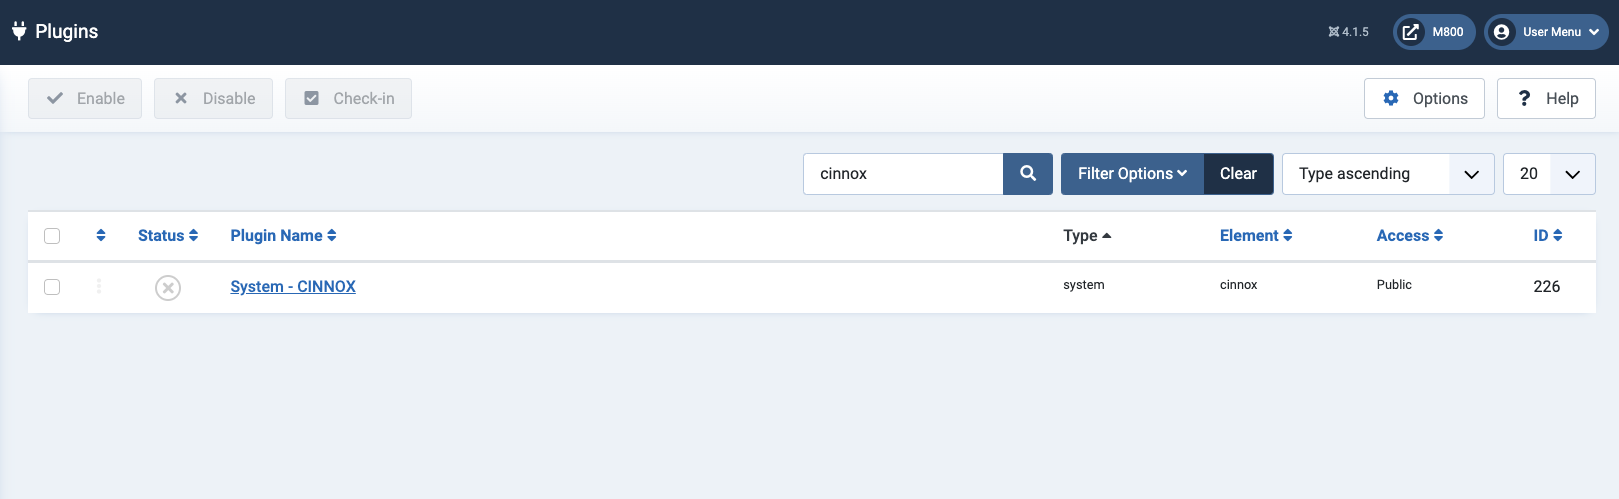
- Tick the checkbox for the System - CINNOX plugin name
- Click Enable .

A toast message will appear that the plugin has been enabled.

- Click the System - CINNOX to open the description of the Plugins: System - CINNOX plugin.
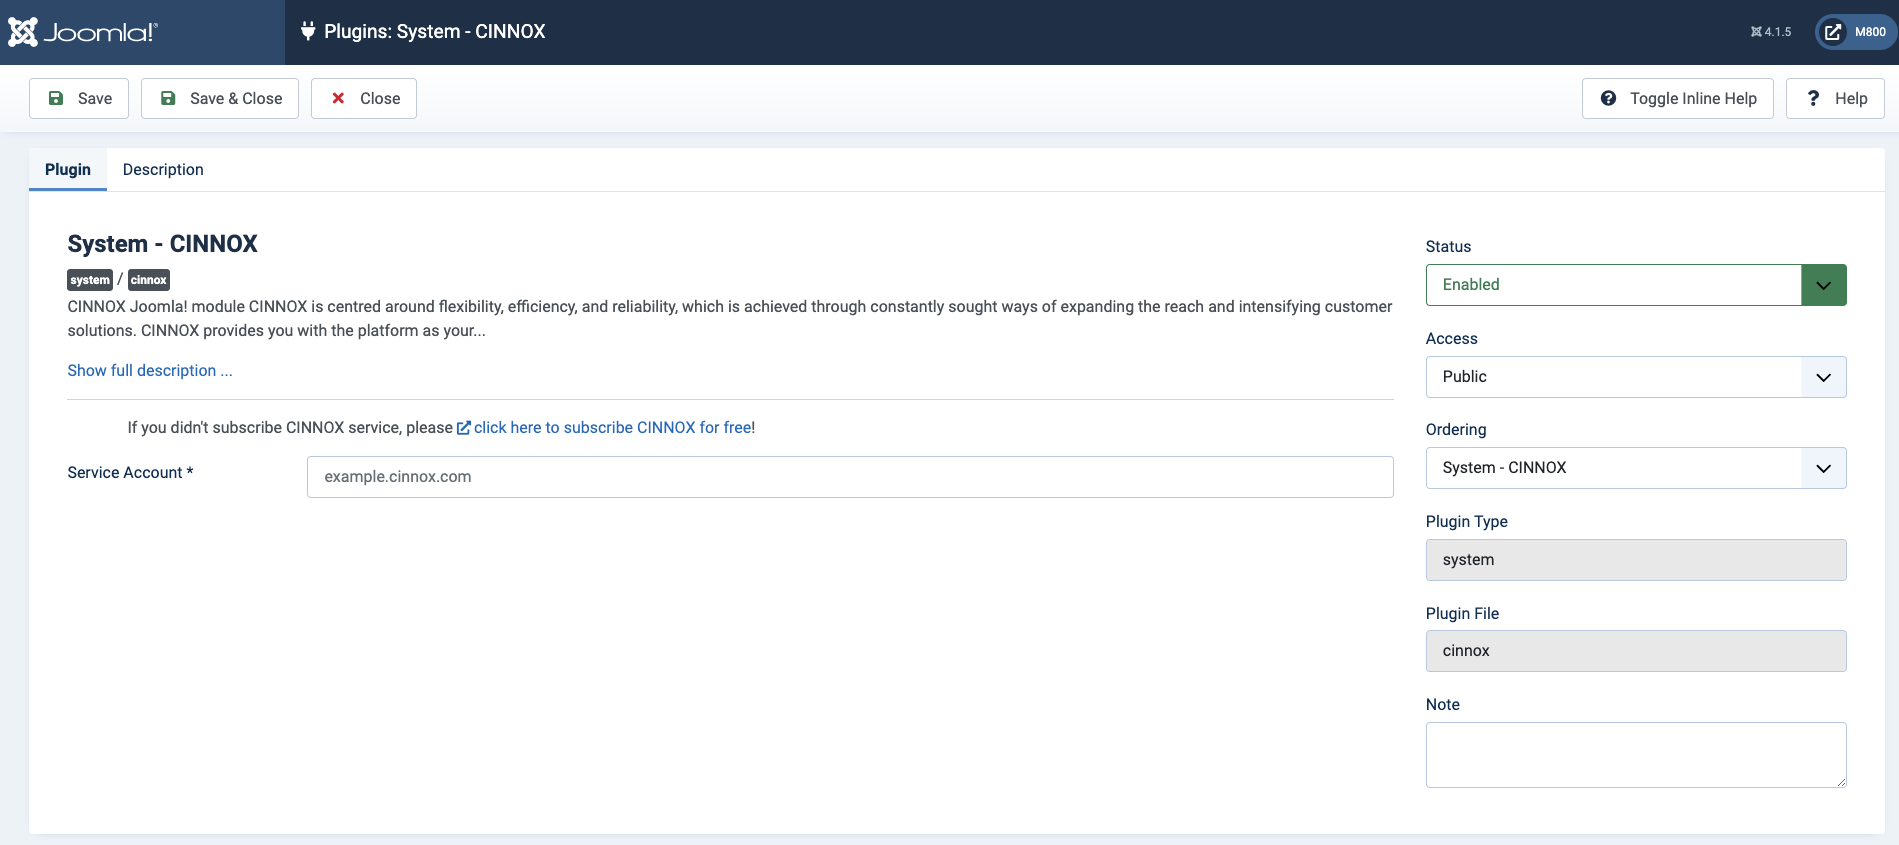
- Enter your CINNOX Service Account - it is the use subdomain of the URL you use when logging in to your CINNOX Dashboard or App.
e.g. abc.cinnox.com - Click Save & Close
A toast message will appear that the plugin has been saved.
Refresh your website. The CINNOX widget should appear at the bottom right corner of the page.
Install CINNOX Widget Manually via the Site Templates
Here are the steps to follow when adding the CINNOX web widget on your Joomla site manually
- Log in to your Joomla Org.
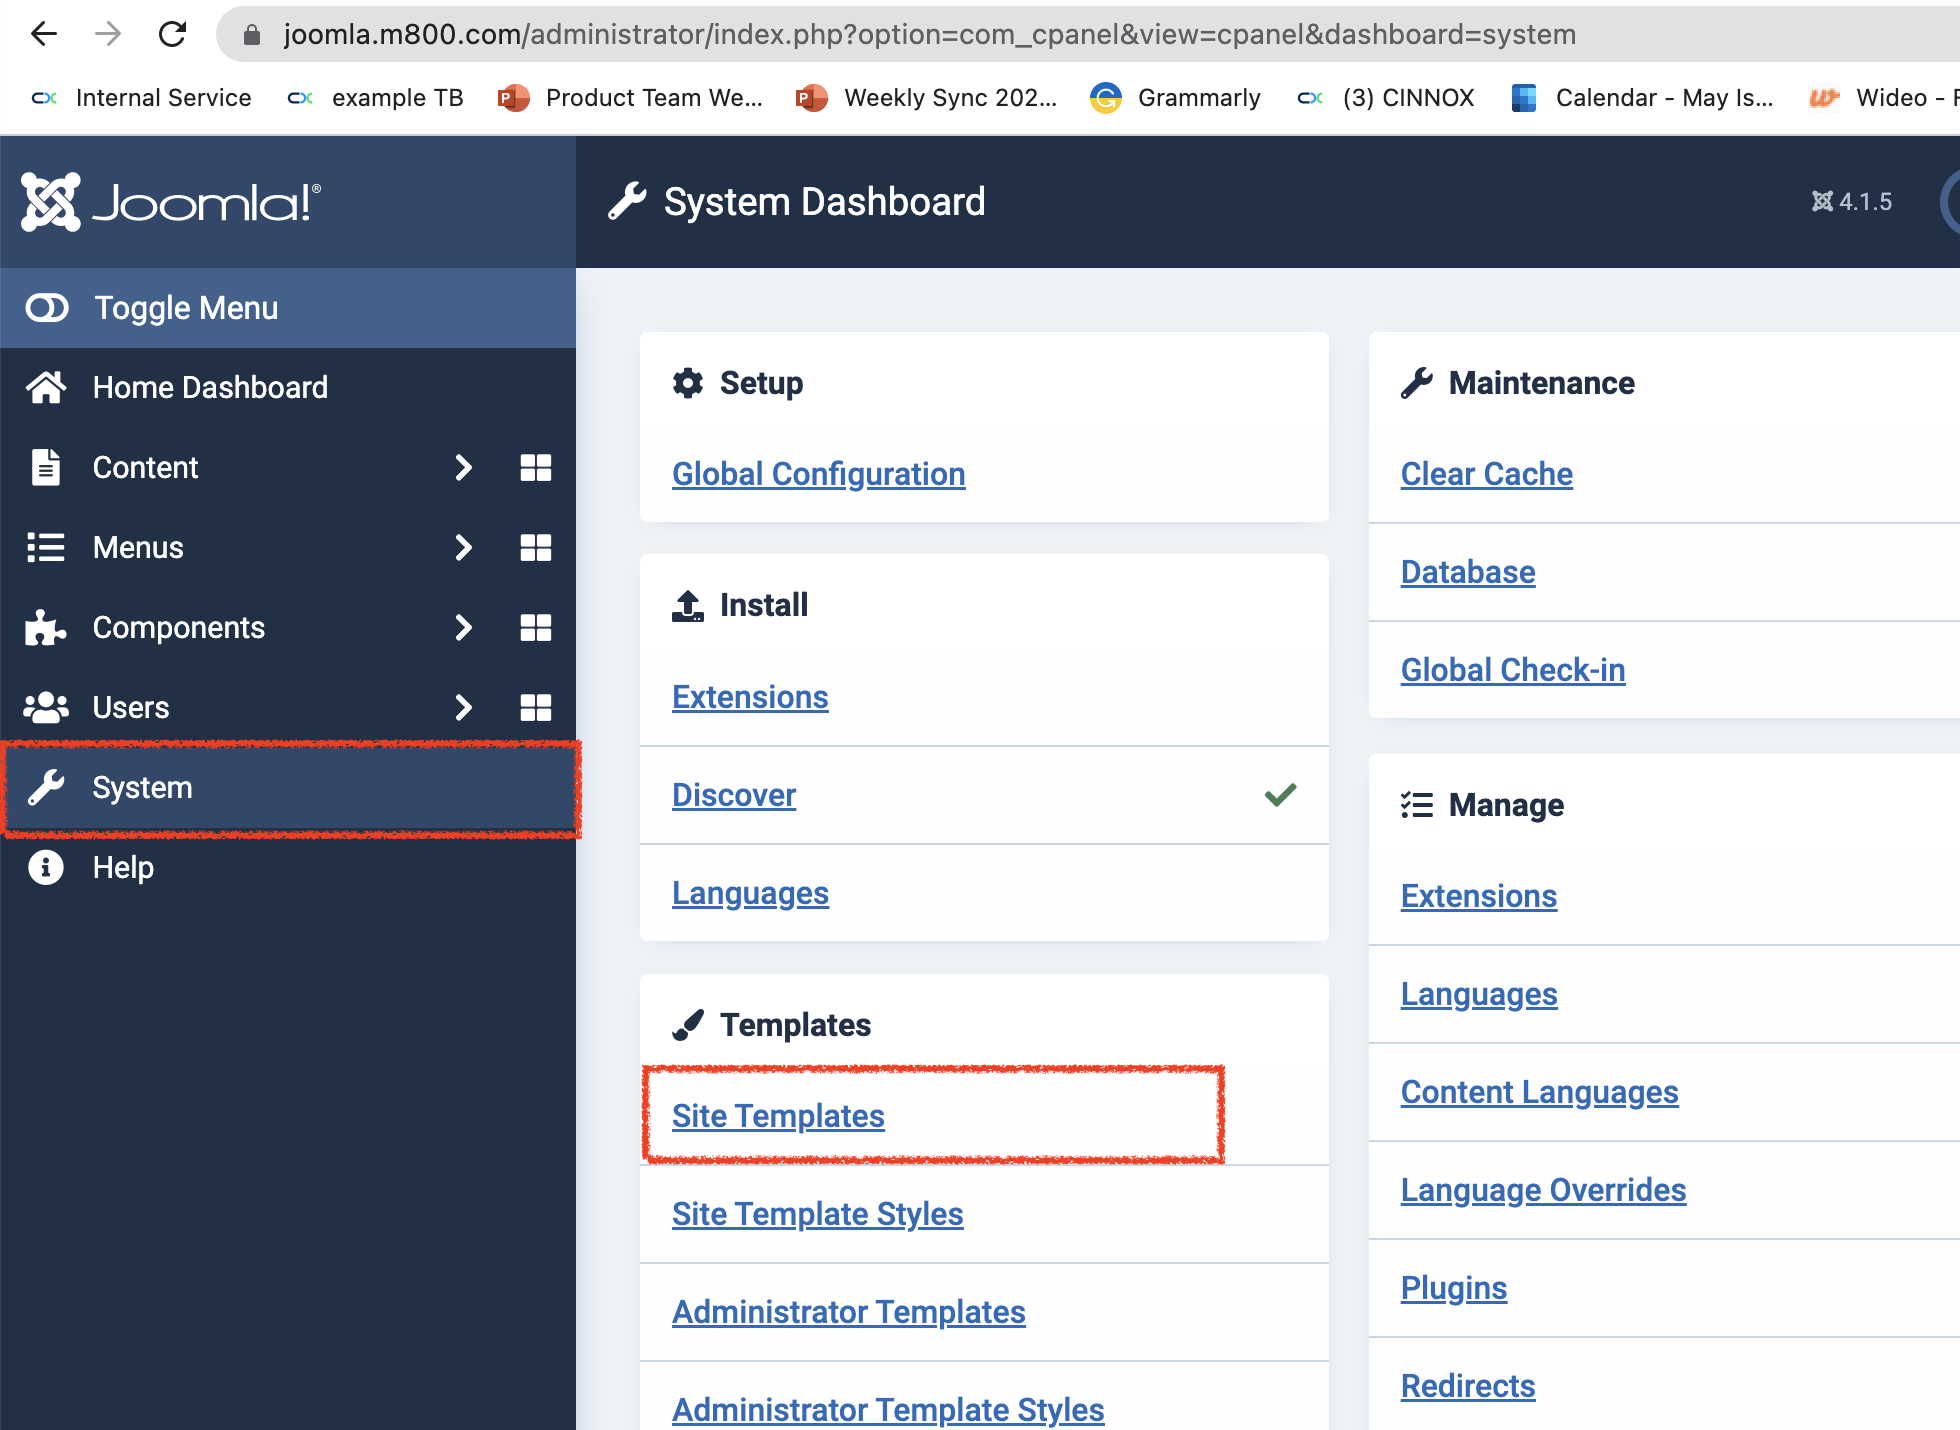
- From the System Dashboard page - left menu and click System.
- Go to the Templates section and click Site Templates.
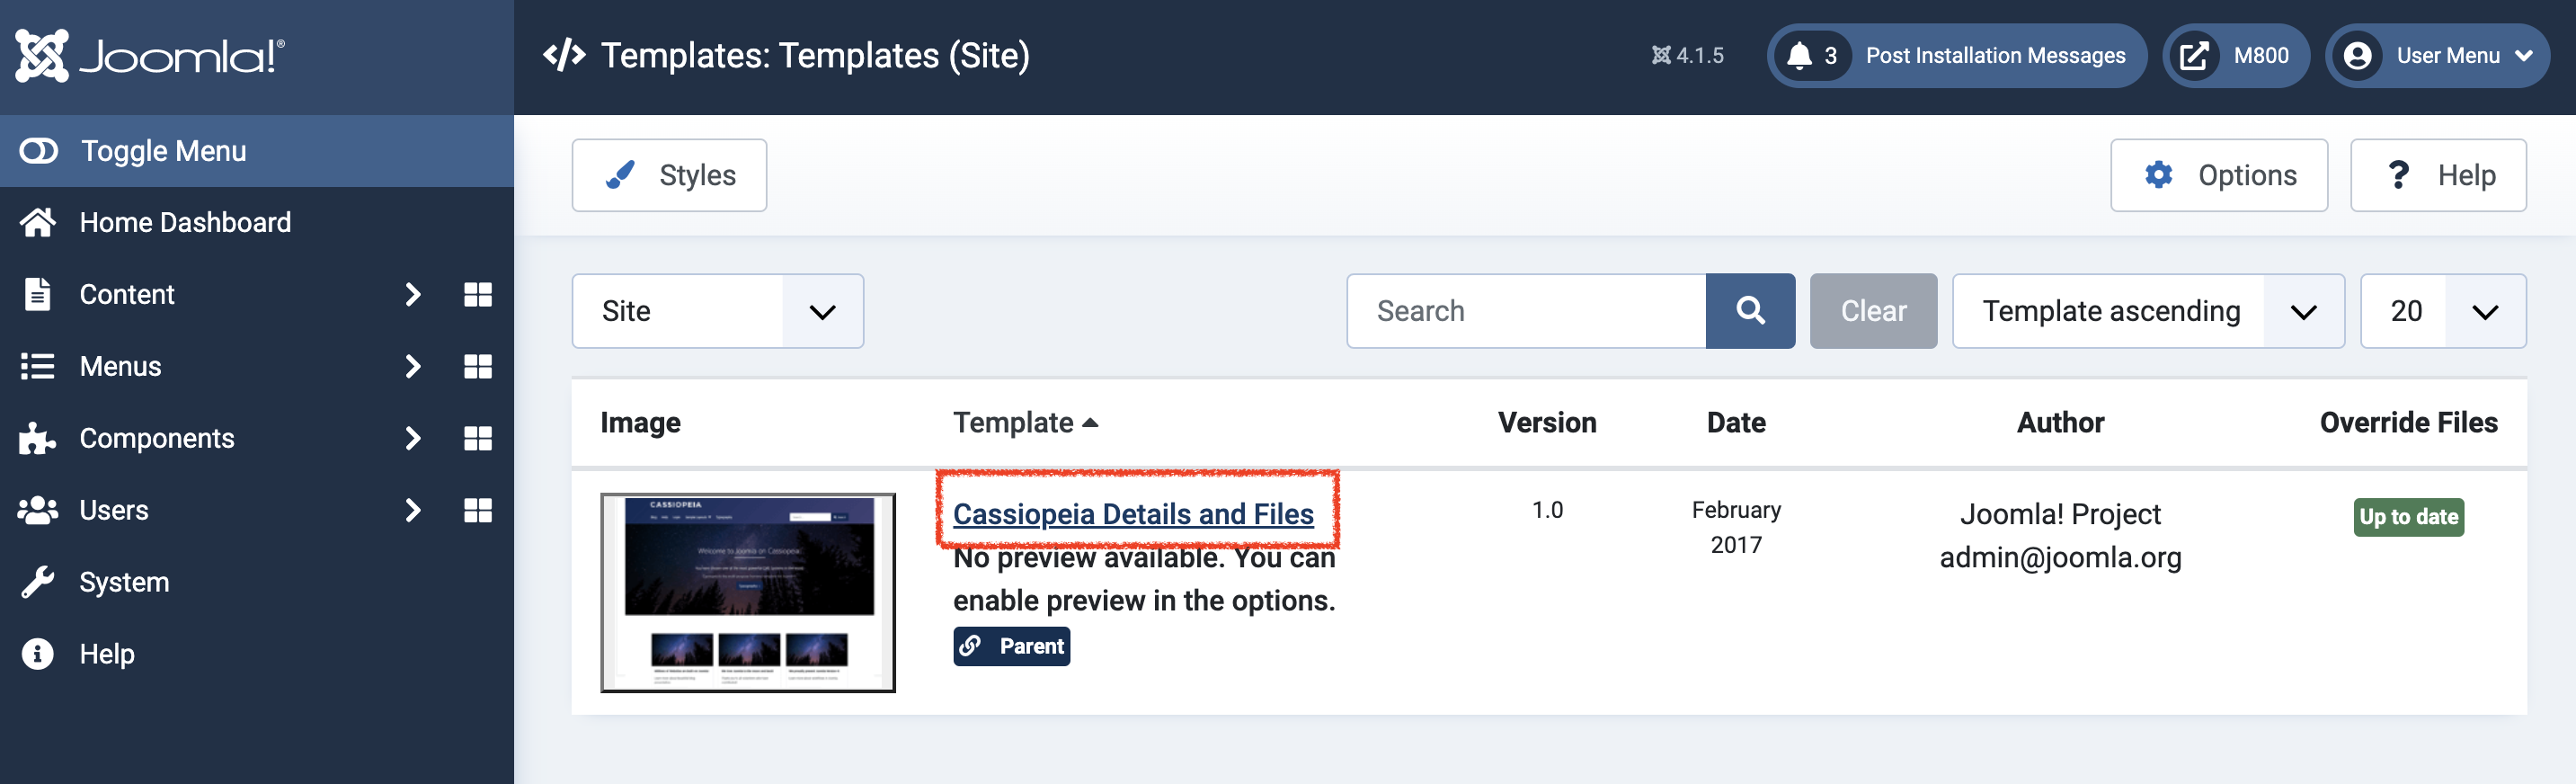
- Click Cassiopeia Details and Files
Note that the Site Templates' names, such as "Cassiopeia", vary depending on your Joomla version.
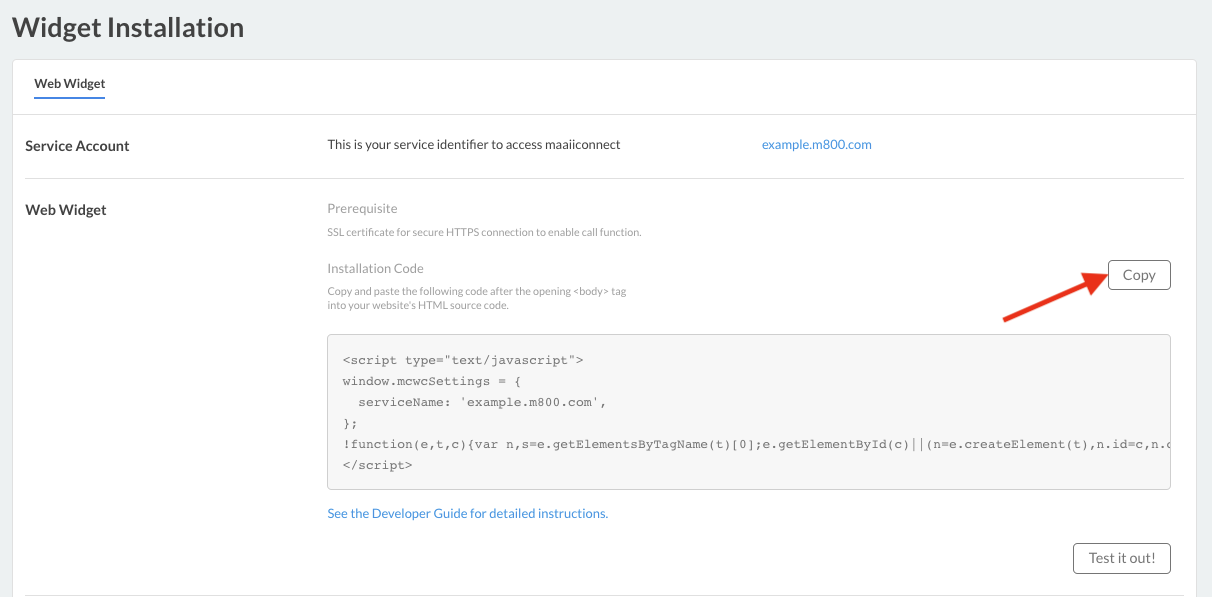
In your CINNOX Dashboard, copy the widget snippet code.
- Go to Settings > Widget > Installation. Under Web Widget and click Copy next to Installation Code.
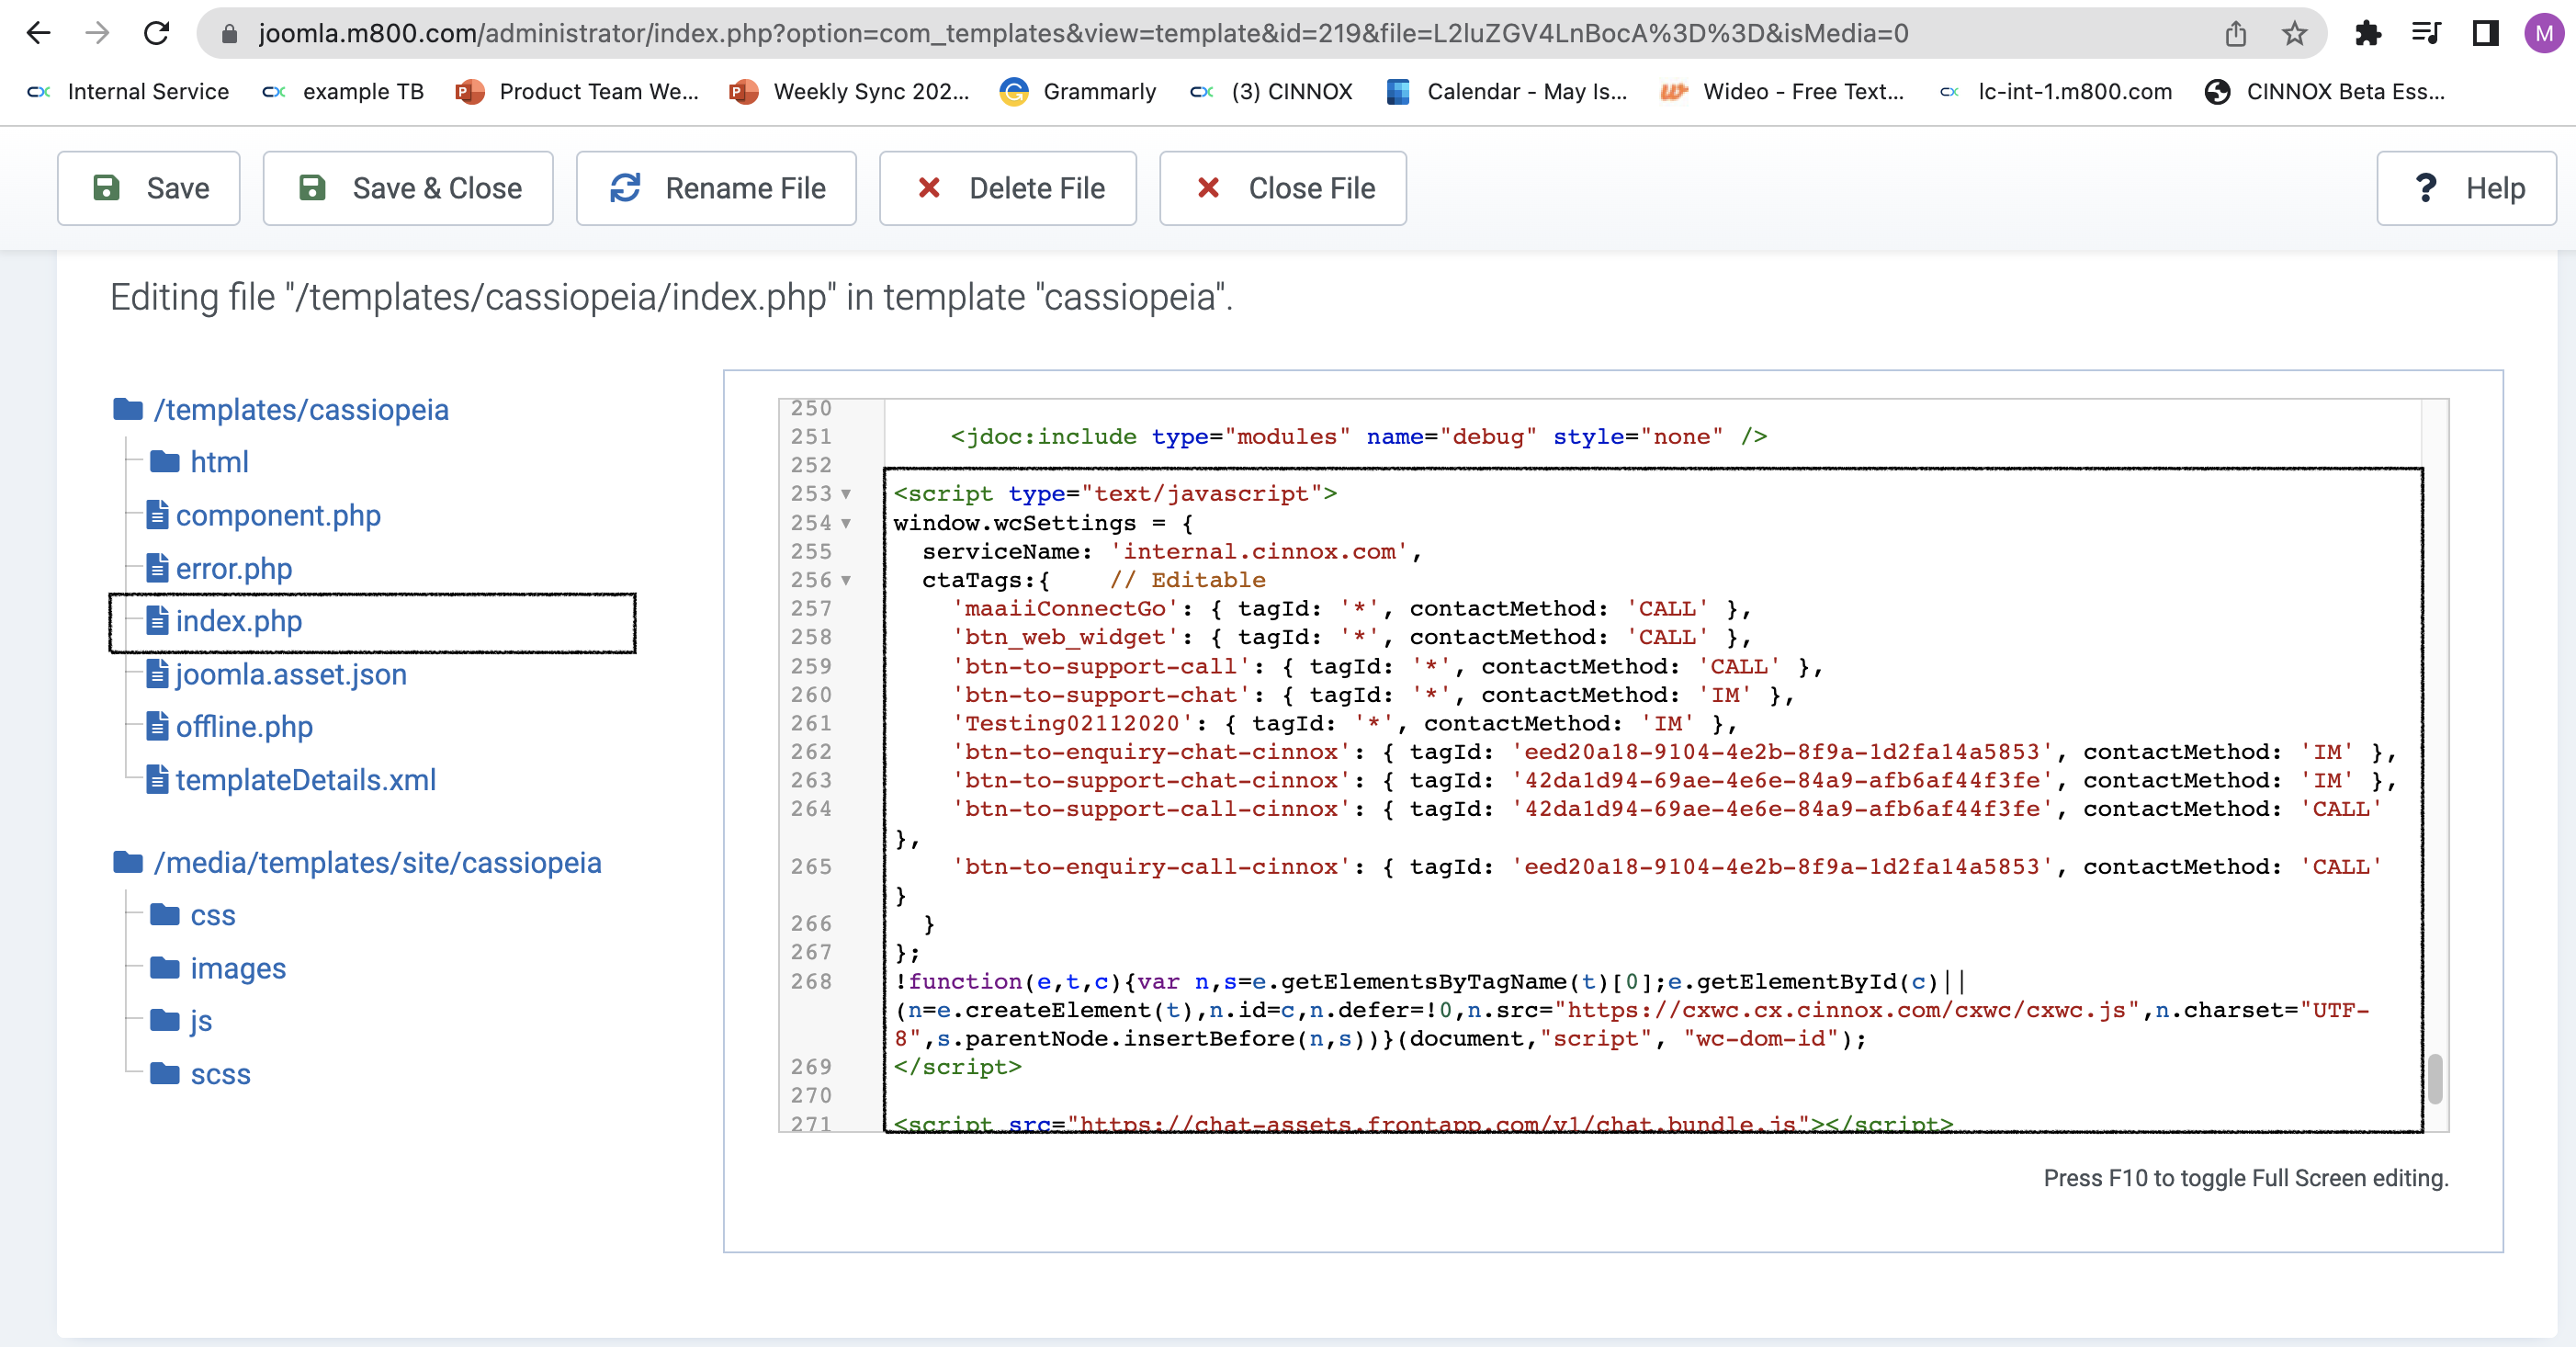
- Back on your Joomla, on the left side menu, click index.php
- Insert the code you have copied from your CINNOX Dashboard right before the closing
</body>tag at the bottom of the page. Click Save.
- The CINNOX widget should appear at the bottom right corner of the page.

📘
For more information on configuring your CINNOX widget, refer to this Guide's Customising Your Widget section.
📘
To know how to change the widget position from right to left, refer to this Guide's Dynamic Change of Installed Widget section.