(AD FS) Third-Party Authentication
Need to set up Third-Party Authentication in your CINNOX service?
CINNOX allows you to activate third-party authentication (SSO) and use your Microsoft AD credentials to effortlessly log in to your CINNOX service. With OAuth integration and Microsoft Active Directory support, CINNOX ensures a secure and streamlined authentication process—a powerful combination that ensures a robust and hassle-free authentication process, granting you peace of mind and saving you valuable time. Elevate your login experience with CINNOX today.
CINNOX lets you set up Third-Party Authentication, allowing you and your fellow staff members to log in to the CINNOX service using an alternative method, such as your company network login credentials. This feature helps users minimise the instances they need to create, store, or remember multiple passwords, which may lead to data security issues if not properly managed.
📘
Important
CINNOX uses OAuth, an open standard for access delegation commonly used for the single sign-on (SSO) feature in websites or applications
To use Microsoft Active Directory Federation Services (AD FS), you must meet the following requirements:
- All users must have a CINNOX staff account.
- All users in your Active Directory instance must have an email address attribute.
- You have a server running Windows Server 2012 R2
Please ask your IT administrator to set up the SSO and bind with your CINNOX service login authentication.
📘
Please check this blog for the Step-by-step guide for the Windows AD FS 2012r2 Installation.
📘
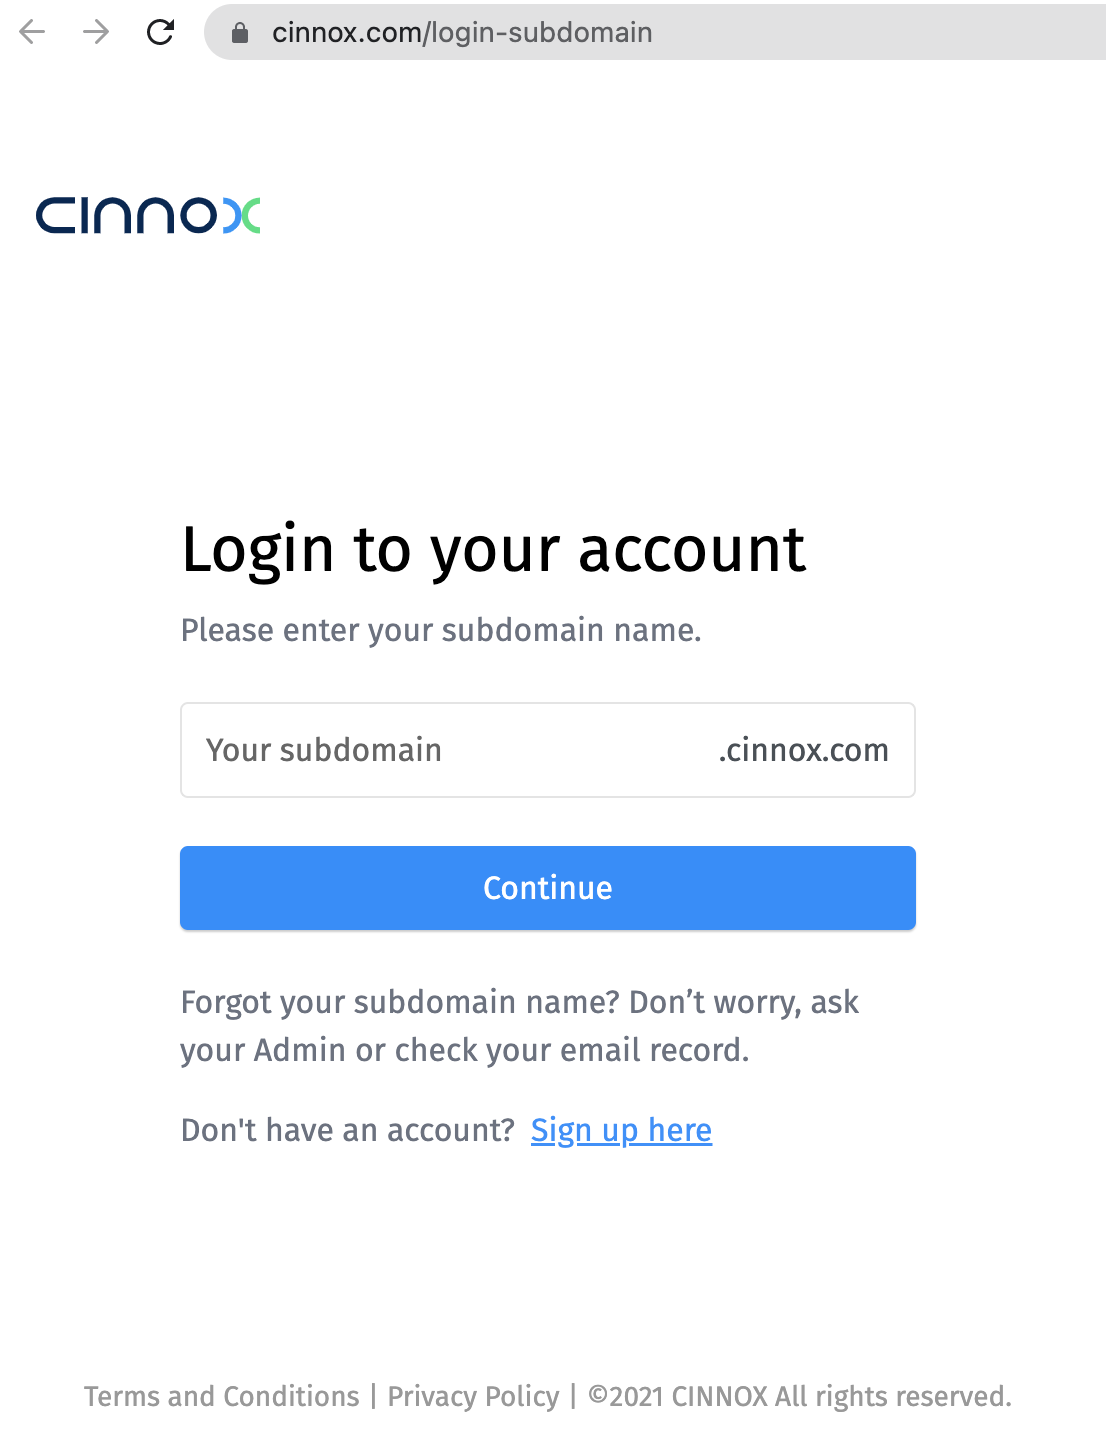
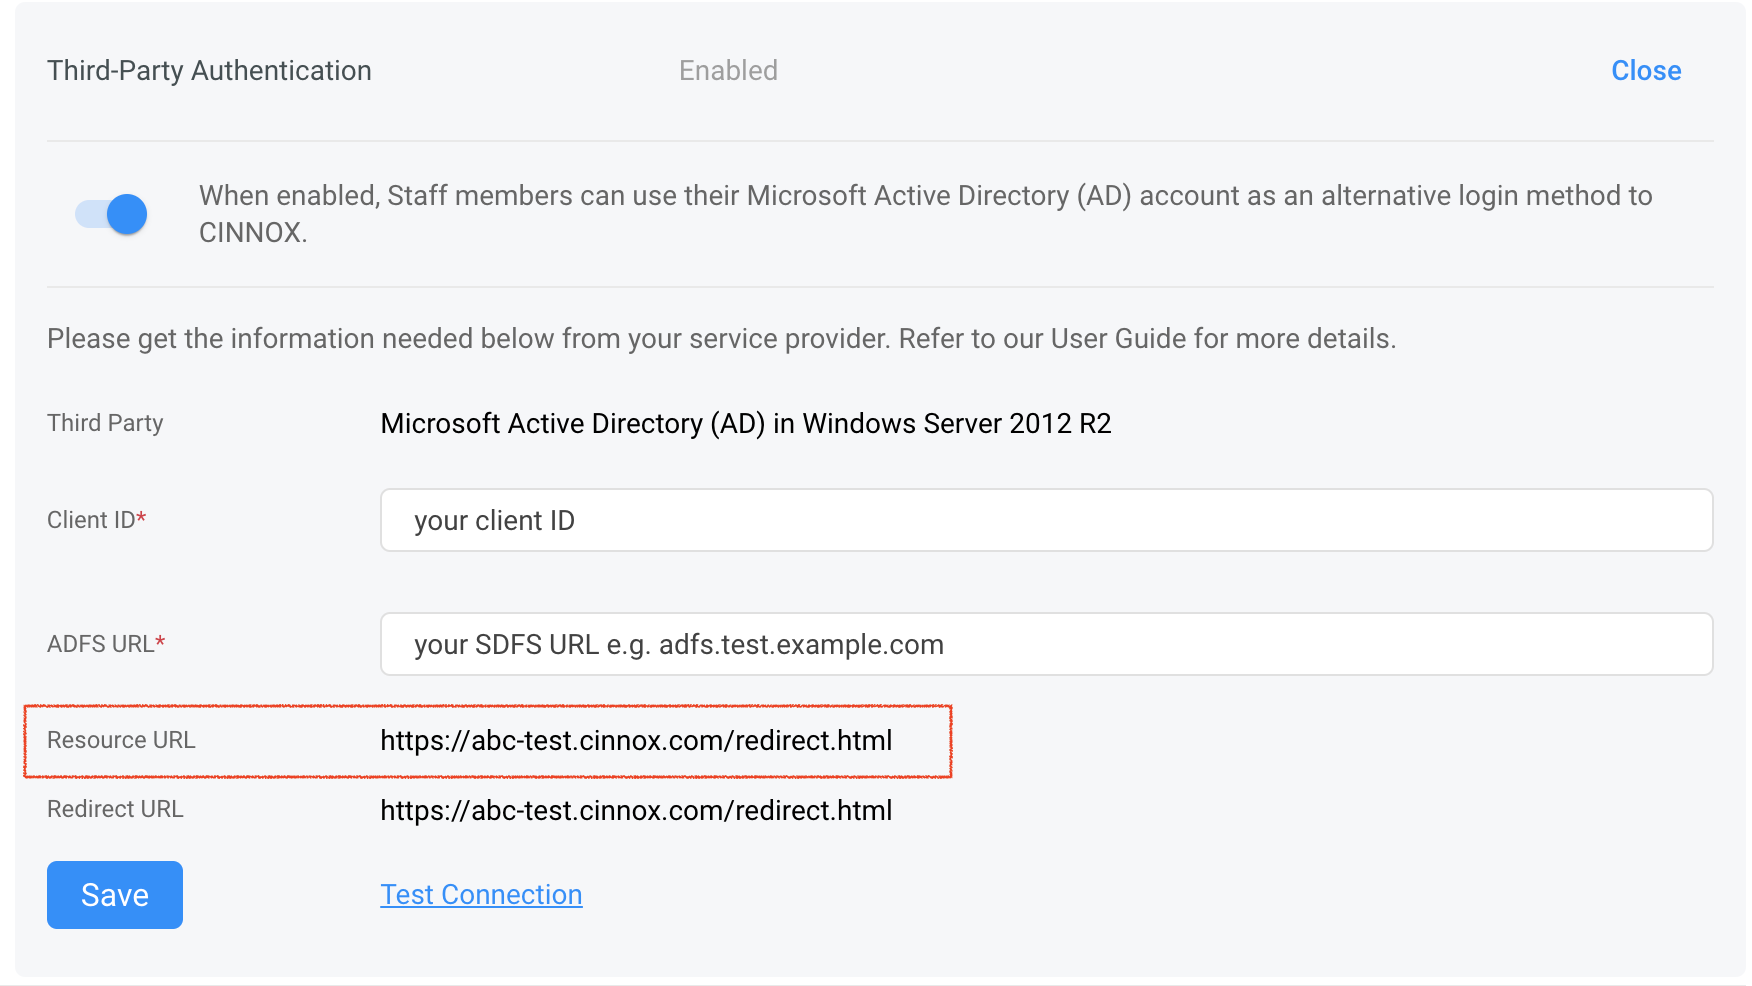
You will need to sign to your CINNOX Web Dashboard with an admin staff account to enable the Third-Party Authentication and get the Resource and Redirect URLs.
Setting up the SSO (AD FS and CINNOX)
Enabling Your CINNOX Third-Party Authentication
- Log in to your CINNOX Web Dashboard.
- Go to Administration > Security > Service Authentication from the navigation menu
- Then click on Edit beside Third-Party.
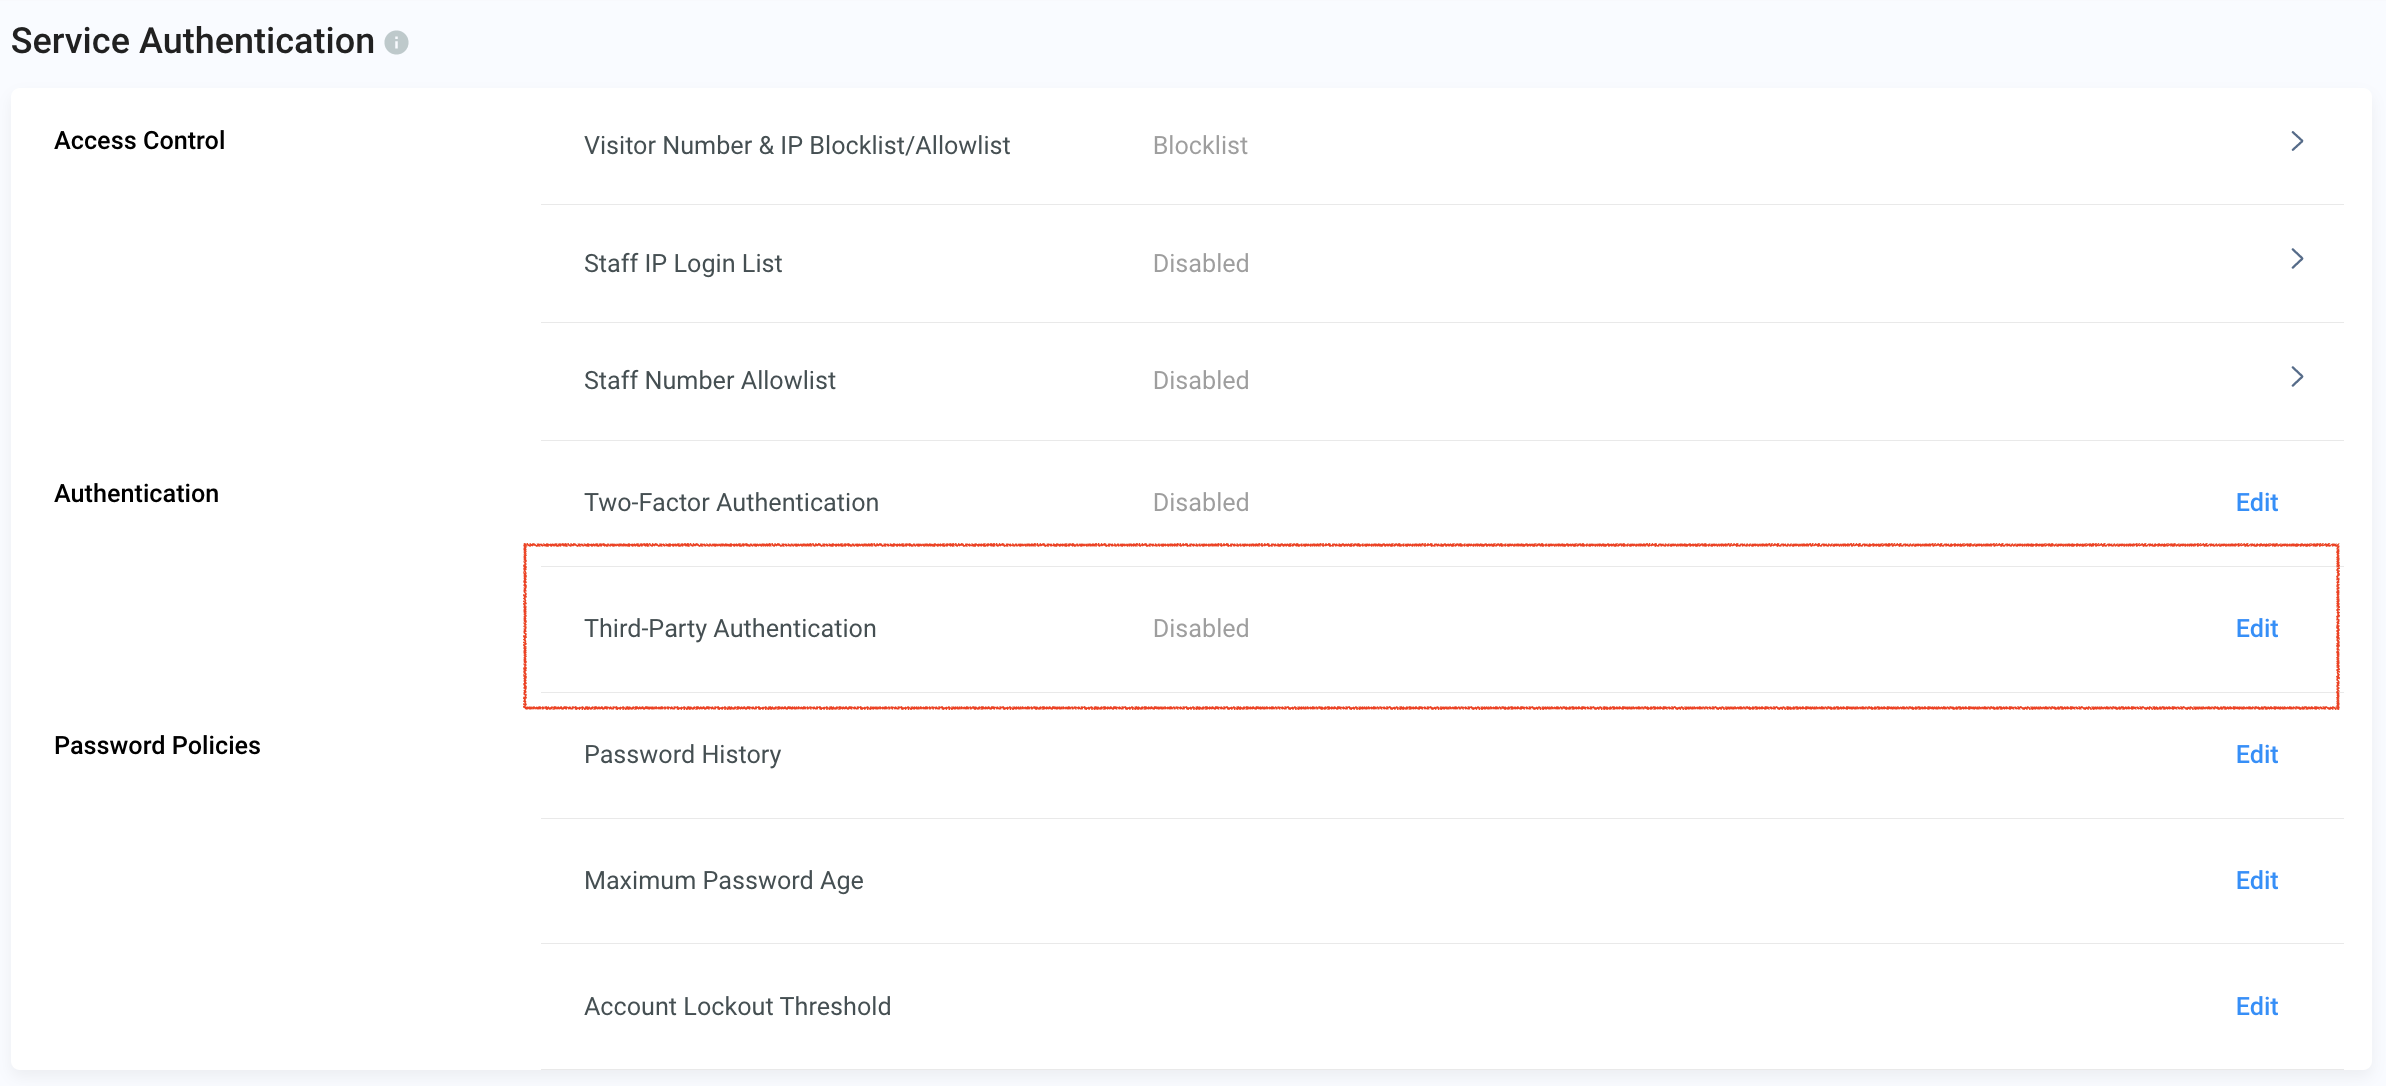
- Toggle the button ON to enable Microsoft AD as alternative login to CINNOX.
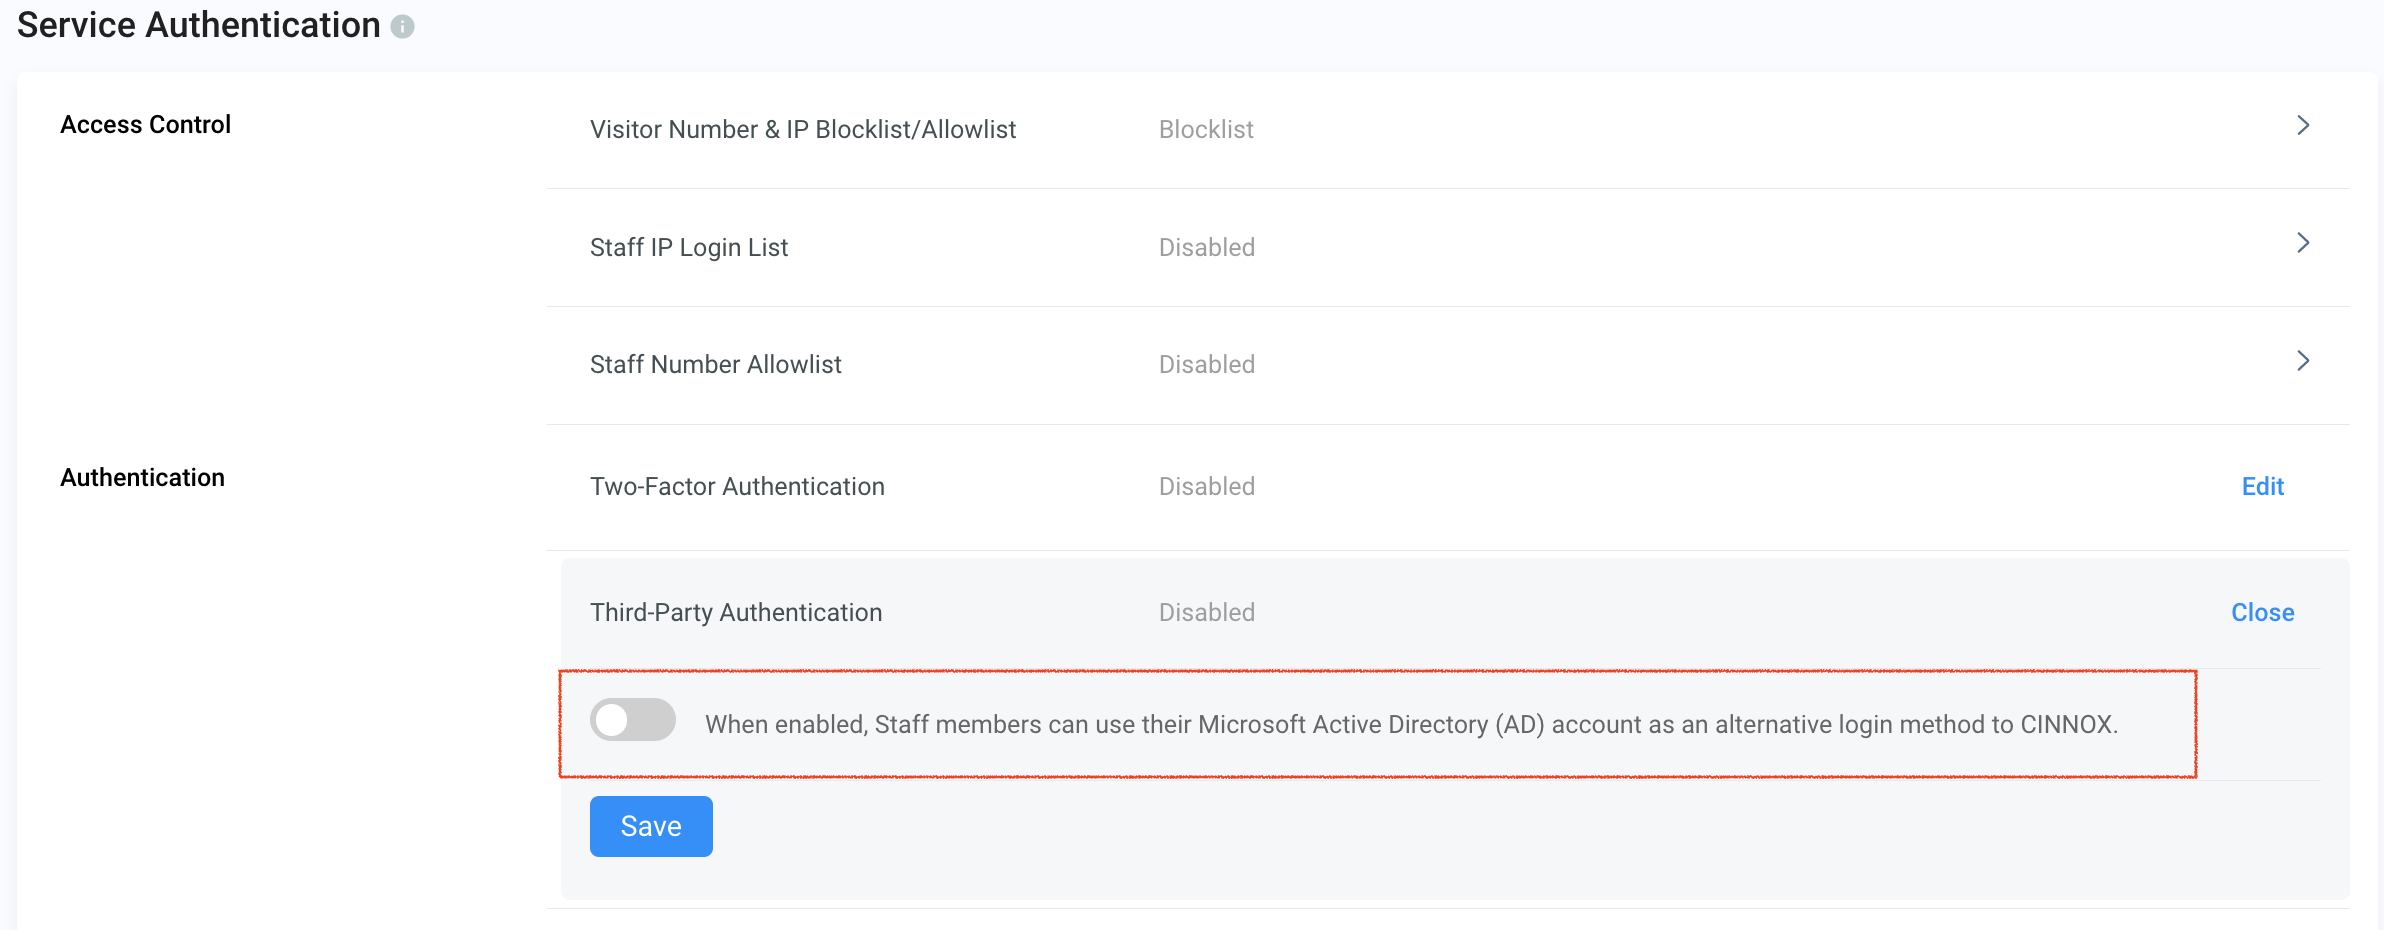
- Copy the Resource URL from your CINNOX Web Dashboard.
Adding a Relying Party Trust (RPT) in your AD FS
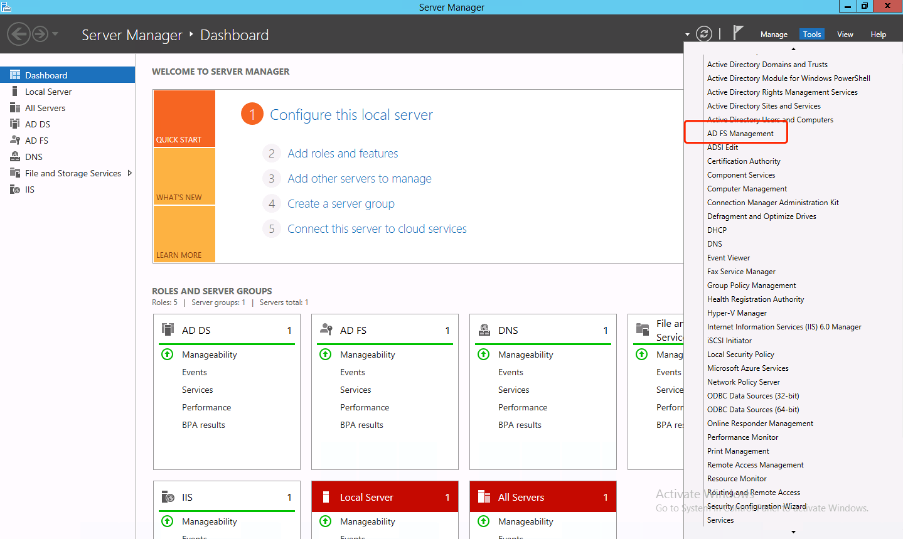
- Open your Active Directory Federation Services (AD FS) manager.
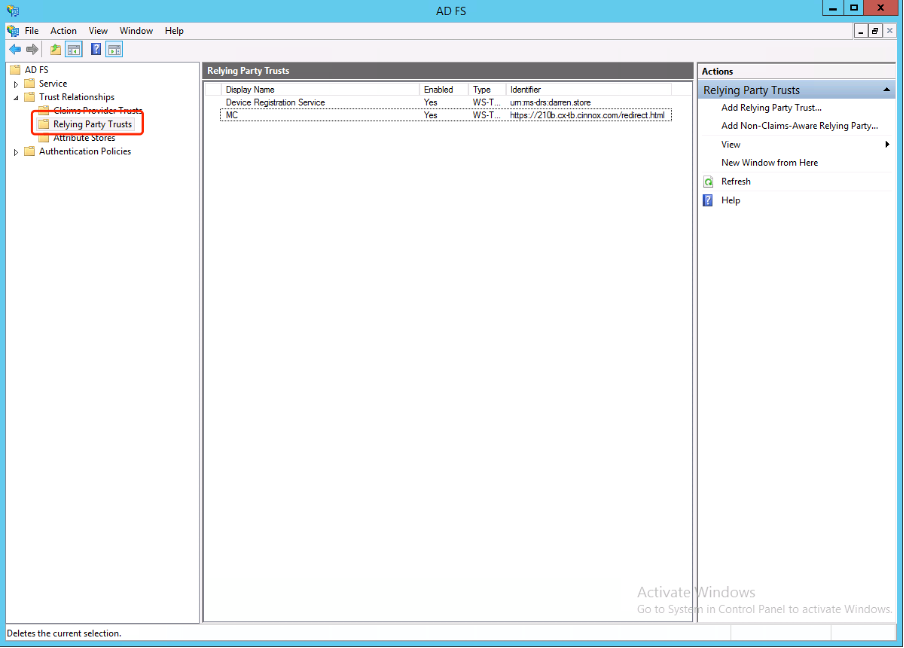
- Open the Relying Party Trusts (RPT) folder in your AD FS manager.
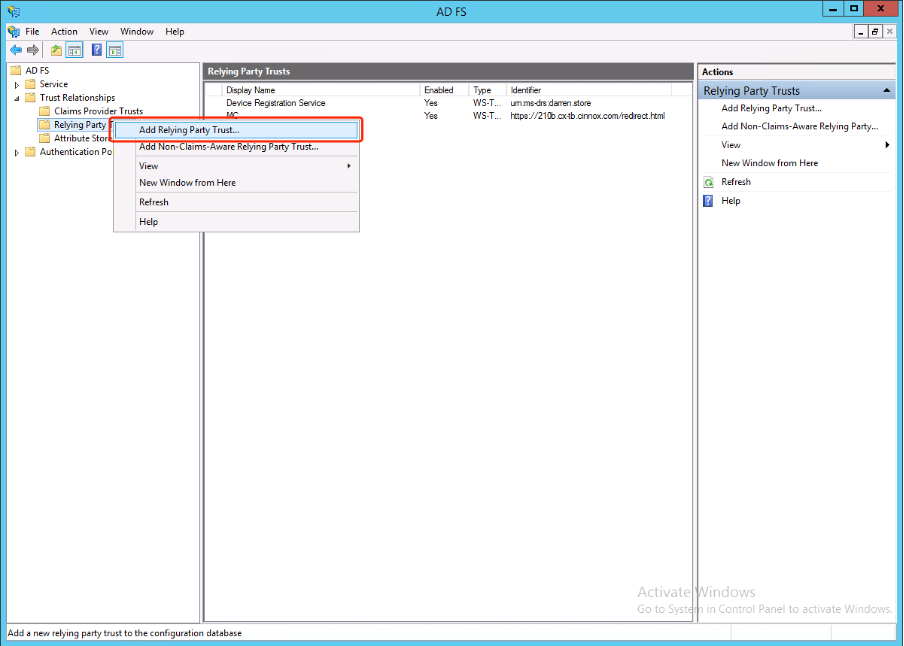
- In the right sidebar menu, select Add Relying Party Trust...
- On the Select Data Source screen, select Enter data about the relying party manually.
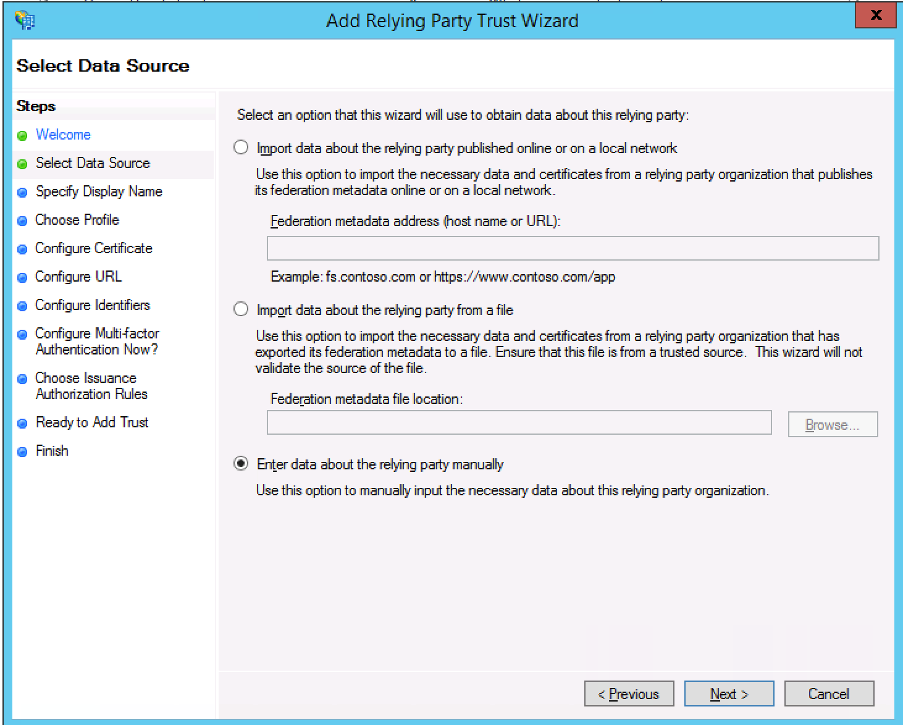
- Click Next >.
- In the Display name field, enter a name for your trust, a name you can easily recognise
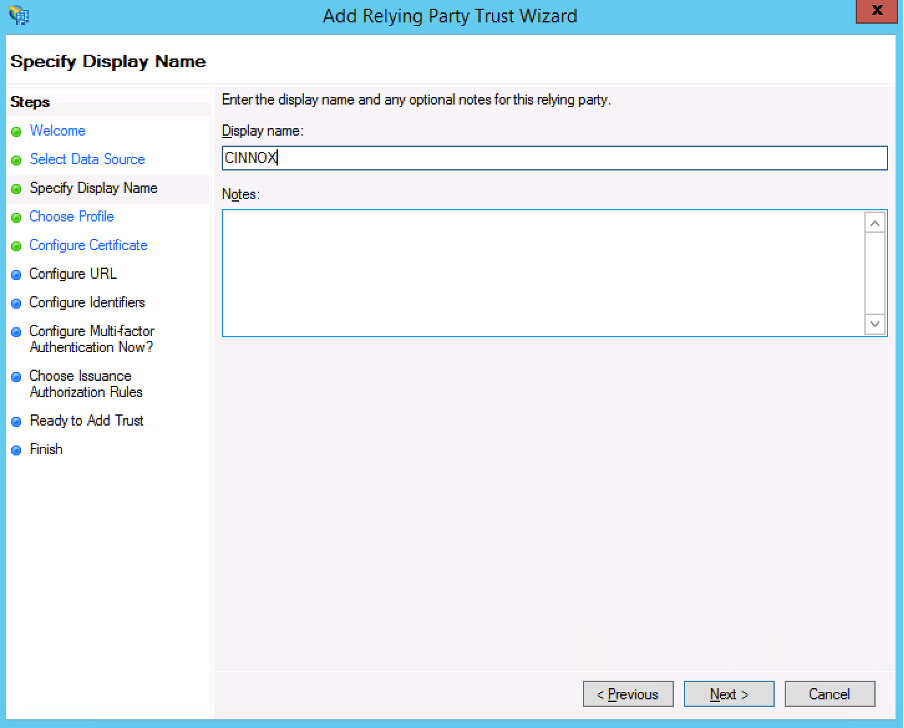
- Click Next >.
- Select the ADFS profile radio button.

- Click Next
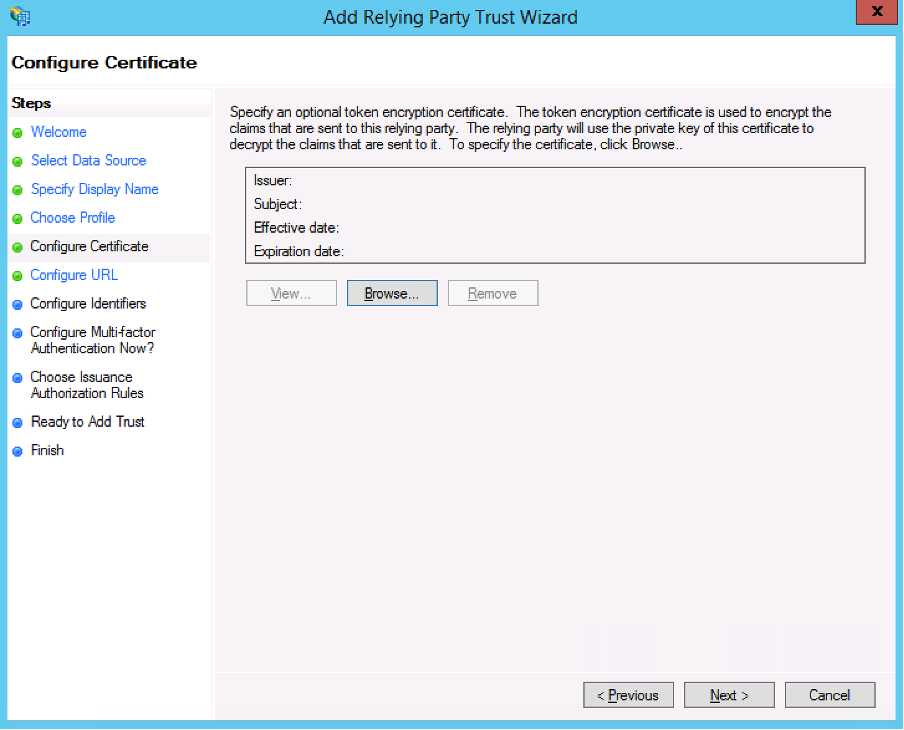
- Click Next
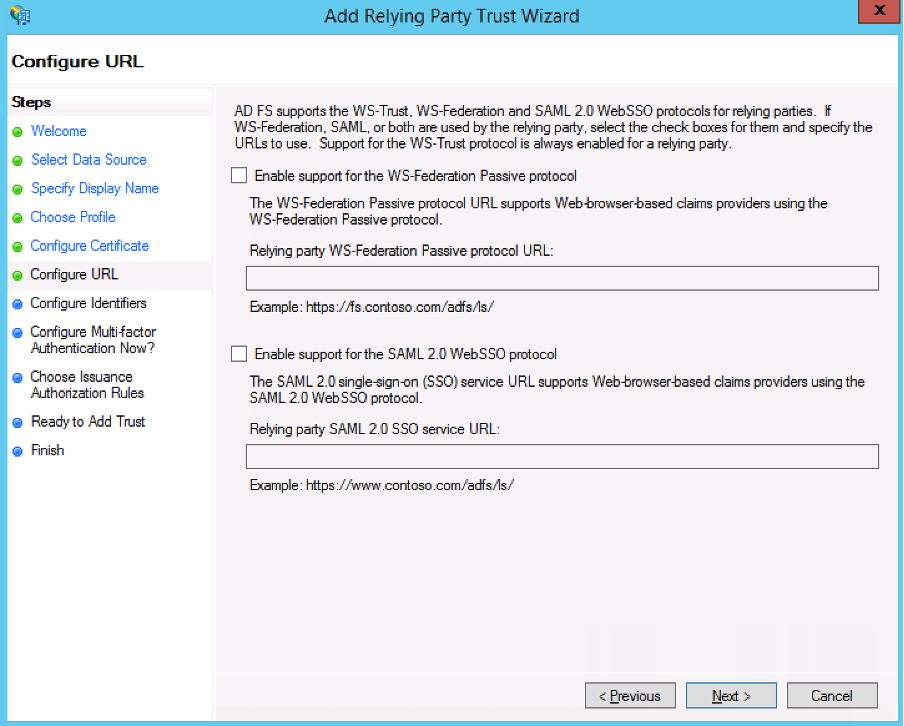
- Click Next >
- On the relying party trust identifier, paste or enter the
<CINNOX Resource URL>, then click Add.
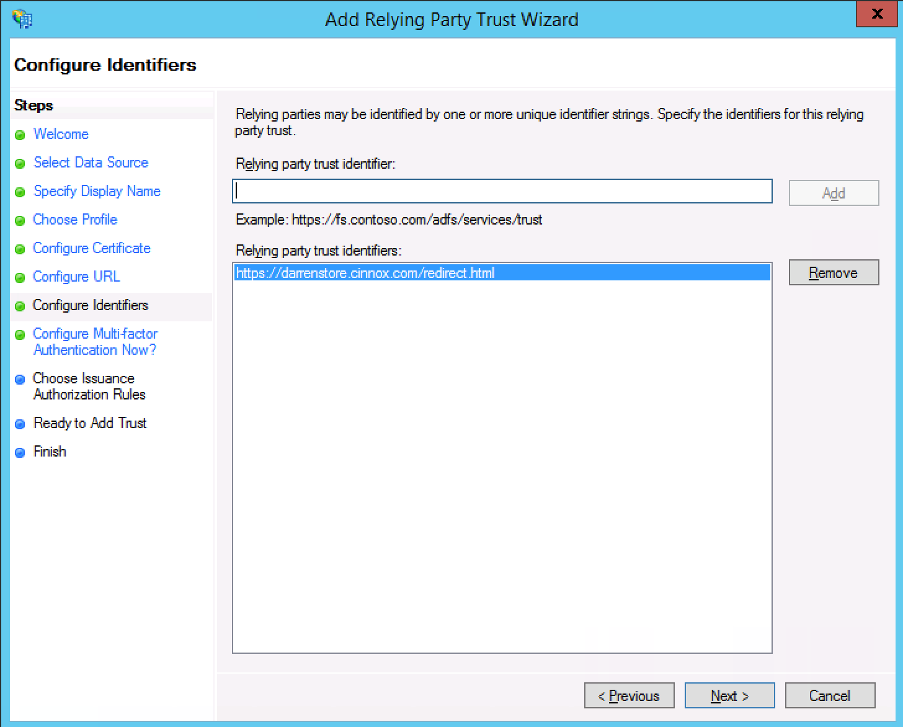
- Click Next >.
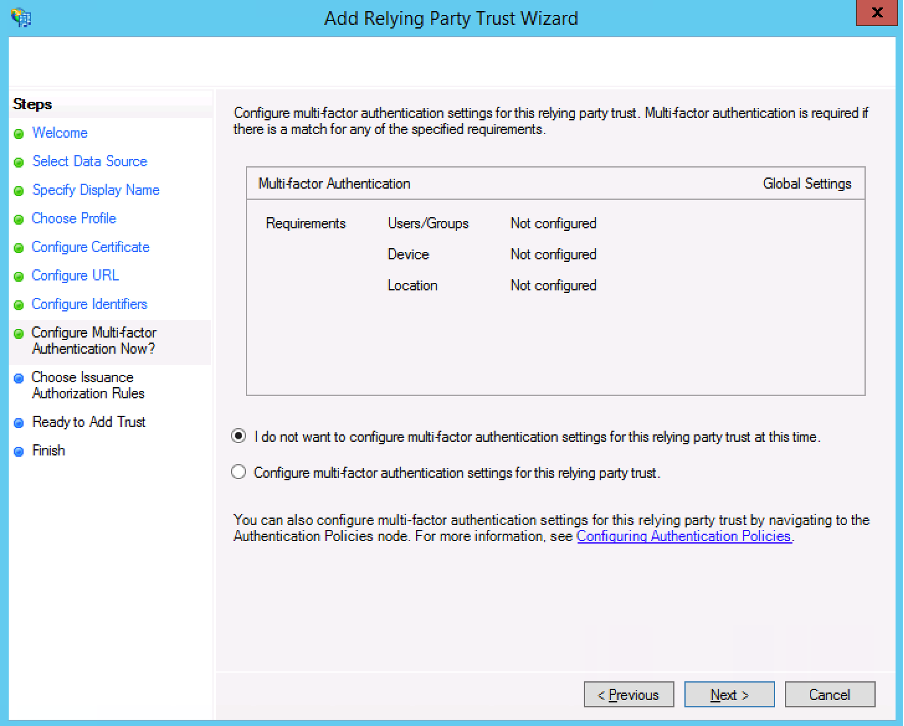
- Click Next >.
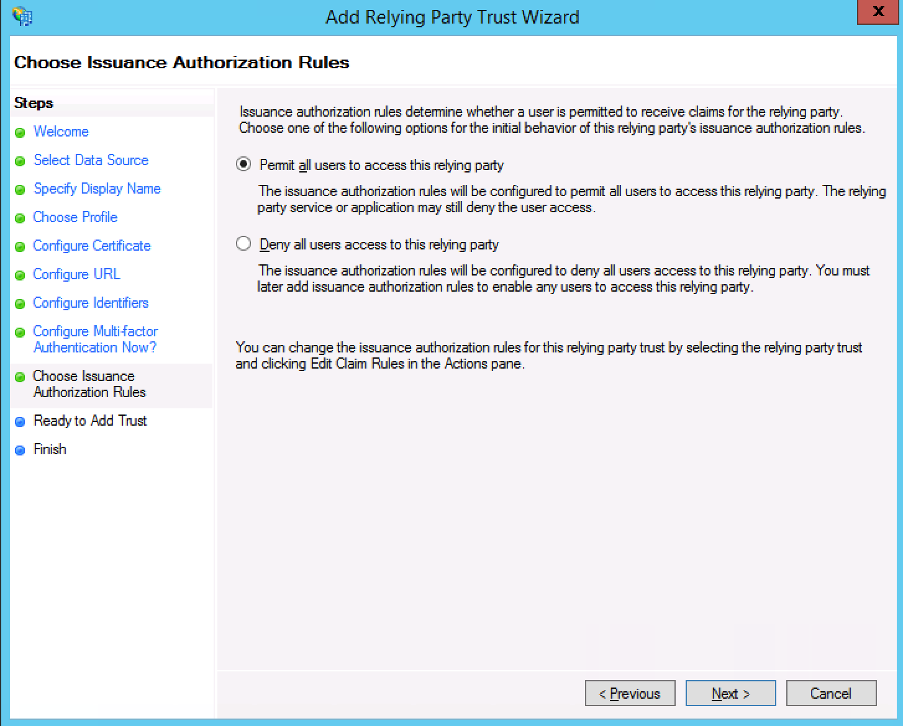
- Click Next >.
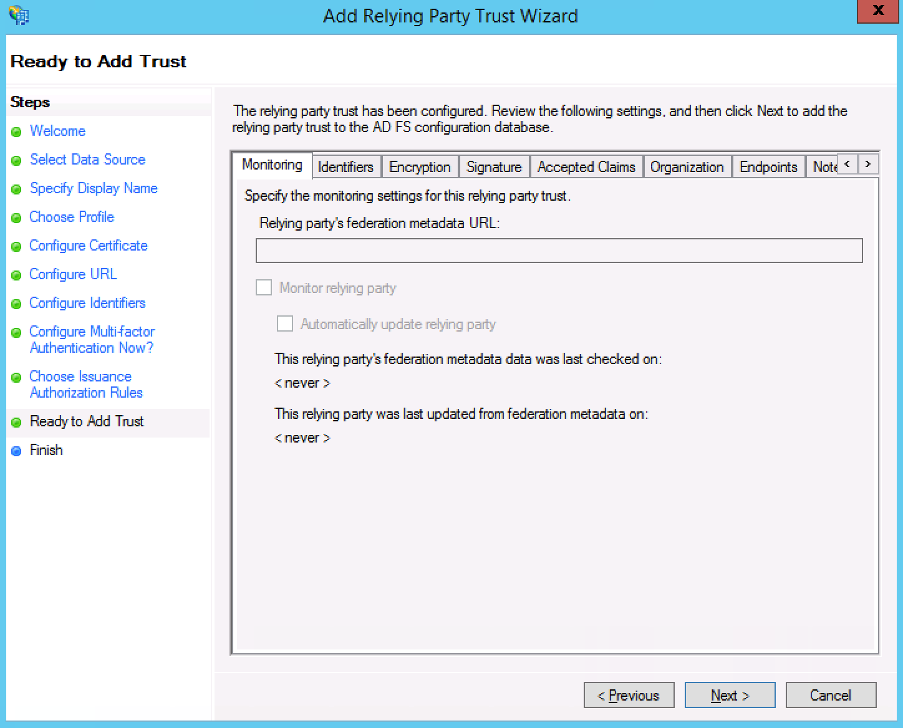
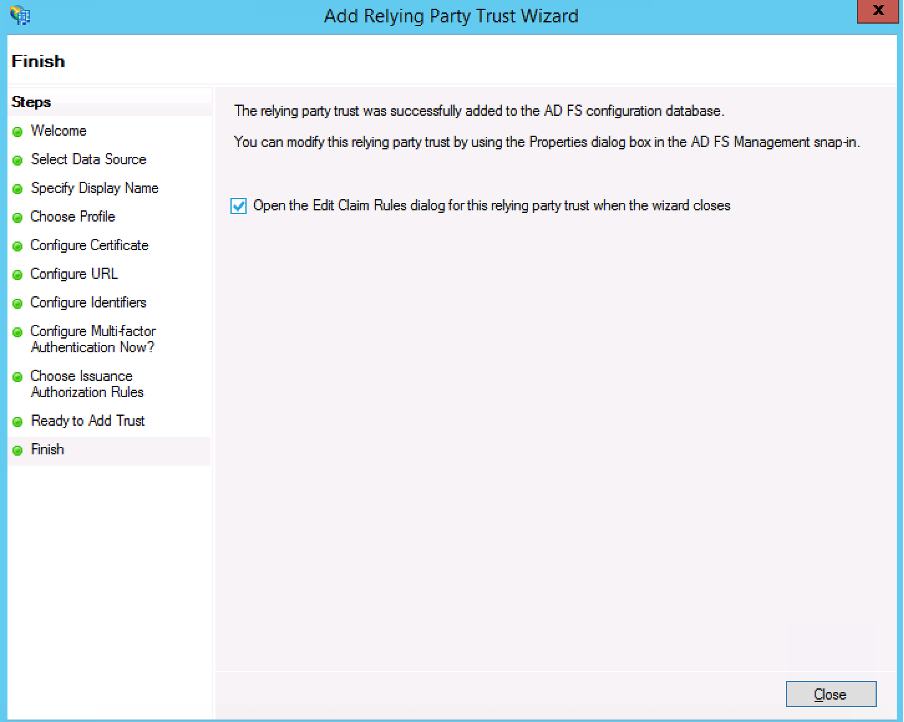
- Click Close >. Keep the checkbox for the Edit Claim Rules dialogue for this relying party trust when the wizard closes.
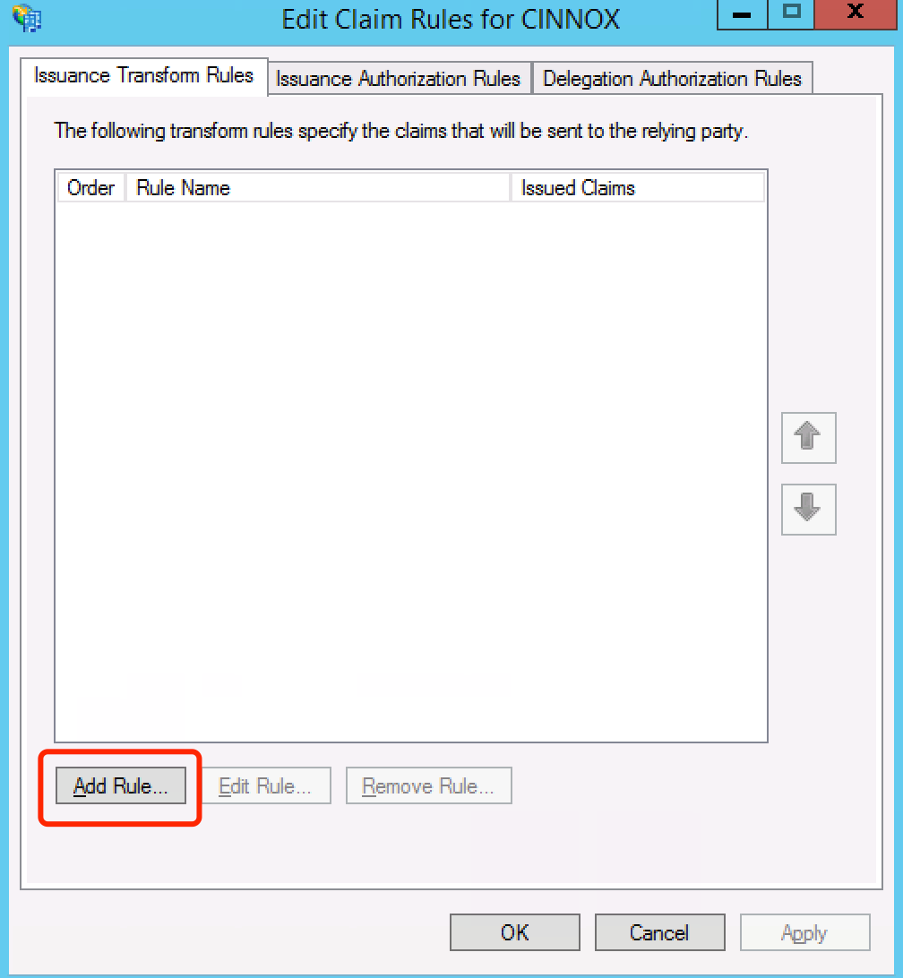
Creating Claims Rules
Before setting up your claims rule, ensure that your users' email addresses match their CINNOX email addresses. You can use other identifiers, such as the User Principal Name (UPN) if your UPNs are an email address.
For single sign-on with AD FS to work, the nameID needs to be in the form of an email address to match with a CINNOX user.
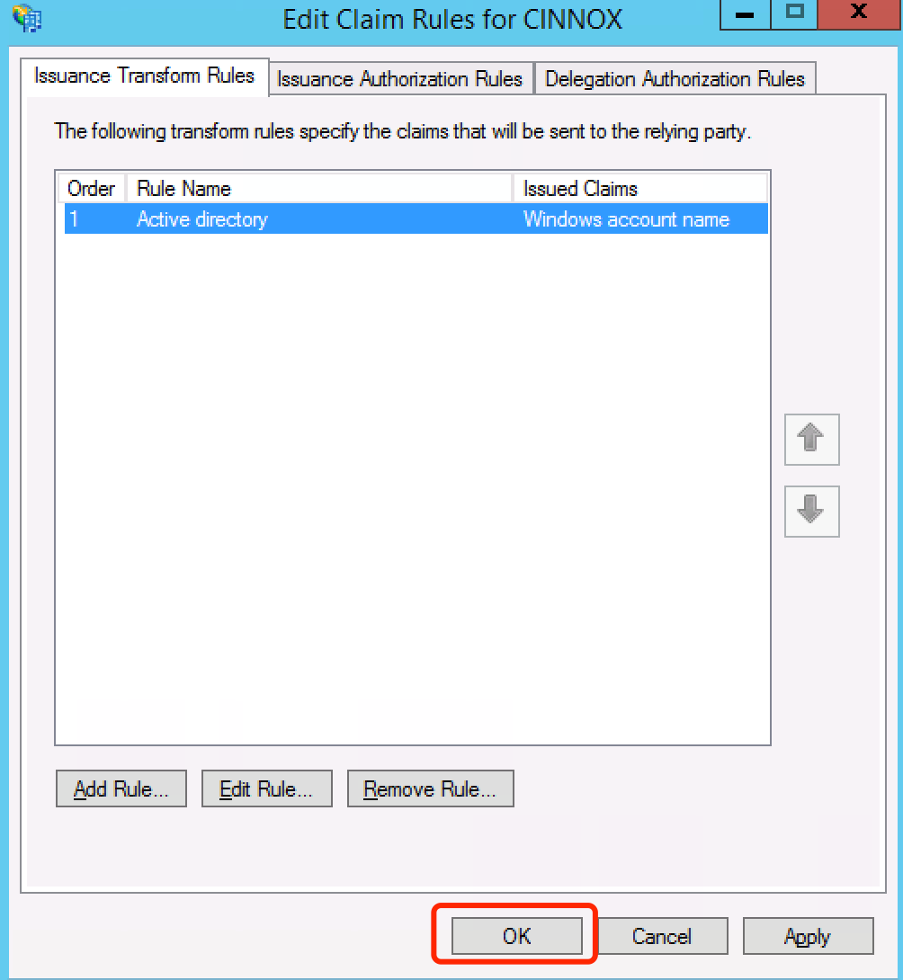
- In the Edit Claim Rules dialogue that appears, click Add Rule.
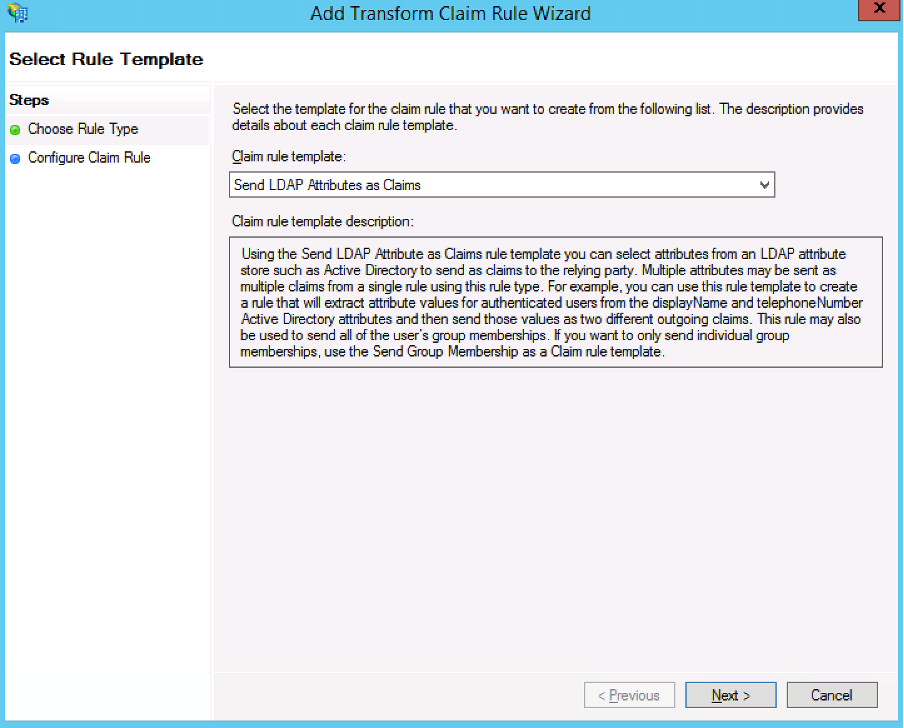
- Click the Claim rule template dropdown menu and select Send LDAP Attributes as Claims.
- Click Next >
-
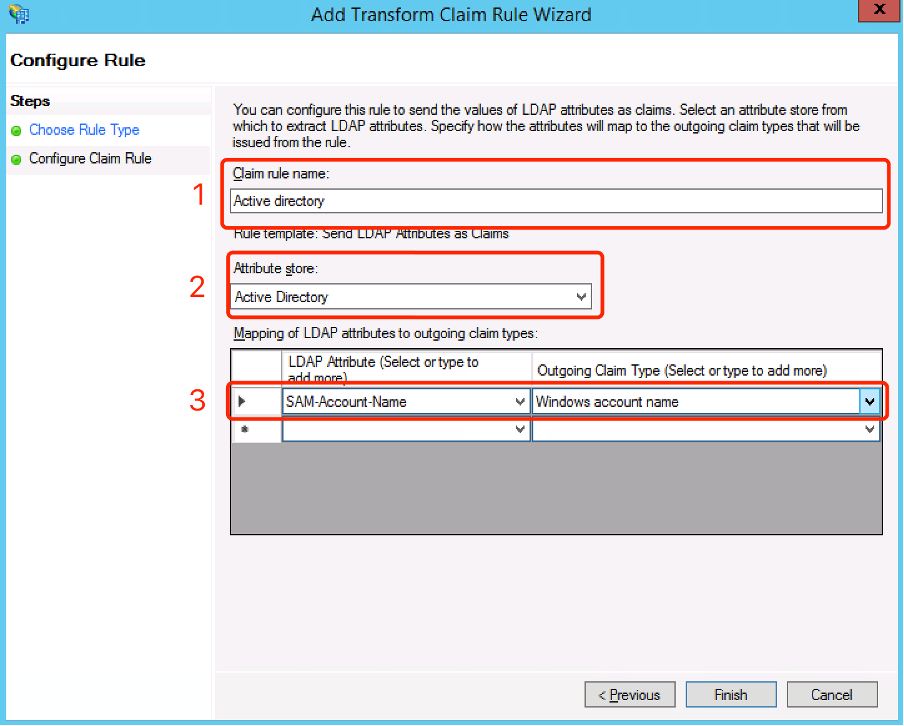
On the Configure Claim Rule screen
- In the Claim rule name field, enter a rule name.
- Click the Attribute store dropdown menu and select Active Directory.
-
In the Mapping of LDAP attributes table, map the following:
- In the LDAP Attribute column, click the dropdown menu and select SAM-Account-Name.
- Click the dropdown menu in the Outgoing ClaimType column and select Windows account name.
-
Click Finish >
- Click OK >
- Launch PowerShell with administrative permission.
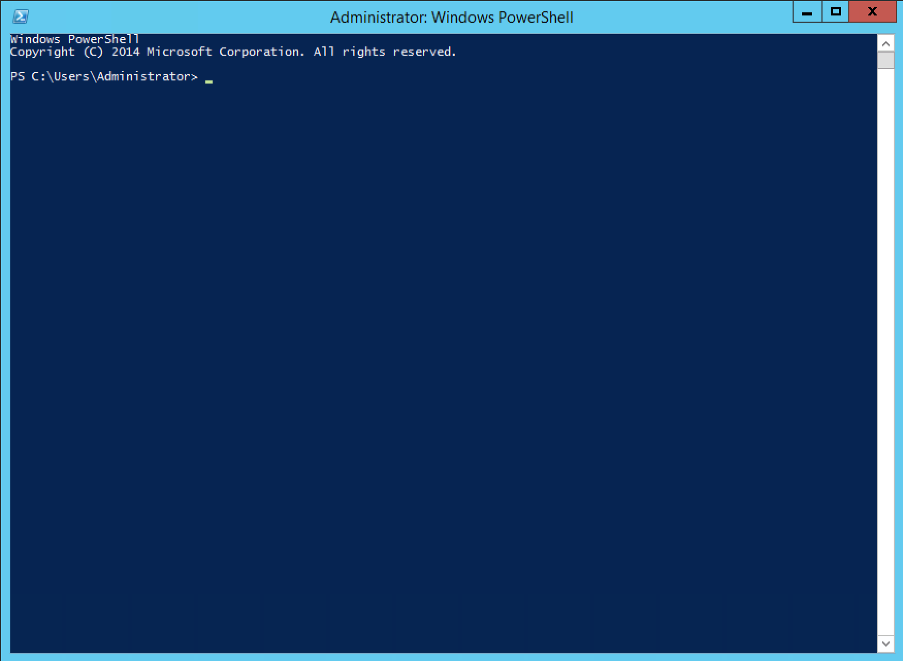
- Add redirect URL endpoint, Redirect URI and ClientID, and Name is pair. It can't be duplicated with other application
Format: Add-AdfsClient -RedirectUri "CINNOX Redirect URL" -ClientId "Name" -Name "Name"
Example: Add-AdfsClient -RedirectUri "https://darrenstore.cinnox.com/redirect.html" -ClientId "CINNOX" -Name "CINNOX"
- Setup Relay Party to open the JWT
Format: Set-AdfsRelyingPartyTrust -TargetName "Name" -EnableJWT true **Example**: Set-AdfsRelyingPartyTrust -TargetName **"CINNOX"** -EnableJWT true

- Click OK >
Configuring CINNOX for Client ID and ADFS URL
Back to your CINNOX Web Dashboard:
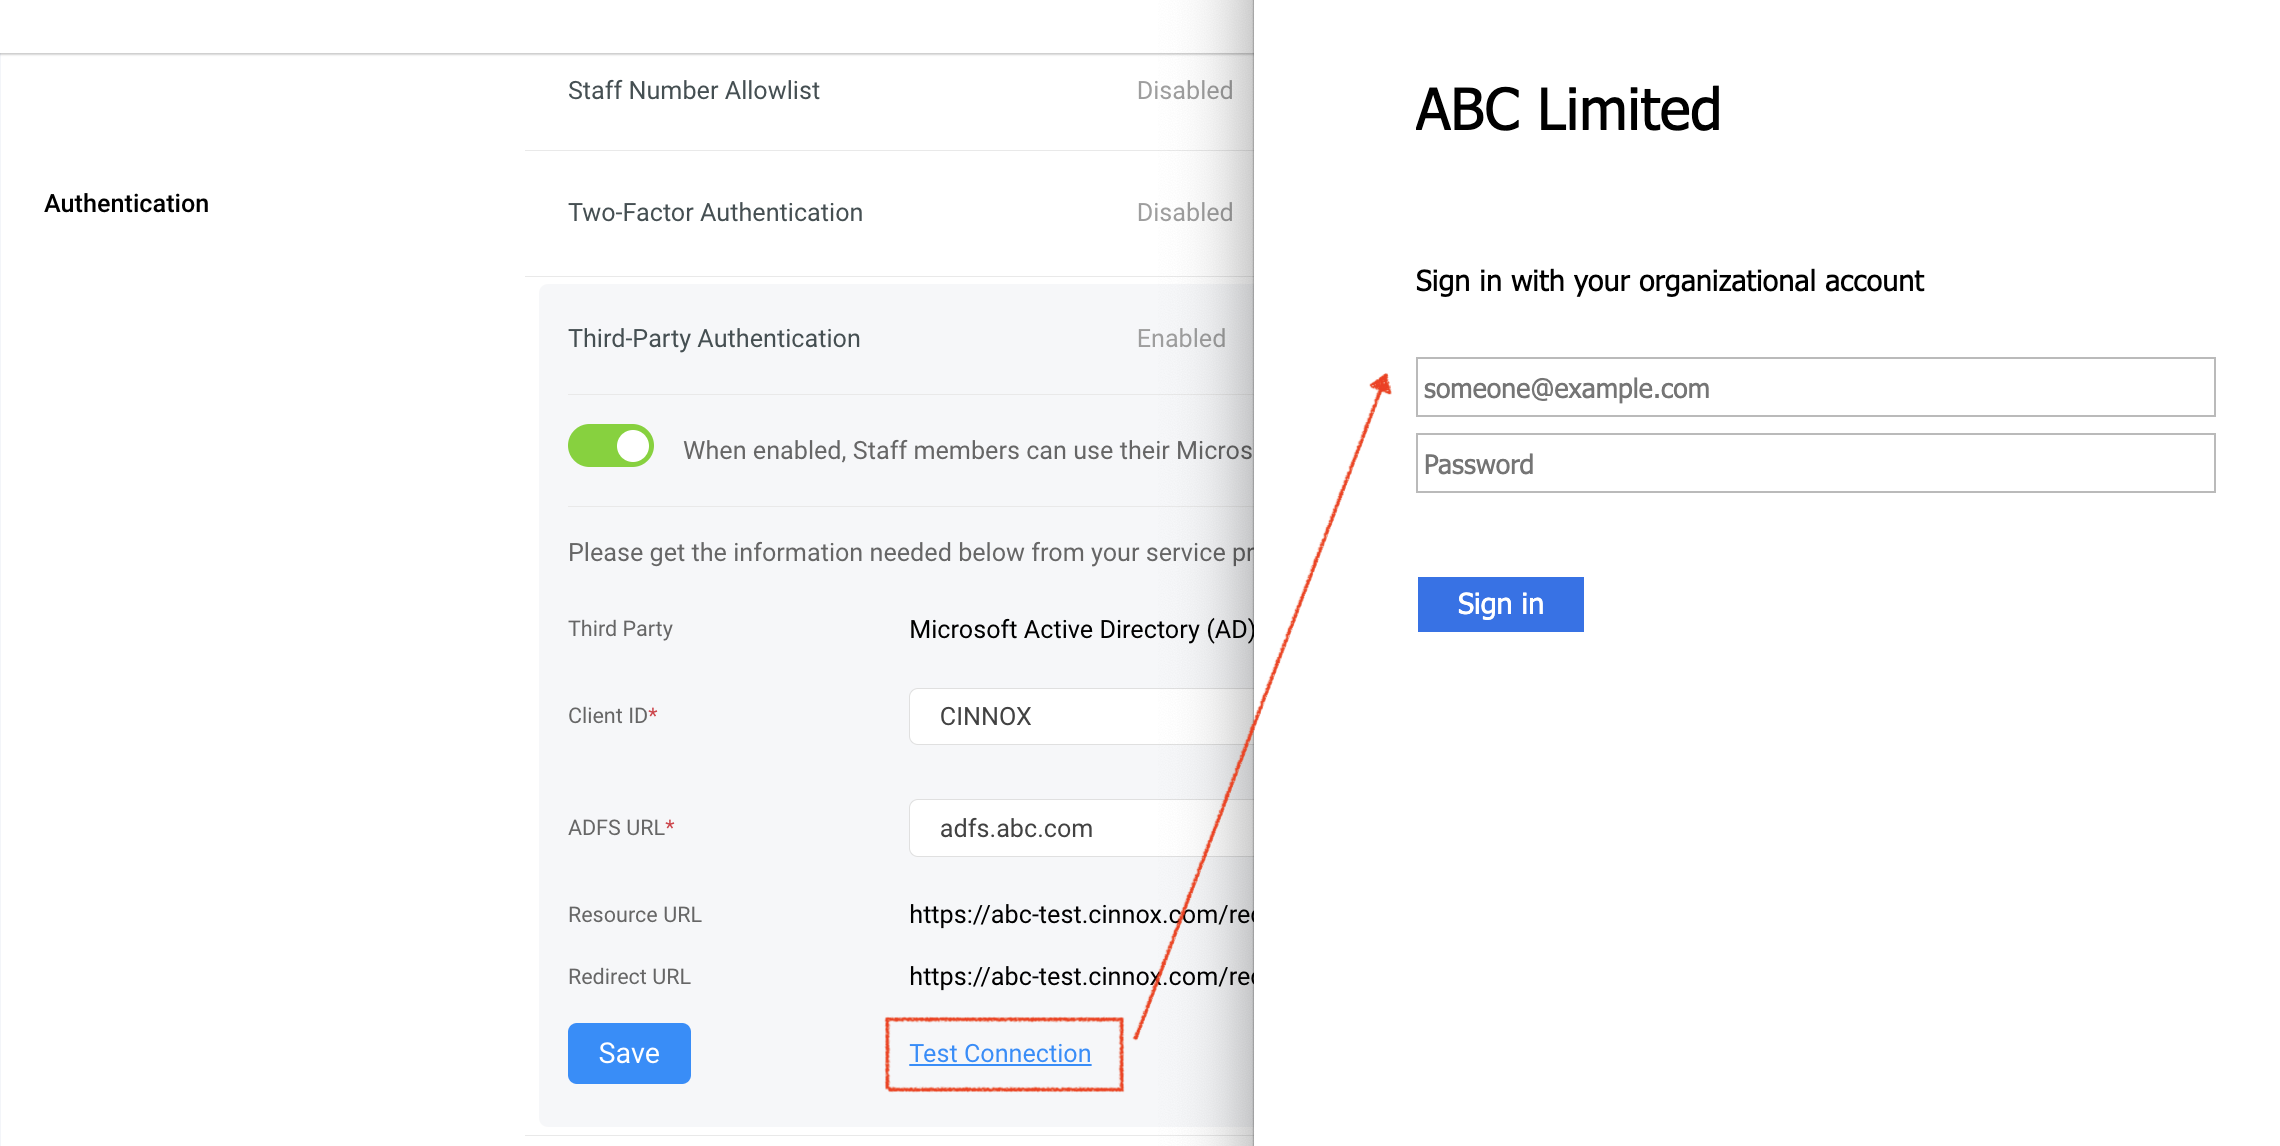
- Go to Administration > Security > Service Authentication > Third-Party Authentication
- Copy and paste the Client ID and ADFS URL from your AD FS Manager to your CINNOX Web Dashboard
- Click on Save.
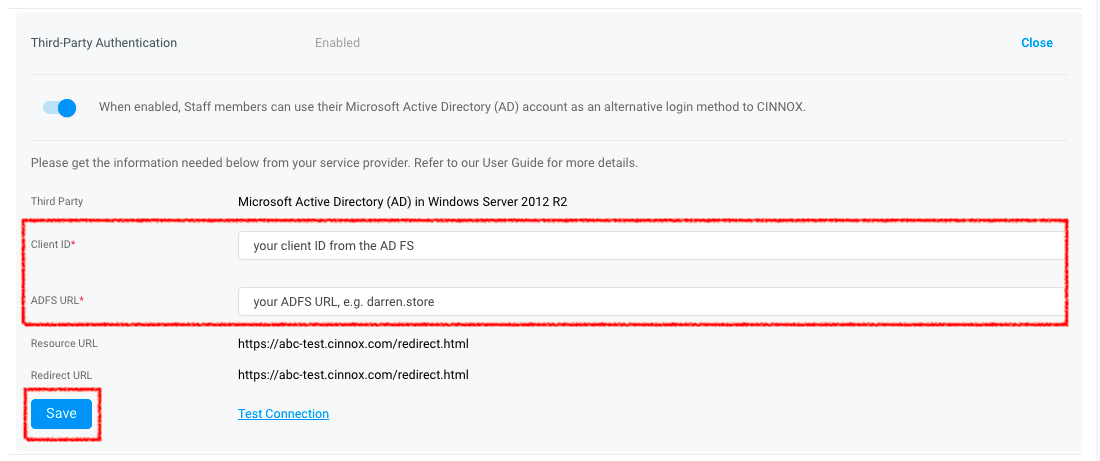
- To check if the configuration is correct, click on Test Connection.
A login page should appear to enter your email address and password.
Once the service-level third-party authentication is activated, Staff members will receive the system-generated message in their email and their Dashboard or App through a CINNOXBot message.
📘
Check your event viewer logs on your device for the error message if you receive an error when configuring the SSO. Contact CINNOX Support, If you are not able to troubleshoot the issue.
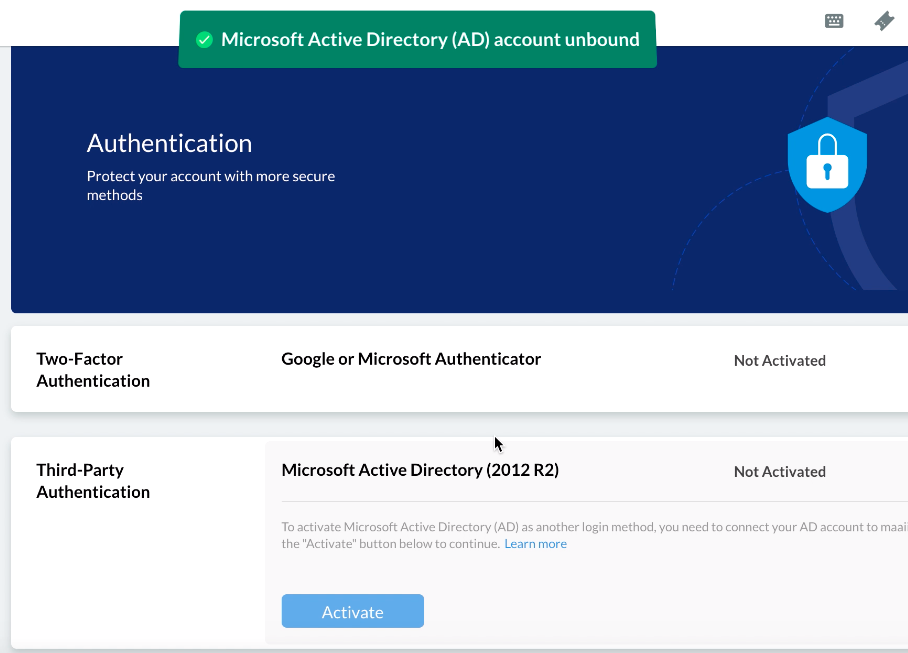
Staff Sign In to CINNOX with AD FS
When a Staff administrator enables third-party authentication, you can use your Microsoft AD credentials to log in to the CINNOX service.
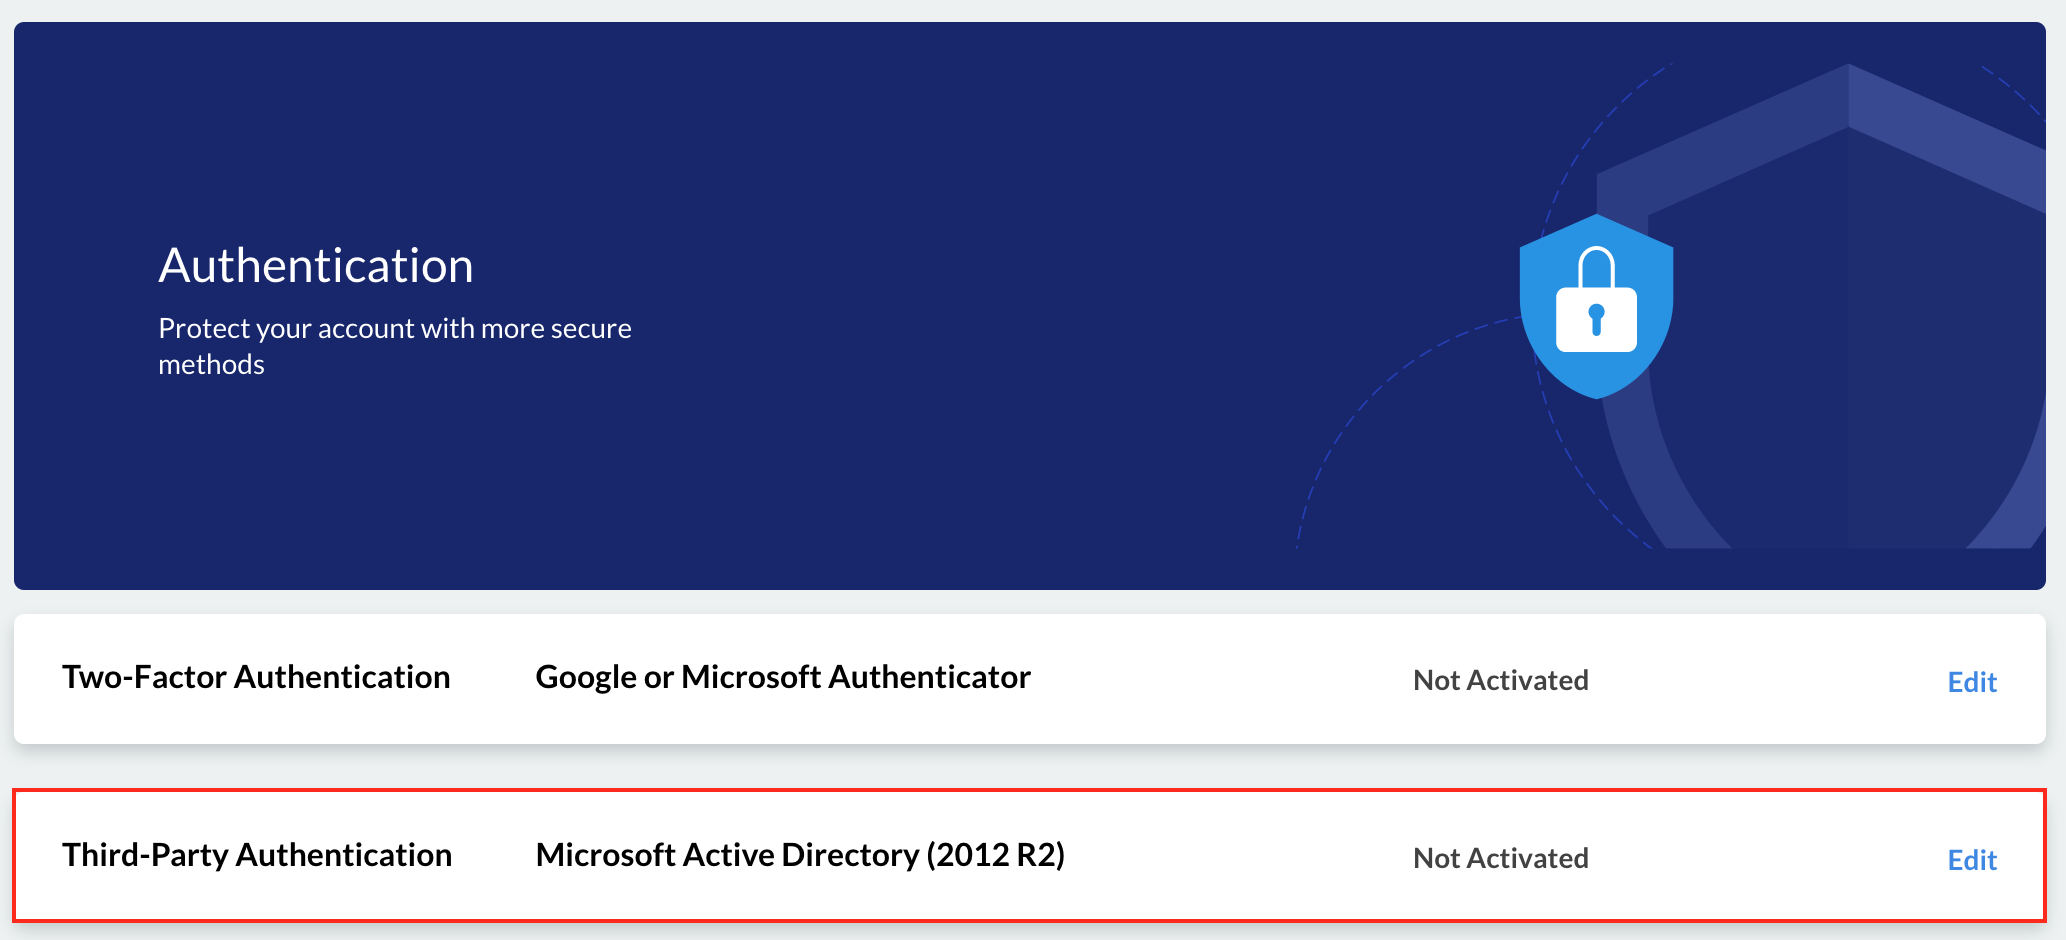
To view and manage third-party authentication, go to My Account > Authentication from the navigation menu.
🚧
If a Staff administrator disables service-level third-party authentication, you will not see this option.
Activating Third-Party Authentication (SSO)
To activate third-party authentication:
- Sign in to your CINNOX Web Dashboard
- Click on Edit on the rightmost side of Third-Party Authentication.
- Click on Activate.
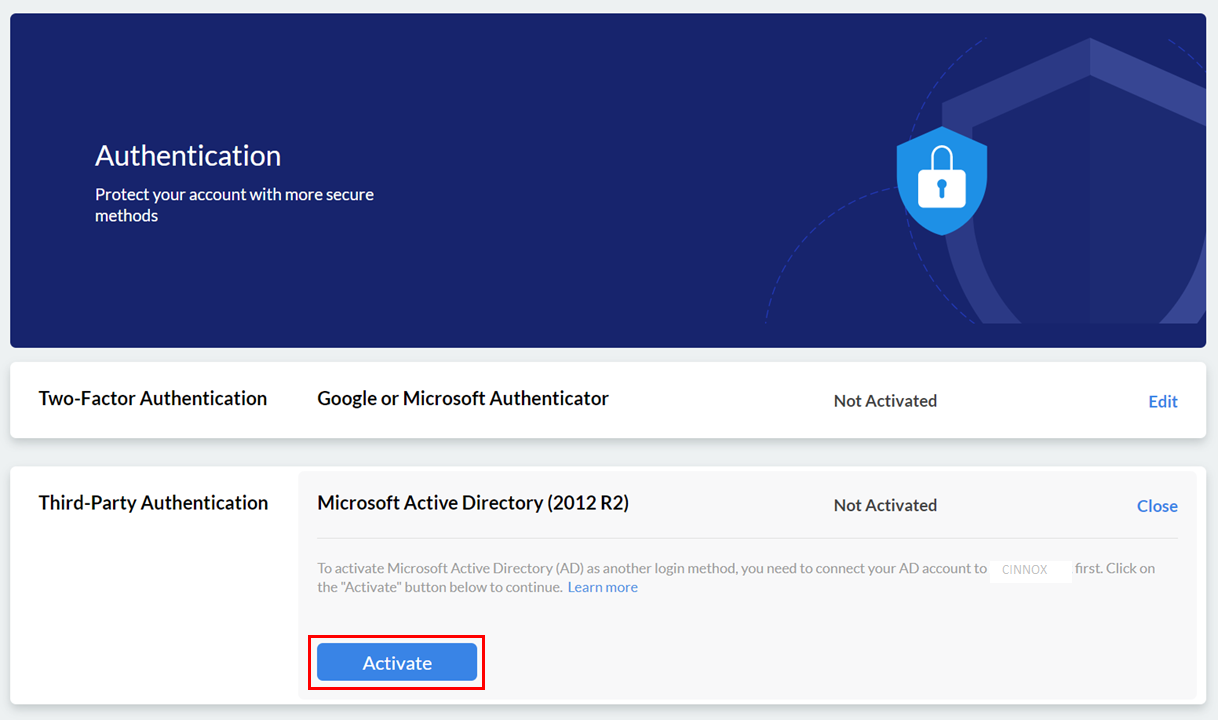
- On the pop-up window, type in your organisational account credentials (email address and password), then click on Sign In.
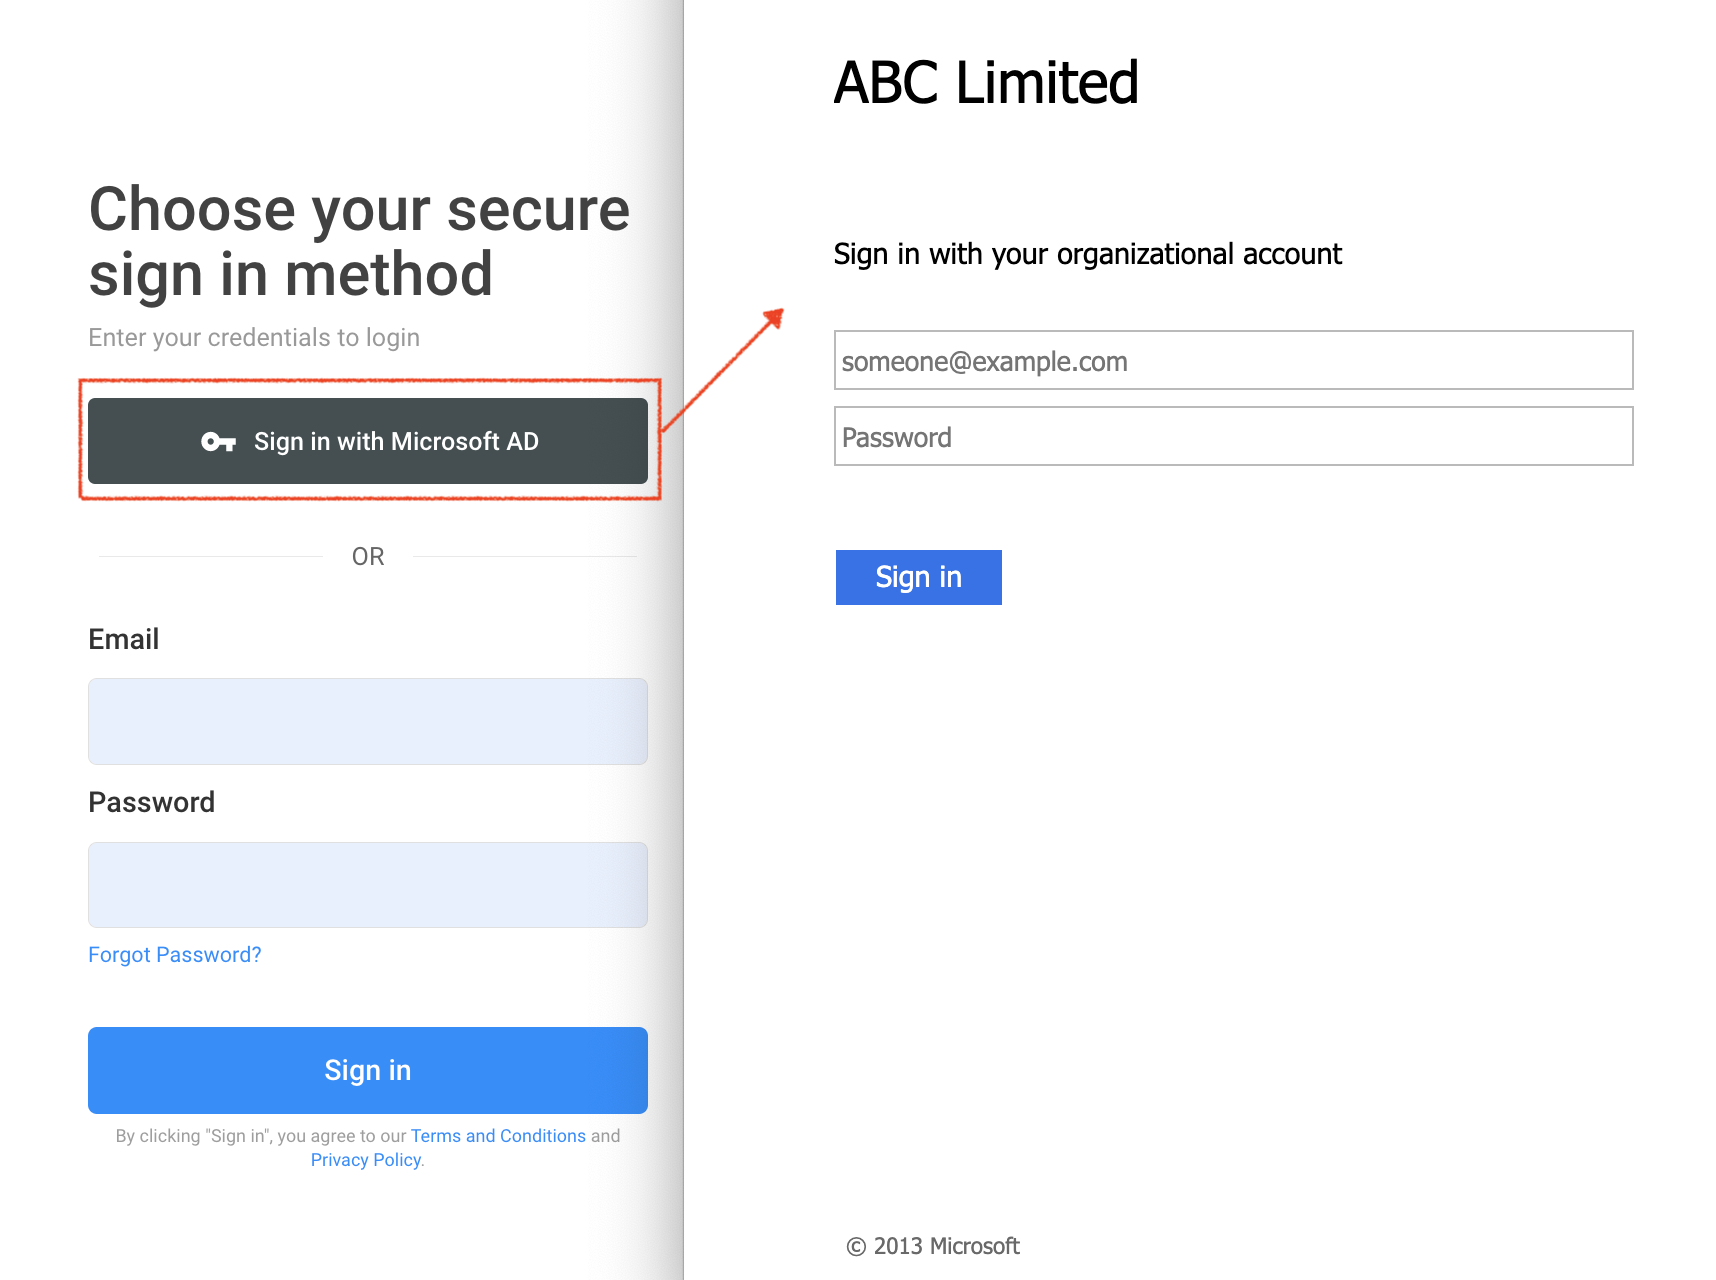
After successfully activating third-party authentication, the next time you log in to the CINNOX service, you may use the Sign in with Microsoft AD option on the login page.
📘
Refer to the App - Third-Party Authentication Guide for the detailed steps to configure and manage the authentication in the CINNOX App.
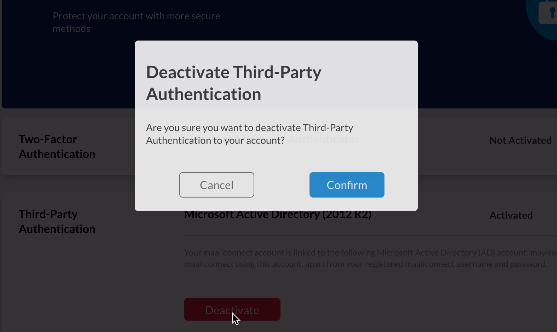
Deactivating Third-Party Authentication (SSO)
To deactivate third-party authentication:
- Click on Edit on the rightmost side of Third-Party Authentication.
- Click on Deactivate. A pop-up message will appear, asking you to confirm the action.
- Click on Confirm.
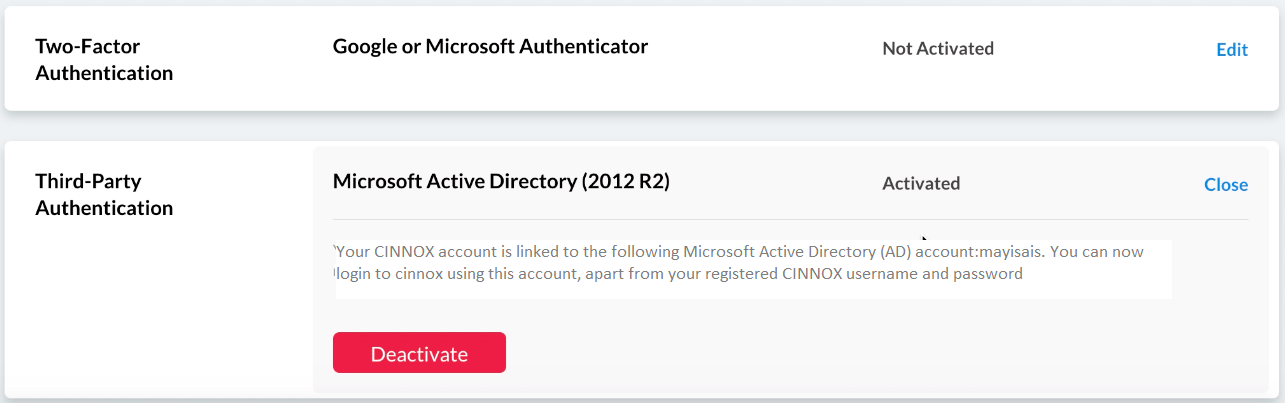
Third-Party Authentication will change to Not Activated.