Space (Group Chat)
What is Space?
Space is CINNOX's group chat feature designed to facilitate seamless communication among staff members. Whether you're handling customer enquiries, participating in meetings, or engaged in various tasks and activities, Space allows you to stay connected and collaborate effectively.
With Space, you can create an Internal Public Space, which is accessible and searchable by all staff members, or an Internal Private Space, which is invitation-only. Each Space can accommodate up to 500 staff members, making it ideal for both small teams and larger groups.
Internal Space has two types: Internal Public Space and Internal Private Space:
-
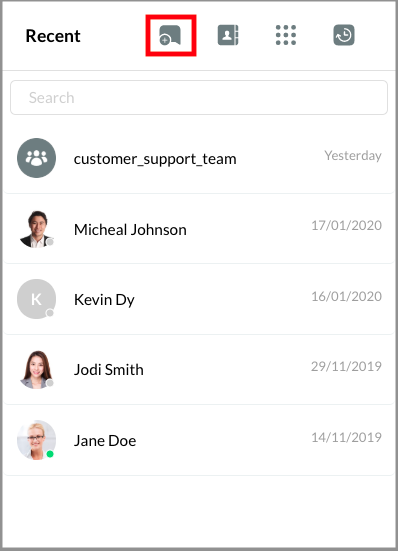
Public Space: These groups are open to all employees; all employees can search for the group name and join. Employees can view a list of all public groups through the workspace search function or by clicking "Browse All Public Groups" in the "Recent Chat Rooms" filter.
-
Private Space: These groups are invitation-only; all employees in the group can invite any other employee to join. The group name cannot be searched in the search bar.
Inside Space, you have a variety of tools to enhance communication and collaboration. You can send messages with @mentions to notify specific members or the entire group, reply to particular messages to keep conversations organized, and edit, recall, or forward messages as needed. Additionally, Space supports group calls, enabling real-time discussions and decision-making.
Enjoy the benefits of streamlined team discussions and enhanced collaboration with CINNOX's Space, ensuring that you and your colleagues can stay connected and productive no matter where you are or what you're working on.
Creating a Internal Public Space
To create an External Public Space:
- On your Workspace's Utility panel, click the (+) button, then click on New Chat.
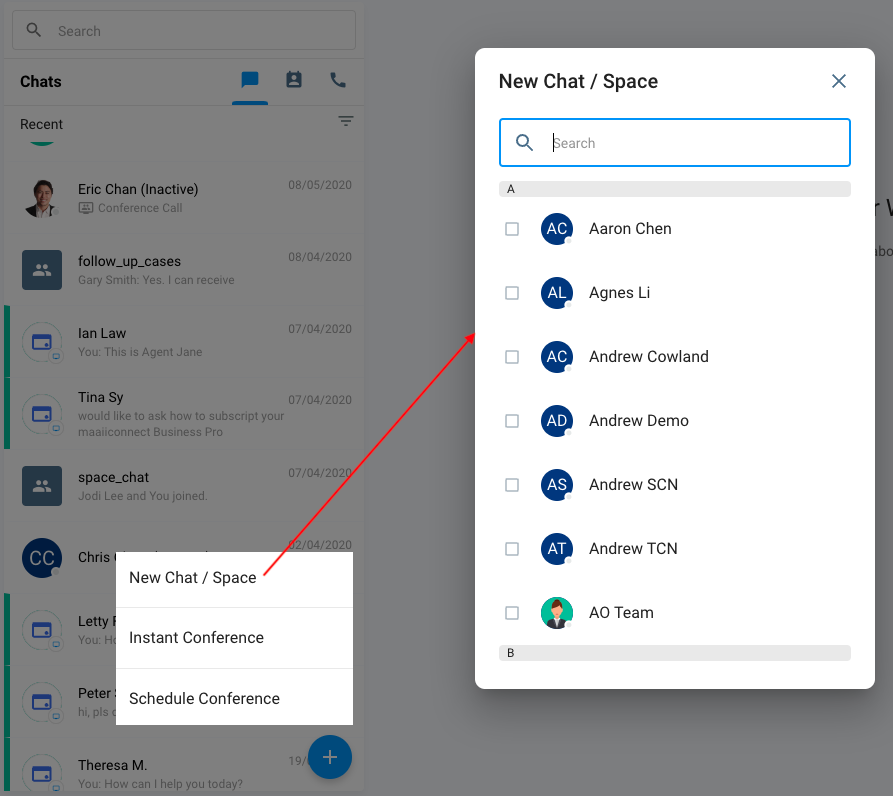
Creating a New Space
- On the Staff Contacts window that will appear, select the staff members you want to add to your Space, then click on Next.
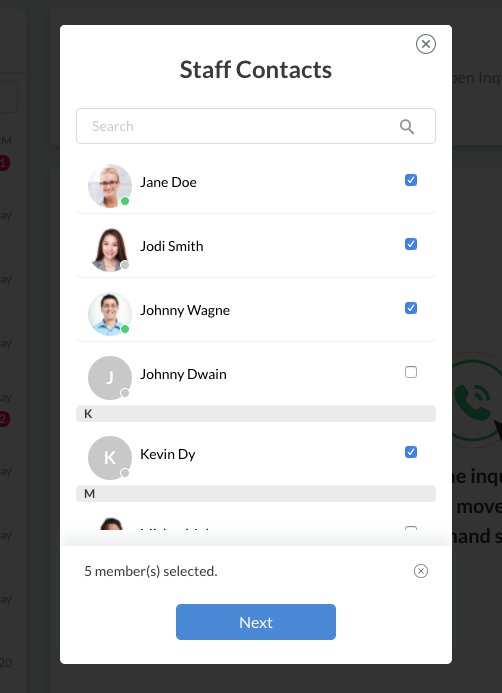
Selecting staff members
- On the New Space window that will appear, type in the name of your Space. The Space name must be unique, no longer than 60 characters, without white spaces and special characters apart from "_" and "-".
- Type in the description of your Space, i.e., what it is about. The description should be no longer than 500 characters.
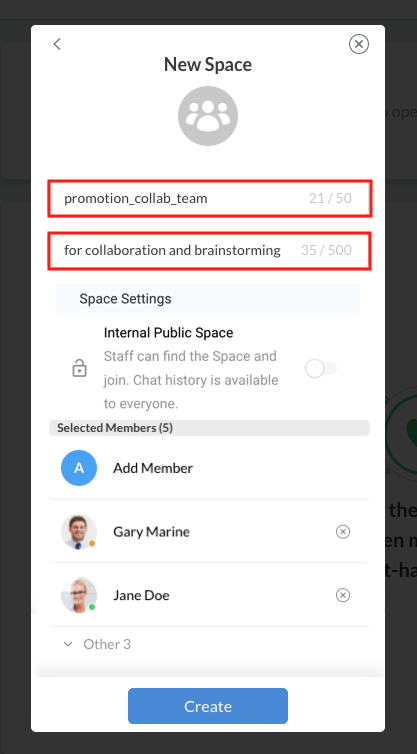
Setting up a New Space (Internal, Public/Private)
- Click on Create.
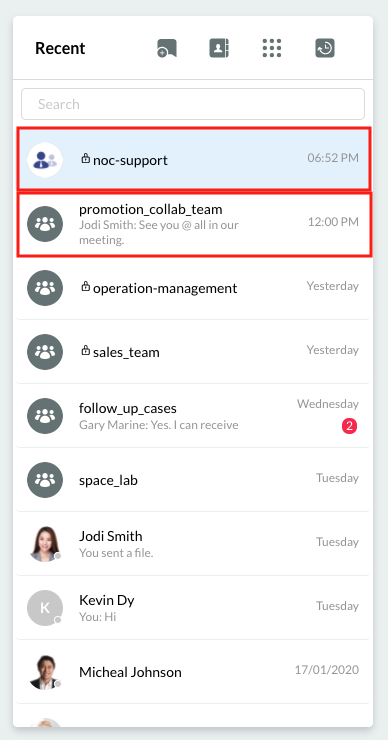
The newly created Public Space will appear in the Recent Connection area of your Workspace's Utility panel. It will also notify the added staff members that they have joined Space.
Creating an Internal Private Space
To create an Internal Private Space:
- On your Workspace's Utility panel, click the (+) button, then click on New Chat.
- On the Staff Contacts window that will appear, select the staff members you want to add to your Space, then click on Next.

- On the New Space window that will appear, type in the name of your Space. The Space name must be unique, no longer than 60 characters, without white spaces and special characters apart from "_" and "-".
- Type in the description of your Space, i.e., what it is about. The description should be no longer than 500 characters.
- On Space Setting, toggle the button ON (green) to set the Space to Private or by invitation only.
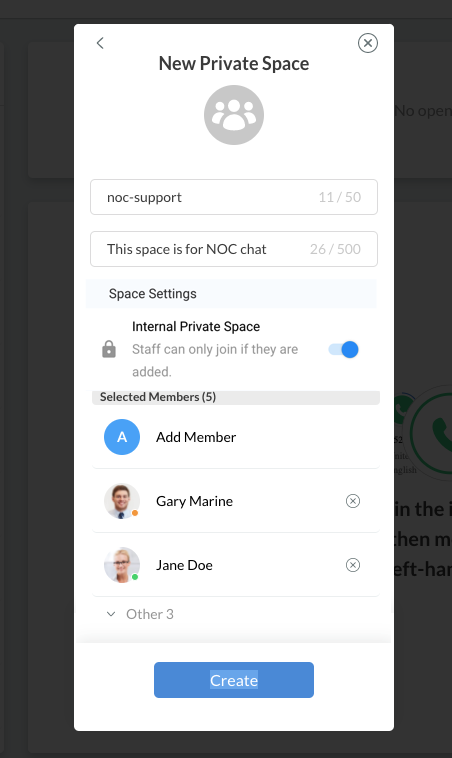
Selecting the Internal Private Space setting
- Click on Create.
The newly-created Private Space will appear with a Locked icon beside its name in the Recent Connection area of your Workspace's Utility panel. It will also notify the added staff members that they have joined Space.
Creating a Private Space
Things to Do Inside a Space
Chat Functions
Below is a summary of the available chat functions you can use inside a CINNOX Space:
- Copy a posted message
- Recall a message or file you posted within five minutes
- Edit a message you posted within five minutes
- Reply to a specific message within the Space
- Add quick links or text shortcuts to weblinks and phone numbers
- Forward a message to any chat room
- Image Preview - to Staff chat room including enquiry room, Space group chat and conference room
- Link Preview - to any chat room
- Share images, videos, documents, and voice messages
- Use @mention,, i.e., use @all or @[staff member name], to respectively notify all Space members or an individual member about a specific message(s)

Using chat functions inside a Space.
For more information, refer to the following sections in this Guide:
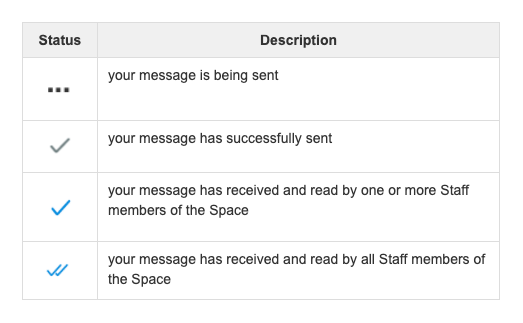
Message Status
During chat conversations, the following indicators let you know the status of the messages you sent in the Space group chat:
Call Function
A staff member can launch a conference call from within the Space. CINNOX will then automatically add the other members of the Space in the conference as participants
For more information, refer to the Conference Call section of this Guide.
Space Room Information
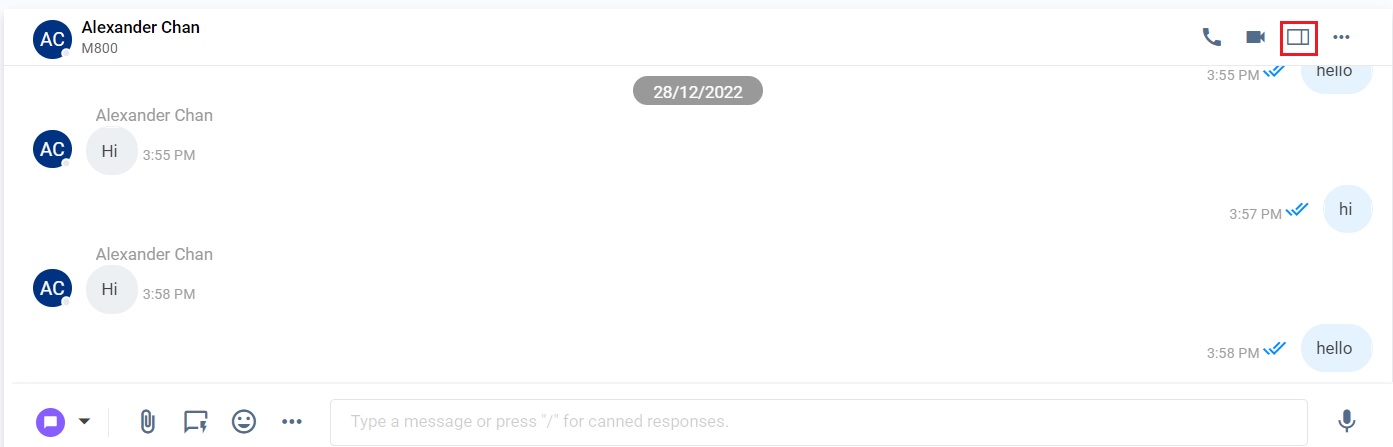
To view the Space information panel:
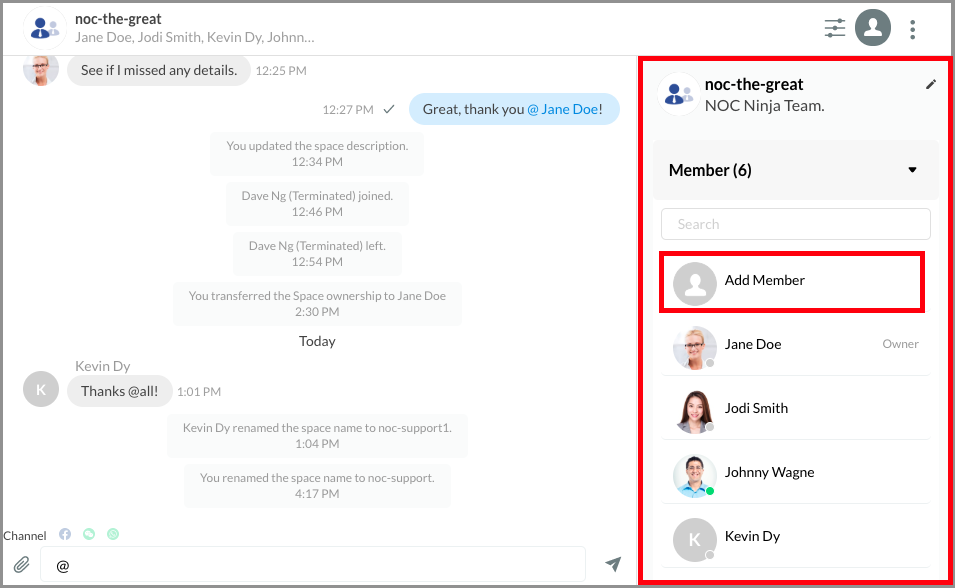
Click the Room Profile icon on the Space window's right side (1).
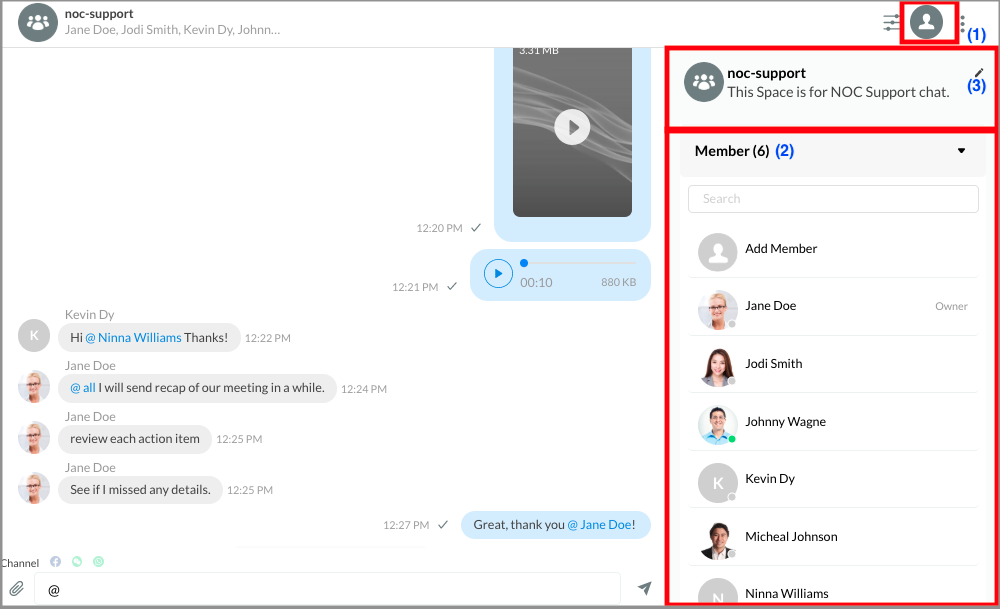
As a Space owner/member, you can:
- View all Space members (2).
- You can rename the Space, update its description, and upload its profile image (3). To make the changes, click the Edit icon, then click Save.
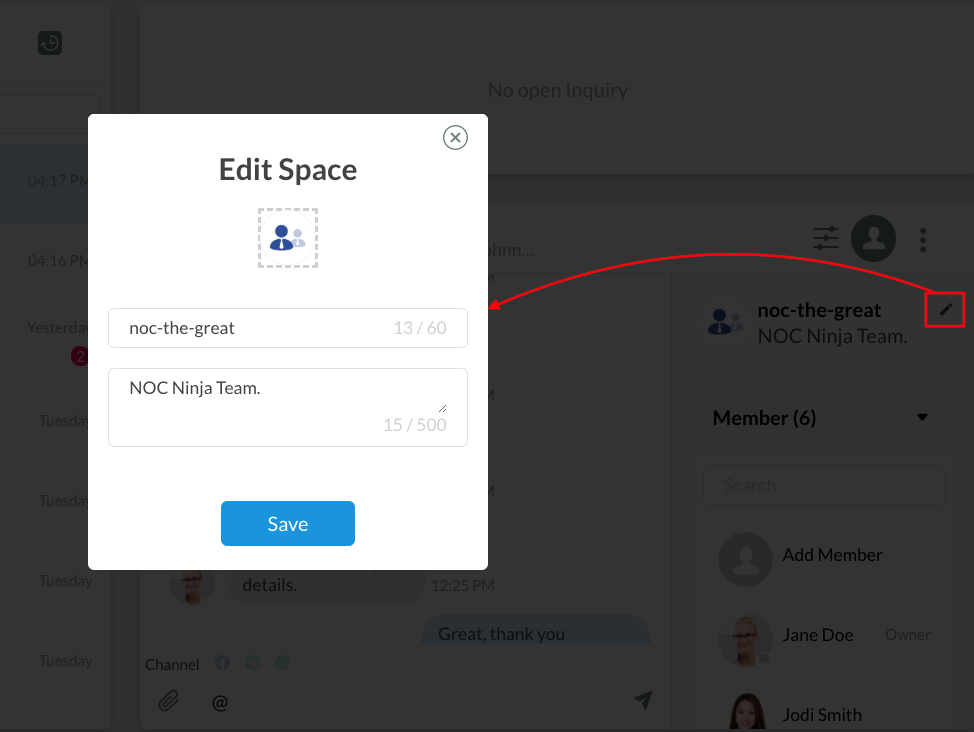
Changes in the name, description, and profile image will be reflected in the Space room information.

Adding Members into Space
As a Space owner/member, you can add members to your Space:
- On the right side of the Space window, click the Room Profile icon to view the Space information panel.
- Click on Add Member.
- On the Staff Contact List that will appear, select the staff member(s) you would like to add to your Space, then click on Invite.
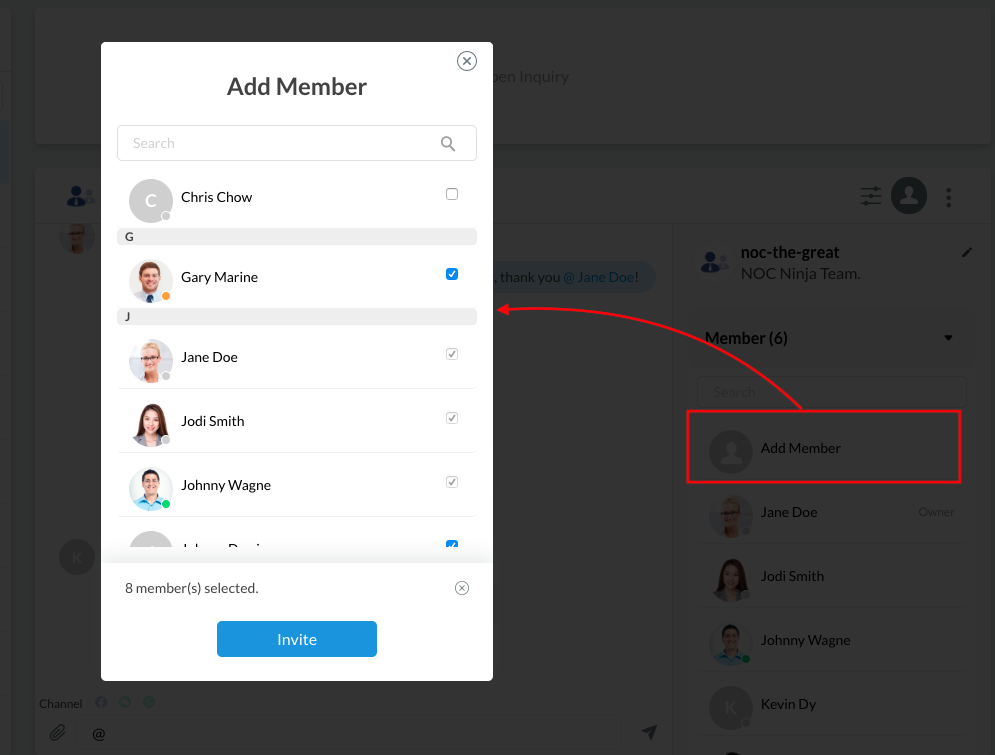
A notification will appear for the successfully added members, and their names will be added to the member list. The Space will also display a system message indicating the staff members have joined.
Removing Members from a Space
A. As a Space Owner, you can remove members from your Internal Private Space.
B. As a Staff administrator, you can remove members from an Internal Public Space.
- On the right side of the Space window, click the Room Profile icon to view the Space information panel.
- On the Members list, find the staff member you wish to remove, then click the (x) button beside their name. A pop-up message will appear, asking you to confirm the action.
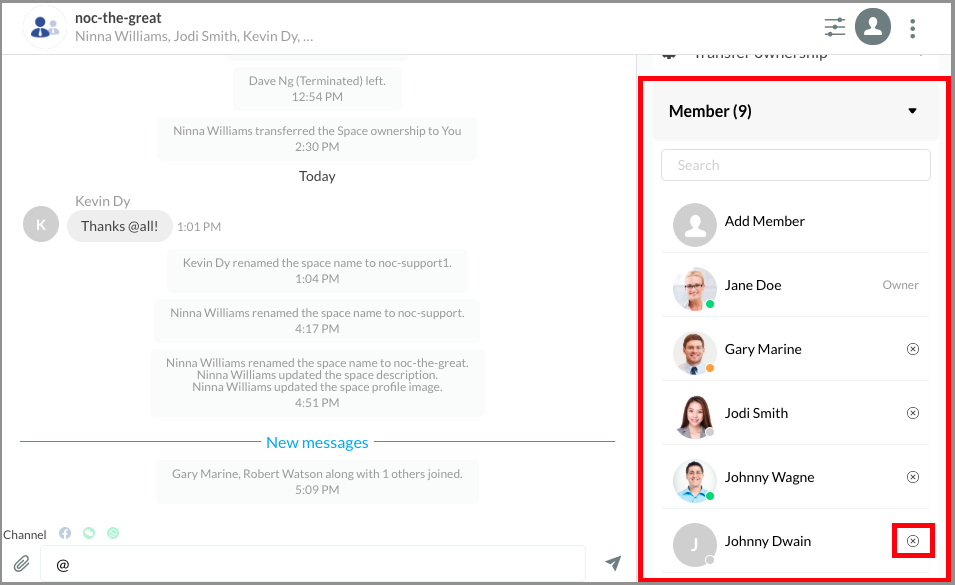
- Click on Remove.
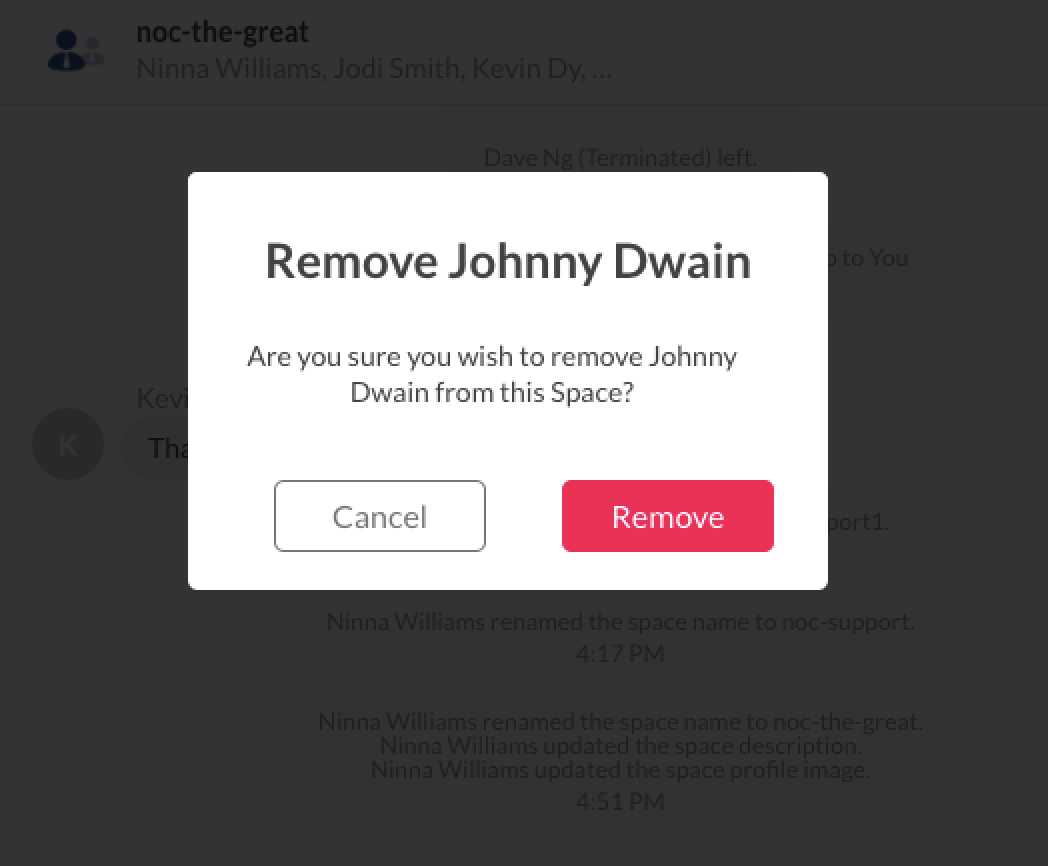
A notification will appear for the successfully removed members, and their names will be removed from the member list. The Space will also display a system message indicating the staff members have left.
Transferring Space Ownership
A. As a Space Owner, you can transfer the ownership of your Internal Private Space to another member.
B. As a Staff administrator, you can transfer the ownership of an Internal Public Space to another member.
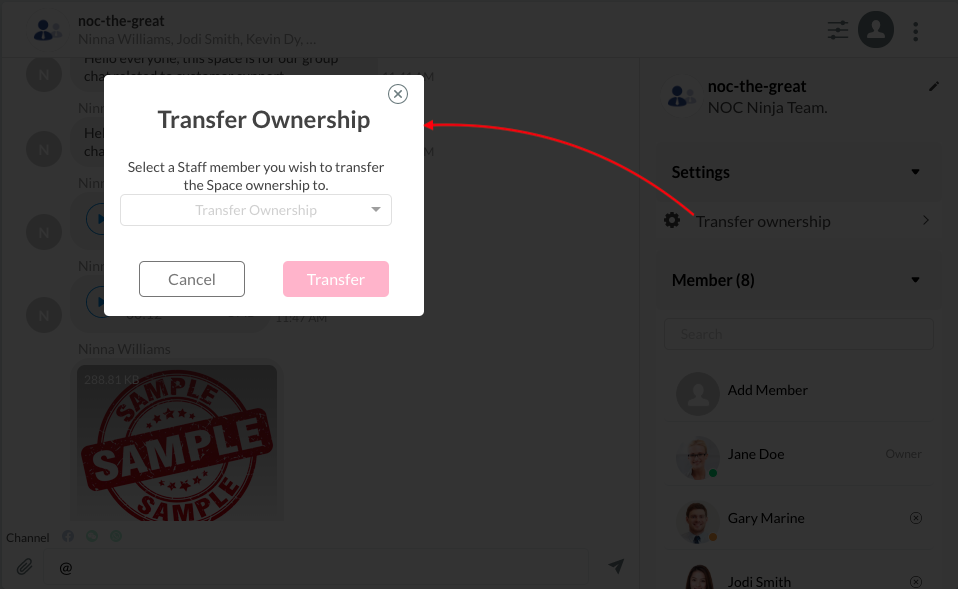
- On the right side of the Space window, click the Room Profile icon to view the Space information panel.
- Click on Transfer Ownership. A pop-up window with a dropdown box containing the members' names will appear. You can then transfer the Space ownership.
- Select the staff member to whom you wish to transfer the Space ownership, then click on Transfer. A pop-up message will appear, asking you to confirm the action.
- Click on Transfer.
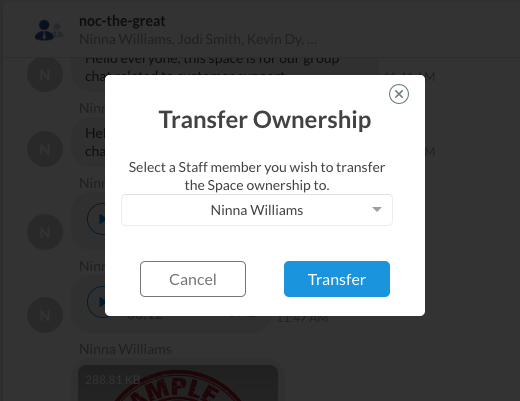
The Space will then display a system message indicating that the Space ownership has been transferred to another staff member.
Copying Room ID
As a Space owner/member, you can copy the Room ID
- On the right side of the Space window, click the Detail Information icon to view the Space information panel.
- Click on the Room Settings icon and the Copy Room ID icon.
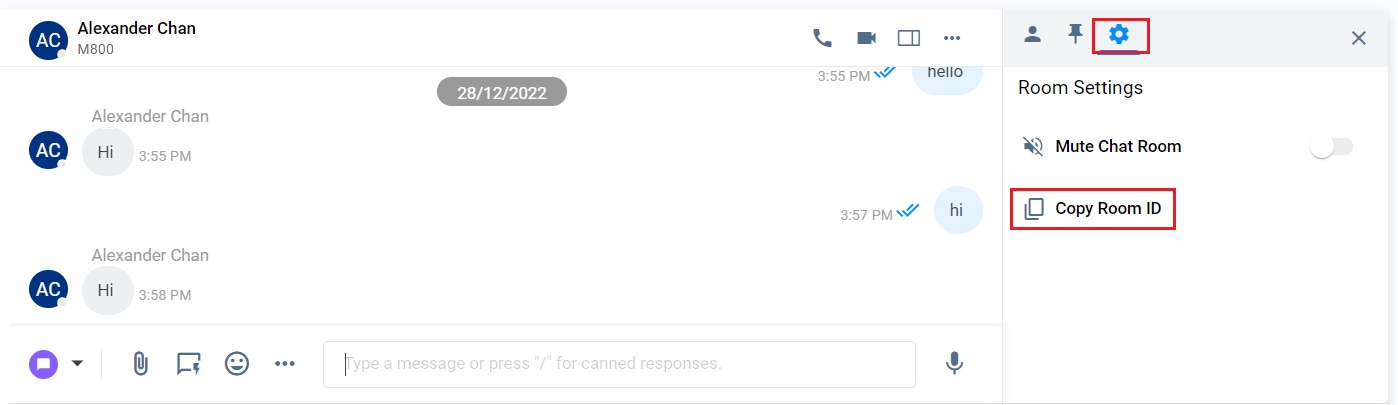
- After successfully copying the Room ID, the toast message indicates "Copied".
- You can paste the Room ID to your required place.

👍
The copied Room ID is required in Zapier to send an instant message to the Room or Staff. For details, please refer to the Zapier page.
Leaving a Space
As a Space owner/member, you can leave and exit from a Space.
- On the right side of the Space window, click the Room Profile icon to view the Space information panel.

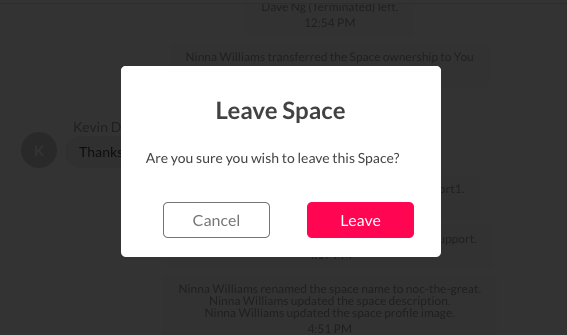
- Click on Leave Space. A pop-up message will appear, asking you to confirm the action.
- Click on Leave. A message will then state that you have successfully left the Space. The said Space will also display a system message indicating that you left.
Deleting a Space
A. You can delete your Internal Private/Public Space as a Space Owner.
B. As a Staff administrator, you can delete an Internal Public Space.
- On the right side of the Space window, click the Room Profile icon to view the Space information panel.
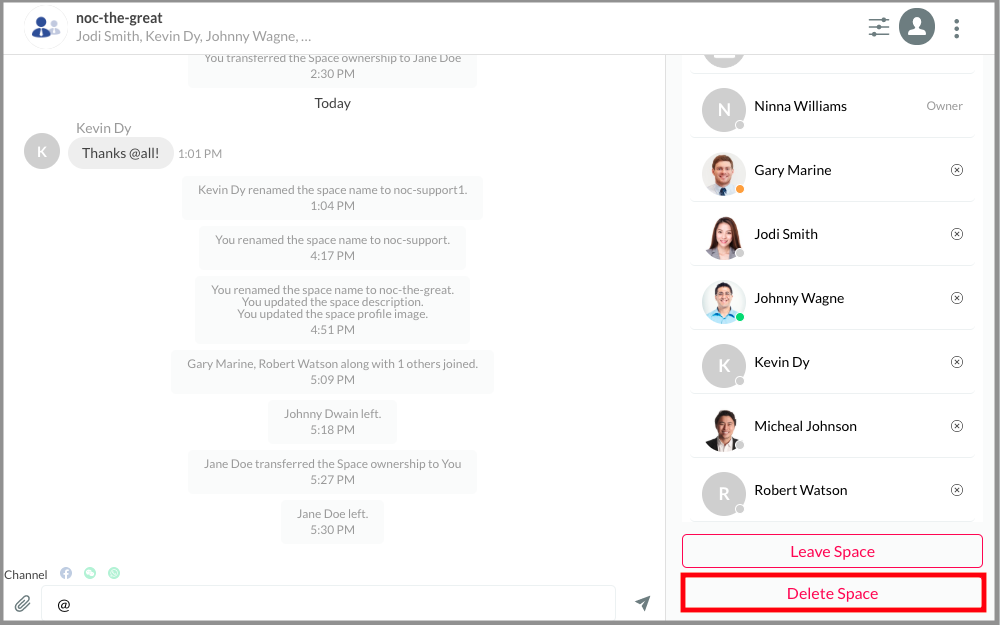
- Click on Delete Space. A pop-up message will appear, asking you to confirm the action.
- Please check the box beside "I confirm to delete this Space" and then click on "Delete."
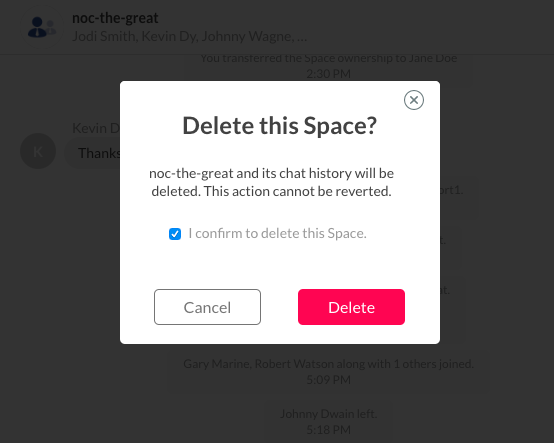
A message will then state that Space has been successfully deleted. The said Space will also be deleted and removed from the Recent Connection area of your Utility panel, and other staff members will no longer have access to it.