Creating SMS Standard Campaign
This section will guide you on creating Standard Campaigns to send SMS messages to any of your target recipients using a spreadsheet template.
To create a new Standard Campaign:
- From the dashboard navigation menu, click on Campaigns, then click on any of the sub-menu items (Submitted Campaign, Draft Campaign, or Sent Campaign).
- Click on the Create Campaign button at the page's top-right corner.
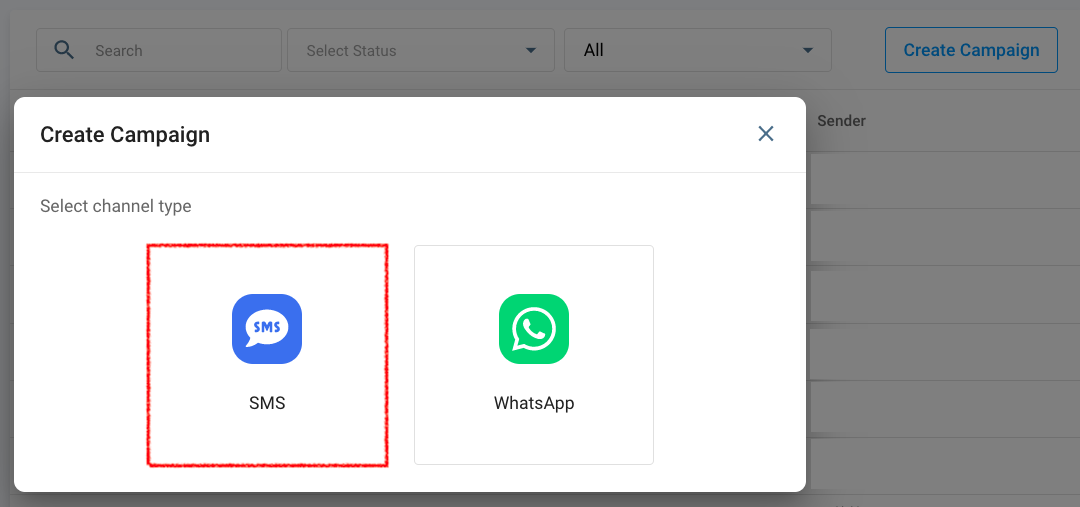
- On the Create Campaign pop-up window that will appear, select SMS.
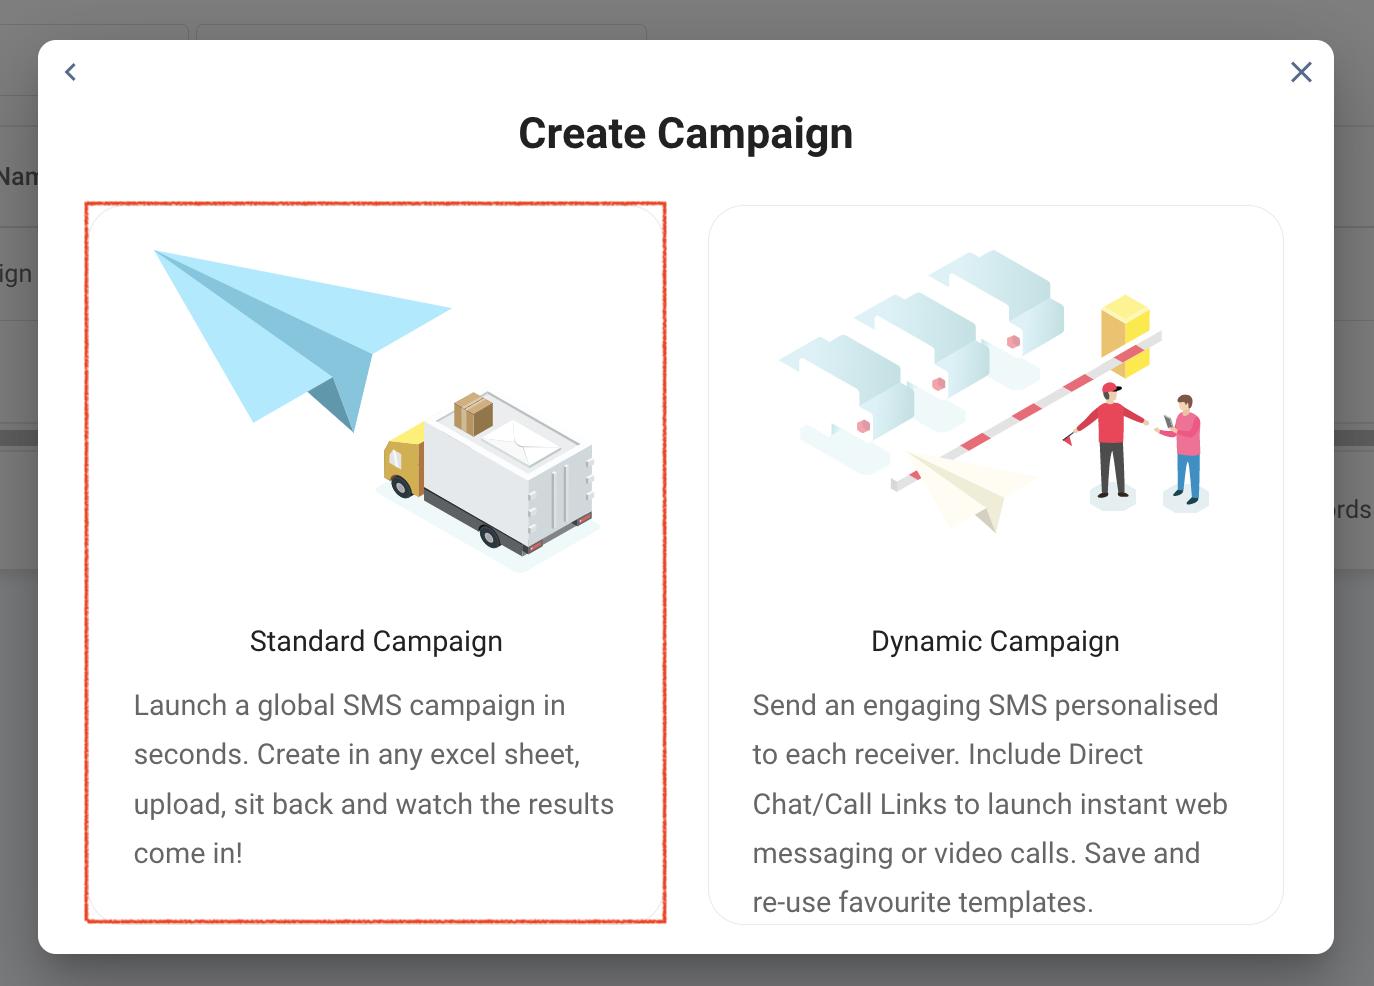
- Then, select Standard Campaign.
Importing Bulk Recipient Numbers and Contents
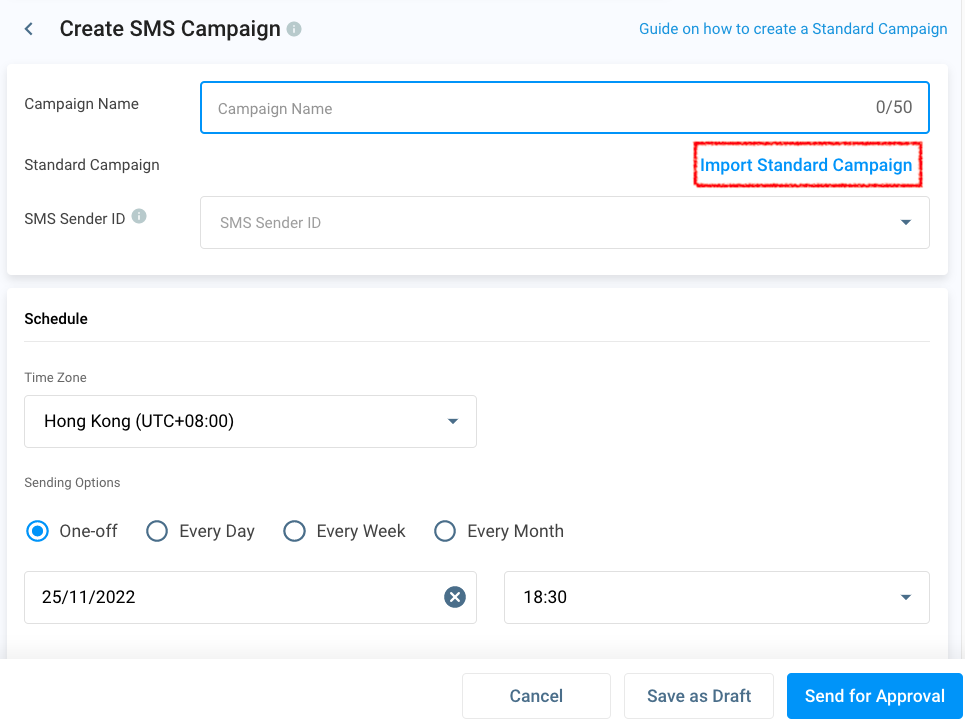
- On the Create Campaign page, click the Import Standard Campaign button at the top-right corner.
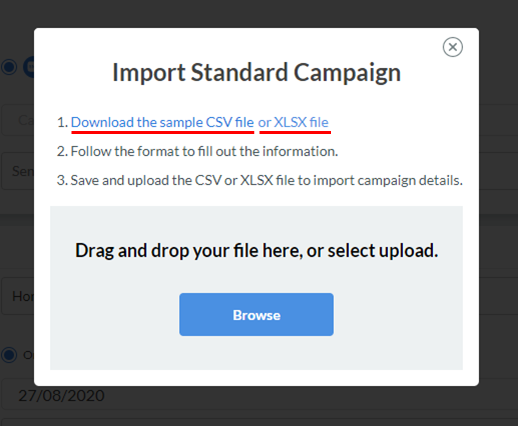
- On the Import Standard Campaign pop-up window that will appear, click on the CSV or XLSX sample file to download a spreadsheet template.
10,000 phone numbers are the maximum number of recipients to send per campaign.
- Open the spreadsheet template, which should contain two columns, and remove the sample first record.
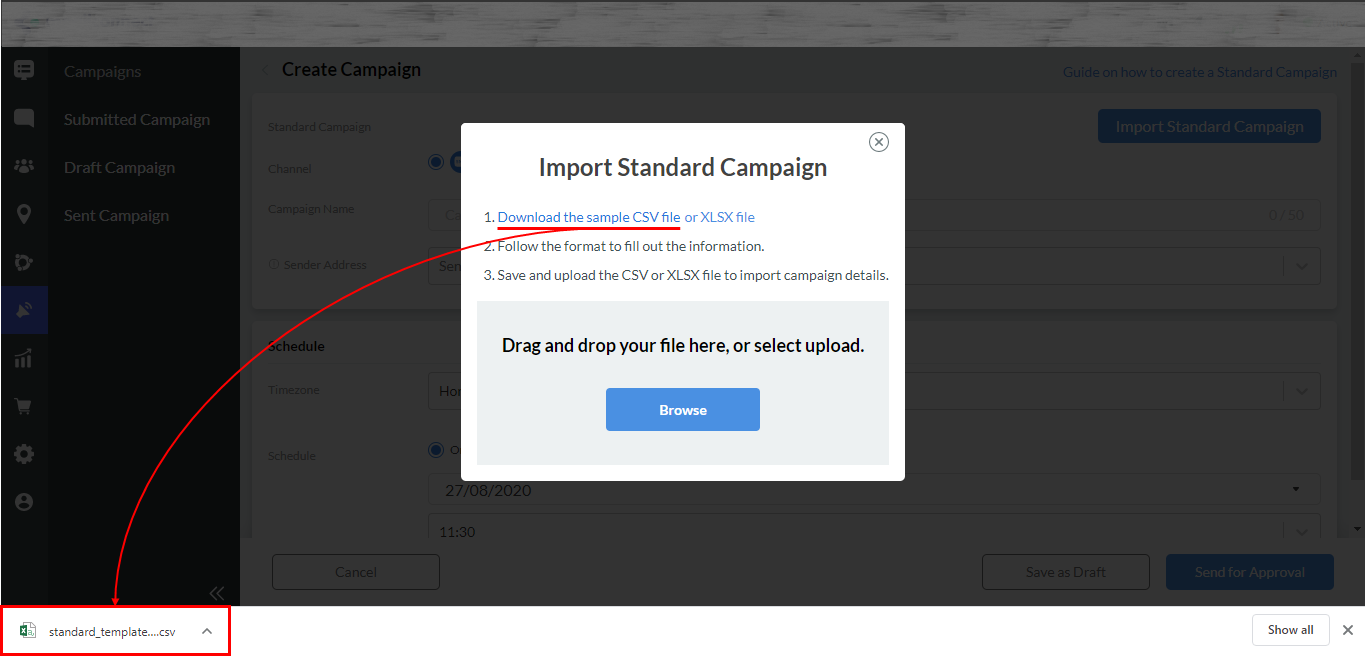
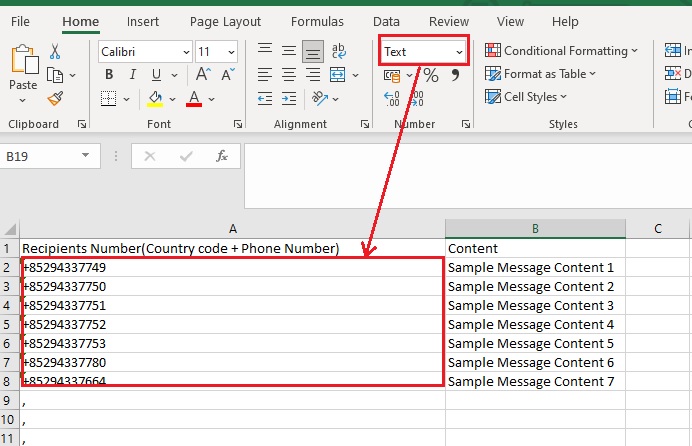
- On the Recipients Number column, add the phone numbers of your target recipients. Make sure to include the country codes before the numbers.
- On the Content column, add the message you wish to send next to each recipient number. You can type up to 1000 characters for each message content.
- Add as many records to the spreadsheet template as long as the file size does not exceed 5MB.

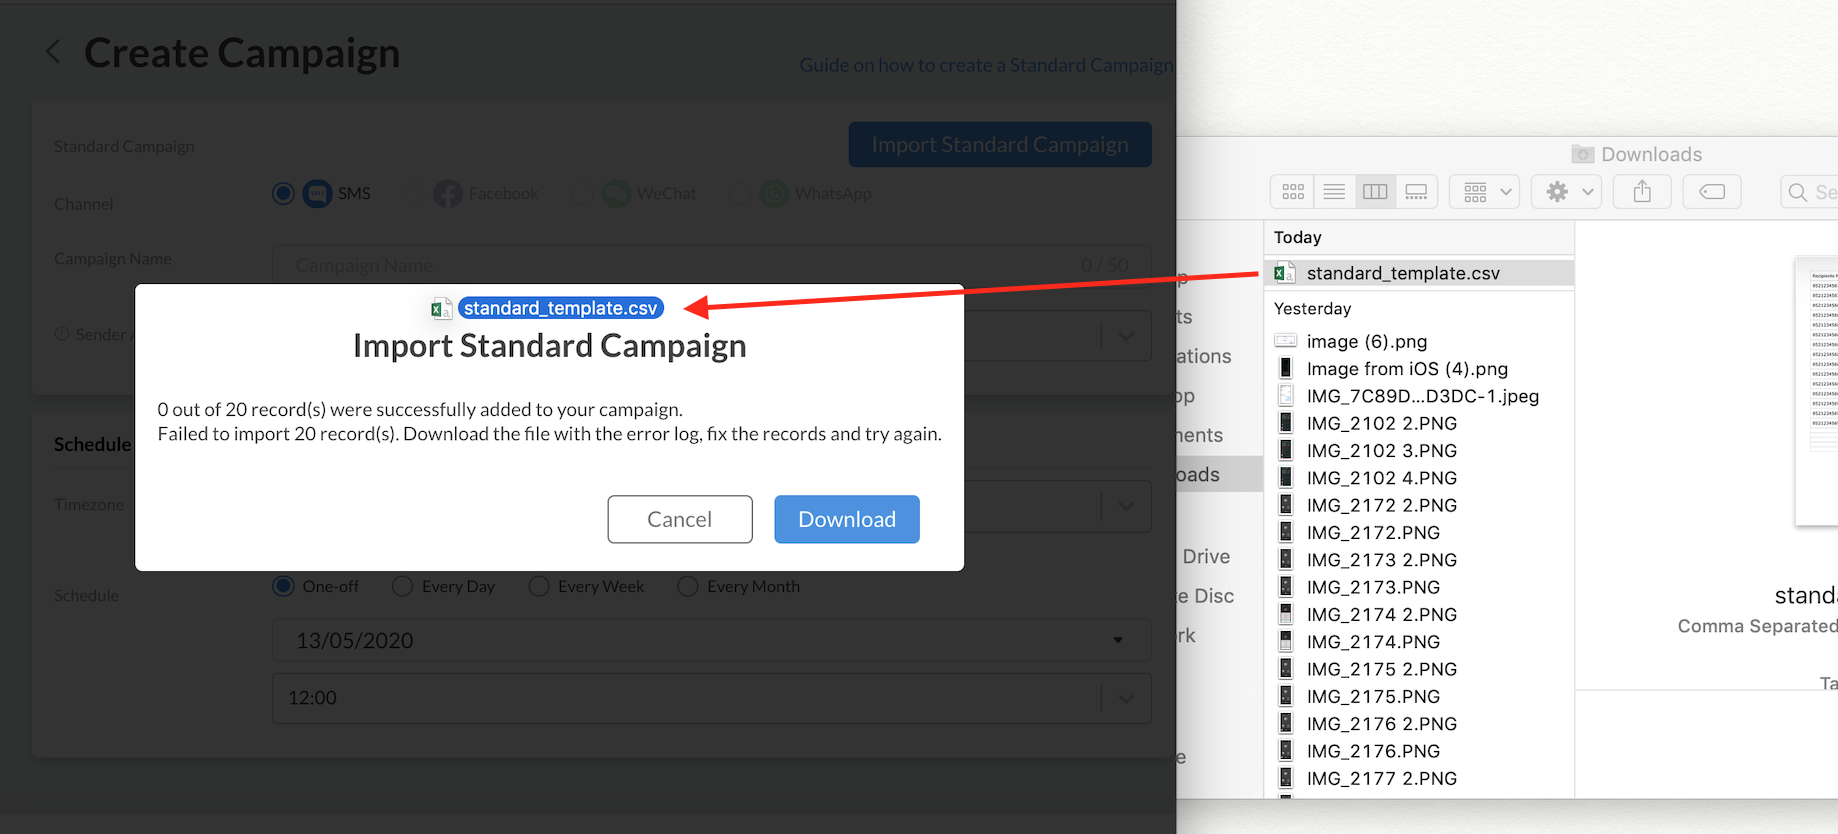
- Once all columns are ready, save the spreadsheet template and upload it in CINNOX by Drag and drop or by clicking Browse and selecting the file from its location. The uploaded file will be validated, and an error log will be created for invalid records.
- CINNOX only accepts text format cells.
- Please add "+" in front of the recipient phone numbers when you add them to the excel file.
How to handle the case of the splitting text in the CSV file
Using a comma (,) to split the text is the function of the CSV file. When importing the CSV file with the comma between texts, the text will be split into the next column in the file after the file upload.
Splitting text in the CSV file
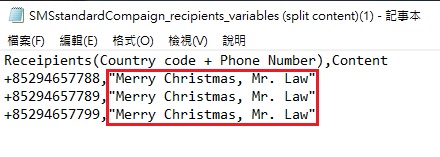
For example, when you enter Merry Christmas, Mr. Law into the column Content, the file is shown below:

After the file upload, the text is shown below:

As the text Merry Christmas, Mr. Law contains a comma in the content, after the filled CSV file is uploaded, the text is split into two columns, Merry Christmas in the column Content and Mr. Law in the next column.
How to avoid splitting text
Using a text editor
- Put the text with a comma in the double quote (""), like "Merry Christmas, Mr.Law" and save it as a CSV file when you upload the file.
Using Excel or style sheet editors
- Fill in the text in the text format.
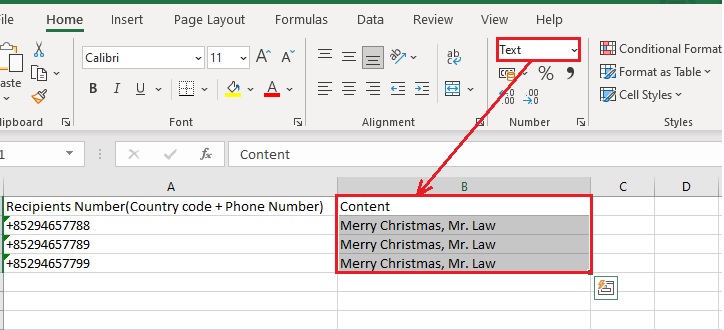
- Save the sheet as a CSV file and upload it to the CINNOX.

- The double quote should be added automatically to the file.
Handling Invalid Records
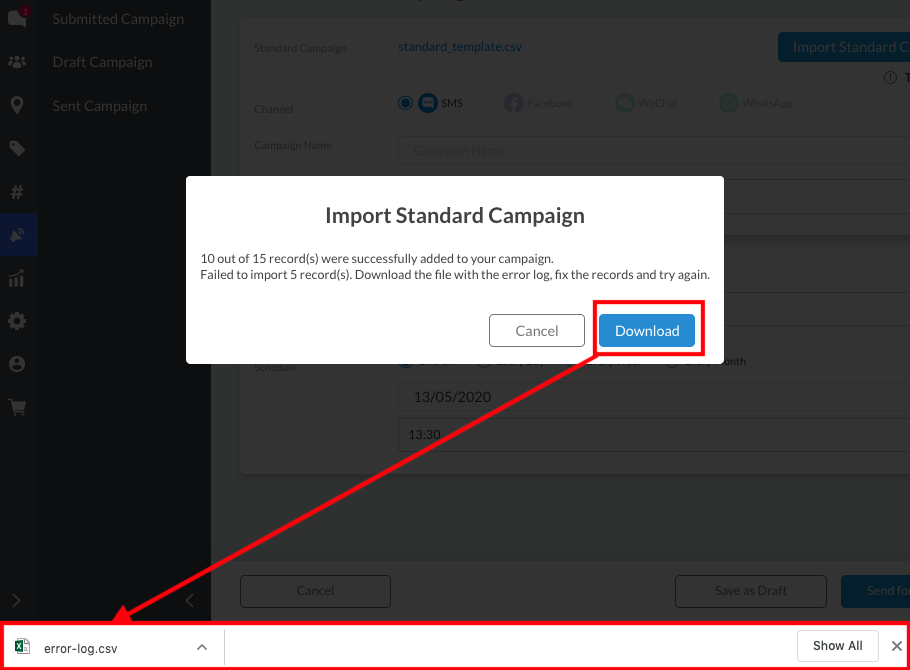
- On the pop-up window that will appear, click on Download to download a copy of the file error-log.csv.
- Click on Cancel to close the pop-up window.
- Open error-log.csv and check the error details in column C. Each record will show error details.
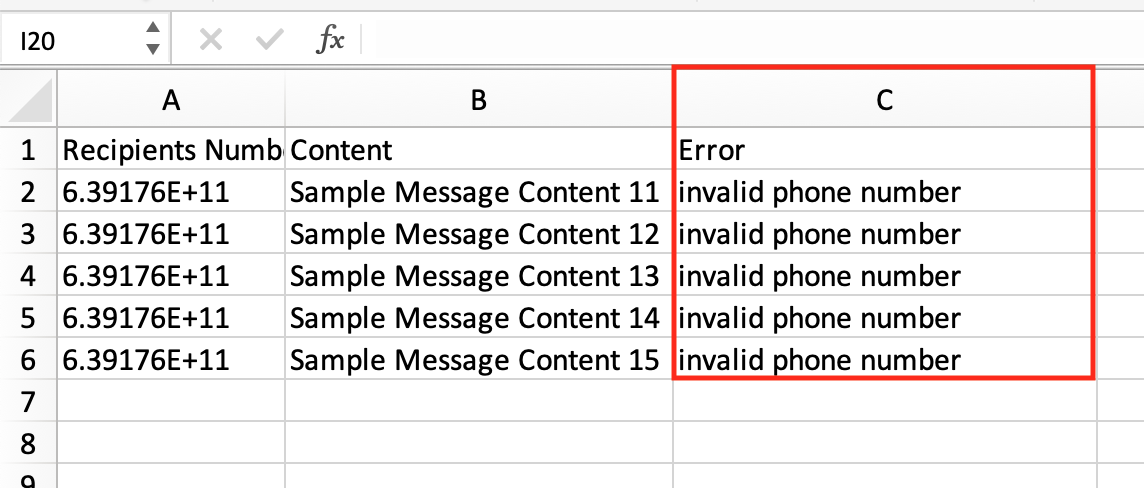
- Return to your spreadsheet template, locate the records with errors, and correct the details.
- Back on the CINNOX Dashboard, click on the Import Standard Campaign button.
- Upload the updated spreadsheet template by dragging and dropping it in the pop-up window. You can also click on Browse from the pop-up window, then locate and select the file from your folder. It will validate the file again, and an error log will be created if still invalid records are found.
- You may also upload the file by clicking Browse and selecting it from its location.
- If you have accidentally closed the pop-up window, click Import Recipients & Variables on the top right corner of the Create Campaign page again.
- When the recipients and variables are successfully imported, the recipients and variables are displayed on the Create SMS Campaign page.
Completing the Campaign Details
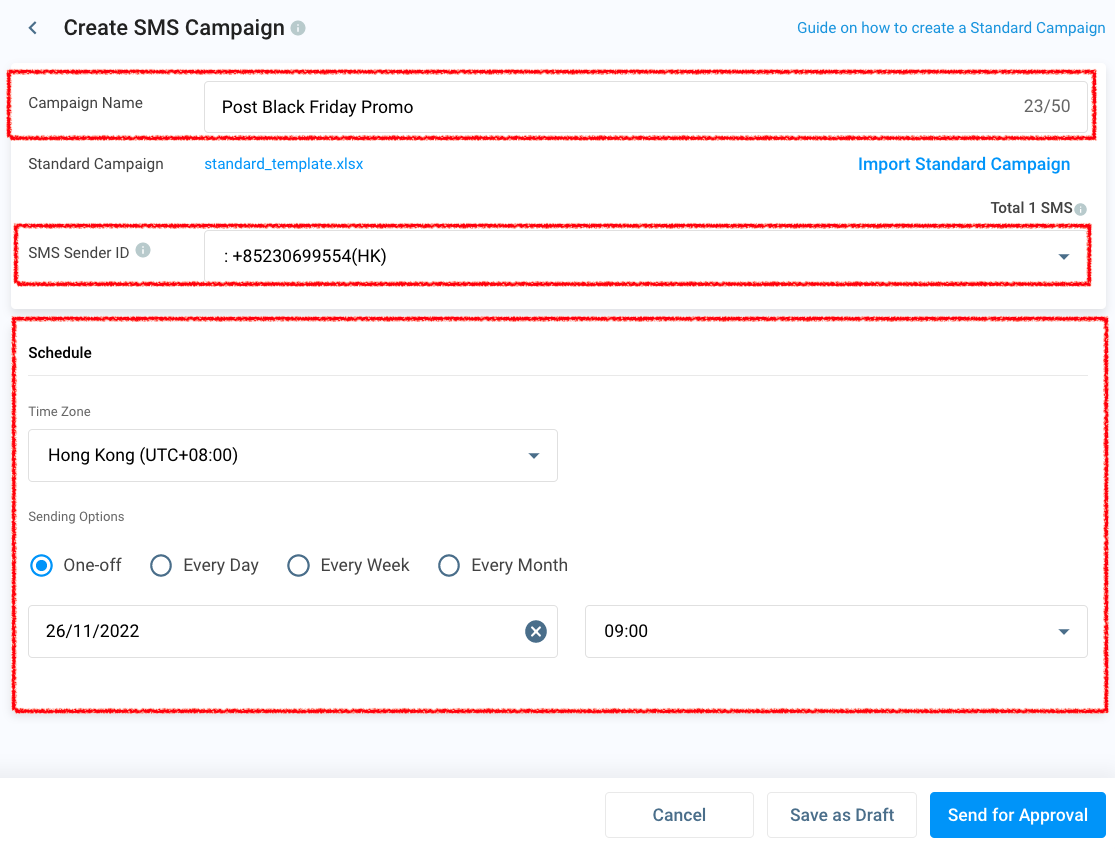
Campaign Name and SMS Sender ID:
- Type in the required Campaign Name in the provided text field.
- Select the SMS Sender ID.
Note that the Sender ID is not guaranteed to be displayed to your message recipients. Please check our [Service Numbers] for more details about SMS Sender ID, and please check our Service Numbers guide.
Schedule:
-
Set the time zone, which is preset to UTC+08:00.
-
Select the sending option:
- One-off
- Every Day
- Every Week
- Every Month
-
Set a date for the campaign to send, which is preset to the current date.
-
Set a time for the campaign to send, which is preset to the nearest 30 minutes of the current time.
Sending SMS to mainland China number (+86)
According to the regulation and requirements of the China carrier, you will need to register a template to the carrier to send an SMS to a mainland China number (+86). The registered template will only be delivered if the SMS content matches precisely.
If you still proceed to send SMS with the content but without a registered template yet or the actual content does not match 100% with the registered template (e.g. a variable field containing an index filled with a string), it will be sent out, but void and it will incur a cost.
Please get in touch with your account manager to learn more about the procedure and requirements for registering a carrier template.
Sending Campaign for Approval
Once all the campaign details are ready for sending:
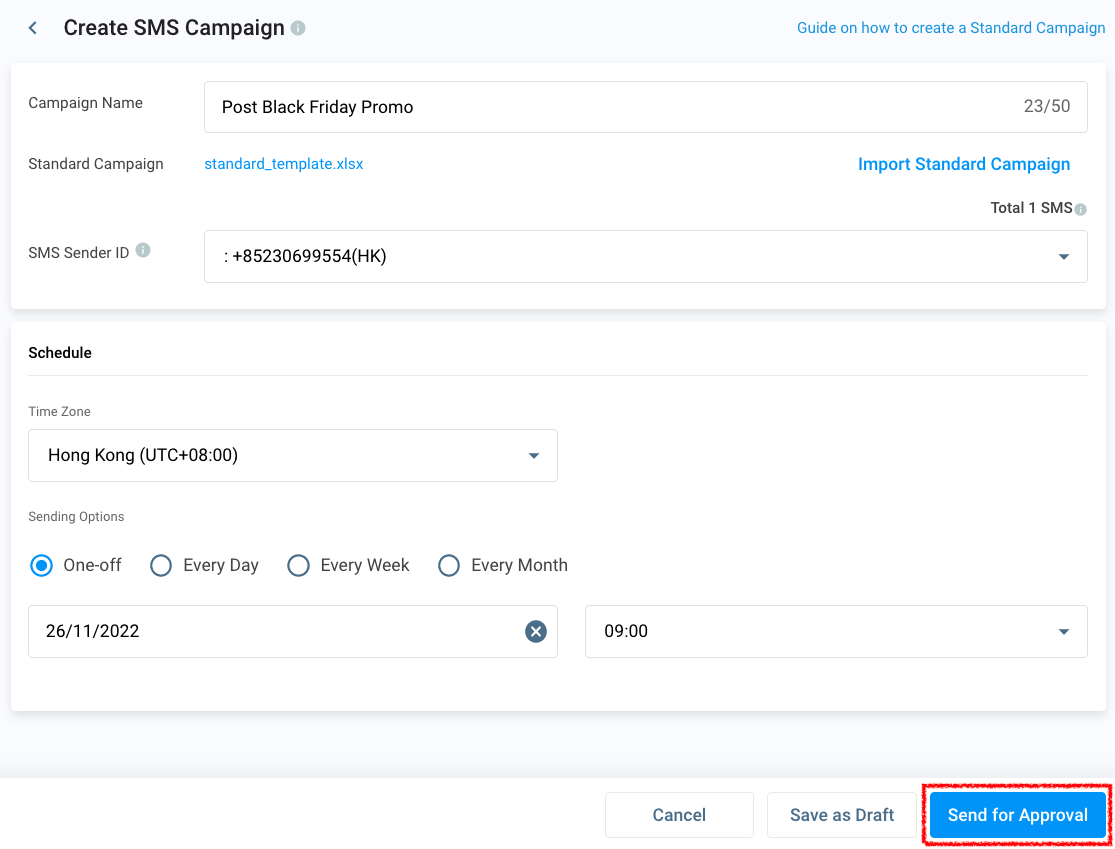
- Click on the Send for Approval button at the bottom of the screen.
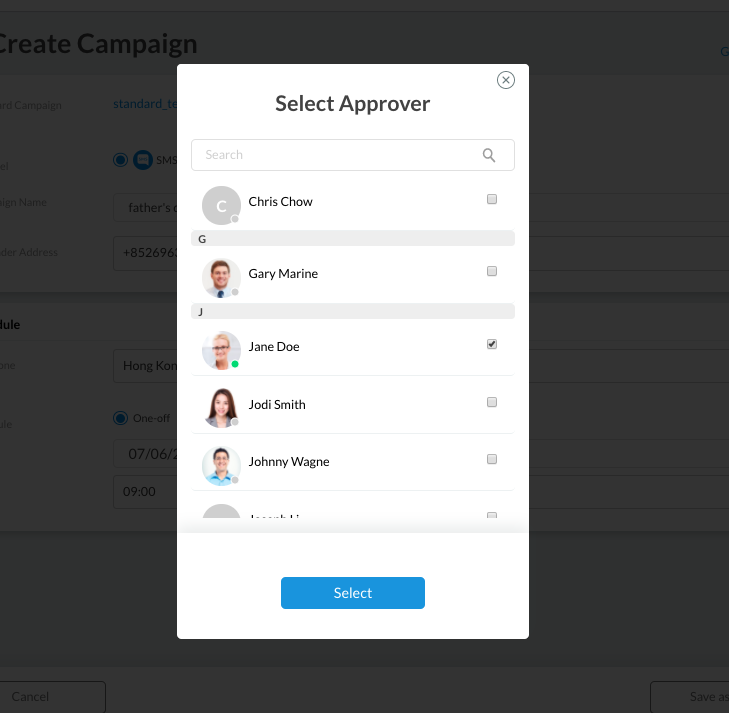
- On the Select Approver pop-up window that will appear, select the staff member required to approve your campaign.
- Click on Select. A CINNOXBot message and an email will be sent to the selected approver, alerting them about the campaign pending approval.
If the campaign creator is also the assigned approver, CINNOX will automatically approve the campaigns they create.
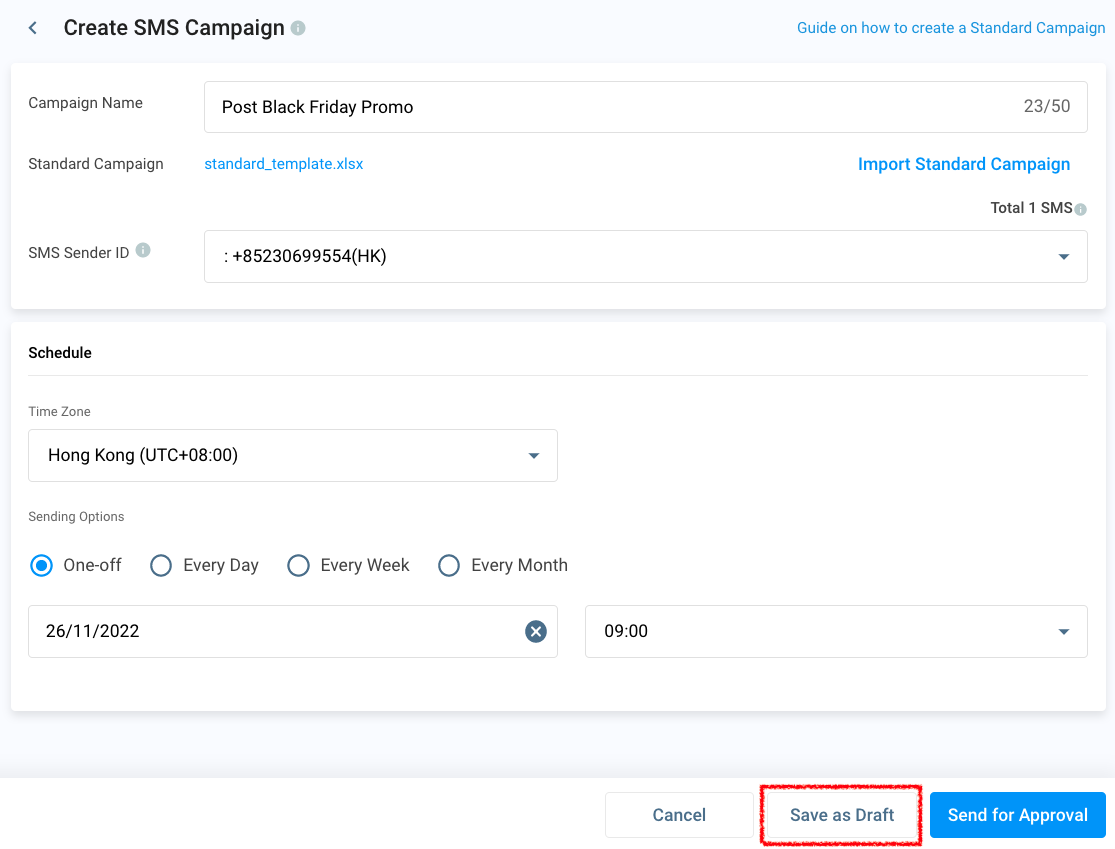
If the campaign is not ready to be approved and sent, click on Save as Draft, and then it will be moved to the Draft Campaign list.
Refer to the Campaigns section of this Guide for more details about SMS and WhatsApp Campaigns.
Updated 6 months ago