
Drupal
Need Omnichannel Live Chat Support for your Drupal website?
CINNOX offers an omnichannel solution that seamlessly integrates with Drupal. Engage with your website visitors in real time through live chat, providing instant support and boosting customer satisfaction. With CINNOX, you can effortlessly handle customer enquiries across various channels and devices, including social media, email, and calls. Simplify your customer service with CINNOX's omnichannel solution today.
Drupal is a free and open-source content management software distributed under the GNU General Public License (GPL) terms. Its flexible modules help users build versatile content and create integrated digital frameworks. Drupal provides a backend framework for a wide range of websites worldwide--from personal blogs to corporate and government websites.
For more details about Drupal, visit the website at www.drupal.org
The CINNOX live chat and web call lets you instantly add call and chat functions on your Drupal site so you can promptly answer enquiries from your online visitors. It installs the CINNOX Widget on your page and lets you take advantage of the platform's core features without needing extensive manual configurations on your Drupal site.
Here are the ways to install CINNOX Widget and the CTA in your Drupal Site:
Install CINNOX Widget via Drupal Extension
The following is a step-by-step guide to installing the CINNOX Widget on your Drupal-based website using the CINNOX extension.
- Download CINNOX Extension on the Drupal Org site.
- Log in to your Drupal Administrator Dashboard.
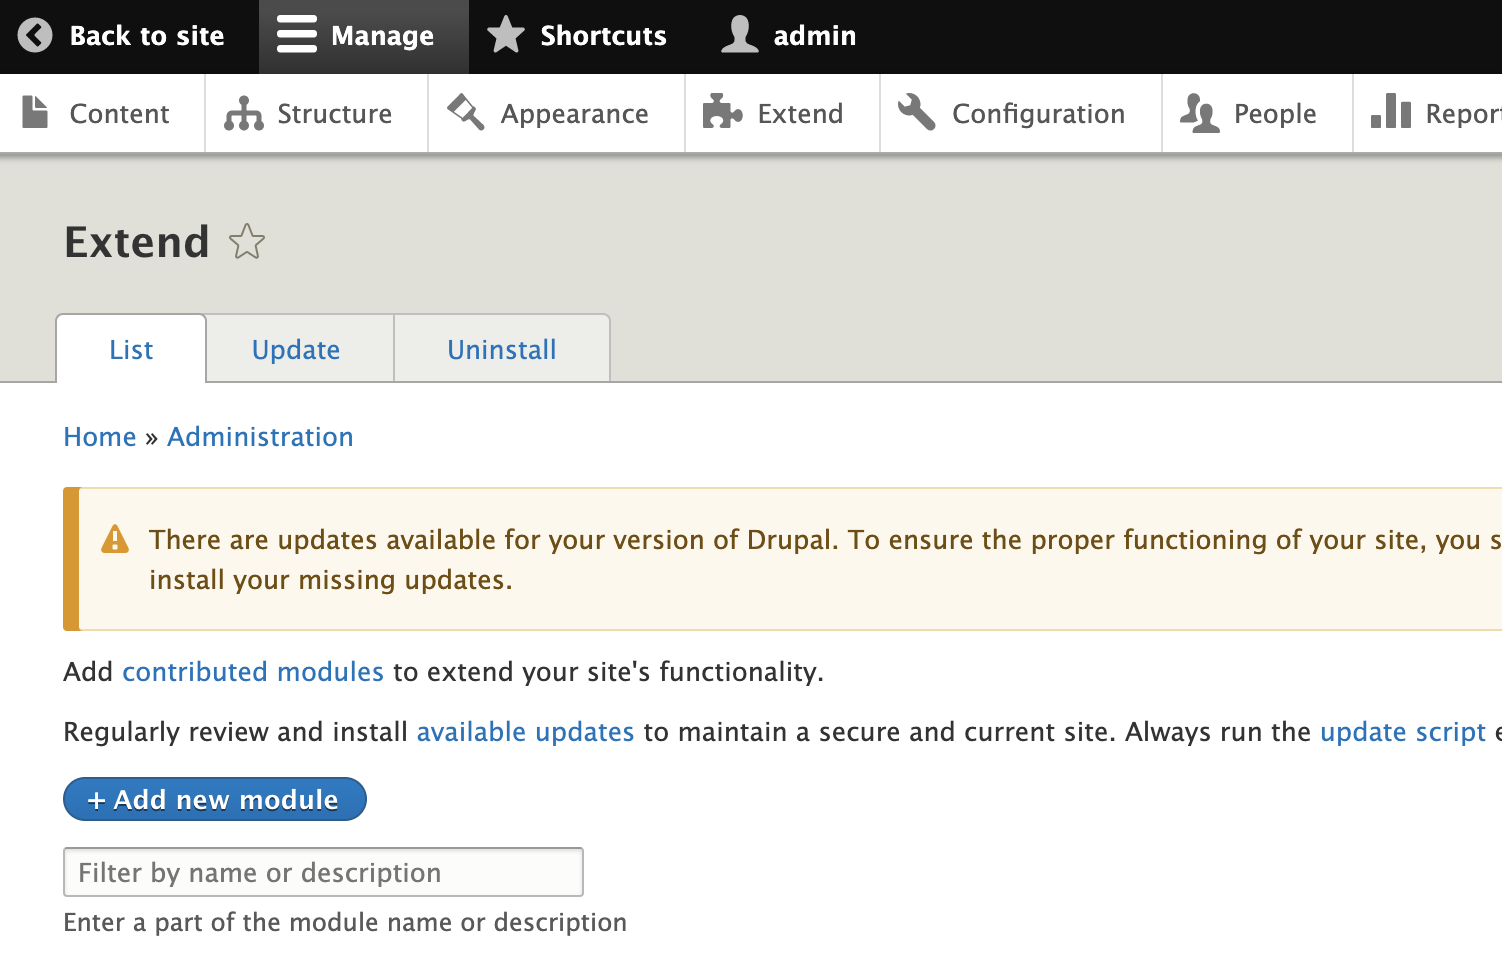
- On the Main dashboard page, click on the Extend tab.
- On the List tab that will appear, click + Add new module
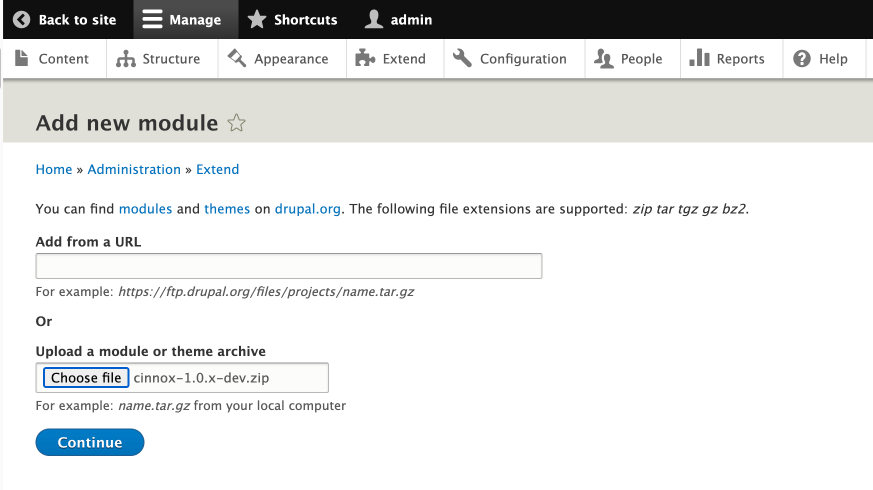
- On the Add new module page that will appear, click Choose file and select the CINNOX file ( .zip or.tar.gz) you have downloaded on your local machine.
- Click Continue.
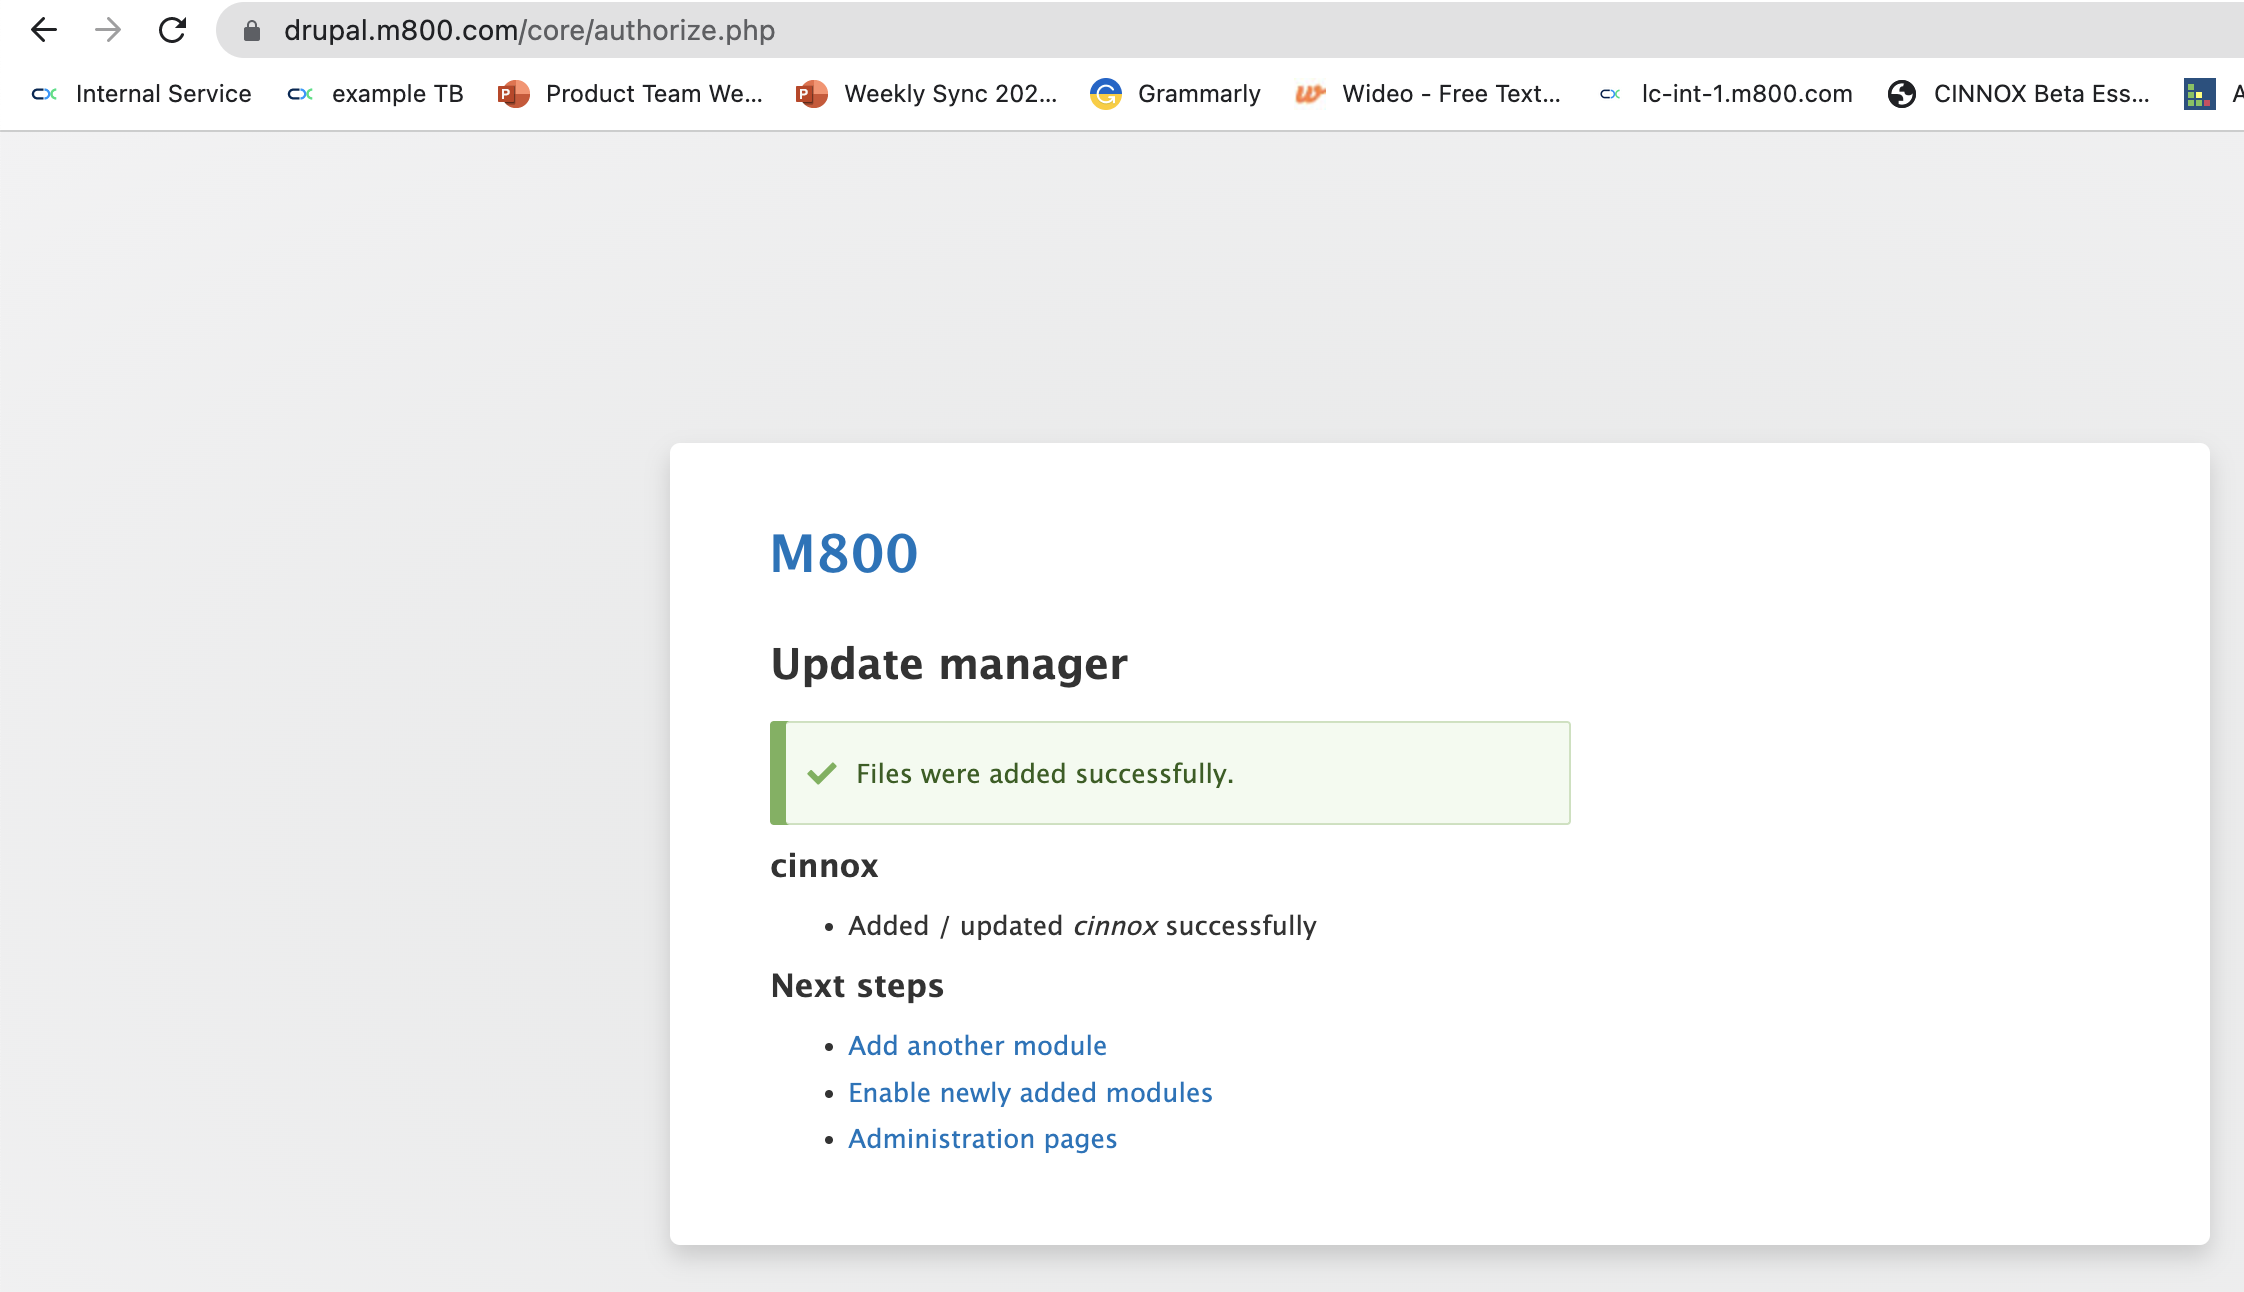
The update manager page should be displayed withFiles were added successfully message.
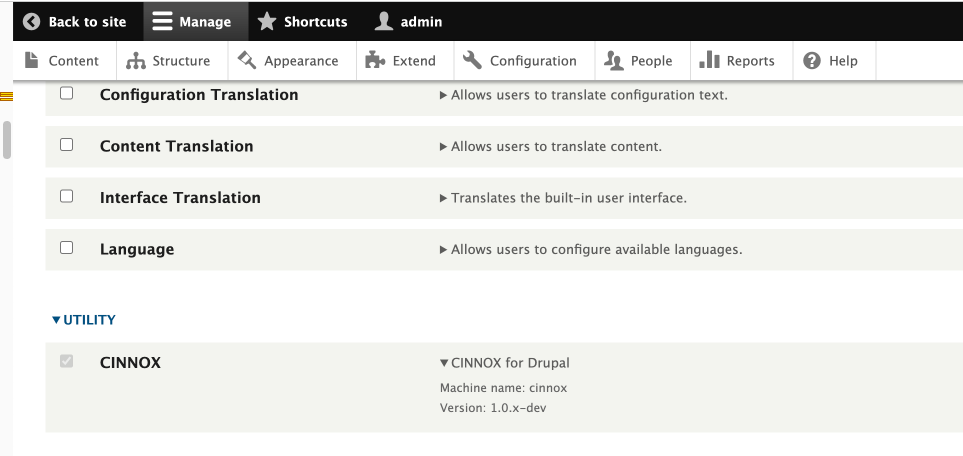
- On the Main Dashboard page, click on the Extend tab. Scroll down the page, find the UTILITY section, and tick the checkbox for CINNOX.
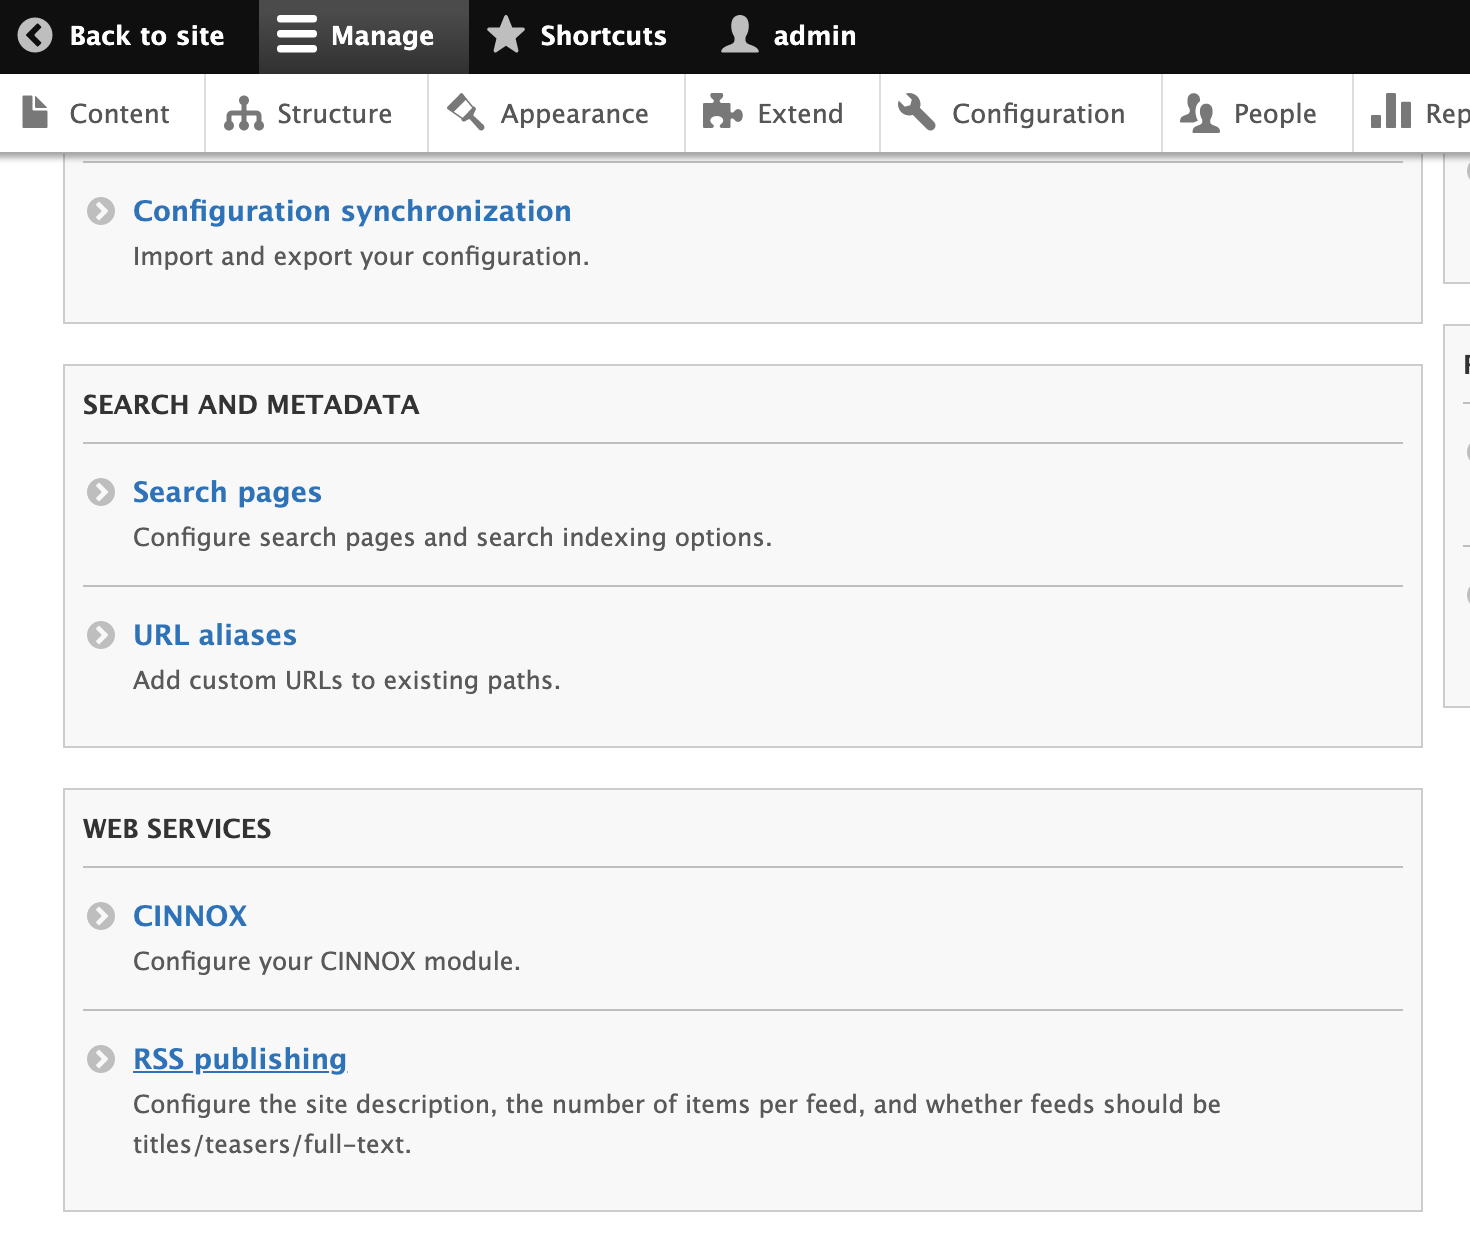
- On the Main Dashboard page, click on the Configuration tab. Scroll down the page, find the WEB SERVICES section, and click CINNOX.
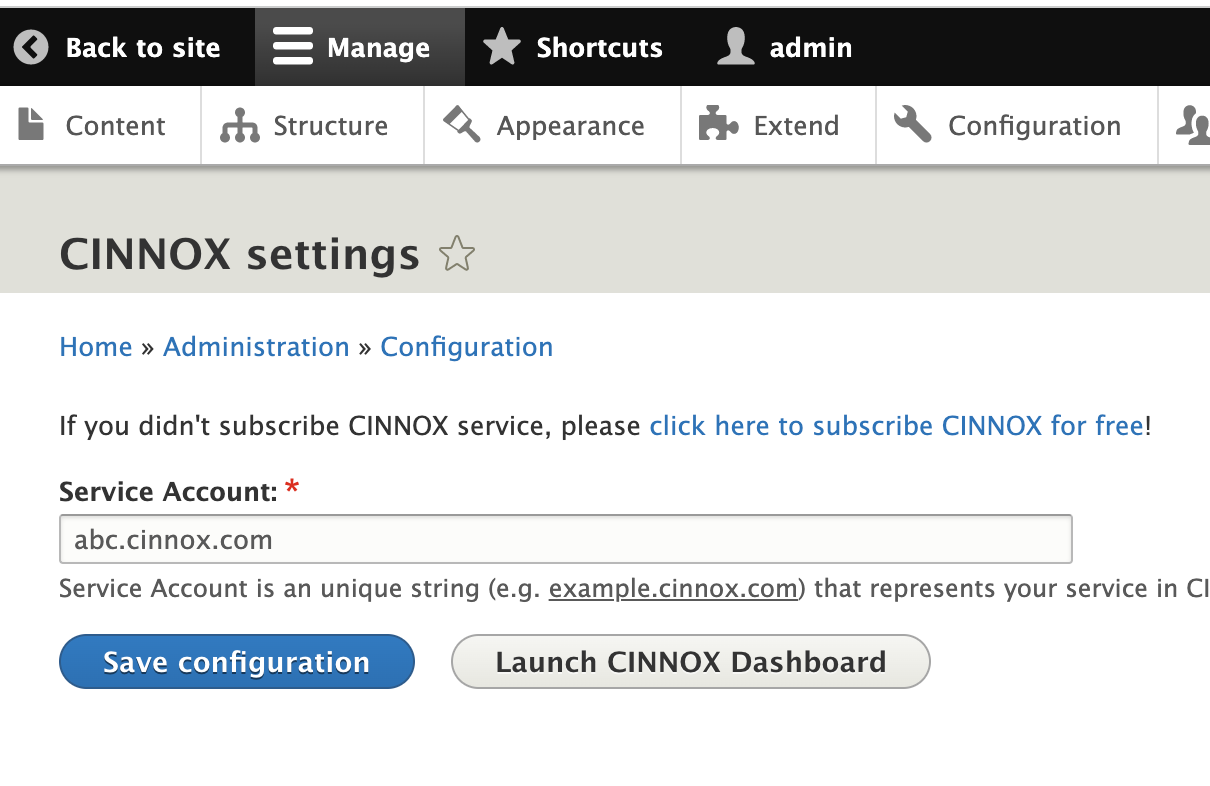
- On the CINNOX settings page, enter your CINNOX service account, e.g. abc.cinnox.com.
- Click Save Configuration.
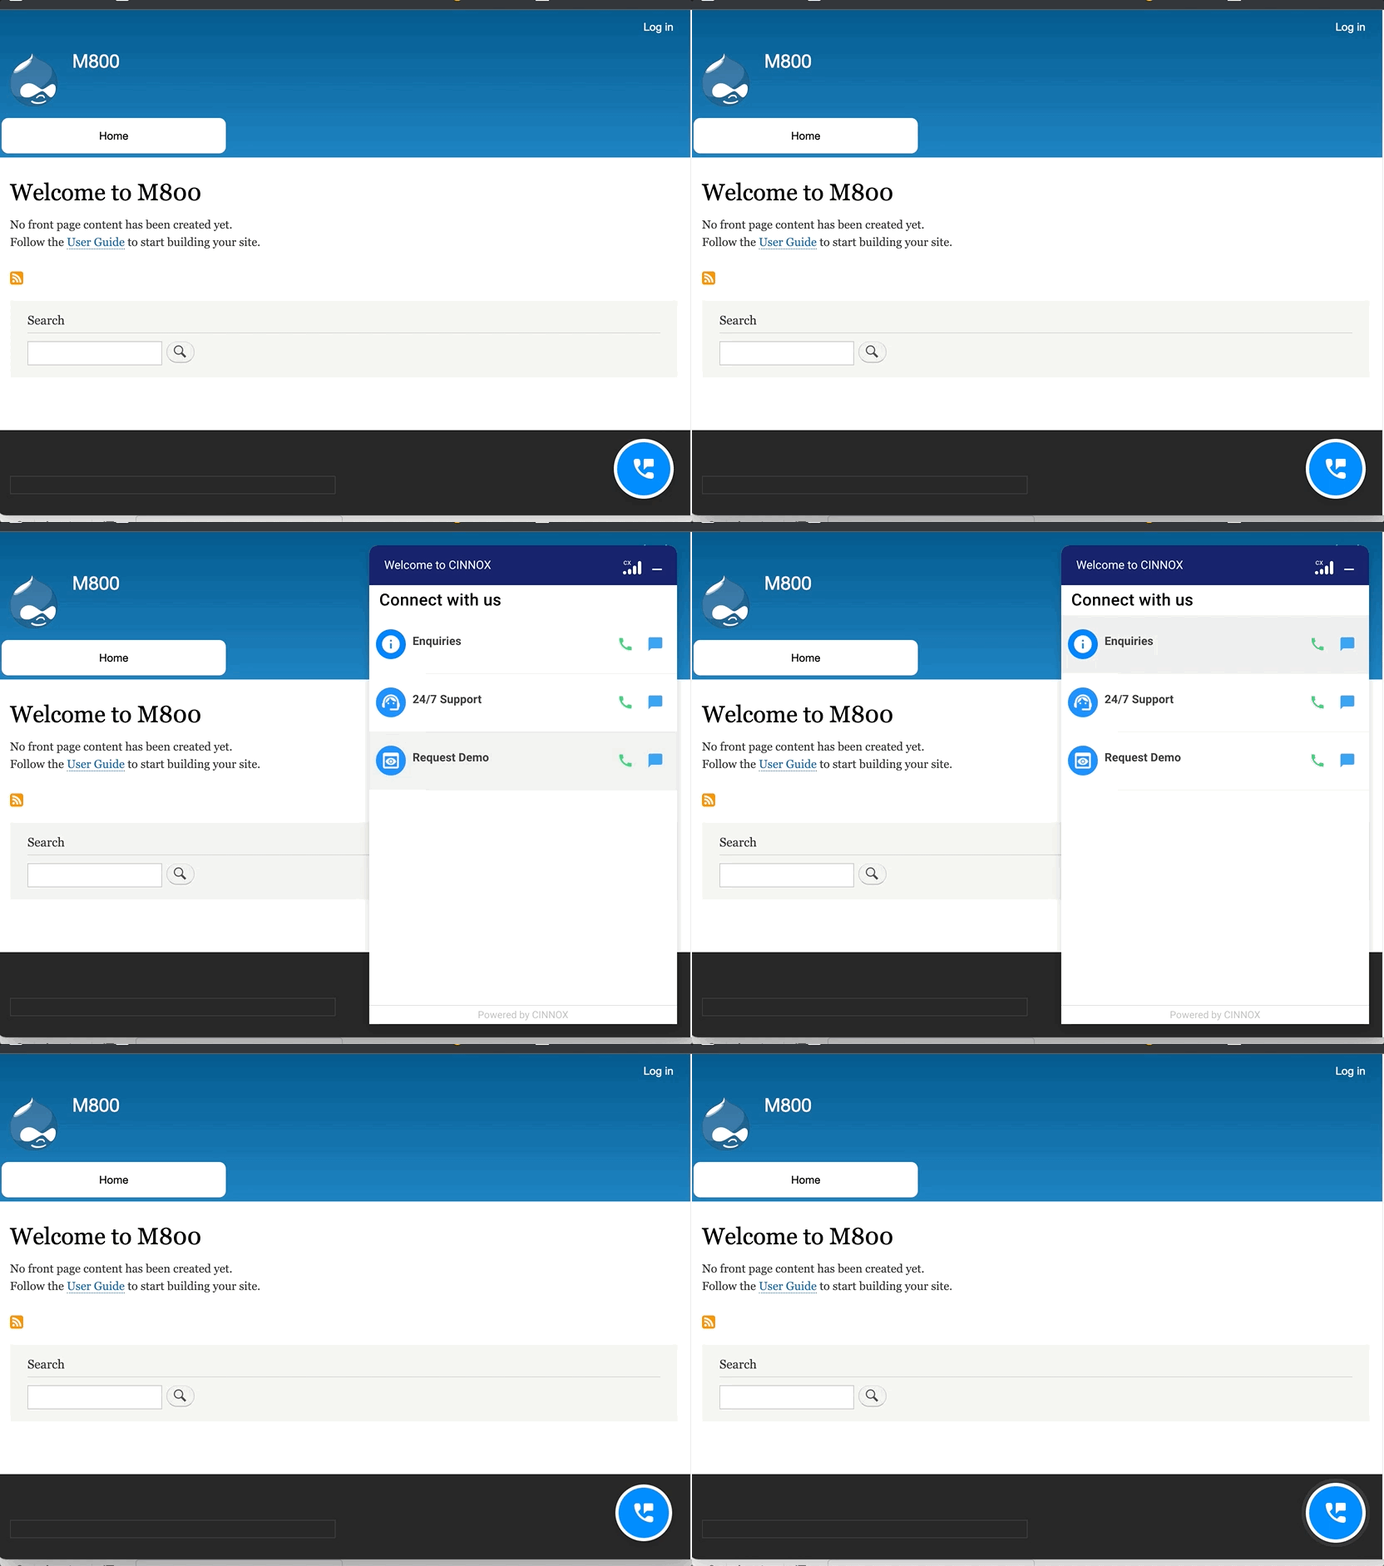
- Refresh your website. The CINNOX widget should appear at the bottom right corner.
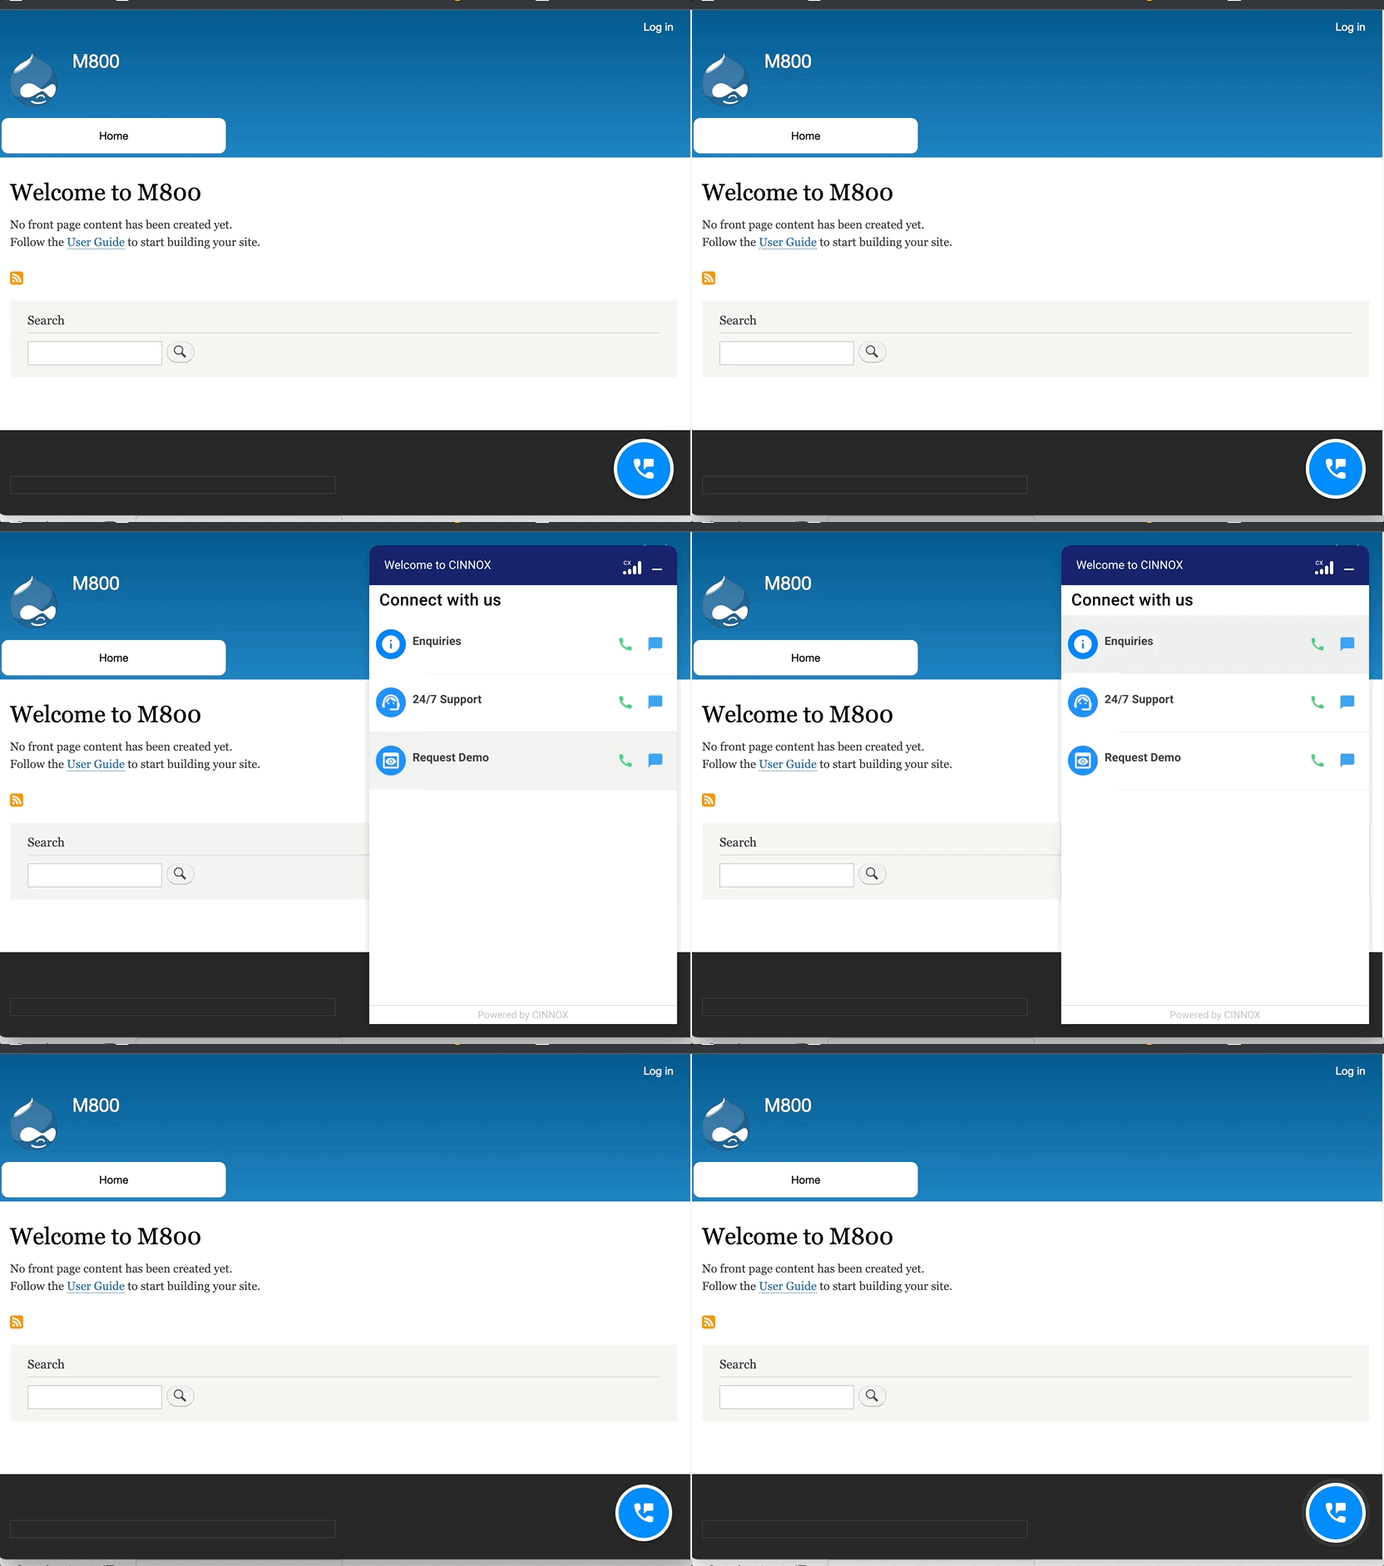
You may also click on Launch CINNOX Dashboard to open your CINNOX Dashboard on your browser.
If you haven't yet signed up for a CINNOX service, go to the CINNOX website and register for one.
Install CINNOX Widget via Drupal Custom Block
- Log in to your Drupal Administrator Dashboard.
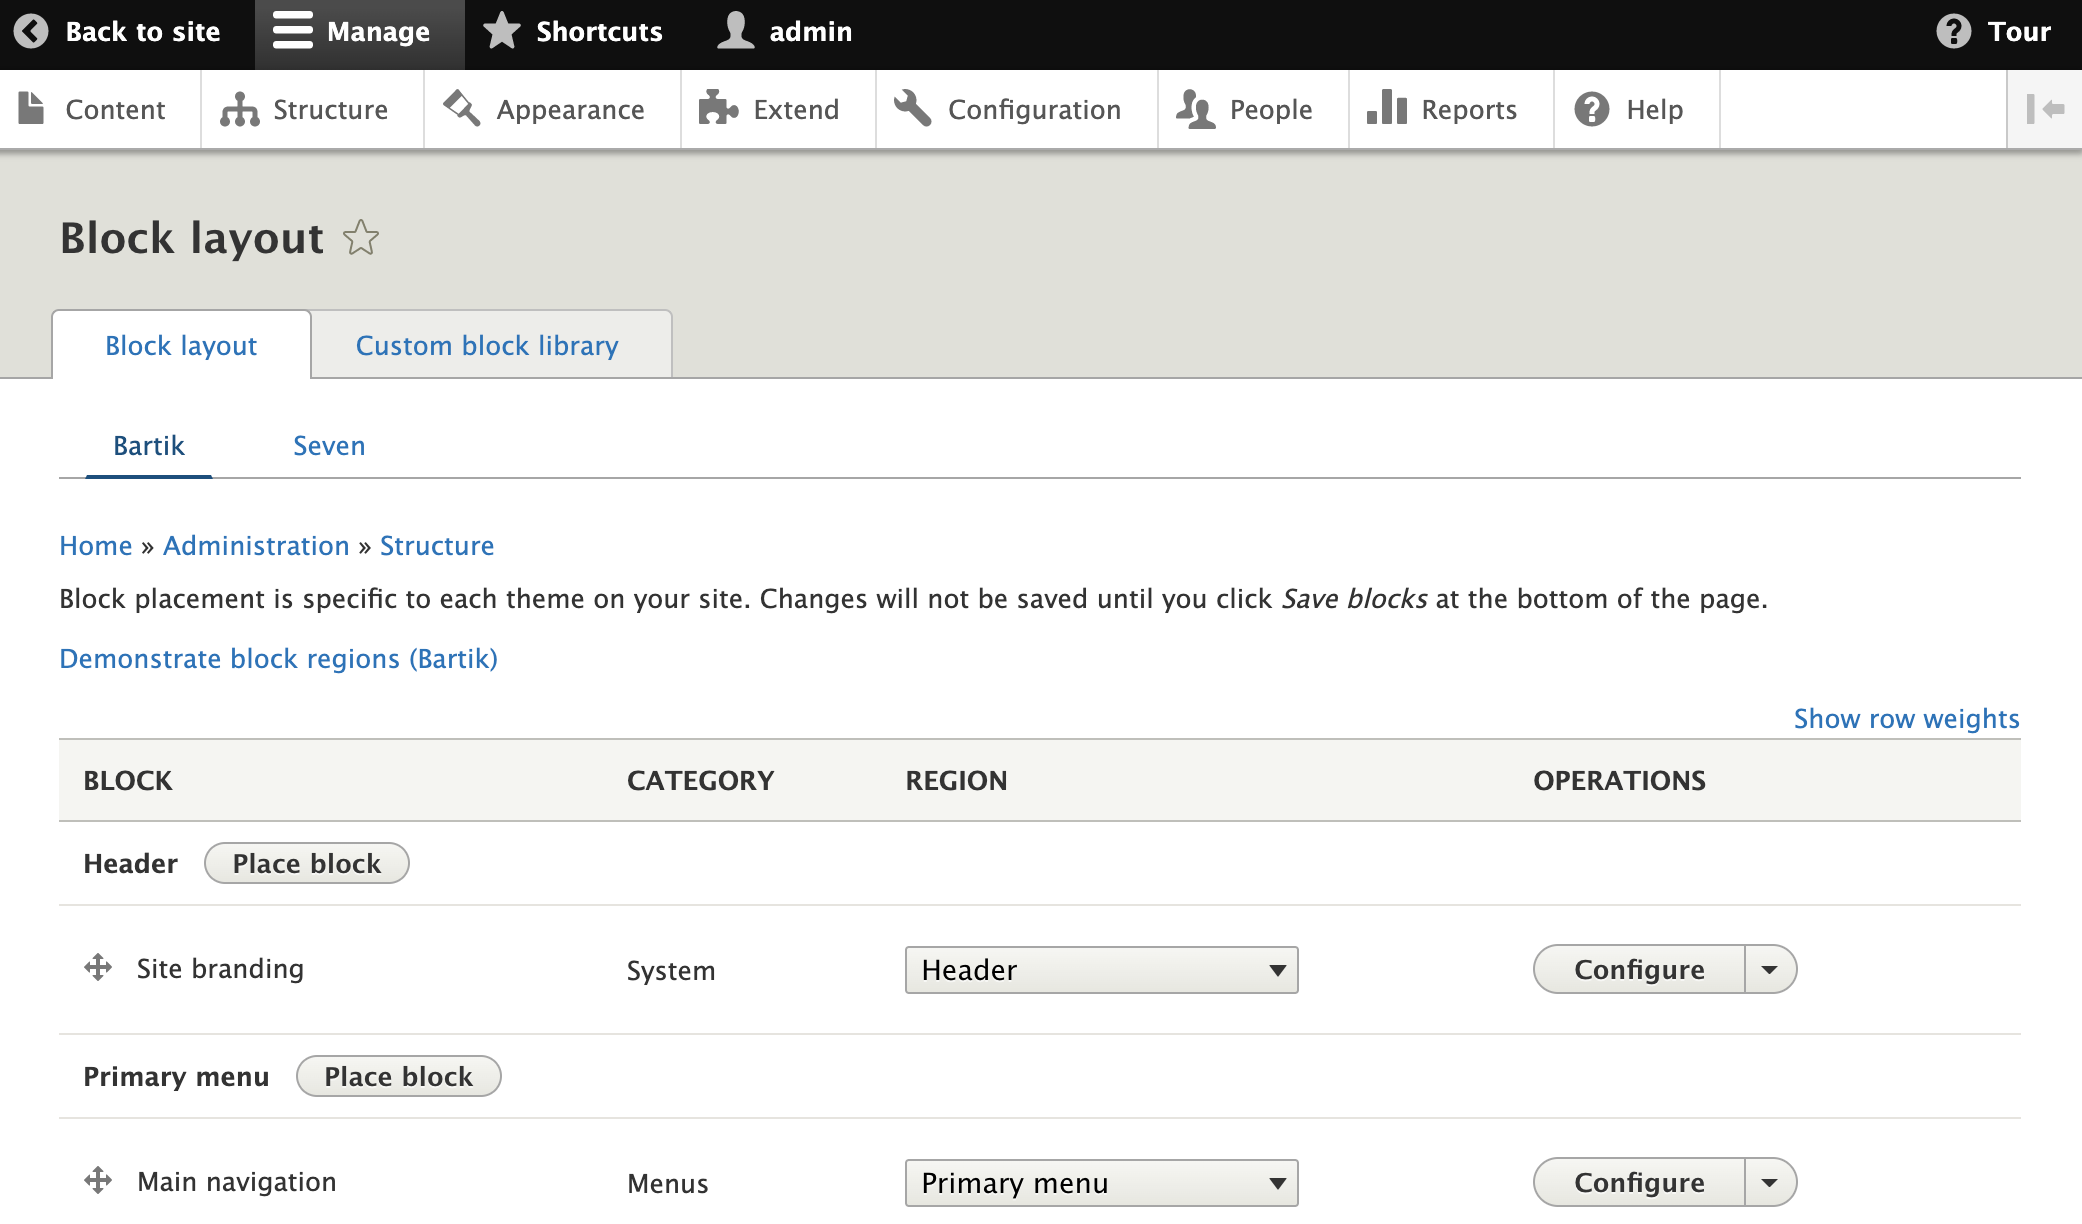
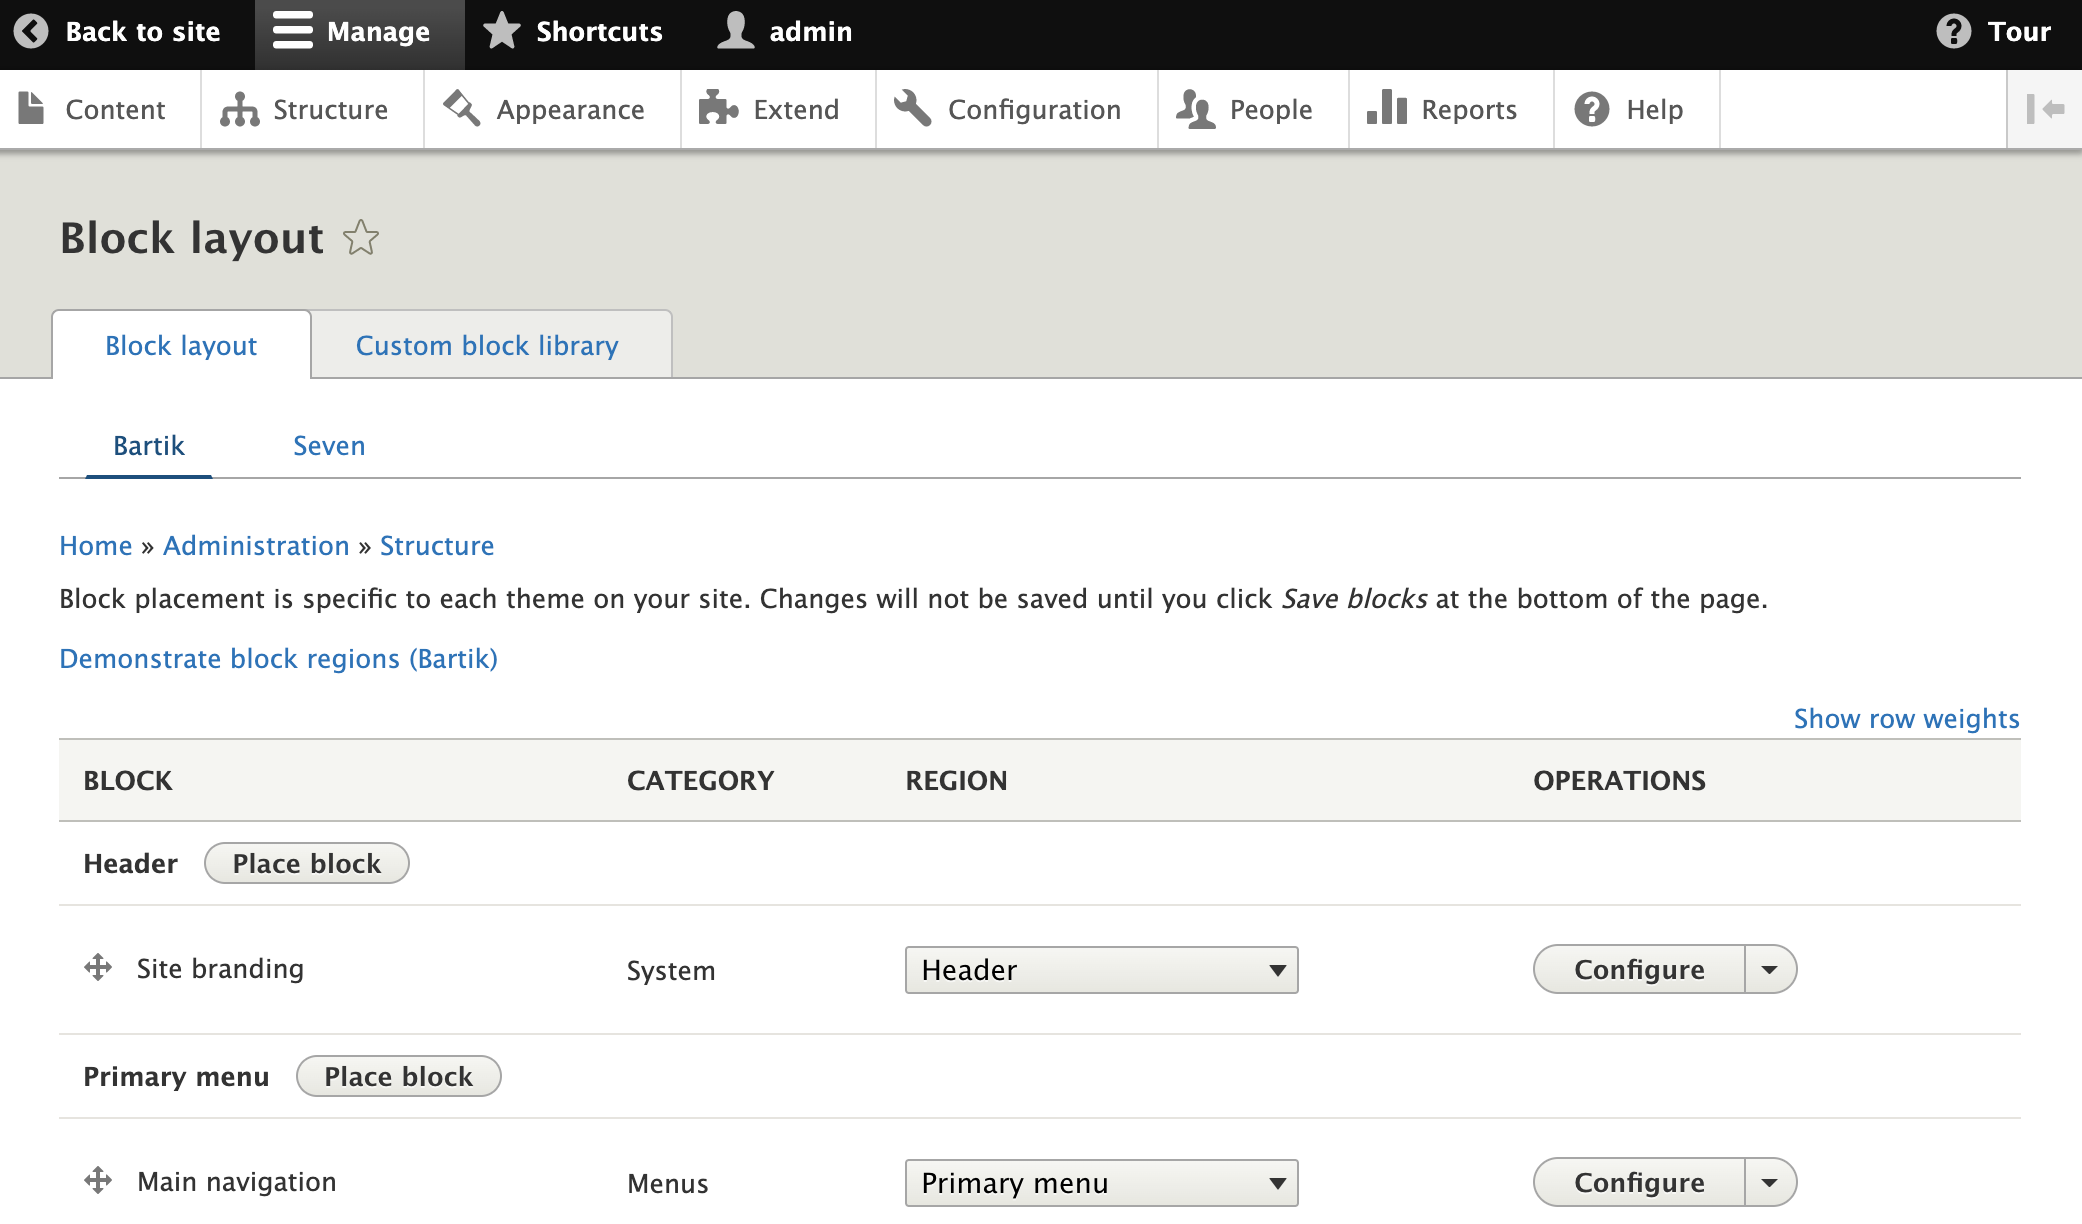
- Navigate to Structure, then click Block layout.
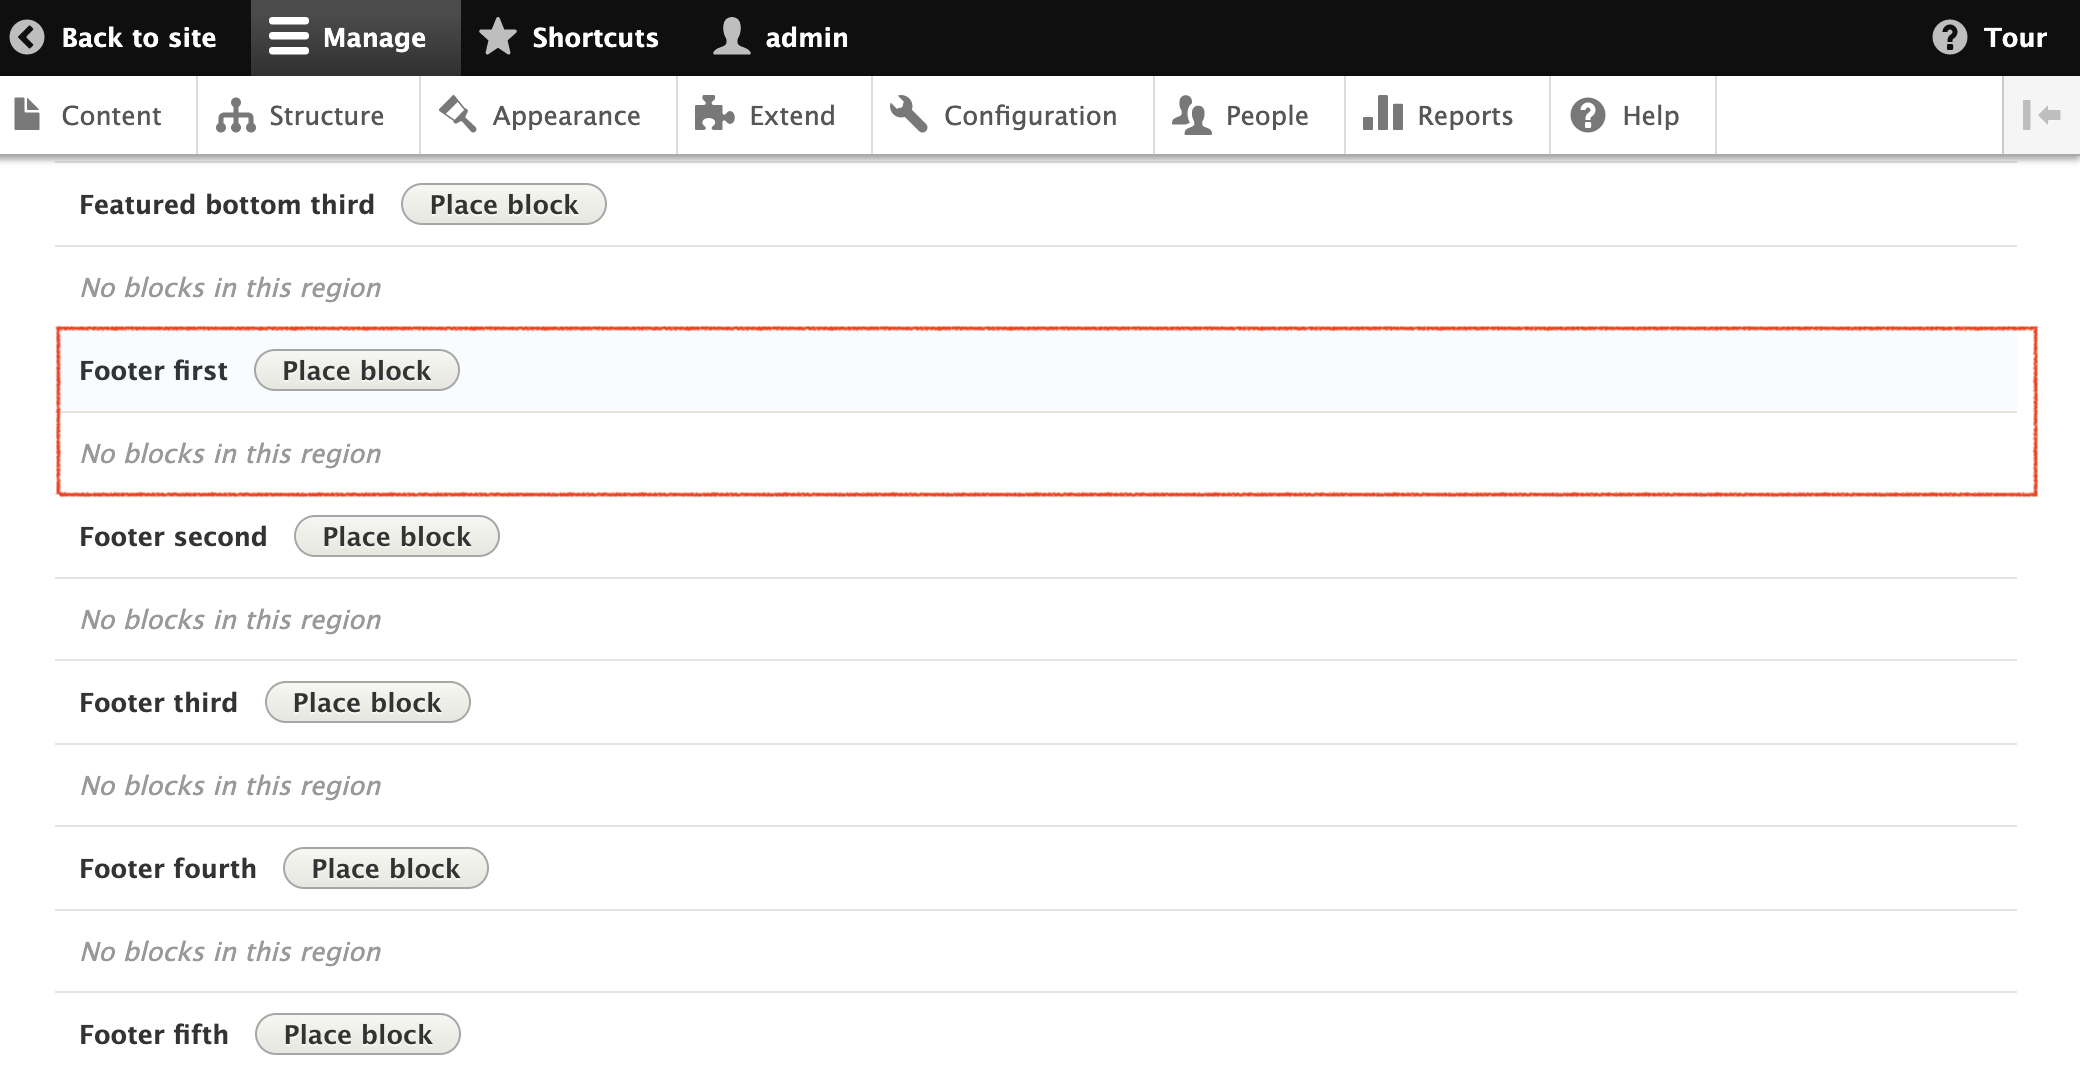
- Scroll down the Block List and find the Footer where to position your CINNOX widget (e.g. Footer first).
- Click Place block located in the Footer.
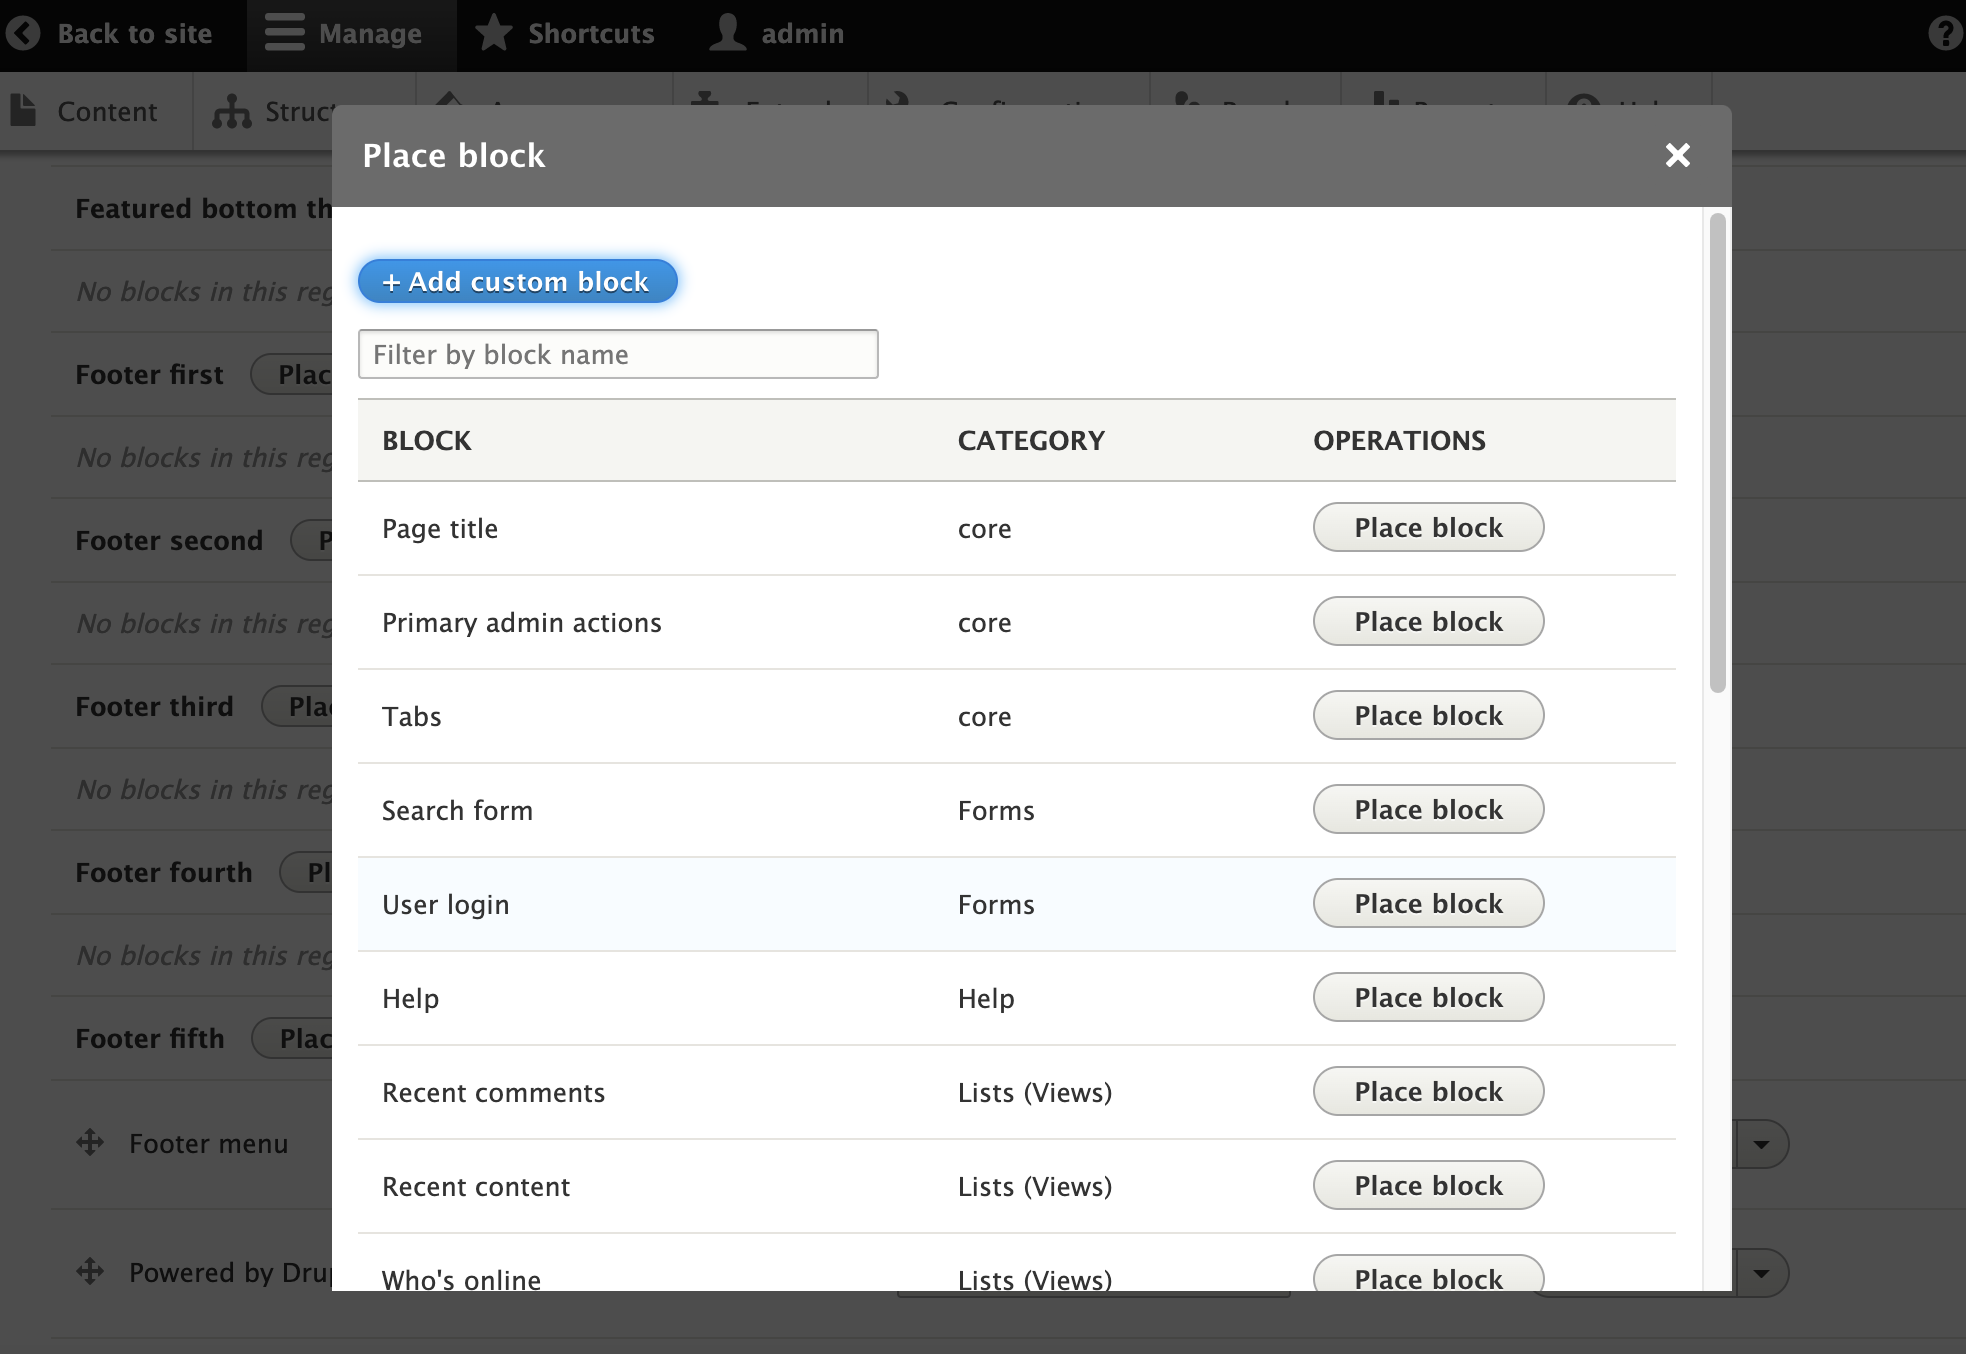
- Click + Add custom block in the pop-up window.
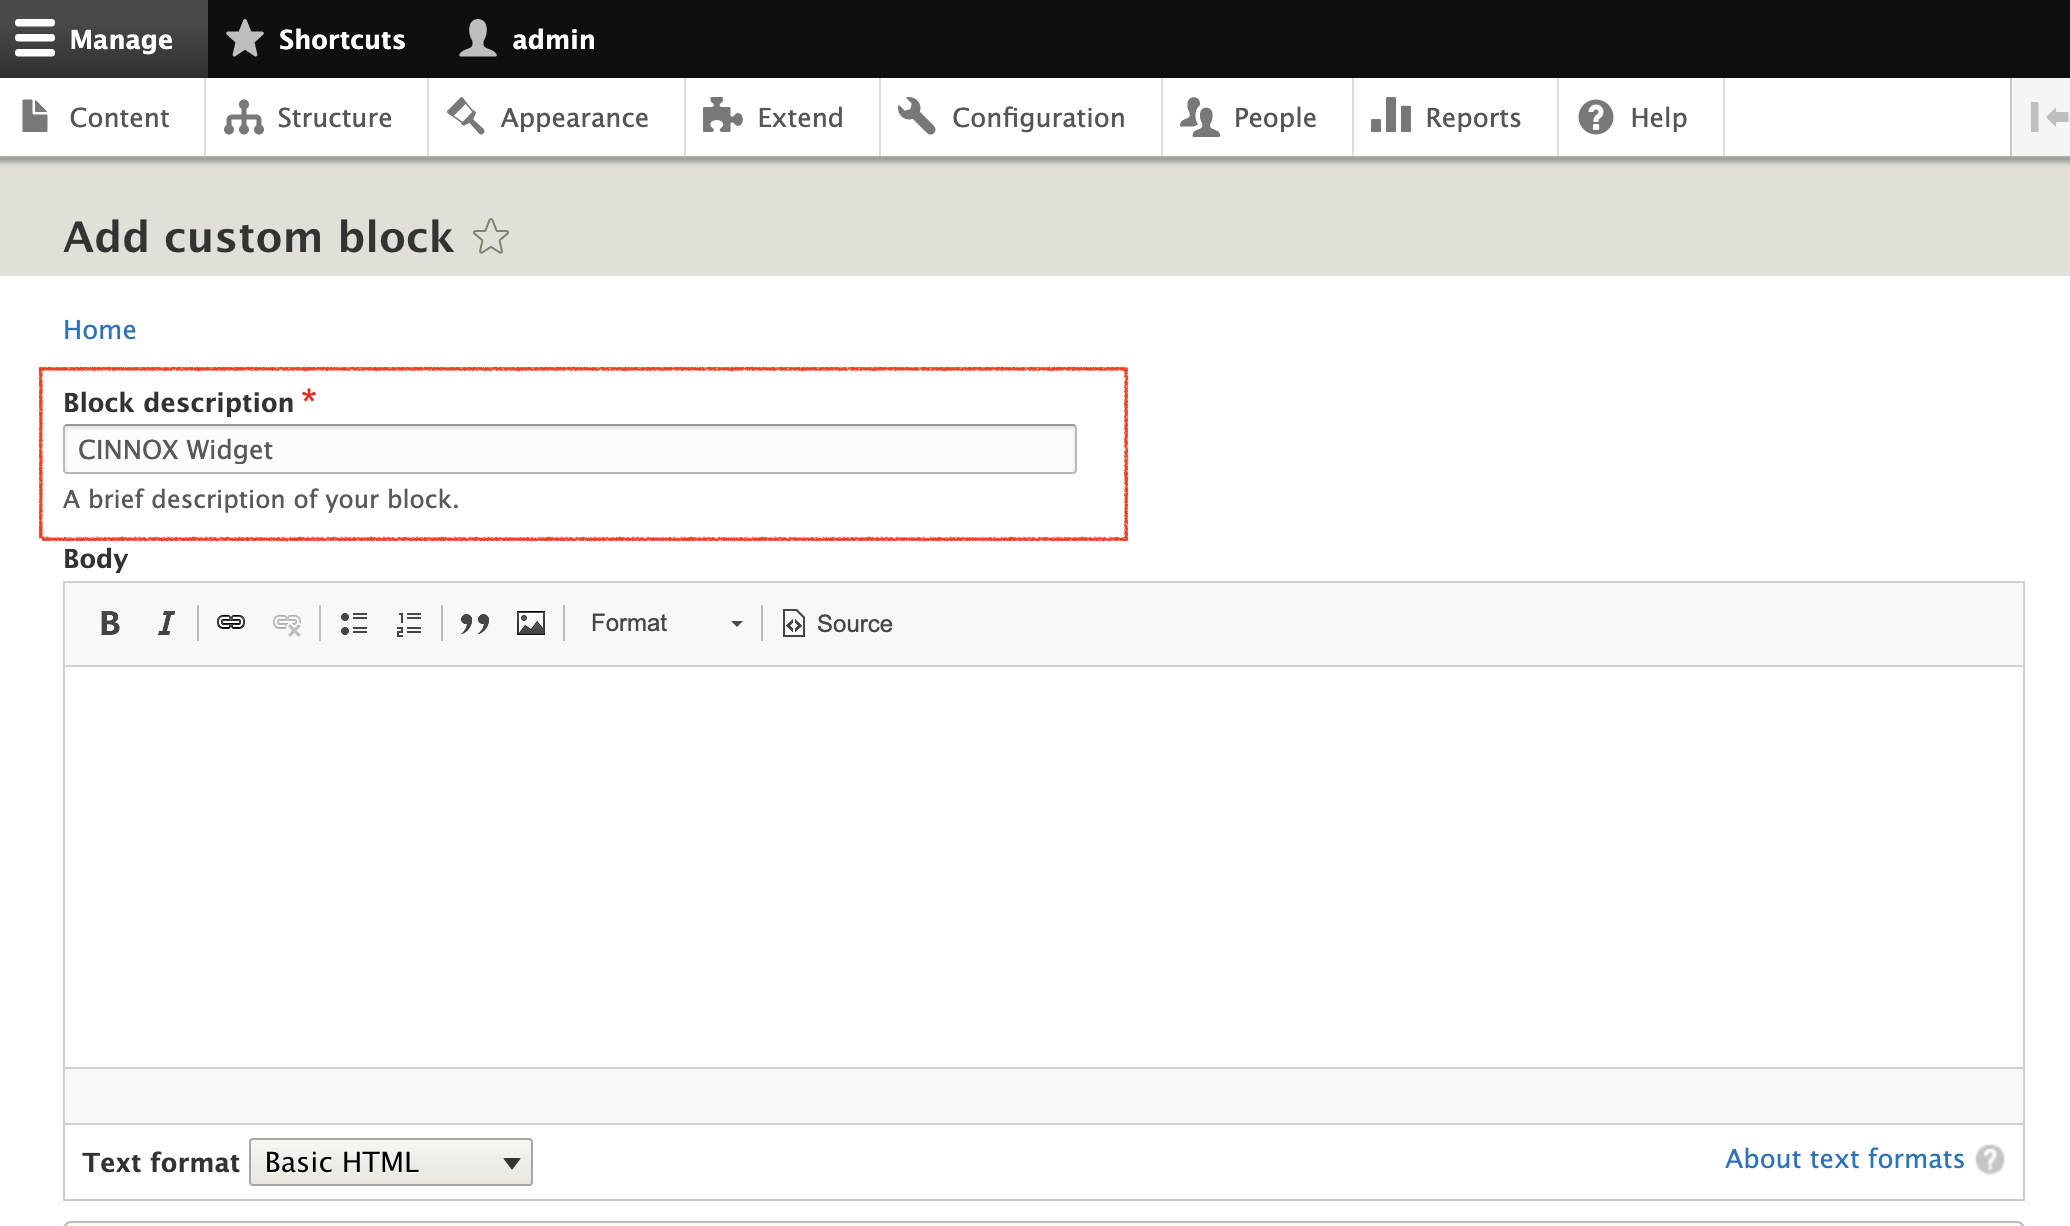
- On the Add custom block page, add Block description. It can be any description, e.g., CINNOX Widget.
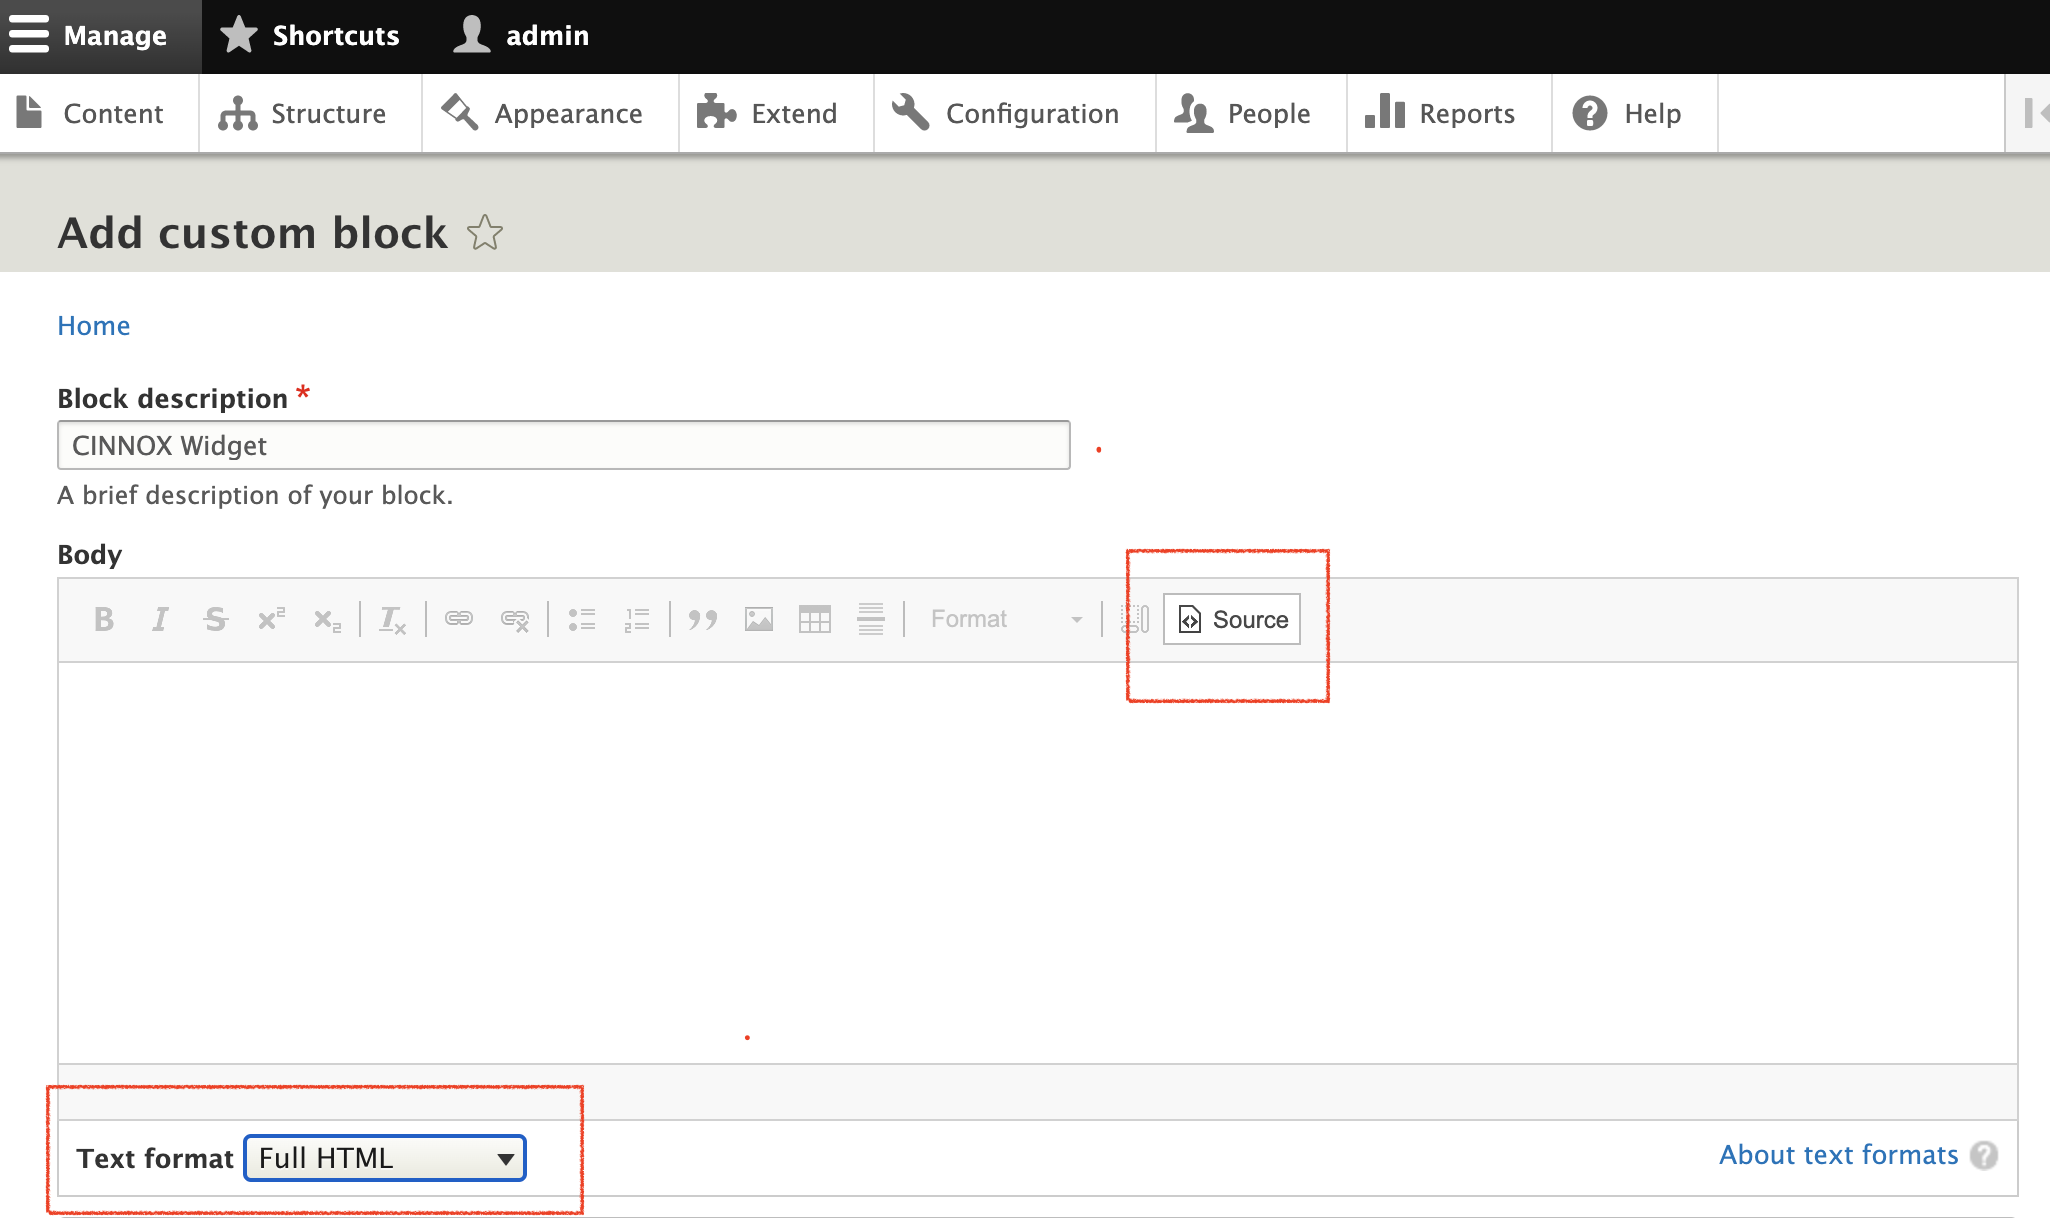
- On the Text format, select Full HTML.
- On the Body, select Source.
- Log in to your CINNOX Web Dashboard.
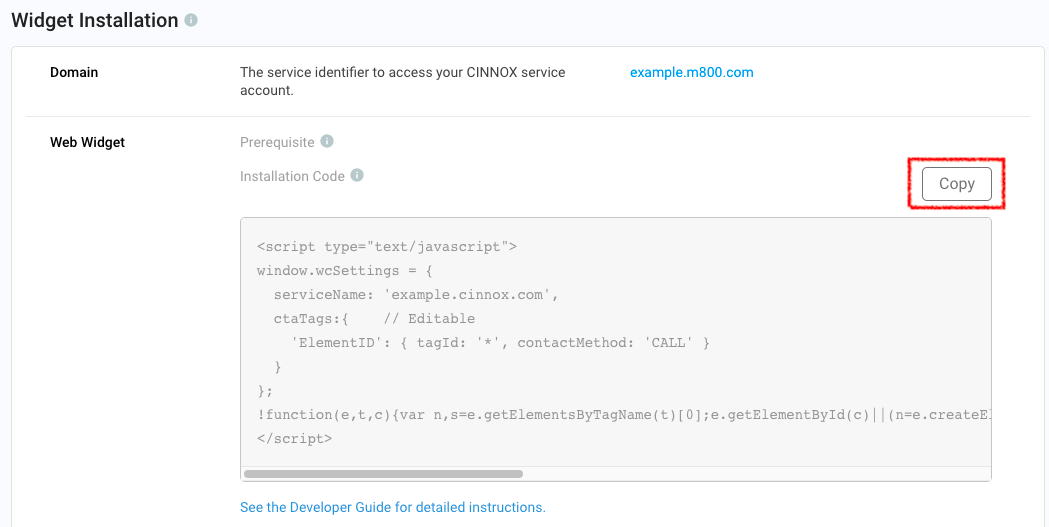
- Navigate to Administration > Widget > Installation. From the Widget Installation > Web Widget, click on Copy.
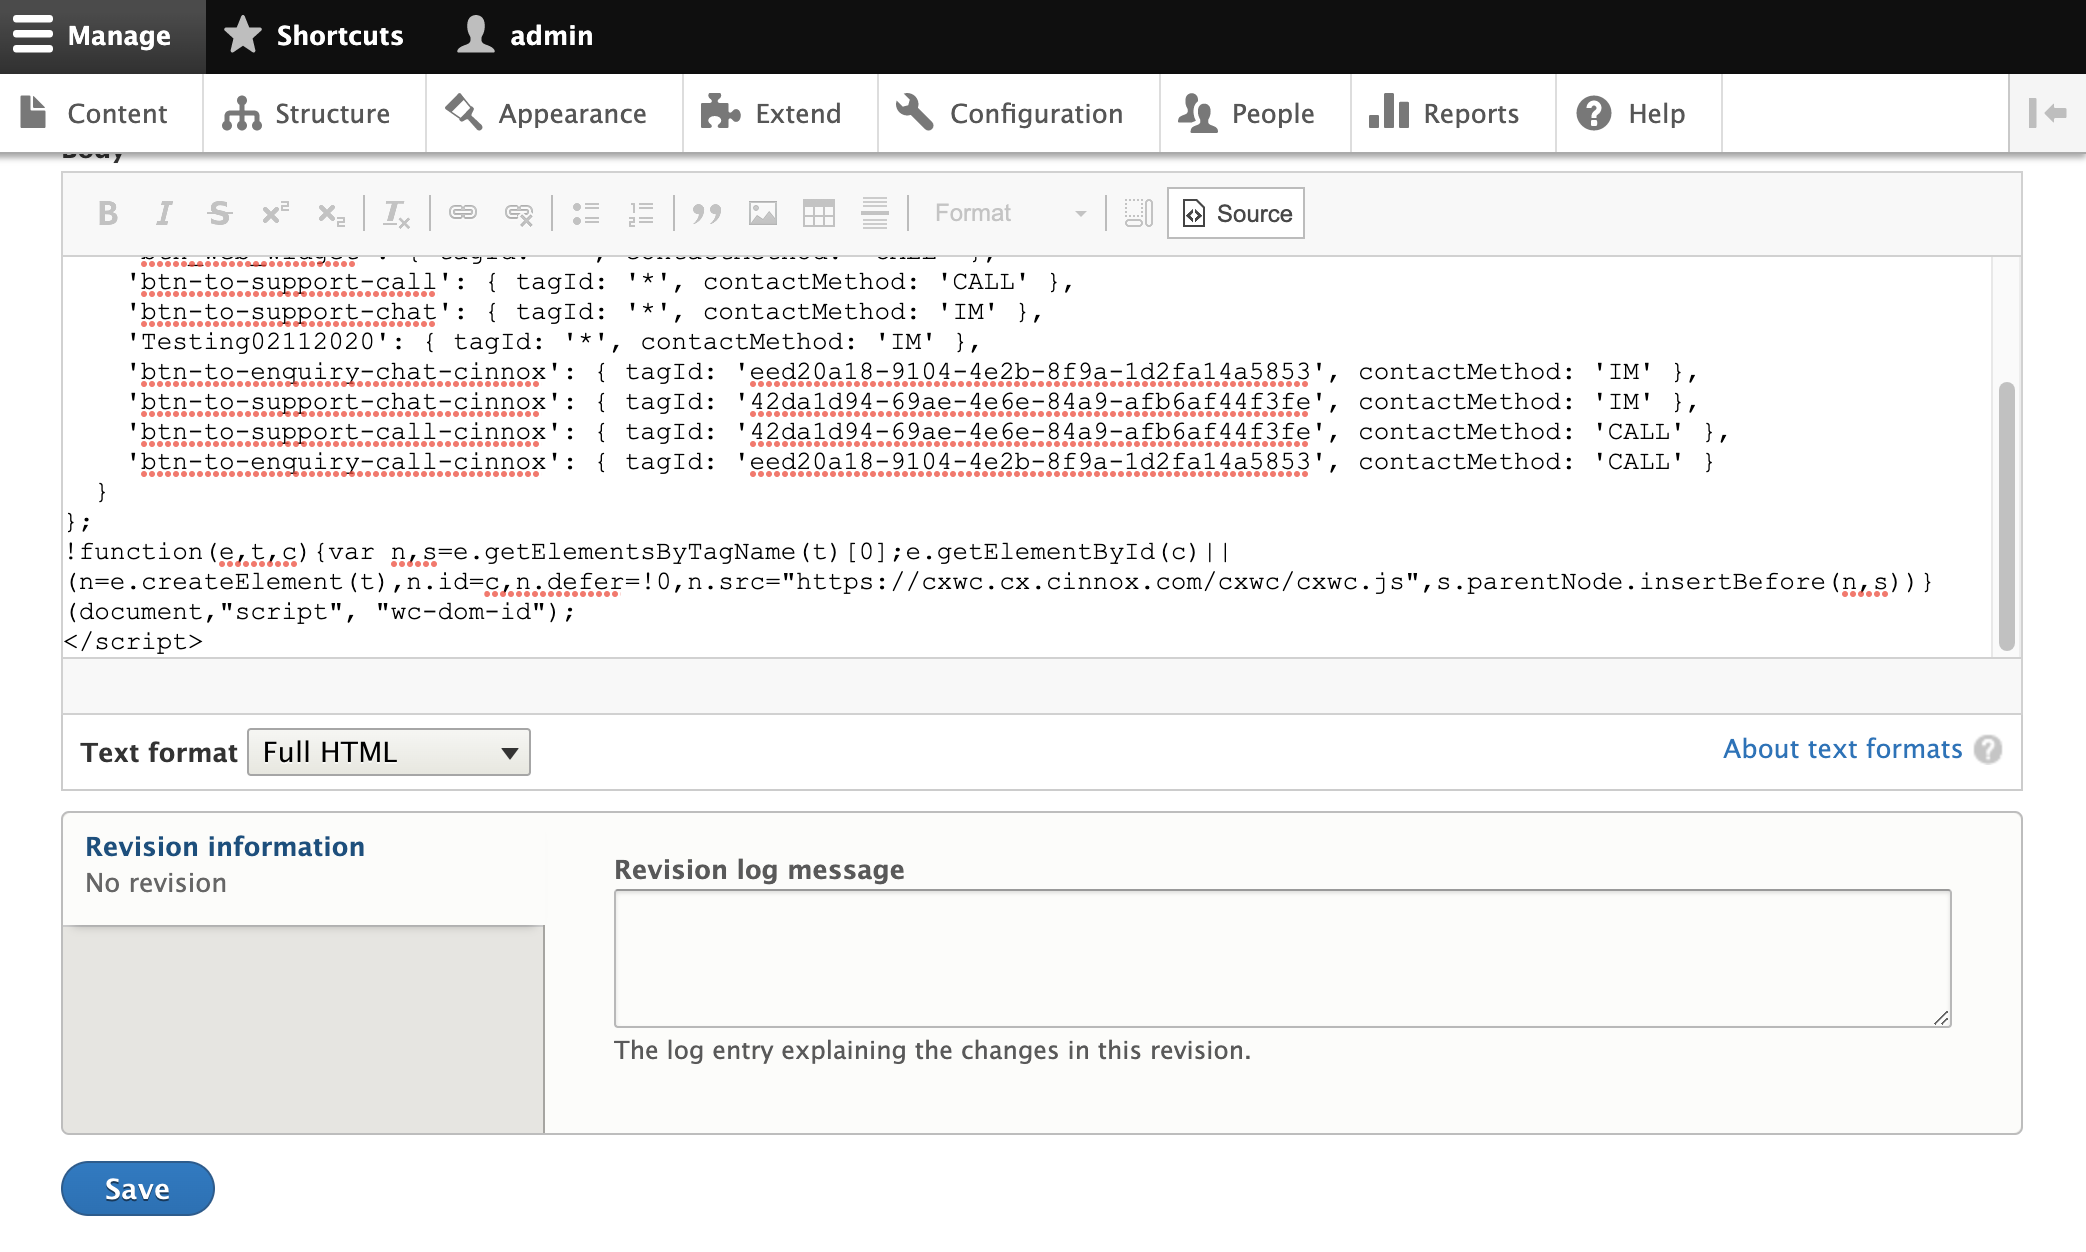
- Back on your Drupal Add Custom Block > Body, paste your CINNOX Widget code in the code snippet box. Please ensure Source has been clicked.
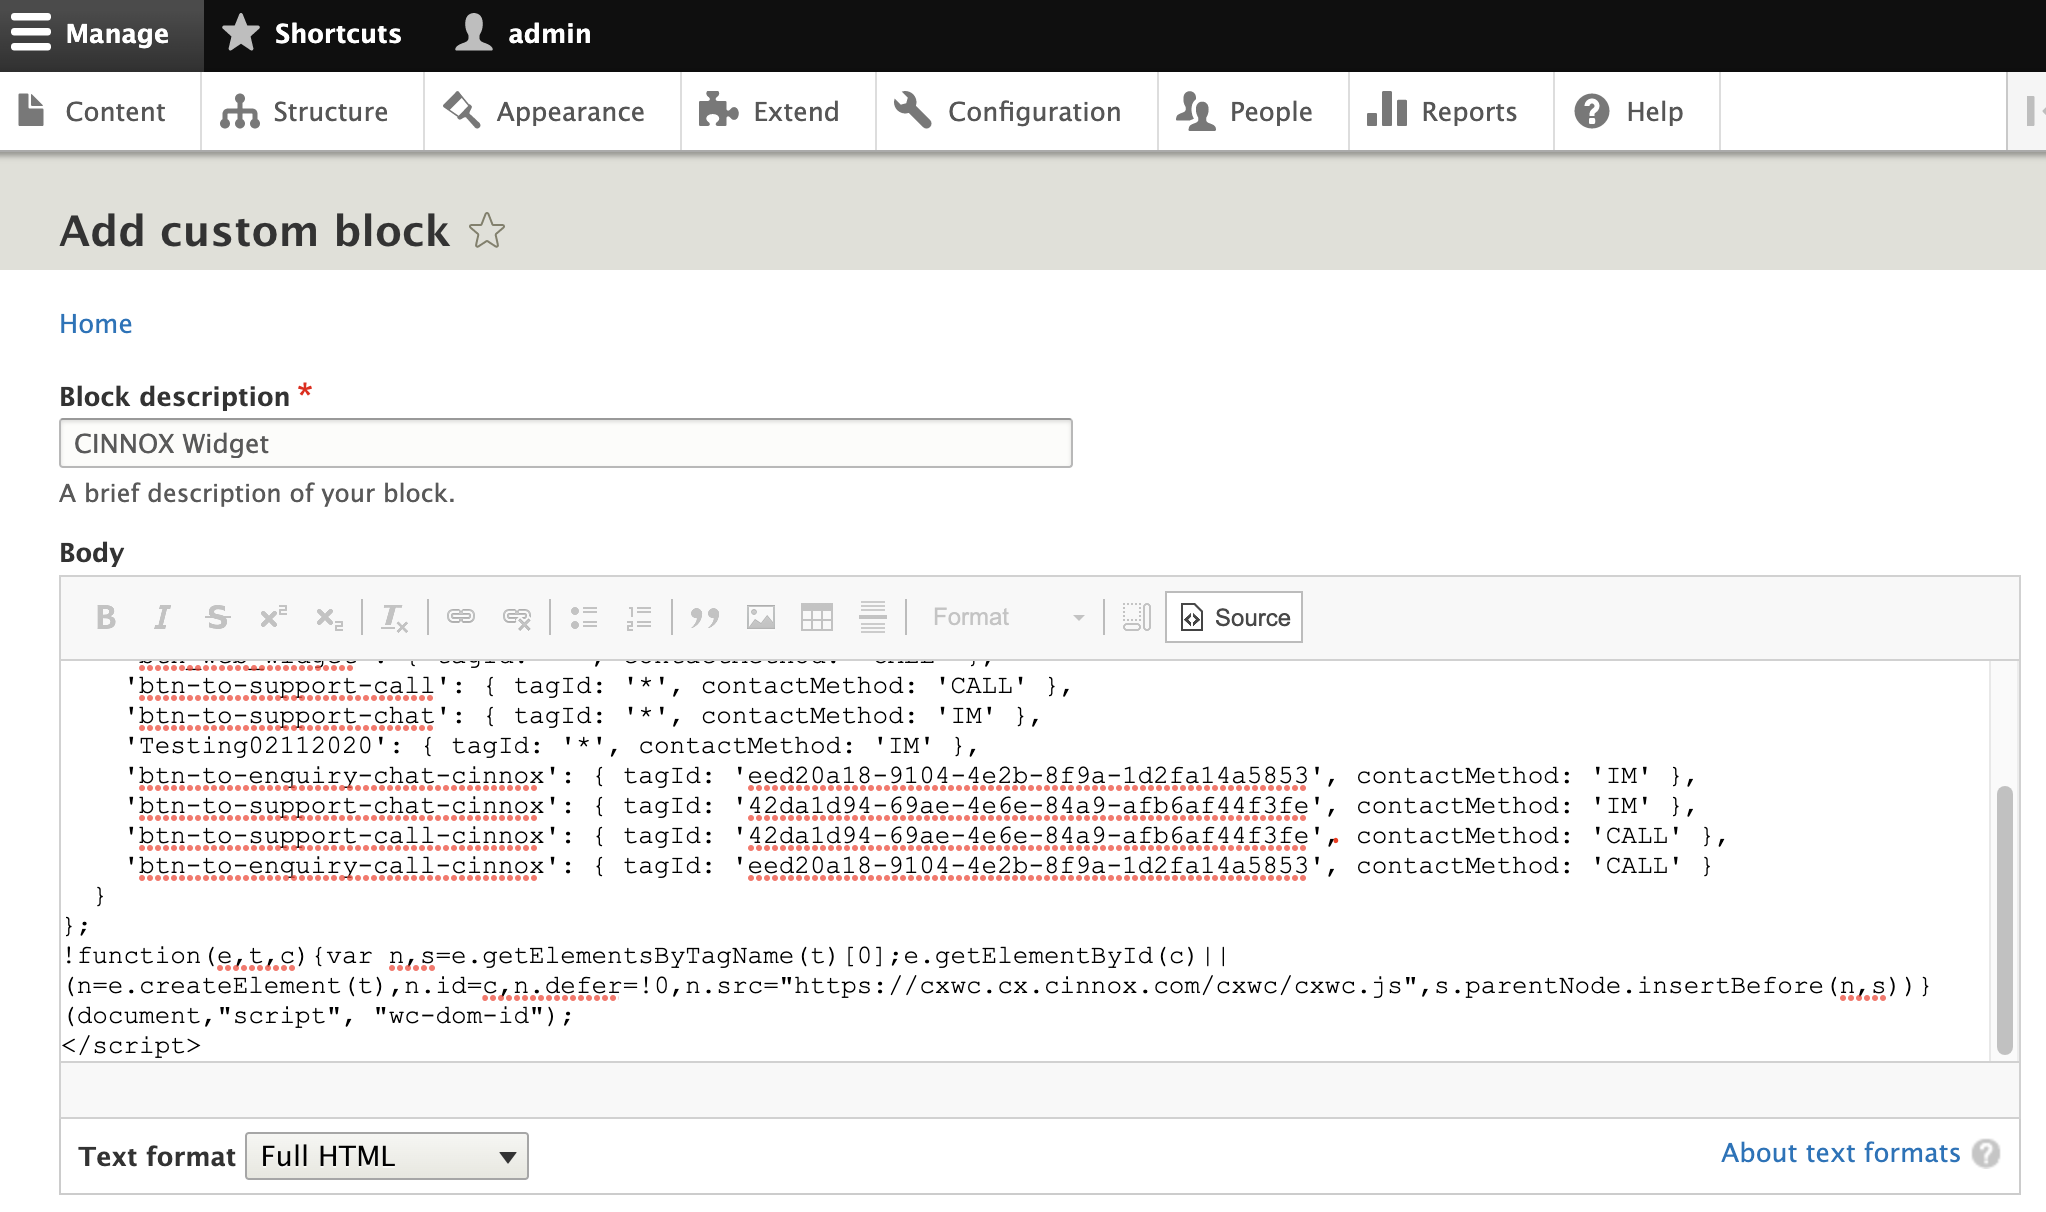
- Click Save located at the bottom of the page.
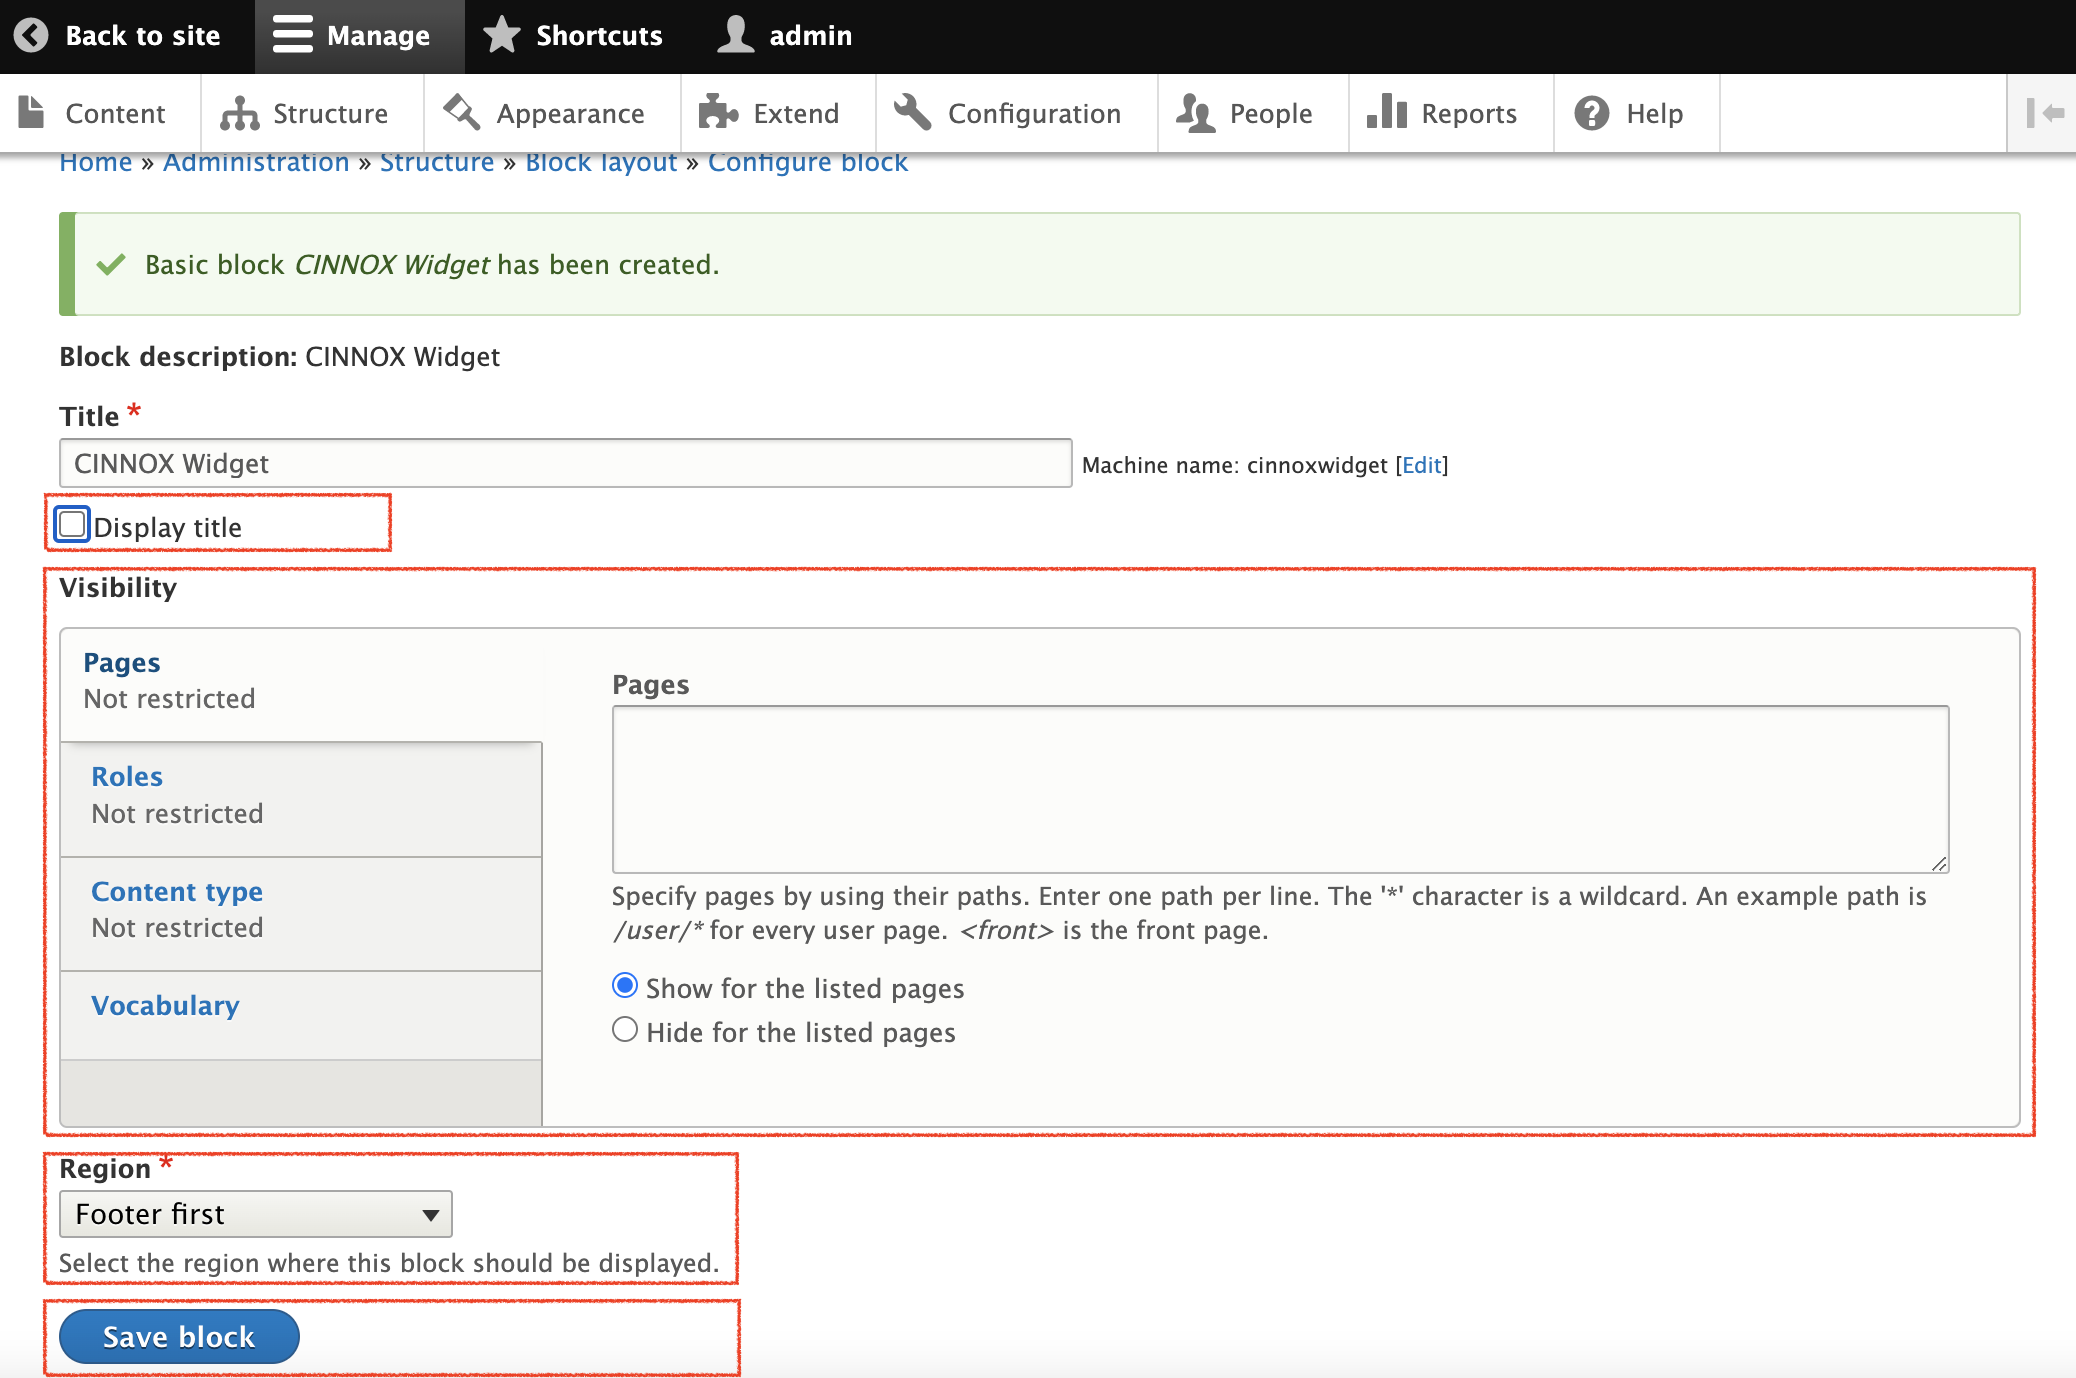
- On the Configure block page, untick the Display title for the Title.
- Check the Visibility section of your Pages, Roles, Content type and Vocabulary.
By default, the CINNOX widget will be available to all your site pages and content type. - In the Region drop-down list, select the Footer (e.g. Footer first) similar to the Place block you have set in the first steps.
- Click Save block. A confirmation will display that the blocks have been saved.
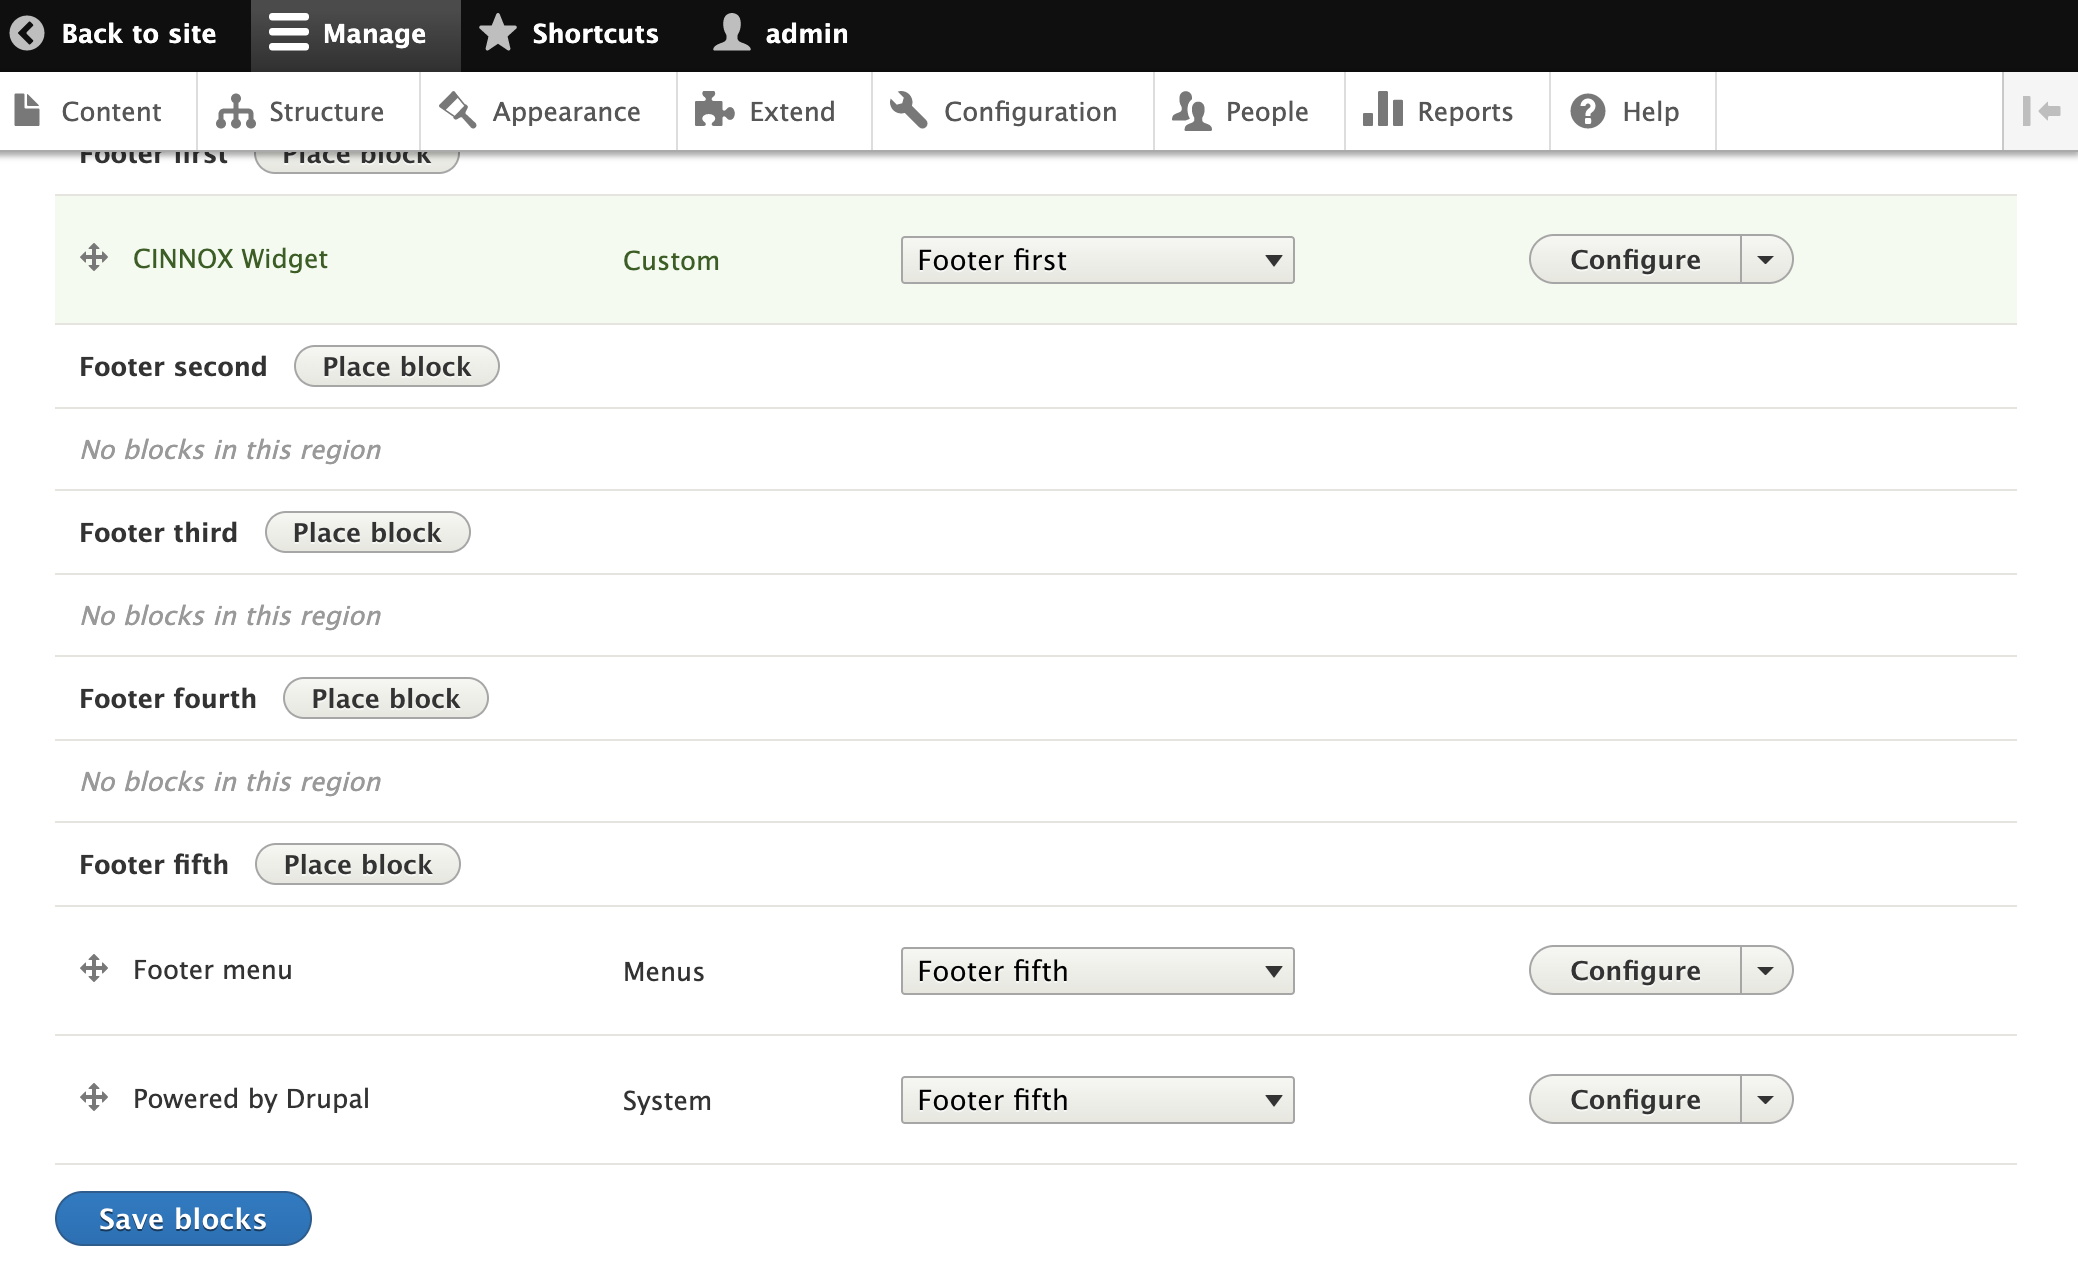
- In the Block layout page, click Save blocks. A confirmation will display that the blocks have been updated.
- Refresh your website. The CINNOX widget should appear at the bottom right corner.
Add CINNOX Click-to-Action (CTA) via Drupal Custom Block
A CTA button is an HTML5 button in your website that you can configure to trigger the following actions in the CINNOX web client without clicking on the Widget:
- Open the CINNOX Directory
- Make a call or chat enquiry to a particular tag
🚧
Preconditions
- You have to create your CTAs in your CINNOX Web Dashboard. Refer to Adding Click-to-Action (CTA) Buttons for more details.
- Complete the Installation of the CINNOX Widget via Drupal Custom Block with the CTA codes before proceeding with the below steps if you want to create CTAs on your site.
Create Custom Block for CINNOX CTA
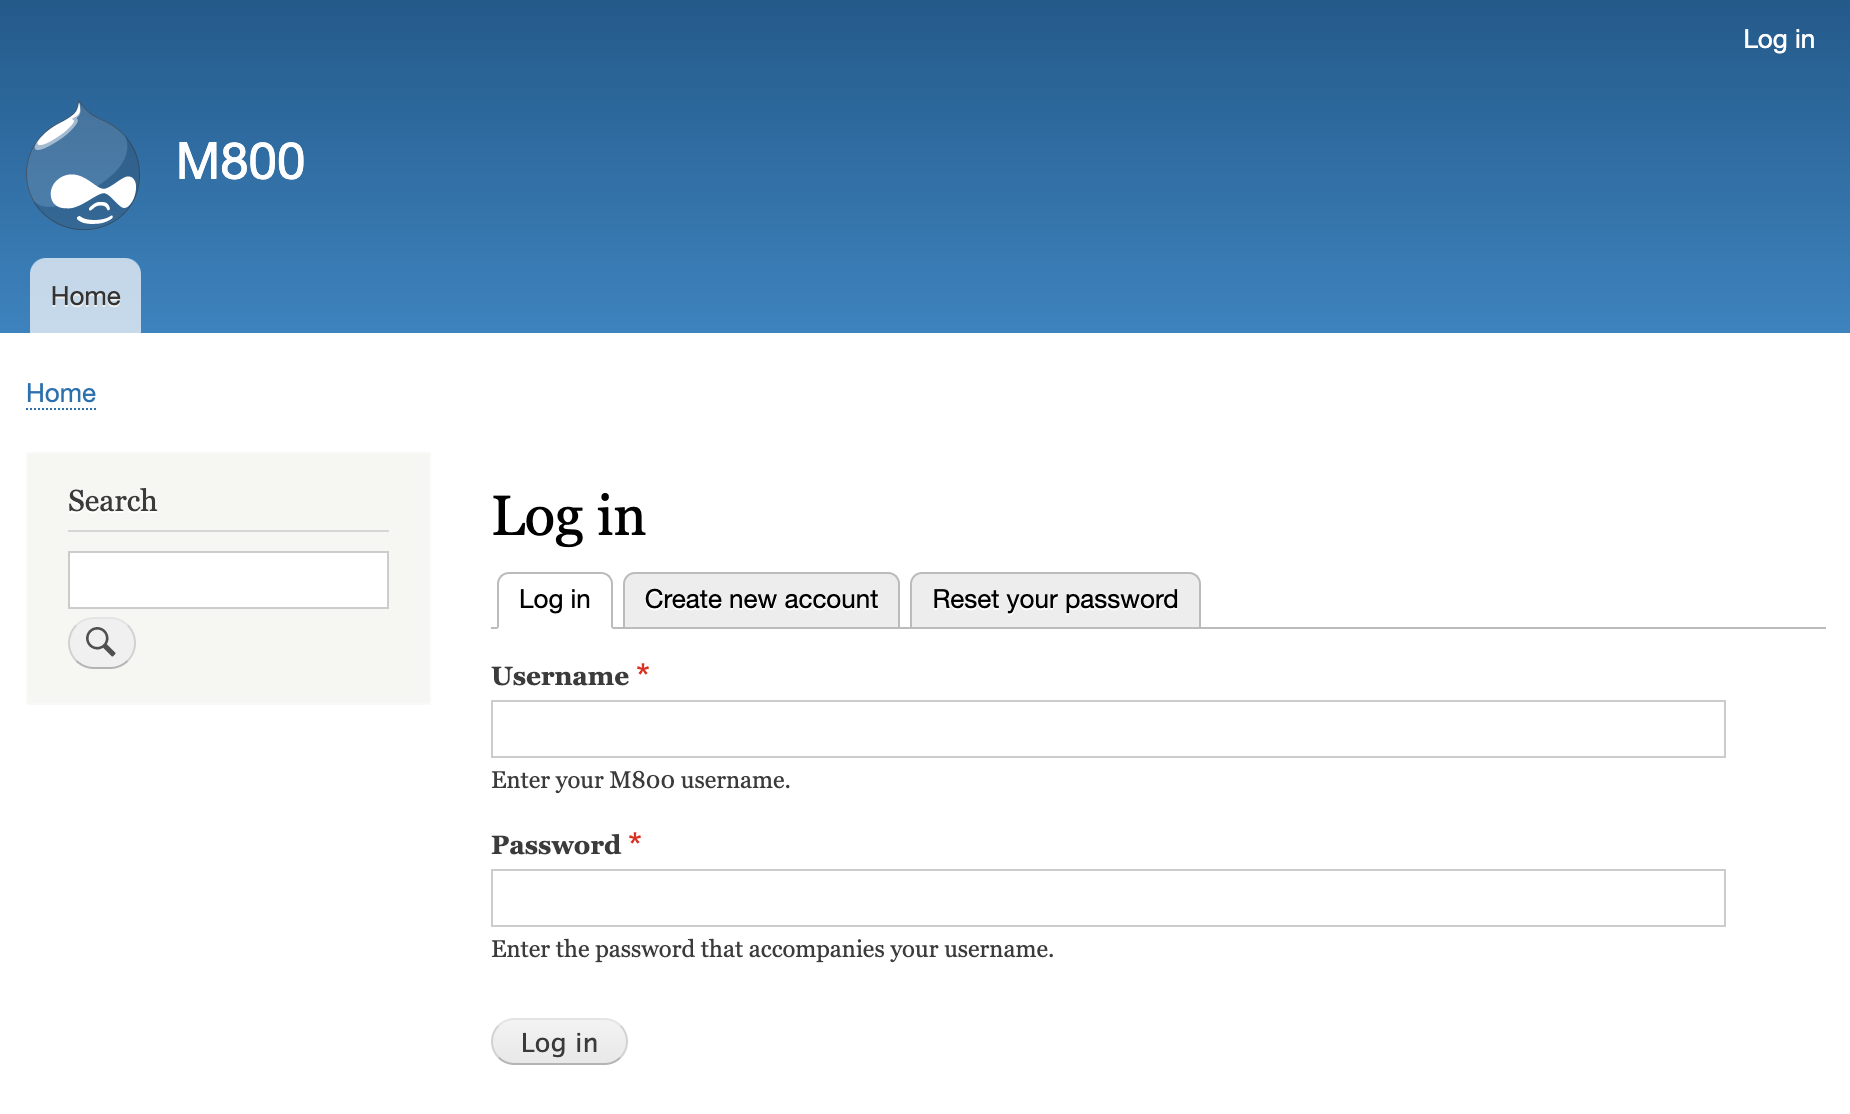
- Log in to your Drupal Administrator Dashboard.
- Navigate to Structure, then click Block layout.
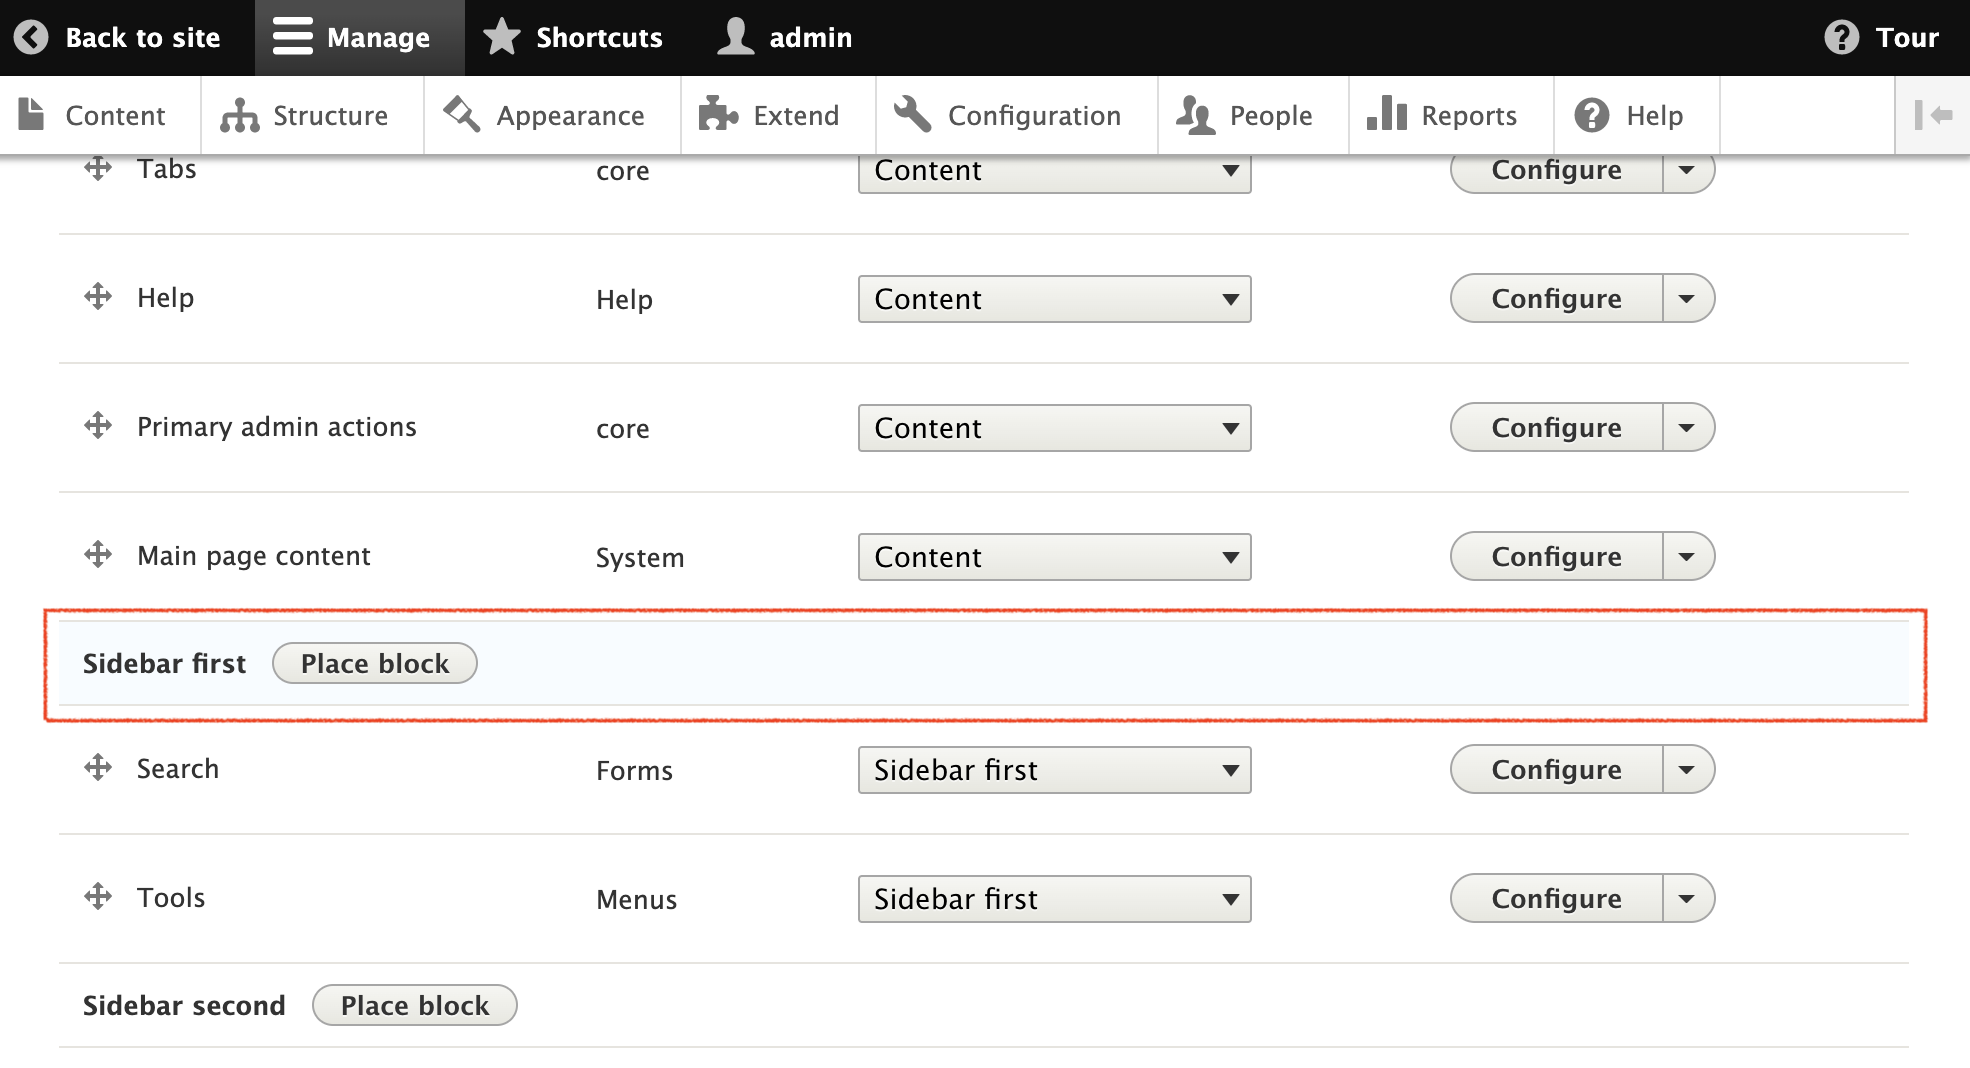
- Scroll down the Block List and find the block where to position your CINNOX CTA (e.g. Sidebar first).
- Click Place block located on the Sidebar.
- Click + Add custom block in the pop-up window.
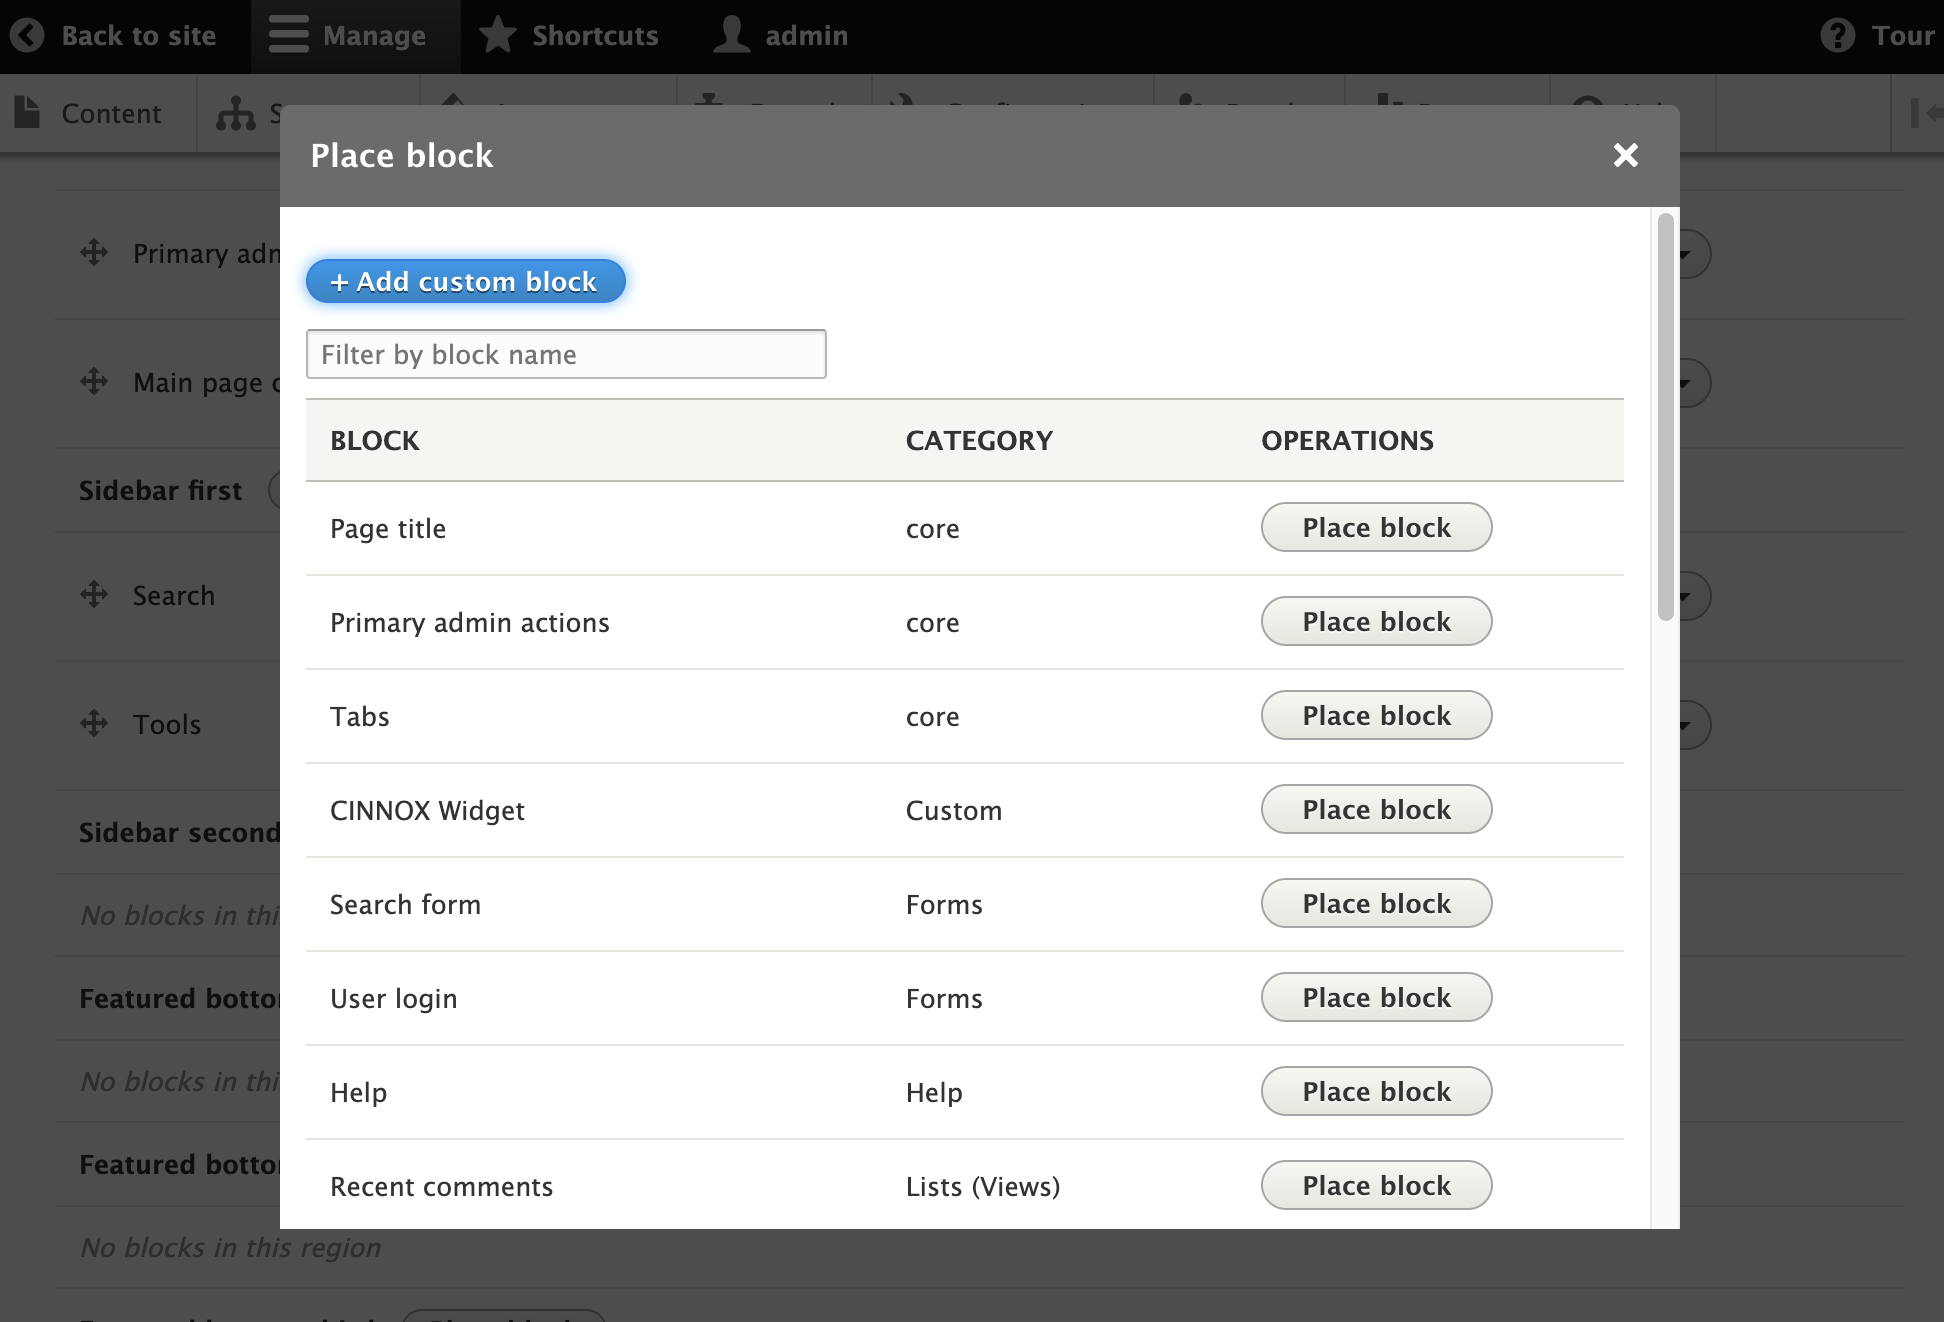
- On the Add custom block page, add Block description. It can be any description, e.g., CINNOX Call CTA.
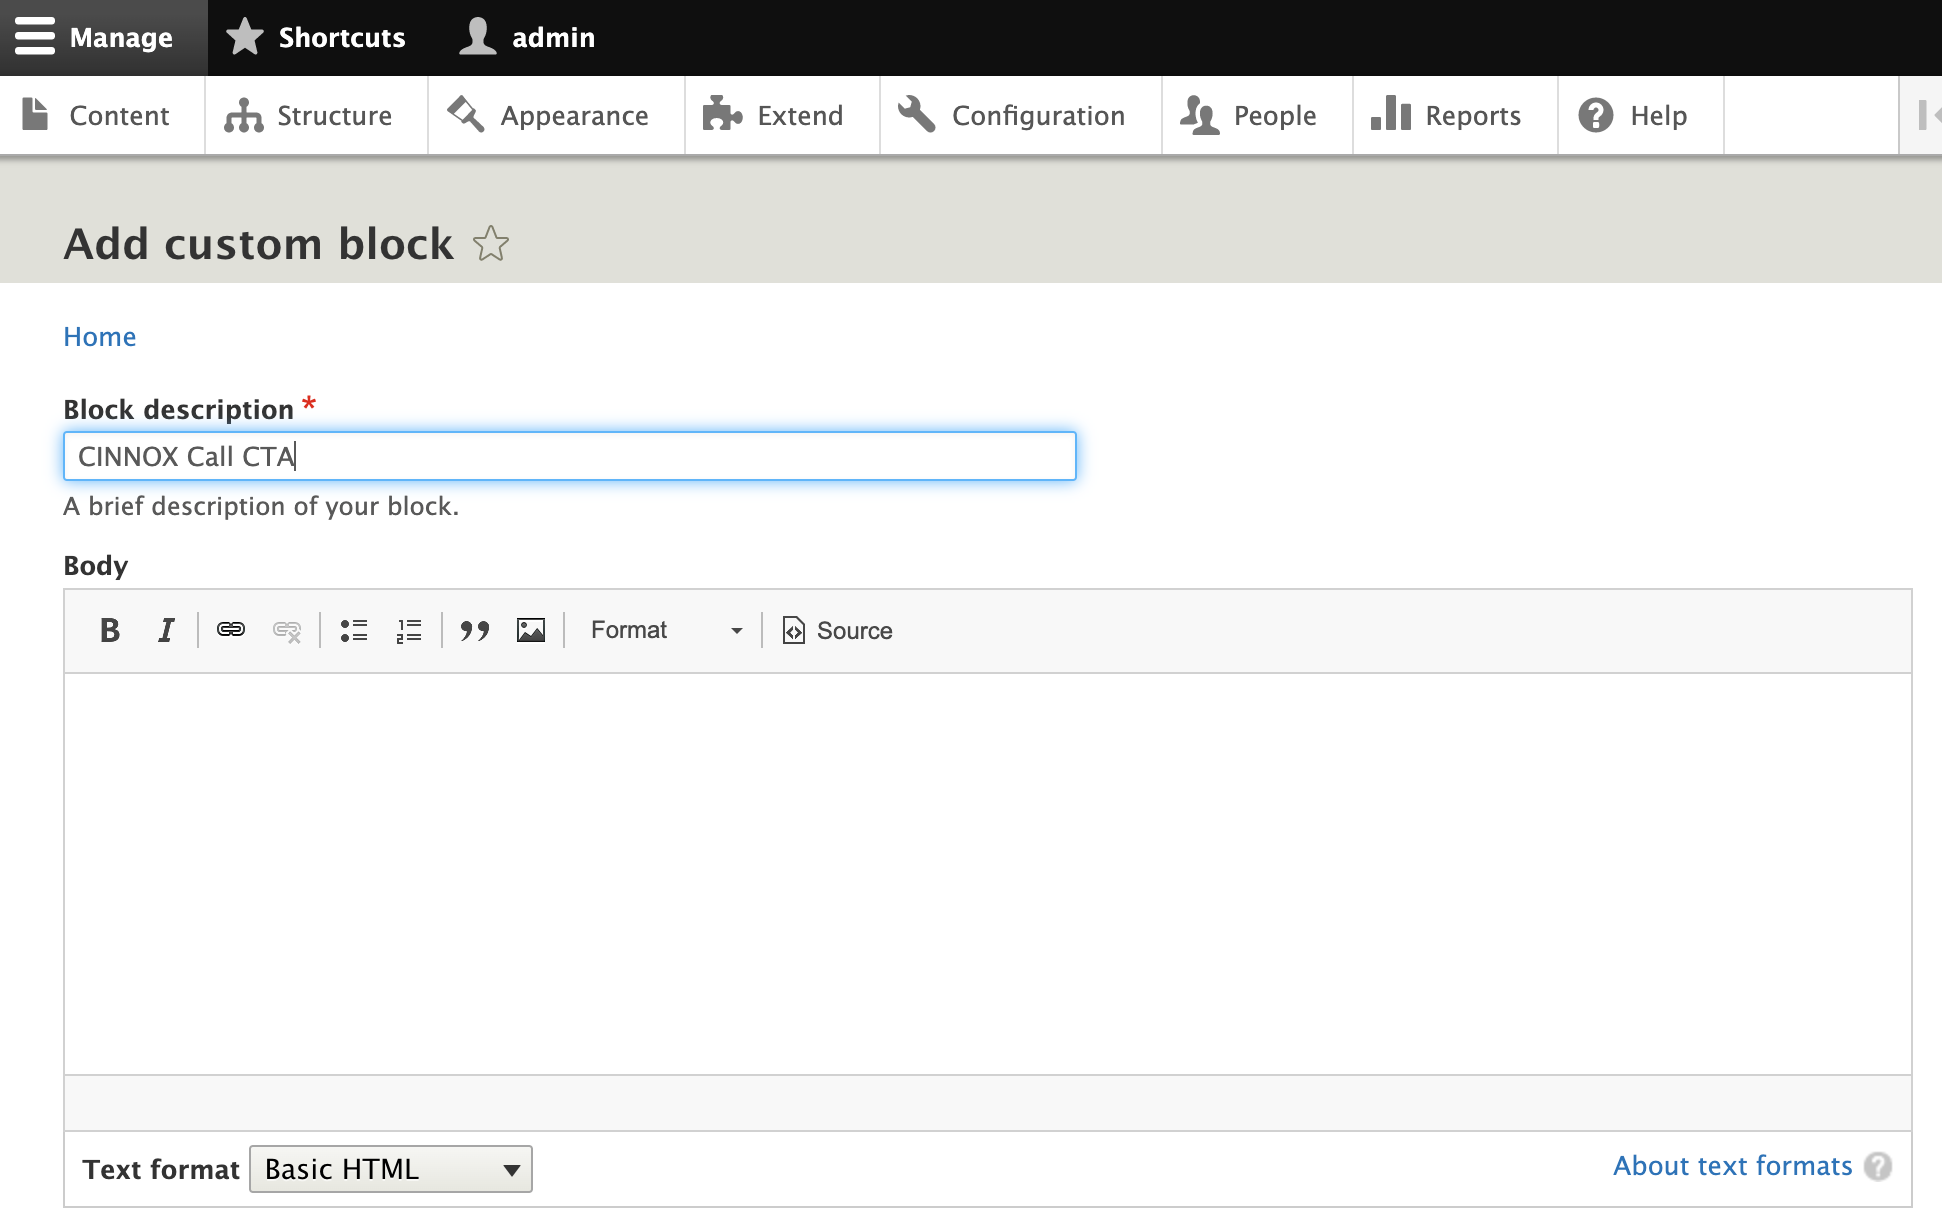
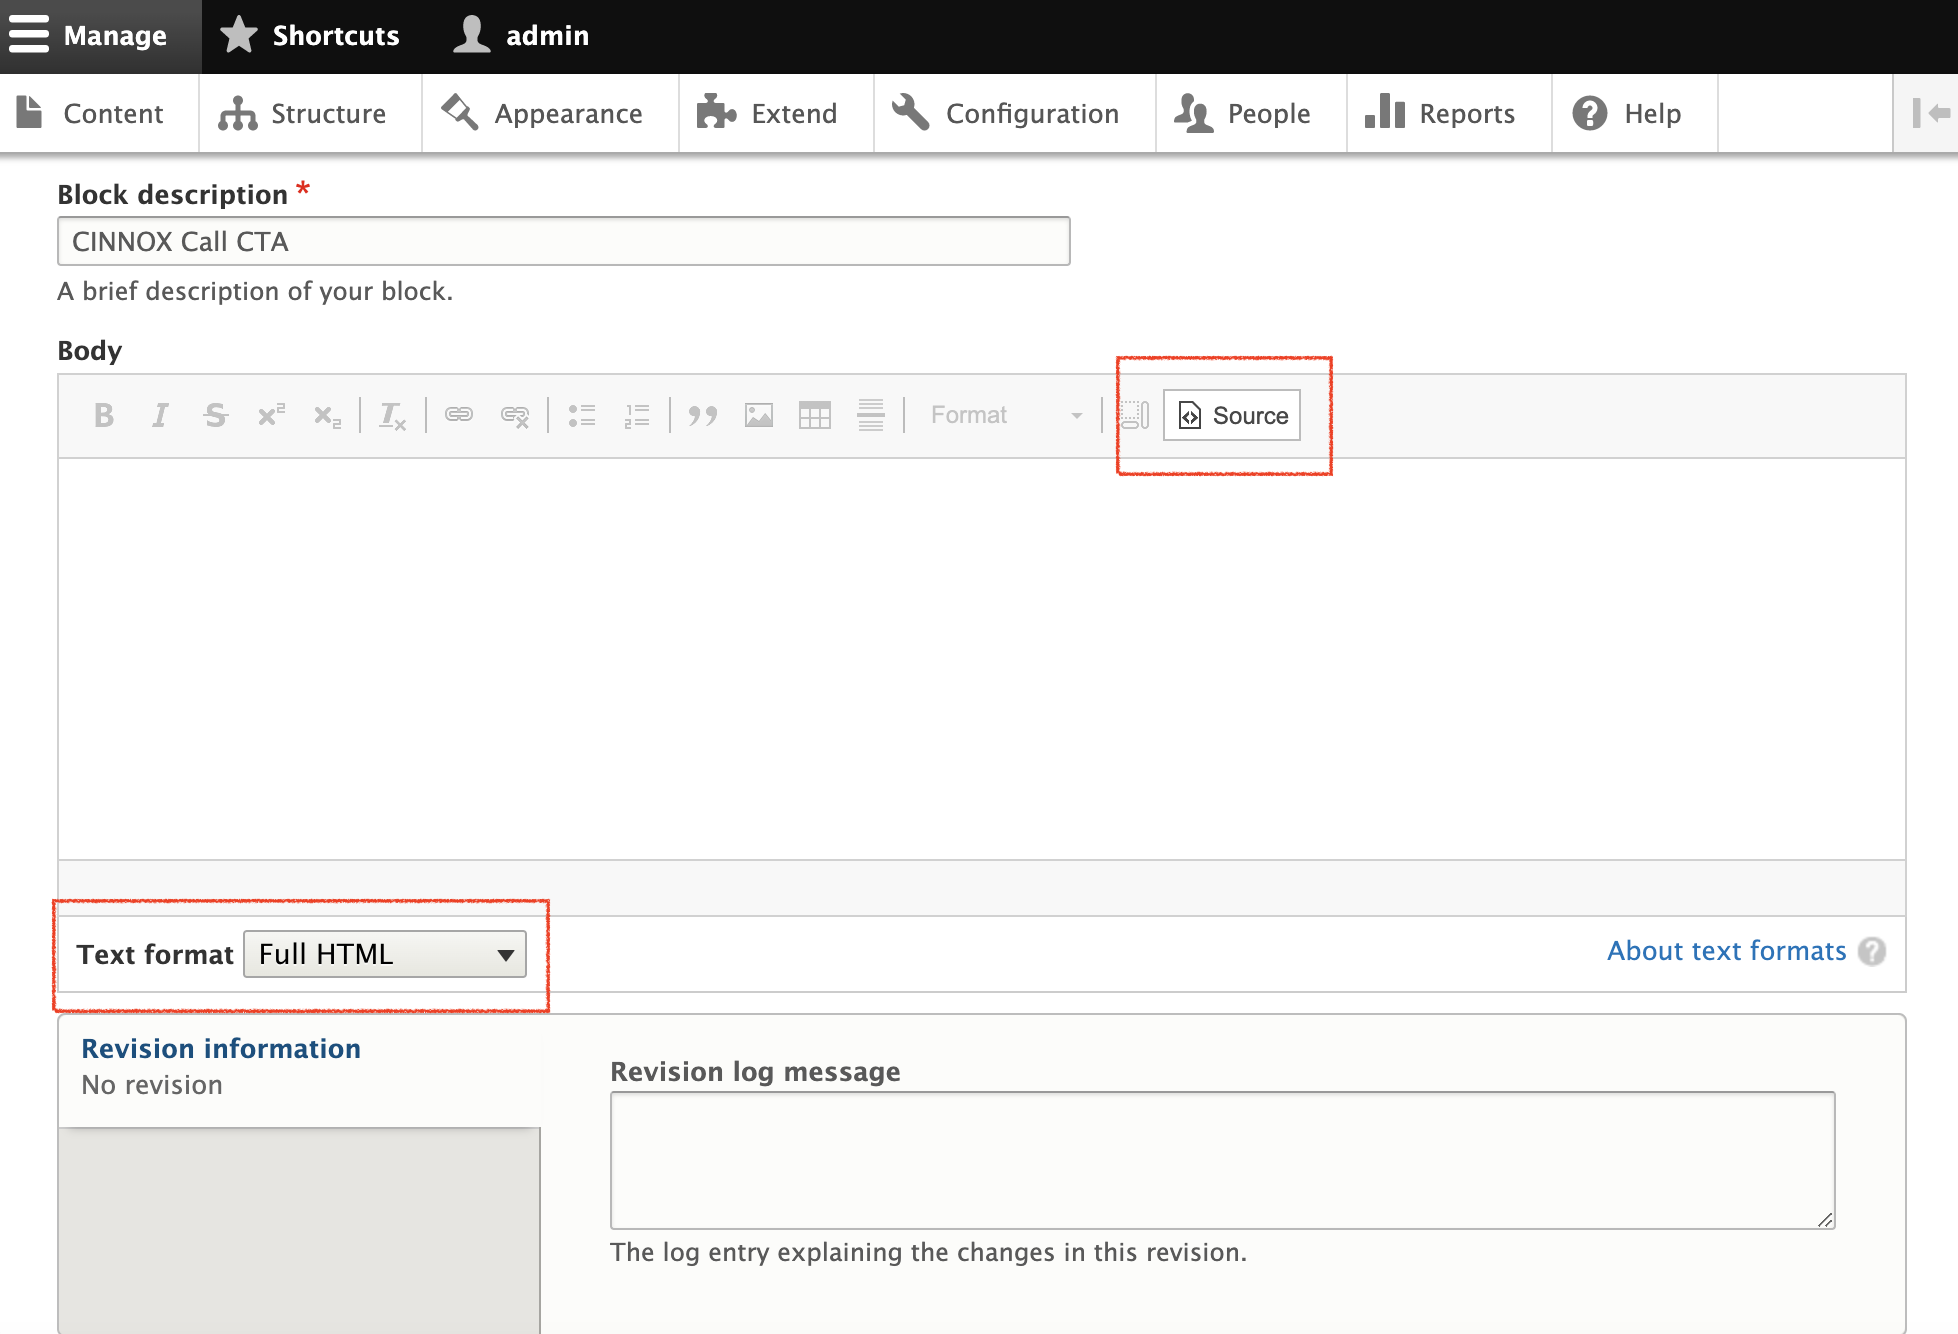
- On the Text format, select Full HTML.
- On the Body, select Source.
- Log in to your CINNOX Web Dashboard.
- Navigate to Administration > Widget > Installation, from the Widget Installation > Web Widget, and copy your CTA Button ID. If no CTA has been created, please create one first and copy the button ID afterwards.
Refer to Adding Click-to-Action (CTA) Buttons to know more about how to create a CTA in the CINNOX Dashboard.
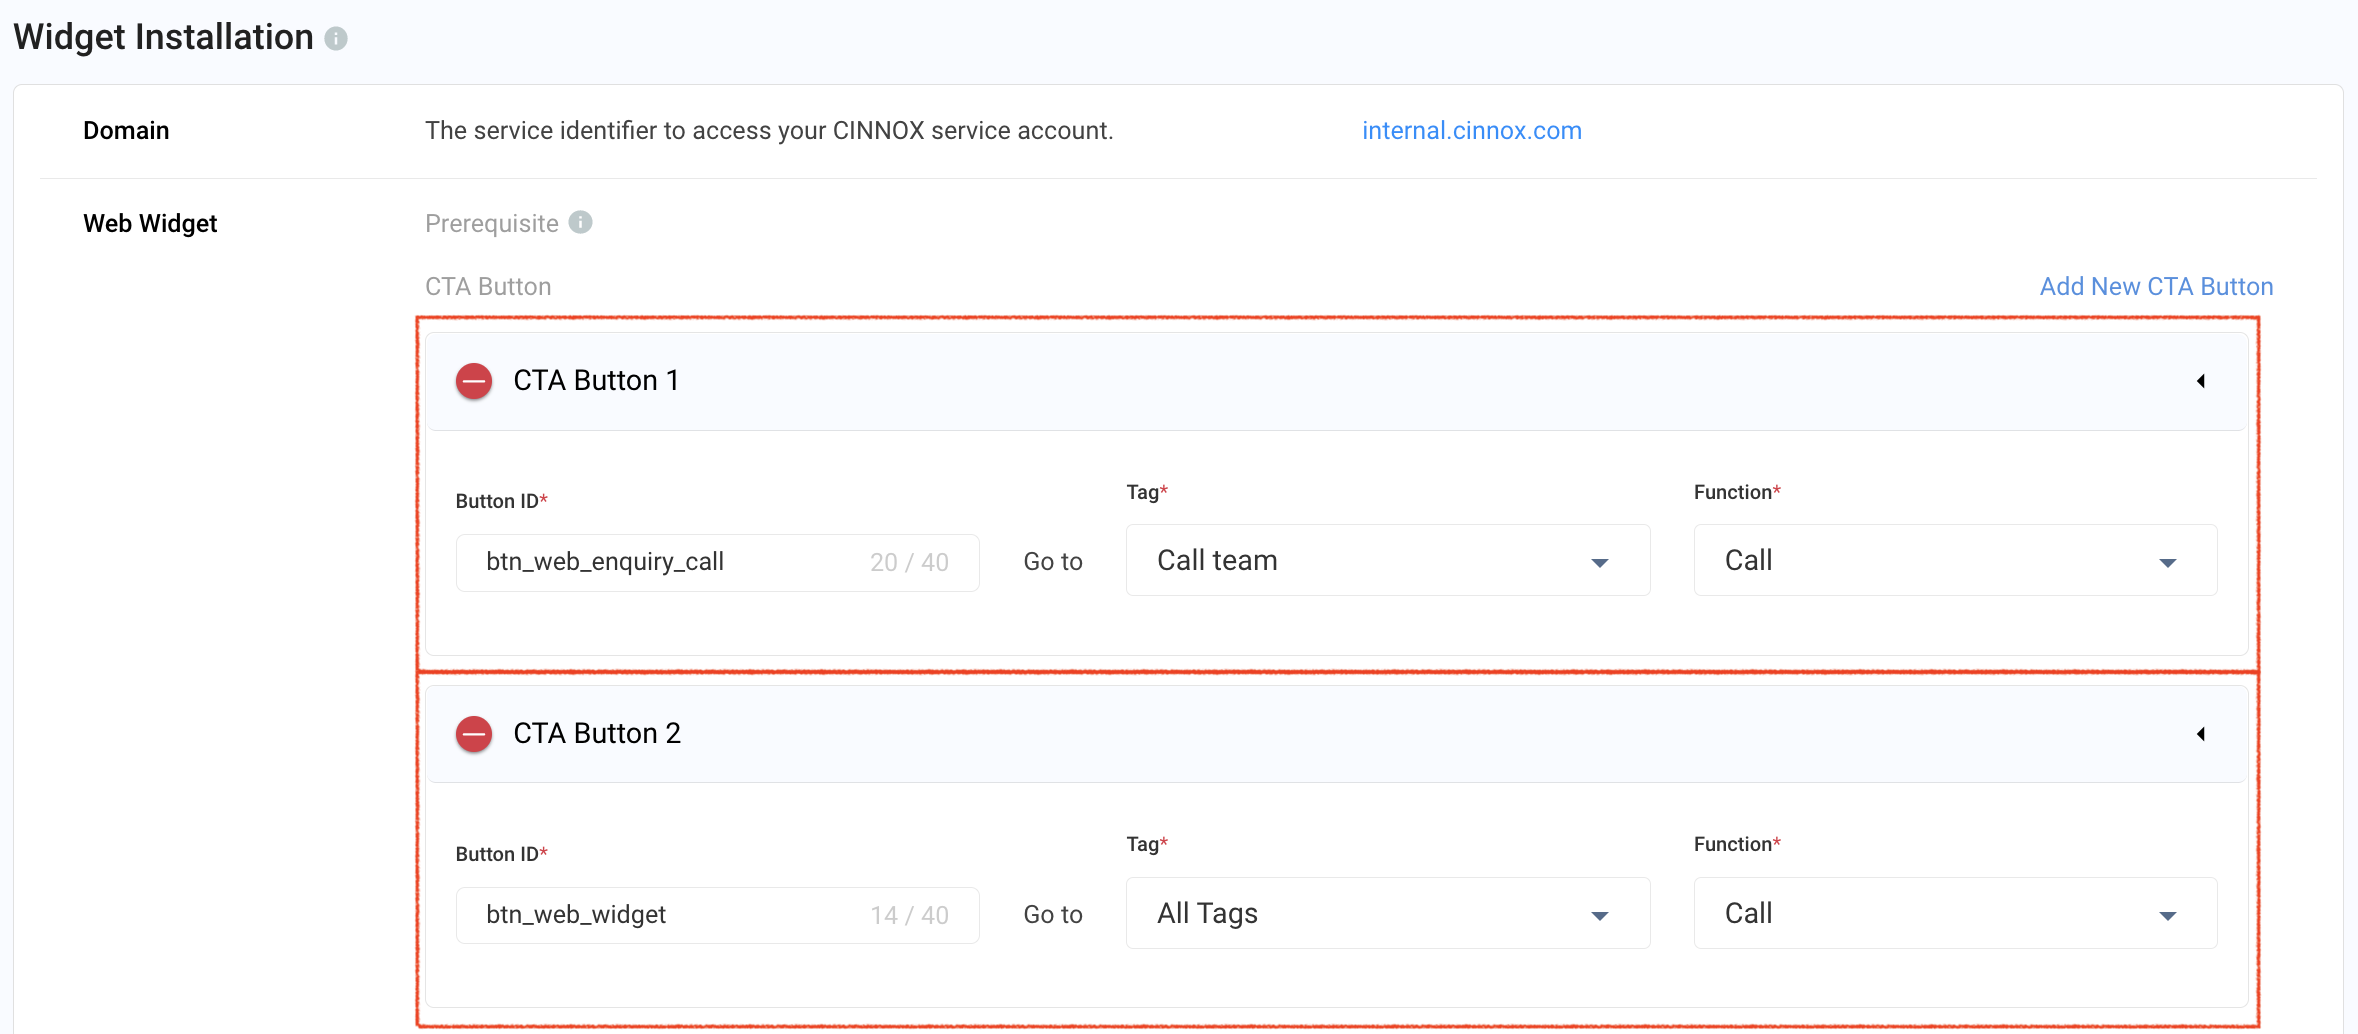
Example CTAs
- On your Drupal Add Custom Block > Body, add the CTAs in the Source
See below examples for reference
Sample CTAs in th Source Body
<hr />
<p><span class="cta-demo-text" id="btn_web_widget">Trigger the Directory</span><br/>
<button class="cta-demo-btn" id="btn_web_widget">Have Questions?</button></p>
<p> </p>
<hr />
<p><span class="cta-demo-text" id="btn-to-support-chat-cinnox">Trigger the Chat function of a Tag</span><br />
<button class="cta-demo-btn" id="btn-to-support-chat">24/7 Support - Chat with Us</button></p>
<p> </p>
<p> </p>
<hr />
<p><span class="cta-demo-text" id="btn-to-support-call-cinnox">Trigger the Call function of a Tag</span><br />
<button class="cta-demo-btn" id="btn-to-support-call">Request Demo - Talk to an Expert</button></p>
<p> </p>
<p> </p>
<hr />
<p> </p>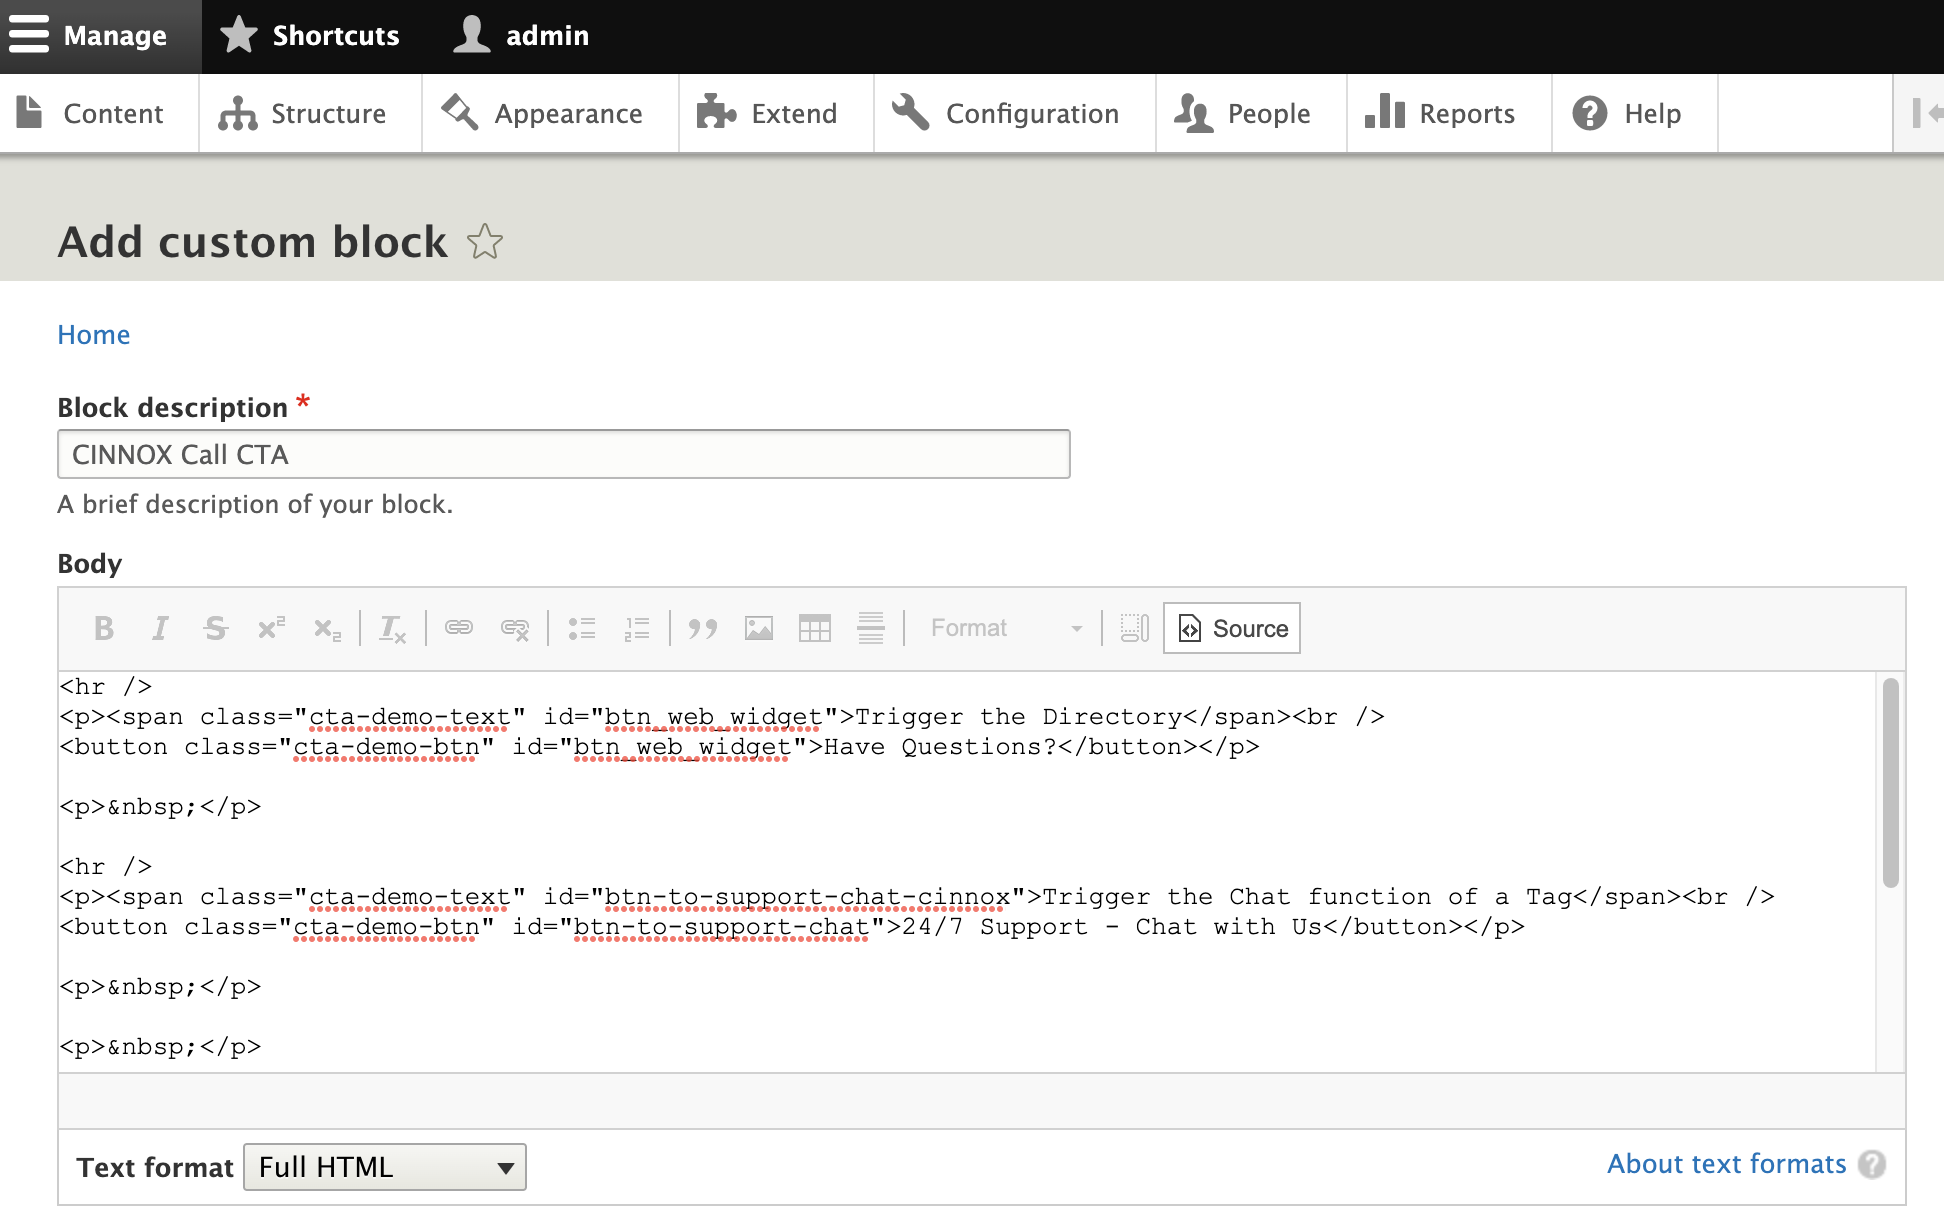
- Click Save.
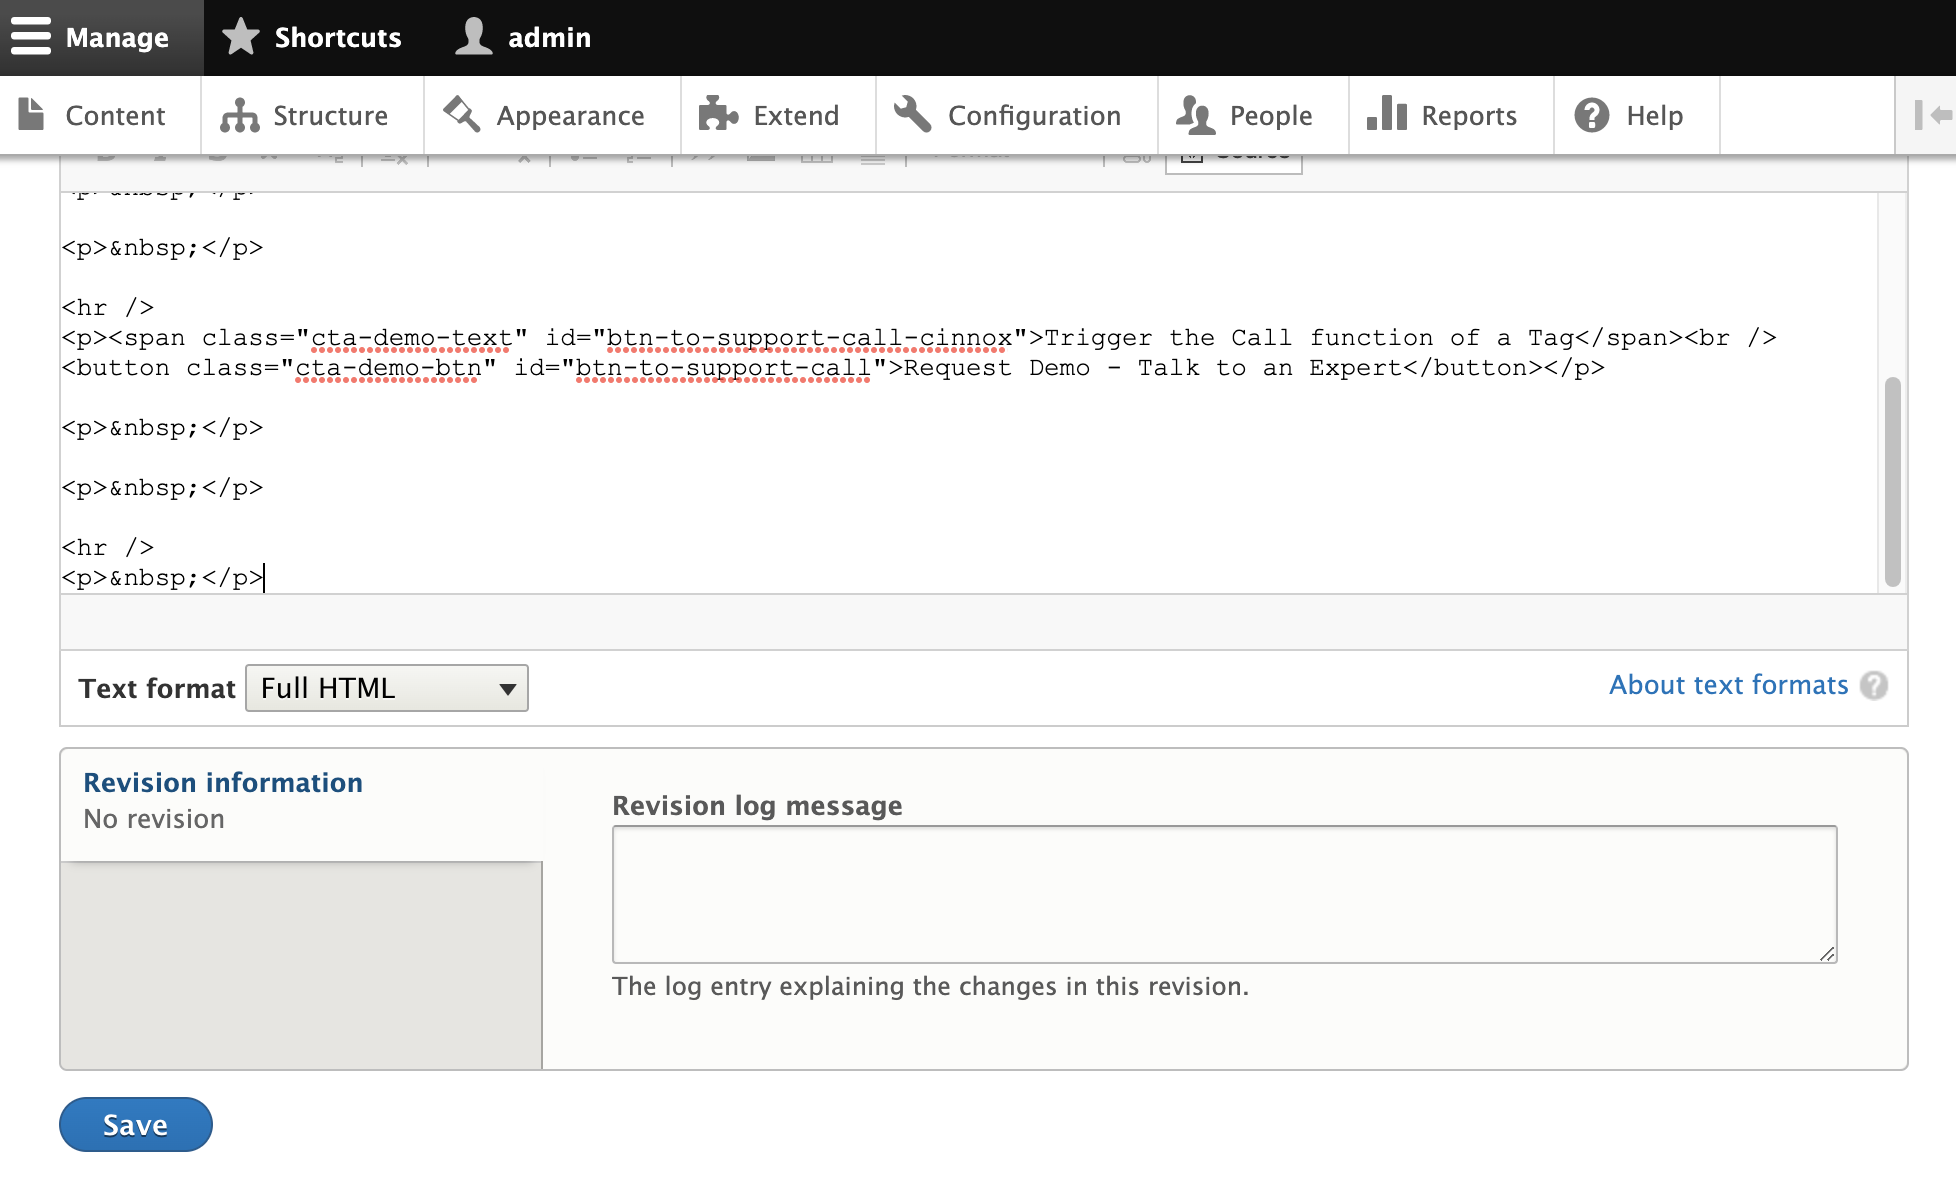
- On the Configure block page, untick the Display title for the Title.
- Check the Visibility section of your Pages, Roles, Content type and Vocabulary.
The CINNOX CTA will be available according to the selected block layout. - In the Region drop-down list, select the Sidebar (e.g. Sidebar first) similar to the Place block you have set in the first steps.
- Click Save block. A confirmation will display that the blocks have been saved.
- In the Block layout page, click Save blocks. A confirmation will display that the blocks have been updated.
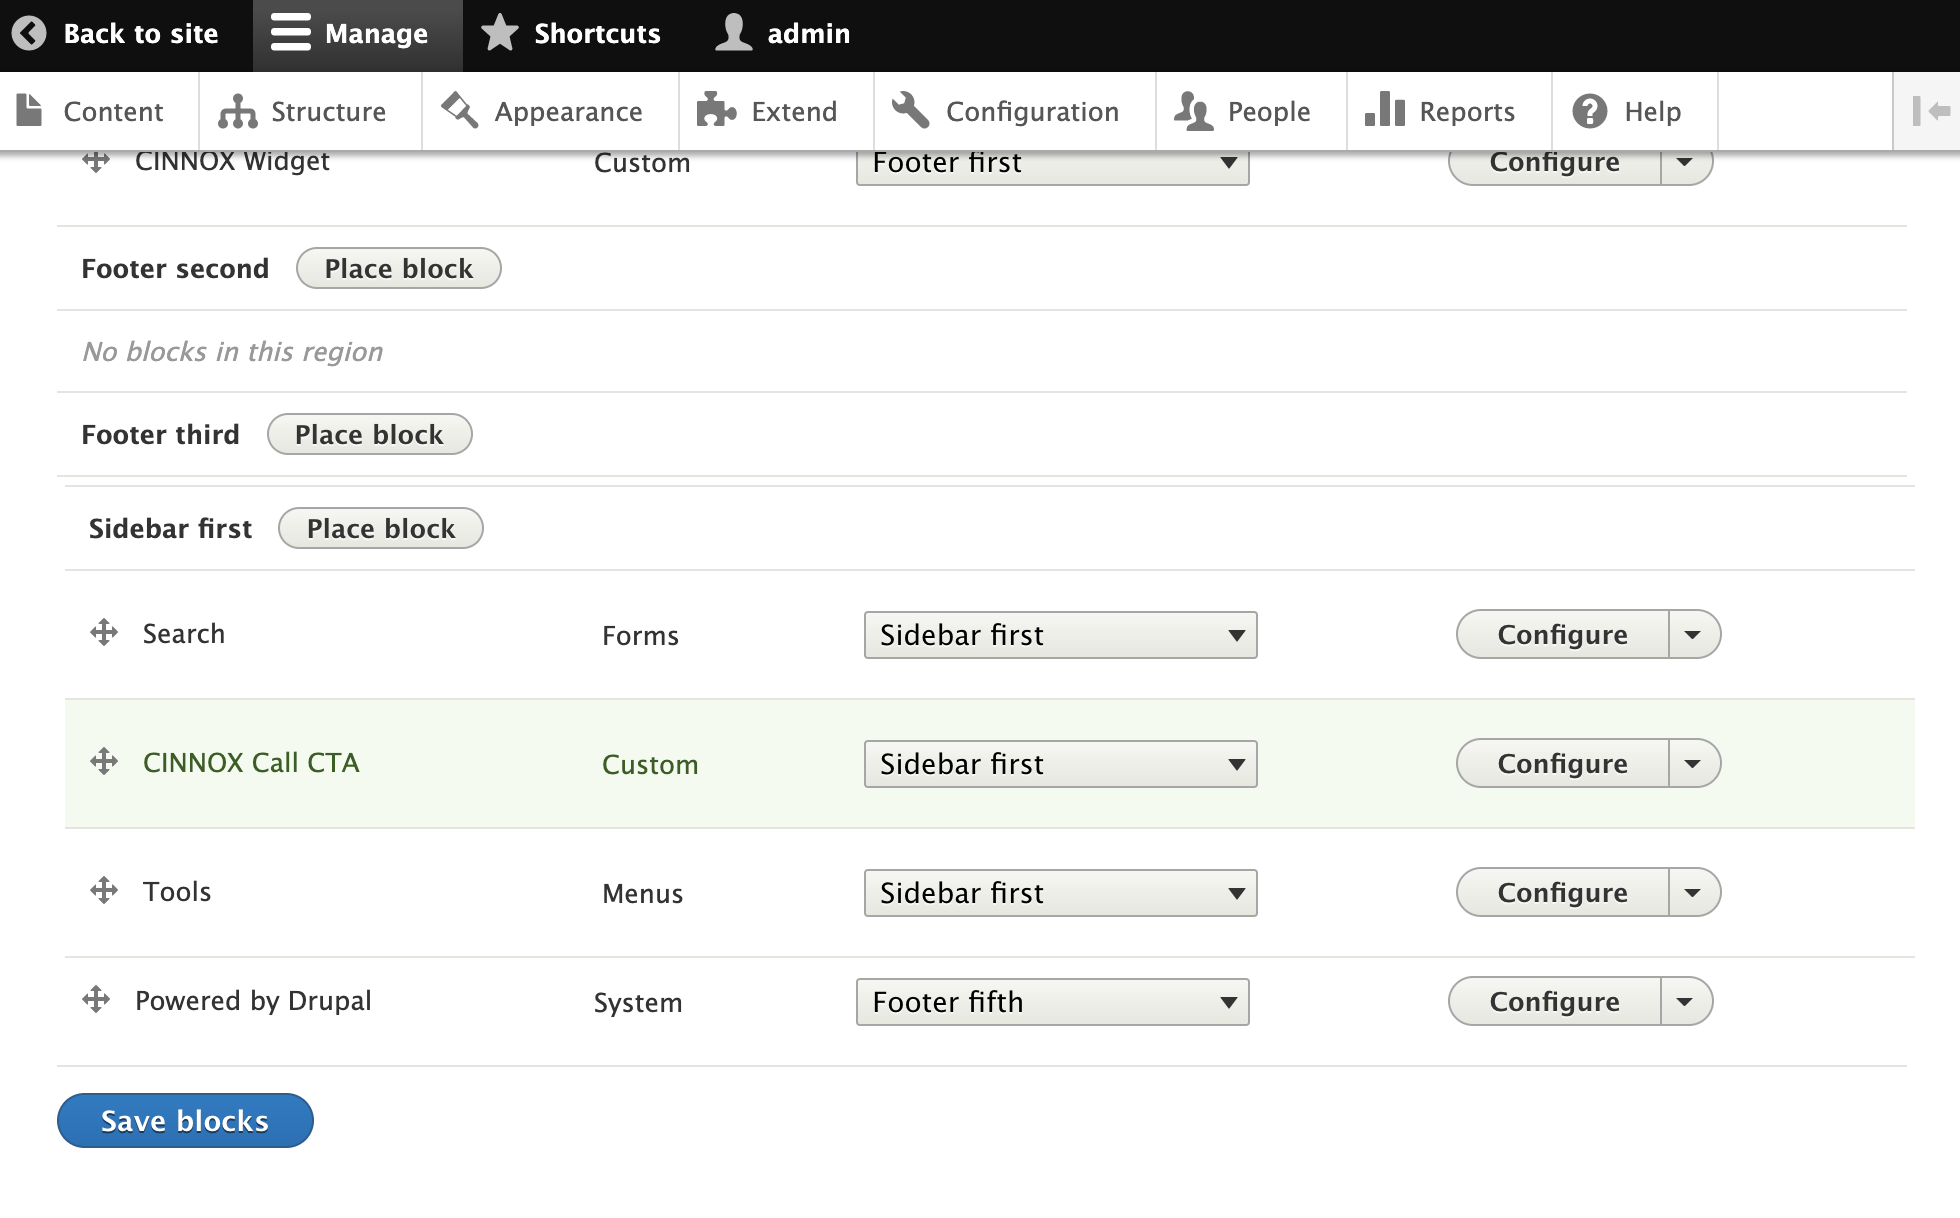
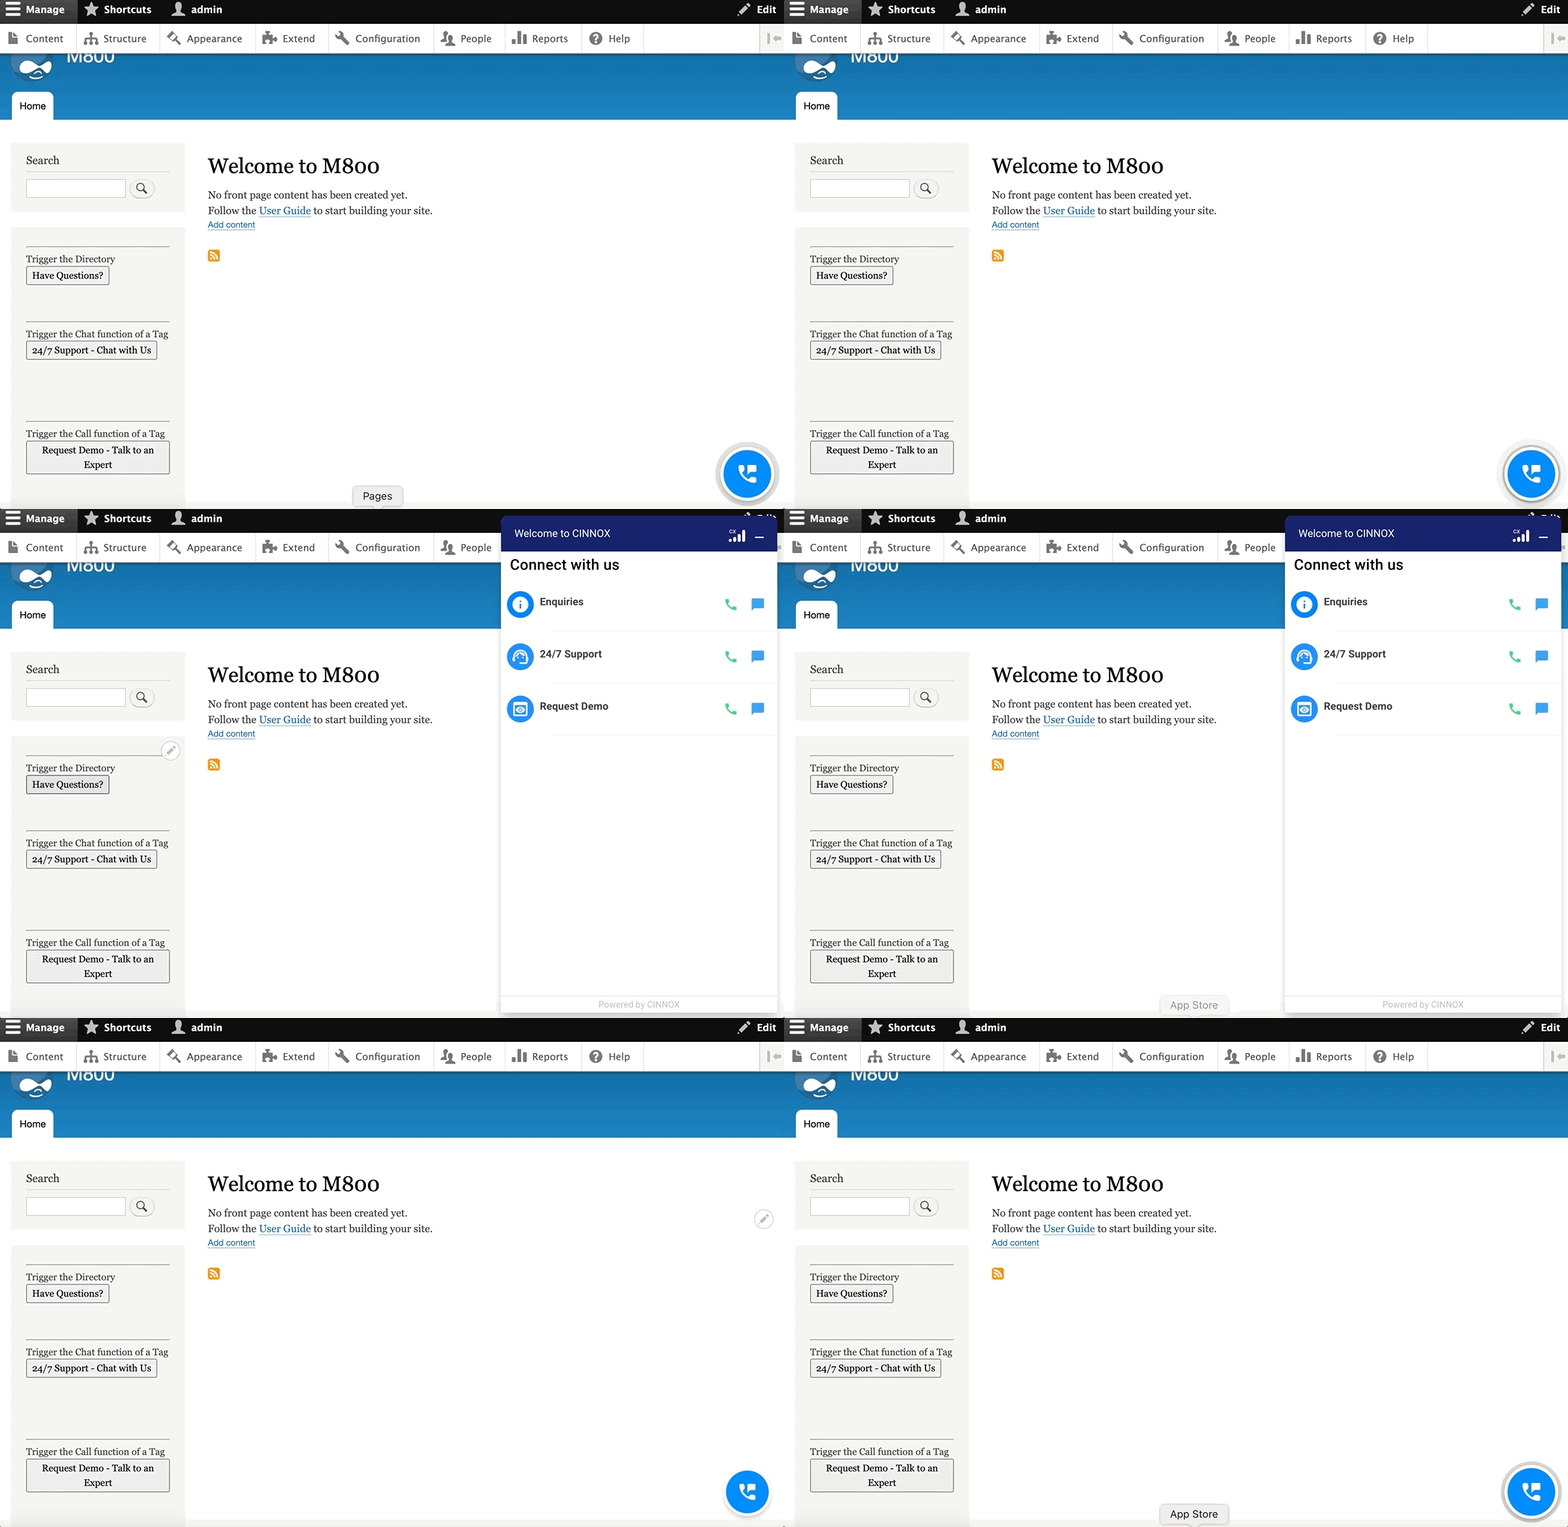
- Refresh your website. The CTA should appear at the selected block.
- Click the CTA. It should trigger the CINNOX widget for the directory, Live Chat or Web Call for a specific tag.
📘
For more information on configuring your CINNOX widget, refer to this Guide's Customising Your Widget section.
📘
To know how to change the widget position from right to left, refer to this Guide's Dynamic Change of Installed Widget section.
📘
To know how to hide the CINNOX Widget and just the CTAs on the website, refer to this Guide's Hiding or Disabling the Web Widget section.