
Voicemail
CINNOX's Voicemail feature lets your visitors leave you a voice message when your agents cannot answer their call enquiry.
Voicemail provides a 24-hour answering capability and is essential to business communications. This feature enhances your staff's efficiency and productivity, ensuring no customers slip through the cracks. Staff members can immediately follow up on missed enquiries based on the details left on the voicemail messages.
Voicemail on Virtual Numbers
Enabling Voicemail
To enable voicemail:
- Navigate to Channel and Click on Numbers.
- Click on More (...) and Virtual Number Details.
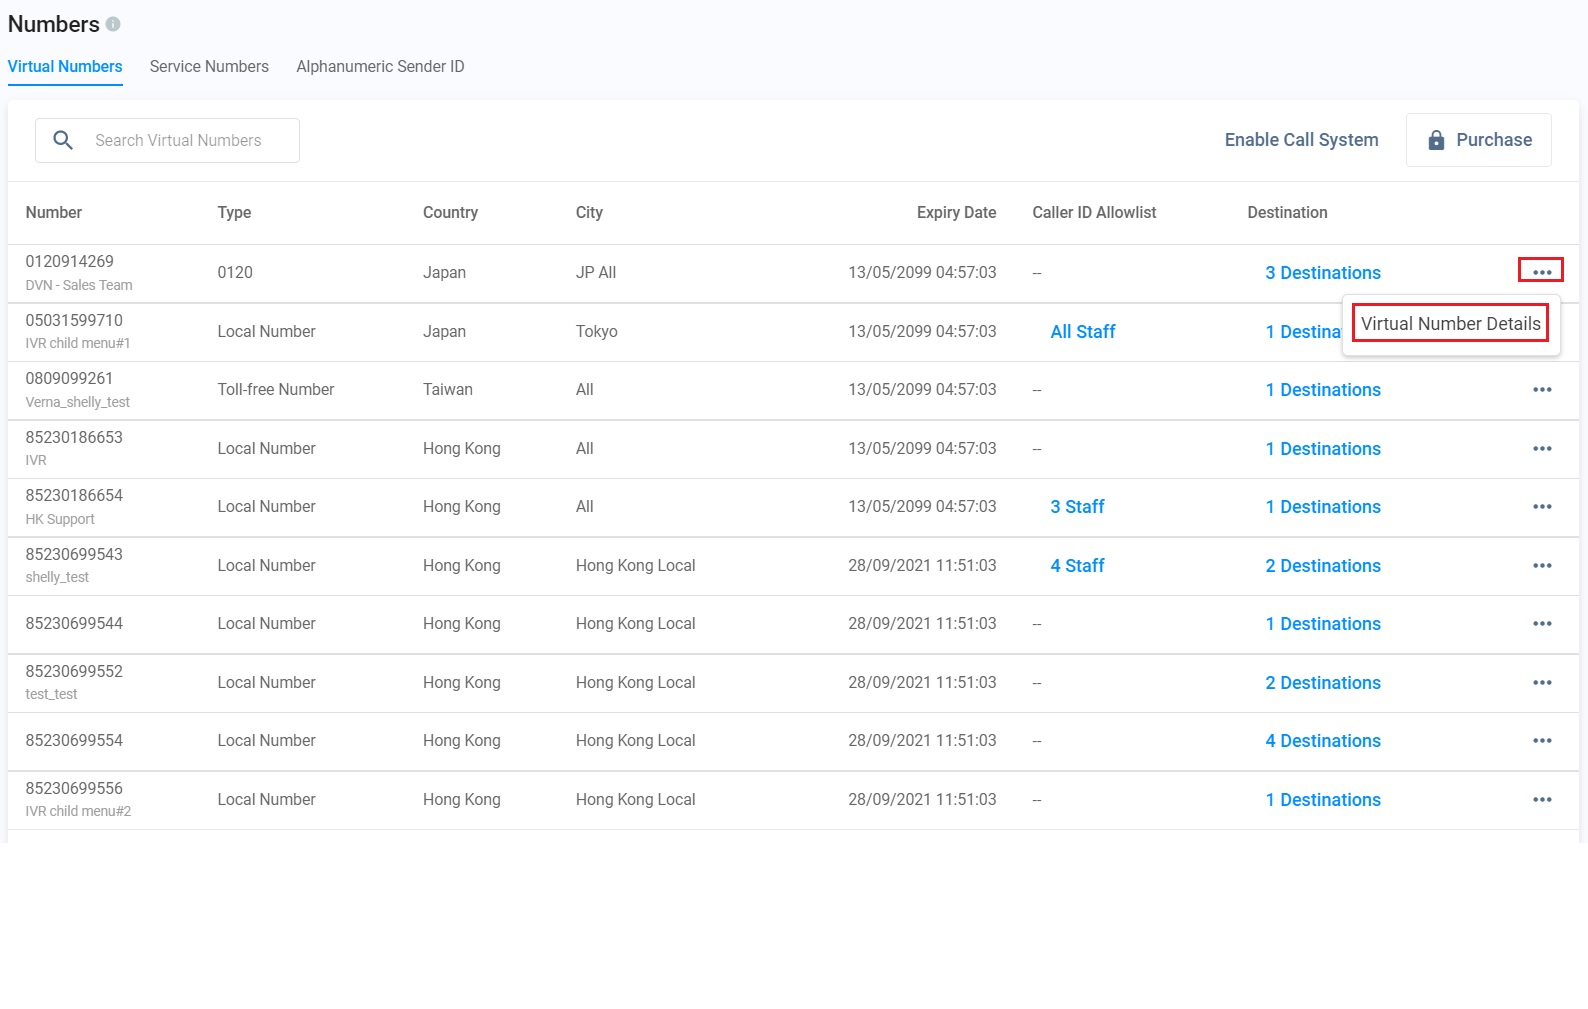
Click on Virtual Number Details
- Click on Edit of Routing Settings.
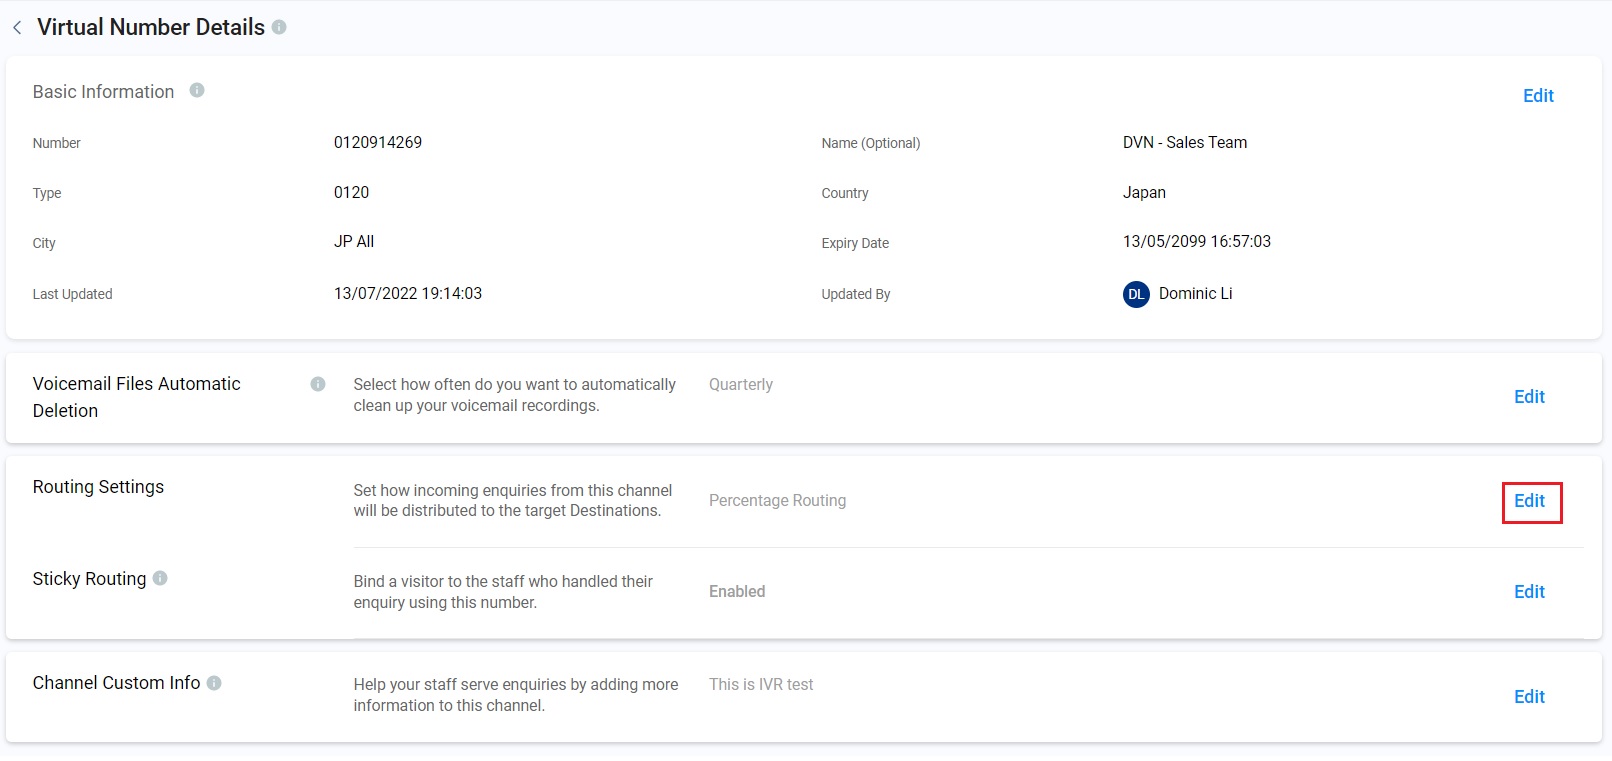
Click on Edit
- Toggle the Voicemail & Voicemail Prompt button ON. A set of additional options will then appear.
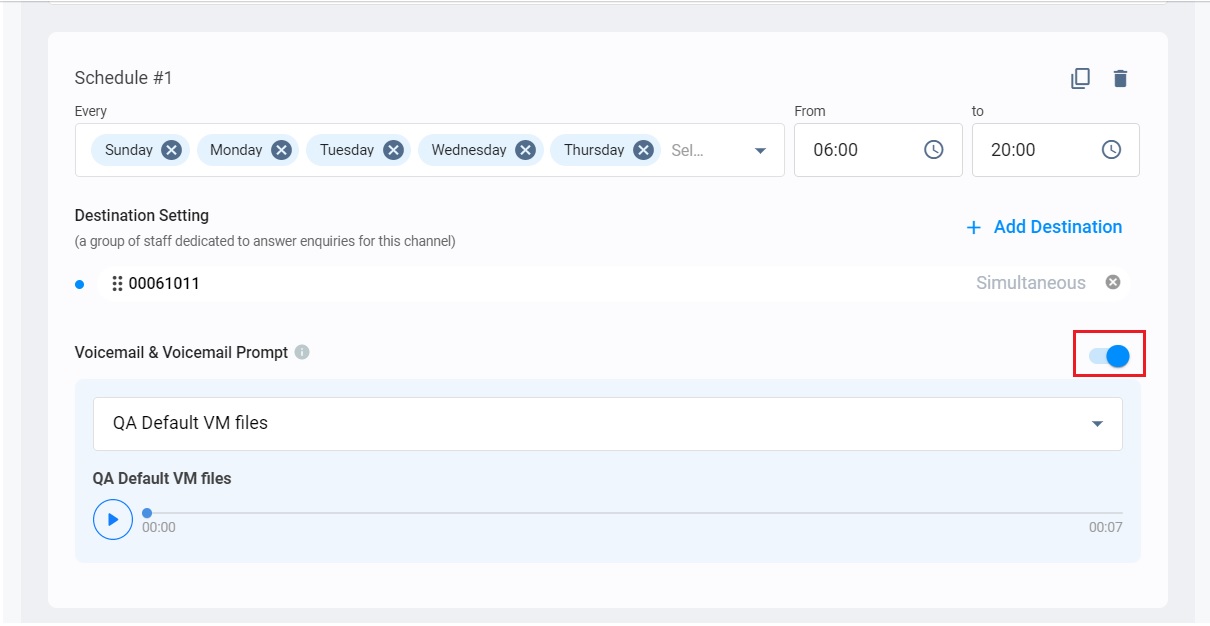
Toggle on the button
Voicemail Prompt
CINNOX provides simple default voicemail greetings to select that you want to use from the drop-down box. This greeting is the recording your visitors will hear before leaving a message.
- Under Voicemail & Voicemail Prompt, select the Voice greeting you want to use. The Default voicemail prompt is the chosen prompt that will play when the voicemail is enabled.
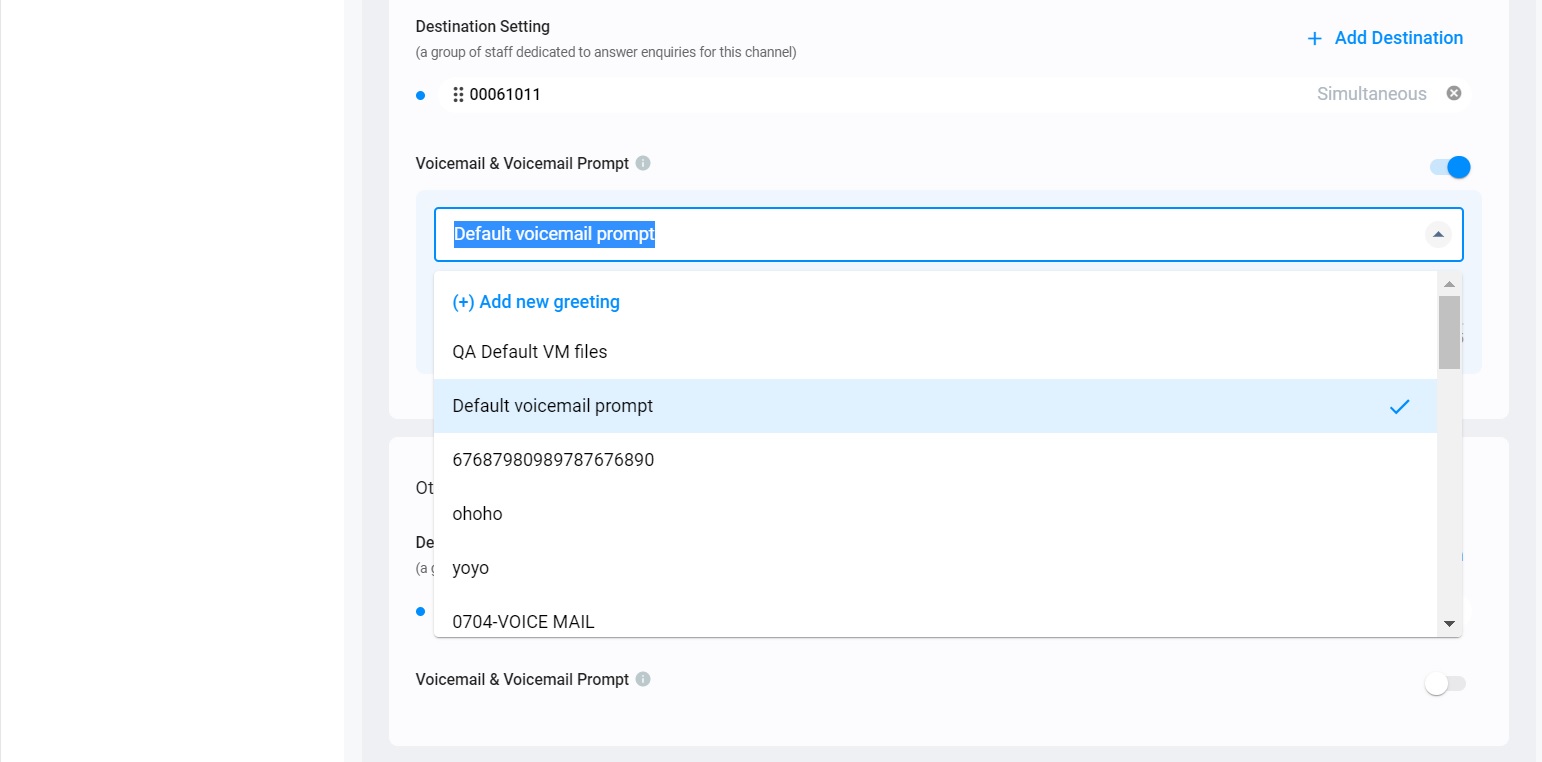
Select Voicemail Prompt
- You can listen to the available prompts and select which one will fit in your voicemail.
Besides, CINNOX allows you to add your voicemail greeting via uploading an MP3 file or using Text-to-Speech powered by Google.
- In the Voicemail & Voicemail Prompt, select (+) Add new greeting
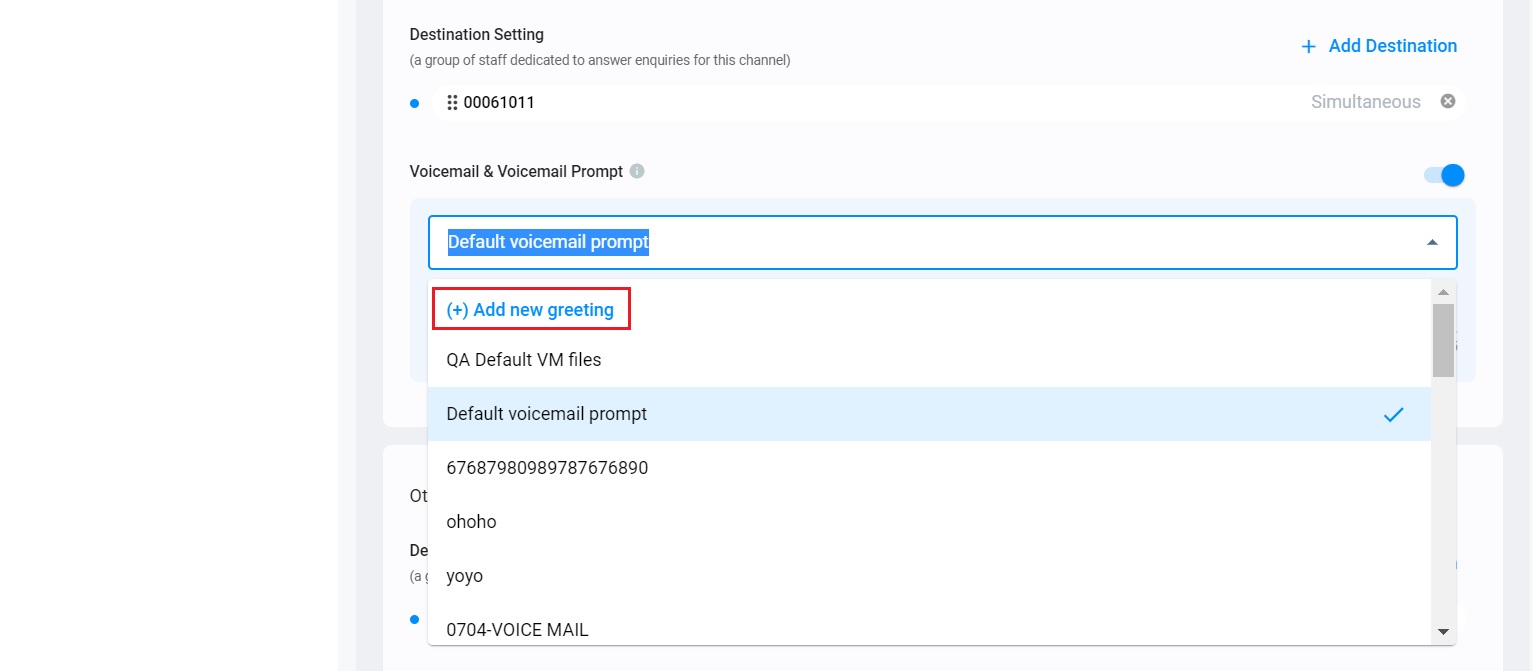
Select Add a new greeting
A pop-up window will display to upload a new greeting.
Case 1: Audio File
- Type the file name of the greeting to upload; a file name can be of any name but should not exceed 50 characters as the maximum limit.
- Drag and drop the MP3 file or browse and select the location of the MP3 file to upload.
- The MP3 must not exceed 10 MB as the maximum limit.
- You may click the play button to listen to the uploaded audio file.
- You may upload a different file to replace the current file if necessary.
- Click the Create button to complete uploading an audio file greeting.
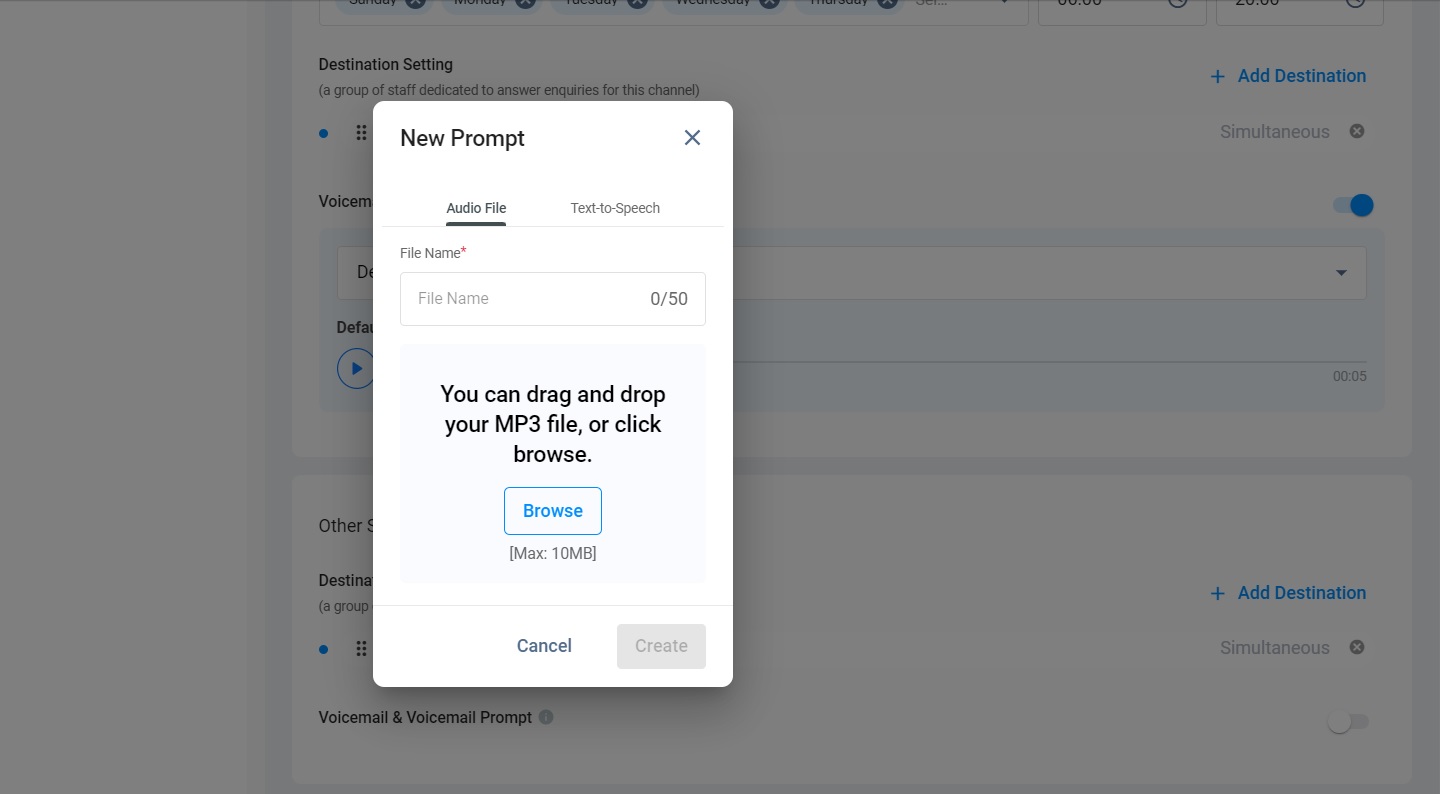
Upload the Audio File
Case 2: Text-to-Speech
- Type the file name of the greeting to upload. A file name can be of any name but should not exceed 50 chars as the maximum limit.
- Type or paste the text you want to convert to a voice message. It must not exceed 700 characters as the maximum limit.
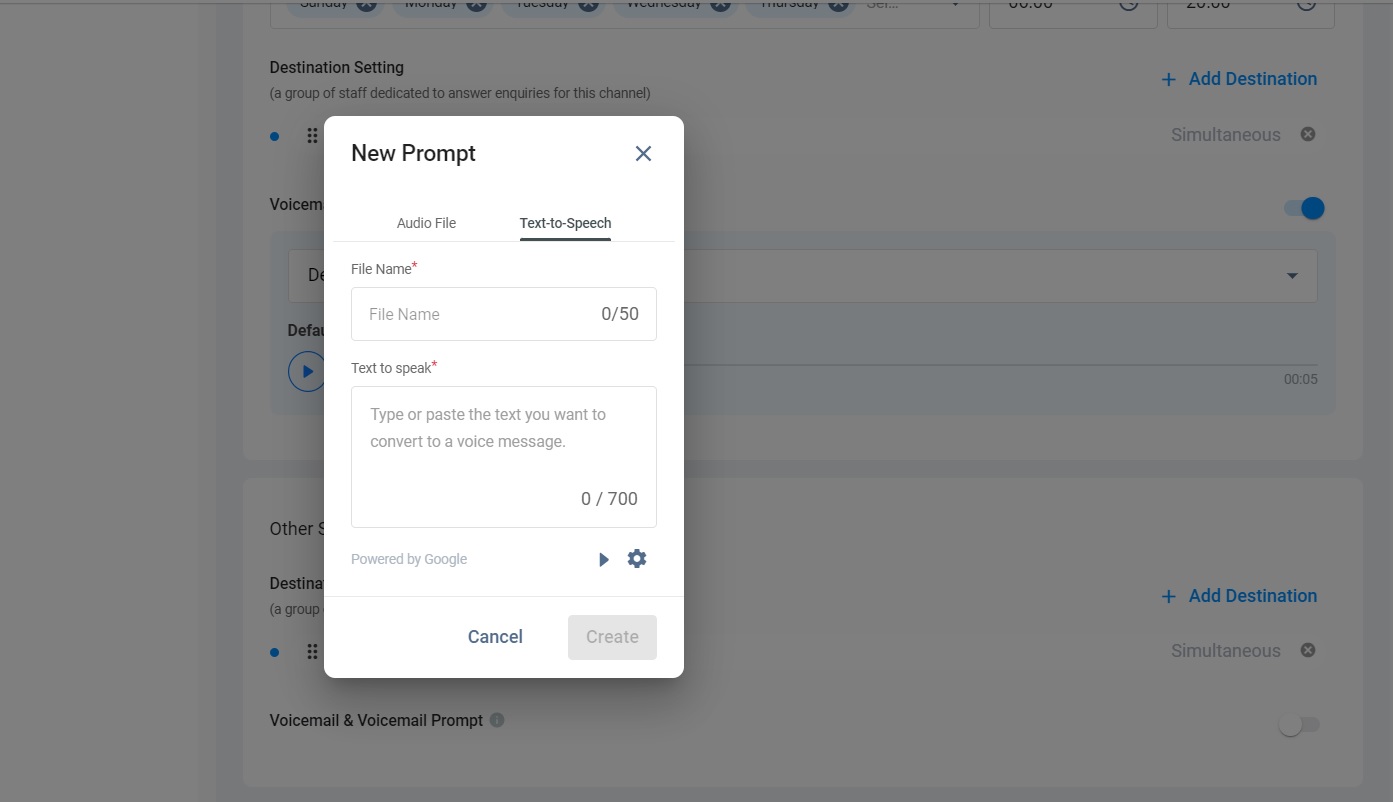
Text-to-Speech
- You may click the play button to listen to the voice message.
- To select the preferred language and Voice Name, click the settings gear icon to expand the page and display the Language and Voice Name drop-down list.
- Select the language in the drop-down list
- Select Voice Name in the drop-down list
- You may click the play button to listen to the selected language and voice name.
- You may refine the text message to fine-tune the message if necessary.
- Click the Create button to complete the steps of uploading a TTS greeting.
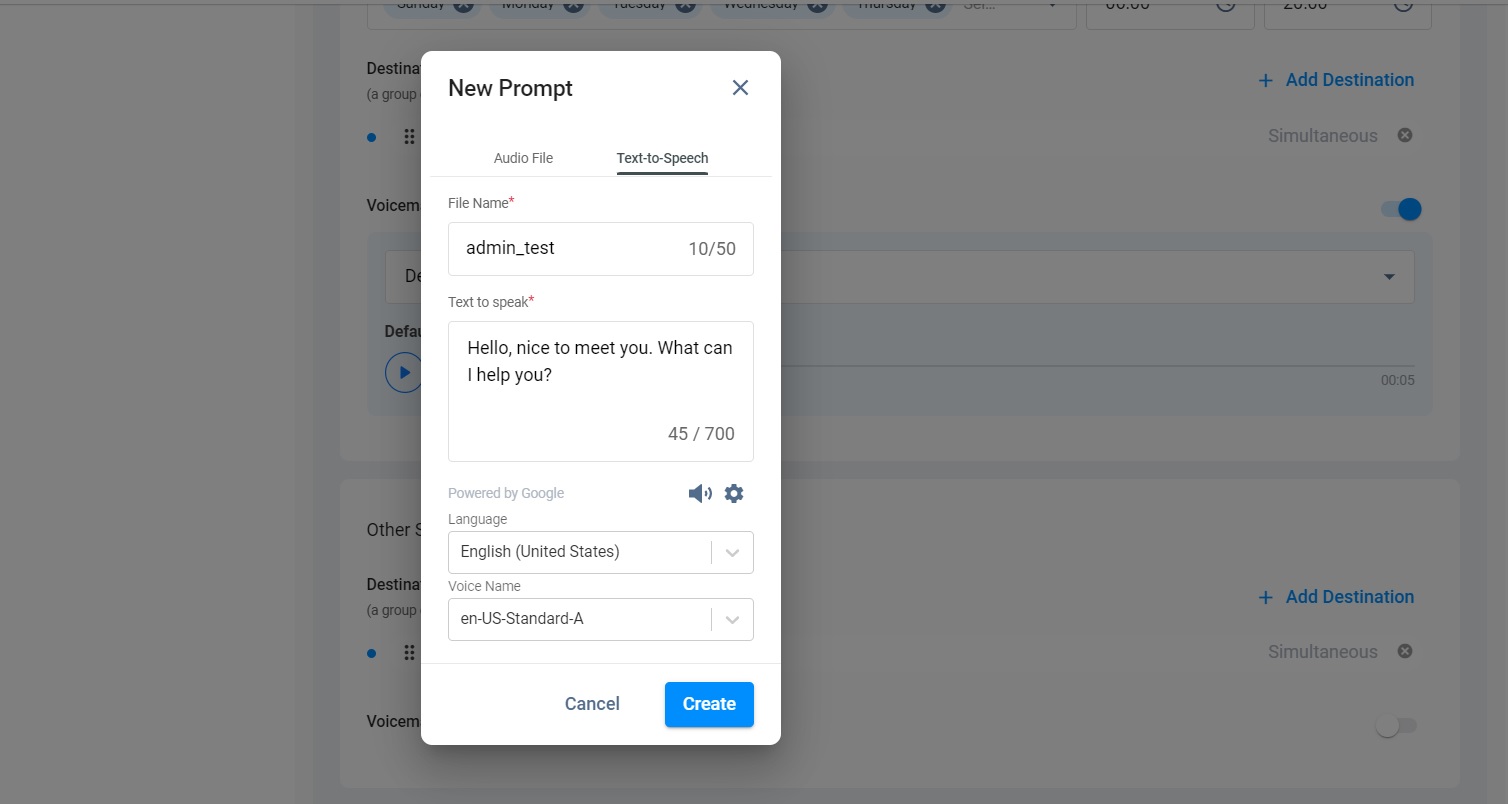
Click on Create
Once a new call recording greeting is uploaded, it will be available in the voicemail greeting drop-down list to be selected.
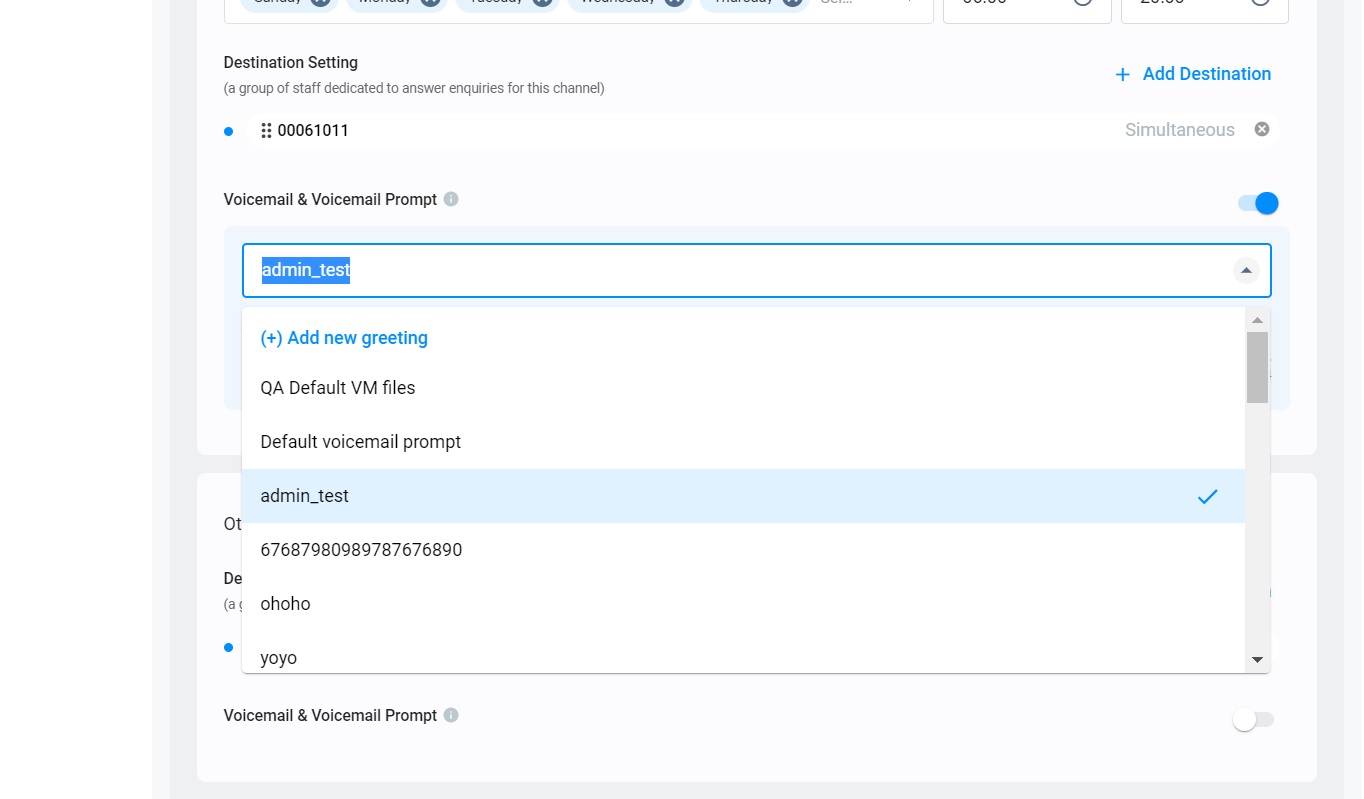
New voicemail prompt created
Voicemail Files Automatic Deletion
- Under Auto file deletion, select how often you want the voicemail files to be automatically deleted. The frequency can be any of the following:
- Every week
- Every two weeks
- Monthly
- Quarterly
- Click on one of them and click Save.
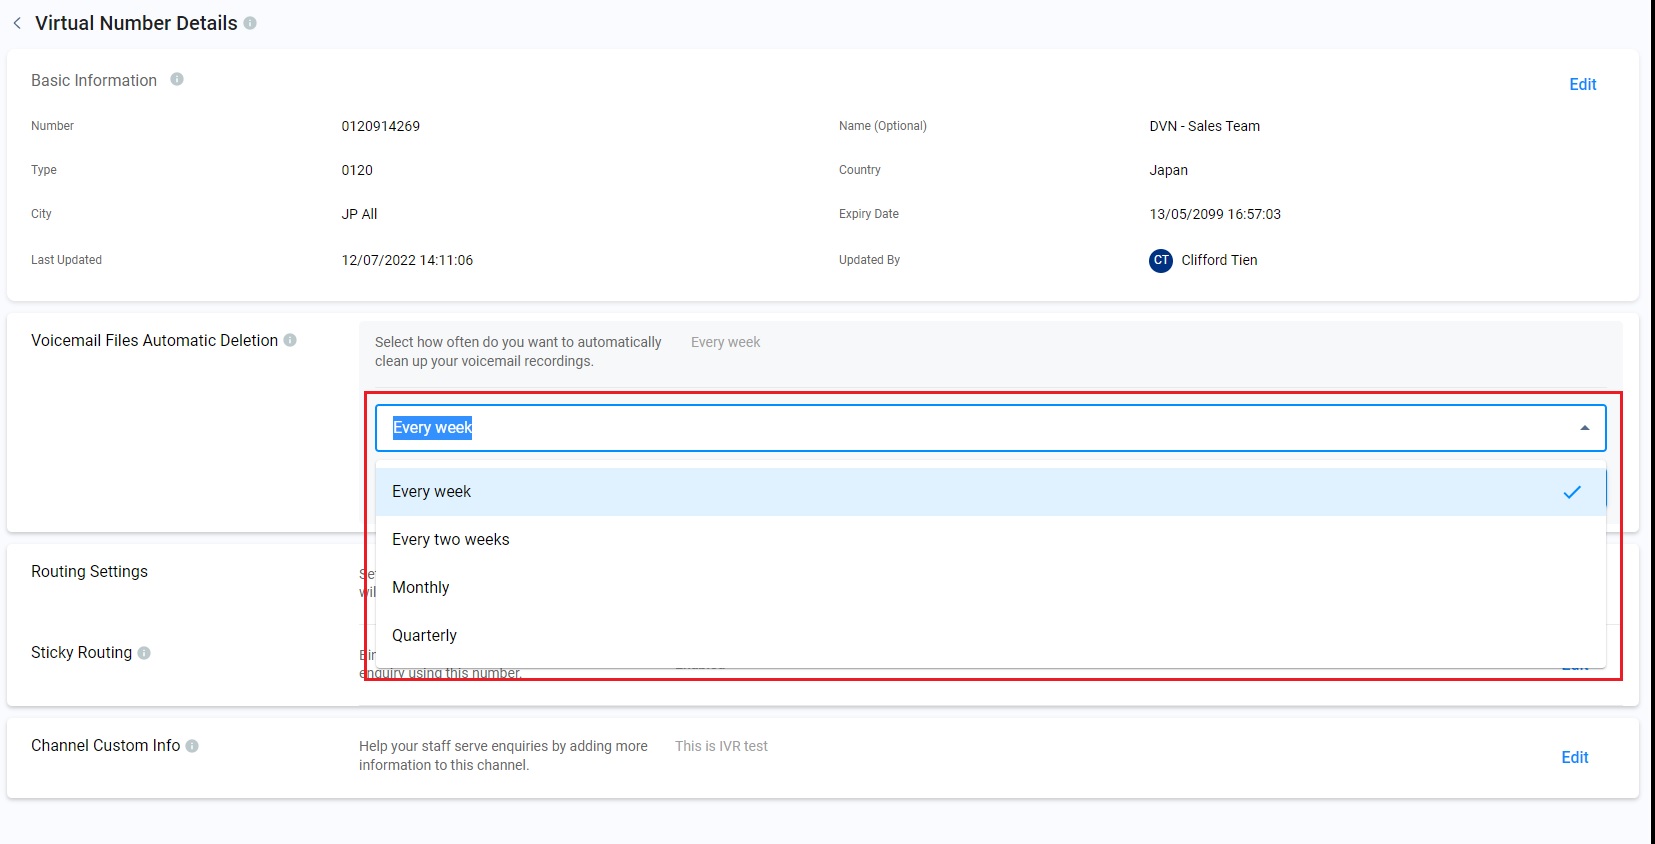
Click on the drop-down box to select the frequency
Disabling Voicemail
To disable voicemail:
- On the Virtual Number Details page, in the Routing Setting section, click on Edit.
- Toggle the Voicemail button OFF. A pop-up message will appear, asking you to confirm the action.
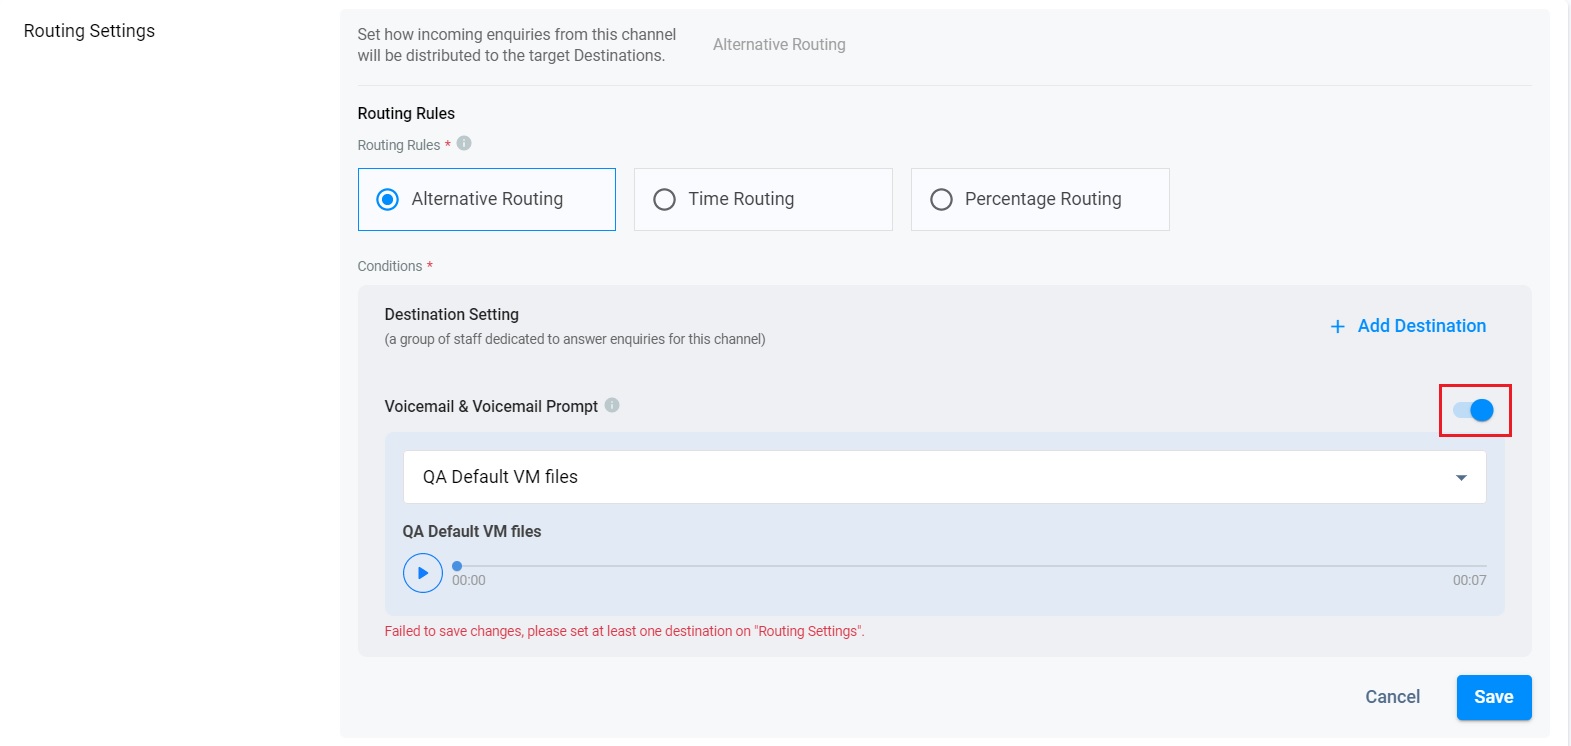
Toggle off the button
- Click on Disable.
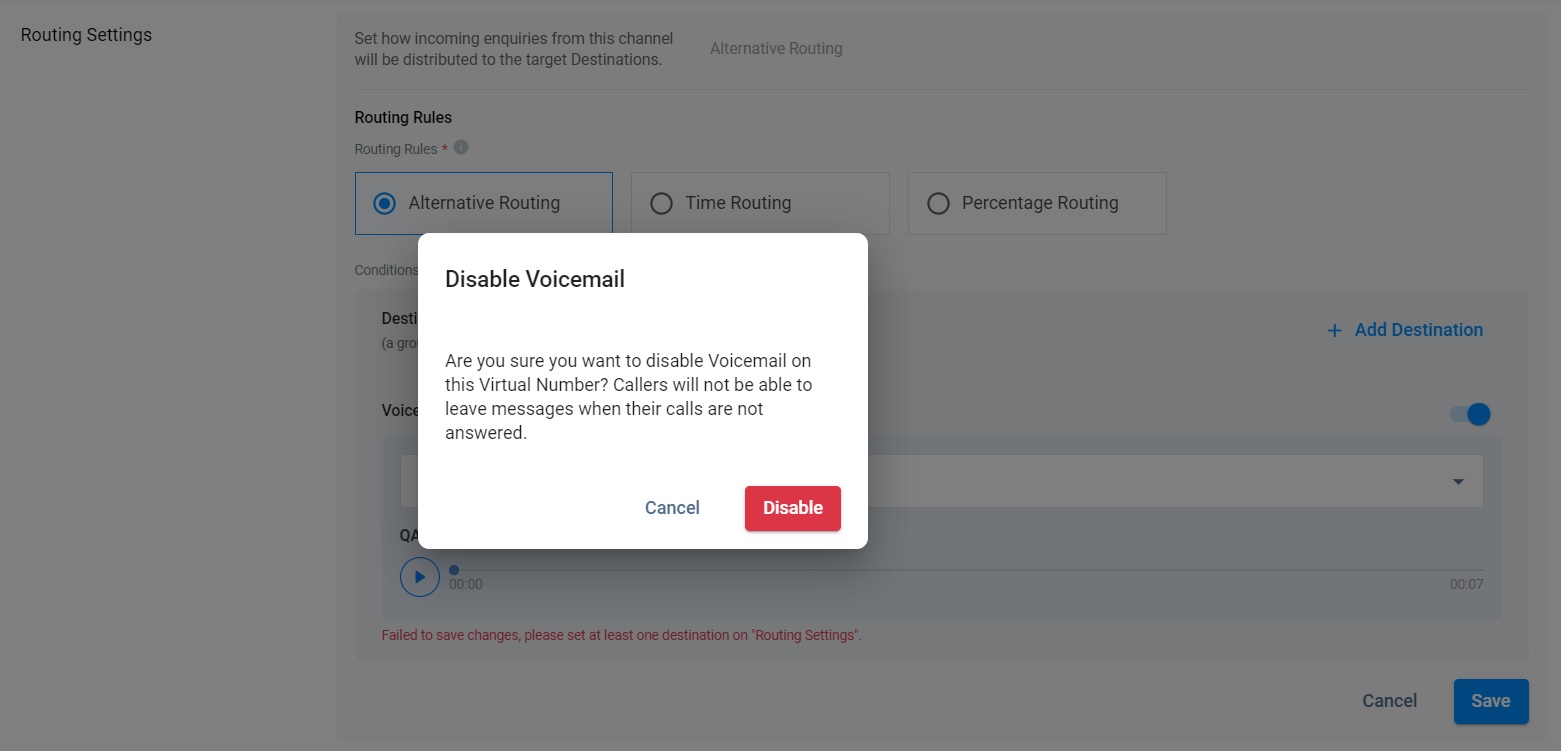
Click on Disable
📘
After configuring your Voicemail, you can also continue setting up the Engagement Mode, Caller ID and Custom Info of your Virtual Number.