
Custom Staff Status
This section of the User Manual will guide you through creating a custom status for your staff members. By implementing custom statuses, you will gain valuable insights into how your staff members allocate their time and better understand their availability and workload. This feature allows you to tailor the available options to align with your business needs and provides a convenient way for staff members to communicate their current activities or priorities. This guide will explain the steps in setting up custom staff statuses, empowering you to effectively track and manage your staff's busy schedules.
Creating Custom Staff Status
To add a new custom staff status:
- Go to Administration > Organisation > Custom Staff Status, then click Create Staff Status at the top of the page.
- Enter the Status Name in the field, , e.g., meeting, training, out of office, break, etc.
- Click Create to save the custom staff status.
Once successfully created, the staff members can select the unavailable and custom status in their Staff Profile.
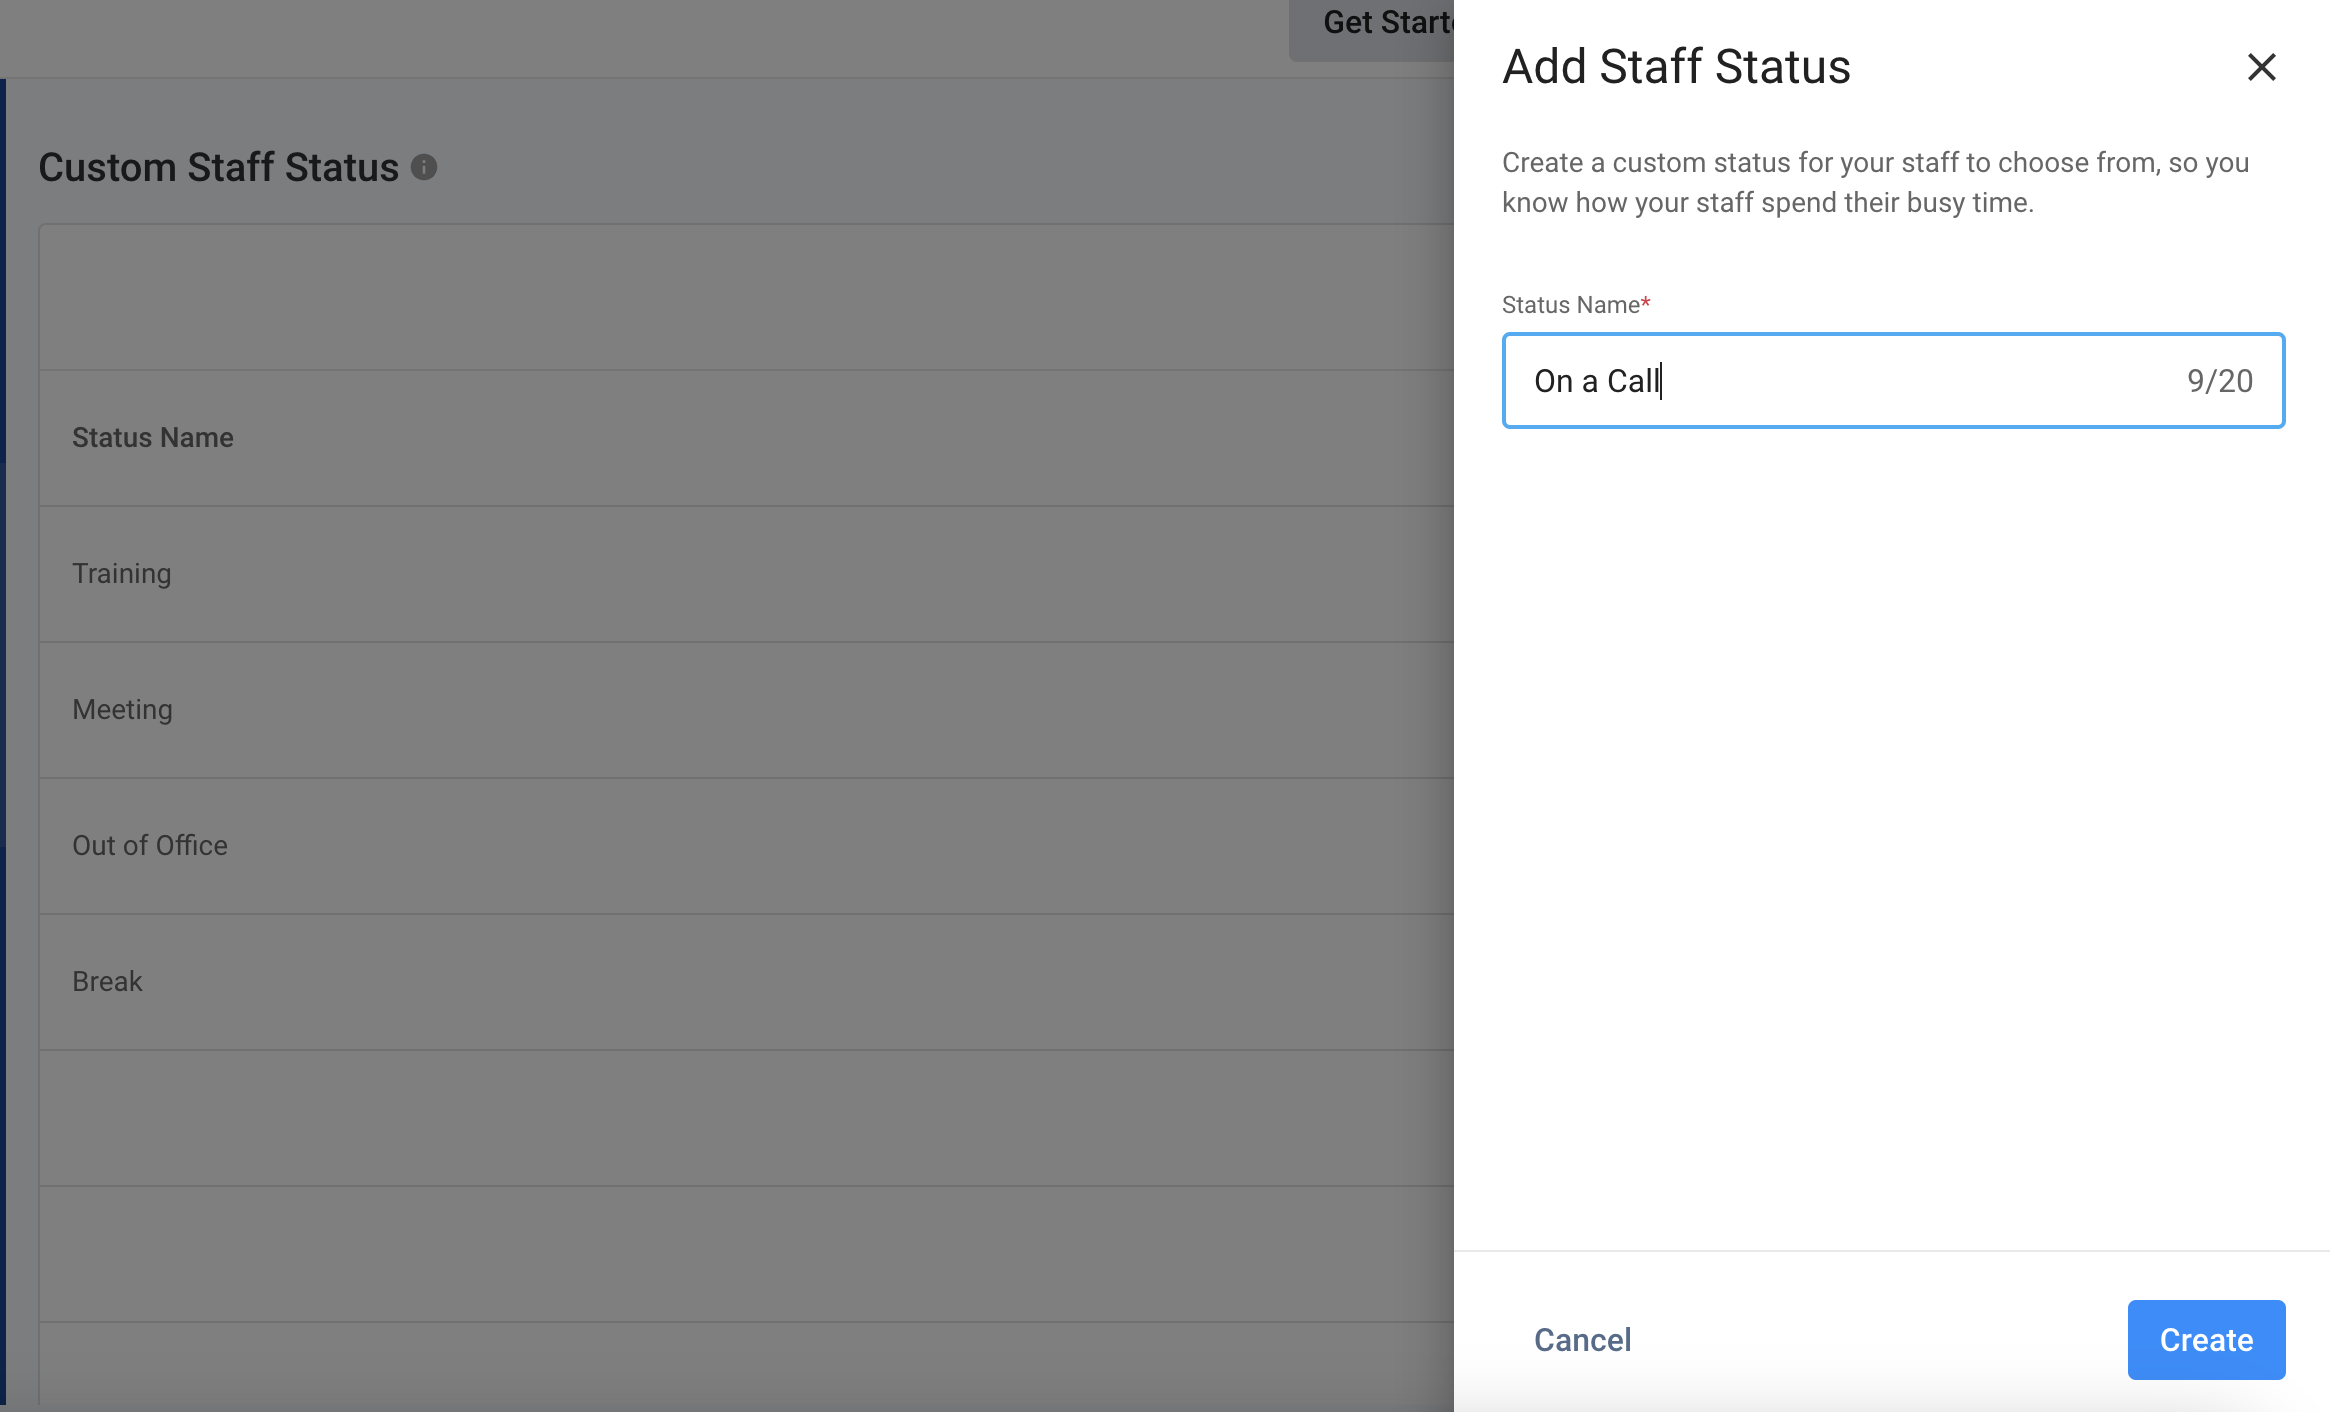
Add Custom Staff Status
Editing Custom Staff Status
To edit a custom staff status:
- Go to Administration > Organisation > Custom Staff Status, then scroll down through or search for the status you wish to edit.
- Click on the vertical ellipsis icon ( ) on the Staff name's right-hand side, then click on Edit.
- Enter the new Status Name in the field.
- Click Confirm to update the custom staff status.
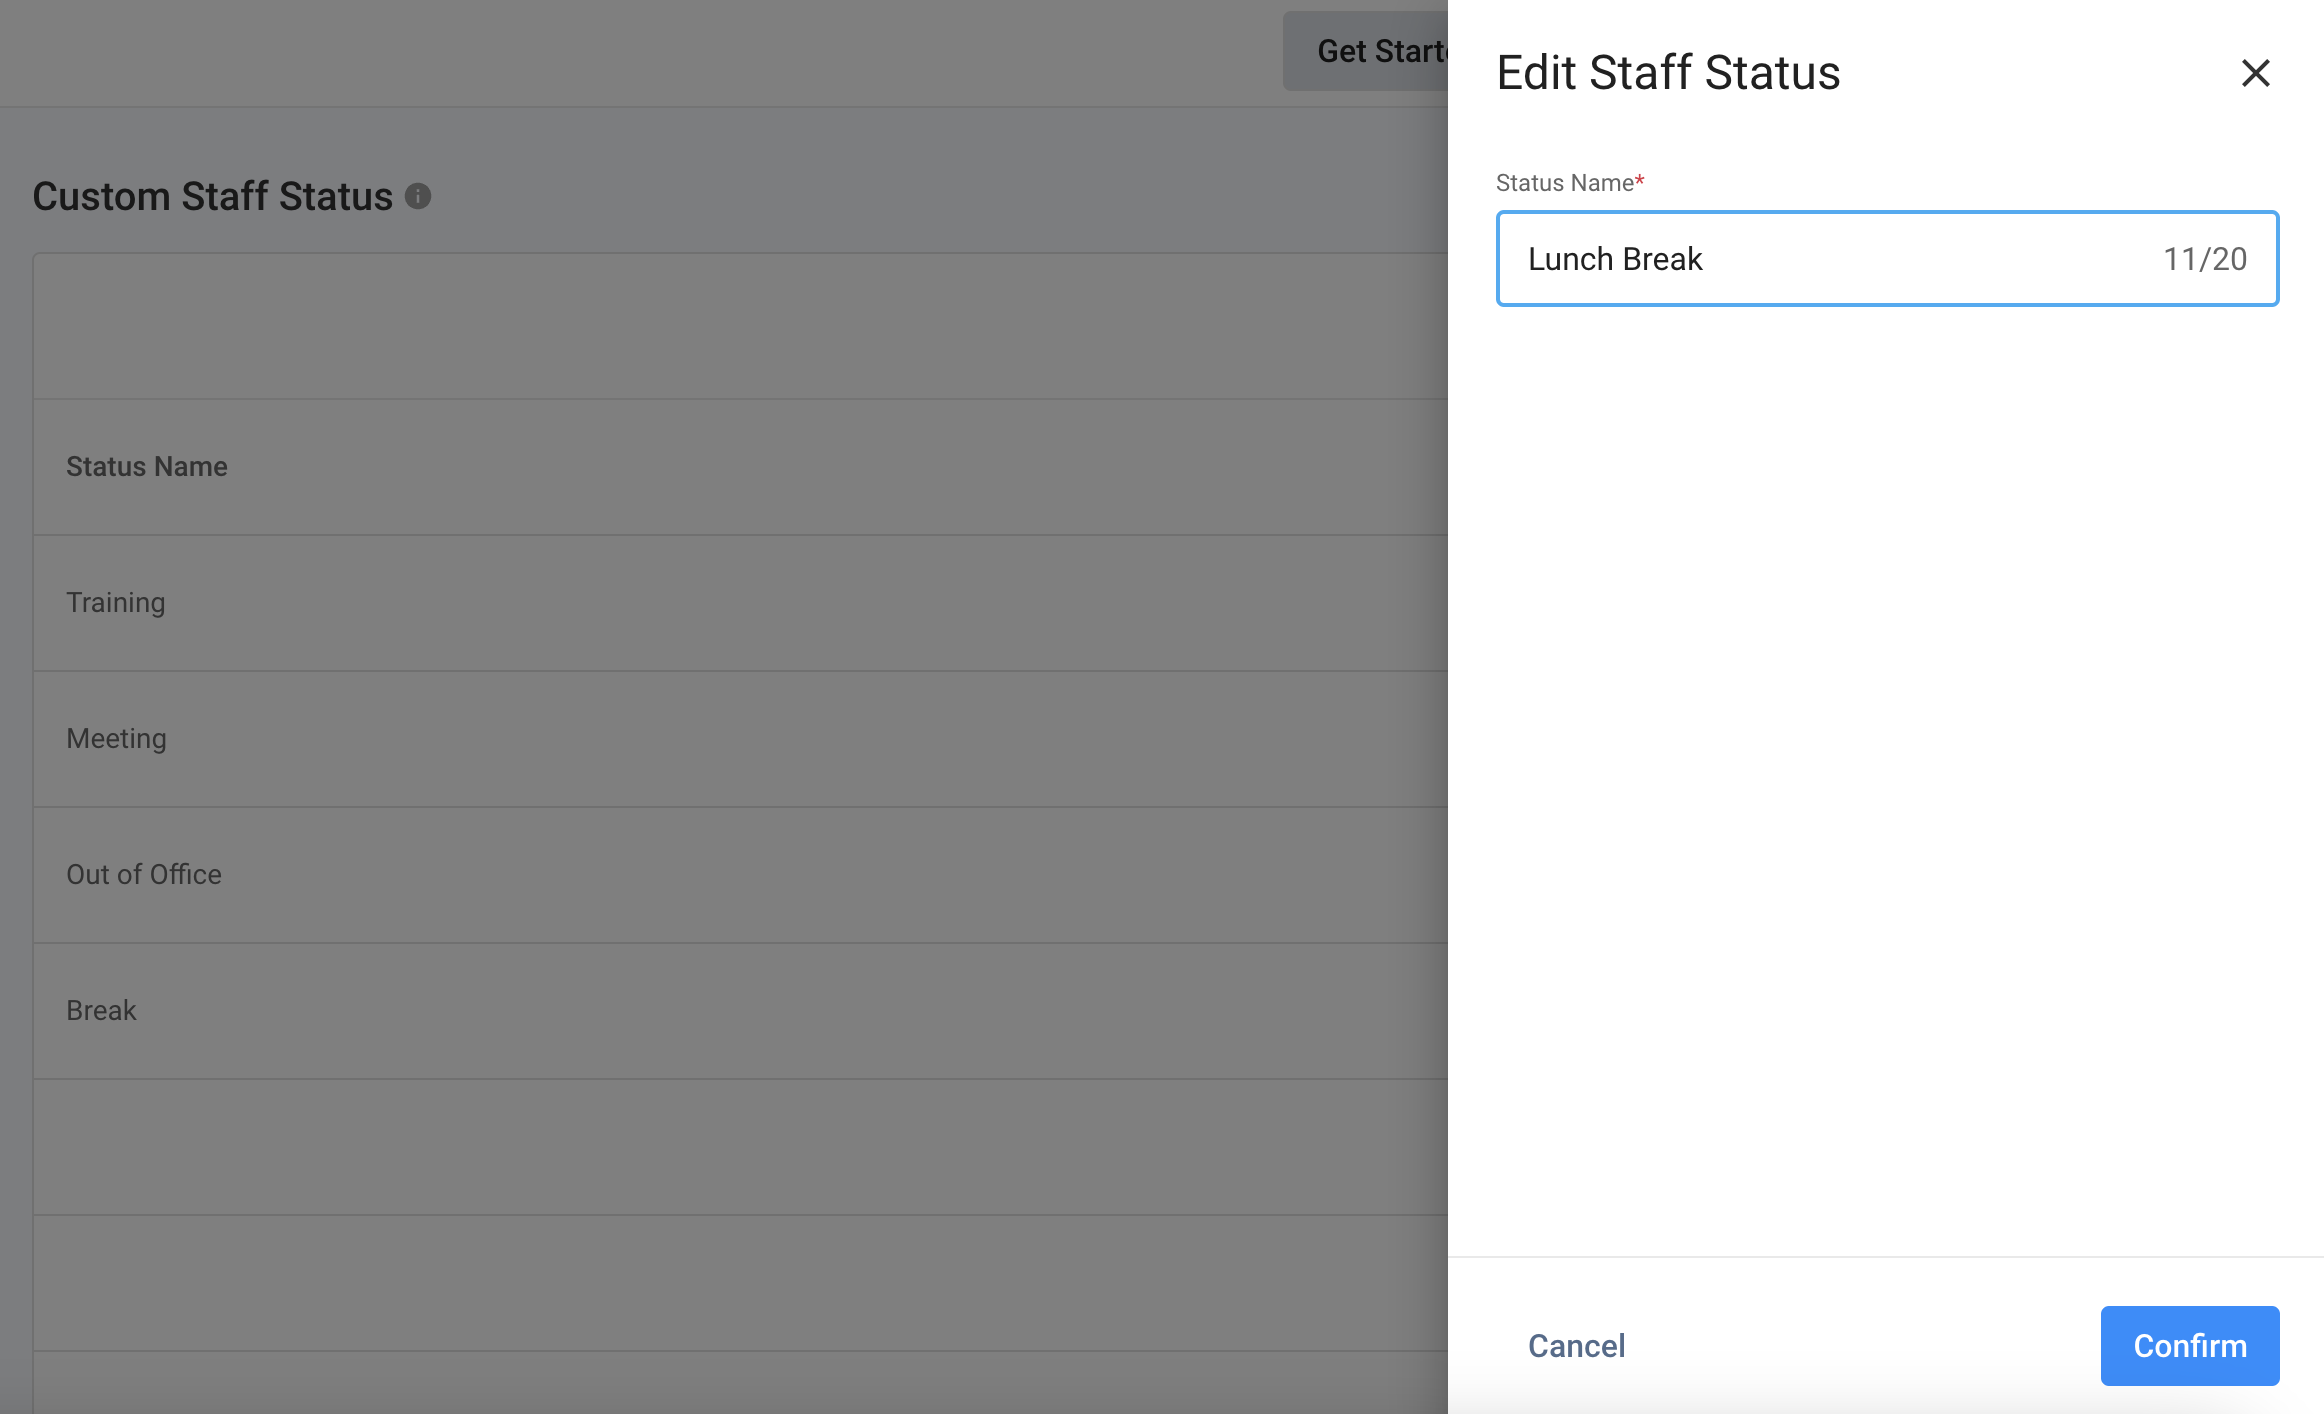
Edit Custom Staff Status
Deleting Custom Staff Status
To delete a custom staff status:
- Go to Administration > Organisation > Custom Staff Status, then scroll down through or search for the status you wish to delete.
- Click on the vertical ellipsis icon ( ) on the Staff name's right-hand side, then click on Delete. A pop-up message will appear, asking you to confirm the action.
- Click on Delete.
- The deleted status will be removed from the list when successfully done.
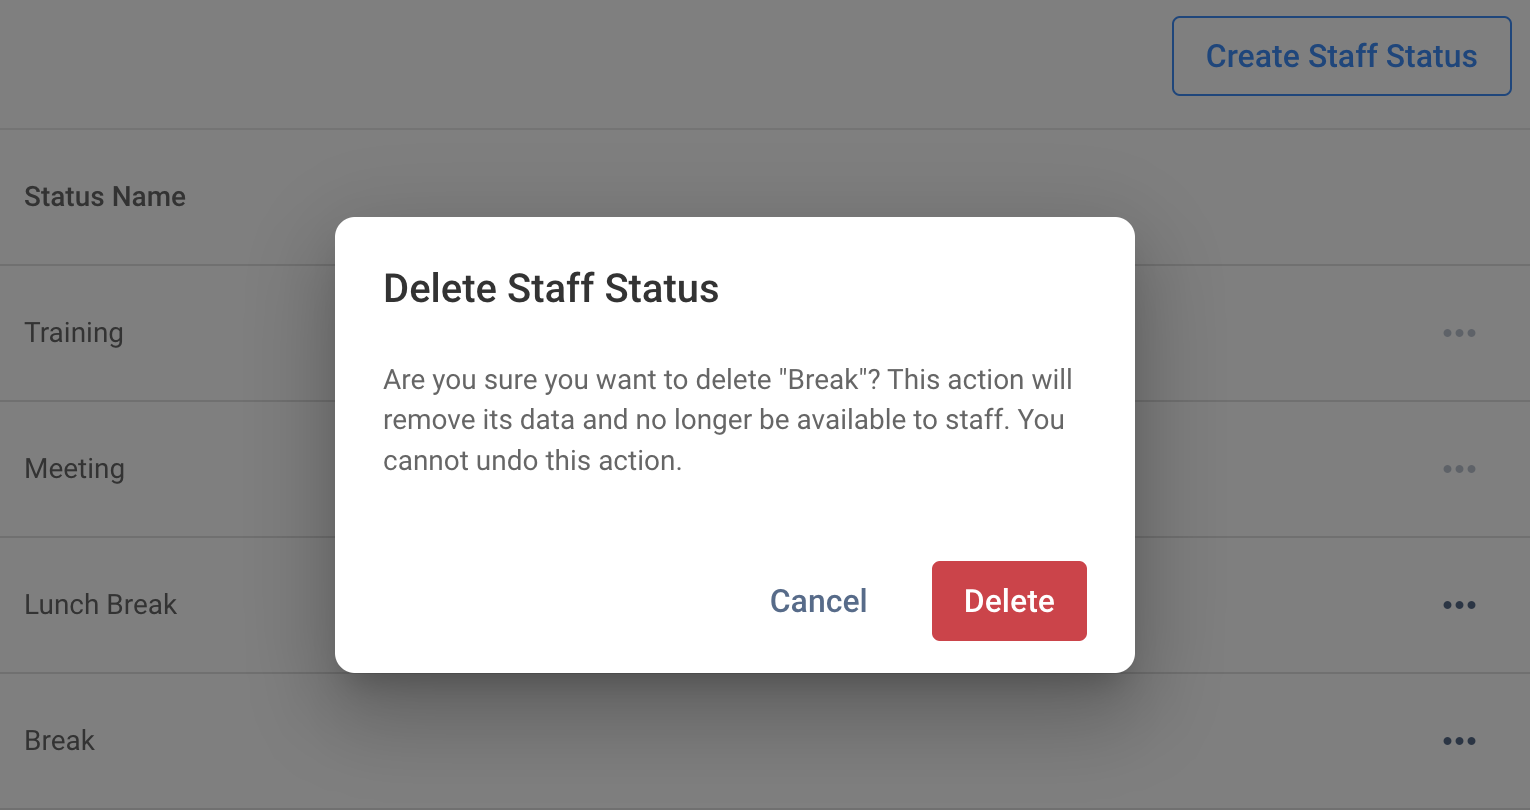
Delete Custom Staff Status